Search the Community
Showing results for tags 'alienware'.
-
Hi guys, i have several question that i want to ask.... Before i want to upgrade my m15x, i just want to make sure of it 1. Is nVidia GTX 765M compatible with alienware M15x ? 2. if its compatible, then what requirement that i need to upgrading my m15x? 3. will the old X bracket will fit for GTX 765M(and also maybe a guide to remove the old GPU to the new GPU, cause i'm really noob at this)? 4. and lastly what driver or bios/vbios i need to install it? Here is my m15x profile.. Operating System: Windows 7 Home Premium 64-bit (6.1, Build 7601) Service Pack 1 (7601.win7sp1_gdr.120830-0333) BIOS: Ver A03 1.00 Processor: Intel® Core i7 CPU Q 720 @ 1.60GHz (8 CPUs), ~1.6GHz Memory: 4096MB RAM Graphic Card : nVdia GTX 260M
-
Today I was trying to revert my Alienware's Nvidia 460m card back to the A04 bios to remove the downclocking functionality. After I reverted the bios, I changed some of the settings in the f12 boot menu, mainly the gpu throttle temp (which I thought it wouldn't have) and made a few other tweaks which i don't remember. After it restarted, the display lit up but only gives me a black screen. I can hear the fans begin to start, but the stop and restart every second, after a few seconds I can hear a clicking noise after the fans start each time. I removed the computer and system batteries and heldthe power button for 30 seconds before rebooting but it didn't help, I've also tried to blind flash the bios but to no avail (though I'm not sure the flashdrive I'm using will work for a blind flash). Does anyone know what's wrong or have anything I can try? Recap of Symptoms - Black Screen - Fans start and stop - Clicking noise
-
Hi i bought a clevo gtx 880m as n upgrade and cant seem to get it to work. the laptop sees the card just doesnt know what it is. ive tried modding the .inf file to no avail im kinda slow when it comes to software things. So im wondering if someone could spare me a bit of their time and either mod a driver for me or direct me to a slow kids step by step guide to modding one myself? switching over from a gtx 580 sli to just one gtx 880m not sure if thats pertinent but figured id ad that. using windows 7 64 bit and processor is intel core i-7 2760-qm. Thanks in advance
-
 I have an Alienware m17x R3, 2720QM, GTX 580M, 3D, 120HZ. Because my GTX 580M broke down, I bought a GTX 780M with Eurocom. I followed all the steps described by J95 in GPU in the post on notebookreview Alienware M17x R3 460M to 780M - Questions/Concerns - Page 4. Got my card working, for a couple of days, and decided to do a clean Windows 7 install. First thing I did, was I reset the BIOS, and blindflashed the BIOS with the unlocked A12 bios. After that I was unable to enter in the BIOS. I get 8 Beeps and no post. LCD / or GPU faulty. Seeing that things were working before, I find it hard to believe something really broke, but... Anyone ideas? I know that in order to get the card working correctly I need to enter the BIOS and do the following: >Advanced Menu>Video Configuration >disable IGP >set display to PEG > Disable the Integrated sound card >F10 reboot I am suspecting it had something to do with my BIOS flash. Question: Can the A12 Unlocked BIOS be flashed with pre-modified settings: - disable IGP - display to PEG - Integrated sound card disabled. Thanks!
 -
 Please follow the instructions below. • Specs. • Device manager ->Display Adapters ->Details ->Device Description ->Hardware Ids, post results (request). - Extract downloaded driver using 7-Zip/winrar. - Extracted Nvidia...International\Display.Driver folder\ -> copy/overwrite nvdmi.inf - Nvidia...International folder\ -> run setup.exe - Windows 8 - disable driver signing Command Prompt (Admin) Win key + X Type: bcdedit /set {current} testsigning yes -> "The operation completed successfully" ->reboot ->Install drivers. Exit test mode, cmd (admin). bcdedit /set {current} testsigning no ->reboot. - Use DDU to remove previous drivers/GPU installations (Nvidia & AMD), create restore point then select first uninstall option (safe mode). GeForce 334.89 WHQL Modded nvdmi.inf v334.89 AW M17XR2/R3/R4 3D + M18XR1/R2 GTX 680M / 780M Modded nvdmi.inf v334.89 AW M18XR1/R2 GTX 680M / 780M SLI Enabled - - - Updated - - - Quadro Notebook Driver 334.95 PhysX 9.13.1220 - Extract - Nvidia...International folder\ -> delete the following folders: Display.NView Display.Update Display.Optimus NVWMI - Display.Driver copy/overwrite nvdmwi.inf - Nvidia...International\ -> run setup exe - Install Physx -> reboot Fire Strike NVIDIA GeForce GTX 780M video card benchmark result - Intel Core i7-3940XM,Alienware M17xR4 [ nvdmwi.inf_v334.95_AW_M17XR2_R3_R4_3D_M18XR1_R2_GTX_680M_780M.zip nvdmwi.inf_v334.95_AW_M18XR1_R2_GTX_680M_780M_SLI_Enabled.zip
 -
I'm not sure what models this all applies to but: The alienhead on the back of the LCD is always white. It leeches of the LCD backlight and there is not remotely enough space to allow for a RGB system. Well, there might be, but it would be super tight tolerance and not for this particular system. I have some light gel sample thing for stage lighting. These allow an adequate amount of light through while changing the color of said light. One thing I love about this company is the overly cheesy names: Simply Mauvelous, Purplexed, Kablueie, Bluetylicious, Putting Green, Rust Assured, Just Peachy, Peach My Interest, Salmon"illa", Pink Pong, Pinkerbell. I personally used Bodacious Blueberry for this mod. Procedure:: 1. Rip off front plastic bezel. Start in an upper corner and work your way around. Pretty easy (Rider is watching you) 2. Pick your color samples: 3. I picked Bodacious Blueberry. Suigintou seems to like it as well. 4. Unscrew the LCD and make sure to pull away your webcam cable (it's stuck to the back of the LCD). Lay it down on your keyboard. You can test your colors now: Assortment of colors (Mauvelous, Neon Yellow, Diva Red, Bodacious Blueberry, Putting Green) 5. Determine how big to cut, I found out after my first cut, it's easier to just cram the light gel behind the silver reflective stuff, a dull xacto blade helps here: 6. Cut (this is too large to install in a easy manner, it ends up being about half this size - only need to stretch in the opening in one dimension either vertically too tall or horizontally too tall.): 7. Cram it in. The gel sticks a few mm over the top and bottom and is near flush on the left and right sides (in relation to the silver cut out): 8. Use a flashlight to test: 9. Slap it back together: 10. Enjoy. --- Pretty simple and quick mod. I did this spur of the moment while checking the pins on the LVDS cable to see if I could put a 1080p panel in here. It's a 40-pin 2ch 6bit LVDS connection. All 1080p panels that can fit in the m14x are 13.1" or smaller and 30pin LVDS. So a no go there.
-
 Greetings, I upgraded my M15x to Windows 8.1 64bit (clean install) and had no other problems with any other components during the process - save one - the Broadcom Wireless 370 Bluetooth Mini-card adapter. The drivers on Dell's site are outdated, not above Win7, and Windows 8.1 even prevents an attempted installation of them; flagging it as being a potential bluescreen/brick issue. Unfortunately, Bluetooth's auto-detect/install package from Bluetooth Software Download | Broadcom didn't detect the hardware or help here either. Any ideas or suggestions? TIA.
 -
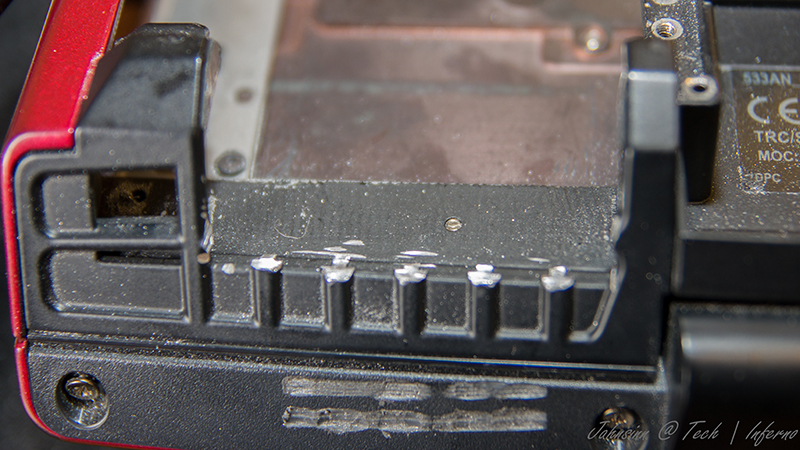
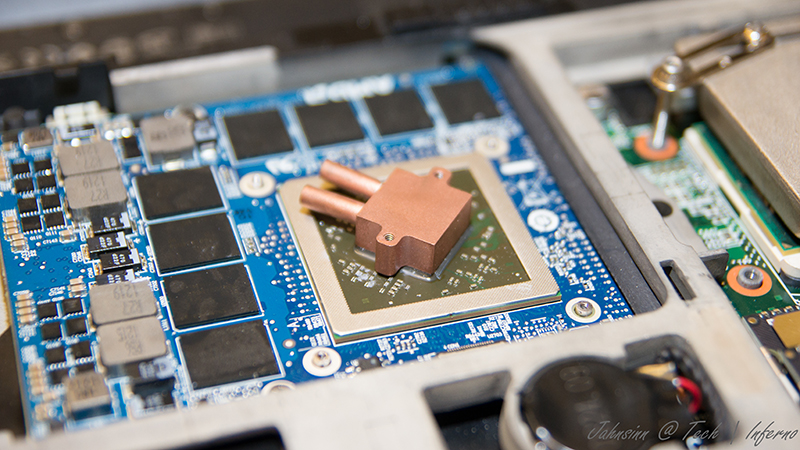
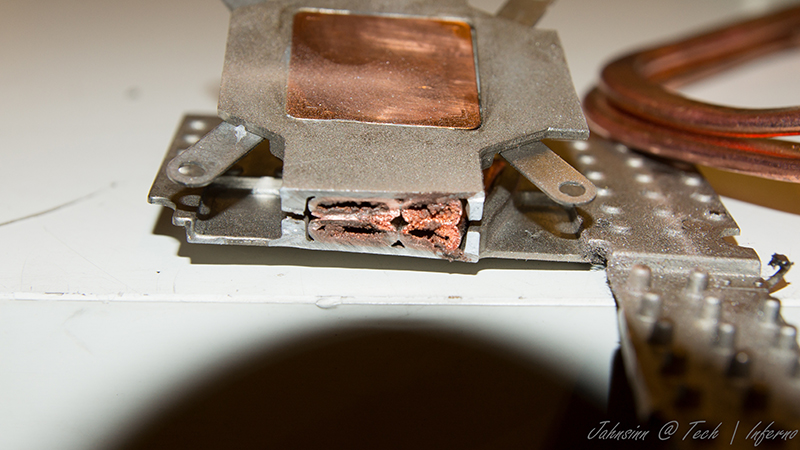
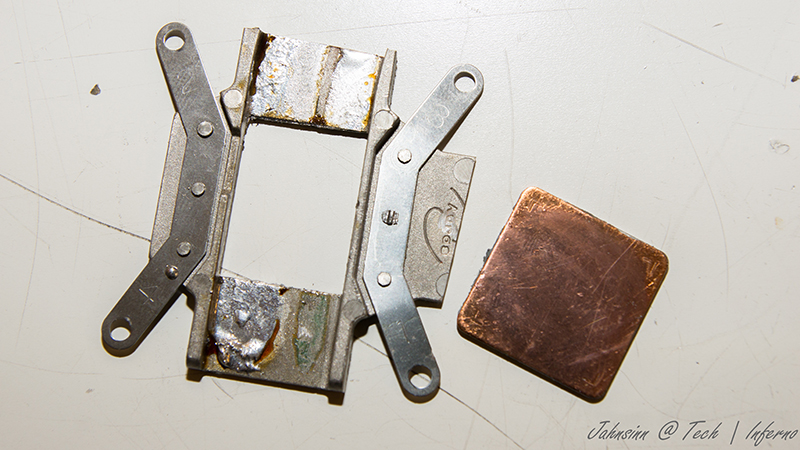
Apologies for the wall of text, next time I take this machine apart I will take some photos! Teardown Instructions: ---- WARNING! THIS WILL MOST LIKELY INVALIDATE YOUR WARRANTY WITH DELL ---- ---- This is a guide only, no warranties or guarantees are implied, damage is at your own risk --- ---- You will need: T9 TORX screwdriver (to remove CPU only), Decent Thermal Paste, Philips Screwdriver, Thin flatblade screwdriver, Isoproponal electronics cleaner (Meths will probably work too), paper towels, plastic pry tool (or very strong fingers!) ---- If trying to "recover" the BIOS from an overclock, you will also need a non overclockable processor such as the i7-4700MQ or i7-4702MQ. It may work with the i7-4800MQ but I have not tried it. Steps: Turn system upside down, with the back / cooling fans towards you. Undo the 3 screws on the base. Carefully lift the plate that covers the front of the system (furthest from you) it is clipped in at the sides Carefully push the back plate with the fan grilles away from you about 5mm, this unclips it which means it is free to be lifted off. Remove the 2.5" HDD bay (4 rubber grommeted screws) and SATA connector from the motherboard Remove the DVD drive plate (4 screws) and SATA connector from the motherboard. Remove the battery (2 screws) and battery connector. Carefully remove 5 ribbon connectors. 2 are on the right near the 2.5" bay area, these are vertical. To remove, lift the plastic collar of the motherboard connector with a flat blade screwdriver. pull the ribbon cables up using the attached tab (not the wire) They should lift with no force, if they are still stuck, the collar needs to come up more. Remove the 3 horizontal cables under the DVD drive. You one need to undo one side of each. Undo the connector closest to the back in this area, then undo the SD card reader at the side closest to the edge, lift the white locking collar to do this and slide the ribbon cable out using the tab. repeat this for the connector underneath, this is the long one and will need gentle prizing (if you use too much force at once, you will break the locking collar). Remove the SD Card or SD card spacer / blanking plate (IMPORTANT!) Remove all the screws with a P in a circle next to them. take note of the size information. It tells you the width and length of the screw. This is very important when putting the system back together, it you put a long screw in a short hole it may damage the system or ruin the aesthetics. likewise a short scew in a long hole may not grip enough causing other problems. The next part will use the pry tools and is not for the feint hearted! Getting the AW18 apart is a pain, even when all the screws are out there are clips holding the palm rest on these are so tight, most will break when you separate the palm rest from the base of the system. It seems to be easier starting the separation at the point above the power connector and working towards the front. At that point, open the lid / screen as far as it goes, then unclip the back clips around the hinge. Then pull the palmrest away from the other side and these clips will stay intact. Finally lift it from the back and pull towards the screen, this will save the clips to the front of the palmrest. With the palmrest off you can change the second bank of DIMMS, Wireless card, CPU and graphics card. To get the CPU out, you will need to undo the lid hinge screws from the top, there are 3 in total. (2 on the left and one on the right). You will also need to remove the plastic guide for the wireless antennae leads. This has one screw on the right side. Remove the display cable from the motherboard and the logo led cable (use a small flatblade screwdriver to lever the white connector, don't pull the lead). If you have 2 video cards, you will need to remove the SLI cable. Disconnect the right side first, the cable is only wedged between the heatpipe and hinge, then carefully remove the tape from the CPU heatpipe. Then lift the lid away from the base slowly, you don't need to disconnect the antennae leads, you just need a small amount of clearance to get the CPU heatsink out. Undo the CPU heatsink screws, follow the order they show. (before you do this, make sure you have some good thermal paste, something like Arctic Silver 5 or Coolaboratory Pro). ---- FOR BIOS RESET STEP ONLY --- Install the i7-4700MQ and give it a reasonable thermal connection (you can probably re-use the existing thermal paste). Boot it up with a USB mouse and keyboard plugged in (this way you can keep the palm rest off). There is a power switch soldered onto the motherboard, just in front of the "bottom" DIMM, roughly centered between right and left. Follow the steps about the BIOS resetting below: I have to go into BIOS, reset to defaults (F9), save (F10) and then reboot again. Go into BIOS a second time (F2) and then you can disable overclocking support in the performance option (under advanced) Replace the CPU with the original that supports overclocking (i7-4930MX or i7-4900MQ for sure, not sure about i7-4800MQ). This time clean it up with the isoproponal cleaner fluid, make sure all traces of the old thermal paste have been cleaned from the copper heatsink pad and the top of the CPU / capacitors. Be careful not to break bits off the CPU die (the long grey rectangle) as this is actually the CPU and you will start to remove transistors from it! Its fairly tough, a bit like glass, but can be scratched, crushed or shattered if mis treated. Make sure you don't get cleaner and paste on the pins or in the socket. pour a small amount onto a paper cloth and use this to wipe the paste away. Don't pour directly onto the CPU, motherboard, socket or heatsink. Follow heatsink paste manufacturers instructions of how to apply the paste (I have used both Arctic Silver 5 and Coolaboratory Liquid Metal pad, the pad is much easier to apply and seems to have great results! Coollaboratory*Liquid MetalPad - the innovation of cooling for High-End sytems) Be careful not to get these metal based thermal interface pastes onto the capacitors on the CPU. Fire up the system with the palm rest off to make sure it boots (it may reset a few times or beep continuously on the first boot, this is normal. if you get the beeps, just switch it off and on again, the next time it should eventually boot (may take a minute or so to get through the BIOS screen, or even to get the AW logo). When you get the opportunity to enter BIOS setup, once again go into the BIOS and make sure overclocking options are switched off. (The BIOS auto detects the CPU and normally the OC options come back on) ---- END OF BIOS OC RESET ---- ---- GPU THERMAL PASTE CHANGE ---- If you are feeling super brave you can repeat the process on the GPU too. Personally, I found a 10 Celsius improvement in replacing the stock paste with the coolaboratory pad. The system fans stay off longer while in Windows too. ---- END OF GPU THERMAL PASTE CHANGE ---- ---- RECONSTRUCTION --- Make sure the SLI cable is reconnected.. I have done this in the past after putting it all back together to find it was not re connected, no cable, no SLI!! Hopefully it worked and booted to Windows (Check SLI is enabled, if the options are non existent then the cable is not reconnected properly (or you have 1 card!)) If no NVDIA options are enabled, the system is probably in Intel GFX mode, press FN + F5 to reboot in NVIDIA GFX mode. If everything is OK, repeat the teardown in reverse to reconstruct your machine. When the system is rebuilt but the power button, touchpad, LEDs, backlight or SD card reader don't work, this is because the ribbon cables were not connected back or locked down properly. Make sure the ribbon cables are square to their sockets (there is a guide line on the cable to indicate the final position) and the locks are clamping the cables. The next time I need to take the system apart again I will include some photos! Good luck!
-
Hi guys, i had this problem since 1 year more or less, someone know how to help me to cease the vibration of the fan when spin faster on my laptop ? i tried 3 fans and always was the same, i checked the 3 screws that holds the fan and are fine. Alienware said to me " you could try to isolate the fans with a piece of rubber. It could be a damaged screw not holding the fans in place " but don't know how is the best way to isolate the fan. When the fan spin slow i don't feel anything under my left side of the keyboard, but when goes at high speeds yeah i can feel it pretty much. Thanks again always for your help.
-
Alright, I installed 8970m in alienware m17x r3 last night. I started up went into the BIOS and disabled the IGP and set the display to PEG. I restarted and got 6 beeps. Disappointed to say the least. However, I persevered (maybe not what my wife would say) and cleared CMOS, which allowed me to reenable my IGP and set the display back to SG. So, I then could go back into Windows and the card is detected by HWinfo and device manager, but when I install a driver and restart windows I see nothing on the display though windows loads up, and I can sign in. I tried to output to my TV via HDMI and VGA, but neither worked. Later today, time pending, I will try a monitor via VGA, but I highly doubt it will work. So, it seems like I don't have the right vbios? Any other ideas or suggestions? Thank you everyone.
-
Hello, i want to give my Alienware M17X R1 a new Graphic card, now i have choosen a good graphic card, which fits for me with all stats. My problem is now, that on the page of the seller is written, that the graphic card matches with the M17X R!, but i am not sure if this is realy like this. I am talking about the following graphic card: New Nvidia GeForce GTX 675M 2GB DDR5 MXM 3.0 Type B for Alienware MSI | eBay Hope anyone can help me with this
-
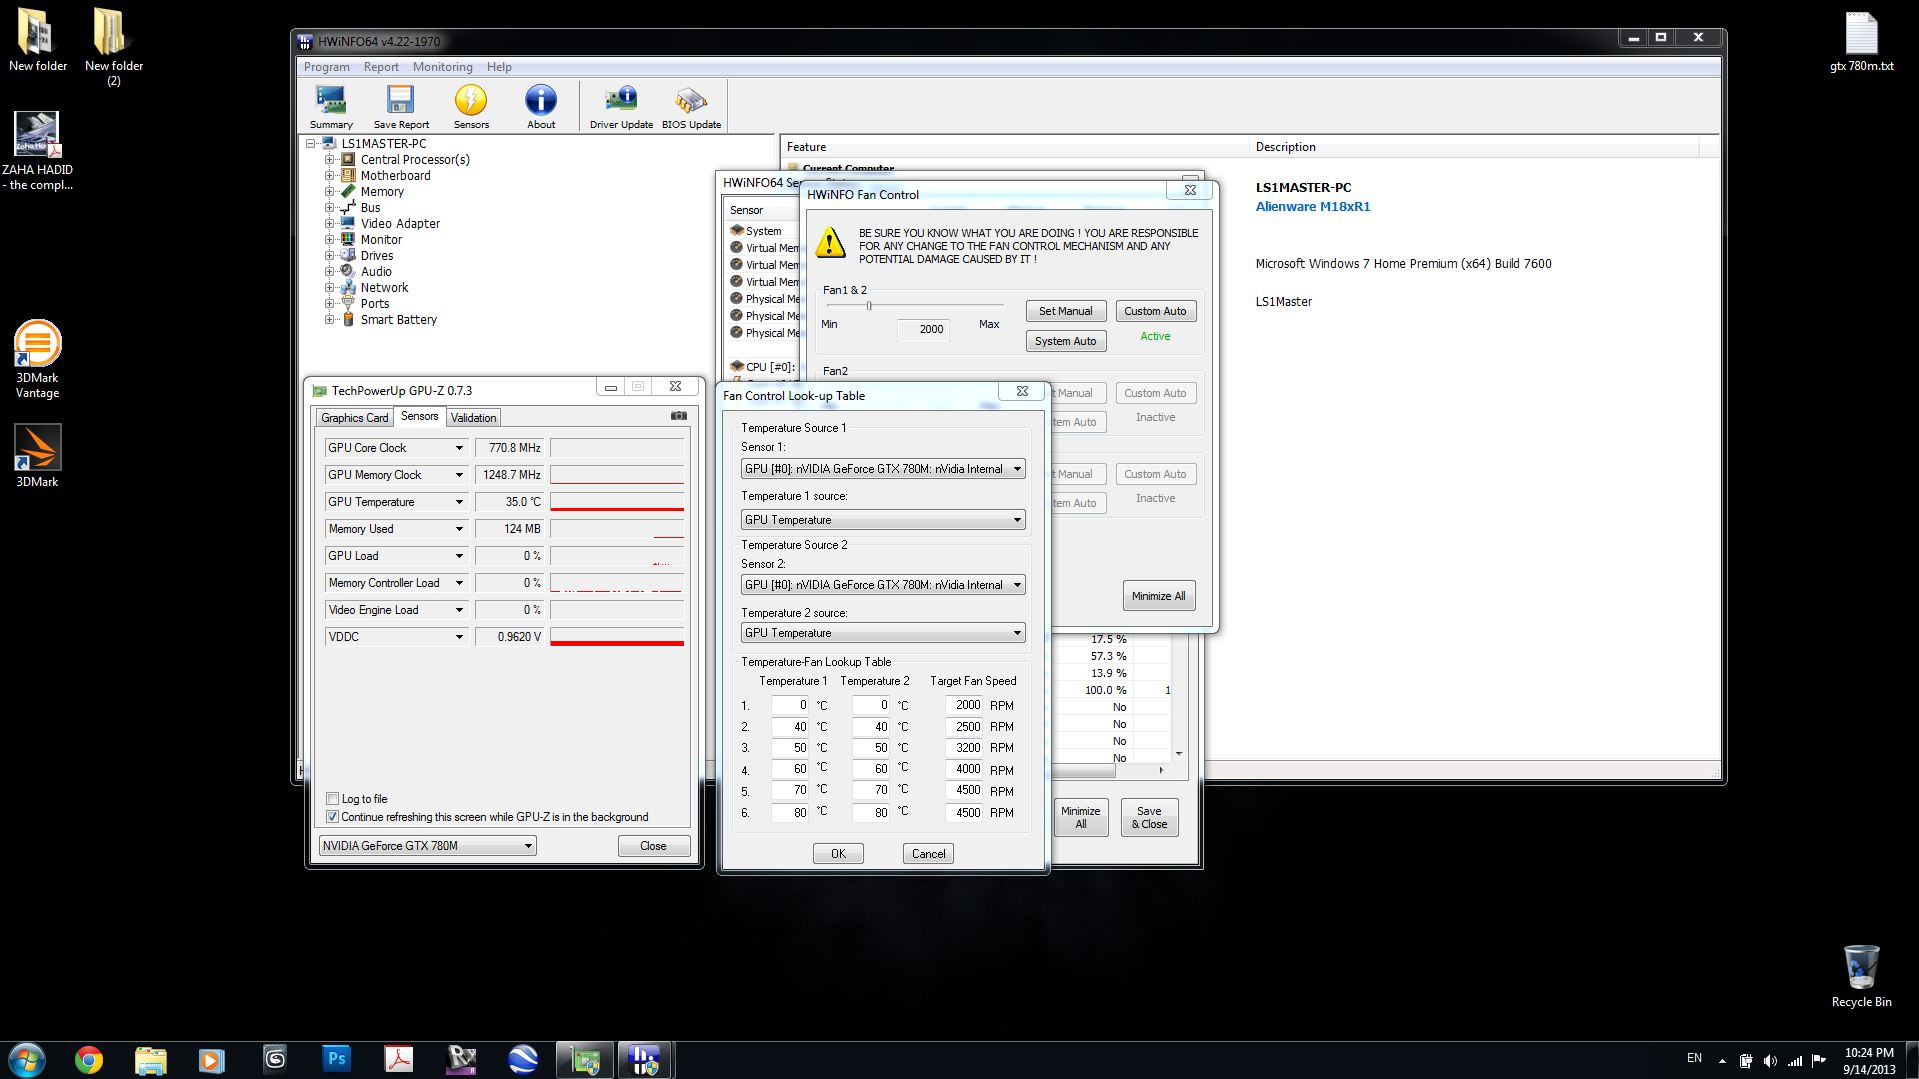
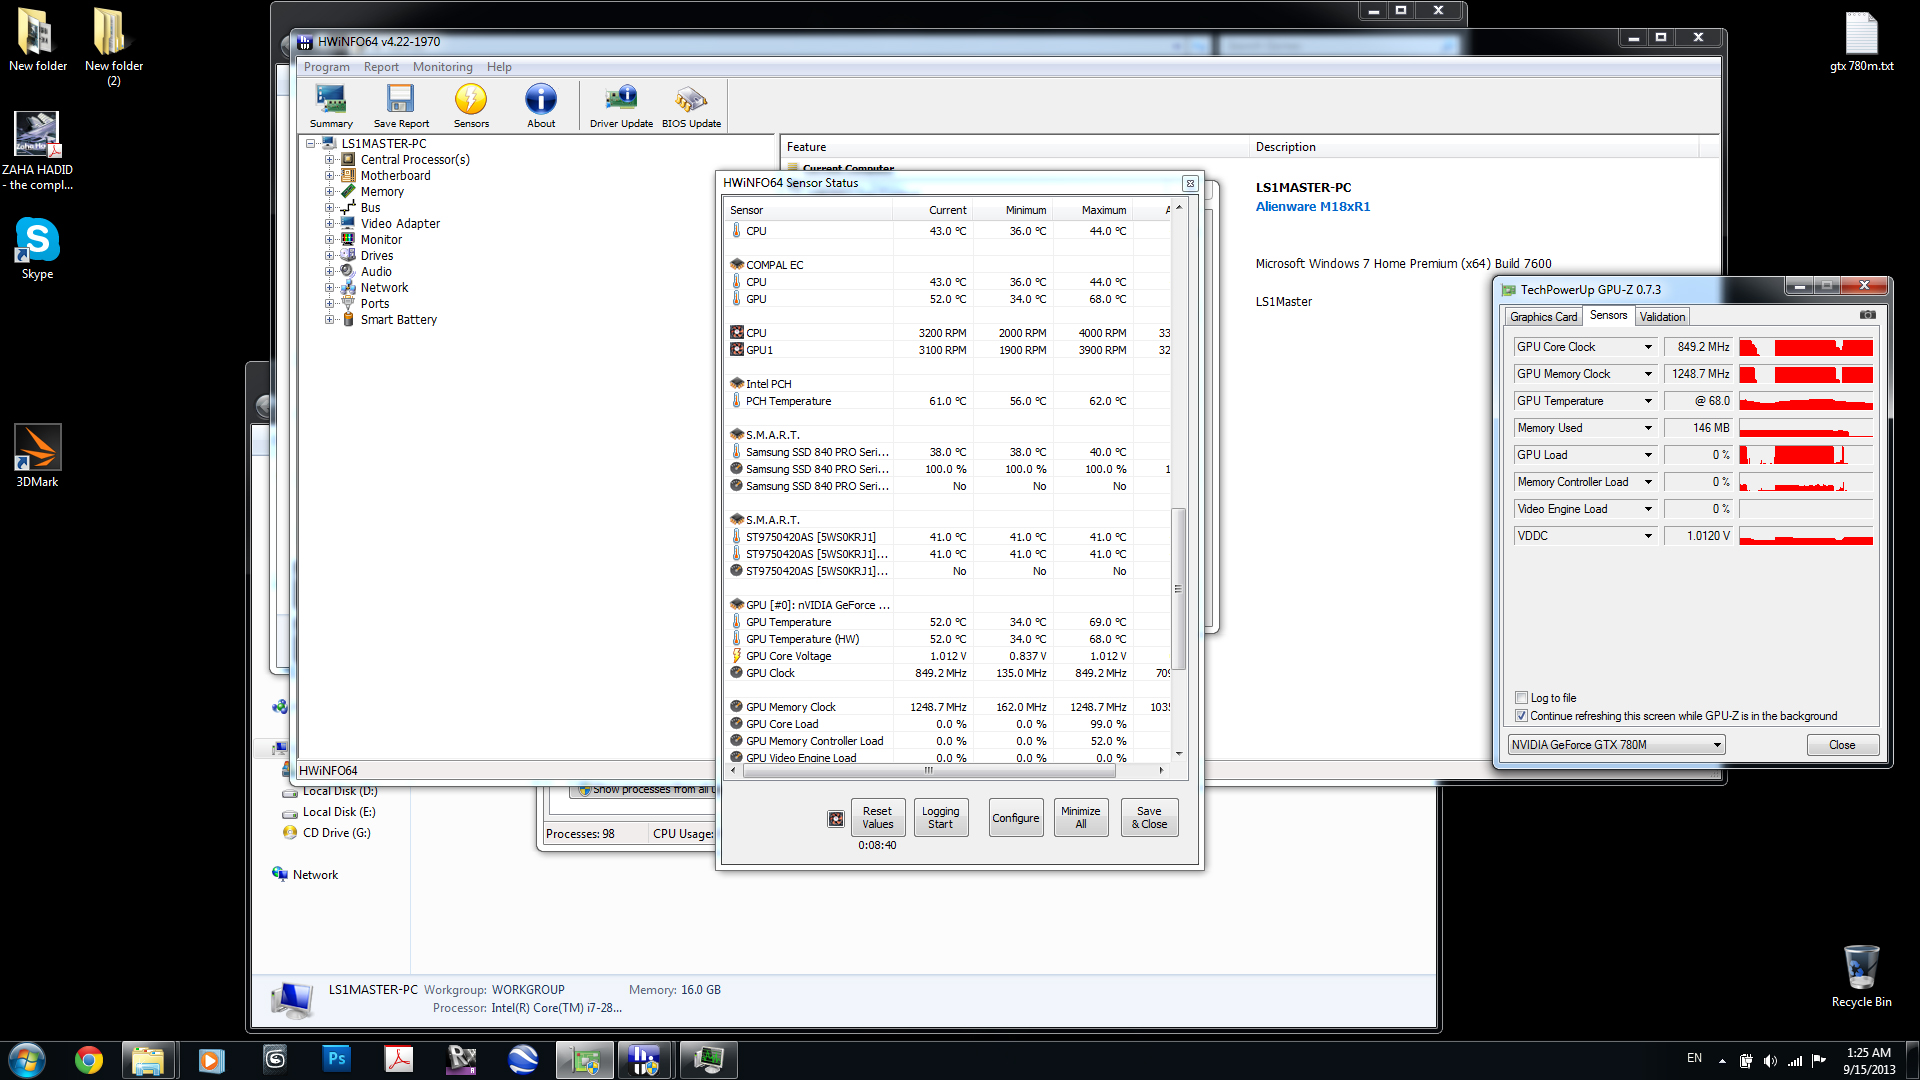
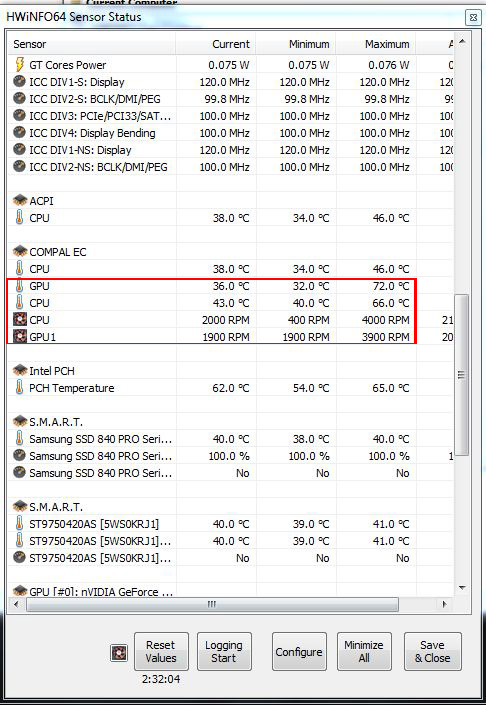
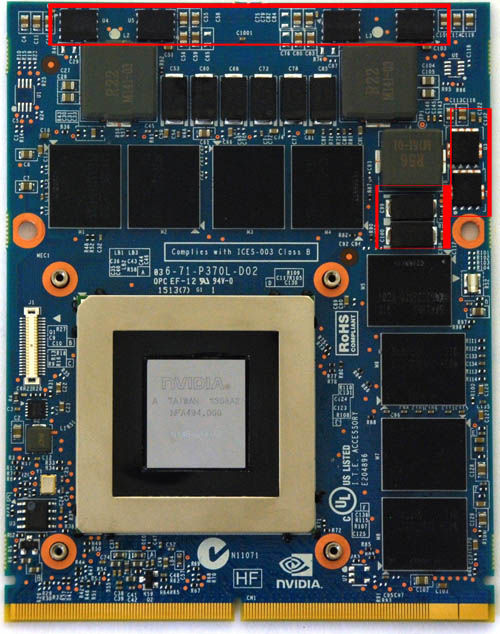
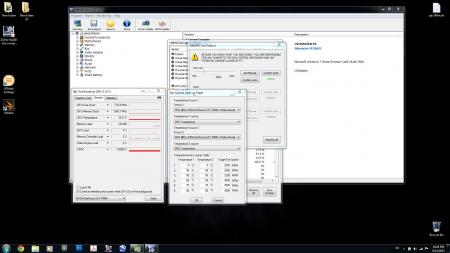
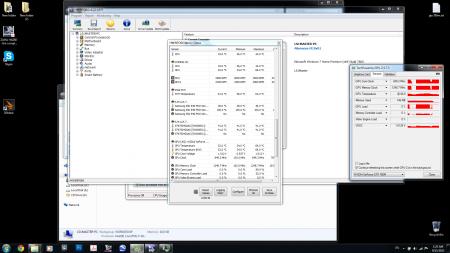
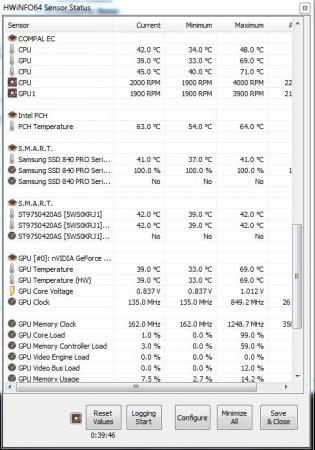
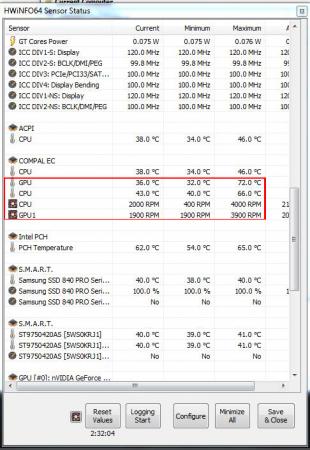
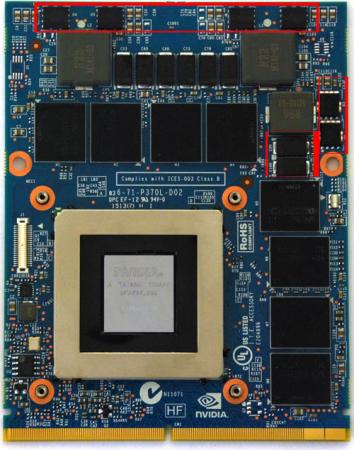
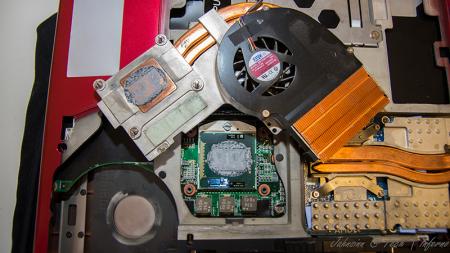
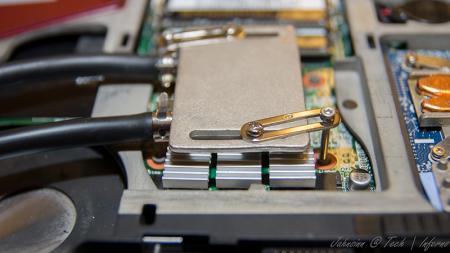
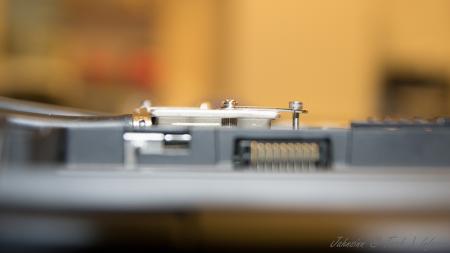
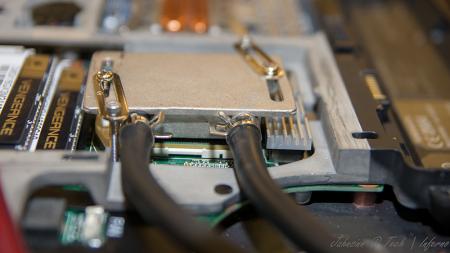
sooo first of all thank u J95 , for your support and ur advice i really appreciate that v much and thank u chiefulefor staring ur thread and ur feedback it was inspiring so some of u know about my bad luck with my gtx 780M which i bought recently from eurocom i was upgrading my m18X R1 from gtx 460M to this beautiful 780M , i got a sick dying GPU previously anyways to not go out of topic i got it replaced and i did some benchmarks and here is the results of the tests and the temperatures Note :- i'm using the 240 W AC and the 75W heatsink with new thermo pads NVIDIA GeForce GTX 780M video card benchmark result - Intel Core i7-2820QM Processor,Alienware M18xR1 NVIDIA GeForce GTX 780M video card benchmark result - Intel Core i7-2820QM Processor,Alienware M18xR1 NVIDIA GeForce GTX 780M video card benchmark result - Intel Core i7-2820QM Processor,Alienware M18xR1 so far i got minimum of 32 deg and maximum of 72 deg but i'm still worried about the card , i mean the tempreture . i know this tempretures ave good but what i don't know is that which parts the sensor getting the temperature from ? beacuse maybe there is another parts more hotter then this and i cant know that right ?! second thing is this black chips in the picture need any thermo pads ? because i didnt apply any

-
Hi All, I recently bought a Dell Alienware M15x laptop. I thought it would be a good idea to do a full re-install of the OS as the laptop was previously used. After the re-install the lights on my laptop stopped working. After a bit of research I found this is a common problem with the Alienware laptops and its not an easy or quick fix. I tried what the DELL website says to do by downloading the latest drivers and doing the re-install again but no joy! I then contacted DELL support who advised due to the wrong firmware being applied, my motherboard was now corrupted and will need replacing for which they wanted close to £400. My issue is I used the resource CD that comes with the laptop from DELL to do the re-install. The CD's only purpose is for that very reason, to provide all the drivers needed after a re-install. If this is a known problem, why is DELL providing these CD's with the laptops? surely there's a legal case to made somewhere in this?? I can't afford to spend another £400 on a new motherboard so I am hoping someone on these forums has come accross this issue before and managed to resolve it. If so I would be immensely grateful if you could post how it was fixed. If I cant fix this issue I will have to sell the laptop as spares or repairs and only get back a fraction of what I paid. I will also NEVER buy from DELL again!!! Looking forward to any response!!!! PLEASE HELP!!!!! Please see the error messages I am getting below: Error reads: Error 2: Error reads: AlienFX Test: PLEASE HELP!!!!!
-
 Like the subject title says, would you be interested in an article from Tech|Inferno that details purchasing and installing a 780M SLI in an Alienware M18x? We have old benchmark results with the 680M SLI + 7970M Crossfire which we could compare to it as well. Let us know!
 -
So Alienware should be gearing up to introduce us to their new redesigned lineup this June. A Chinese website has some leaked images, video and specs of these new models, here they are: Changes No express card and possibly no eSata. Keyboard has been changed and should be similar to the island style one found in Clevo notebooks and others. This should also affect how AlienFx looks and functions compared to previous models. New lid design with light strips. New base is more blockier in design, old speaker grills are gone and now the front is flat with some speaker lines. Touchpad lights up completely. Cooling? Remains to be seen, will update as we get more info. Option of IPS FHD display in all 3 models. Aluminum build for all 3 models though some parts will undoubtedly be plastic - we'll see and update. Videos: <embed src="http://player.youku.com/player.php/sid/XNTY0ODIxNzky/v.swf" allowfullscreen="true" quality="high" width="480" height="400" align="middle" allowscriptaccess="always" type="application/x-shockwave-flash"> Pictures: <ignore_js_op style="word-wrap: break-word; color: rgb(68, 68, 68); font-family: Tahoma, Helvetica, SimSun, sans-serif; line-height: 21px; background-color: rgb(255, 255, 255);"> </ignore_js_op><ignore_js_op style="word-wrap: break-word; color: rgb(68, 68, 68); font-family: Tahoma, Helvetica, SimSun, sans-serif; line-height: 21px; background-color: rgb(255, 255, 255);"></ignore_js_op><ignore_js_op style="word-wrap: break-word; color: rgb(68, 68, 68); font-family: Tahoma, Helvetica, SimSun, sans-serif; line-height: 21px; background-color: rgb(255, 255, 255);"></ignore_js_op><ignore_js_op style="word-wrap: break-word; color: rgb(68, 68, 68); font-family: Tahoma, Helvetica, SimSun, sans-serif; line-height: 21px; background-color: rgb(255, 255, 255);"></ignore_js_op><ignore_js_op style="word-wrap: break-word; color: rgb(68, 68, 68); font-family: Tahoma, Helvetica, SimSun, sans-serif; line-height: 21px; background-color: rgb(255, 255, 255);"></ignore_js_op><ignore_js_op style="word-wrap: break-word; color: rgb(68, 68, 68); font-family: Tahoma, Helvetica, SimSun, sans-serif; line-height: 21px; background-color: rgb(255, 255, 255);"></ignore_js_op><ignore_js_op style="word-wrap: break-word; color: rgb(68, 68, 68); font-family: Tahoma, Helvetica, SimSun, sans-serif; line-height: 21px; background-color: rgb(255, 255, 255);"></ignore_js_op><ignore_js_op style="word-wrap: break-word; color: rgb(68, 68, 68); font-family: Tahoma, Helvetica, SimSun, sans-serif; line-height: 21px; background-color: rgb(255, 255, 255);"></ignore_js_op><ignore_js_op style="word-wrap: break-word; color: rgb(68, 68, 68); font-family: Tahoma, Helvetica, SimSun, sans-serif; line-height: 21px; background-color: rgb(255, 255, 255);"></ignore_js_op><ignore_js_op style="word-wrap: break-word; color: rgb(68, 68, 68); font-family: Tahoma, Helvetica, SimSun, sans-serif; line-height: 21px; background-color: rgb(255, 255, 255);"></ignore_js_op><ignore_js_op style="word-wrap: break-word; color: rgb(68, 68, 68); font-family: Tahoma, Helvetica, SimSun, sans-serif; line-height: 21px; background-color: rgb(255, 255, 255);"></ignore_js_op><ignore_js_op style="word-wrap: break-word; color: rgb(68, 68, 68); font-family: Tahoma, Helvetica, SimSun, sans-serif; line-height: 21px; background-color: rgb(255, 255, 255);"></ignore_js_op>
- 42 replies
-
- 1
-

-
- alienware
- alienware 2013
- (and 8 more)
-
Here's a video showing how our loved systems get boxed after leaving production line. Warning: Not for the fainthearted Alienware fan... hxxp://video.sina.com.cn/v/b/99873463-1705961623.html ... ka-chak and next... ka-chak. Hehehe, nice, right?
- 21 replies
-
- 2
-
-
- alienware
- alienware boxing
- (and 1 more)
-
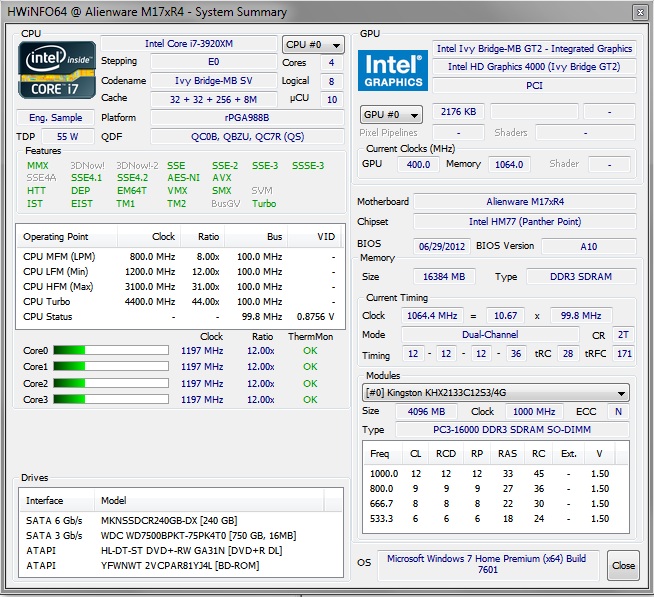
 This is a weird quirk that has stumped me for a long time and I've found nothing through my own extensive research (thanks Intel for your "confidential" PDF collection!) System is M17x R4 running A10 BIOS; Similar behavior seen on M14x R2. Installing RAM faster than original 1600MHz (verified w/ Crucial 1866MHz and Kingston 2133MHz) causes the base speed of the iGPU to idle below the advertised 650MHz. On 3740qm CPU it ran at 350MHz and with 3920xm it runs at 400MHz. It still ramps up as high as 1300MHz as needed for performance but uses a hell of a lot less power at idle - so I really want this behavior! With these power savings, I'm able to run my M17x on battery for nearly 6 hours! Really! Everything works great if I boot on AC power, even if I then switch to battery, even sleep/hibernate. The issue is that if the system is booted from a cold start or rebooted while on battery, the iGPU does its advertised 650MHz (which I do not want) and draws 2+ watts of power from the battery, even to do nothing. It stays like that until the AC adapter is plugged in, at which time it immediately switches down to 400MHz (verified w/ 2 separate 240w adapters.) With the desired behavior - running at 400MHz - iGPU only draws ~0.1 watts at idle doing nothing. It might sound silly but I really want those two watts of power savings ALL THE TIME, which I lose if I'm running on battery and I have to reboot for whatever reason. Can anyone explain this behavior? Has anyone else experienced it? It's not a huge issue but it has perplexed me for so long and I cannot find anything on the topic. I do know that downgrading back to A05 BIOS made my original 3740qm's iGPU run at the lower speed all the time, even when booted on battery, so I'm assuming that would work with this CPU too but I'd like to actually understand what's going on here - and if there's another way to control it. I'd like to be able to force it manually. I have tried lowering the iGPU clock multiplier in both Intel XTU and in BIOS (via the GT overclocking section) but it gets ignored.
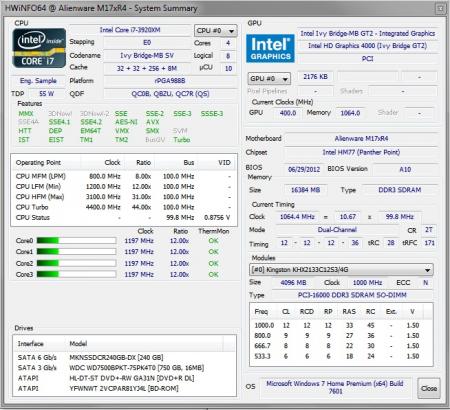
-
hey all, I completed the AMD 7970M upgrade in January 2013, and it went perfect! but today i had my motherboard replaced under warranty due to the Ethernet port not working, after having a mix up with Alienware and about 3 faulty motherboards fitted i now have one that allows the computer to start, and also has a working Ethernet connection! But, there is always a BUT! when i play games which i used to get 60-80 fps during a high load battle and about 120 fps just standing around (World of Warcraft) i now get 6 - 15 fps in major city's and 20-30 fps being stationary! i have re seated and re pasted the GPU but this has not helped, any ideas what the reason to this may be? neither the GPU or CPU temps are high, but the grames have droped by 75% since the new motherboard has been installed! NovaBench 322 FPS with Geforce Graphics Card 907 FPS with AMD 7970M These results where on 08/01/13 when the new card was fitted (before / after) Now i run the benchmark again and i am only getting 219 FPS... what has happened? also, Alienware are now informing me that due to the change of graphics card the whole laptop is warranty void? i thought this was not the case with Alieware? Many thanks for your time to reply to this issue! Jake
-
Hi all I decided to upgrade my M15X. Current configuration: DDR3 SDRAM 4.096 MB @ 1.333 MHz 1GB NVIDIA® GeForce™ GTX260M 500GB (7,200rpm) Serial ATA Hard Drive Intel® Core™ i7 Processor 720QM Im looking for nVidia gtx 670M and gtx675M, but no idea what works better on my laptop, I was read some issues about power supply (75W or 100W), about throttling and about incompatibilities. Im reading your posts, and get more and more doubts, can somebody help me? Thank you so much!
-
 Hey everybody, I installed a gtx 660m in my M15x and after finally installing the drivers, it works! But there is something weird about it. Here is a picture of what I mean: Laptop Forums and Notebook Computer Discussion Can someone tell me what's going on!!! (note: I can only overclock the memory not the core clock)
 -
 Hey Guys.. It may Sound Stupid or Crazy to Install Mac OSX and Ubuntu on an Alienware.. But I Want to .. I dont have any Experience with VirtualBox. but i have seen ppl running MAC OSX and UBUNTU at the same time via Virtual Box.. i need a Someone who can Guide me through the Process.. if you have some Tutorial Specifically for this Purpose than please post the link.. All The Advice and Suggestion and Comments are appreciated
 -
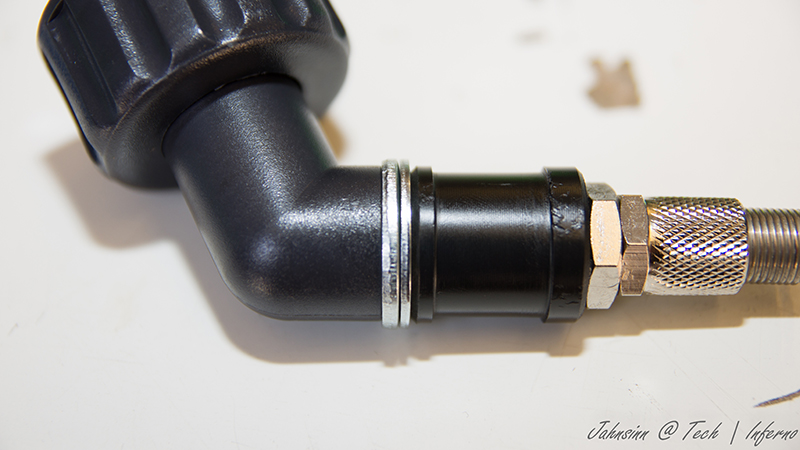
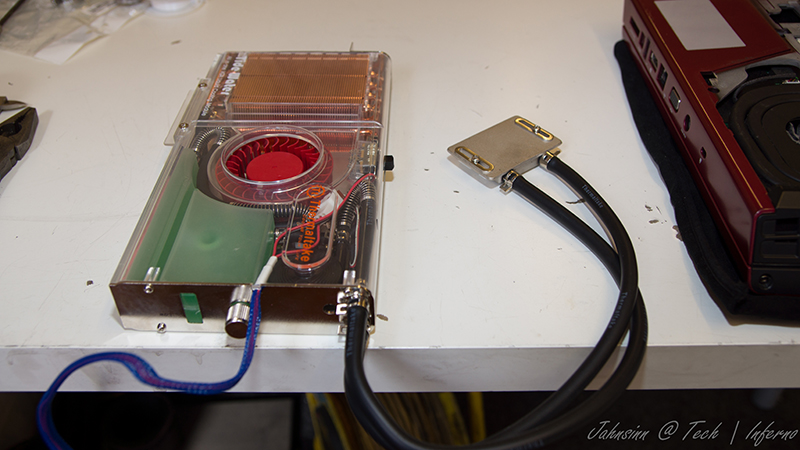
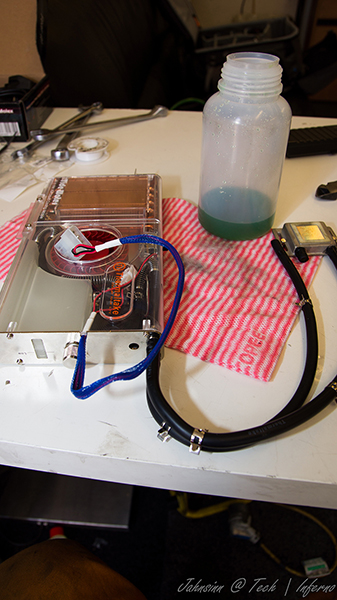
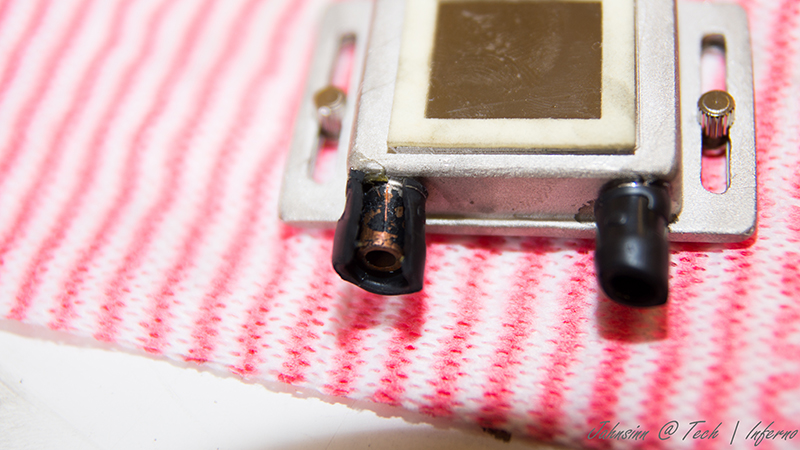
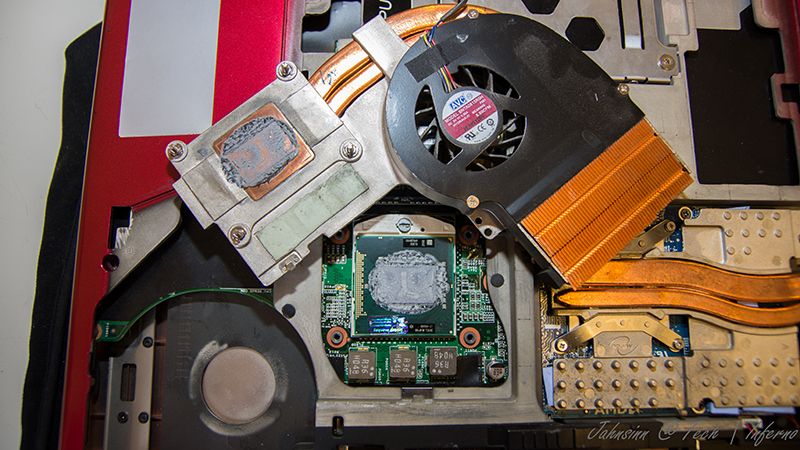
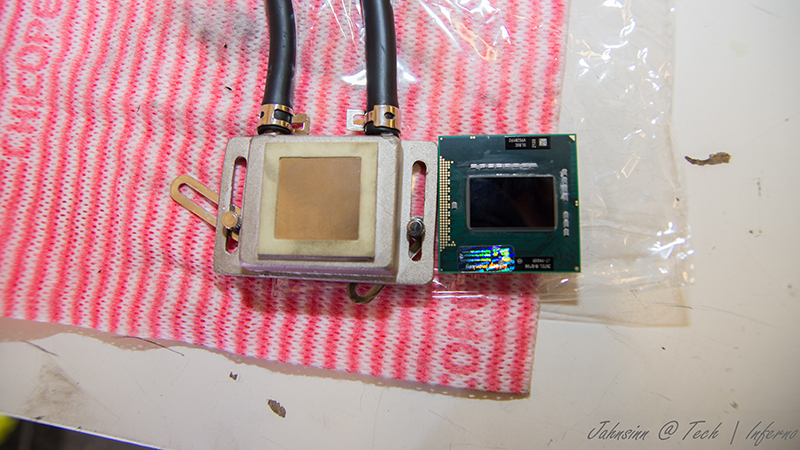
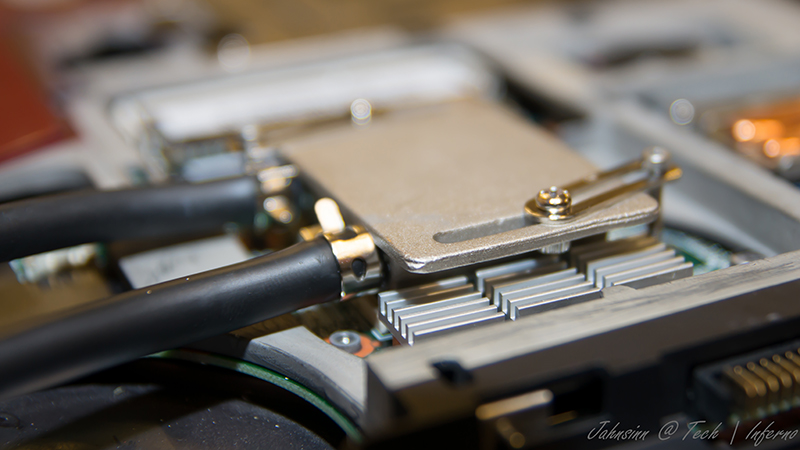
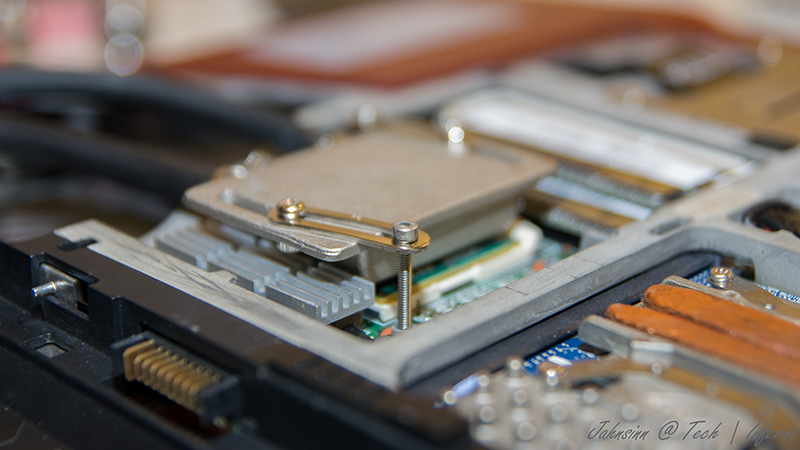
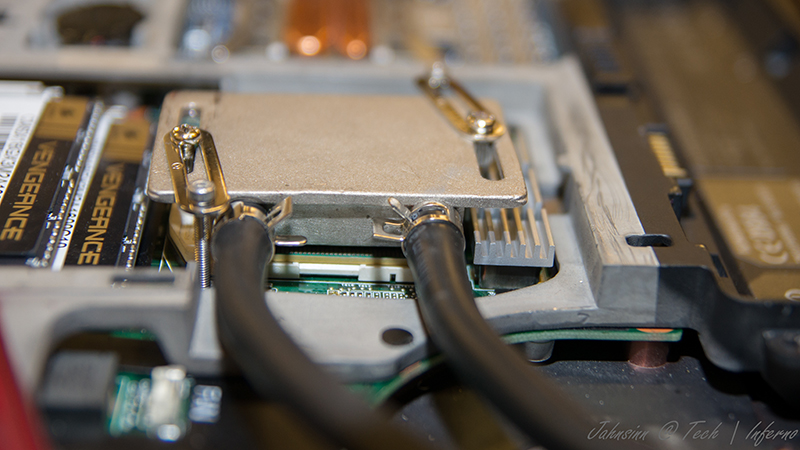
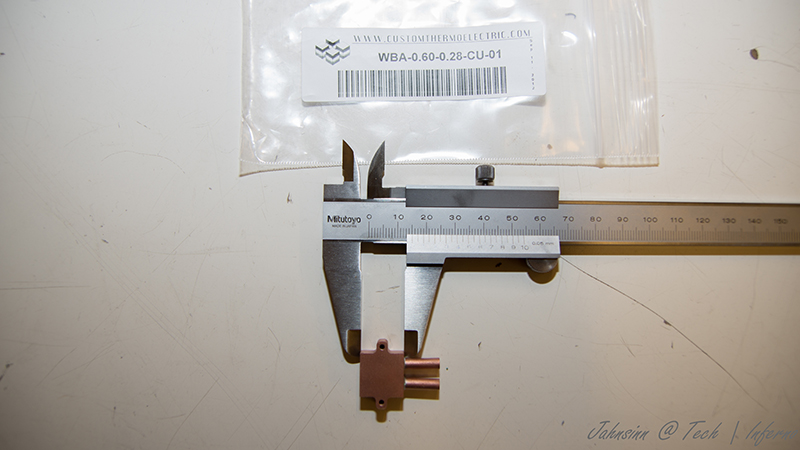
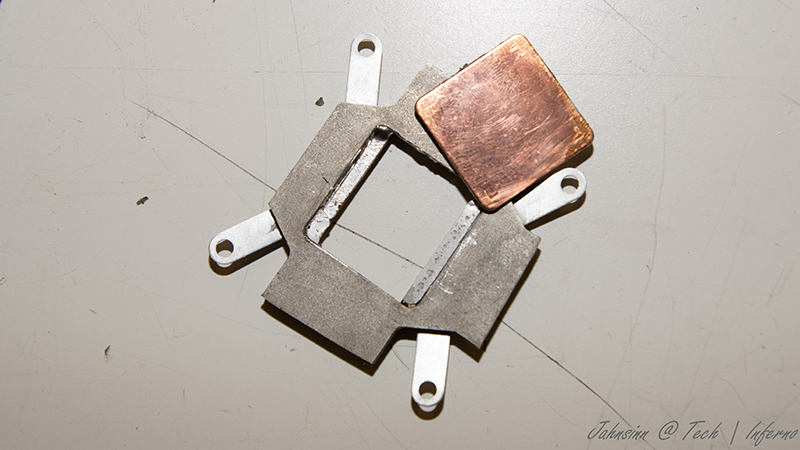
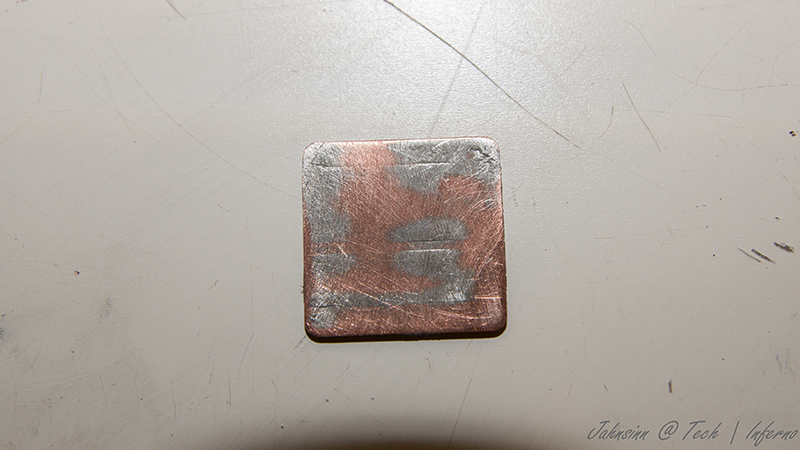
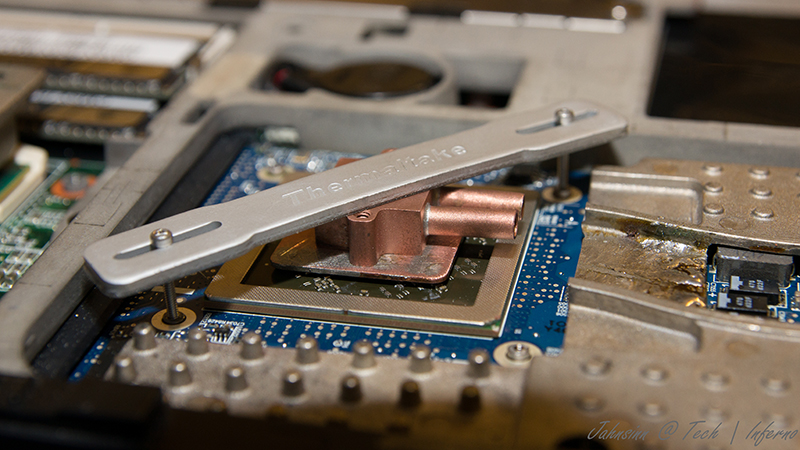
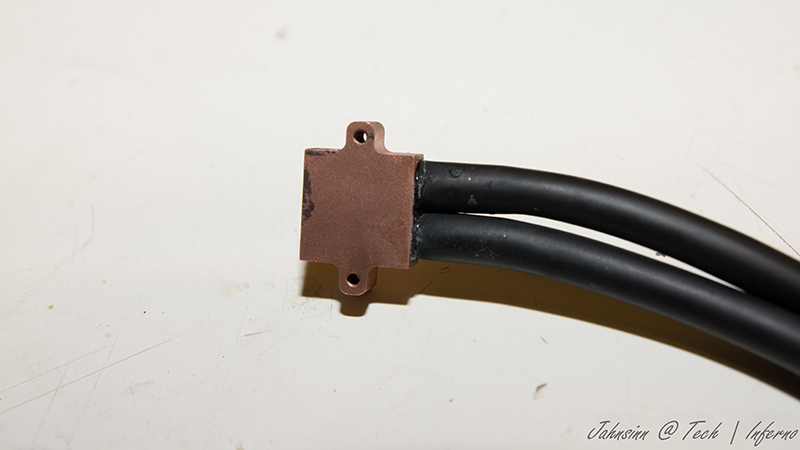
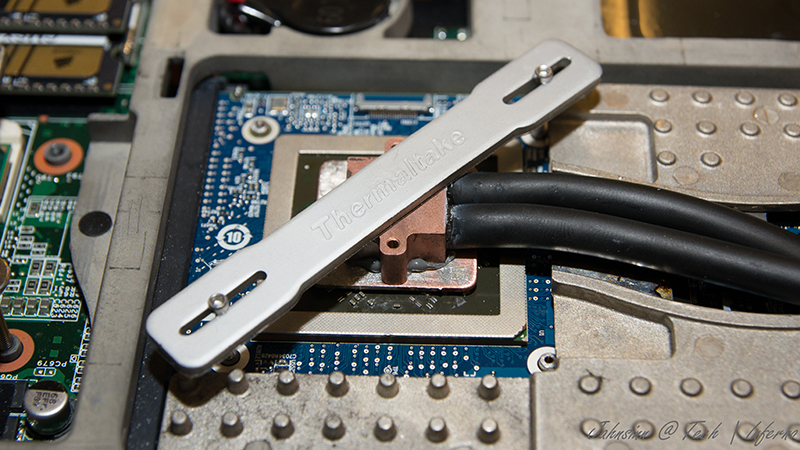
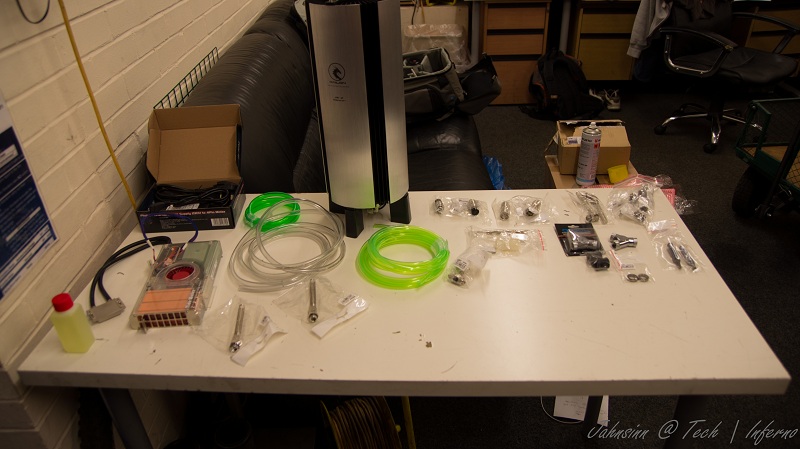
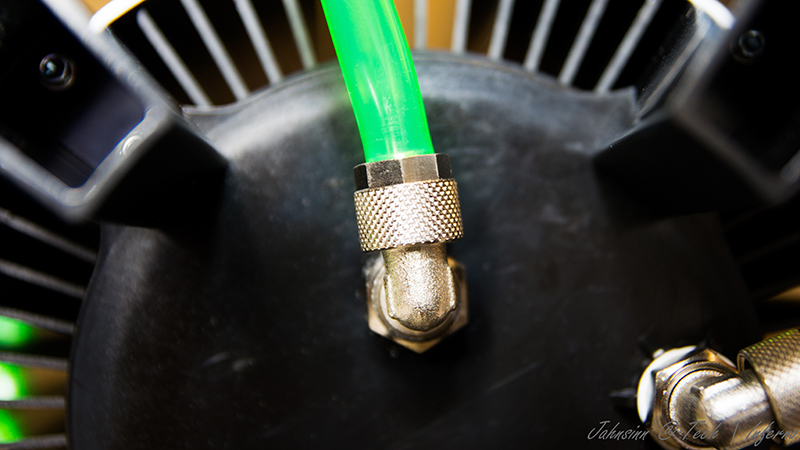
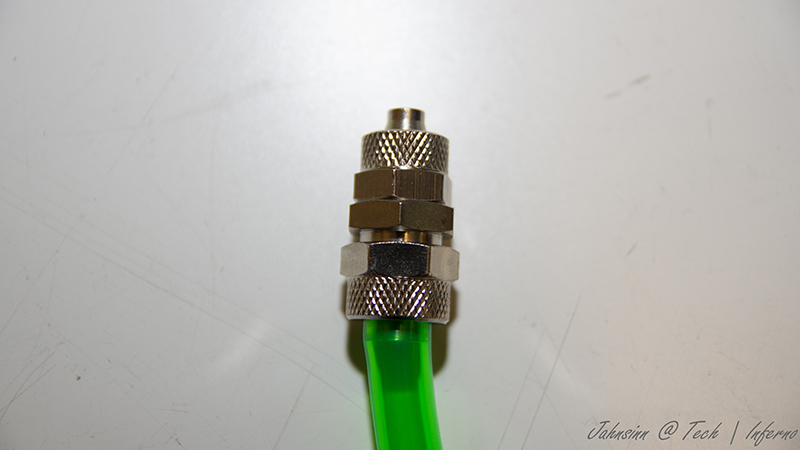
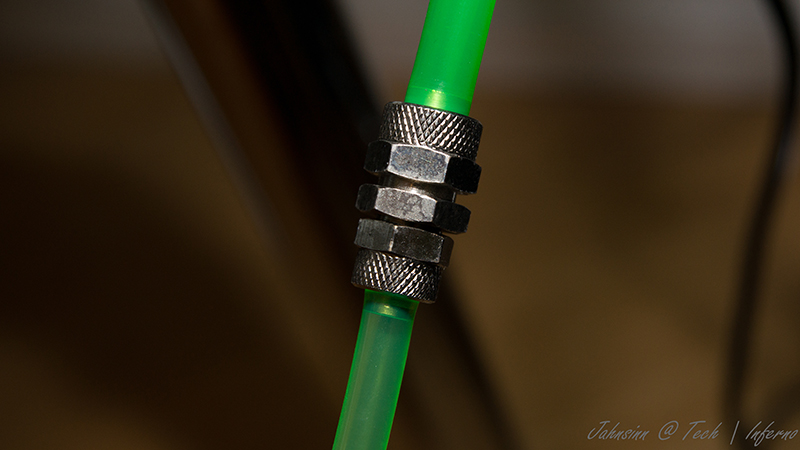
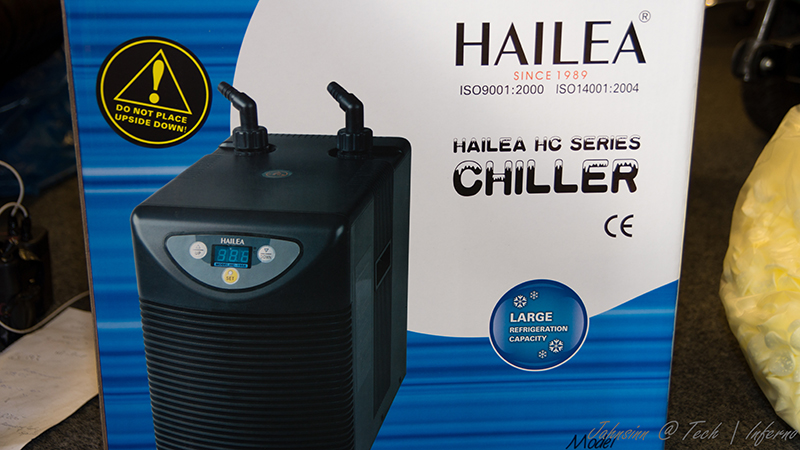
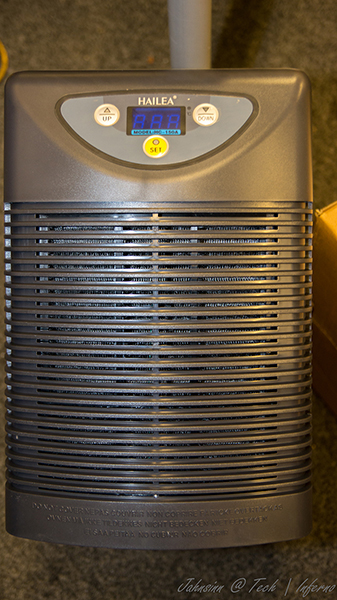
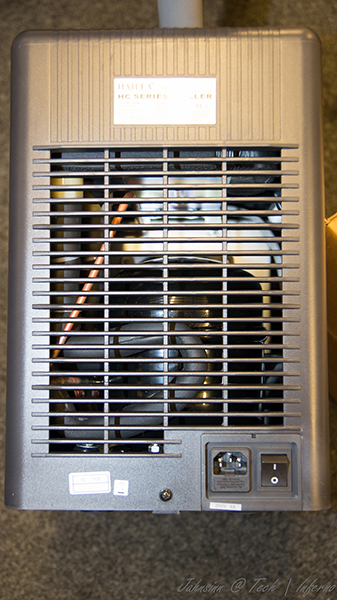
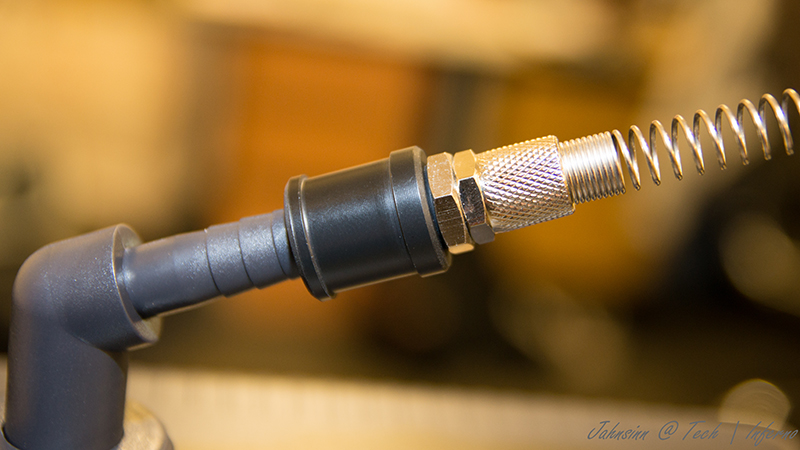
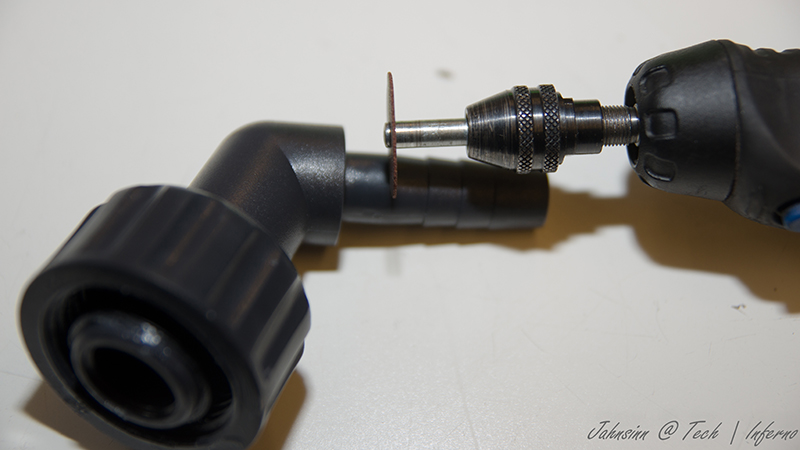
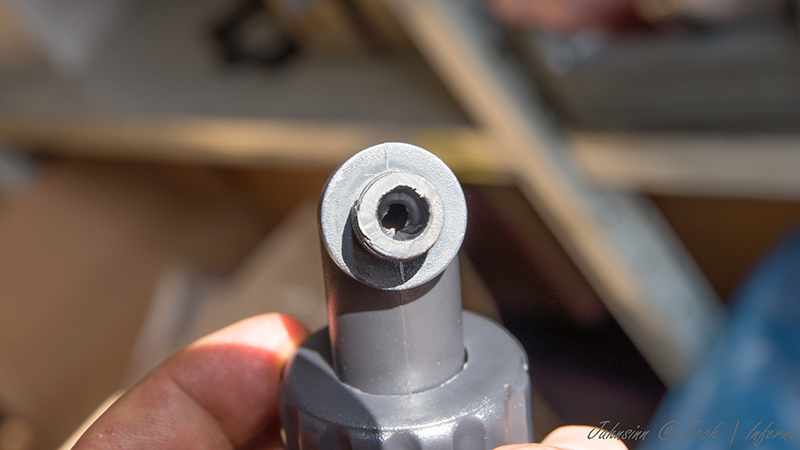
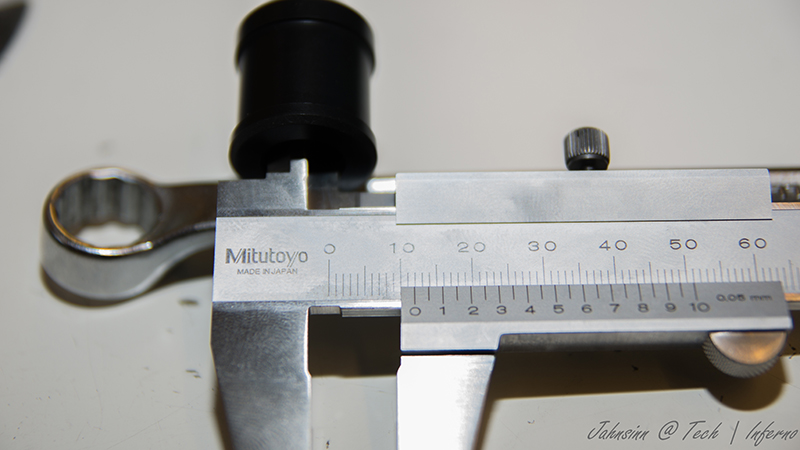
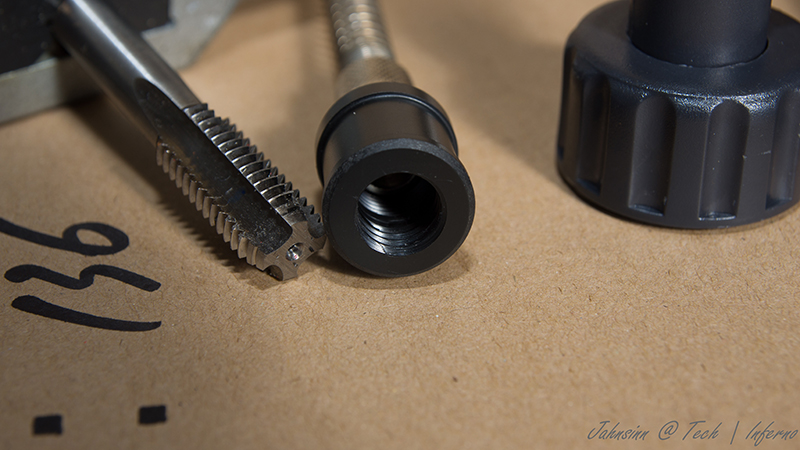
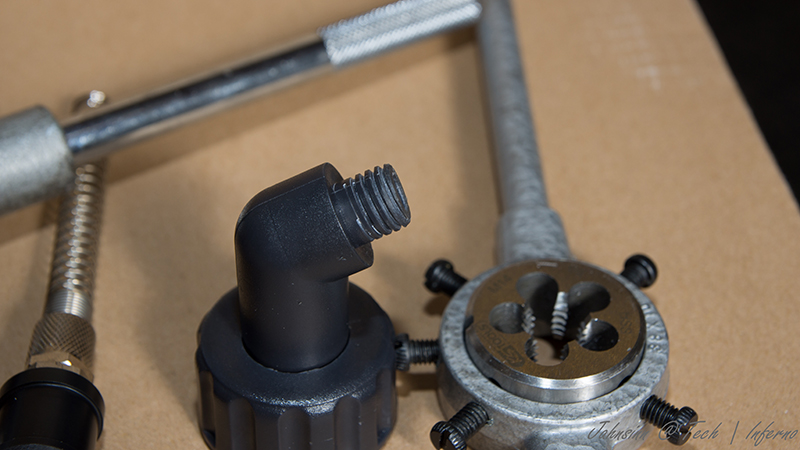
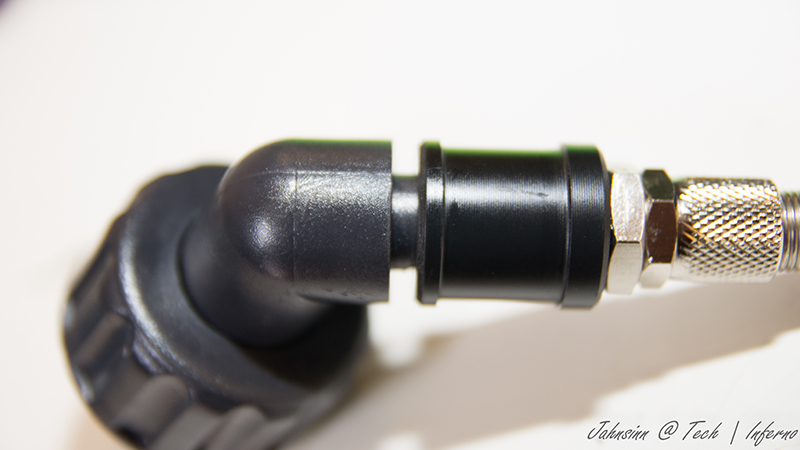
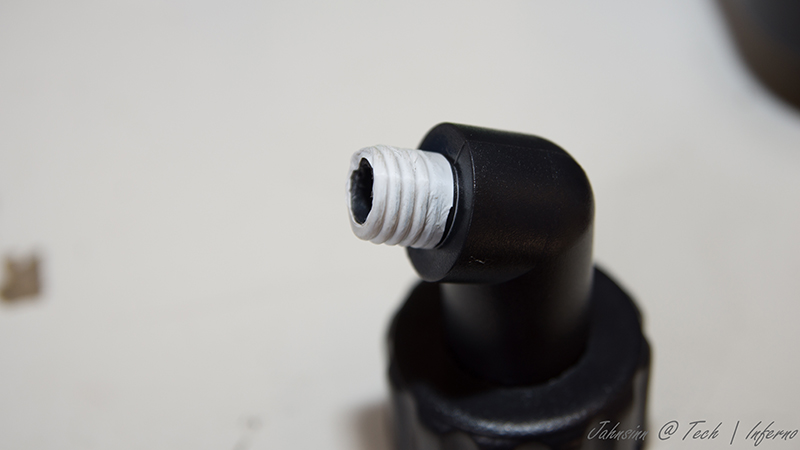
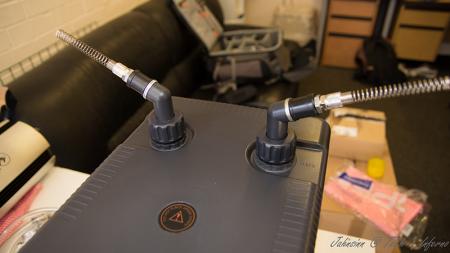
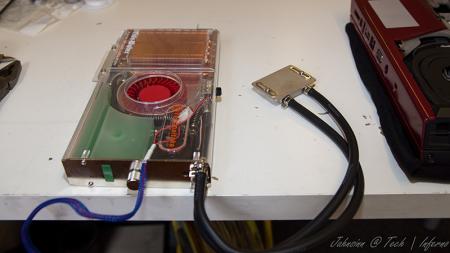
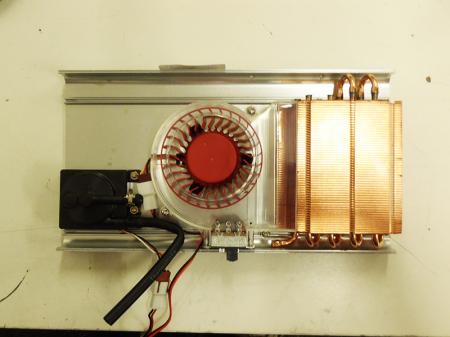
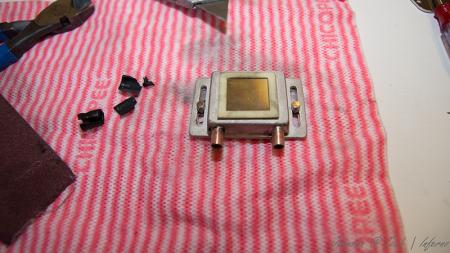
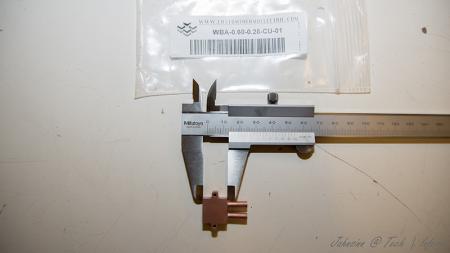
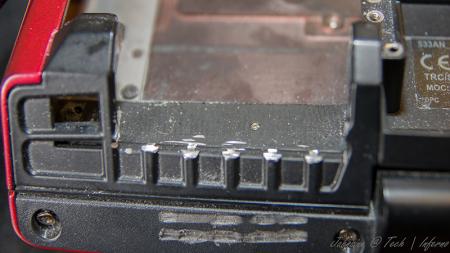
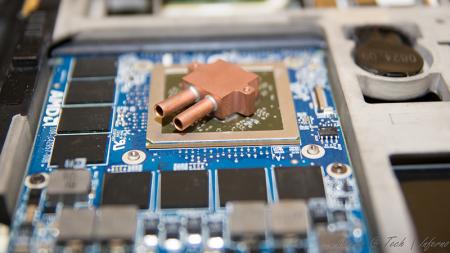
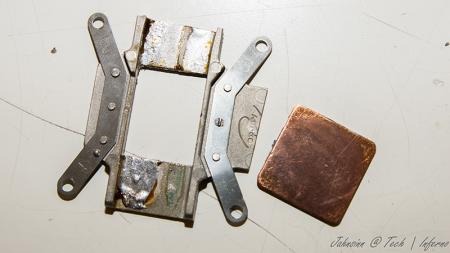
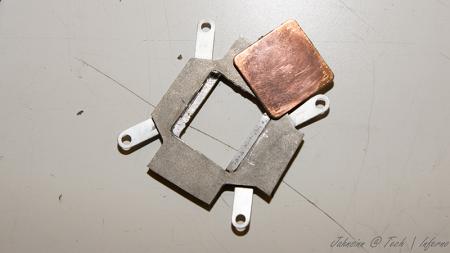
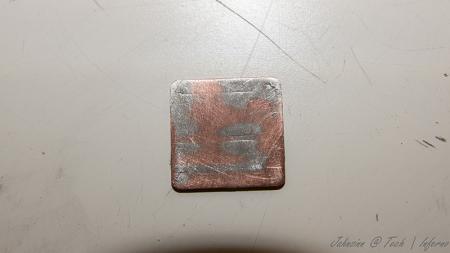
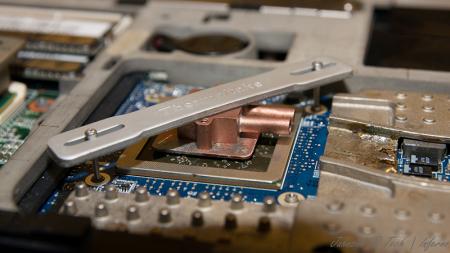
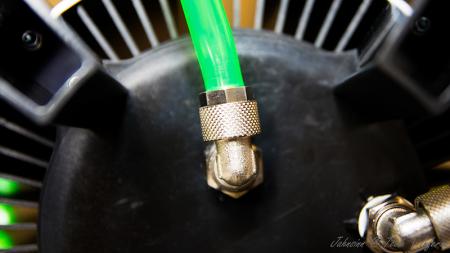
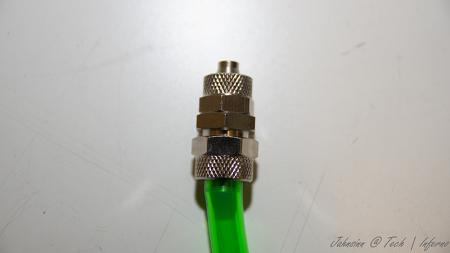
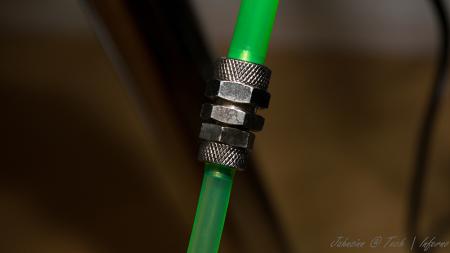
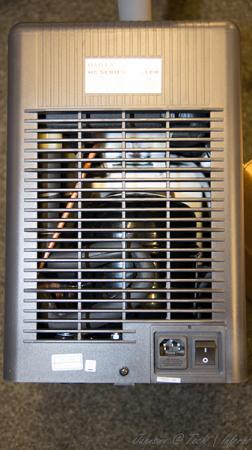
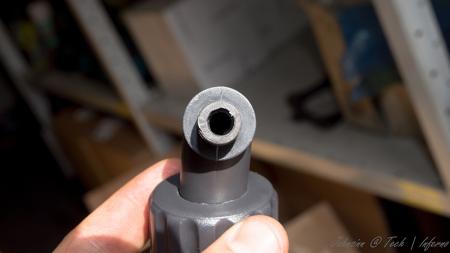
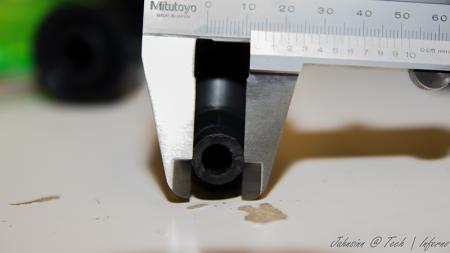
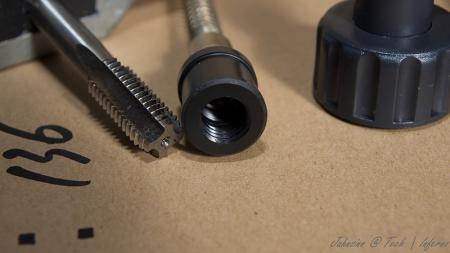
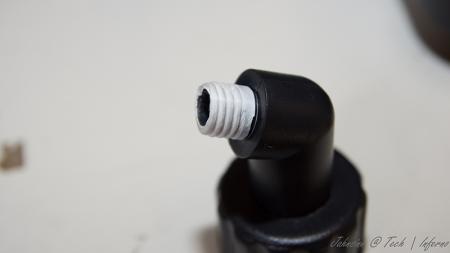
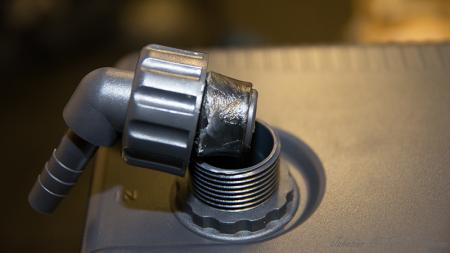
First of all, let me say I haven't finished yet. I'm still working on it and will update this thread from time to time due to much work at the moment. When I fitted my 940xm and the 7970m I got really mad of the heat and the fan noises even in idle mode. So I decided to get it all cooled with a silent, most important quiet, external water cooling system. I checked the internet and found evth I need to get it done. The most difficult thing was to find slim water blocks to cover the dies. I will list all the parts I used with article number and website if you're interested at the end of this post. First the overview. These parts are going to be used: Actually not much, so let's start. I start tubing at the inner hose socket of the reserator. This is the place where the pump is placed behind. You have to use a 10/8mm hose. By this, 10mm means the outside diameter of the hose, 8mm means the inside diameter. This is very important to know by everything you do on water cooling systems due to different fittings, barbs or reducers. Fit the hose and tighten it well with a spanner. Now you need a reducer to get on a 8/6mm hose. This is necessary to get in fitted to the chiller. At the other end you need to fit the 8/6mm hose. After this is done the 8/6mm hose leads into the chiller. A chiller pushs down your temps to a predefined value set by you, the minimum you can get theoretically is +3°C. Basically you can say it works like a refrigerator. This is very helpfully when you start gaming or other intense work on the laptop to keep the temps low. Here are some pics of it. To get the hose fitted the first custom made had to be done. Maybe I didn't know how it actually works, but I had no clue how else to do it without a modification... As you can see on the picture, the 1/4" adapter didn't fit to the chiller's nozzle. I really don't know what's the original idea by the developers. So the first adjustment had to be made. Cut the end of the nozzle as you can see on the pic. When this was done I noticed really pour casting quality inside the nozzle. This would massively reduce your flow speed. So I used a drill to get it out. Finally I got an outside diameter of 13mm at the nozzle. The adapter has 12mm inside diameter So just perfect to cut a M14 thread to both parts. Unfortunately I couldn't get closer due to the layout of the die. two washers solve this problem to get it proper tightened. To get it proper sealed I used teflon tape. Just the best way to get something sealed. Don't do it without any sealing! Use some Vaseline before you stick in the nozzles. Do the same with second side of course. At the end it'll look like that. Let's get to the CPU water block. I purchased the Thermaltake CL-W0052 Tide Water, originally made for desktop PCs to cool down the graphics card, on ebay to get all the stuff I'll need to do it. I chose that one because the water block has just a height of 8mm. Also all the hoses and clamps will be helpful. First drain the coolant. Then I opened the chassis and robbed all hoses and clamps. You'll need them in a couple of minutes. They're all bonded quite well, so just cut them at the ends. I also cut and removed the hoses of the water block itself, just to make sure everything is okay. I didn't want to get upset when I filled the system with water. So I cut them and removed the old adhesive. I then removed the original cpu heatsink and compared the die with the water block The water block as it was out from the box was just a touch too small to fit correctly onto the die. So I just removed the tape around the block. Now it was ready to get fitted. All I needed to do was loosing the existing bolts on the water block and tightened it with M2.5x20 hex nut bolts into the existing holes. At the end it looks like that. By the way, the mosfet heatsinks came with the tide water vga cooler. I also fitted the black hoses as they were, just without the glew and it still seals perfectly. To get the hoses guided out of the laptop you need to remove your fan control at the back of your laptop. When you're doing this, be careful not to touch the chassis as I did with whatever you use. I used the dremel and didn't see it for a while. What a shame! Nevermind, so let's get over to the gpu side. I bought a very tiny water block with just 15x15x7mm dimensions to not to exceed the height. So may be later I will be able to fit the backplate cover again. The water blocks would actually fit on the die, perfectly. But due to the layout of the gpu die the block just fits in diagonal postion. So useless for me. To get the water block in the right direction I unsoldered the copper plate of the original heatsink. That one has got the right dimensions to get this solved. Clean the copper plate from the old tin on top by using the Dremel or sandpaper. At the end that's the way it should work. Just to mention, also the holder came with Thermaltake tide water cooler. The bolts I bought seperatly on ebay. They are M1.6x20 but too long, so I cut them down to 15mm. Now they fit into the existing holes and push down the block properly Use now the -->small<-- black hoses robbed from Thermaltake chassis. These are the inside hoses, they're smaller. You need to use some adhesive because the clamps coming with the hoses are just a way too big and don't keep it tight to nozzle. Now just add some thermal paste between copper plate and die, and copper plate and water block. Tighten it all down. Finally it looks like that. [ATTACH=CONFIG]5105[/ATTACH] hoses leaded through the fan grill, gpu side. I mention again, just temporarily cause I'm still waiting for parts. in progress... [ATTACH=CONFIG]5107[/ATTACH] [ATTACH=CONFIG]5106[/ATTACH] cpu side [ATTACH=CONFIG]5108[/ATTACH][ATTACH=CONFIG]5109[/ATTACH] The hose laying is actually just in common sense. Nothing particular I should mention. Reserator -> 10/8mm hose -> 10/8mm to 8/6mm reducer -> 1/4" compression fitting -> 1/4" adapter for chiller -> chiller nozzle -> chiller -> nozzle, adapter, fitting -> 8/6mm hose -> Y-splitter first end hose -> 8/6mm hose -> quick coupling -> black hose (termaltake tide water) -> cpu block inlet-> cpu outlet -> black hose -> quick coupling -> 8/6mm -> Y-splitter second end hose -> 8/6mm hose -> 6mm barb -> small black hose (thermaltake tide water) -> gpu block inlet -> gpu outlet -> small black hose -> 6mm barb -> 8/6mm hose -> Y-splitter | Y-splitter -> 8/6mm hose -> 10/8 to 8/6mm reducer -> reserator update in progress...


- 25 replies
-
- 15
-
-
Hello I have a m14xr1 555m which has been repaired by dell 4 months ago. Despite a terrible service from the technician and two MOBO replacements, everything was working fine until few weeks ago when I was playing diablo3. FPS dropped to 5 and the game since then has been unplayable. I noticed my GPU temp was too HI reaching 99c causing GPU throttling. I have been reading a lot about same issues from several people with the same machine claiming different causes: (Nvidia drivers, GPU physics load, Virtual Sync config, Blizzard patches, processor cores load, Dust in fan, etc). I have tested all suggested solutions and even re-pasted with IC diamond 24. After all this it seems that the FPS drops and thermal increase vary from machine to machine for Daiblo3, so I decided to test with any other game and discovered the thermal increasing was happening again. Before calling Dell again I would like to know if somebody knows what is the cause for those thermal increases in such way as idle remains between 50 to 60c. I acknowledge the GPU rise in temp with heavy load (even max settings) but shouldn't go beyond 80's Many thanks for your time
-
 Today I decided to be helpful. If you're like me and you hate bloatware with a burning passion and you absolutely must ave a 100% clean hard drive, then you're reading the right post! This is a Windows 7 and drivers installation guide for the Alienware M14X R1 (not the R2). I downloaded the latest drivers (as of 8/26/2012)for you guys from the offiicial dell drivers website (Drivers and Downloads | Dell [united States]) and arranged them in order of installation. I also included the latest NVIDIA driver 304.79 (BETA) and other important installers you need after doing a Windows 7 installation. The files are inside the 4hared folder I linked, If you don't want to download from my link, you can track down and download the files yourself at these links: MY 4Shared folder (contains drivers and programs numbered in order of installation/ up to date as of 8/26/2012) : 4shared folder - My 4shared *Dell drivers: Drivers and Downloads | Dell [united States] *NVIDIA Drivers: NVIDIA Driver Downloads - Advanced Search *Alienware WMP Skins (They're at the bottom of the page): AlienGUIse Theme Manager - Alienware Arena *AlienAutopsy: What is the Alienware AlienAutopsy Software and Where can I download? | Dell *CCleaner (I recommend the portable version for less footprints): CCleaner - Builds *Wireless-N 1103 Driver (the one in dell' driver download section is full of bugs): Killer Gaming :: Support :: Driver Downloads *DirectX: Download: DirectX End-User Runtime - Microsoft Download Center - Download Details *.NET Framework 4: Download: Microsoft .NET Framework 4 (Web Installer) - Microsoft Download Center - Download Details *Adobe Reader: Adobe - Adobe Reader download - All versions *Adobe Flash Player: Flash Player | Adobe Flash Player 11 | Overview (You can download the Live! Central application from My Dell Downloads:https://smartsource.dell.com/Web/Welcome.aspx?ReturnUrl=%2fweb%2fmain.aspx ) *You have to have your login information to download the Live! cetral (and the bloatware)that came with your laptop (the Live! Central Is also in my 4shared link)* THIS IS A "FOR DUMMIES GUIDE" THIS GUIDE ASSUMES LOW EXPERIENCE IN THE SUBJECT FROM ITS READERS Windows 7 Installation *TIPS* * Before doing step 2, I suggest loading optimal defaults in BIOS settings. This can be done by pressing f2 instead of f12, after doing that you can press f12 after saving the changes you made. * If you plan on gaming on your laptop (which I'm pretty sure you are), after the steps above, press the right shift key five times and turn off sticky keys STEPS: 1. Insert the Windows 7 installation Disc that came with you laptop 2. Restart, then press F12 repeatedly 3. Choose Boot from CD/DVD 4. Choose your language 5. Click "Install Windows" 6. Click "Custom Installation" 7. Click "advanced" and format all partitions 8. Delete all partitions then click next 9. Wait for the installation process to finish 10. Click "Install Important Updates Only" 11. Create your new log-in information 12. Eject Windows 7 Installation Disc Drivers and Programs Installation *TIPS* * Ignore the BIOS (A08) and HDD Firmware (D2D5DEM1) file if you've already run that before * Don't be impatient and skip restarts, doing restarts prevents errors * Run the installer files from a USB flash drive r external hard drive so you don't have to waste about 1.5 gb of your hard drive with installer files that you'll only need once * Customize settings of applications and windows only after you finish all the steps below * Avoid windows updates until you are finished with the steps below (Step 2 being an exception) * If you trust me, you will use the drivers I uploaded as I have already extracted the installer files from the original dell drivers so that it doesn't clutter up on your hard drive and not make the C:/Dell folder where they extract the installer files. * I suggest keeping your driver files in a USB so that they don't get corrupted (corrupted driver= lots of BSOD's and errors) and don't clutter up space in your hard drive * If you don't want to follow TIP number 6, then download drivers only from the dell website I provided above * After step 23, you've still yet to restore your laptop to it's optimal state, I suggest doing the recommended steps to make your installation SUPER clean * Install all other programs (Skype, Steam, games, etc) after all step 23 and windows update (exception of microsoft office that would be optional step 27) STEPS: 1. Install Atheros driver 2. Plug in your ethernet cable then wait a few minutes for the first windows update to finish 3. Restart when asked by Windows Update 4. Install Wireless Card Driver then restart(the one I uploaded is for the Killer-N 1103 driver for others you're gonna have to download your driver from dell) 5. Install Intel Management Engine Interface 6. Install Intel HM67 Cougar Point Chipset Driver then restart 7. Install Realtek Card Reader 8. Install DirectX 9. Install .NET Framework 4 10. Install Adobe Reader 11. Install Adobe Flash Player (for Internet Explorer) 12. Install Intel HD Graphics 3000 Driver then restart 13. Install NVIDIA GT 555M driver then restart 14. Install Alienware Command Center then restart 15. Install Alienware OSD Application then restart 16. Install Realtek Audio Driver then restart 17. Install Intel Rapid Storage technology then restart after install and again after boot up 18. Install Synaptics Touchpad Driver then restart 19. Install NEC USB 3.0 Driver 20. Install Dell 375 Bluetooth Module 21. Flash Alienware M14x Camera Firmware 22. Install ST Microelectronics Free Fall Sensor 23. Install Live! Central Application Recommended Steps: 24. Download the "Customization" folder I provided, it contains original (not user made) alienware wallpapers, screensavers and avatars for windows 7 25. Put the files accordingly to where they should be. A Path.txt file is provided so you know where they should be 26. Customize the settings of Windows 7 (battery settings, wallpaper, screensaver, etc) also I provided all 4 alienware WMP skins OpS 27. Install MS office (and run every single program of it once and configure settings, click updates to the recommended setting) if you have it. If you dont have it, ignore this step. 27. Install Antivirus program NOW if you don't want to use the Microsoft Security Essentials that come with windows updates. (I highly recommend using MSE, it's an awesome, not annoying, super quiet anti-virus program, and it doesn't take much space) 28. Type Windows Updates, configure the schedule on it, check every check box on the settings and check for updates 29. Tick every single checkbox for important updates 30. Tick every single checkbox for optional updates EXCEPT for "bing desktop" hide this abomination and never make contact with it again (lol jus kiddin) 31. Install all the updates. (This will TAKE A LONG TIME make sure your laptop doesn't shutdown/sleep/hibernate on the process and keep an eye on it, some updates need user input especially MSE) 32. After the first batch of windows updates are done, check it again, there will be more left. then install all of them. 33. When you are sure there are no more updates, then you can proceed to install your games and other programs 34. I recommend installing the AlienAutopsy program, it's PC Doctor alienware version, it comes with your alienware laptop out of the box. I don't consider it bloatware as it is useful when I want to check for hardware problems. 35. After you have installed all your games and programs, run a full scan with your antivirus, run a default scan on AlienAutopsy, fix all options on windows and your programs, do everything you have to do. Check for updates on all your programs. 36. Now to make your laptop *SUPER* Clean, Defragment your Hard Drive (for HDD I'm not sure this is recommended for SSD users) 37. Check C:/, C:/Program Files and C:/Program Files (x86)for any unwanted files. 38. Type cleanup on start menu and clean up everything 39. Run CCleaner (Provided in download section) clean reistry, and check every box except wipe free space (I've tested this and it doesn't harm your computer) 40. Create a restore point 41. Run disk cleanup twice (once with no admin mode and one with admin mode) (this deletes other restore points wich takes up a lot of GB's) ENJOY your *SUPER* clean M14X R1! -alienhead0306 PS: This is my first post EVER so constructive criticism would be appreciated
 -
The dell site says nothing, does anyone know what changes are in the A04 BIOS? I'm about to flash it momentarily. Kaldon:ambivalence: OK, I've flashed it with no problems, was there a USB Debug option in the BIOS before? I don't recall it but I never specifically looked for it. The VBIOS version is now 80.07.28.00.26 my old version was 80.07.16.00.04 My fingers are crossed that they removed the 65C thermal limit... Will be testing that next. Im also going to see if my USB 3.0 problem is fixed with external drive constantly remounting. Kal