Leaderboard


Popular Content
Showing content with the highest reputation on 02/14/13 in all areas
-
Okay, here we go for the Win8 user with BIOS R0081C8 EDIT: Outdated instructions - removed.4 points
-
Bios v8.00 added to the first post. Bios v2.07 modified -> Lenovo Y580 / Y580 BIOS v2.07 - 'unlocked', no whitelist, Nvidia 660m @ 1GHz. Both mods contain wwan / wlan whitelist removal. I tweaked it a bit more, so users with a v2.06 mod who are experiencing issues with a 3rd party wwan / wlan card should switch to the new 2.07 mod once it's online, the issues should be fixed now. Furthermore I added some tweaks to the 660m (1GHz) and the setup comes with unlocked menus. If you flash it please report back to confirm that everything is working as expected, would be appreciated, thanks!4 points
-
? Well, people asked me to push the 660m a bit, and as a former 660m user I know that 1000MHz shouldn't be a problem at all, even at stock voltage. Since I didn't touch the voltage, the additional heat shouldn't be much.3 points
-
Good Mornin' everybody, I'm a student currently studying at my university in mexico, I'm age 20 and I'll try to give everything I can about with my knowledge about my G75VW and programming skills. I hope I can be of great help!2 points
-
IT WORKED!!!! The problem was my USB stick. When I was applying the fix I noticed that it took a long time. Then i created another flash drive /usb stick with the format tool and applied the fix while the files were on my computer and not the usb stick. I copied everything back and it works! The white list fix works perfectly. I was able to install another Wi-Fi card that I had laying around and am typing this from my lenovo wirelessly. Thank you so much.2 points
-
hello, my online name is dbrasco75. I also am registered at NBR and ROG, and i'm here to learn. I don't post much, because, i'm fairly new to pc and I like to read and learn all that I can about stuff from uncle webb and chastity@asus rog. was alway's a console gamer, mostly sony's console's, ps1,2 and 3. but, x-mass 2011 got my first gaming rig, asus g73jh-bst7. with the years that have gone bye, the hardware is a little dated for most of the software that's out now. am playing far cry 3 right now and I can't stand that I have to play on low setting's with DX9 so, started searching around and found chastity's Modded v93 vBIOS/od2.rar. also did Version 5: G73JhAS.213.Moddedv5 and am in the process of learning how to set up throttlestop correctly on my rig from reading uncle webb's The ThrottleStop Guide. but i'm still in the the middle of learning how to do that. so any advice anybody has on how to set it up on the g73jh-bst7 with the intel i7 740qm not the 720qm would be much appreciated.2 points
-
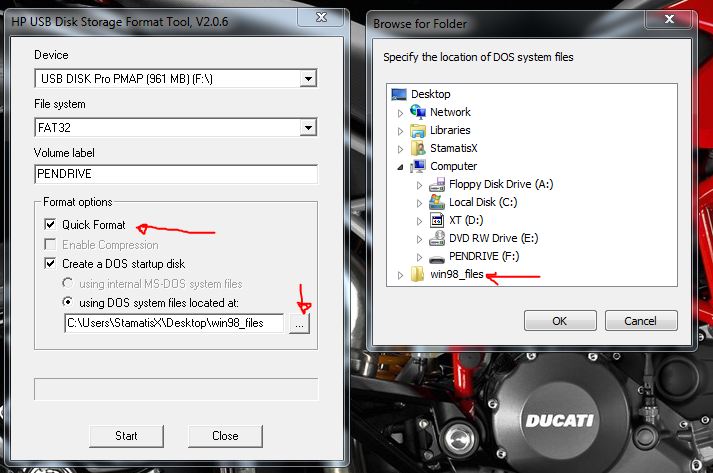
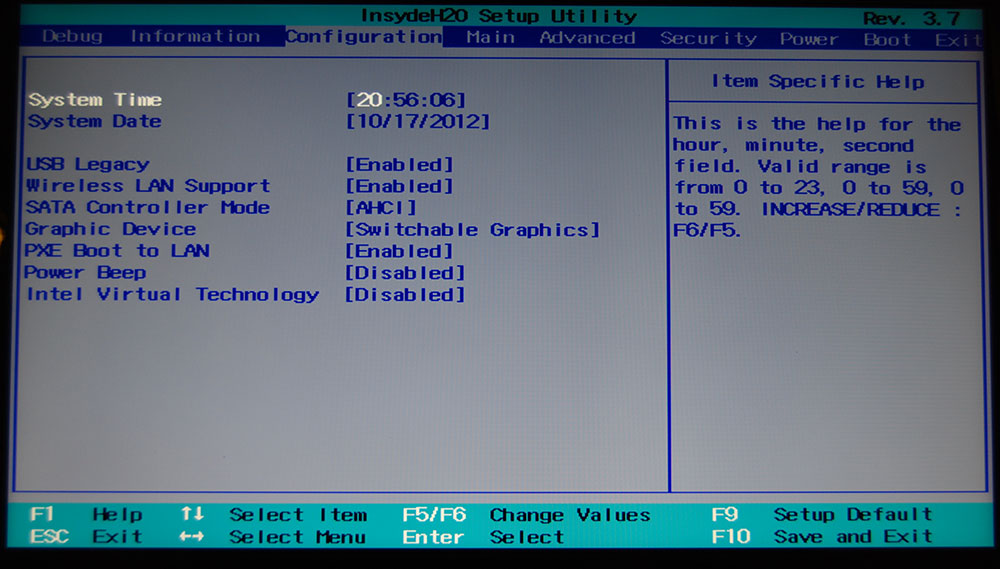
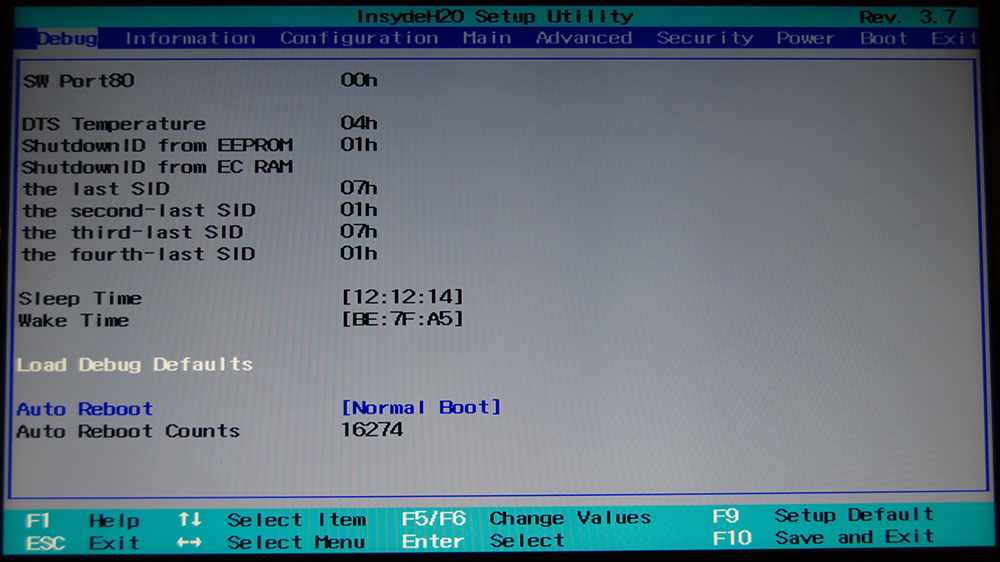
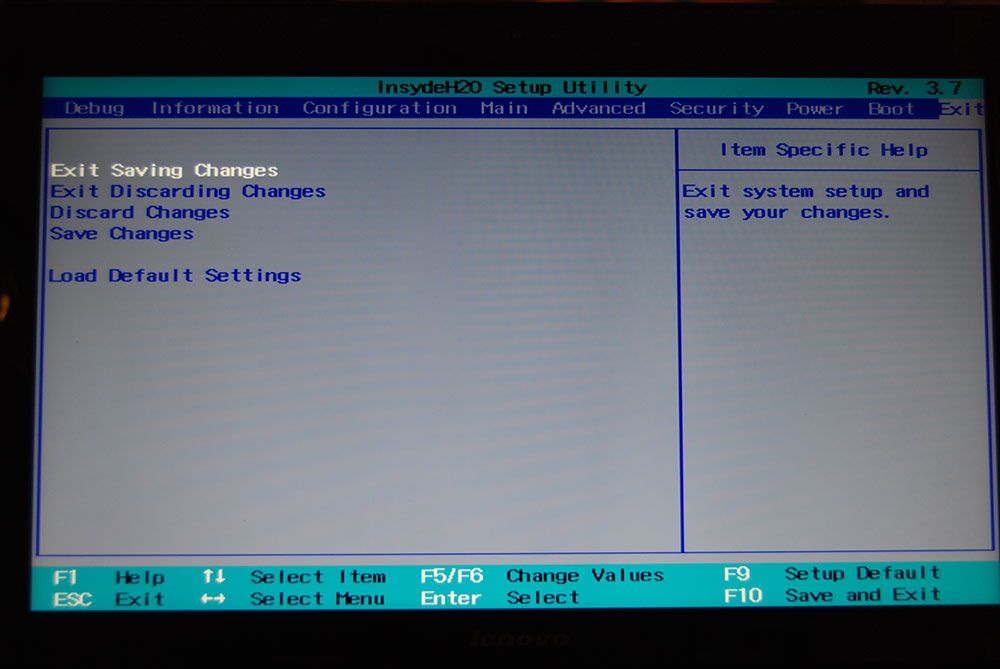
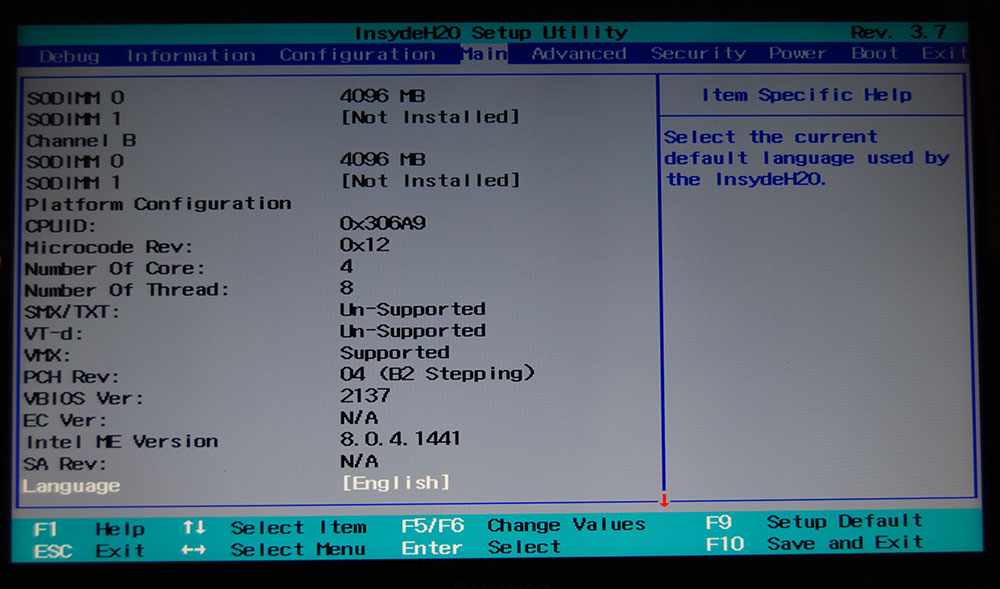
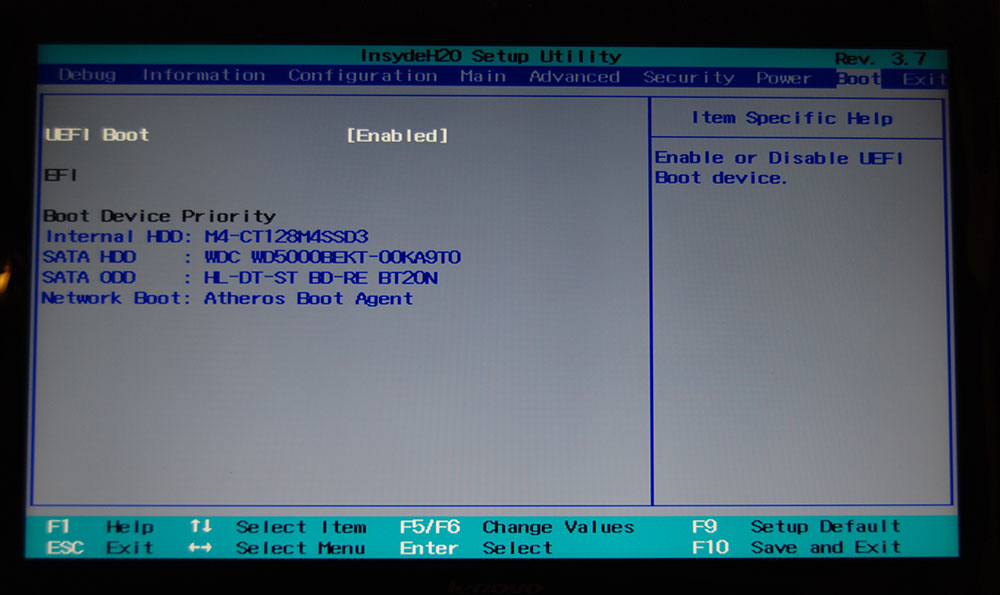
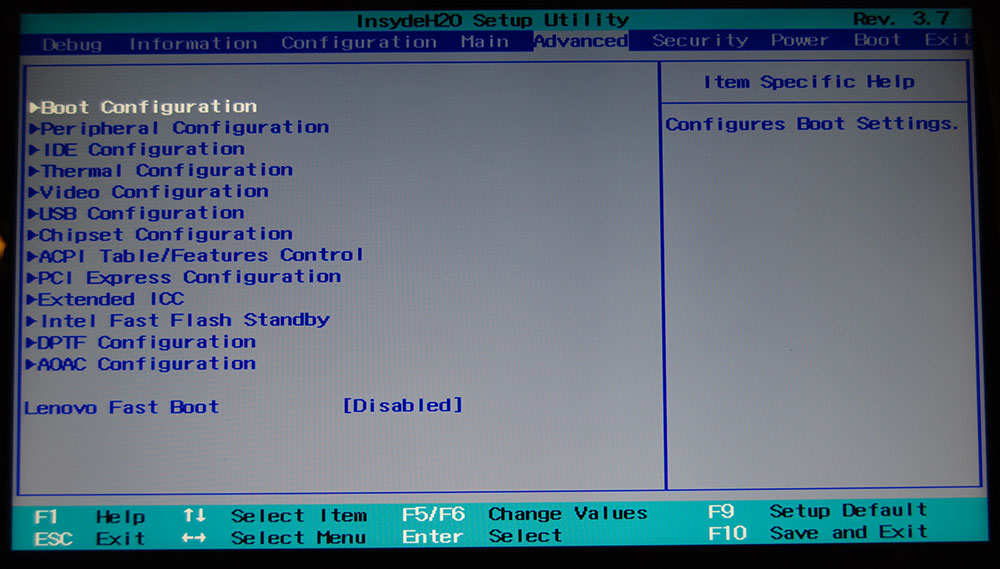
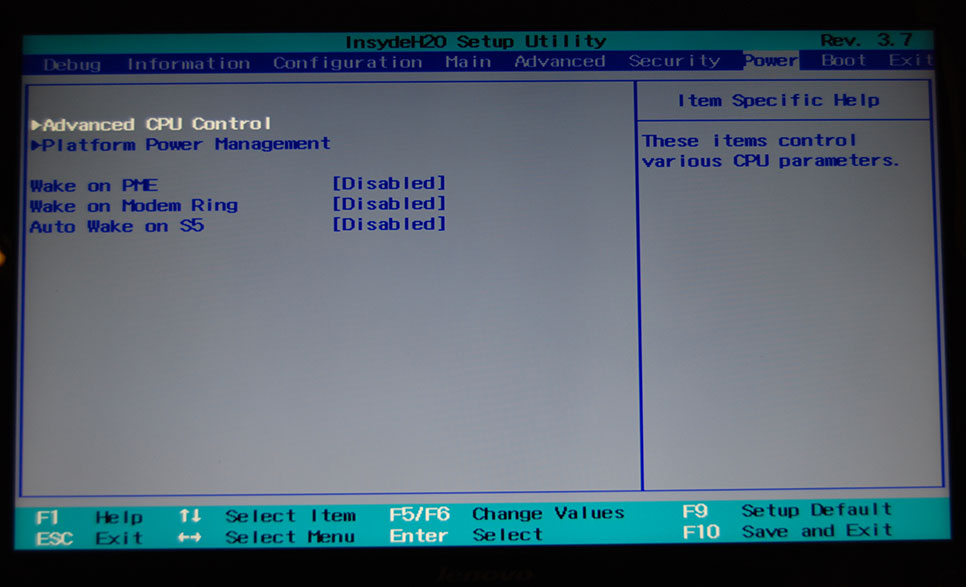
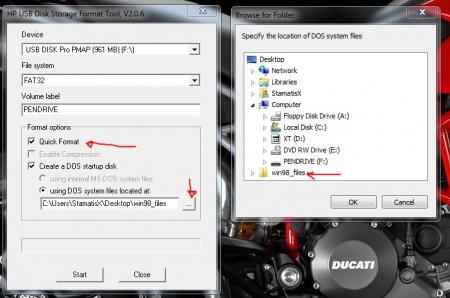
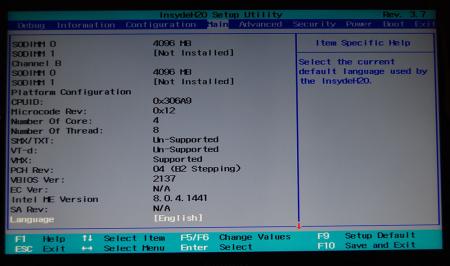
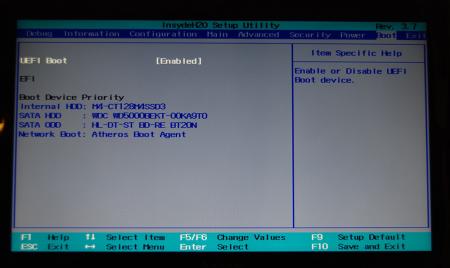
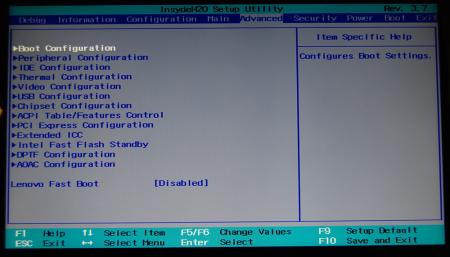
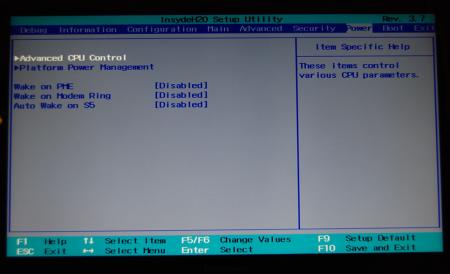
Lenovo Y500 - 'unlocked' BIOS / wwan-wlan whitelist removal The Lenovo Y580 / Y480 comes with a pretty locked down BIOS, and in addition to this with a whitelist which prevents the user from getting 3rd-party wwan/wlan cards to work properly. The modified BIOS versions here will take care of this. Keep in mind that not necessarily all options available in the modified bios will work. Some might not do anything at all, others could possibly leave your system in a state which will prevent it from booting. Use care when changing stuff in the modified bios, don't touch things you're not familiar with. Use all the mods and software posted here on your own risk. NOTE: This will only flash the bios region. It won't reset the nvars set in the bios. While it is technically possible to update from v2.0x to v8.01 by using the method described below, I can't really recommend it since the EC of your system won't get updated. While it might work (possibly even without any issues) I can't recommend it. Therefore if you're on v2.0x and want to update, the better option is to wait until Lenovo provides an official 8.xx firmware update with EC and BIOS. You can then still flash the modified version as described below, once you're on a proper v8.xx firmware. Attached you'll find a modified version of the Y580 / Y480 BIOS v8.01 (5DCN90WW). ----------------------------------------- >> For users with a v2.0x BIOS: << Download links Old version: Current 2.0x version: Lenovo Y580 / Y480 BIOS v2.07 (5DCN40WW) -> unlocked, whitelist removed, Nvidia 660m @ 1GHz default 3d clocks Flash with the included InsydeFlash utility. ----------------------------------------- >> Instructions for v8.0x BIOS users: << The attached BIOS ("Lenovo Y580 - Y480 BIOS v8.01 (5DCN90WW) - Mod") is unlocked, whitelist stuff removed and the 660m is tweaked to 1GHz default 3d core clock. The only way I know of which allows you to flash the modified BIOS for v8.01 users does unfortunately also describe certain information which you don't want to loose (serials, Windows licencse etc.). Don't worry, I got it all sorted out, but due to this the flashing procedure is a bit more complicated than usual. Make sure you follow the instructions carefully. Download the flash tool, for flashing you'll need the DOS version, but for creating the backup of your current BIOS the Win64 version will do as well, and it is faster. Get the prr tool as well. Grab the modified BIOS you want to flash and the Y580-Y480_BiosFix tool. Create a backup of your current BIOS using the flash tool you downloaded (first step) by runing the included backup.bat, or by using the Win or Dos version flash tool with this command: -d BackupBiosY500.bin -bios If you get and 'Error 104', grab 'Error 104' fix and replace the original fparts file with it. . Make sure you have the modified bios which you want to flash, the bios backup you just created and the "Y580-Y480_BiosFix" tool in the same folder. Run the Y580-Y480_BiosFix tool, follow the instructions on the screen. Enter the name of the files correctly, else you'll get an error. It will create a new file for you and will be named after the modified bios file you specified, with 'Fix' appended to it. Here's a screenshot of the tool in use (Y580 version looks the same). In the case shown here it will create a file called "modifiedBiosFix.bin" which you can find in the folder where you run the tool. Use that one for flashing. Put the fixed BIOS, the prr.exe tool and the fpt.exe (along with the fparts.txt file) on the root of your prepared DOS bootable USB drive, restart your system and boot from that drive. Execut the prr.exe, if you don't get an error message continue by pressing enter. Then flash the bios by using this command (filename.bin obviously needs to be replaced with the name of the file you want to flash). If you can't remember the name of your file, use the command dir to display all the files on your drive. Flash with this: fpt.exe -f filename.bin -bios NOTE: The name of the BIOS file mustn't exceed eight characters (not counting the extension)! That's a DOS limit, so make sure the name of your file isn't too long. Wait until the process is done. After flashing it will verify the data, in case there's something wrong with the flashed data it will tell you. In that case don't reboot, just flash again. It might look a bit complicated at first, but that's the easiest way I could think of. Let me know if anything is unclear. The attached v8.0x modified versions include: - unlocked menus - whitelist removed (wwan / wlan) - Nvidia 660m 'GHz edition' - 1000MHz default 3d clocks >> Here's the 'buy me a beer' link in case you like this. Modding makes me thirsty << Use at your own risk, you are responsible for your system and the changes you make on it. My programs come with absolutely no warranty to the extend permitted by applicable law. Thanks @X0pas1 for testing, and for some pics - see below: I'd appreciate it if someone could also post some pictures of the more interesting sub-menus, e.g. advanced CPU control, video settings and similar. UPDATE 1/17/16 DOWNLOAD LINK FOR FILES REFERENCED IN THIS POST:
 1 point
 -
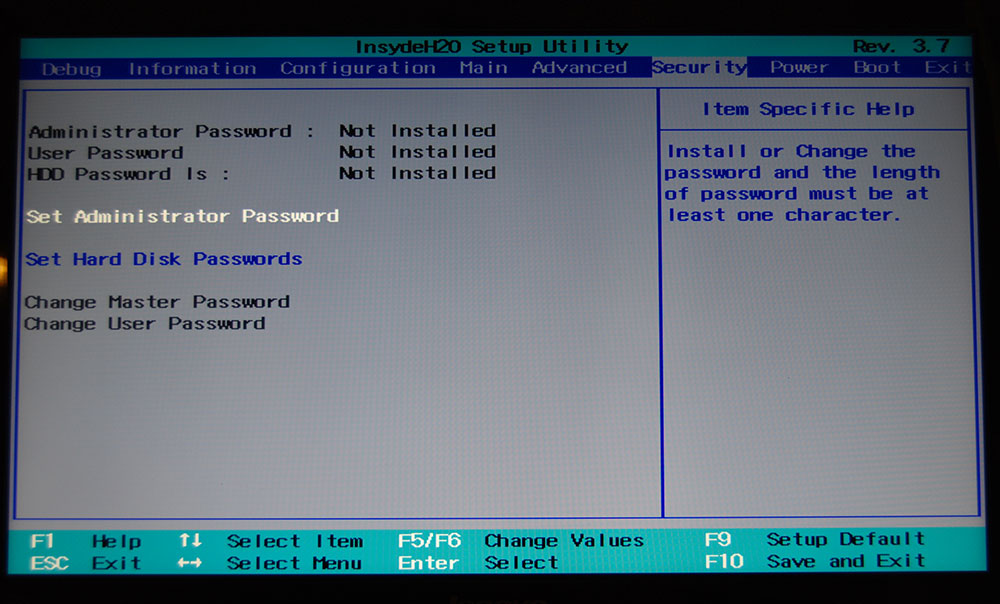
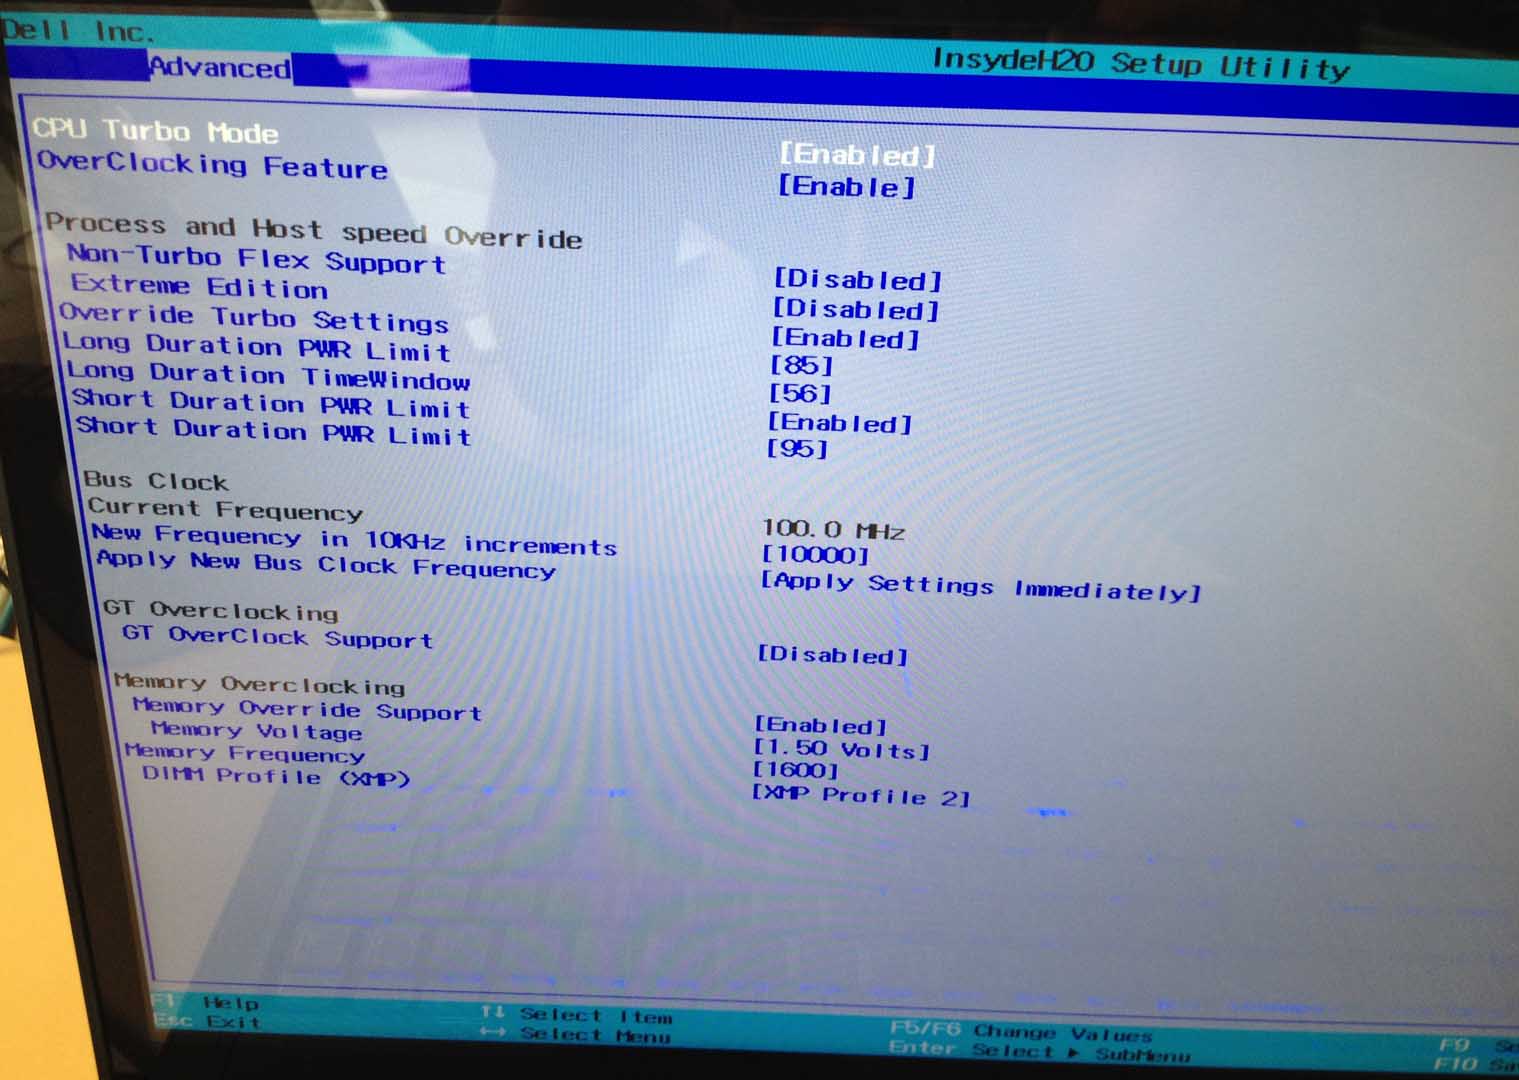
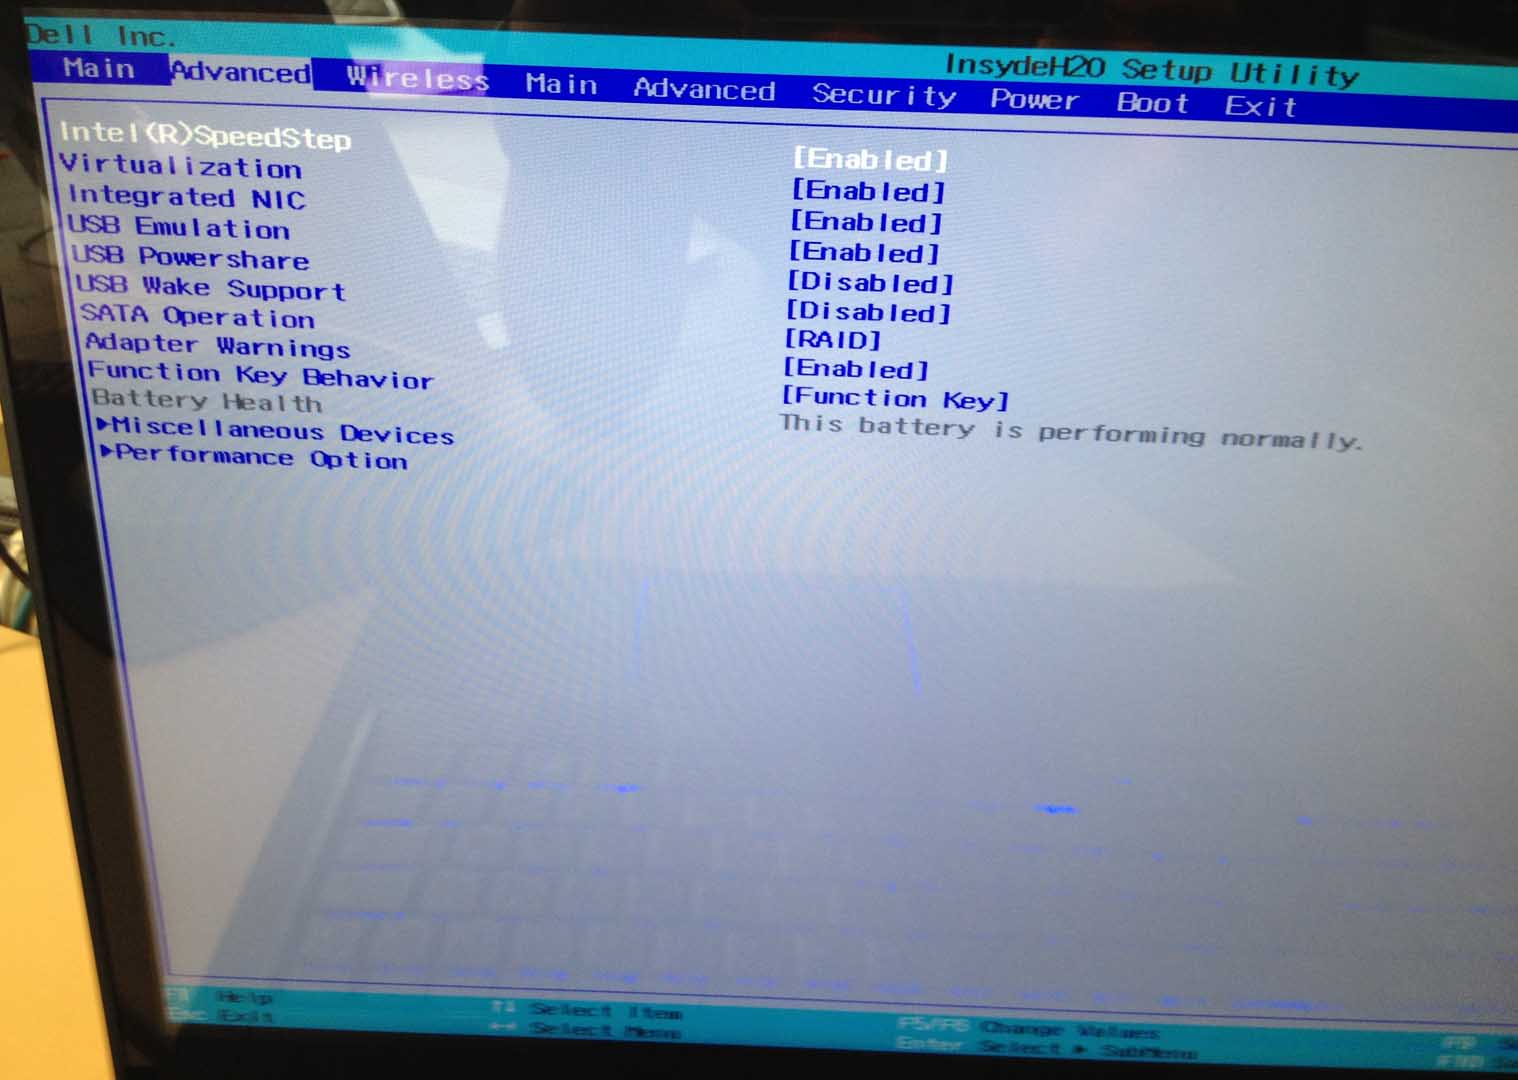
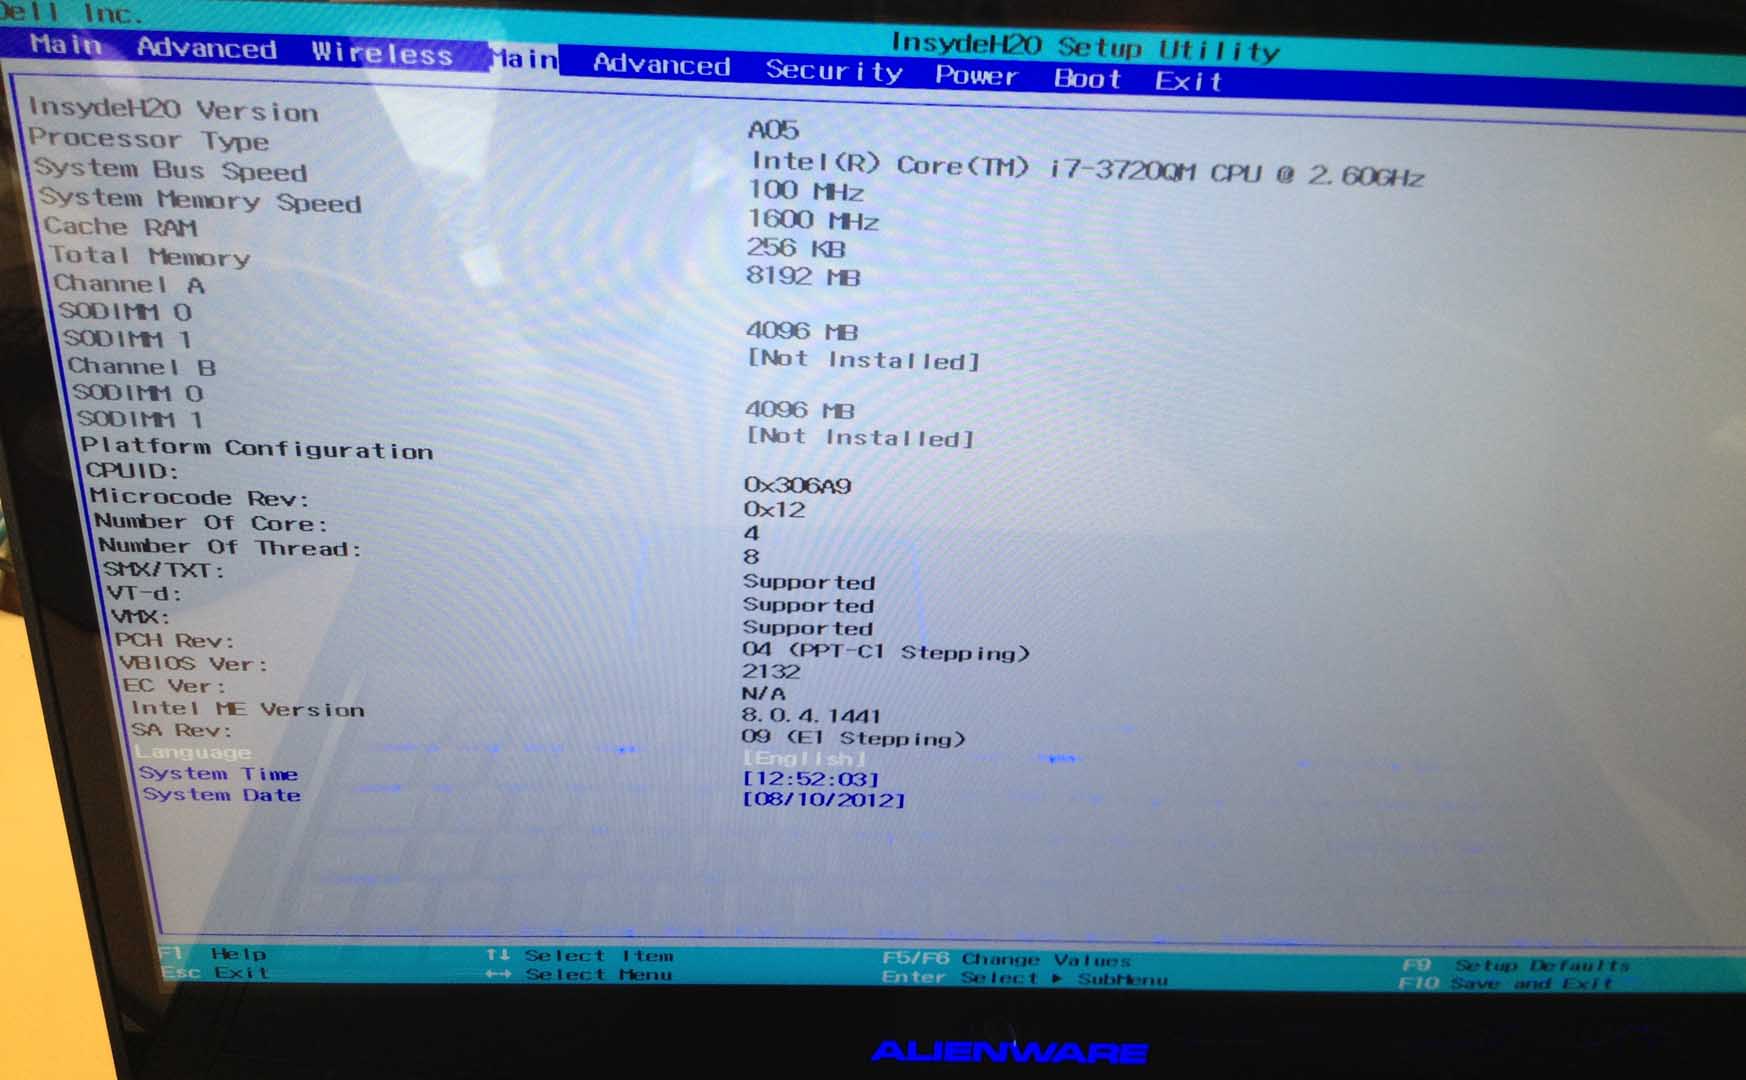
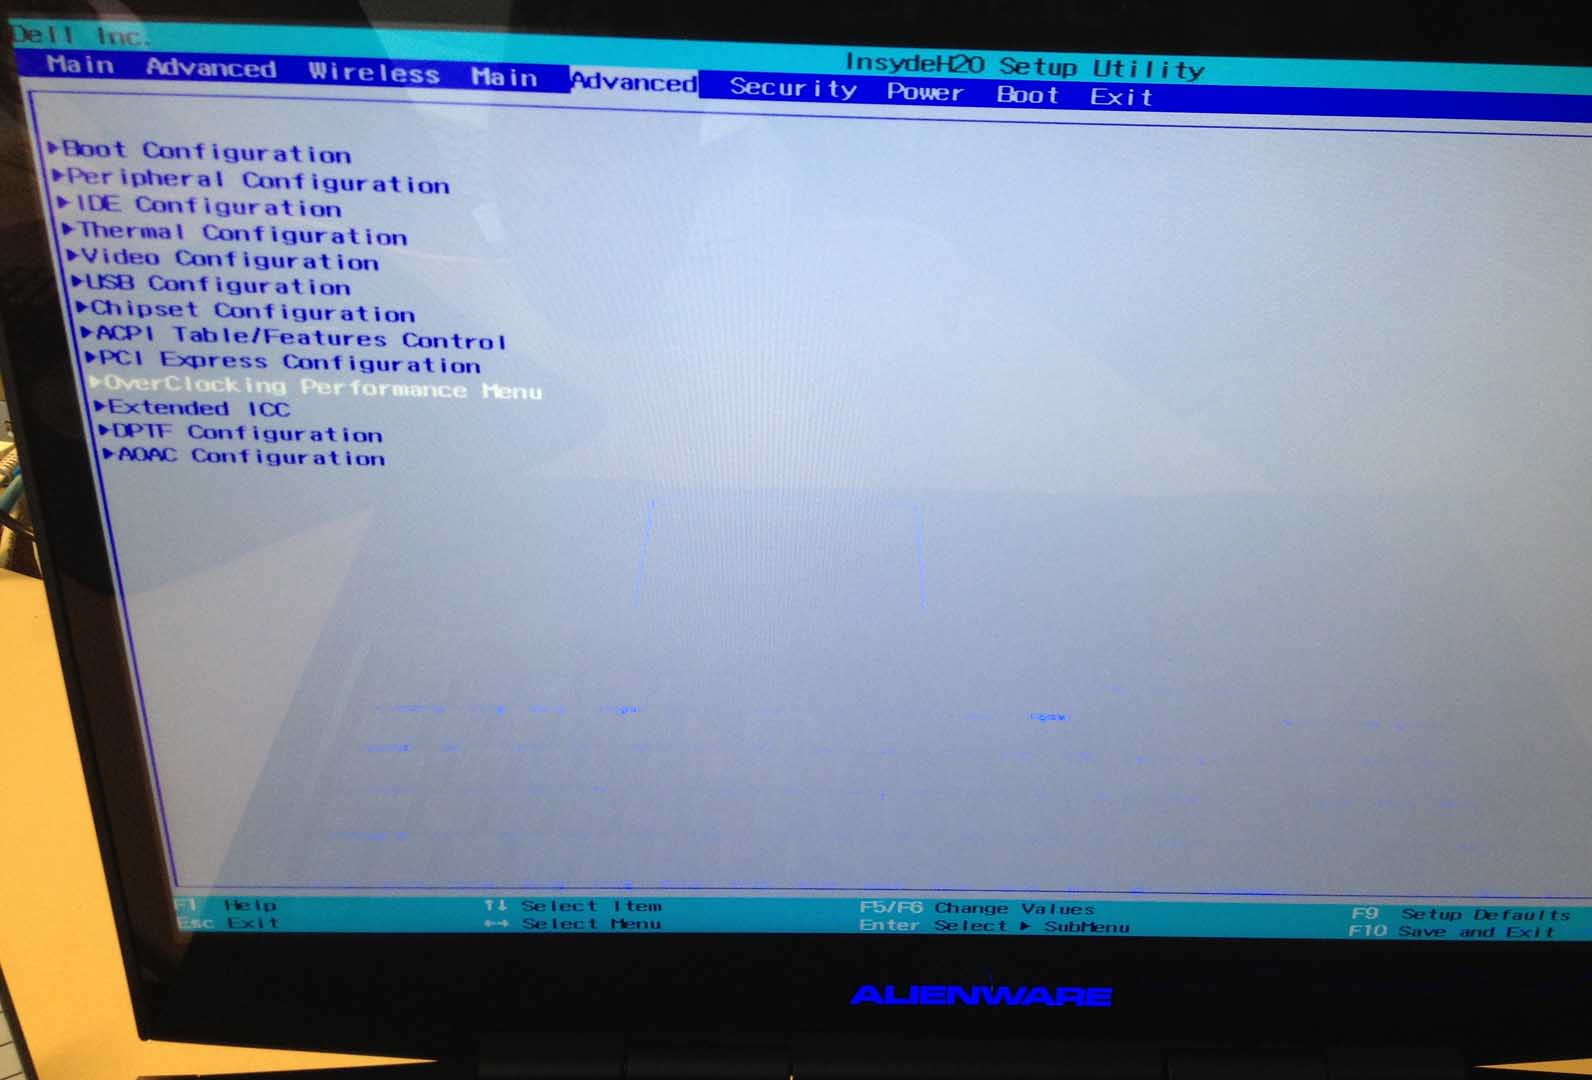
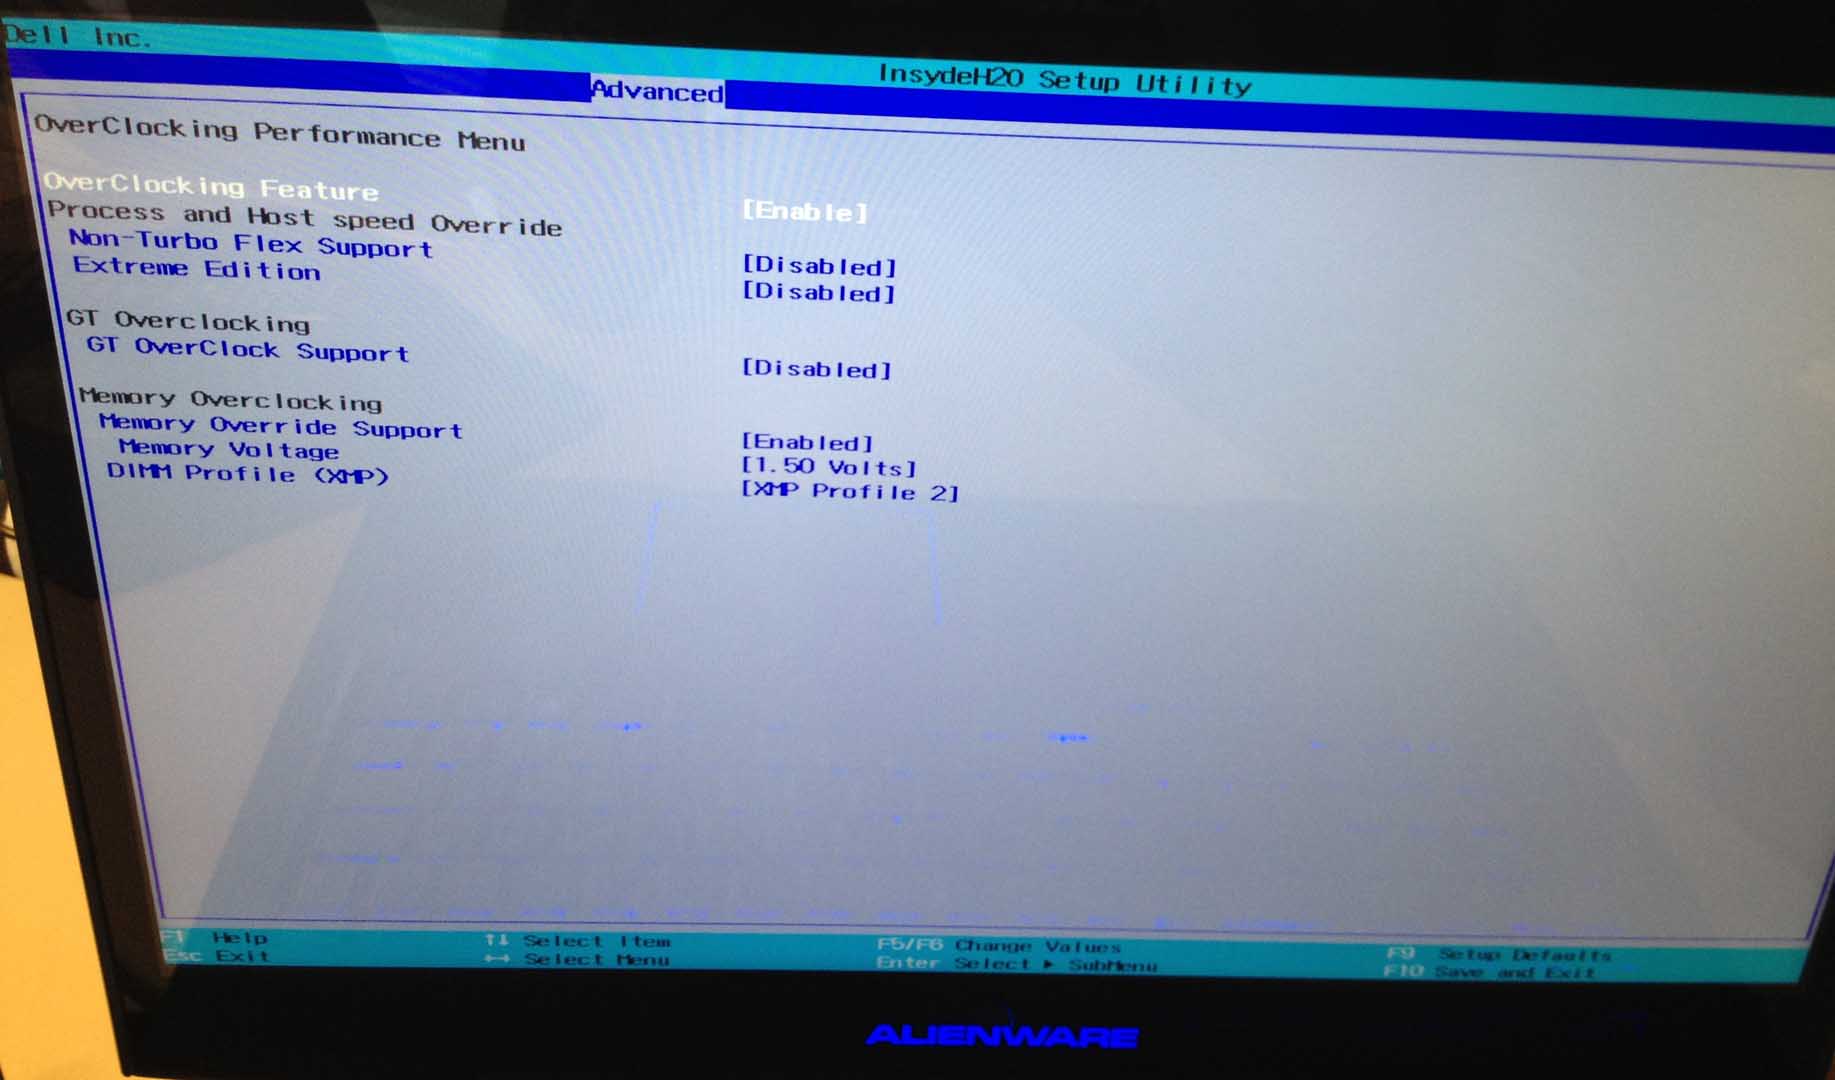
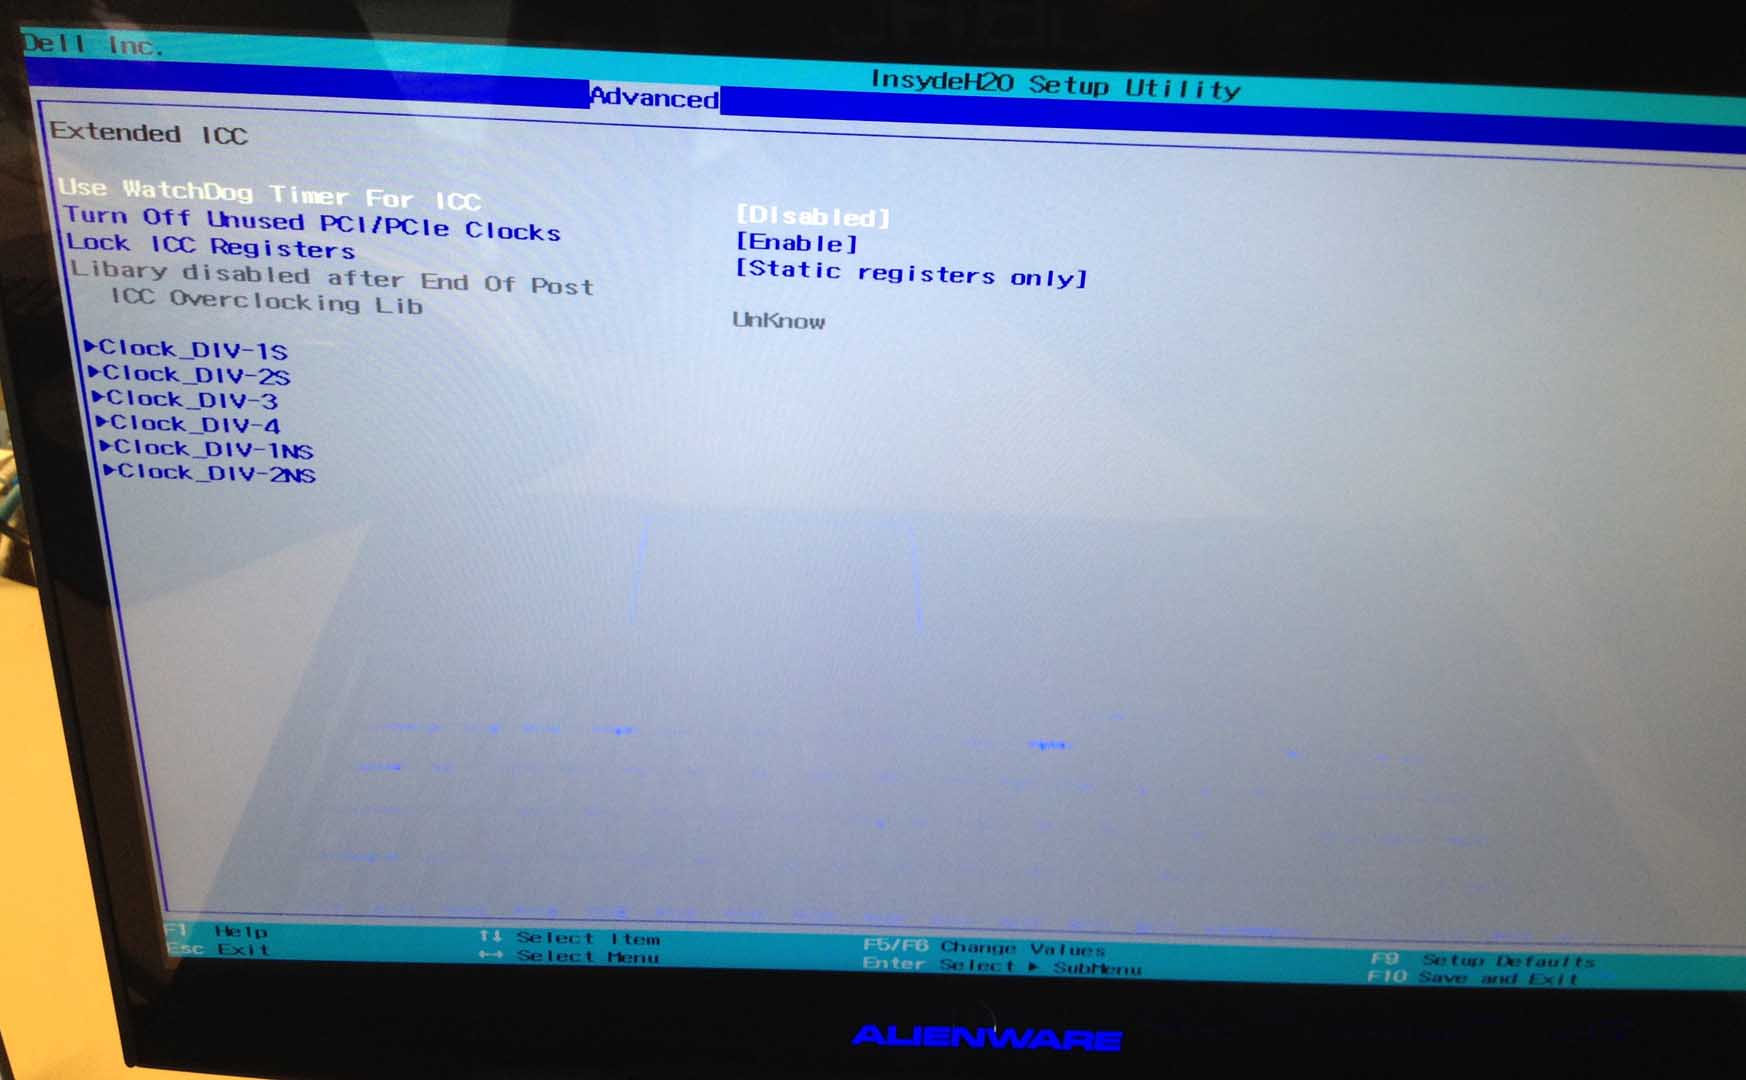
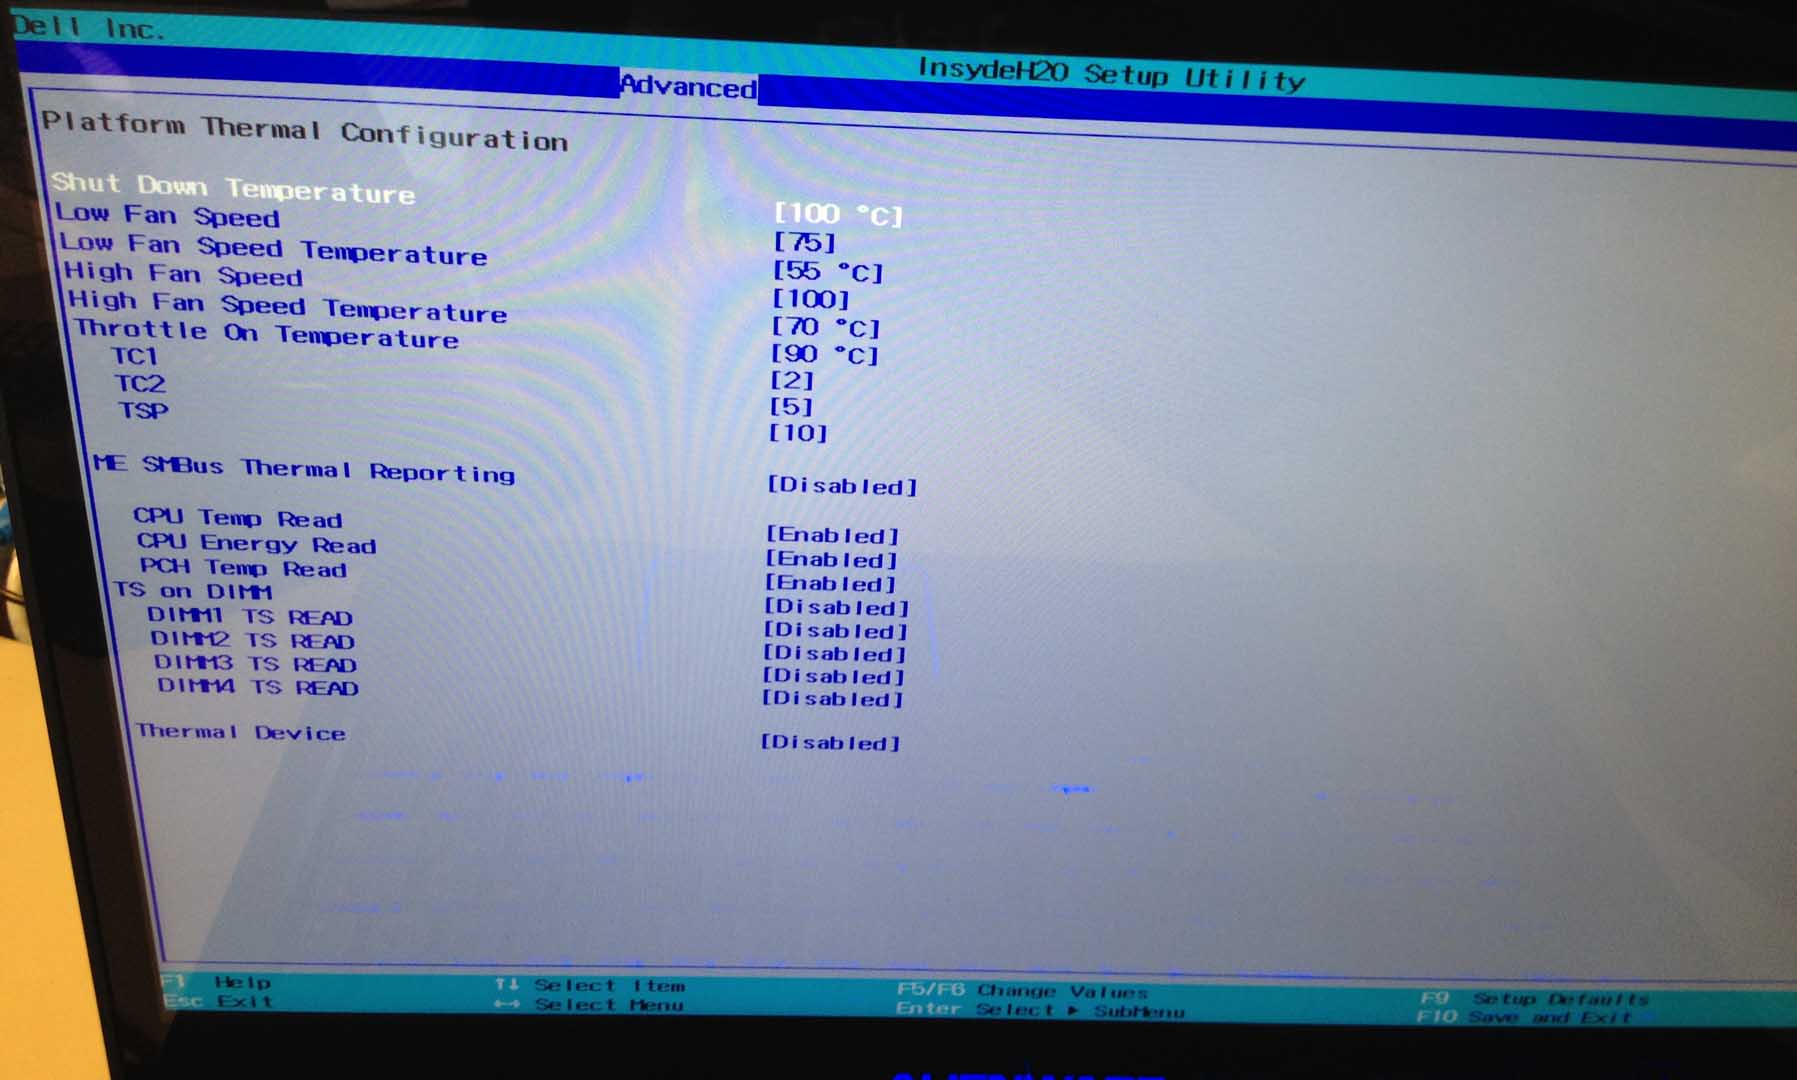
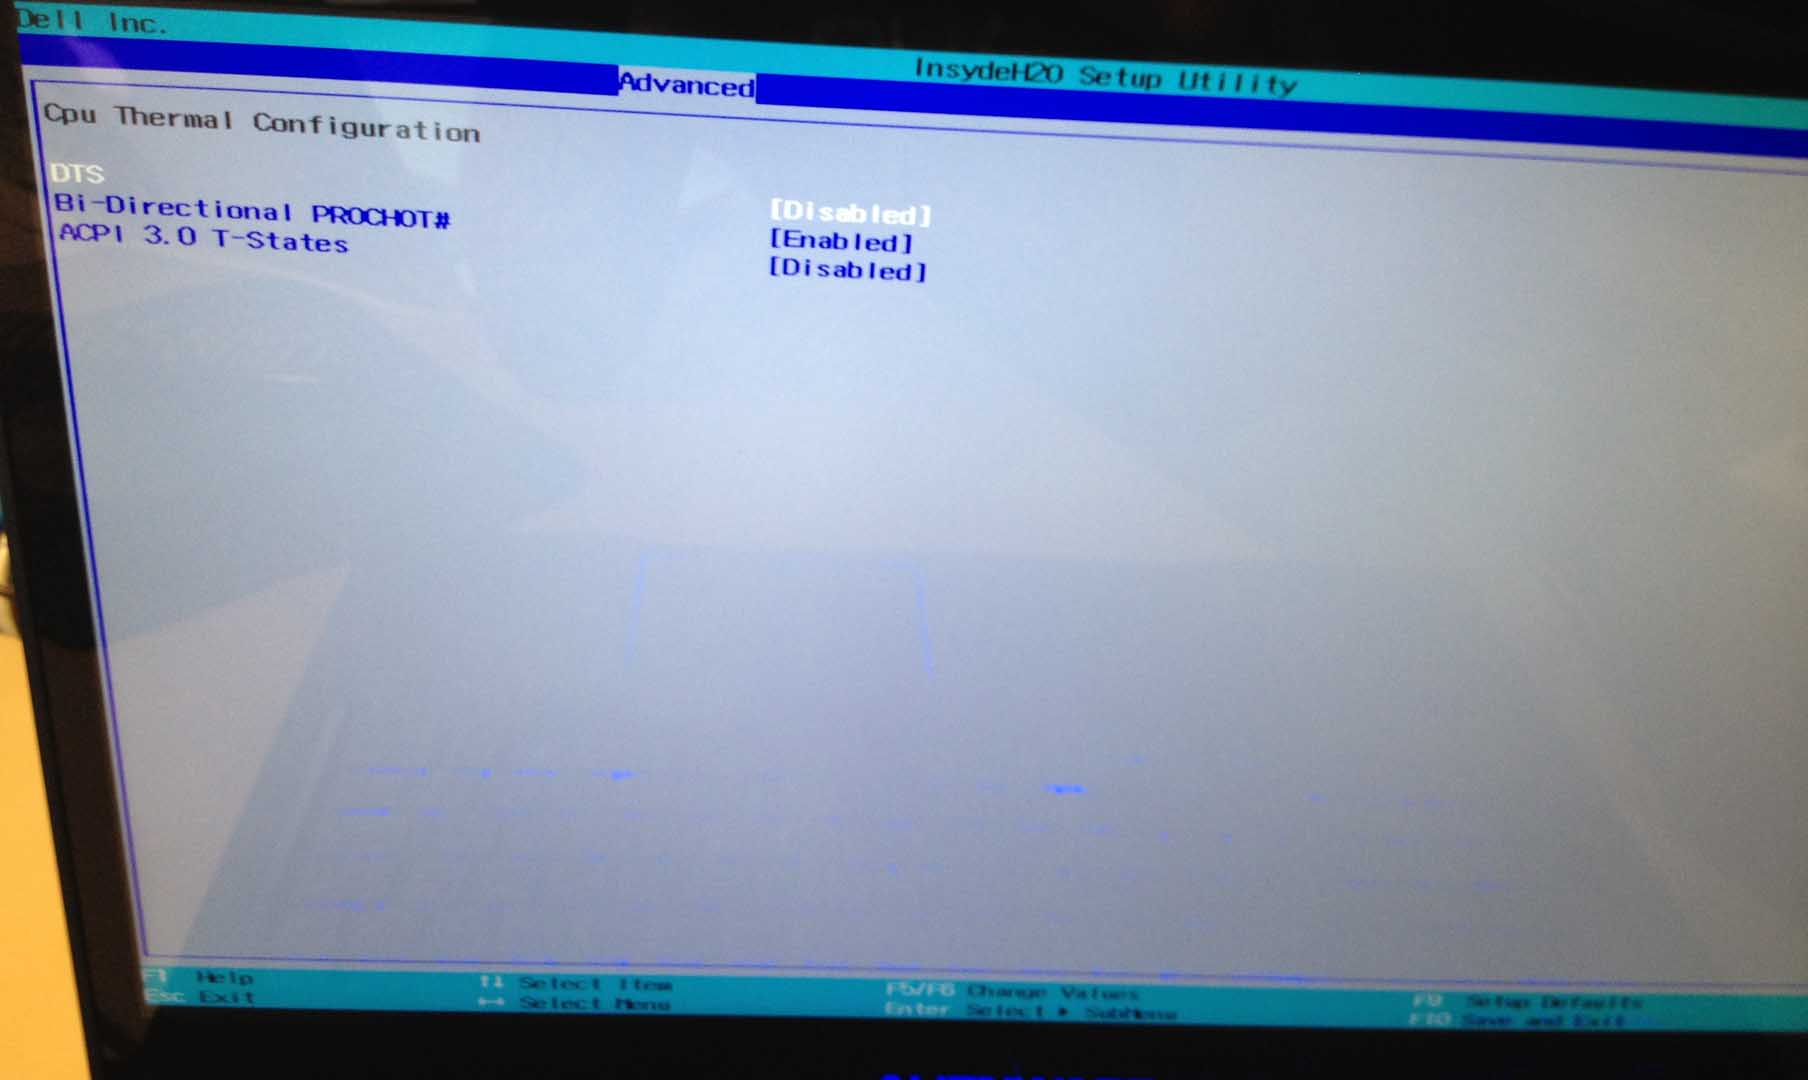
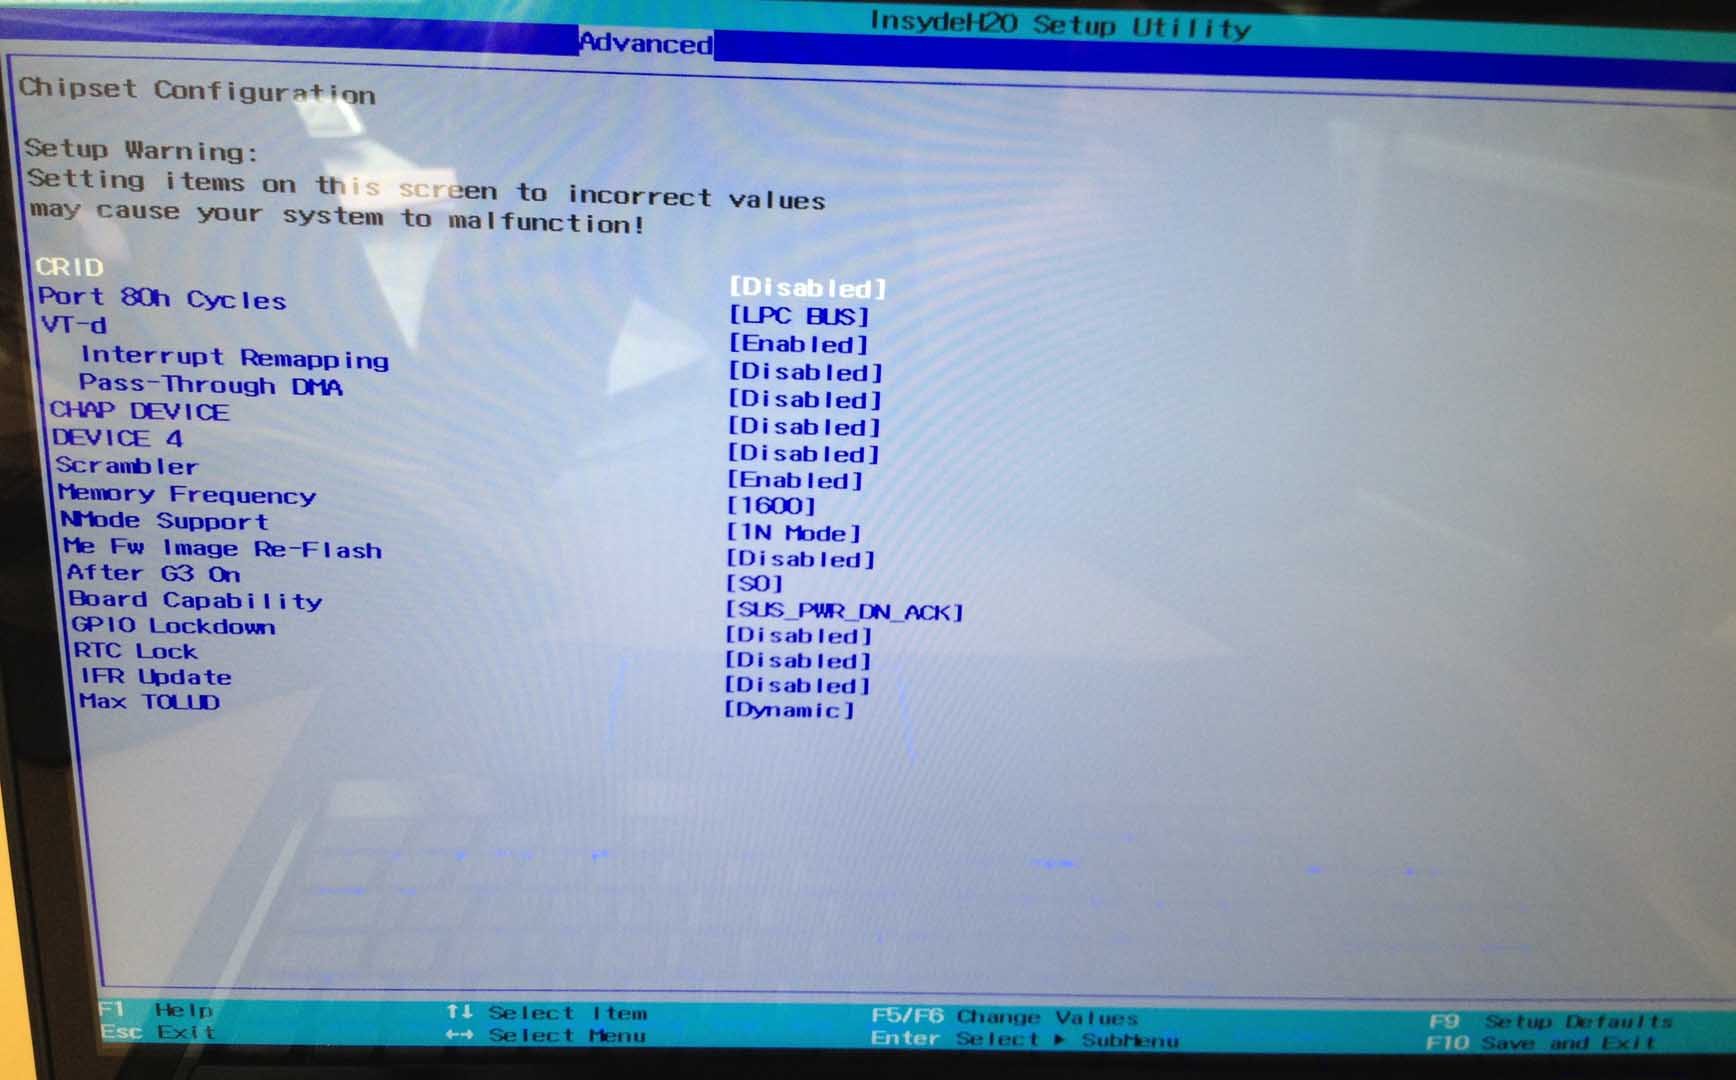
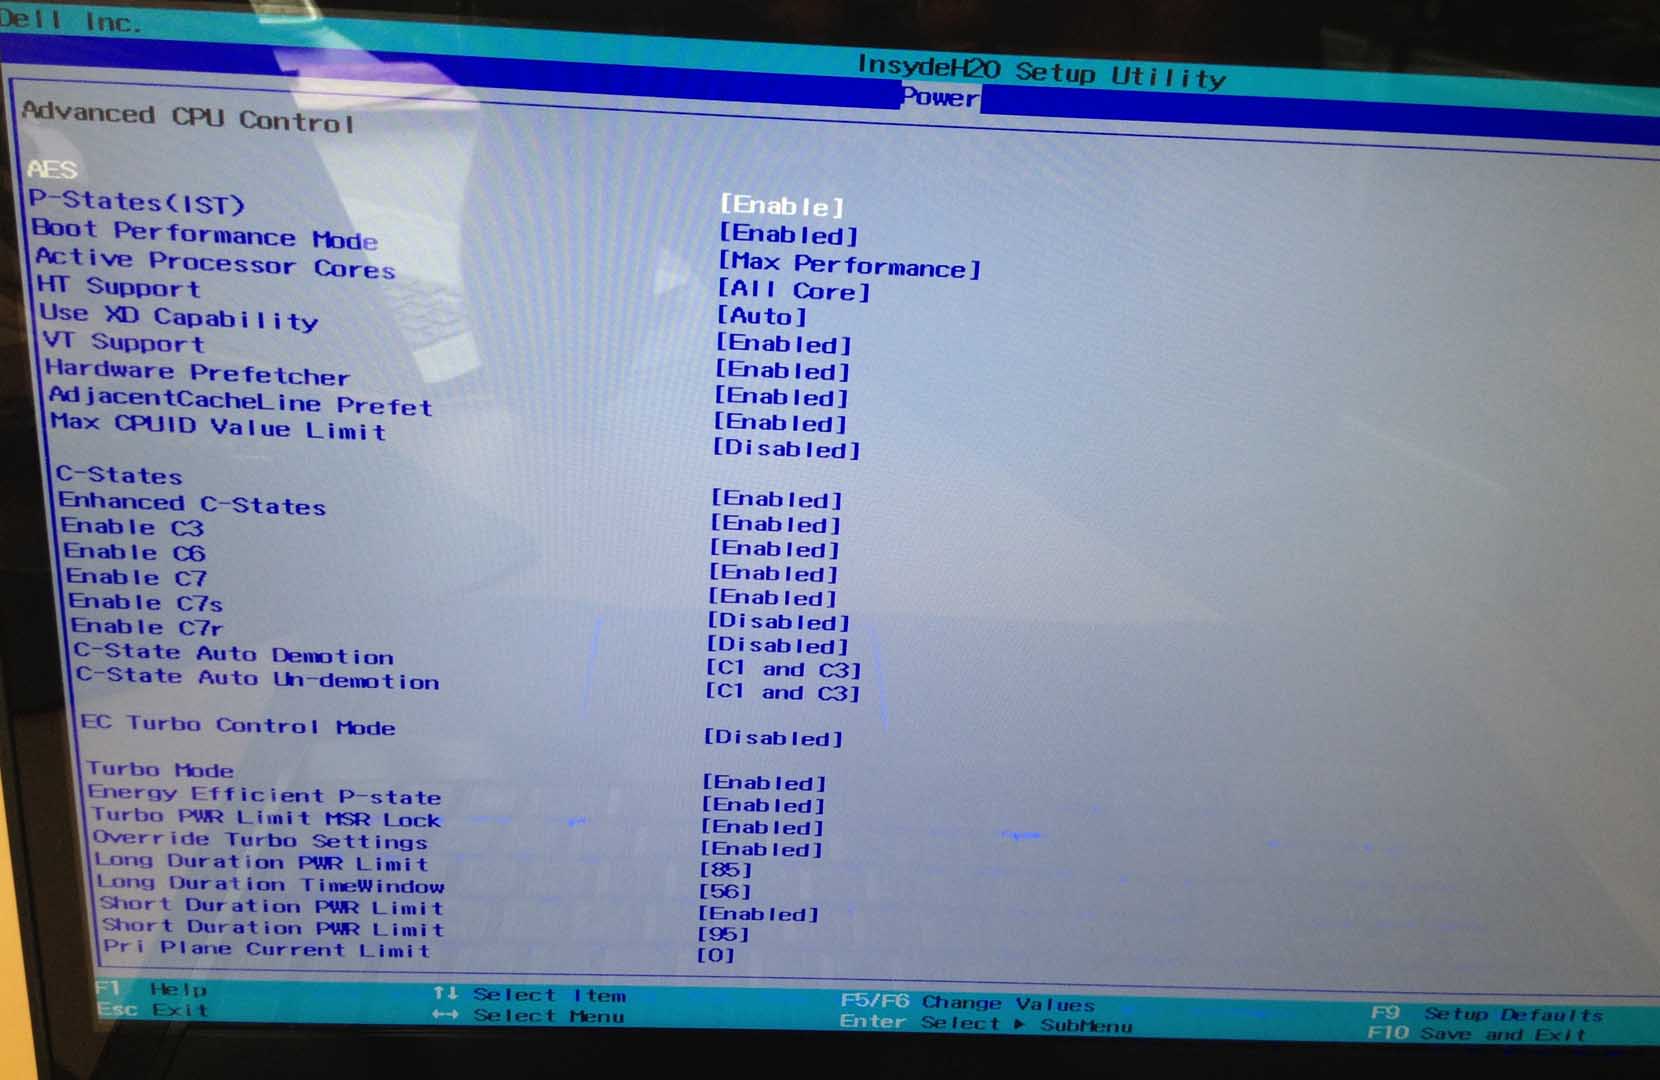
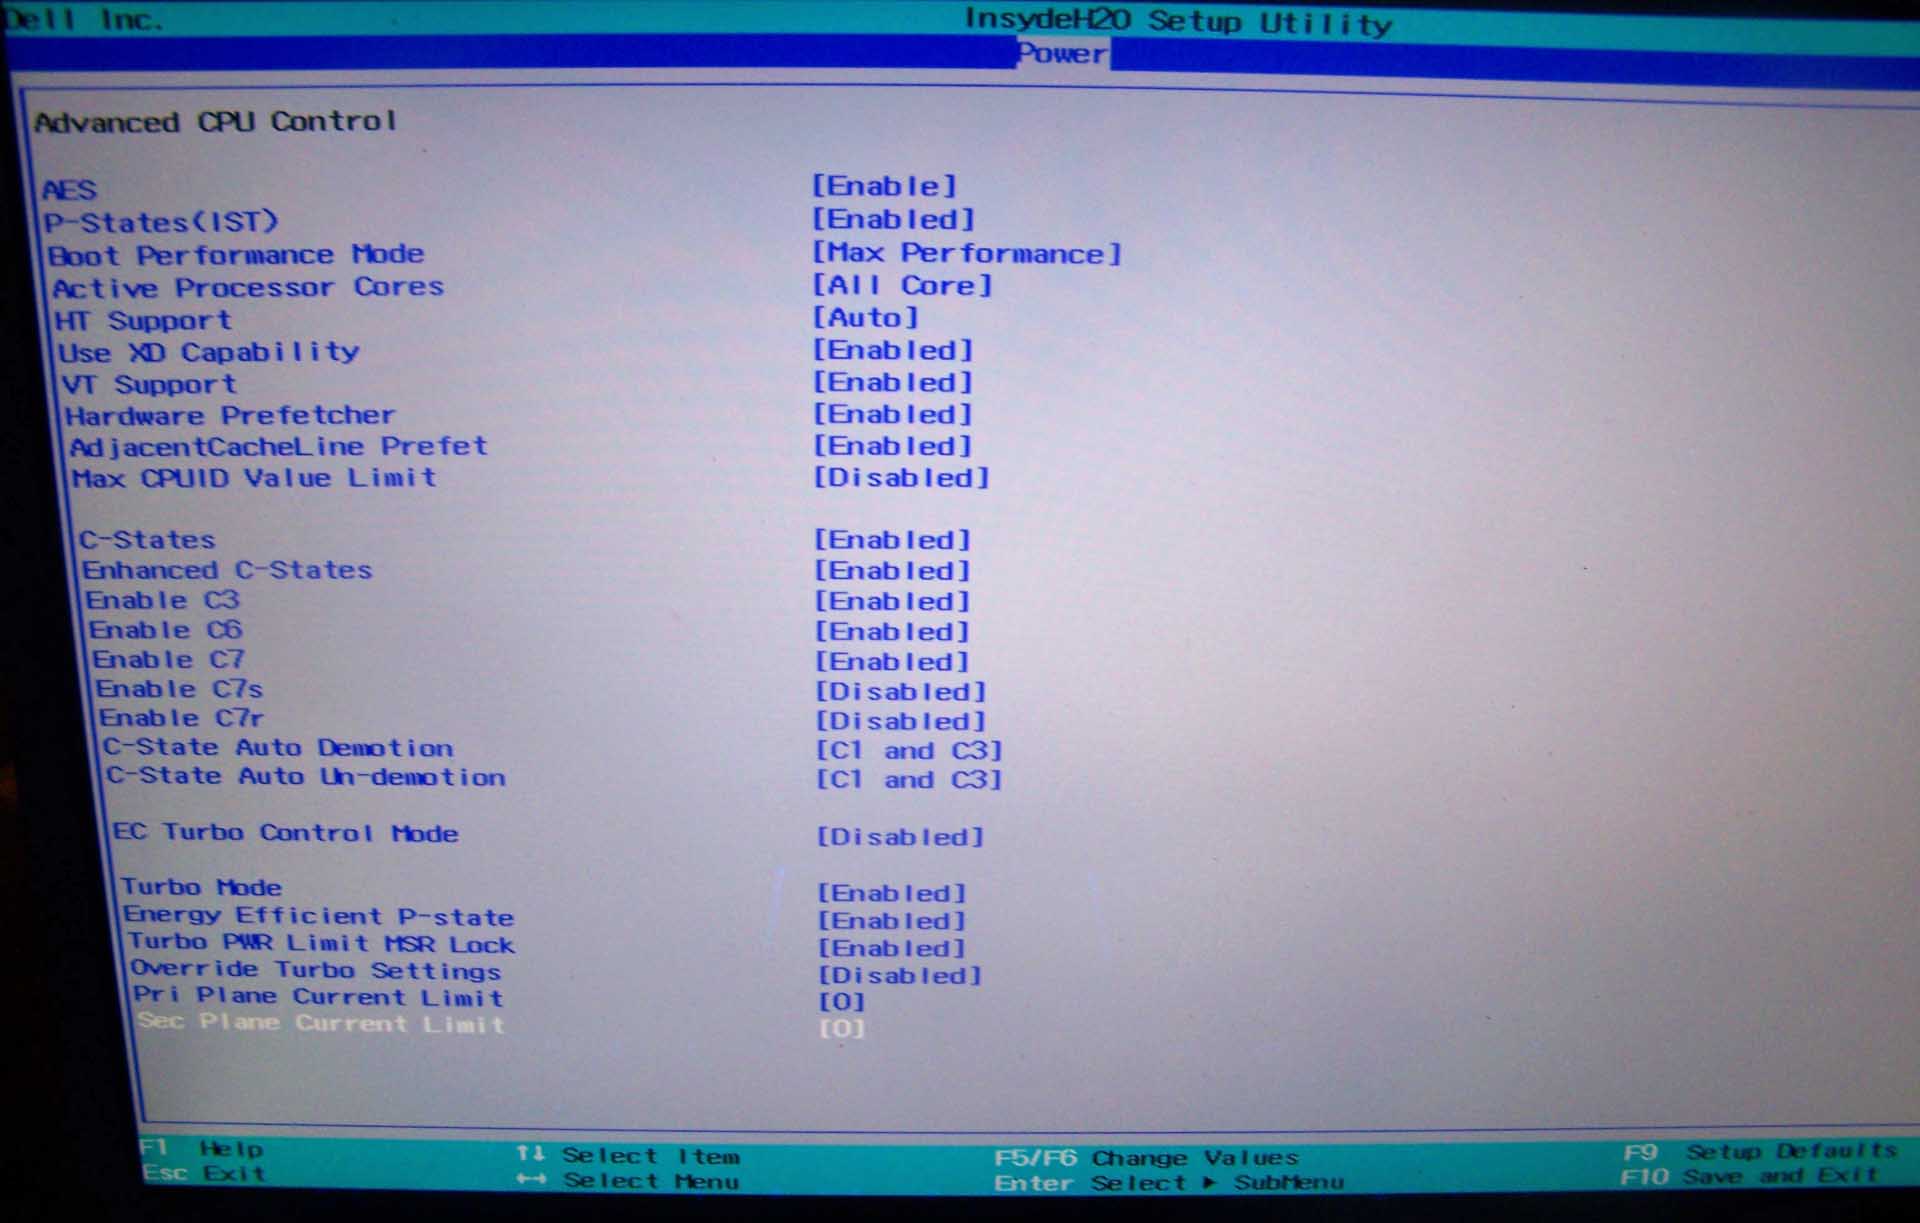
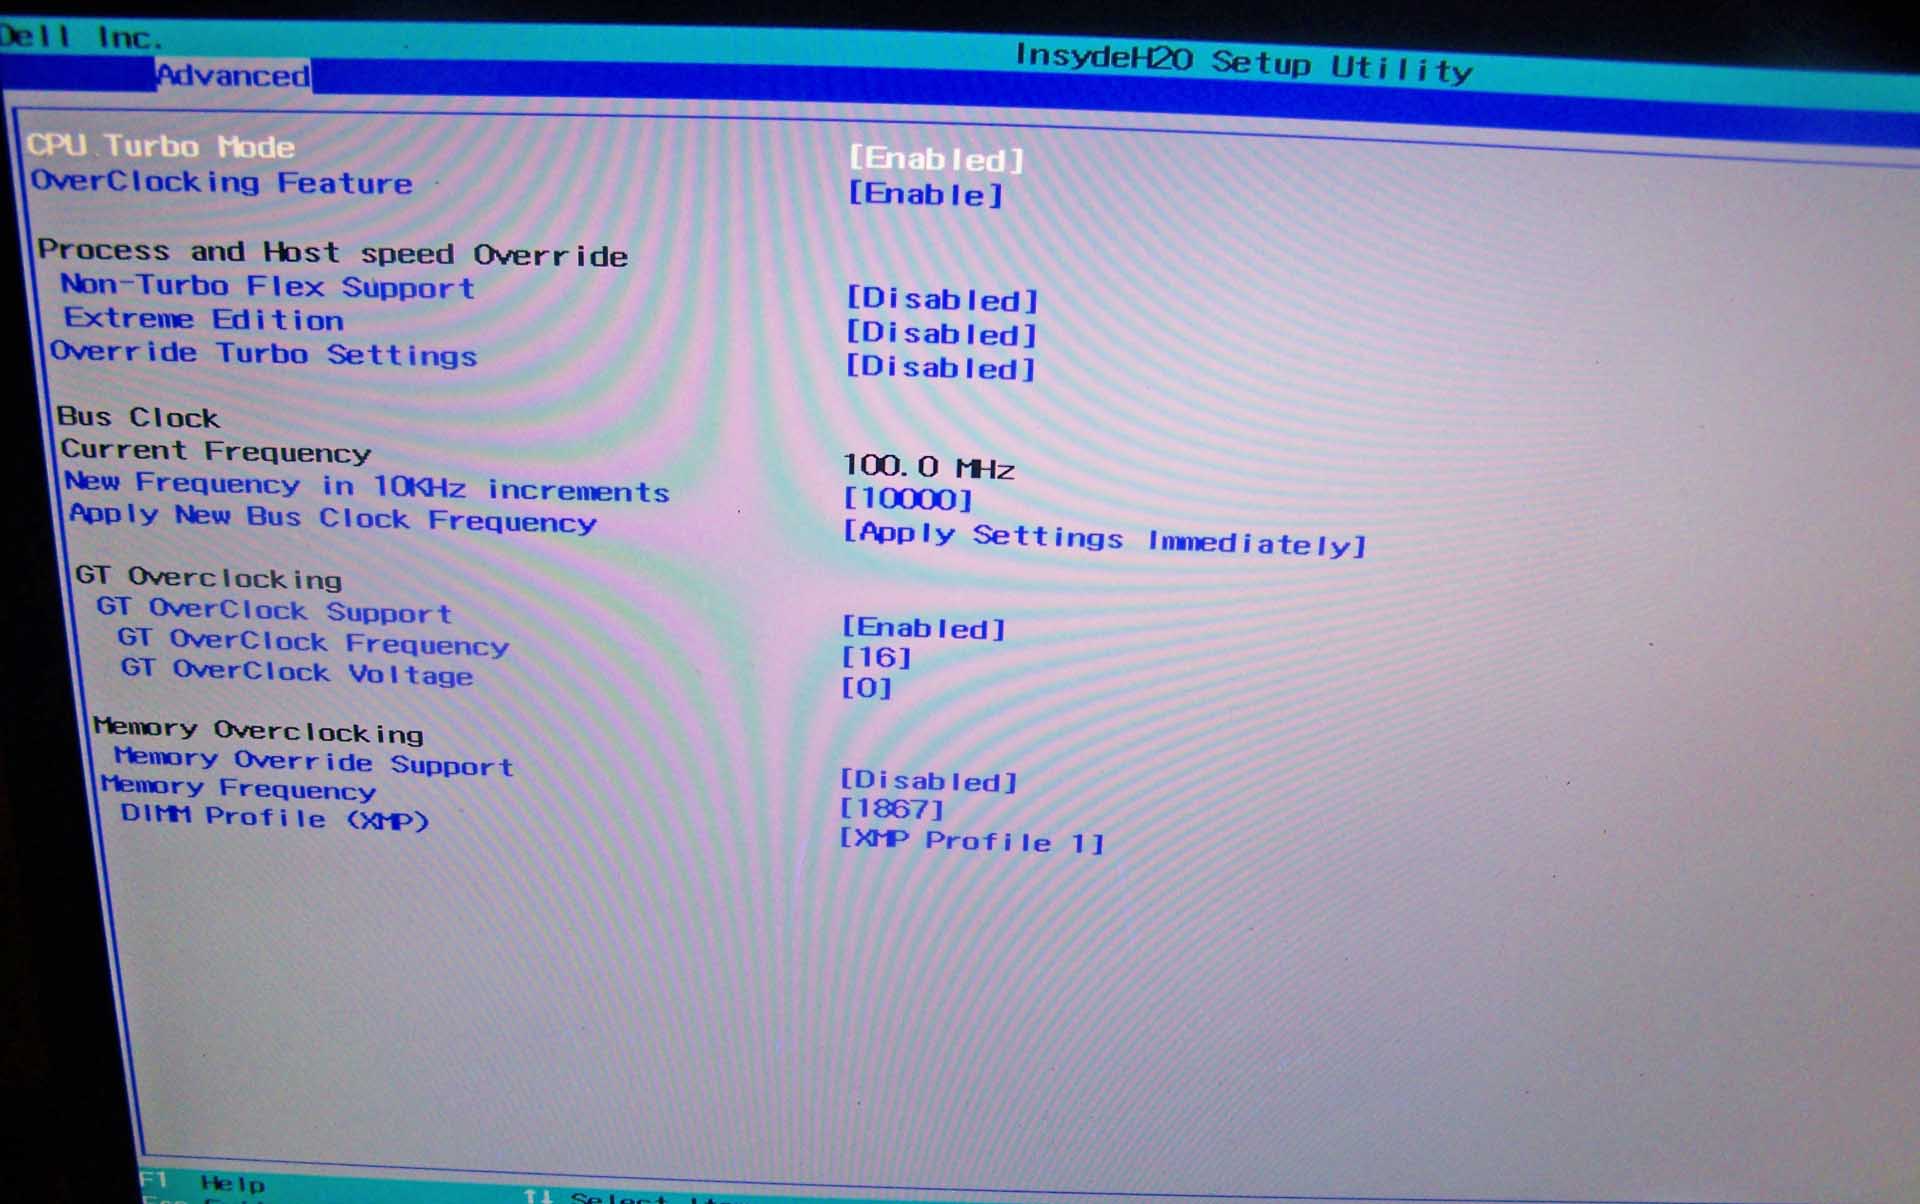
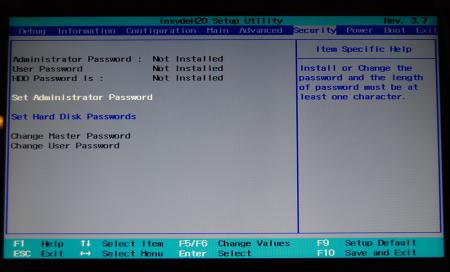
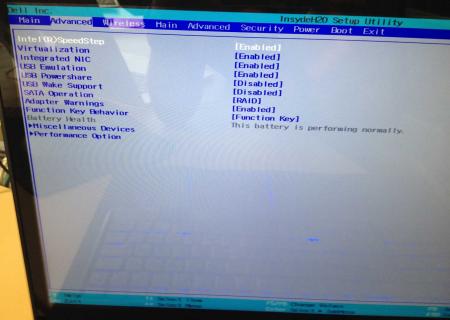
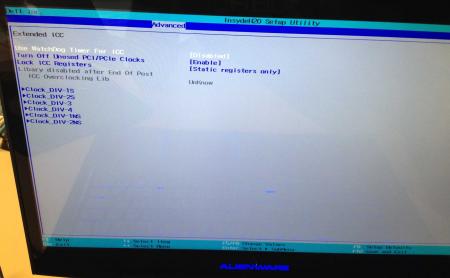
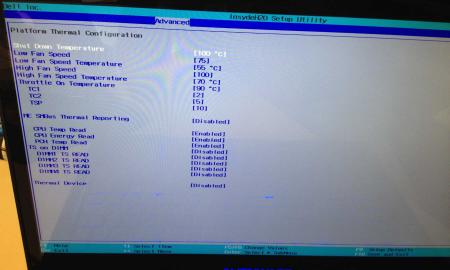
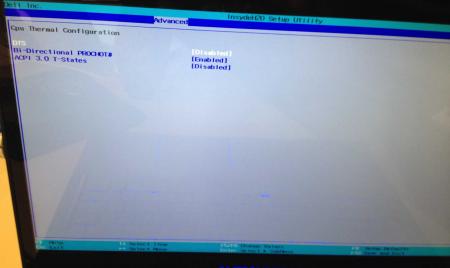
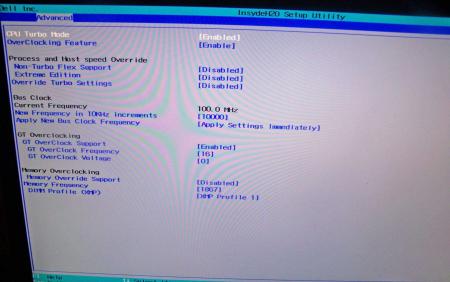
Dell has hidden a lot of options in the BIOS of the Alienware M17x R4, the modified BIOS versions here will show you all the hidden menus and allow you to further tweak your system and optimize its performance. Don't change anything you're not familiar with. There might be functions available which don't work on your system, so use this BIOS with care. It should only be used by advanced users. In case you mess up and your system refuses to boot after applying the changes you make, remove the AC adapter, battery and coin cell battery in order to clear the non-volatile ram of the BIOS. This should fix most issues. *********************** Instructions: If you're on A05 or an earlier version, you can flash the modified bios by simply using the InsydeFlash utility provided with the official bios update on the Dell support site. However, once you're on a version newer than A05, things get a bit more complicated. There are two options then: - Method 1: Revert to stock A05 or earlier by using the Insyde USB bios recovery method, and then flash the modified bios by using the official tools (InsydeFlash). - Method 2 (recommended): Flash the modified Bios from DOS by using the FPT tool: . Grab the DOS version of fpt for flashing, and my 'prr tool' to circumvent write protection.. Download a '[FPT]' labeled version of the unlocked BIOS. Put the DOS version of the flash tool on the root of the prepared USB stick (fpt.exe and fparts.txt), along with the prr.exe and the file you want to flash (plus the included flash.bat). . Restart the system and boot from your USB stick. Run prr.exe, then flash the bios by executing the flash.bat file. Wait until the tool completes the flash. If the verification is okay, reboot, else flash again.. Go to the bios, load the default settings and reboot. Done NOTE: The flashing from DOS as described above will only update the BIOS, not the rest of the firmware. Therefore I strongly advise you to first flash the stock version of the bios you want by using the official update provided by Dell, and once that's done you can go ahead and flash the modified version of your bios by following the instructions above. Download links to the unlocked M17x R4 BIOS versions: M17x R4 - BIOS A05 [unlocked] M17x R4 - BIOS A08 [unlocked] - see attachment M17x R4 - BIOS A09 [unlocked] - see attachment M17x R4 - BIOS A10 [unlocked] - see attachment [FPT] M17x R4 - BIOS A10 [unlocked] - see attachment [FPT] M17x R4 - BIOS A11 [unlocked] - see attachment Donation link, in case you want to buy me a beer Here some pictures of the menus (thanks a lot for the pics @deadbydawn!) I want to thank @widezu69 for testing !! It's hard to find users who are willing to risk their system in order to test a mod, I greatly appreciate this! Thank you!! ********* Flash and use at your own risk. I don't take any responsibility for any possible damages on your system. The software which I provide here ('prr tool') comes with absolutely no warranty to the extent permitted by applicable law. ___ M17x_R4_-_BIOS_A08_[unlocked].zip M17x_R4_-_BIOS_A09_[unlocked].zip M17x_R4_BIOS_A10_-_[unlocked].zip [FPT]-M17x_R4_BIOS_A11_-_[unlocked]V2.zip [FPT] M17x R4 - BIOS A10 [unlocked].zip M17x_R4_-_BIOS_A05_[unlocked].zip


 1 point
 -
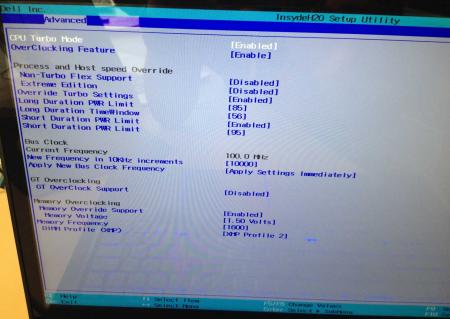
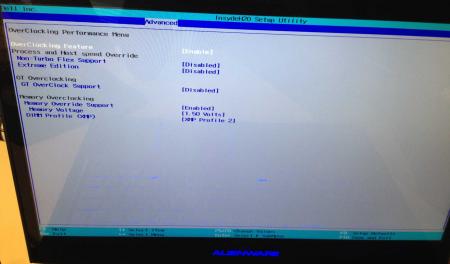
.If you're interested why not all modified BIOS versions can be flashed the 'usual' way with the official tools, read this:http://forum.techinferno.com/alienware/2252-information-about-bios-updates-a07-a08-higher-m14xr2-m17xr4-m18xr2.html M18x R2 - 'unlocked' BIOS versions The following BIOS of the Alienware M18x have been modified so that all hidden menus and options are visible. It will allow you to further tweak your system and optimize its peformance. Most of the options are only meant for advanced users. Don’t change anything you’re not sure about. It's possible that you see options which don’t work for your system, so be careful when changing settings. In case you mess up and your system refuses to boot applying new settings, remove the AC adapter, battery and coin cell battery in order to clear the non-volatile ram of the BIOS. This should fix most issues. *UPDATE*Instructions: There are two ways to flash the modified BIOS: Downgrade to stock A03 by using the USB recover procedure. (Thanks @Scott Matusow for summarizing the procedure). Make sure to closely follow the instructions, and wait until the system is done with the flash. Once you're on A03 flash the modified BIOS using the regular way (using the tools provided by Dell)..This method seems to work very well on the M18x R2, at least as long as you do as instructed. It can be a bit scary though since you can't see what's happening. .. Flash the BIOS from DOS with the FPT tool. This will only flash the BIOS part and leave out the EC and so on. It's a really safe option when done properly and less scary since you see the progress and information on the screen. For the USB recovery method follow the instructions in the link above. Second possibility - flashing from DOS: Prepare an USB drive so that it can boot DOS. If you don't know how to do this, check the instructions in the spoiler. . Grab the DOS version of fpt for flashing, and my 'prr tool' to circumvent write protection.. Download a '[FPT]' labeled version of the unlocked BIOS. Put the DOS version of the flash tool on the root of the prepared USB stick (fpt.exe and fparts.txt), along with the prr.exe and the file you want to flash (plus the included flash.bat). . Restart the system and boot from your USB stick. Run prr.exe, then flash the bios by executing the flash.bat file. Wait until the tool completes the flash. If the verification is okay, reboot, else flash again.. Go to the bios, load the default settings and reboot. Done. NOTE: If you want to use an unlocked BIOS newer than A03 I highly recommend to first flash the desired version of the unmodified BIOS (grab it at the Dell download site). Once you're on the version you want to unlock, follow the DOS flashing procedure described above. If you want to go A03 or earlier, the best thing to do is using the USB recovery method. Here two pics of the most interesting options: ********** Thanks @Riri-Fifi for the pics and testing! Thanks @johnksss for testing my prr tool! ********* Flash and use at your own risk. I don't take any responsibility for possible damage on your system. ___ The software which I provide here ('prr tool') comes with absolutely no warranty to the extent permitted by applicable law. Download the bios files referened in this post from here:

 1 point
 -
I followed the youtube video Lenovo Y400 Y500 Full Disassembly - YouTube. However, the video was probably created with a prototype y500 because some of the layout of the laptop did not match mine. Most noticeably is that there are *three* screws holding the keyboard down not *two*, I almost ripped the keyboard trying to pull it off with one screw still in there. Also, a few of the ribbons are located in different places which I think is an improvement over the y500 in the video. Finally, the hardest part of the entire process was to remove the back cover because it is held on by plastic tabs facing in different directions so the best way is to wiggle it left and right while lifting and not lift directly up. That is just regular white thermal paste on the heatsinks. The OEM thermal paste resembled AS5 in color and thickness and I recommend that it be left alone if the temperatures are good. I have since replaced the cheap stuff I put on there with AS5 and still have not seen the temperatures I saw when it was stock (still 3-5C higher). Here is what I did to stop the twitchy touchpad (issue is well documented in the Lenovo support forum) and the random extra characters the keyboard would add while typing (less known issue).1 point
-
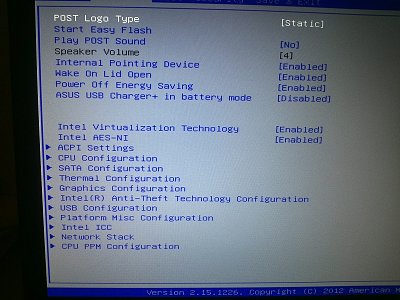
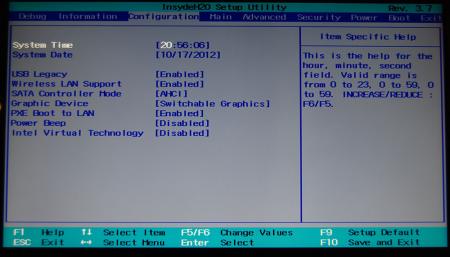
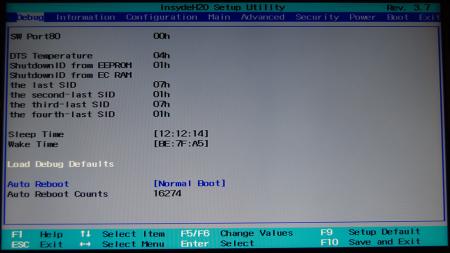
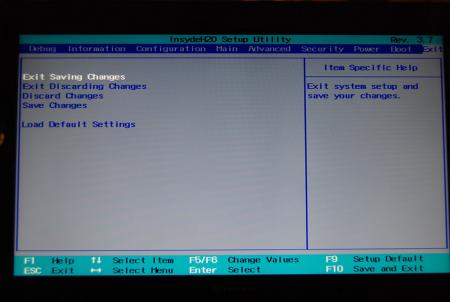
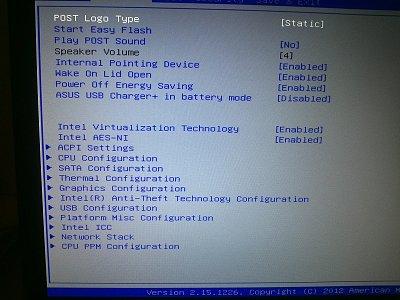
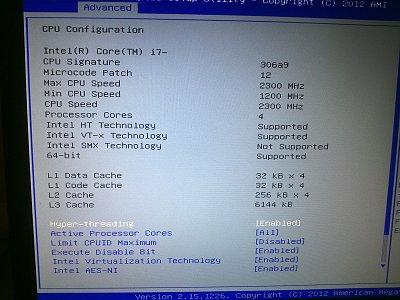
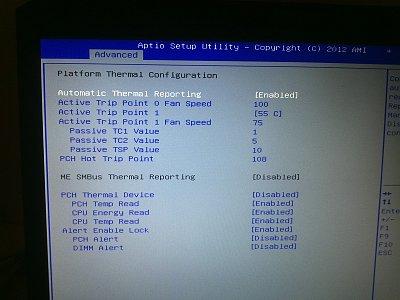
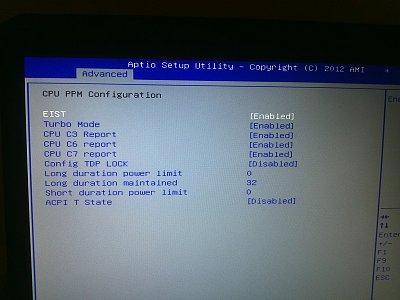
Asus G75VW - modified BIOS / VBIOS Here's a modified BIOS for the Asus G75VW. It enables some more options and settings in the BIOS setup. It also contains a tweaked VBIOS for the 660m. Detailed version information: mod02 'GHZ edition' - 660m 3d clocks at 1000MHz core - 670m @ 715/1650 (only in 'overclock edition') additional BIOS menus Pics of the most interesting BIOS settings (thanks @bobby7): Instructions: Download the BIOS you want to flash, as well as the flash tool (Win64). Put the modified BIOS (and included files) in the same folder as the flash tool . Make sure that your current BIOS version is the same as the one you want to flash. Then create a backup of your BIOS by executing the backup.bat file. . Download the 'G75VW-BiosFixer.zip, put it in the same folder as the flash too and run it. Follow the instructions on the screen, it will ask you for the BIOS backup you just created, as well as the modified BIOS file which you already downloaded. . If the tool doesn't come up with an error message, go ahead and flash the created file by executing the included flash.bat file. . Wait until the flashing is done, in case everything's okay you can reboot. NOTE: It's a good idea to go to load the default BIOS settings after flashing. Also I really recommend flashing the official version before applying the modified BIOS, as mentioned in the instructions. >>> Here's my donation link, if you like my mods feel free to buy me a beer <<< As always with such mods, use at your own risk. The program I provide here (BiosFixer) comes with absolutely no warranty to the extent permitted by applicable law. *** Asus G75VW - BIOS v223 - [unlocked] [overclock edition].zip G75VW-BiosFixer.zip Asus G75VW - BIOS v223 - [unlocked].zip
 1 point
 -
Instructions for flashing the VBIOS of a NVIDIA video card: You'll need: A VBIOS file you want to flash The latest version of NVflash, a DOS utility to flash the VBIOS of Nvidia cards. A USB drive, formatted to boot DOS, in order to use NVflash How to create a bootable USB flash drive: The flashing procedure: Put the NVflash files to the root of your prepared (DOS bootable) USB drive. Do the same with the Vbios you want to flash. NOTE: DOS has a limit of 8 characters per file name (not counting the extension). So make sure to rename your files appropriately before putting them on the USB drive. Make sure the USB drive is plugged into a port which is active at boot, reboot the system and go to the boot manager. Choose to boot from your prepared USB drive. As soon as you see the command line you're ready to go, write dir and hit enter to display all the files on the USB drive. Display all Nvidia adapters in the system: nvflash -a or alternatively the longer version of the command: nvflash --list This command will return you a list with all Nvidia adapters present in your system. Here's an example output of this command run on my M15x with a 680m in it: NVIDIA Firmware Update Utility (Version 5.117) NVIDIA display adapters present in system: <0> N13E-GTX (10DE,11A0,1028,02A2) H:--:NRM B:02,PCI,D:00,F:00 The number in the <> brackets is the index of the corresponding device. SLI users will have more than one entry and flash each card separately. Backup your current VBIOS: Never forget to keep a backup of your original VBIOS before you flash anything non-stock. Use this command to save a copy of the firmware to your USB drive: nvflash -b filename.rom or with nvflash --save filename.rom Flash the VBIOS to your card(s): For a single card it's really straight forward, you don't need to worry about the adapter indices. Just use this command: nvflash -6 vbiosname.rom -6 will allow you to override mismatches of the PCI subsystem ID. In case of a mismatch you'll need to confirm the flash with 'y'. NOTE: Users with a non-US keyboard might need to press 'z' or similar, because the 'y' isn't at the same location for all keyboard layouts. SLI users will need to flash each card separately. The concept stays the same, but you will need to use the corresponding adapter index to flash a card. How to figure out the adapter nr. is described above. Flashing goes like this: nvflash -i[index] -6 vbios.rom [index] represents a number, namely the index you found with the 'nvflash -a' command. So a command example to flash a card which has index 0 is: 'nvflash -i0 -6 vbios.rom' When the flashing starts, just wait until it says that it's done. Then reboot with Ctrl+Alt+Del and remove your USB drive. Pro tip: Let me know if I missed anything important or if you have questions.1 point
-
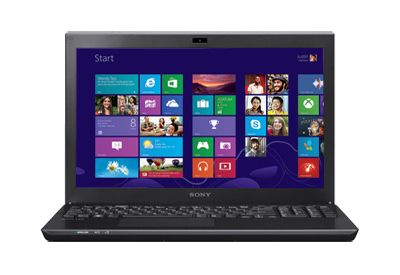
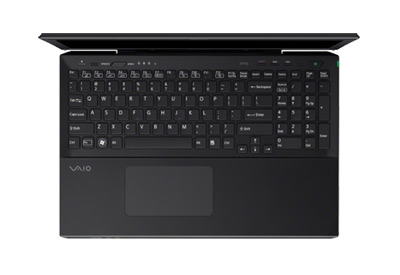
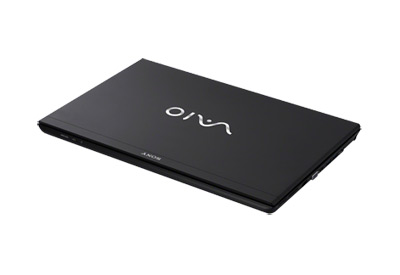
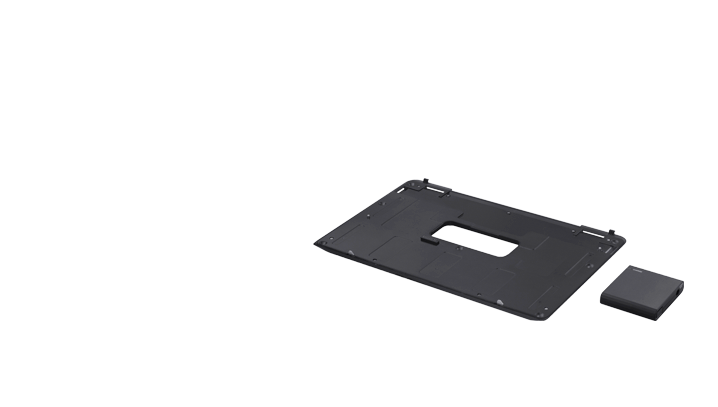
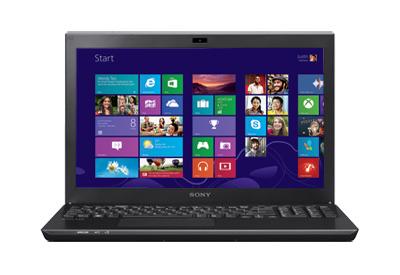
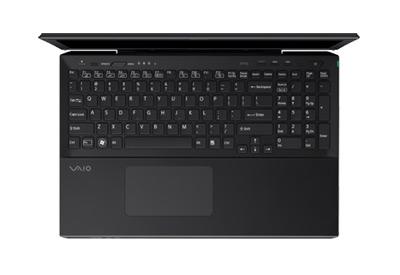
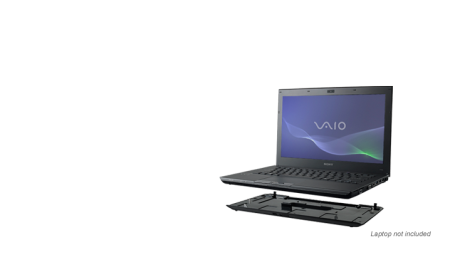
[ATTACH=CONFIG]5976[/ATTACH] [ATTACH=CONFIG]5977[/ATTACH][ATTACH=CONFIG]5978[/ATTACH][ATTACH=CONFIG]5979[/ATTACH] Model SVS151290X Specifications[H][/HR]3rd gen Intel® Core™ i7-3632QM quad-core processor (2.20GHz / 3.20GHz with Turbo Boost) Windows 8 64-bit 15.5" LED backlit Full HD IPS display (1920 x 1080) NVIDIA® GeForce® GT 640M LE (2GB) hybrid graphics with Intel® Wireless Display technology 750GB (7200rpm) hard drive 8GB (4GB fixed onboard + 4GB removable) DDR3-1333MHz CD/DVD player / burner Internal lithium polymer battery (4400mAh) [ATTACH=CONFIG]5981[/ATTACH][ATTACH=CONFIG]5982[/ATTACH] Optional Battery Sheet[H][/HR]Battery - Number of Cells : 6 (2p3s) Battery Capacity : 4400 mAh Battery Type : Lithium-ion Estimated Battery Life : Battery life will vary based on model configuration. Please see notebook spec sheet for specific battery life. Output Voltage : 11.1 V Support Links [H][/HR] Manuals, Specs & Warranty


 1 point
 -
here's the dump.bin file created by fptw64 dump.zip1 point
-
Works like a charm! I had to use ur links and roll back to 2.06 in order to install it. I simply just flashed your 2.06 then went to 2.07 Unlocked. Thanks Svl7 As soon as I get my paypal account sorted expect a beer:).1 point
-
If you already have installed the 2.07 bios without mods you have to change the last word in the third line of the file "platform.ini" from "RESSEN" to "RESSDIS".1 point
-
Sent you some beer money, svl7 - thanks for all your (and anyone else's) hard work on the vBios files, really came in handy for me and my M18x R1 upgrade to 680m SLI. Thanks a bunch, it's not a fortune, just for you to have a drink on me.......1 point
-
IE... enough said I didn't know there were tech enthusiasts who still use this.1 point
-
What's your version?1 point
-
http://forum.techinferno.com/general-notebook-discussions/1847-nvidia-kepler-vbios-mods-overclocking-editions-modified-clocks-voltage-tweaks-149.html#post40363 Your laptop must have minimum this bios version to be compatible with clevo .33 and .67 vbios. You can found the bios Clevo BIOS Thread1 point
-
Hello, I'm lightrefracted. I just bought a lenovo y500 and I found this forum while searching for an unlocked bios so I can upgrade the WiFi adapter. Everyone has been helpful and I look forward to contributing.1 point
-
hi, my name is gerphil and i'm from germany. got here thru research for gpu upgrades for my alienware m15x. i'm a graphics artist (2D/3D) and admin, working at a renderfarm. i usually use my aw m15x for graphics and gaming (just WoW, quakeworld and quakelive )1 point
-
On the other hand, I have never experienced something like that and I am pretty sure I exceed 12A combined but I have the other PSU mod... --UPDATE-- Just run Metro 2033 benchmark maxed out, my amp meters reported 16A combined, 4A from the one and 12A from the other (one PSU is working more than the other due to slightly higher voltage output)1 point
-
Removing the battery won't ruin the warranty.. Nobody has to know anyways.. I left mine out.. unplugged my machine, large battery out. - Let sit for an hour.. and it went back to normal. I thought pushing the power button would speed up the process of the drain, but no luck.. I had to let it sit for awhile. Be patient. If you wanted to disable Onboard Video, The method SVL7 told me was to switch video to PEG, and disable Onboard Video. And that worked for me without getting the beeps.1 point
-
Radji, I think you are right. I measured current draw on my system as I haven't had any problems, and I'm using around 200W. However I had a look at the R1 schematic, and there is a current sensing circuit that detects overcurrent conditions for the battery and different adapters. The system will trip at 11.69A on the 240W adapter. Of course this is the R1 schematic, I don't have an R2 schematic. I assume that something similar is on the R2 MB. Since the trip limit is set by a few resistors it is possible that the trip limit could be raised but this isn't an easy fix as you have to change out resistors on the motherboard.1 point
-
Unlocked version with stock vbios added to the first post. The G-series has a decent cooling system, you won't burn anything unless maybe you block all air intakes. I don't need any more bios dumps at the moment.1 point
-
You could downgrade, in theory, to a checksum'd bios of you choice using ctrl+home (its ctrl+alt+home if ctrl+home doesnt work). Basically yes theres a hidden partition on your drive's EFI. You can mount this in, say, linux doing a mount -t fat32 /dev/sda1 /wherever (or similar). You'll find a G75VW.bin you can replace to whatever version you want in /EFI/ASUS just name it G75VW.bin. But word of caution, you can REALLY mess things up if you don't know what you're doing in the EFI partition.1 point
-
I hope Samsung releases that Chronos... I want to see @Brian with an AMD card, hell yeah!!1 point
-
They could use a killawatt to monitor the draw from the wall when that happens. Sent from my GT-N7100 using Tapatalk 21 point
-
First post updated with new file (A10) and new flashing method. Let me know if you have any questions.1 point
-
@nabelo: The only vbios that seems to work fine in that system is the MSI or the older Clevo vbios, as stated in the second post of the kepler vbios mods thread. There are many German Clevo resellers who sell cards, and I bet they still have cards with the older vbios in stock, you'd just need to ask before buying. A cheaper source would be ebay, and again, ask the seller about the vbios version before buying the card.1 point
-
If the issue comes back, like it did for me after 2 weeks. Here is the final solution. For me, it was a grounding issue, and I think it is the same with the keyboard. The touchpad feels great after relocating the silver tape. Very responsive, and I have the multi gesture stuff enabled, everything works good. The red circle indicates where I've move the silver tape too, had to angle it a little but now it is grounded directly onto the top aluminum case as opposed to the painted plastic (conductive?). I've been trying to get it to fail ever since and so far it is working perfectly. http://i39.photobucket.com/albums/e156/n1smo/Lenovo%20Y500/DSC_0364_newgroundingpoint_zpsec25ebe0.jpg So, I posted that in the Lenovo support forum but basically, I just relocated the silver tape and it's been working great. The touchpad has never felt this good. - - - Updated - - - This is the Elan touchpad. It was one of the earlier builds, got mine back in November.1 point
-
Hey all, I'm Kai from Adelaide and I joined up so that I could get the unlocked BIOS for my Alienware M17X R4 (I'm sick of the switchable graphics working poorly, So I want to disable the integrated card on the laptop1 point
-
Hey, here is my dump: https://www.dropbox.com/s/voi64cgl3wtkyb5/dump.bin I make it with: fptw64 -d dump.bin -bios My Model: SVS1512C5E1 point
-
Hello there. I go by ZeroBarrier. Currently own a G75VW and before that a G50VT both from ASUS. (You can imagine how drastic the jump is from Core 2 Duo & nVidia GeForce 9800M GS to a i7 & GTX660m (currently overclocked in games to 1200/3100 <3) Pleasure to meet you all.1 point
-
Hi, I'm Matthew, 22 student from Poland I'm here for cooling solutions for my aspire 5750g1 point
-
Hi, I came here from NBR (got the same name so some might recognize me) I got interested in computers when i bought my MSI GE60. I have been overclocking it for a bit but want to take it to the next level (currently got the highest 3dmark vantage score for i5 and 650m) So i signed up here to learn about advanced overclocking I heared at NBR this was the place to learn about tweaking the vbios and stuff like that. Cheers, Daniel1 point
-
List of all nvflash (DOS) commands (as of version 5.117): NVIDIA Firmware Update Utility (Version 5.117) -- Primary Commands -- Update firmware: nvflash [options] <filename> Save firmware to file: nvflash [options] --save <filename> Compare adapter firmware: nvflash [options] --compare <filename> Verify adapter firmware: nvflash [options] --verify <filename> Update TV data: nvflash [options] --tv <filename> Display version: nvflash [options] --version [<filename>] Display firmware bytes: nvflash [options] --display [bytes] Check for supported EEPROM: nvflash [options] --check Write protect EEPROM: nvflash [options] --protecton Remove write protect: nvflash [options] --protectoff Change soft straps: nvflash [options] --straps=<straps> Set IEEE 1394 GUID: nvflash [options] --guid=<guid> Set IEEE 1394 GUID source: nvflash [options] --guidsource=<location> List adapters: nvflash [options] --list List PCI firmware blocks: nvflash [options] --pciblocks List applied patches: nvflash [options] --listpatches Press 'Enter' to continue, or 'Q' to quit. -- Commands and Options -- help ? Display this screen. save b <filename> Read EEPROM and save to <filename>. compare k <filename> Read EEPROM and compare with <filename>. verify h <filename> Verify <filename> matches EEPROM if flashed. tv x <filename> Transfer TV data from file to EEPROM. version v <filename> Display file version and ~CRC32 (if no filename, acts on display adapter). listpatches Display list of runtime ROM pack patches applied at boot (primary only). display d [bytes] Display 256 the first bytes of the EEPROM (default is 256 bytes) check c Check for supported EEPROM. protecton w Write protect EEPROM (only on some EEPROM's). protectoff r Remove EEPROM write protect (only on some EEPROM's). straps m <straps> Change soft straps. format is: AND Mask 0, OR Mask 0, AND Mask 1, OR Mask 1 Press 'Enter' to continue, or 'Q' to quit. guid q <guid> Set the IEEE 1394 GUID in the firmware image (GUID is in the form of 16 hex digits). guidsource 1 <location> Set the source of the IEEE 1394 GUID. main - main EEPROM image dedicated - separate serial EEPROM part list a List all NVIDIA display adapters found in the system. pciblocks List all the PCI ROM Images stored in the EEPROM. upgradeonly Only allow upgrading of firmware based on version. overridetype 5 Allow firmware and adapter PCI device ID mismatch. overridesub 6 Allow firmware and adapter PCI subsystem ID mismatch. reboot y Reboot the PC after other tasks completed. keepstraps g Keep the soft straps already present in the EEPROM after flashing the new image. romstrap j Override the ROM strap setting to allow flashing an image when grounding the STRAP_SUB_VENDOR pin. This allows flashing a corrupted or erased EEPROM. Note: Make sure there is a physical EEPROM present when using this option index i <index> Force a specific device index. filterdevid f <value>[,<mask>] Filter device list by device ID and optional mask. fwindex F <fw index> Index of which firmware image to use from a firmware bundle. auto A When possible, run without user intervention. directpci n Bypass the PCI BIOS. Press 'Enter' to continue, or 'Q' to quit. silence s Silence all audio beeps. beep ! Beep to signal updating progress. nolight l Do not light keyboard LEDs. override o <level> Override safety check level: default unknown EEPROM | NV adapter aborts application. level=1 unknown EEPROM acceptable for read operations. level=2 unknown NV adapter acceptable for read operations. level=3 Combined effect of 1,2 (cannot write to unknown EEPROM or adapter). log L <log file> Create a log file. Use a single dash ("-") to use the single letter version of a command. Use a double dash ("--") to use the longer descriptive version of a command. Use equals ("=") to specify parameters, with separating commas (","). -- Sample Usage -- nvflash --index=1 nv30nz.rom Press 'Enter' to continue, or 'Q' to quit. -- Supported EEPROM's -- AMD AM29LV001B 128Kx8 2.7vV, 1B page, 16k blk, ID=(01,006D) AMD AM29LV010 128Kx8 2.7vV, 1B page, 16k blk, ID=(01,006E) AMD AM29LV001T 128Kx8 2.7vV, 1B page, 16k blk, ID=(01,00ED) Atmel AT49F512 64Kx8 5.0,3.0,2.7V, 1B page, 0k blk, ID=(1F,0003) Atmel AT49F001T 128Kx8 5.0V, 1B page, 0k blk, ID=(1F,0004) Atmel AT49F001 128Kx8 5.0V, 1B page, 0k blk, ID=(1F,0005) Atmel AT49BV/LV010 128Kx8 2.7-3.6V, 1B page, 0k blk, ID=(1F,0017) Atmel AT29LV/BV010A 128Kx8 3.0V, 128B page, 0k blk, ID=(1F,0035) Atmel AT29LV512 64Kx8 3.0V, 128B page, 0k blk, ID=(1F,003D) Atmel AT25F1024 1024Kx1S 2.7-3.6V, 256B page, 32k blk, ID=(1F,0040) Atmel AT29C512 64Kx8 5.0V, 128B page, 0k blk, ID=(1F,005D) Atmel AT25F1024 1024Kx1S 2.7-3.6V, 256B page, 32k blk, ID=(1F,0060) Atmel AT25F2048 2048Kx1S 2.7-3.6V, 256B page, 64k blk, ID=(1F,0063) Atmel AT25F512 512Kx1S 2.7-3.6V, 128B page, 32k blk, ID=(1F,0065) Atmel AT49F010 128Kx8 5.0V, 1B page, 0k blk, ID=(1F,0087) Atmel AT29C010A 128Kx8 5.0V, 128B page, 0k blk, ID=(1F,00D5) Atmel AT25DF021 2048Kx1S 2.3-3.6V, 256B page, 4k blk, ID=(1F,4300) Atmel AT25DF041 4096Kx1S 2.3-3.6V, 256B page, 4k blk, ID=(1F,4401) Atmel AT25FS010 1024Kx1S 2.7-3.6V, 256B page, 4k blk, ID=(1F,6601) ST M25P05 512Kx1S 2.7-3.6V, 128B page, 32k blk, ID=(20,0005) ST M25P10 1024Kx1S 2.7-3.6V, 128B page, 32k blk, ID=(20,0010) ST M29W512B 64Kx8 2.7-3.6V, 1B page, 0k blk, ID=(20,0027) Press 'Enter' to continue, or 'Q' to quit. Num M25P10-A 1024Kx1S 2.3-3.6V, 256B page, 32k blk, ID=(20,2011) AMIC A25L512 512Kx1S 2.7-3.6V, 256B page, 4k blk, ID=(37,3010) AMIC A25L010 1024Kx1S 2.7-3.6V, 256B page, 4k blk, ID=(37,3011) AMIC A25L020 2048Kx1S 2.7-3.6V, 256B page, 4k blk, ID=(37,3012) XLNX XCF128XFTG64C 8192Kx16 9.5,8.5,2.0,1.7V, 8B page, 128k blk, ID=(49,016B) Tenx ICE25P05 512Kx1S 2.7-3.6V, 128B page, 32k blk, ID=(5E,0001) PMC Pm25LD512 512Kx1S 2.7-3.6V, 256B page, 4k blk, ID=(7F,9D20) PMC Pm25LD010 1024Kx1S 2.7-3.6V, 256B page, 4k blk, ID=(7F,9D21) PMC Pm25LD020 2024Kx1S 2.7-3.6V, 256B page, 4k blk, ID=(7F,9D22) PMC Pm39LV512 64Kx8 3.0-3.6V, 1B page, 4k blk, ID=(9D,001B) PMC Pm39LV010 128Kx8 3.0-3.6V, 1B page, 4k blk, ID=(9D,001C) PMC Pm25LV512 512Kx1S 2.7-3.6V, 256B page, 4k blk, ID=(9D,007B) PMC Pm25LV010 1024Kx1S 2.7-3.6V, 256B page, 4k blk, ID=(9D,007C) SST SST29EE010 128Kx8 5.0V, 128B page, 0k blk, ID=(BF,0007) SST SST29LE/VE010 128Kx8 2.9,2.7V, 128B page, 0k blk, ID=(BF,0008) SST SST29LE/VE512 64Kx8 2.9,2.7V, 128B page, 0k blk, ID=(BF,003D) SST SST45VF010 1024Kx1S 3.0-3.6V, 1B page, 4k blk, ID=(BF,0042) SST SST25LF020 2048Kx1S 3.0-3.6V, 256B page, 4k blk, ID=(BF,0043) SST SST25LF040 4096Kx1S 3.0-3.6V, 256B page, 4k blk, ID=(BF,0044) SST SST25VF512 512Kx1S 2.7-3.6V, 256B page, 4k blk, ID=(BF,0048) SST SST25VF010 1024Kx1S 2.7-3.6V, 256B page, 4k blk, ID=(BF,0049) SST SST29EE512 64Kx8 5.0V, 128B page, 0k blk, ID=(BF,005D) SST SST39SF010 128Kx8 5.0V, 1B page, 4k blk, ID=(BF,00B5) SST SST39VF512 64Kx8 2.7-3.6V, 1B page, 4k blk, ID=(BF,00D4) Press 'Enter' to continue, or 'Q' to quit. SST SST39VF010 128Kx8 2.7-3.6V, 1B page, 4k blk, ID=(BF,00D5) MX MX29F001T 128Kx8 5.0V, 1B page, 0k blk, ID=(C2,0018) MX MX29F001B 128Kx8 5.0V, 1B page, 0k blk, ID=(C2,0019) MX MX25L512 512Kx1S 2.7-3.6V, 256B page, 4k blk, ID=(C2,2010) MX MX25L1005 1024Kx1S 2.7-3.6V, 256B page, 4k blk, ID=(C2,2011) MX MX25L2005 2048Kx1S 2.7-3.6V, 256B page, 4k blk, ID=(C2,2012) MX MX25L4005A 4096Kx1S 2.7-3.6V, 256B page, 4k blk, ID=(C2,2013) GD GD25Q512 512Kx1S 2.7-3.6V, 256B page, 32k blk, ID=(C8,4010) GD GD25Q10 1024Kx1S 2.7-3.6V, 256B page, 64k blk, ID=(C8,4011) GD GD25Q20 2048Kx1S 2.7-3.6V, 256B page, 64k blk, ID=(C8,4012) GD GD25Q40 4096Kx1S 2.7-3.6V, 256B page, 64k blk, ID=(C8,4013) WBond W39L010 128Kx8 3.3V, 1B page, 4k blk, ID=(DA,0031) WBond W39L512 64Kx8 3.3V, 1B page, 4k blk, ID=(DA,0038) WBond W29C011A 128Kx8 5.0V, 128B page, 0k blk, ID=(DA,00C1) WBond W29EE512 64Kx8 5.0V, 128B page, 0k blk, ID=(DA,00C8) WBond W25X10A 1024Kx1S 2.7-3.6V, 256B page, 4k blk, ID=(EF,3011) WBond W25X20A 2048Kx1S 2.7-3.6V, 256B page, 4k blk, ID=(EF,3012) WBond W25X40A 4096Kx1S 2.7-3.6V, 256B page, 4k blk, ID=(EF,3013) WBond W25X80A 8192Kx1S 2.7-3.6V, 256B page, 4k blk, ID=(EF,3014)1 point
-
More stuff exclusive for T|I users, voltage mods: All the vbios listed here are attached at the end of the post. ******************************** Nvidia 800m series: Nvidia GTX 880m (8GB version only): 'OC edition' -> unlocked overclocking limits, voltage adjustable, power target adjustable, optimized performance at higher clocks Can be used for all current 880m (Clevo, MSI and Dell). Nvidia GTX 870m: 'OC edition' -> see above Nvidia GTX 860m (GK104 variant): 'OC edition' -> see above. Refer to the file name to know which version is suited for your system. NOTE: Only for the Kepler version of the 860m. Silly Nvidia started giving different GPUs the same name. ******************************** Nvidia 700m series: Nvidia GTX 780m: 'OC edition' -> unlocked overclocking limits, voltage adjustable, power target adjustable, optimized performance at higher clocks Can be used for all current 780m (Clevo, MSI and Dell). Nvidia GTX 770m: 'OC edition' -> see above Nvidia GTX 765m: 'OC edition' -> see above. Refer to the file name to know which version is suited for your system. ********************************* Nvidia 600m series: MSI GTX 680m (4GB version): 'OC edition' revised -> higher limits for software overclocking, stock default clocks ----------------------- Dell GTX 680m (2GB version) vbios: 'OCedition' revised -> higher limits for software overclocking, stock default clocks same with increased 3d voltage ('OV') -> refer to the file name ----------------------- Clevo GTX 680m (4GB version) vbios: 'OCedition' revised -> higher limits for software overclocking, stock default clocks. For P1xxHM based systems I recommend only using version 80.04.29.00.01 !! Some users reported issue with other vbios versions (stock or modified, doesn't matter). EM users make sure you're on the latest BIOS / EC same with increased 3d voltage ('OV') -> refer to the file name (Same warning as above applies to P1xxHM users). ----------------------- K3000m: (Nvidia) K3000m - 80.04.3A.00.07 'OCedition' -> higher software overclocking limit Should work on all K3000m, unless you got a board ID mismatch. (HP) K3000m - 80.04.33.00.2E - 'OC edition' - > same as above, but probably the better choice if you use a HP machine ----------------------- K5000m: (Dell) K5000m - 80.04.33.00.35 - 'OCedition' -> higher software overclocking limit, stock 3d clocks 758MHz It's Dell but should work on all K5000m, unless you get a board ID mismatch. ----------------------- GTX 670mx: MSI 670mx (1.5GB) - 80.04.5B.00.A5_'OCedition'_rev00 -> higher software overclocking limits, tweaked performance at high clocks. Same board as the Clevo card. Clevo 670mx (3GB) - 80.04.58.00.03_'OC edition'_rev02 -> same as above, plus voltage is adjustable per software. ---------------------- MSI GTX 675mx: MSI 675mx (2GB) - 80.04.58.00.14_'OCedition'_rev00 -> higher software overclocking limits, tweaked performance at high clocks. MSI 675mx (4GB) - 80.04.58.00.0E_'OCedition'_rev00 -> same as above, vbios for 4GB card (!) ----------------------- Clevo GTX 675mx: Clevo 675mx (4GB) - 80.04.58.00.05_'OCedition'_rev00 -> higher software overclocking limits, tweaked performance at high clocks. ----------------------- ASUS G75VW BIOS: - 660m at 1000MHz core / 1400MHz memory - additional BIOS menus http://forum.techinferno.com/asus-gaming-notebook-forum/2538-%5Bg75vw%5D-modified-bios-vbios-higher-overclocking.html ------- Donation link in case you want to buy me a beer Thanks and cheers! *** FILE DOWNLOAD LOCATION:1 point