Leaderboard


Popular Content
Showing content with the highest reputation on 11/22/12 in all areas
-
Hi all, Just read thru all the posted.. Crazy stuff. I guess I didn't get that deep into NBR. I would like to thank Xonar for leading me here (he doesn't even know it).. But glad I found where he went too. Look forward to one day flashing my GT680R with his work. Happy tweaking2 points
-
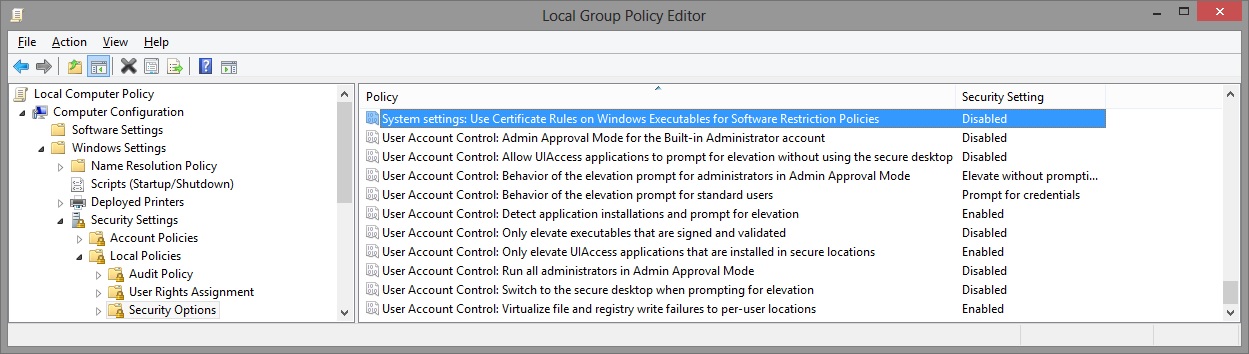
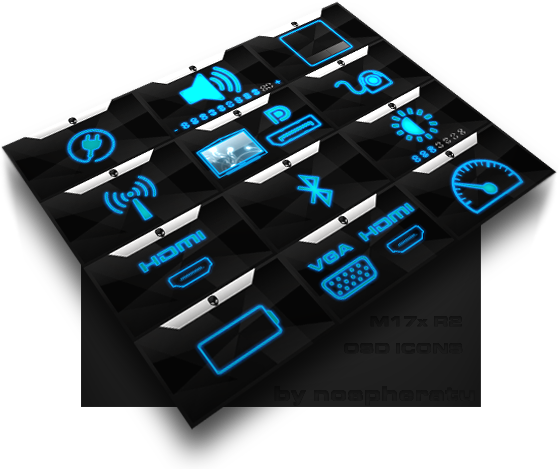
I've recreated the OSD Icons for the R1/R2/R3/R4 and R5 aka 17 as the standard ones are a bit dated. It should also work with the M15x though as my old M15x had the same setup for the OSD app. Regarding the R3 OSD, it seems its the same install for the M18x as well so it should work for you M18x owners too. I've also added the AW 17 OSD to the list. This exe is also compatible with the 14 and 18 as Dell uses the same OSD for all the new machines. There's also a set for you Area-51 m17 R1 owners. I've tried to give it a simular feel to the Invader Icon pack by Alienware. Hope you guys like it Install Instructions for R1 1. You need to end the OSD process in Task Manager since it may be using some of these icon files. Ctrl+Shift+Esc then find the OSD process and end it. 2. Backup your current icons if you want to revert to the originals (You can also uninstall and re-install the OSD application if you want to go back to the original icons) 3. Extract the attached "M17X R1-R2 & M15X.zip" contents to C:\Program Files (x86)\OSD\picture\. Overwrite if prompted. 4. Restart the OSD application. It is located in C:\Program Files (x86)\OSD\Launch.exe 5. Done! Install Instructions for R2 /M15x 1. You need to end the OSD.exe process in Task Manager since it may be using some of these icon files. Ctrl+Shift+Esc then find "OSD.exe" and end the process. 2. Backup your current icons if you want to revert to the originals (You can also uninstall and re-install the OSD application if you want to go back to the original icons) 3. Extract the attached "M17X R1-R2 & M15X.zip" contents to C:\Program Files (x86)\OSD\ICONs\. Overwrite if prompted. 4. Restart the OSD application. It is located in C:\Program Files (x86)\OSD\Launch_OSD.exe 5. Done! Install instructions for R3 / R4 / M18x 1. You need to end the OSD process in Task Manager since it may be using some of these icon files. Ctrl+Shift+Esc then find the AlienwareOn-ScreenDisplay.exe process and end it. 2. Backup the existing AlienwareOn-ScreenDisplay.exe by renaming it to "AlienwareOn-ScreenDisplay.exe.BAK" for example. Its in C:\Program Files (x86)\Alienware On-Screen Display\ 3. Extract the AlienwareOn-ScreenDisplay.exe from the appropriately named file depending on your OS and model to the C:\Program Files (x86)\Alienware On-Screen Display\ folder. 4. Restart the OSD application by double-clicking the file. 5. Done! Install instructions for 14 / 17 / 18 ** 1. You need to end the OSD process in Task Manager since it may be using some of these icon files. Ctrl+Shift+Esc then find the AlienwareOn-ScreenDisplay.exe process and end it. 2. Backup the existing AlienwareOn-ScreenDisplay.exe by renaming it to "AlienwareOn-ScreenDisplay.exe.BAK" for example. Its in C:\Program Files (x86)\Alienware On-Screen Display\ 3. Extract the AlienwareOn-ScreenDisplay.exe from the "AW 14-17-18 (Windows 8).zip" file to the C:\Program Files (x86)\Alienware On-Screen Display\ folder. 4. Restart the OSD application by double-clicking the file. 5. Done! The Area-51 m17-R1 install should be similar to the steps for the other laptop revisions above. They all basically follow the same process anyway, apart from filenames/paths. @robby_hd was kind enough to make a red version of these icons for the M17x R3 / M18x R1 which can be downloaded from his post here. **There seems to be a security issue with Windows 8/8.1 at this point in time since it doesn't allow modified exe's. I will update this post with a solution once it has been found. Also a few Alienware owners are having an issue with the unmodified OSD and Windows 8. Only the default Windows 8 OSD displays and not the Alienware version. Try the solution posted by Dell here and then attempt installing the mod. The below screenprint is a workaround by editing the security policies to allow the unsigned exe to run in Windows 8. If you are not aware of what these settings do and the repercussions of changing them, please do not attempt it. - Open the Group Policy Editor by typing "gpedit.msc" in the search or run text box. - Duplicate the settings below. Area-51 m17-R1.zip M17X R1-R2 & M15X.zip M17X R3-R4 & M18X R1-R2 (Windows 7).zip M17x R4 & M18X R2 (Windows 8).zip AW 14-17-18 (Windows 8).zip M17X R4 & M18X R2 (Windows 8.1).zip

 1 point
 -
Instructions for flashing the VBIOS of a NVIDIA video card: You'll need: A VBIOS file you want to flash The latest version of NVflash, a DOS utility to flash the VBIOS of Nvidia cards. A USB drive, formatted to boot DOS, in order to use NVflash How to create a bootable USB flash drive: The flashing procedure: Put the NVflash files to the root of your prepared (DOS bootable) USB drive. Do the same with the Vbios you want to flash. NOTE: DOS has a limit of 8 characters per file name (not counting the extension). So make sure to rename your files appropriately before putting them on the USB drive. Make sure the USB drive is plugged into a port which is active at boot, reboot the system and go to the boot manager. Choose to boot from your prepared USB drive. As soon as you see the command line you're ready to go, write dir and hit enter to display all the files on the USB drive. Display all Nvidia adapters in the system: nvflash -a or alternatively the longer version of the command: nvflash --list This command will return you a list with all Nvidia adapters present in your system. Here's an example output of this command run on my M15x with a 680m in it: NVIDIA Firmware Update Utility (Version 5.117) NVIDIA display adapters present in system: <0> N13E-GTX (10DE,11A0,1028,02A2) H:--:NRM B:02,PCI,D:00,F:00 The number in the <> brackets is the index of the corresponding device. SLI users will have more than one entry and flash each card separately. Backup your current VBIOS: Never forget to keep a backup of your original VBIOS before you flash anything non-stock. Use this command to save a copy of the firmware to your USB drive: nvflash -b filename.rom or with nvflash --save filename.rom Flash the VBIOS to your card(s): For a single card it's really straight forward, you don't need to worry about the adapter indices. Just use this command: nvflash -6 vbiosname.rom -6 will allow you to override mismatches of the PCI subsystem ID. In case of a mismatch you'll need to confirm the flash with 'y'. NOTE: Users with a non-US keyboard might need to press 'z' or similar, because the 'y' isn't at the same location for all keyboard layouts. SLI users will need to flash each card separately. The concept stays the same, but you will need to use the corresponding adapter index to flash a card. How to figure out the adapter nr. is described above. Flashing goes like this: nvflash -i[index] -6 vbios.rom [index] represents a number, namely the index you found with the 'nvflash -a' command. So a command example to flash a card which has index 0 is: 'nvflash -i0 -6 vbios.rom' When the flashing starts, just wait until it says that it's done. Then reboot with Ctrl+Alt+Del and remove your USB drive. Pro tip: Let me know if I missed anything important or if you have questions.1 point
-
NOTE: The US$180 BPlus TH05 (inc Thunderbolt cable) native Thunderbolt adapter used in this implementation was recalled in Jan 2013 due to (presumably) threats by Intel/Apple per TH05 recall notice. As a result refer to this solution that can be implemented today: [URL]http://forum.techinferno.com/diy-e-gpu-projects/4570-%5Bguide%5D-2012-13-rmbp-gtx660-sonnet-echo-express-se-%40-10gbps.html#post63754[/URL] (recommended for 15" rMBP/MBP due to iGPU issues) or 2013 11" Macbook Air + Win7 + Sonnet Echo ExpressCard + PE4L + Internal LCD [US$250]. While reading some threads about EFI-Boot on Mac I finally made my eGPU work. I fixed my "error 12" by enabling VGA Output on the PCI bridge connected to my Thunderbolt ports using the EFI-Shell. For this task I installed rEFIt and used "pci -i -b" / "pci xx xx xx -i -b" to find VGA devices and their bridges. I noted all Bus/Dev/Func as well as the required registars. After that I had to set those registars using "mm". On a Mac Book Pro 15" 2012 you'll have to do the following: 1. Install rEFIt 2. In Mac OS mount the EFI partition using terminal: mkdir /Volumes/EFI sudo mount -t msdos /dev/disk0s1 /Volumes/EFI 3. Create a textfile called "startup.nsh" in it's root: echo -off echo "Setting Registars" # IGPU Intel HD 4000 # I noticed some improvements in boottimings while deactivating the Intel HD # (don't use this if your running a 13" single gpu model) mm 00020004 1 ;PCI :0 # eGPU PCI Bridge # this line does the magic by enabling VGA Output mm 0001013E 1 ;PCI :8 echo "Booting Windows" fs0:EFIBootootx64.efi 4. Reboot while eGPU is connected (SW1=1) and select "start EFI-Shell" in rEFIt. "startup.nsh" launches and Windows 8 starts up with eGPU enabled. Update: Replaced rEFIt with rEFInd which is is a fork of rEFIt. I'm now able to create an menuentry which boots Windows using my startup script. I'm also able to hide the non functional Windows entries. Here's my current refind.conf: timeout 20 hideui banner showtools shell, reboot, shutdown dont_scan_dirs EFI/Boot, EFI/Microsoft menuentry "Windows 8 with eGPU" { icon EFI efindiconsos_win.icns loader EFI oolsshell.efi options "fs0:StartupseGPU.nsh" } Update (experimental): Thanks to Linux's "apple-gmux" developer Andreas Heider I was able to switch graphics before booting Windows and enable Intel HD as primary VGA device. Though Intel HD is still bugged this probably allow us to enable Optimus functionality in the future. You can also boot with Intel HD enable by installing gfxCardStatus 2.1.1(!) and setting it to integrated only, too. For now you'll receive a black screen and reboot due to some "igdkmd64.sys" error. Add this to your startup.nsh before "mm 0001013E 1 ;PCI :8": echo Switch select mm 7C2 1 ;IO :1 stall 100000 mm 7D4 1 ;IO :28 echo Switch display mm 7C2 1 ;IO :2 stall 100000 mm 7D4 1 ;IO :10 echo Switch DDC mm 7C2 1 ;IO :2 stall 100000 mm 7D4 1 ;IO :40 echo Power down discrete graphics mm 7C2 1 ;IO :1 stall 100000 mm 7D4 1 ;IO :50 mm 7C2 1 ;IO :0 stall 100000 mm 7D4 1 ;IO :50 echo enable eGPU mm 0001013E 1 ;PCI :8 echo Boot Windows fs0:EFIBootootx64.efi Some numbers: Model: rMBP 15" OS: Windows 8 EFI-Boot CPU: Intel-i7 3820QM @ 2.7gHz RAM: 16GB iGPU: Intel HD Graphics 4000 (broken for Win8) dGPU: Nvidia GT 650m Adapter: TH05 I tried some overclocking and ended up with some strange results for 3D Mark 06. No matter what you change you'll have lower points than default settings. dGPU GT650m eGPU GTX 560Ti eGPU GTX660Ti eGPU GTX660Ti OC 3DMark 2011: 2431p 4415p 7110 p 7463 p 3DMark Vantage: 10633p 16755 p 23810p 24702p 3DMark 2006: 15289p 17479p 17979 p like 15900? This might work for BIOS boot aswell but I don't know how to launch an MBR partition. (Update: BIOS method by nando) I'll try to tweak this a bit and hope for an Intel fix. Is there anyone with some more knowledge in EFI Shell?1 point
-
Only 2 slots work with i5, it's 1333mhz but you can put two 8gb RAMs in those two. If you upgrade to a i7 you can use all 4 slots up to 32gb 1600mhz,1 point
-
I´m sorry. had a bed day yesterday and i get it in the wrong way... dont mean to attack you.1 point
-
I don't even know why you bother with NBR anymore. people who need to find the new post here will (like me). The only reason why I was on the NBR forum was the egpu thread.1 point
-
Nope, nothing will. It's an Nvidia implementation.1 point
-
Just got myself a RAT 7 on sale for > 50% off. The customization is pretty outstanding. A little weird to get used to at first, but it's amazing. I currently have it set to 1600DPI and find that to be a good balance. Haven't tried it in game as I am waiting for my eGPU setup to get here, but will update once I try a few games out.1 point
-
Ok, interesting. I actually expected it to use the newer vbios... but well, weird bios in this case Try this, it might help you with the clock issue. If it works the card will sustain 835MHz. Dell - Inspirion 7720 - A11 [650m mod v00].zip1 point
-
Do you have the latest BIOS on your system? Does the throttling also happen at stock clocks? Can you attach a GPU-Z log of your GPU which shows the clocks? Run a game for this, no furmark or similar crap.1 point
-
PLL resistor is not evident, but there is no other possibility ME resistor it is.1 point
-
New 306.23 WHQL driver was released, details of the driver as follows: Modded nvdm.inf & nvcv.inf files included with this post for M18x-R1 owners using a Clevo GTX 680M in their systems. If the .inf's don't work for you, then your device id may be different than the one I used. In this case mine is 048F so go to your control panel-->display device-->hardware id and look for the corresponding hardware id for your Clevo GTX 680M and replace 048F with yours in the nvdm.inf and nvcv.inf file. 306.23_Clevo680M_M18xR1.zip1 point