Leaderboard


Popular Content
Showing content with the highest reputation on 01/21/13 in all areas
-
I didn't forget about this stuff, just too busy atm. I'll get back to modding when I have more time.2 points
-
2 points
-
Forgot to mention these: * 15" Sony SVS, i7-3612QM, GT640LE, 1920x1080 IPS, 2kg. Review Sony Vaio SV-S1511X9E/B Notebook - Notebookcheck.net Reviews * 15" Asus Zenbook U500UVZ, i7-quad, GT650M, 1920x1080 IPS, touch display, 2.2kg: Review Sony Vaio SV-S1511X9E/B Notebook - Notebookcheck.net Reviews2 points
-
It's worth noting that Macbook Pros are essentially overpriced ultrabooks. They are all built around the same CPUs and chipsets (Intel Core i5/i7) with Intel HD integrated GPUs. If he's looking to avoid ultrabooks, he's already failed. As far as a recommendation, here's mine. I ordered a Lenovo Y580 just recently (Newegg.com - lenovo IdeaPad Y580 (59345717) Notebook Intel Core i7 3630QM(2.40GHz) 15.6" 8GB Memory 1TB HDD Blu-ray Combo NVIDIA GeForce GTX 660M). It doesn't come equipped with an SSD hard drive, although I ordered a 128 GB mSATA SSD HD for $100 (Amazon.com: MyDigitalSSD 128GB BP3 Bullet Proof 3 mSATA III (6G) SSD Solid State Drive - MDMS-BP3-128: Computers & Accessories) to use as a system drive. The only flaw thus far is the lack of support for dual band wifi cards, although there have been some custom bios files released in this forum to address this issue. You can even buy the dual band wifi cards Lenovo installs in their other machines (Amazon.com: Adpt 6205 Half Height Minicard (bulk) By Intel: Computers & Accessories) for $13. The system does slightly exceed the weight requirements though, weighing in at 2.8 kg. Overall though, for $1113 you get the following - CPU - Intel Core i7-3630QM Quadcore 2.4GHz with dynamic overclocking up to 3.4 GHz GPU - NVIDIA Geforce GTX 660M and Intel HD 4000 RAM - 8 GB DDR3 SSD - 128 GB mSATA III system drive HDD - 1TB 5200 RPM HD data drive Optical Drive - A blu-ray combo drive Wifi - Dual band (pending a successful custom bios flash) Display - 1920 x 1080 LED backlit, 15.6" Performance wise, it's better than any Macbook Pro available and much much cheaper for any of the Macbook Pros that are even close.2 points
-
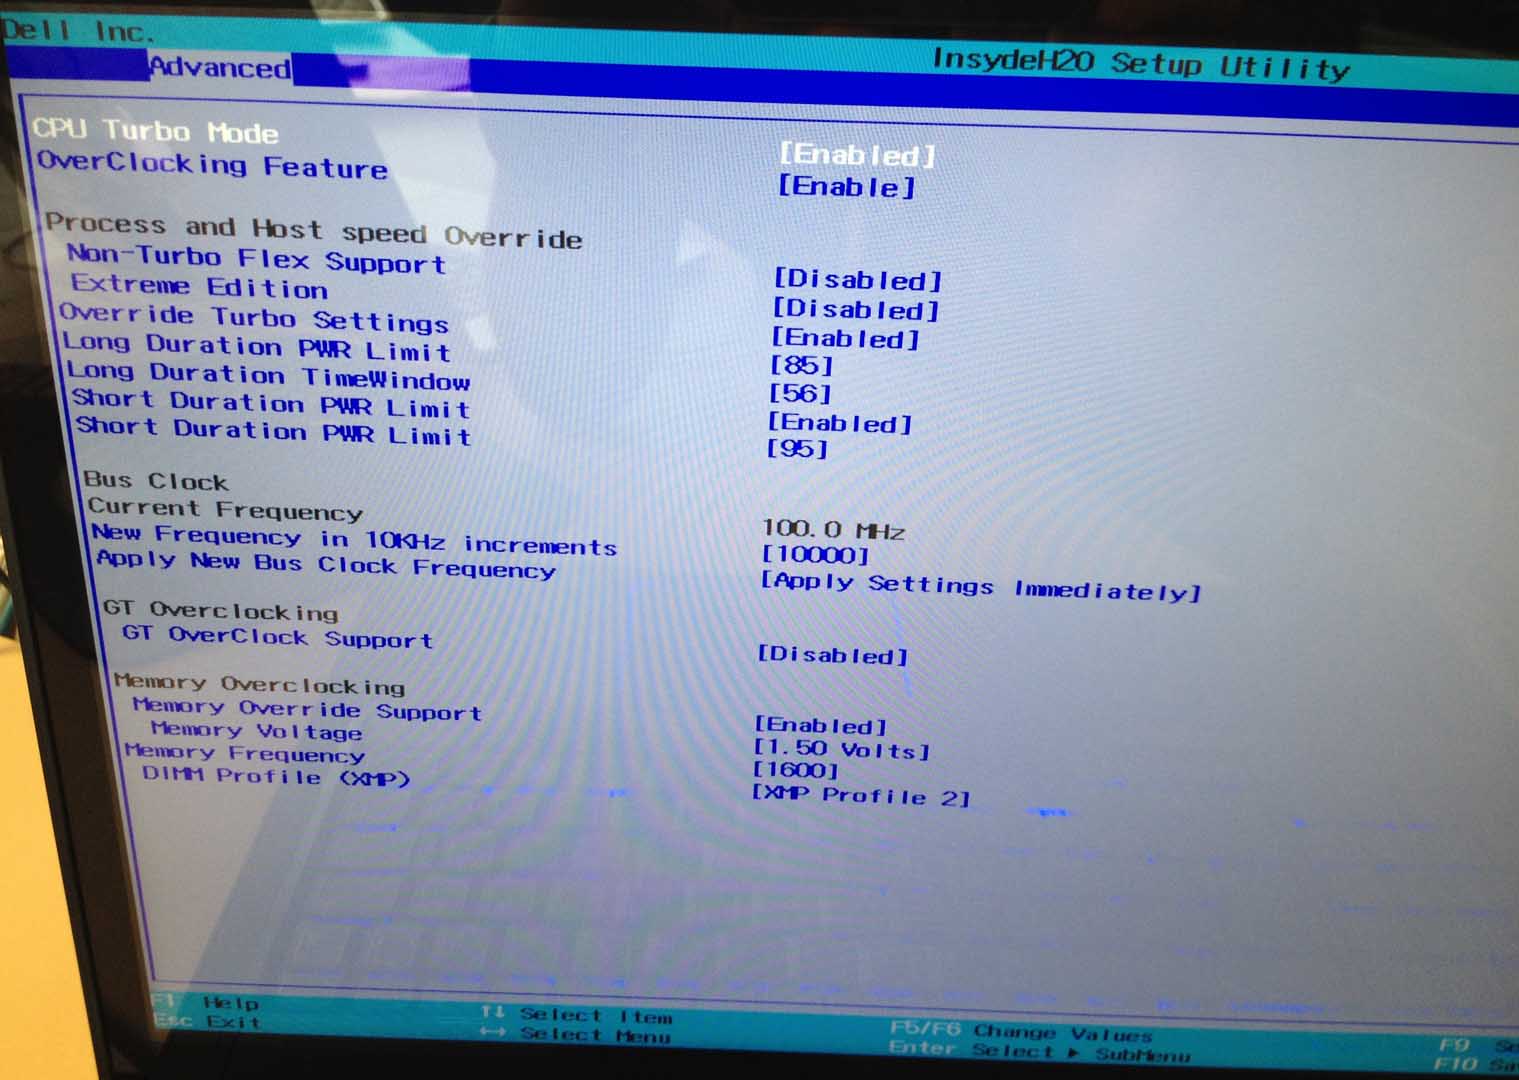
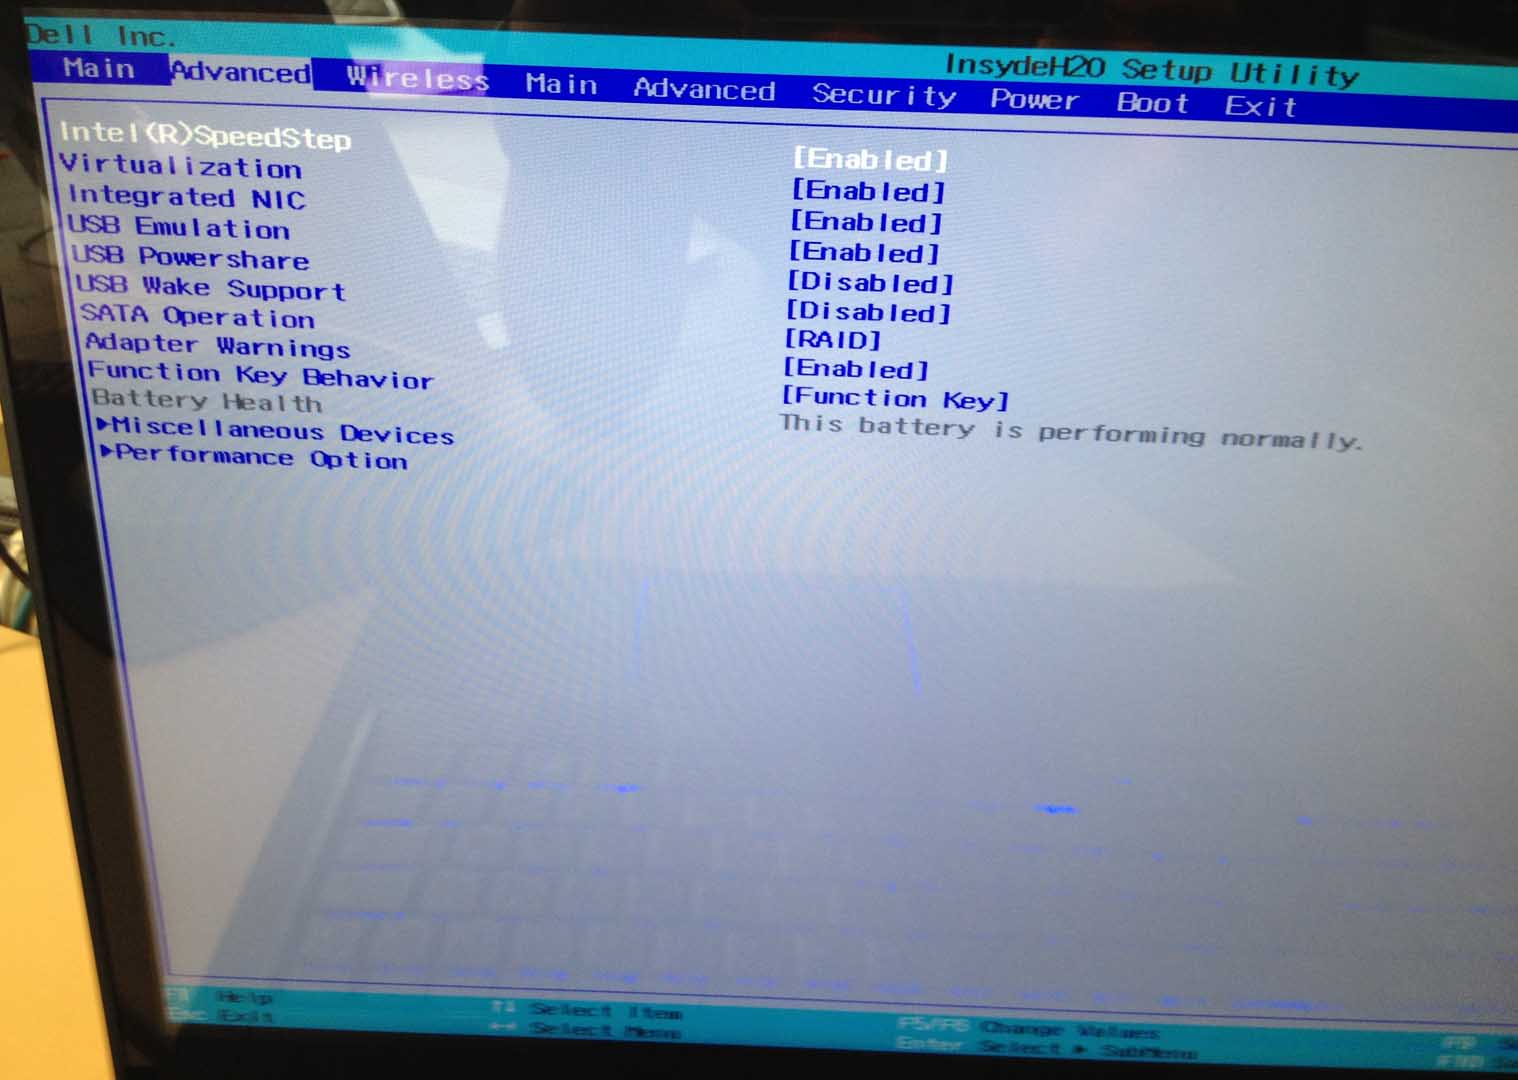
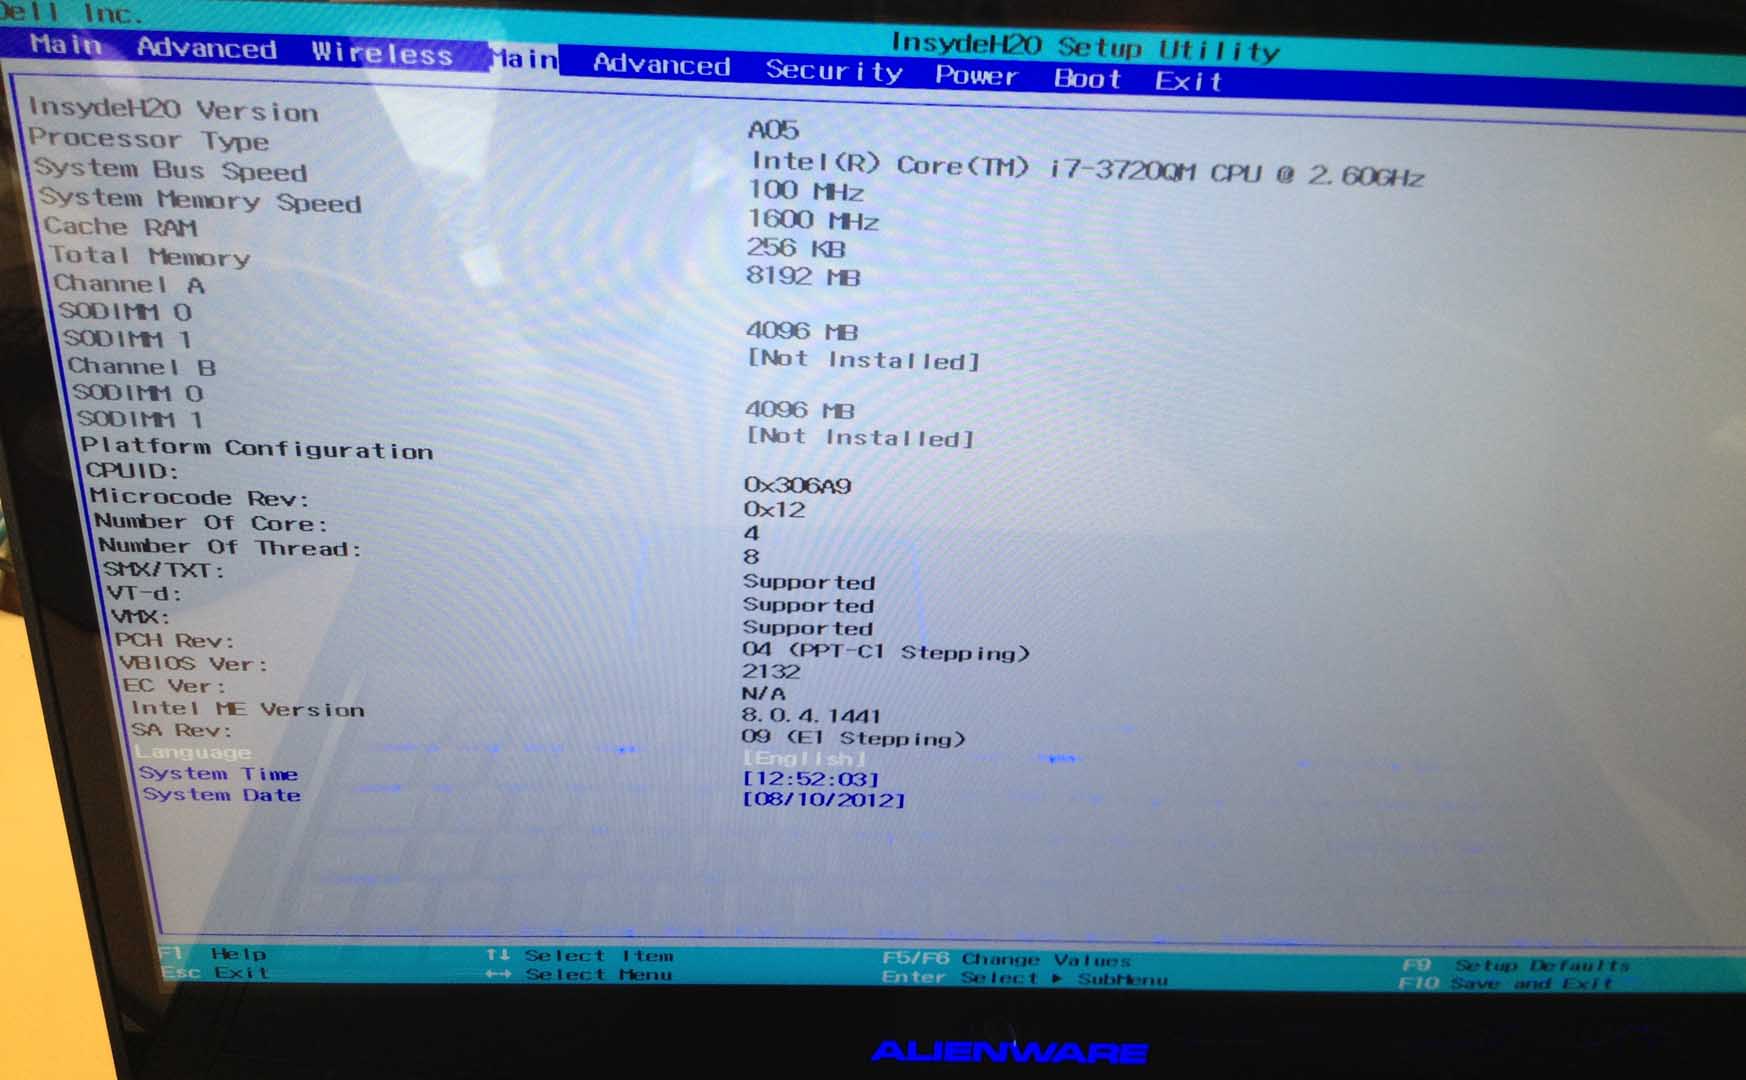
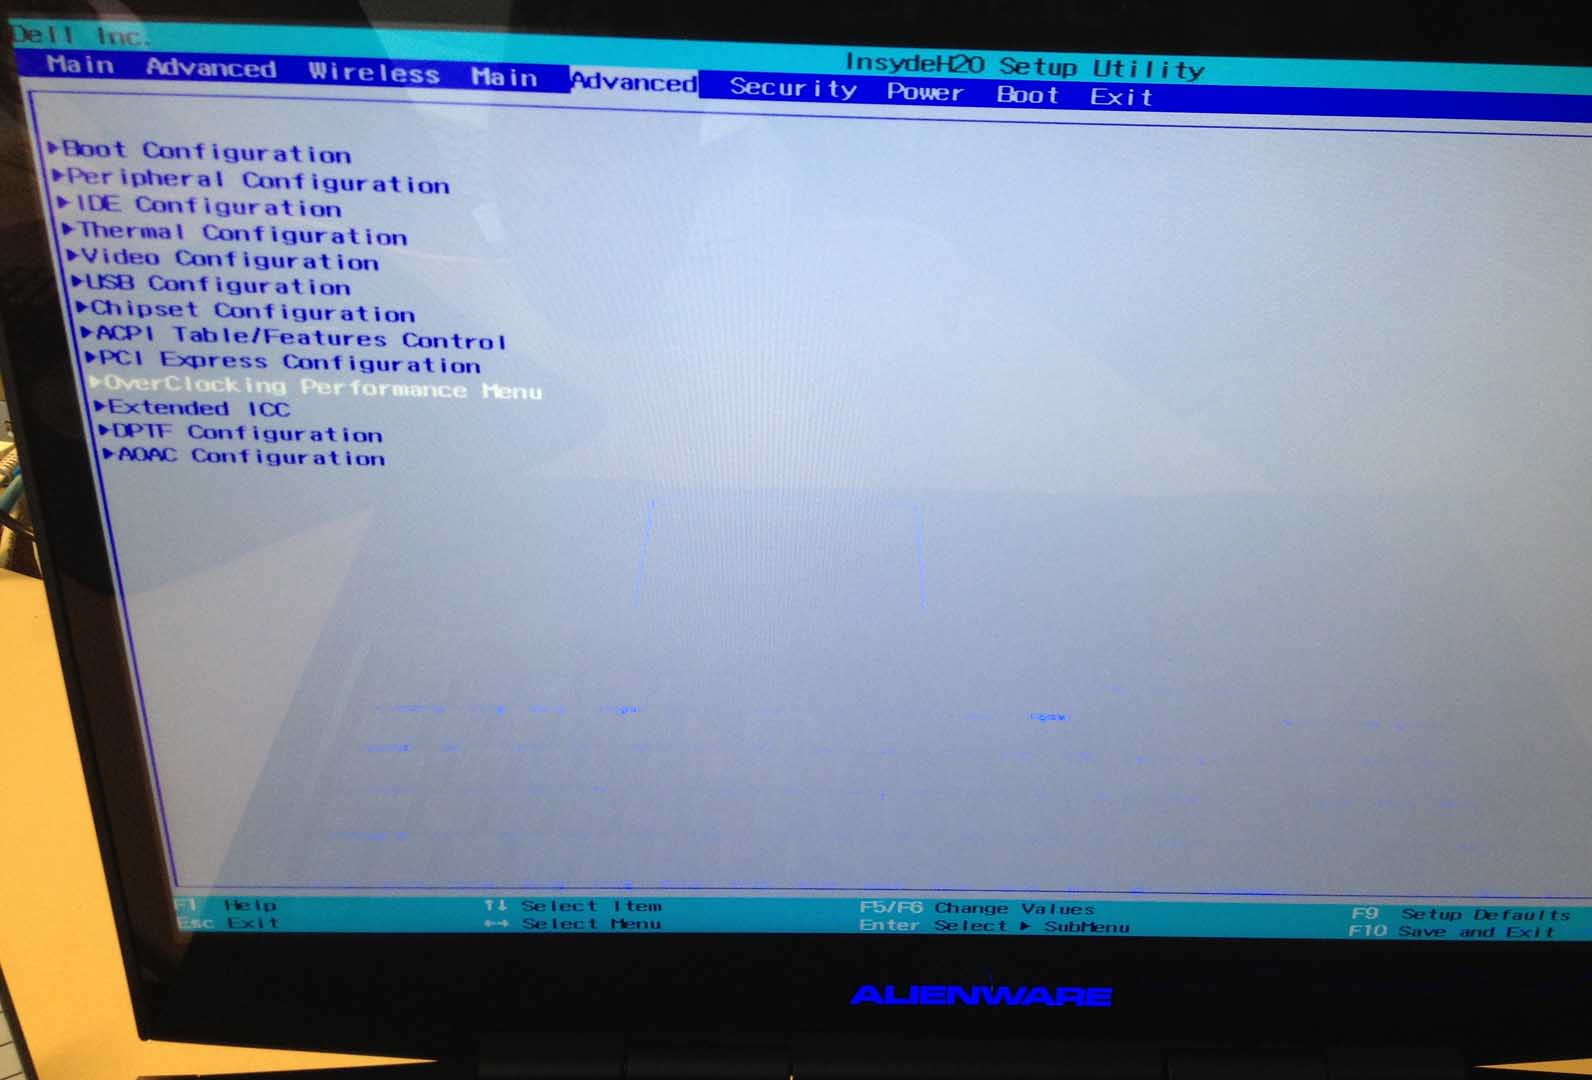
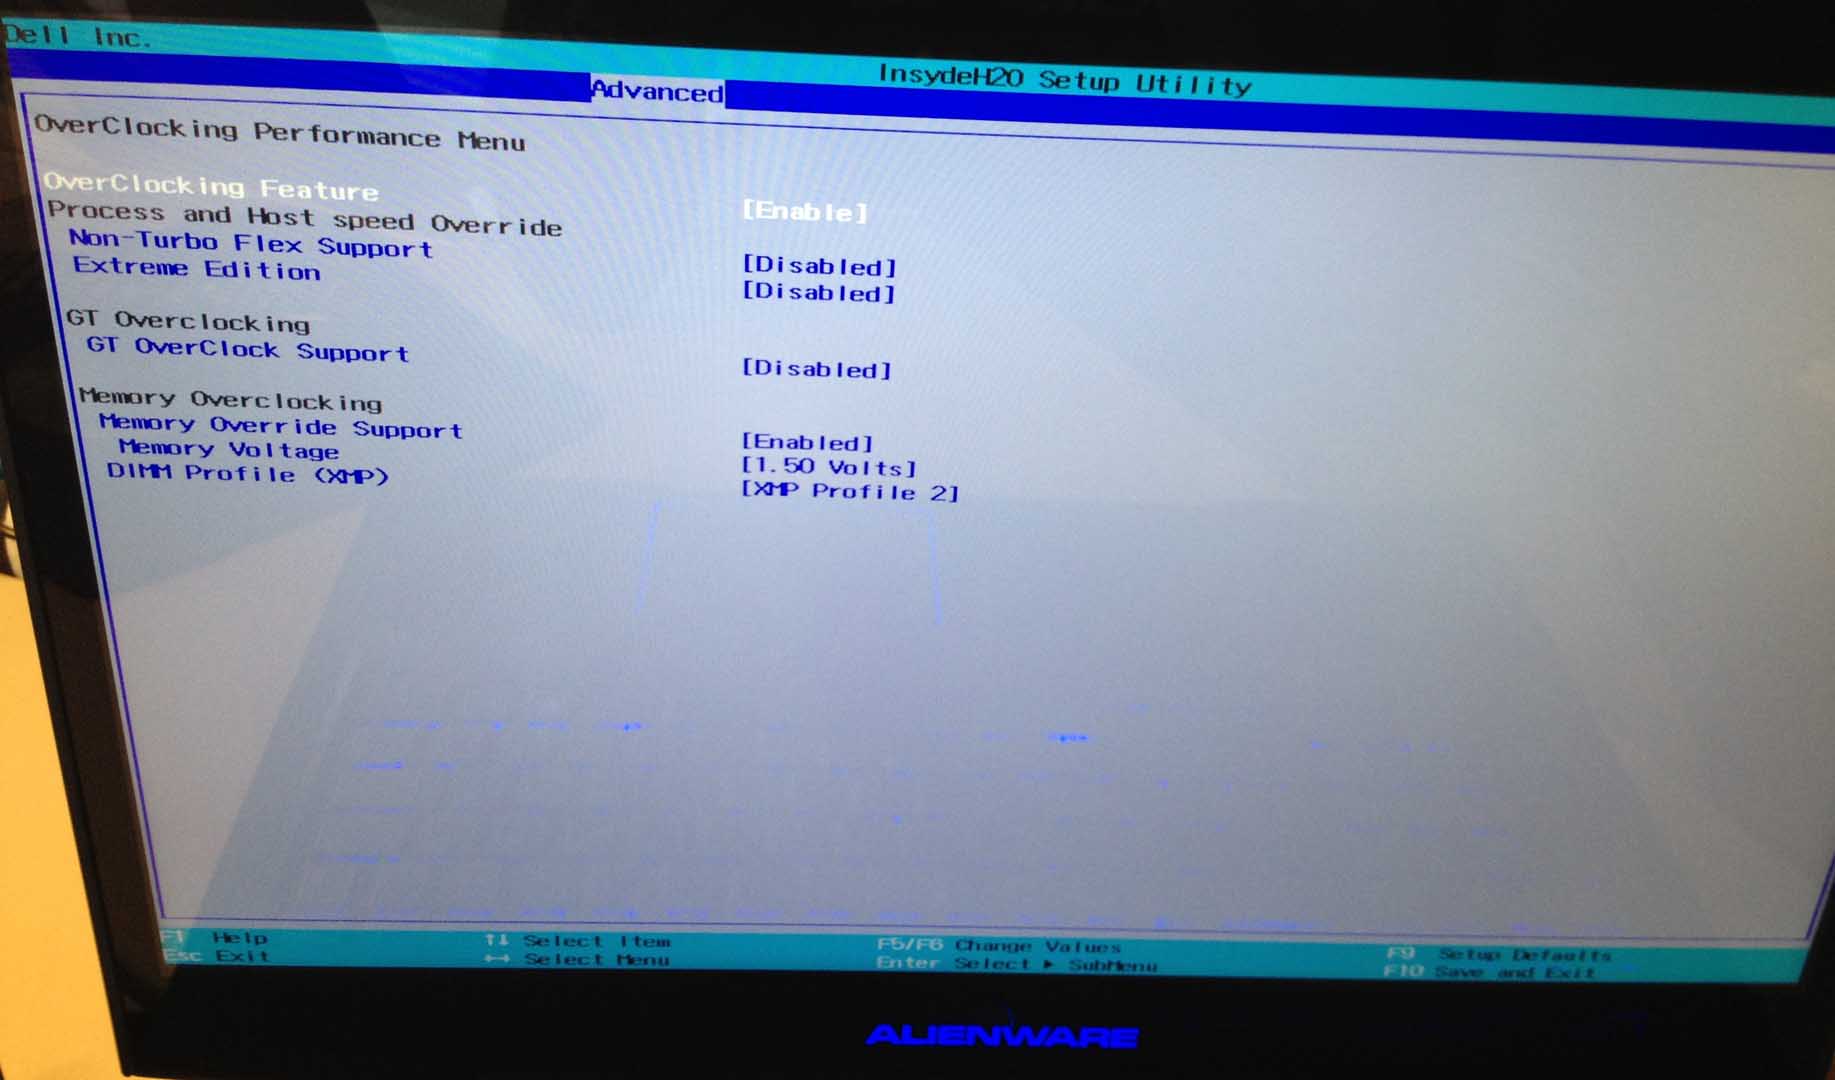
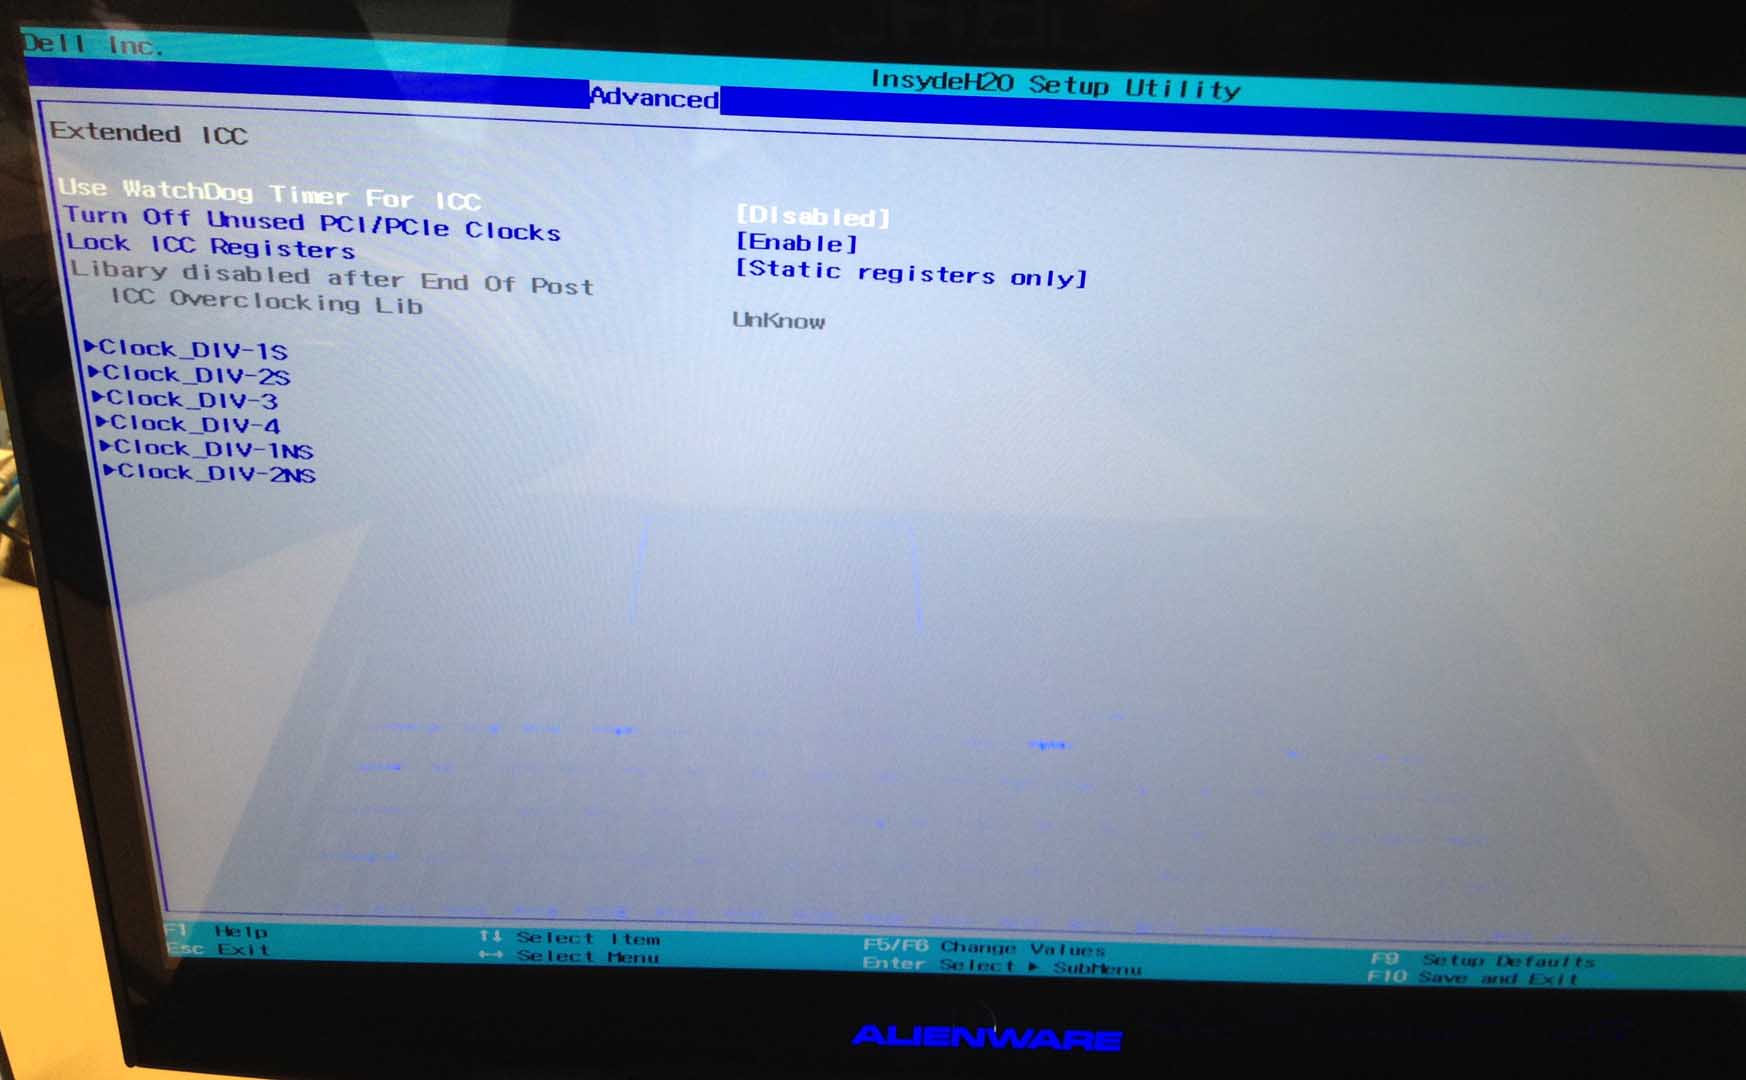
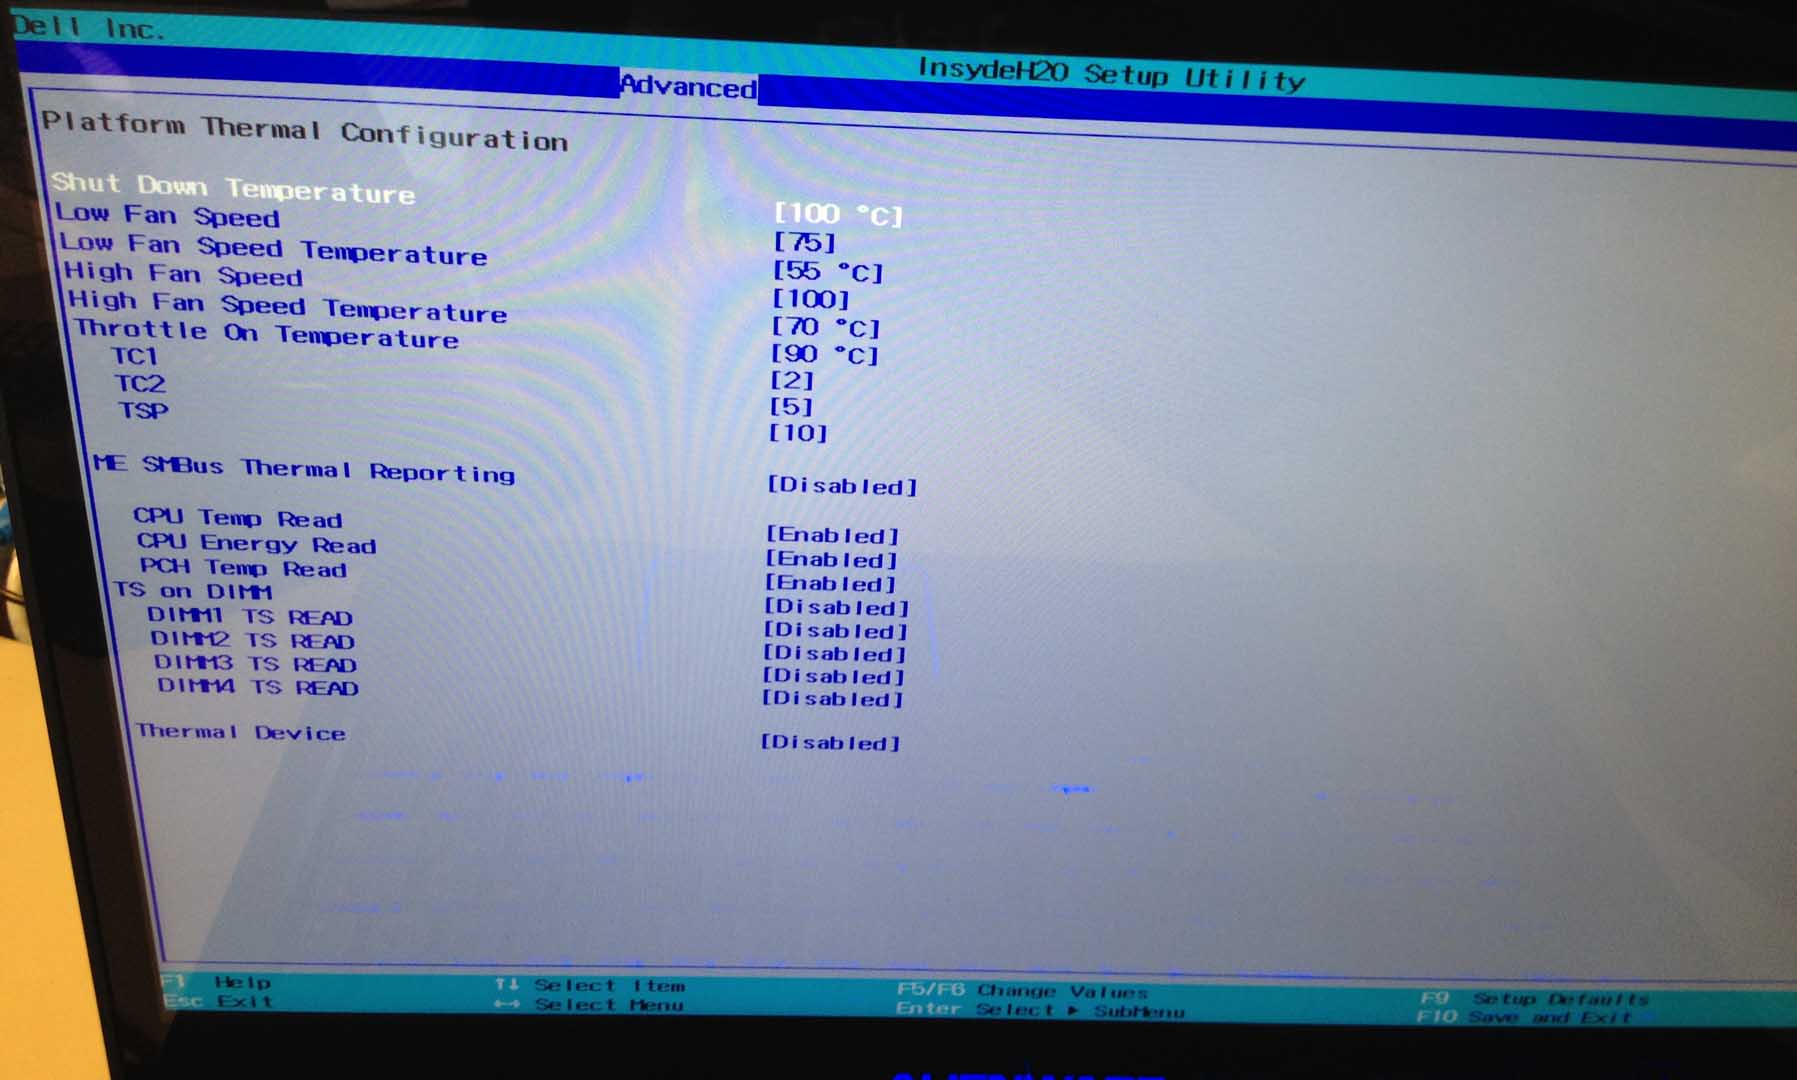
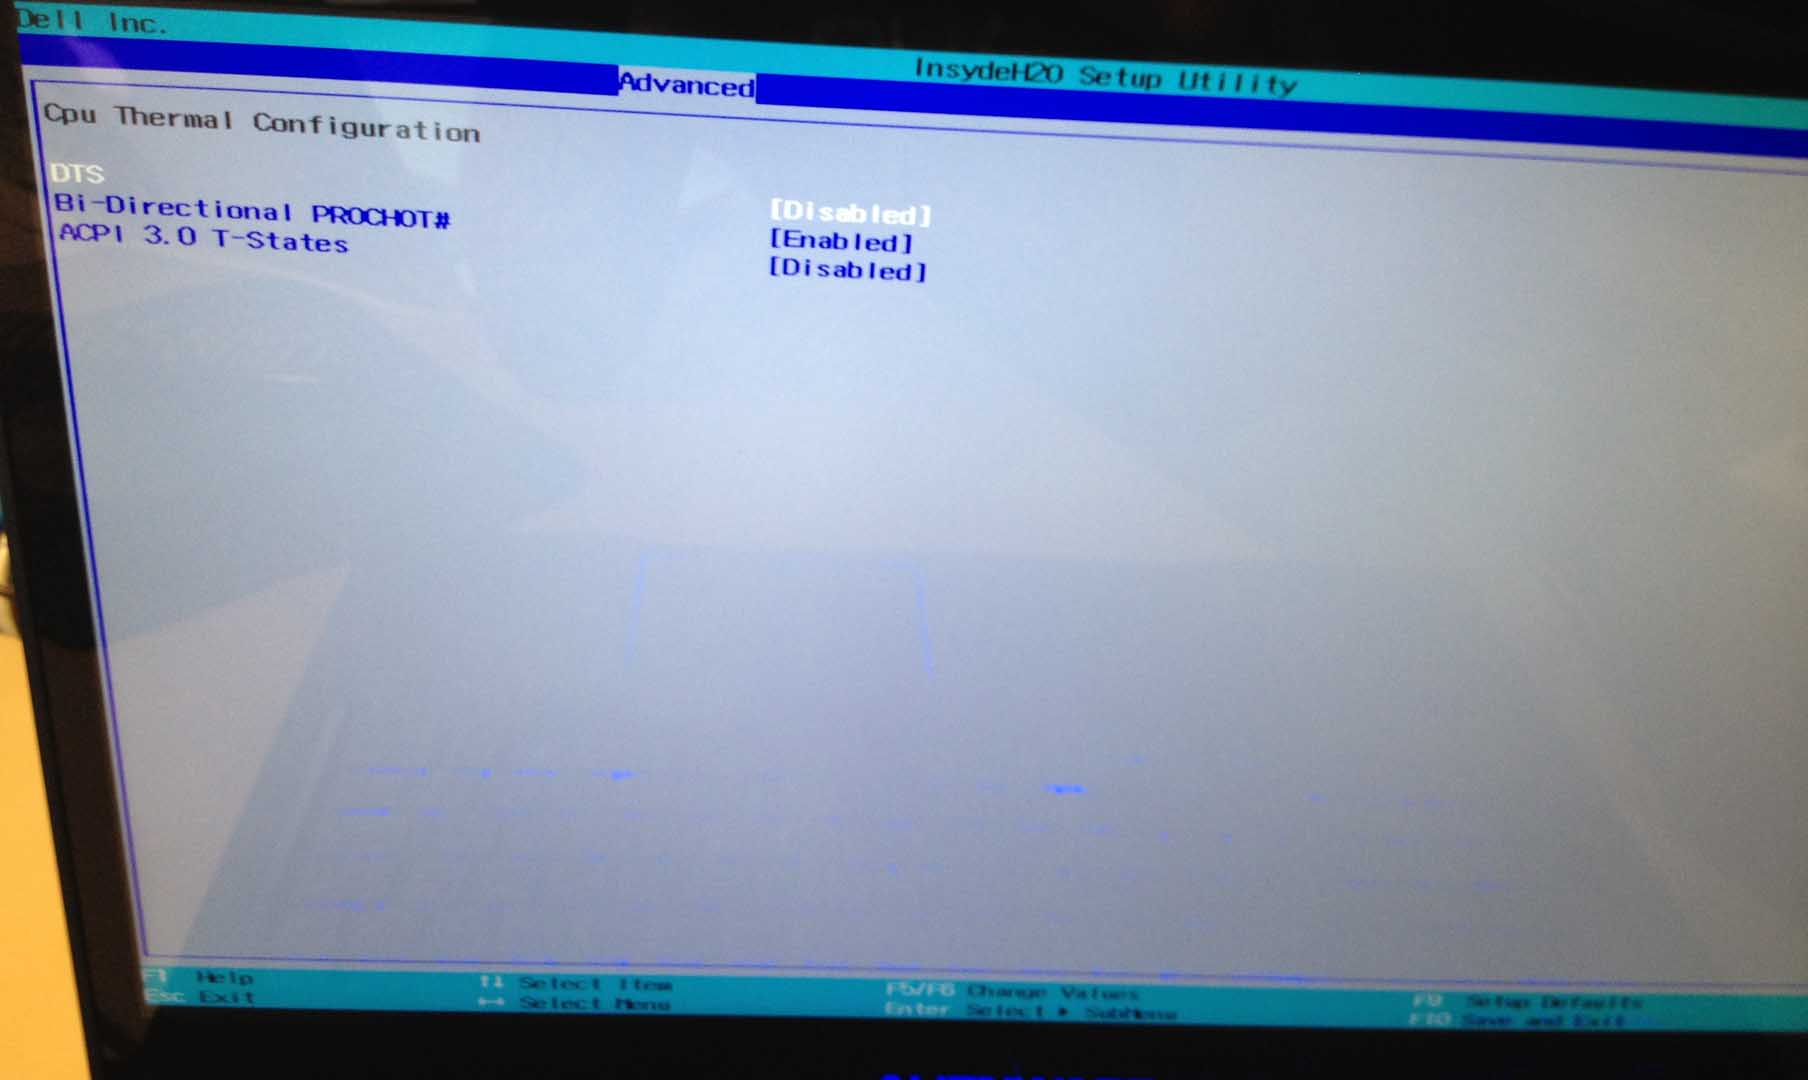
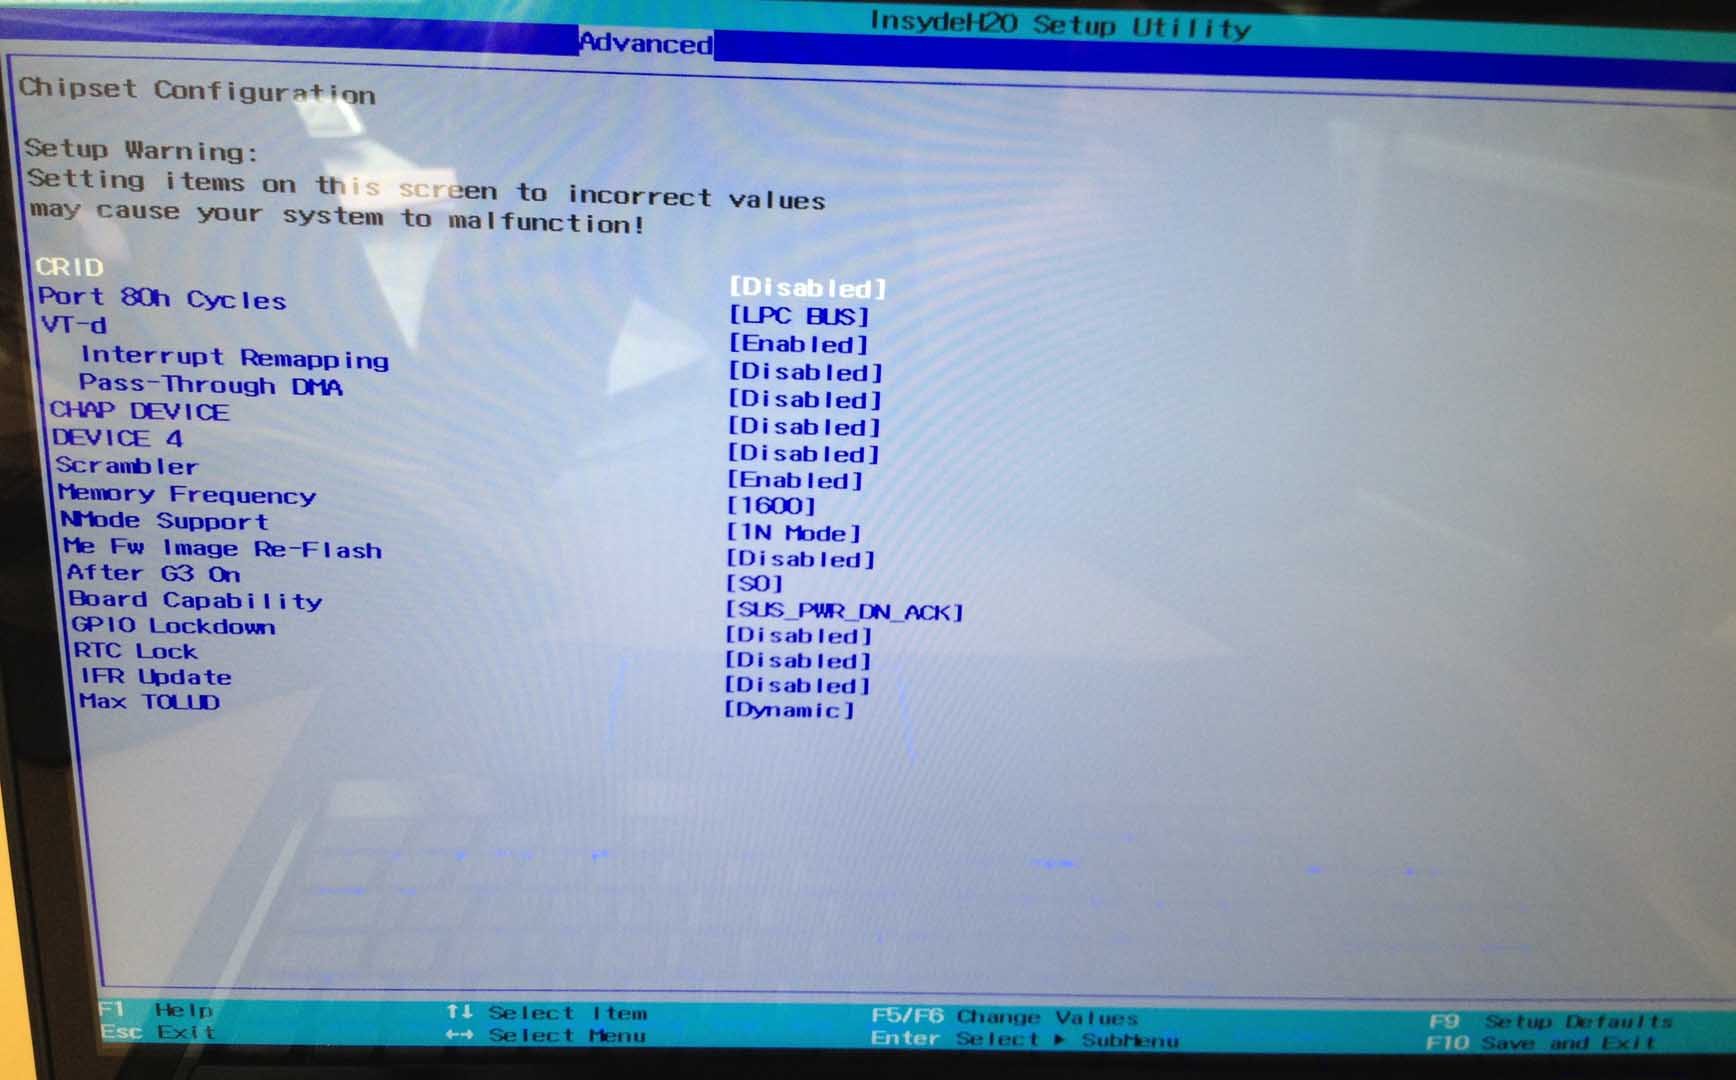
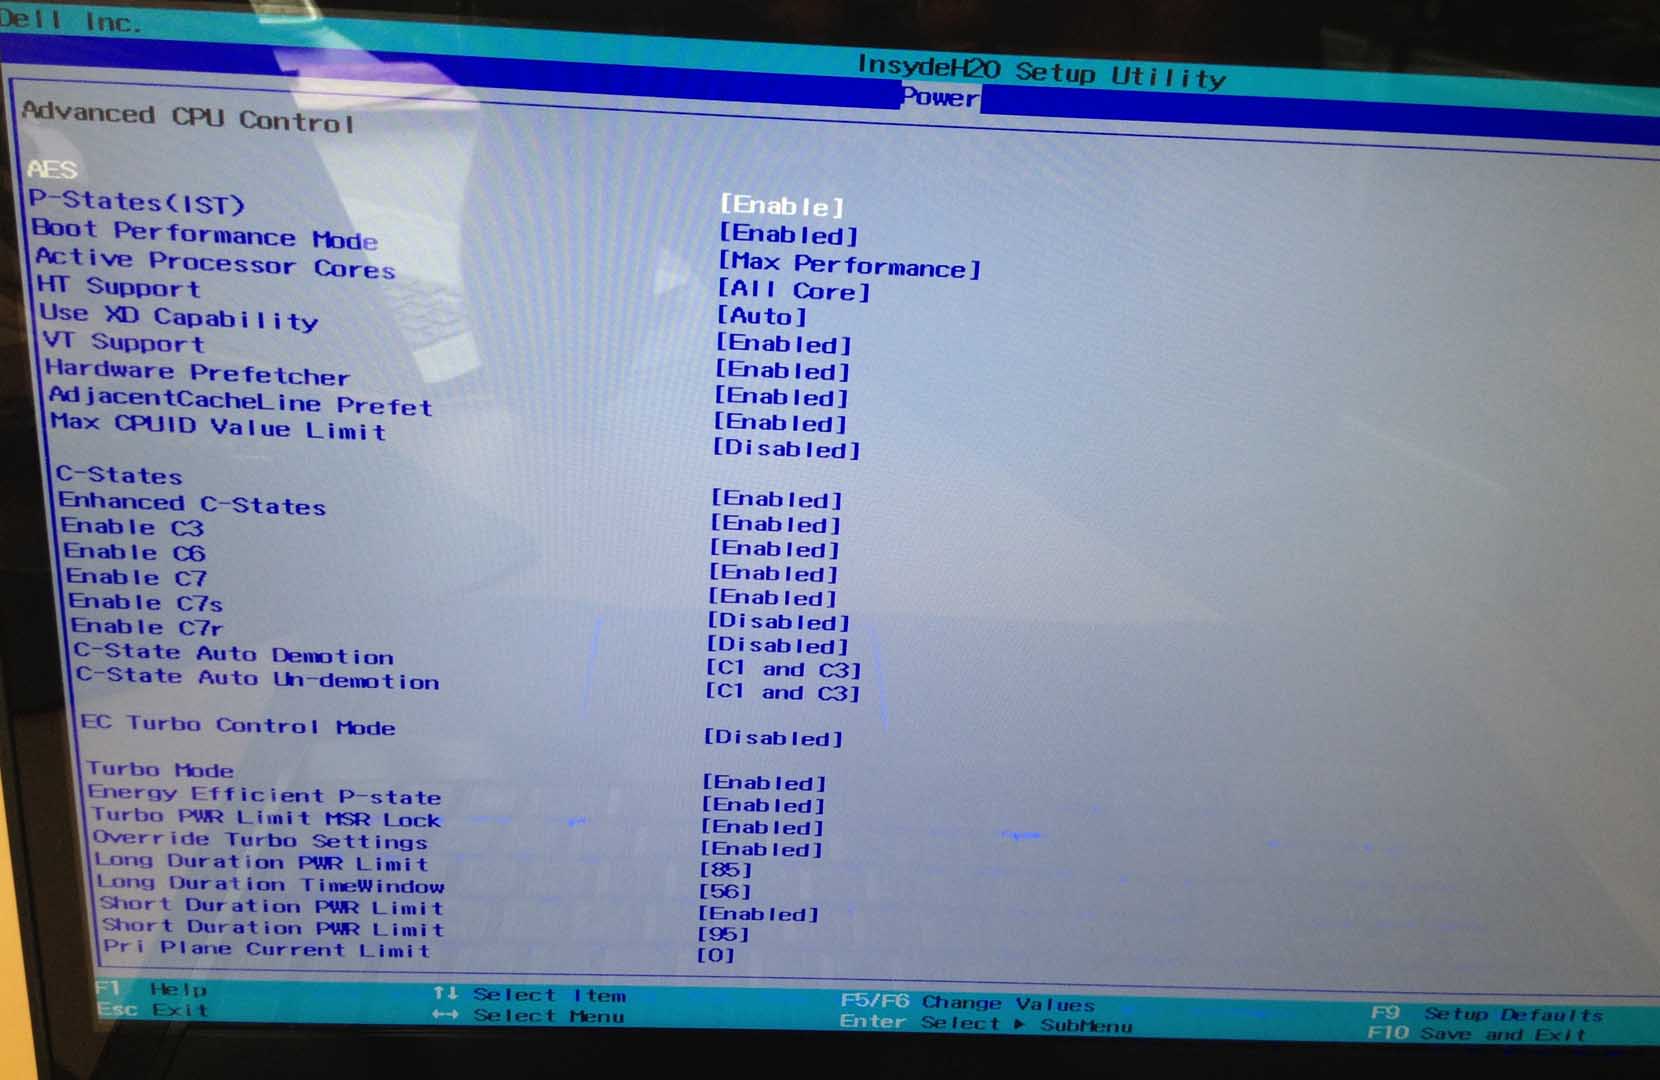
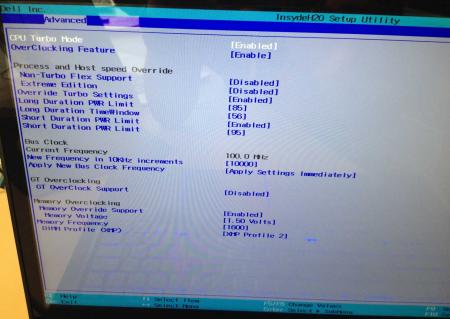
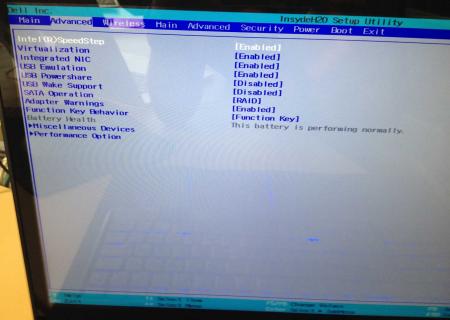
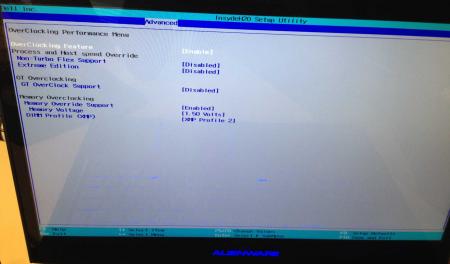
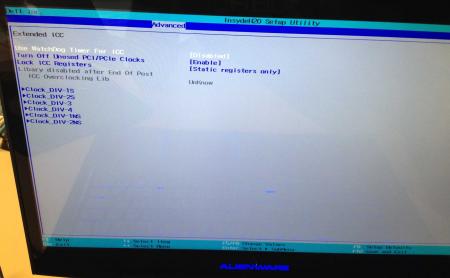
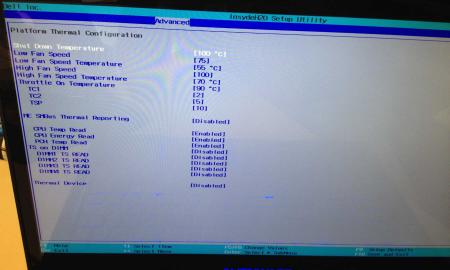
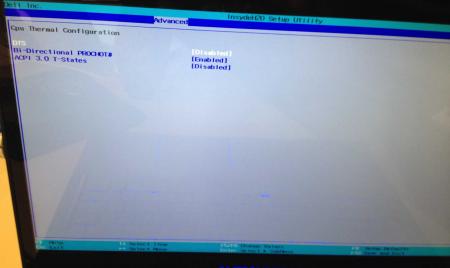
Dell has hidden a lot of options in the BIOS of the Alienware M17x R4, the modified BIOS versions here will show you all the hidden menus and allow you to further tweak your system and optimize its performance. Don't change anything you're not familiar with. There might be functions available which don't work on your system, so use this BIOS with care. It should only be used by advanced users. In case you mess up and your system refuses to boot after applying the changes you make, remove the AC adapter, battery and coin cell battery in order to clear the non-volatile ram of the BIOS. This should fix most issues. *********************** Instructions: If you're on A05 or an earlier version, you can flash the modified bios by simply using the InsydeFlash utility provided with the official bios update on the Dell support site. However, once you're on a version newer than A05, things get a bit more complicated. There are two options then: - Method 1: Revert to stock A05 or earlier by using the Insyde USB bios recovery method, and then flash the modified bios by using the official tools (InsydeFlash). - Method 2 (recommended): Flash the modified Bios from DOS by using the FPT tool: . Grab the DOS version of fpt for flashing, and my 'prr tool' to circumvent write protection.. Download a '[FPT]' labeled version of the unlocked BIOS. Put the DOS version of the flash tool on the root of the prepared USB stick (fpt.exe and fparts.txt), along with the prr.exe and the file you want to flash (plus the included flash.bat). . Restart the system and boot from your USB stick. Run prr.exe, then flash the bios by executing the flash.bat file. Wait until the tool completes the flash. If the verification is okay, reboot, else flash again.. Go to the bios, load the default settings and reboot. Done NOTE: The flashing from DOS as described above will only update the BIOS, not the rest of the firmware. Therefore I strongly advise you to first flash the stock version of the bios you want by using the official update provided by Dell, and once that's done you can go ahead and flash the modified version of your bios by following the instructions above. Download links to the unlocked M17x R4 BIOS versions: M17x R4 - BIOS A05 [unlocked] M17x R4 - BIOS A08 [unlocked] - see attachment M17x R4 - BIOS A09 [unlocked] - see attachment M17x R4 - BIOS A10 [unlocked] - see attachment [FPT] M17x R4 - BIOS A10 [unlocked] - see attachment [FPT] M17x R4 - BIOS A11 [unlocked] - see attachment Donation link, in case you want to buy me a beer Here some pictures of the menus (thanks a lot for the pics @deadbydawn!) I want to thank @widezu69 for testing !! It's hard to find users who are willing to risk their system in order to test a mod, I greatly appreciate this! Thank you!! ********* Flash and use at your own risk. I don't take any responsibility for any possible damages on your system. The software which I provide here ('prr tool') comes with absolutely no warranty to the extent permitted by applicable law. ___ M17x_R4_-_BIOS_A08_[unlocked].zip M17x_R4_-_BIOS_A09_[unlocked].zip M17x_R4_BIOS_A10_-_[unlocked].zip [FPT]-M17x_R4_BIOS_A11_-_[unlocked]V2.zip [FPT] M17x R4 - BIOS A10 [unlocked].zip M17x_R4_-_BIOS_A05_[unlocked].zip


 1 point
 -
Dell recently posted a new BIOS for the M11x R3 on their support site - A05. Grab it here: M11x R3 - BIOS A05 Release notes: Since that's only half the fun I also unlocked the hidden menus, see attachment. As always with modified BIOS - use at your own risk, don't change anything you aren't familiar with. _ M11x-R3_A05_[unlocked].zip1 point
-
Build Info: DriverVer=12/19/2012, 9.012.0.0000 9.012-121219a-151592C-ATI Catalyst: 13.1 CCC: 2012.1219.1521.27485 D3D: 9.14.10.0945 OGL: 6.14.10.12002 OCL: 10.0.1084.4 Sign Date: January 11-16 (Microsoft WHQL) AMD Catalyst 13.1 Release Notes AMD Catalyst 13.1 Win 8 | Win 7 | Vista (64-bit) AMD Catalyst 13.1 Win 8 | Win 7 | Vista (32-bit) AMD Catalyst Mobility 13.1 Win 8 | Win 7 | Vista (64-bit) AMD Catalyst Mobility 13.1 Win 8 | Win 7 | Vista (32-bit) AMD HydraVision 13.1 Win 8 | Win 7 | Vista (32-bit & 64-bit) AMD HydraVision Mobility 13.1 Win 8 | Win 7 | Vista (32-bit & 64-bit) ----- via guru3d & AMD1 point
-
As a follow up post, Wacom have been contacted and they refuse to provide any information or assistance claiming that as they did not supply me with the device, they can not offer me their support. They then went on to tell me that as they did supply Lenovo, I would need to ask Lenoov to talk with them to get the information that I need so that they can relay this back to Lenovo and then Lenovo could pass that back on to me. What a joke... It seems odd that some games can swap how the mouse input is captured going between relative and absolute yet the drivers do not allow for end user control of toggling this feature any more. When I phoned Lenovo back, they said that they would get me the information and call me back the very next day. They are yet to phone me back. So, my options are to hope that someone out there does understand the issue and how it can be fixed or to press on calling Lenovo till they do something about it and I hvae an excessive phone bill. Will keep the progress posted as it rolls in.1 point
-
As long a both cards are flashed correctly, they will scale to the same maximum overclock. I have two Clevo 680M in my Alienware and they scale to max just fine. However, sometimes the secondary card will not clock to max if the game doesn't have a proper SLI profile or it doesn't utilize the cards fully. So test it in a modern title like Battlefield 3 to make sure.1 point
-
I had time to downgrade.. And it's so easy i cant believe that. Im on offical a4 from off. a10. Big thanks for @svl7 and @deadbydawn. Next step is: put back the battery and install svl7 a10 bios Im on svl7s a10 bios. The only error was that my alien wasnt shut down when finished the the installation of a10 but the screen appeared. I wait about 10 min. but nothing happen. I turned off with the alien key. It seems everything working well1 point
-
Won't work. Refer to this thread: http://forum.techinferno.com/asus-gaming-notebook-forum/2696-g75vww-660m-replace-graphic-card.html1 point
-
The CPU has two cores, but with hyperthreading enabled appears as 4 cores in Device Manager. Per the TM2T-2100 Maintenance and Service Guide both the HD5450 and CPU are soldered onto the systemboard. There are RAM slots so 2x8GB could fit. You'd need to ask HP if the bios can make use of it, or ask a computer shop if you can test it. Only way of getting faster GPU performance is as a DIY eGPU (mPCIe), swapping out the wifi card. It's accessible via the underside memory cover as shown below: The system is only pci-e 1.x capable HM55 (Series-5) chipset and the lack of an iGPU means no Optimus/Virtu is possible. The best performing eGPU for this system would be a HD7xxx series attached to an external LCD.1 point
-
yes, the battery needs to be removed. yeah that's the way to go! i just noticed that the modded a03 gives an 404 when trying to download, is this wanted? thread: http://forum.techinferno.com/alienware-m14x/1841-%5Bm14x-r2%5D-vbios-mods-unlocked-overclocking-limits-voltage-tweaks-modified-clocks.html @Toltan Kassay As soon as you downgraded, you can unzip the downloaded folder containing SVL7's modded bios and just run the InsydeFlash.exe, this should do it. as allways, anyone, please correct me if wrong.1 point
-
Thanks guys, I'll make sure he gets all that info! Although I am quite sure he will ignore all this and end up with the apple...1 point
-
Yeah, you would need to go back to unmodified A05 or earlier by using the USB recovery method and then flashing the modified bios the regular way. Just make sure to really follow the recovering procedure properly, quite a few people ended up with a brick when doing this with a M14x R2, I can't tell for sure whether it's due to user error or just random errors during the recovery - all I know is that this method works very well on the M18x R2 (if done properly).1 point
-
Thanks for ur reply, i hope slv7 will help me, if he has enough time1 point
-
This makes me really want to have a system with a current XM CPU in order to try and compete with you guys1 point
-
The safe vbios in a P150HM are the Clevo 80.04.29.00.01 and MSI 80.04.33.00.24 ov 1.000v. The clevo vbios has a 3d voltage of 0.962v (stock voltage with this vbios) it allow an OC at max 954 core 2400 memory (may vary in function of the quality of your card) and give you a 3dmark score of 7600-7850 (in function of your cpu), this is the more safe vbios for your 180W PSU. Msi 80.04.33.00.24 ov 1.000v has a 3d voltage of 1.0v it allow an OC of 1006 core 2400 memory (may vary in function of the quality of your card) and give you a 3dmark score of 8000-8130 (in function of your cpu), at those frequencies and voltage, some games could overload your PSU (Far cry 3 in the LOST EXPEDITION level ...) you need to buy a wattmeter to measure if you could run a game safely with those frequencies and voltage. If you want to reach those frequencies safely, You Must also cool your laptop with a notebookcooler and do some mod on your backplate in order to give more fresh air to the gpu. At that moment the MSI 80.04.33.00.24 OC edition vbios (without OV) seem to have bug and give a voltage of 1.012v, so i can't advise this one on a P150HM. And yes ! Svl7 is a great man ... All others vbios will make your GTX680M unusable on your P150HM (the card will not be bricked but it will block the boot process, and you will be unable to restore a backup vbios unless you put your card in a P1XXEM laptop series) PS: make a backup of your vbios before flashing your card (nvflash -b backup.rom) PS2: Be sure to be in the latest BIOS for your P150HM, because i haven't tested these vbios in other environnement than EC/KBC V 1.00.13 & BIOS V 1.01.14 November 2011, Always update EC/KBC first. http://forum.notebookreview.com/sager-clevo/556299-clevo-bios-older-models.html PS3: If you got a Sager don't flash with a clevo bios and if you got a clevo don't flash with a sager bios (sager bios has custom EC/KBC that wasn't compatible with standard clevo bios, there is a risk of bricking your laptop).1 point
-
Hi all, My name is Jonathan and I'm a tech enthusiast. When I say tech, I mean almost anything techy . I'm currently running on a Alienware M14x, and previously ran a ASUS UL50VT. Recent desktop included an Alienware Aurora R3 along with many custom computers I have personally built in the past. Anyway, my Alienware M14x is an R1 Sandy Bridge running an Intel Core i7-2670 2.2GHz Quad Core, NVIDIA GT555M 1.5GB with Optimus (Intel HD 3000), 8GB Memory, and Samsung 830 128GB SATA III SSD. I usually just watch movies or play a few games on here. I usually play League of Legends, and you can find me by adding my IGN at theJonathanLam. Hope I can get to know you all, contribute to these forums, and learn a few things along the lines.1 point