Leaderboard


Popular Content
Showing content with the highest reputation on 08/02/12 in all areas
-
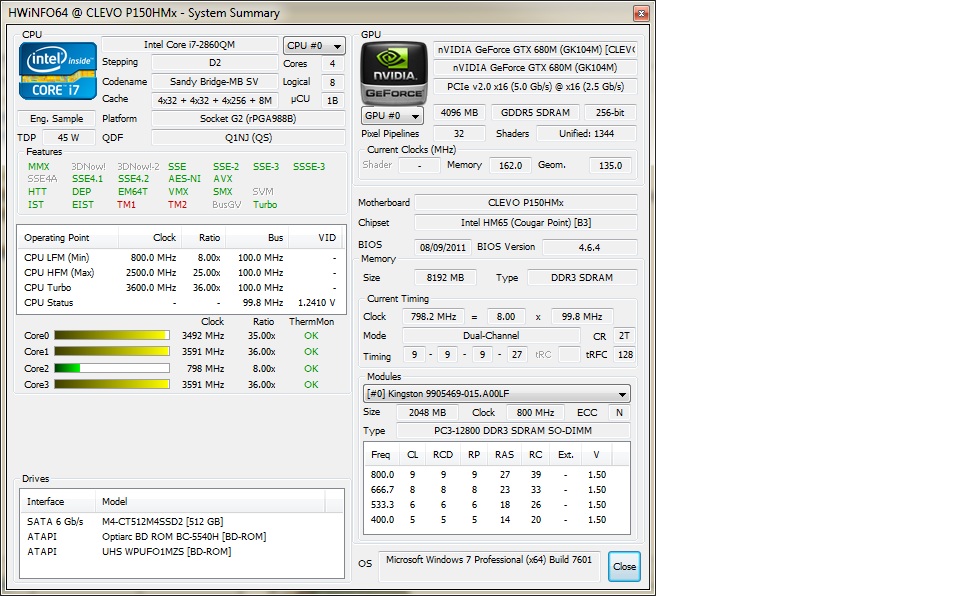
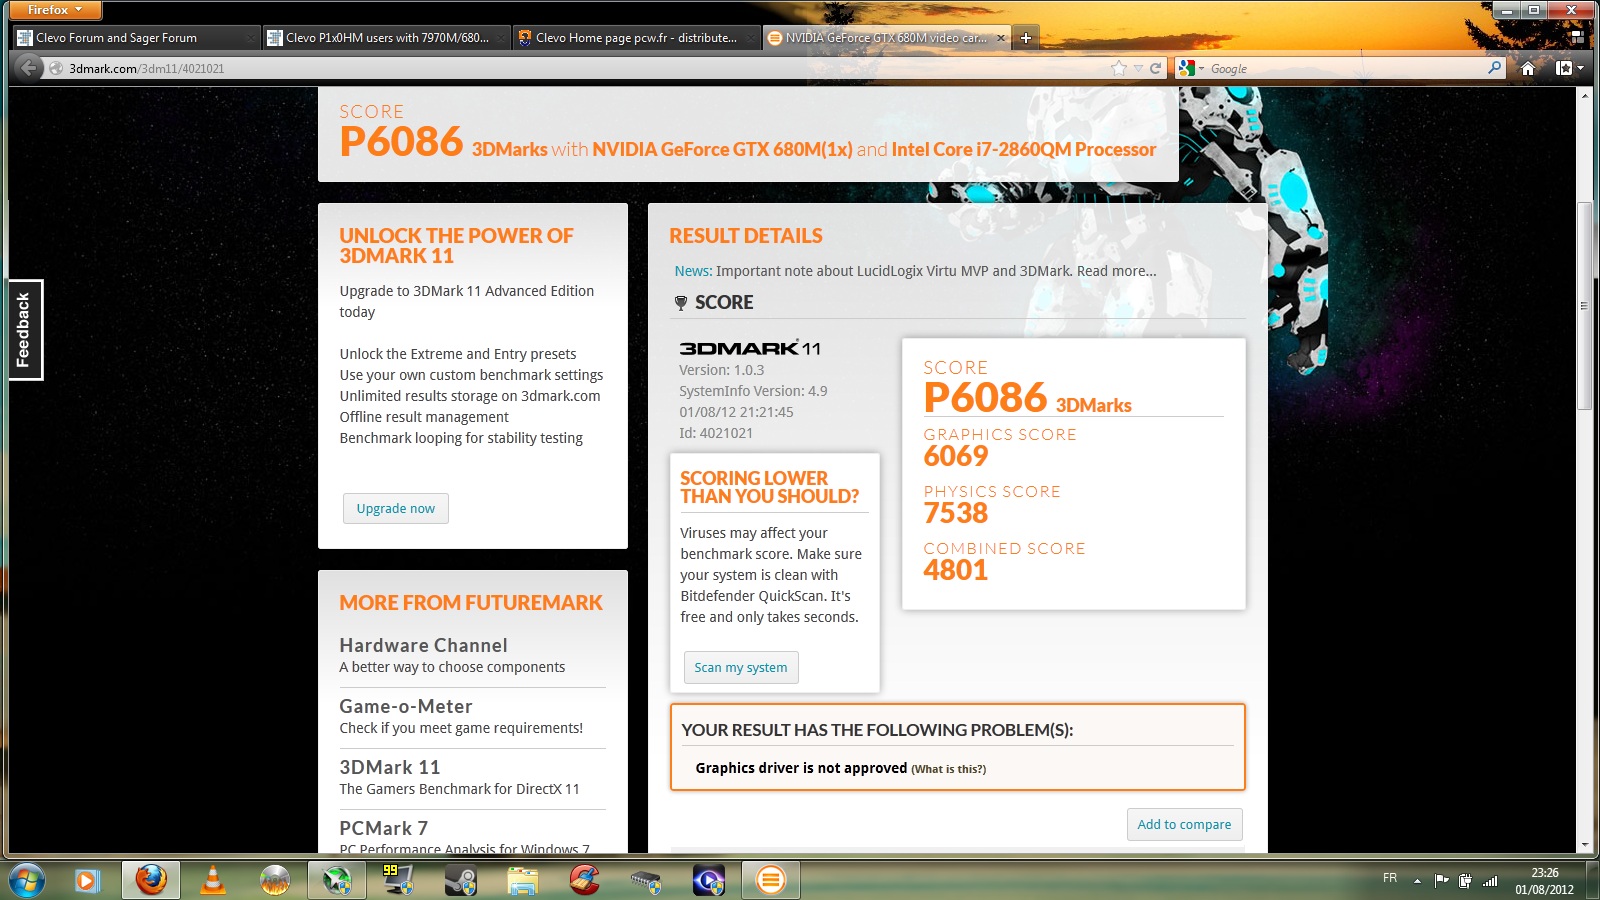
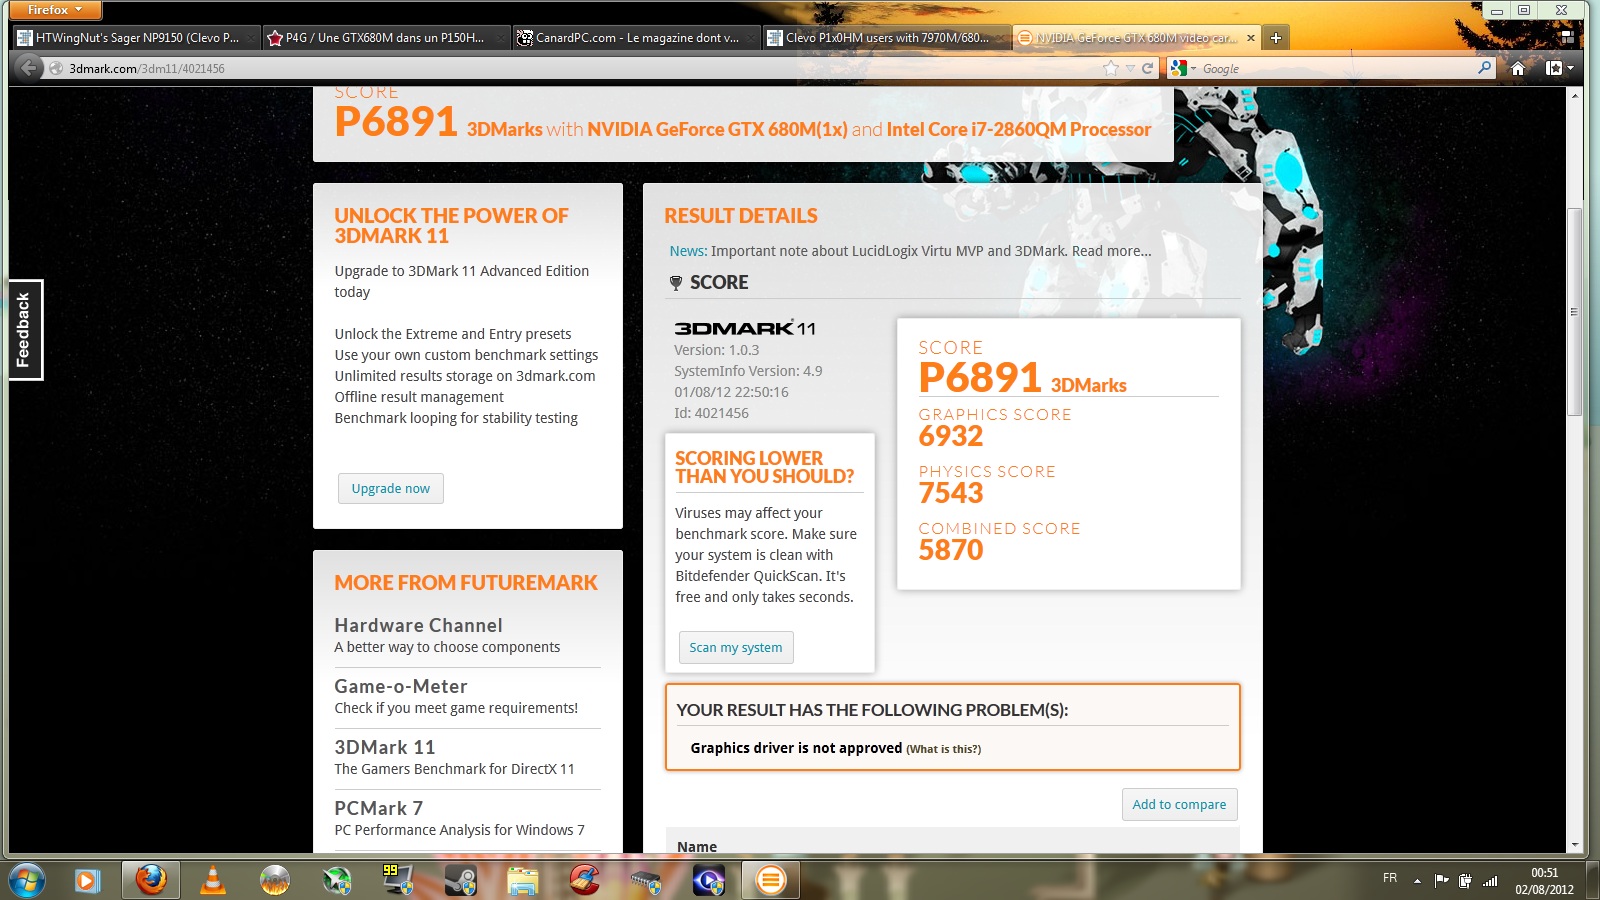
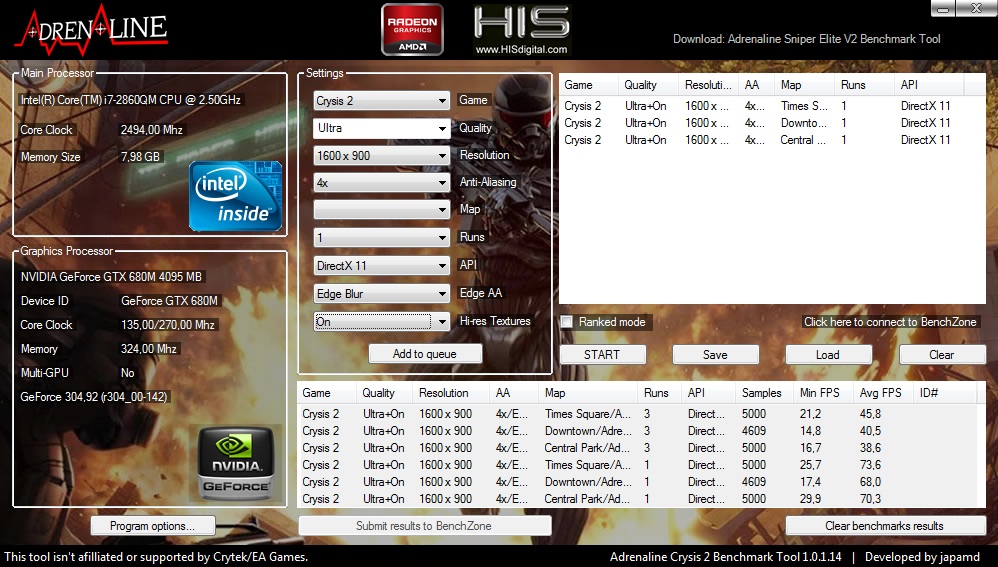
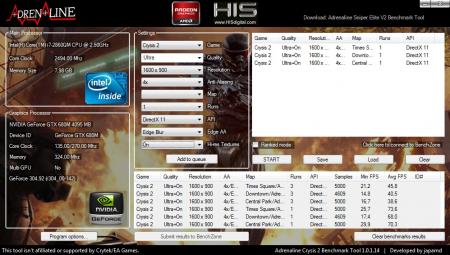
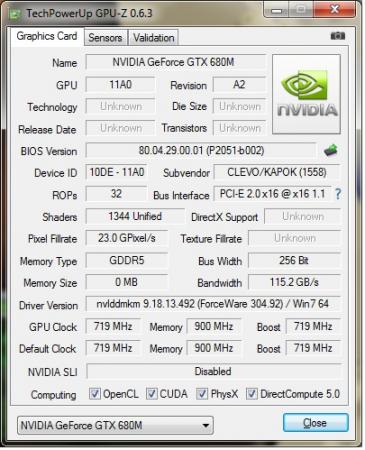
Gtx680M in P150hm 3DM2011 Stock 3DM2011 OC 853/2400 Crysis 2: GTX580M OC (721 core /1700 ram) VS GTX680M OC (853 core /2400 ram) Found this video tutorial to change components on your P1X0HM/EM (Gpu is at 6:16) On a P150HM, only MSI 80.04.33.00.24 and Clevo 80.04.29.00.01 vbios are compatible. Some Benchmarks @1005/2400 http://forum.techinferno.com/clevo-sager/1924-p150hm-gtx680m-yes-we-can-3.html#post27637 Just for fun: 4Years old tri-crossfire Desktop Vs P150HM/GTX680M http://forum.techinferno.com/clevo-sager/1924-p150hm-gtx680m-yes-we-can-3.html#post28594 Backplate Mod http://forum.techinferno.com/clevo-sager/1924-p150hm-gtx680m-yes-we-can-4.html#post31577 http://forum.techinferno.com/clevo-sager/1924-p150hm-gtx680m-yes-we-can-4.html#post31527 Crysis 2 Video 1600x900 DX11 ultra + Texture HD @1006/2400 http://forum.techinferno.com/clevo-sager/1924-p150hm-gtx680m-yes-we-can-4.html#post31552 Crysis 3 Video 1600x900 DX11 ultra AA2x @1032/2400 http://forum.techinferno.com/clevo-sager/1924-p150hm-gtx680m-yes-we-can-9.html#post42374 FarCry 3 Video 1600x900 DX11 ultra AA2x @1019/2400 http://forum.techinferno.com/clevo-sager/1924-p150hm-gtx680m-yes-we-can-10.html#post43122 Crysis 3 performance comparison (1600x900 vs 1920x1080) http://forum.techinferno.com/clevo-sager/1924-p150hm-gtx680m-yes-we-can-10.html#post43328 3dmark2011 and 3dmark2013 score with 326.80 Beta driver http://forum.techinferno.com/clevo-sager/1924-p150hm-gtx680m-yes-we-can-11.html#post65456 2860QM QS - 2960XM OEM performance comparison http://forum.techinferno.com/clevo-sager/1924-p150hm-gtx680m-yes-we-can-11.html#post70475


 3 points
 -
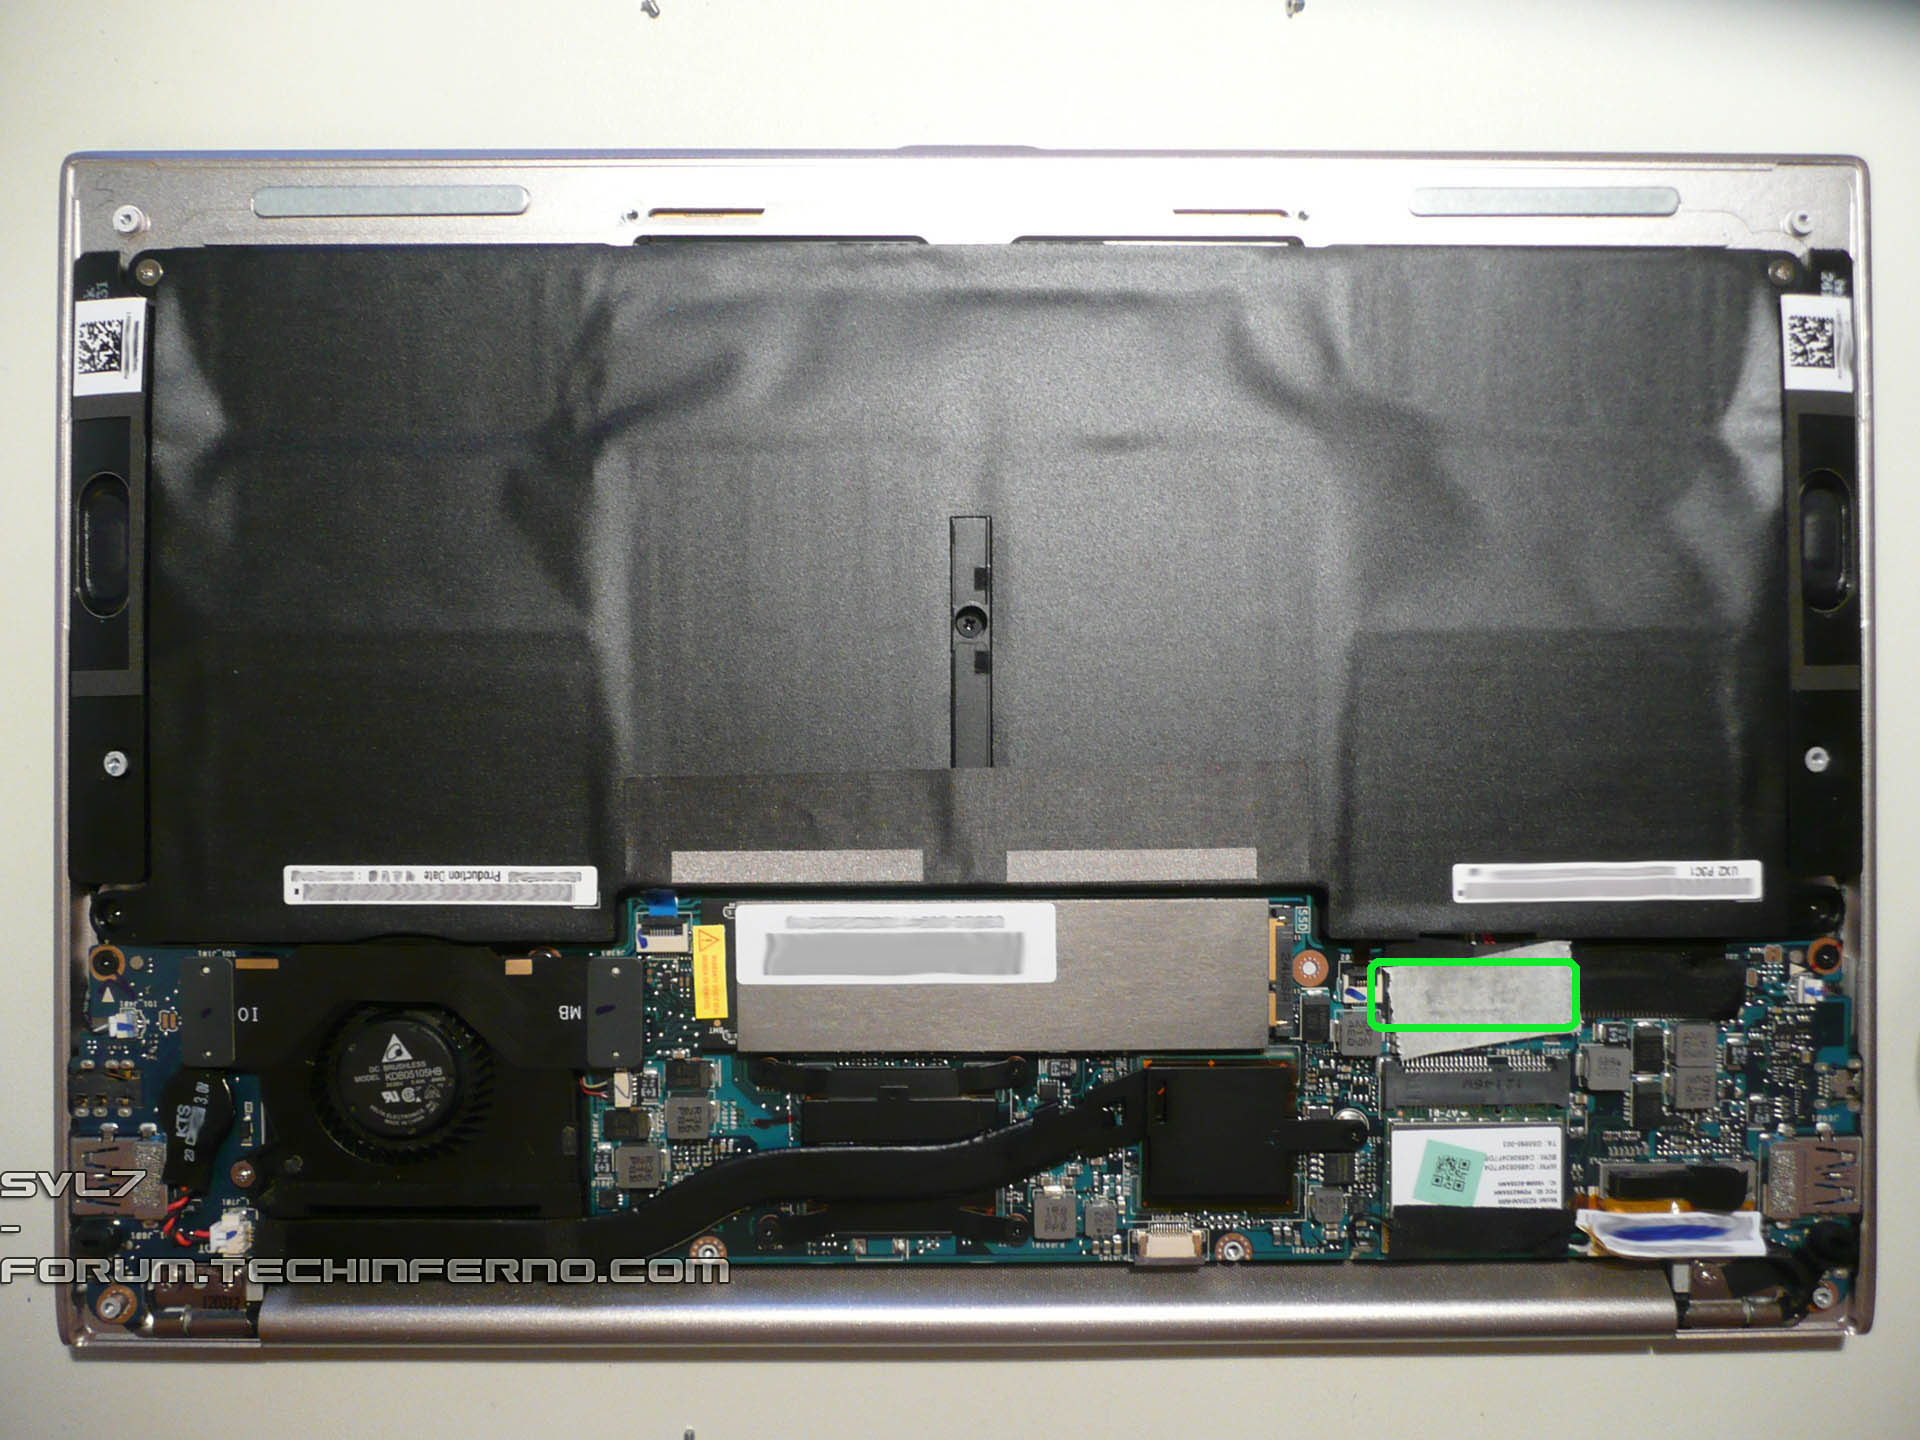
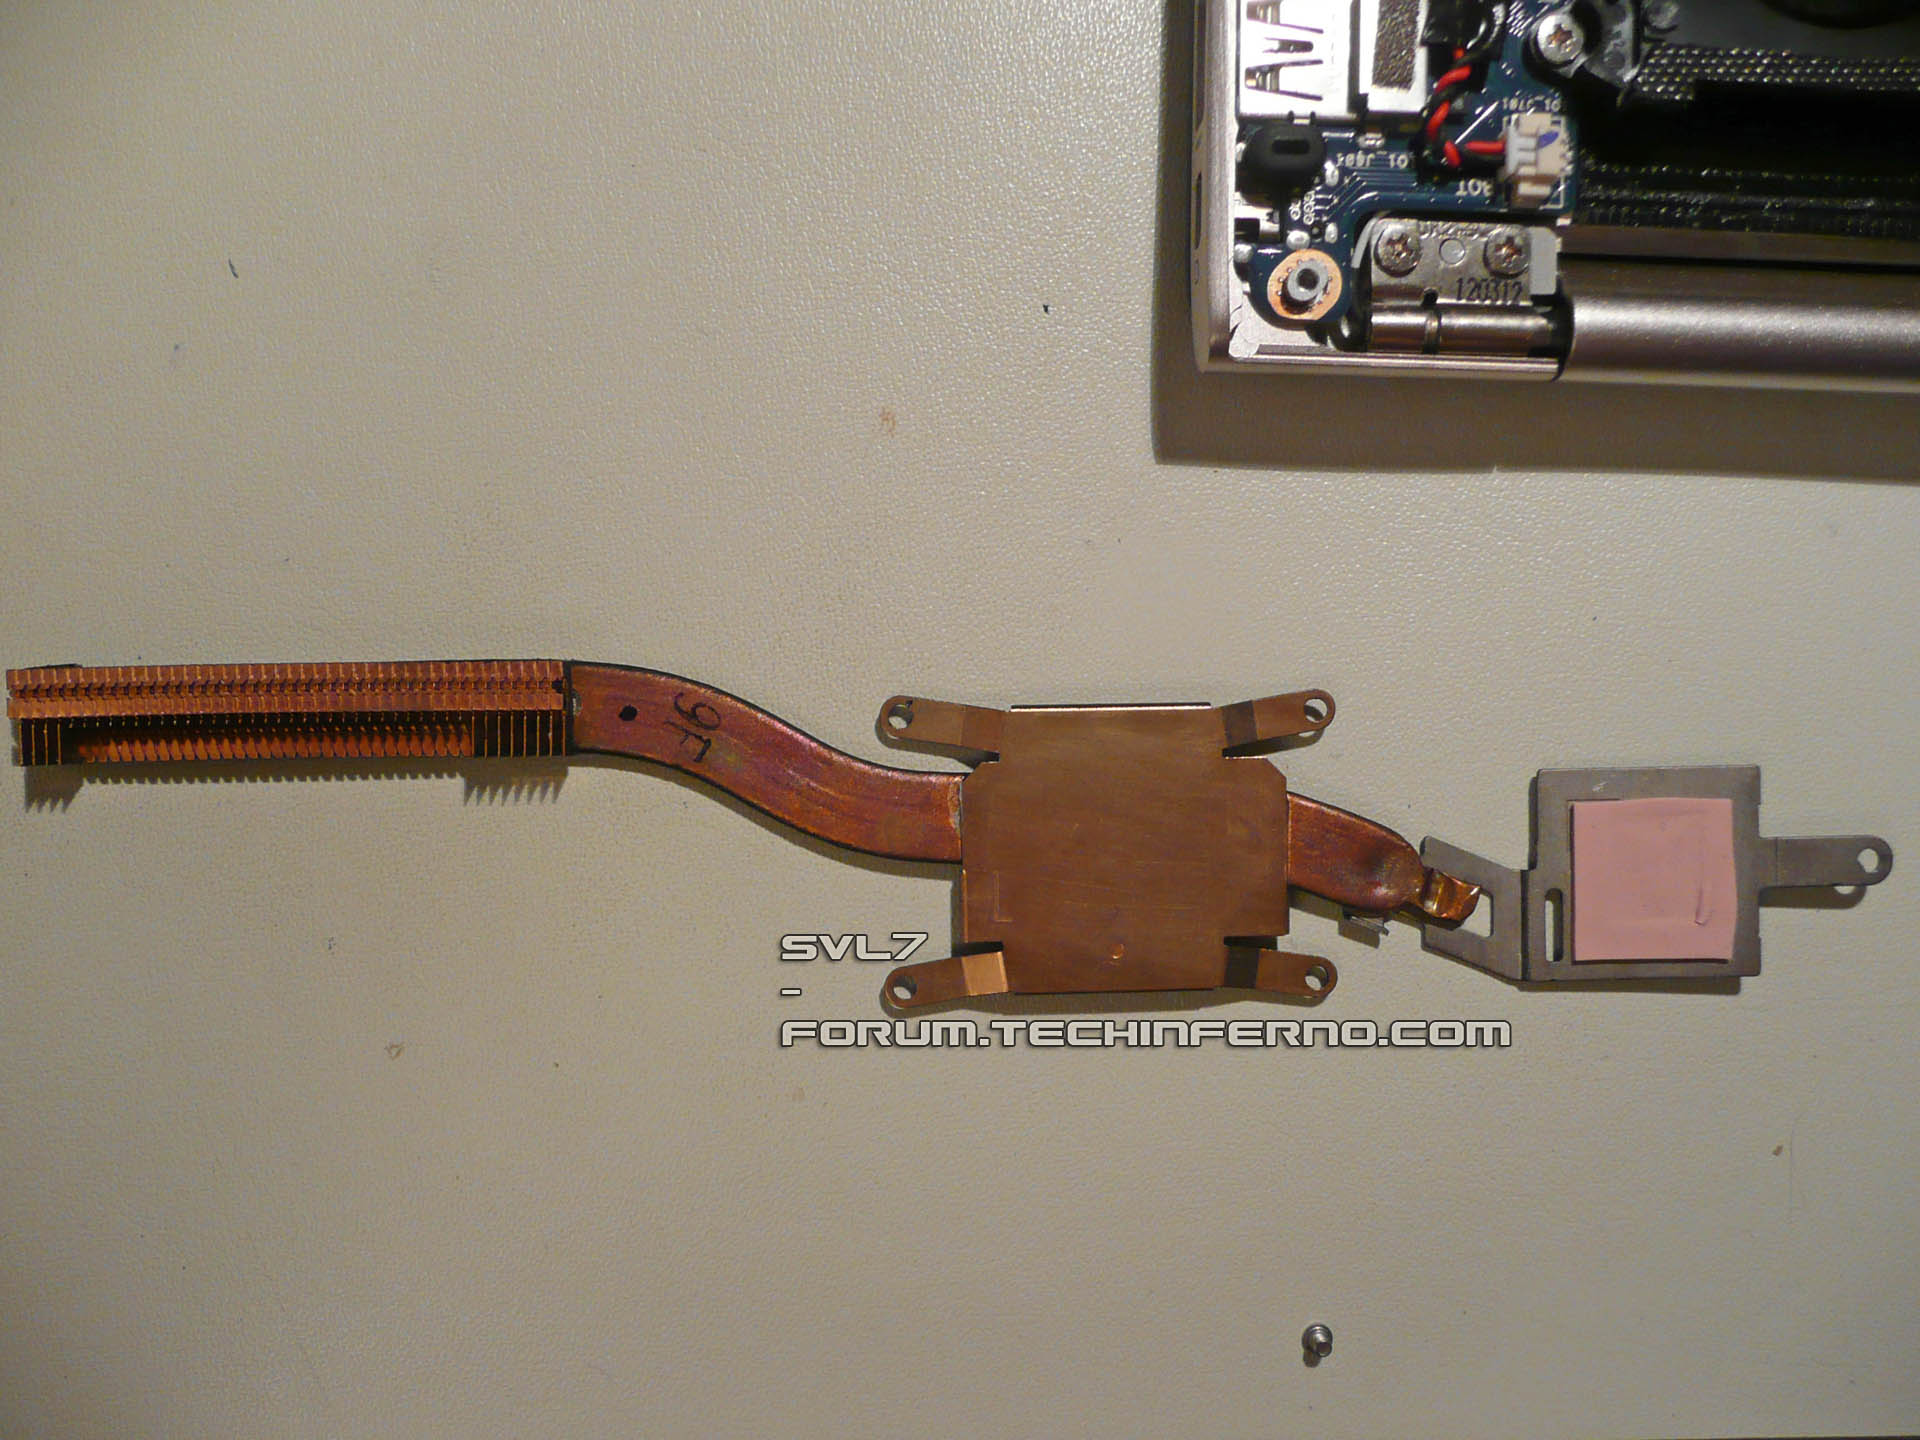
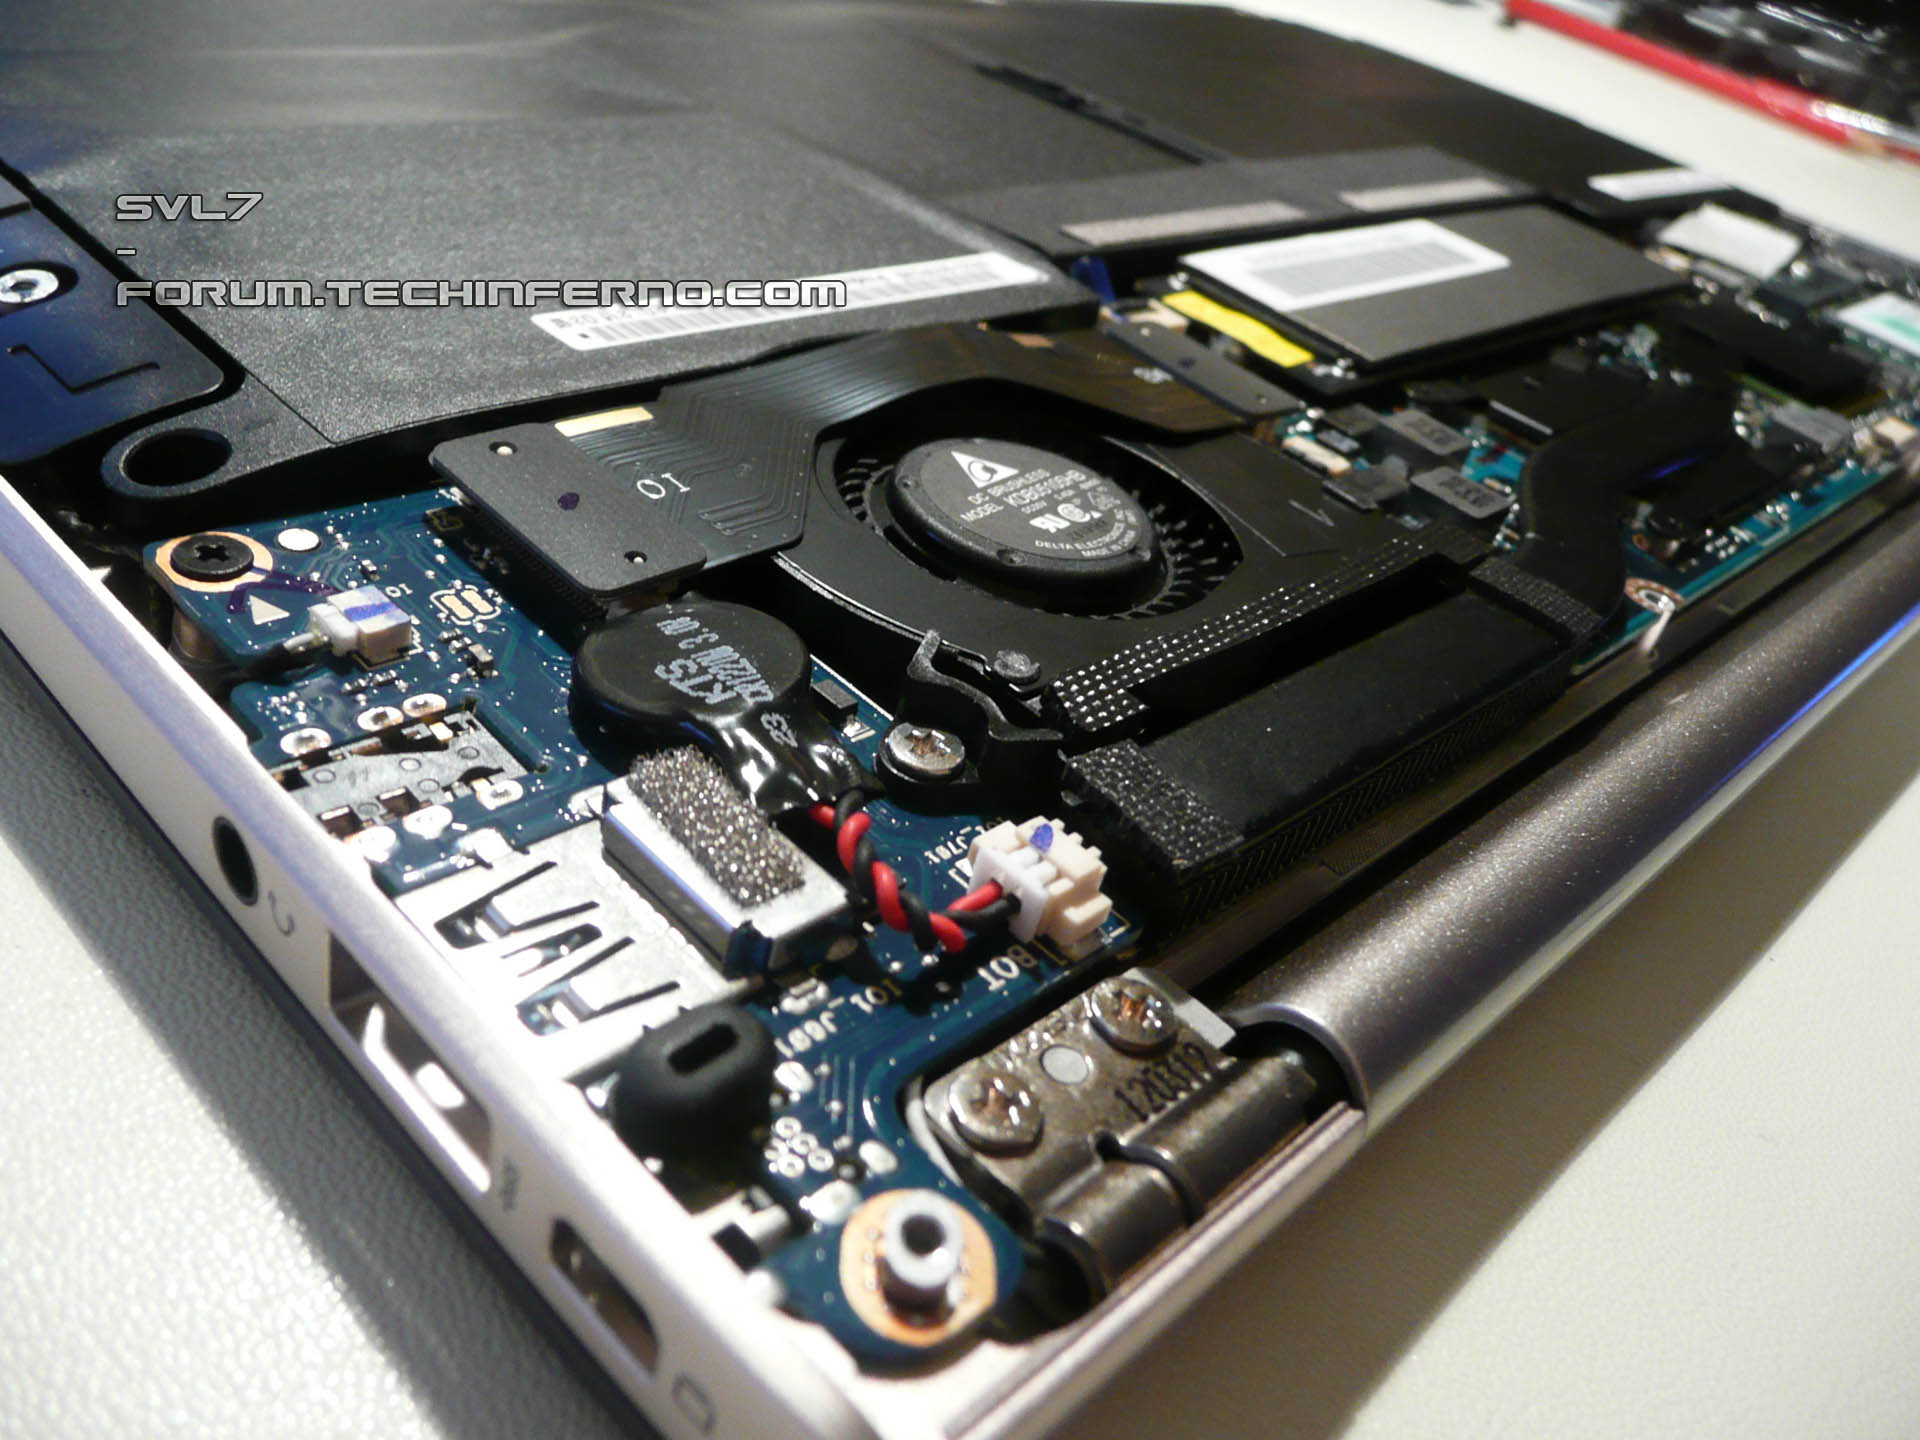
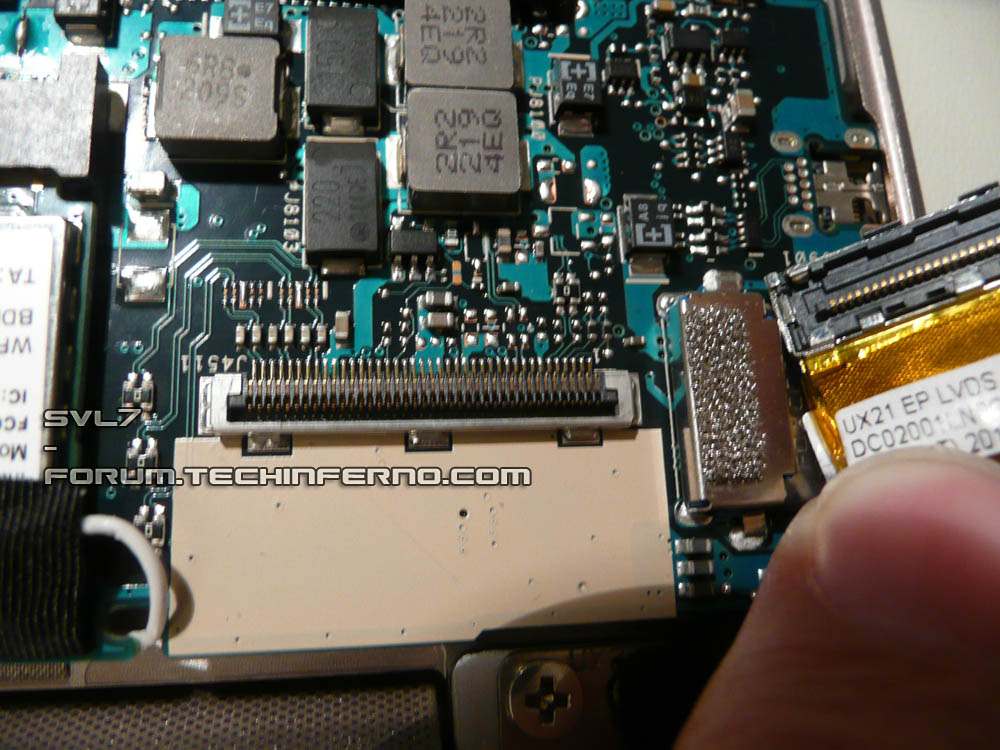
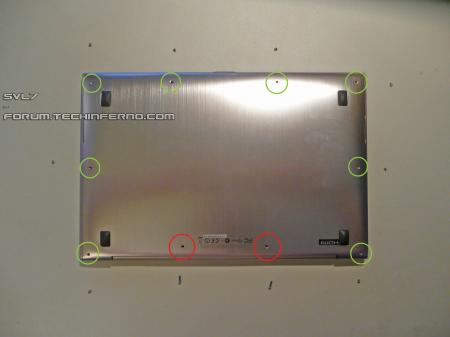
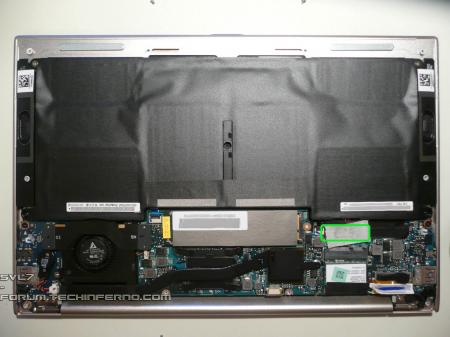
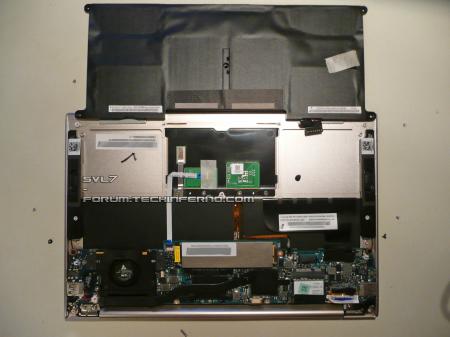
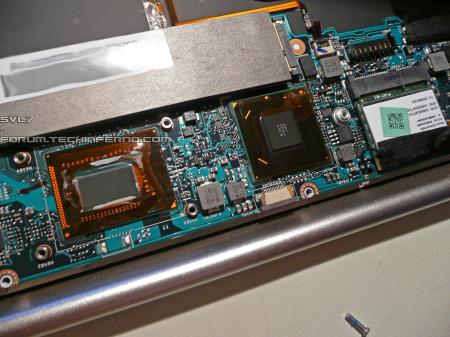
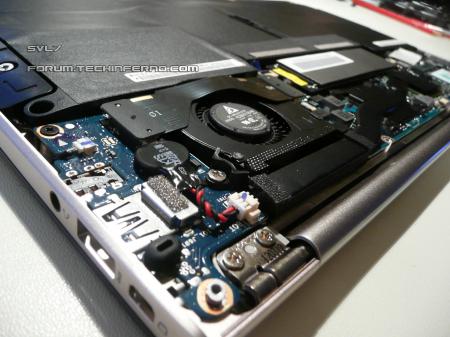
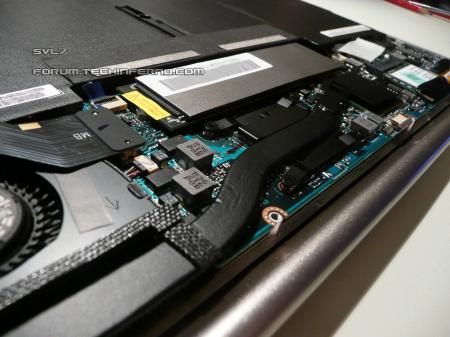
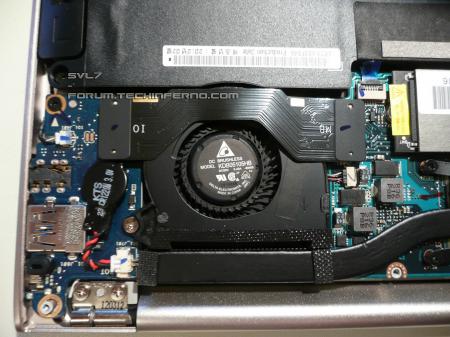
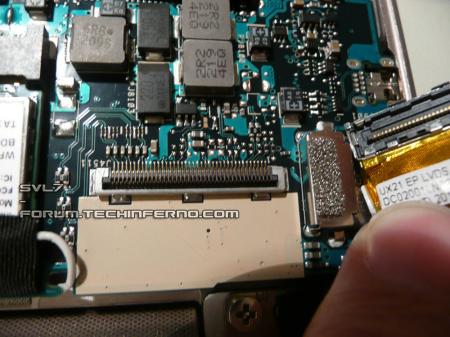
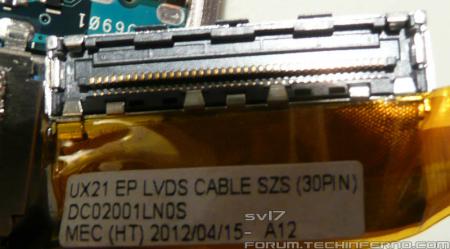
Finally got the proper tools to take a closer look at the insides of the Asus UX21a ultrabook (or "Zenbook"). The disassembly is fairly easy, at least if your careful and not a total amateur when it comes to a task like this. The tools you need are: A Torx screwdriver, size T5 and a common crosstip screwdriver which fits the other screws. I also highly recommend using an ESD mat and wristband whenever you do something like this. That's it - at least if you only want to take a quick look at the interior of the system. In case you plan to reapply the thermal paste then also grab some of your favorite TIM and some rubbing alcohol or similar. Disassembly procedure: It's relatively easy and completely self-explanatory. First of all you need your T5 torx and remove the 10 screws which are fixing the back cover. There are two sizes, 8 small screws (green circles) and to longer screws (red circles). This is what you see once the back is removed, most of the space inside is used by the battery. Usually the first thing you do when disassembling an electronic device is to remove the battery and perform a power drain. That's obviously not possible in this case. Therefore be careful what to touch. Once the back cover is removed I highly recommend disconnecting the battery. The connector is hidden below the white piece of tape (encircled with green), remove it, grab the black lash and pull it up in order to disconnect the battery from the board. Here's a pic with the battery removed. It is mounted by five screws. Remove them and you can easily lift the whole battery pack. No need to brake a seal or similar, so it should be possible to replace the battery fairly easy without killing the warranty. Next pic shows the CPU and PCH with the heatsink removed. Repasting is easy, if you need additional advice check one of the many guides in this forum. Remember to use only a tiny amount of paste. Here some more pics of the board and the cooling assembly. As you can see, the heatpipe only covers the CPU, not the PCH. By using a copper shim between back cover and PCH heatsink it would be possible to easily improve the heat dissipation of this chip, but I don't really think it's necessary. A 30 pin LVDS jack connects the display with the motherboard. Seems eDP is still fairly uncommon these days. When disassembling the system be careful not to damage the screws, only use tools which really fit and aren't low quality. The screws of the back cover are screwed on tightly, the Torx is tiny, it's crucial to have a quality screwdriver in order to beware the screws from any damage. Visible scratches on them might kill your warranty. The only "warranty void if seal broken" can be found on the SSD, so you definitely can't remove it without running into issues. There's no reason to remove it anyway, it's a proprietary connector and it's highly unlikely that there will ever be a third-party model available for this specific design. As already mentioned, take care if you disassemble your system, it's not meant to be disassembled and if you damage anything, possibly even the screws, your warranty might be void.

 1 point
 -
It's a 30 pin LVDS connector, check the attached pic:
 1 point
 -
Not connected it goes up half way into the cable tube and ..... nothing I've removed both from my rotors... LOL1 point
-
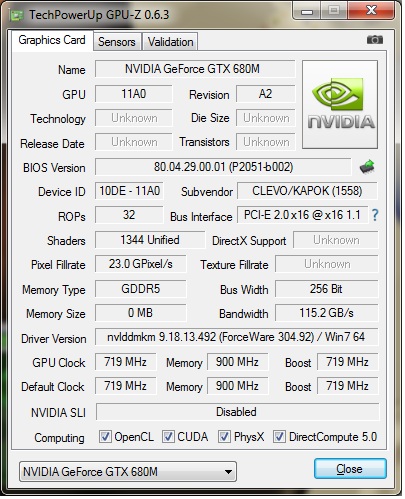
Yes this is clevo card Join gpu-z screenshot You can find here a quickly guide for installing GTX680M on P150HM http://forum.notebookreview.com/sager-clevo/674335-clevo-p1x0hm-users-7970m-680m-ordered-installed-oced-lets-have-34.html Enjoy
 1 point
 -
username changed1 point
-
Hi all, My name is Jonathan and I'm a tech enthusiast. When I say tech, I mean almost anything techy . I'm currently running on a Alienware M14x, and previously ran a ASUS UL50VT. Recent desktop included an Alienware Aurora R3 along with many custom computers I have personally built in the past. Anyway, my Alienware M14x is an R1 Sandy Bridge running an Intel Core i7-2670 2.2GHz Quad Core, NVIDIA GT555M 1.5GB with Optimus (Intel HD 3000), 8GB Memory, and Samsung 830 128GB SATA III SSD. I usually just watch movies or play a few games on here. I usually play League of Legends, and you can find me by adding my IGN at theJonathanLam. Hope I can get to know you all, contribute to these forums, and learn a few things along the lines.1 point
-
Final update on my incident! So last Wednesday I expected to get a call from the rep to arrange an appointment with a tech but he never called. I tried to get another rep on the phone and this guy said my depot work was set up by someone else and he would not be comfortable changing that. So to save myself hassle and time since I will have to contact the original guy by email who set up the box delivery for me, I just packed my laptop up and let Fed Ex came and picked it up. Needless to say ever since I checked my repair status on the depot site feverishly. Although the tracking shows that mine system got sent to the depot on Friday there wasn't any update on the site. I was worried and then later today I came home and bam! here it is my precious! I open it up in hope nothing is messed up. Turn out either I am extremely lucky or it's just the internet being vocal again (or a mixture of both). My laptop came back in perfect condition with everything as it should be. There were no defect, no missing screw or broken hinge whatsoever. Since I formatted my stock hard drive back when I first purchased it, they couldn't get to windows with my stock drive. They thought there was a problem with it and said in the included letter that they dispatched a replacement hard drive to me in 3 days time. So not only my laptop arrived in pristine condition, they also give me a free extra hard drive? And on the invoice, they checked the motherboard box indicating it was the part that got replaced. No question asked and I didn't have to spend a cent. I then proceeded to put back my self-purchased parts. Windows didn't come up at first and I was scared a little. But then I thought maybe the integrated graphics setting got fumbled up with the motherboard replacement so I press the power button once to set it to sleep mode. I pushed the alien head once more to wake it up and the screen gloriously lighten up. I Fn+F7'd and then updated drivers and stuff. Everything is working perfectly again. Also they did already update my BIOS to A05 so I won't have to worry about that anymore. All in all I gotta say their warranty service is terrific even though I did have to jump through a few hoops. And their timing is amazing. Not counting the weekend, it only took 3 days for my laptop to get back to me. I am seriously considering getting extra warranty years now.1 point
-
By the time you finish paying the mortgage you took to fund the first card ill already have dual 7990s :-) Sent from my new Asylum cell1 point
-
svl7 - thanks for the vBIOS mods. I've been pulling the hairs out of my bald head though trying to figure out random crashes. Turns out it was the 304.79 beta drivers the whole time.1 point
-
Yeah well, if that particular hooker turns out to have a dick I'd rather just talk to her! Sent from my ParanoidAndroid powered GNote1 point