Search the Community
Showing results for tags 'acer'.
-
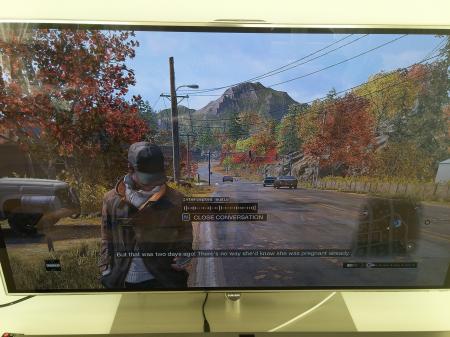
(Watchdogs runs very smoothly if you wanted to know) I finally got my eGPU working on my Acer Aspire V3 - 517G. All credits goes to @Tech Inferno Fan for providing the DIY setup and helping me out with some problems. System configuration Acer Aspire V3 - 517G Intel core i7 - 3632QM @ 2.2GHz (with Turboboost up to 3.2GHz) 8GB RAM (I added 4 GB) iGPU : Intel HD 4000 dGPU : Nvidia Geforce 710m (2GB dedicated VRAM) Windows 8.1 / 64 bit eGPU AMD R7 260X ASUS Directcu II OC (1GB) 500w PSU (has a 115W TDP any ATX PSU can drive it) PE4L 2.1b DIY eGPU Setup 1.3 software Setup If you own the exact laptop then you don't have to worry about the TOLUD value (it is 2.5 GB = no "error 12"). But there is a poblem (I had the problem) when you want to install the Setup 1.3 Software (you need it to deactivate the dGPU). Your Hard Drive must be in MBR NOT in UEFI/GPT. You will face the problem right after you installed Setup 1.3 Software and executed it. There are different ways to solve it. I solved the problem by changing my Hard Drive to MBR with a program called "AOMEI Partition Assistant". But after I booted my laptop there was no OS found. If you did it like me just press any F[Number] button (I can't remember which button it was) next to the "Escape" button. It will show you the BIOS and the only thing you have to do is changing from UEFI boot to the normal boot (you can now select Windows 8.1 or Setup 1.3). Like I just said there are many ways to solve the problem. One easy method is (I am not sure if this works) to do a fresh Windows 8 install. After you finished installing Setup 1.3 turn off your System / Laptop. Connect the eGPU (disconnect the WLAN card) which is connected with PE4L 2.1b and with the external monitor. Turn on your ATX PSU which is connected to the PE4L 2.1b AND to the eGPU. Turn on your Laptop and in the booting screen go to the Setup 1.3 (if you installed Setup 1.3 properly there will be a selection between Windows 8.1 and Setup 1.3). In Setup 1.3 select the "menu - based..." and then it will detect your eGPU automatically. Go to Video Cards and select your dGPU (Geforce 710m) and make sure it says in brackets "off" (like this : "dGPU: Nvidia 710m[OFF]"). Go to Chainload selection and select test run. It will take you back to the booting screen where you can choose either to boot in Windows 8.1 or Setup 1.3 . Select Windows 8.1 . When you go to the Device Manager you will notice no "Nvidia Geforce 710m". Instead a new device called "VGA Adapter" or something. Put the CD (the one it was in the box with the GPU) into the Laptop to install the new driver. Wait till the Setup is finished and reboot! (Don't forget to go to Setup 1.3 and deactivate the dGPU every time and boot into chainload!) Questions and Troubleshootings Q: How is the performance with an AMD GPU? The performance is surprisingly better than expected. Q: I got a problem with the AOMEI program you used! Don't forget to click "apply" button left upper corner. Then change your boot mode. Q: The Setup 1.3 can't find my eGPU! (THAT was MY problem) - There are different ways to do it (it is also for those who do not have the exact same Laptop) : - Search in the Forum for "Anti - Whitelisting of the WLAN Card" because it may be possible that the card is whitelisted and it won't detect your eGPU (almost all Acer Laptop have a whitelisted card but mine wasn't whitelisted). - Try "hot plugging" - Try switching or "correcting" the switches on the PE4L 2.1b (there are tiny switches called SW1 (it should be on 1 - 2) and SW2 (this should be in 2 - 3) ). - Check that everything is connected to each other (for example, check if the ATX PSU is connected to the GPU as well) - The fans of the eGPU is working the ATX PSU is powering everything alright, I checked the connection twice, but for some reason my eGPU can still not be detected! - Go and check if your GPU is defect. I checked my GPU at my friends' Desktop PC and it could not be found either. It IS a rare case because the chances are pretty low that you buy a defect GPU or that the GPU dies fast. Tip : Go or contact the person you bought the GPU from. I got a refund and could get a new one. - I checked the GPU and it could be detected on a Desktop PC but it can't still be detected on my PE4L? - Now it can be anything. Your PE4L, or the ATX PSU, or etc... You would have to test everything out till you get the defect hardware. Benchmarks I've forgot to do a benchmark. I will update this post as soon as possible with a benchmark. Acknowledgements Thank you to all the others so I could do researches and solve my problem as soon as possible. And espescially, thank you @Tech Inferno Fan by helping me and keeping in touch by mailing! And also sorry for my bad english / mistakes. I am a Korean who lives in Germany
-
Dear all, I hope someone can help me out here. I have an Acer Aspire E4-471g Laptop. Intel Core i5-4210U NVIDIA GeForce 820M 16gb DDR3 RAM 512GB SSD I have an EXP GDC V8 Beast eGPU adapter. I use a power adapter to juice my eGPU by Dell Netzteil ADP-220AB B 12V 18A 220W P/N Y2515 REV A02 I have a Zotac GeForce GTX1050ti 4GB The Problem:- I did the normal procedure, disable the eGPU. Took out the wifi and replace it with the mpcie cable. Switch on the computer and I have a blank screen. No screen at all on the laptop screen nor in the external monitor. Is there a best solution? I have seen the Setup 1.3 but I will do that if that is really the necessity.
-
Hollo, It's my first post. Few weeks ago I made setup: Laptop: Acer Aspire V3-772G i7 4702MQ, 4 cores 2.2 ghz. 8GB DDR3 ram 1 TB 5.2k HDD 120GB SSD Windows 8.1 works on SSD BIOS InsydeH2O 3.7 fully unlocked My external setup : EXP GDC beast v7 GTX 1060 6GB MSI ARMOR 600W PSU please note my PSU and GPU is completely new. I can play games very well, however games randomly crash it takes from 5 to 40 mins to crash. Also I noticed crash sometimes happens not playing anything, desktop turns black. That's my only problem and I can't find a fix. Also please not after crash Windows recovers quickly. what I have tried : - Because Acer has no white list, I have unlocked BIOS and disabled dGPU, after that everything started to work. Please note my dGPU is broken, can't do any 3D render for some reason... - I have tried few different versions, like Windows 10, windows 7 and Windows 8.1. Now currently I'm using Windows 8.1 it seem to give best performance. - Nvidia drivers I have tried is only few versions, however game still crashing. -I haven't tried 1.30 setup that much main reason is that, I don't really know what to do there and also can't start Windows after configure. - Mainly I'm testing on GTA V, however I've tried different games like Tomb rider or wither 3. - Also played with EXP GDC v7 switches, these makes no effect at all. - switching to gen1 in bios also made no difference. I only receive poor performance in games. - I have also done cpu monitoring all seem very perfect. No problems with power and so. lastly, I'm waiting for any help what I could do with my setup. Also you can ask me for any information I'll be happy to provide it. please help me to fix this problem.
-
Hello everyone, some time by now I flashed a custom Vbios (thank you Klem) on an Acer Predator 15 G9-591 and I started doing some tests about how far I could go overclocking the gtx 970m without running too hot. With the voltage up to 1150mV and something like 300 additional MHz for the core clock, in the strongest stress condition for both Gpu and Cpu ( i7-6700hq undervolted), the Gpu reaches a max temp of 85C (with some 86 spikes but never more than that). Considering that soon I'm going to relid both Cpu and Gpu and clean everything in the internals (laptop is 4 years old) I think I'm going to have some additional heatroom. I've already tested some further overclocking and I noticed that even if the temperatures remains under 93C (which is just for testing purposes, but after relidding temps could be nicer) graphical glitches occur and after some time most games crash. But my question is, could it be because of lack of power supply? The laptop charger provides 180W Could there be an increase in overclock margins with a 230W psu or something like that? (Obviously with the same 19.5V output) If anybody tried something like that on any laptop model, or knows the matter, I'd like to know
- 2 replies
-
- laptop overclock
- psu
-
(and 3 more)
Tagged with:
-
Hello all! Im posting this here in hope to receive some orientation or help regargind my egpu project. I have my old and trusted Acer 5750G and I’m still using it everyday for work. I’m a photographer and it has worked quite well with some upgrades: -Upgraded i5 to i7 2630qm. -Upgraded ram, 8gb to 16 gb. -Upgraded HD to SSD. Some facts: – I have the unlocked bios so I was able to set the mpci port as “hot pluggable” and I can also deactivate the dedicated nvidia 630m from the bios itself. – I have bough this case [PCIe PCI-E EXP GDC External Laptop Video Card Dock / Laptop Docking Station (Mini PCI-E interface Version) ] that will arrive home in 10-15 days. – I have ordered a wifi usb card. I was thinking in getting a nvidia 1060 6gb and plug it to my old laptop using the mpci port. I ask for your advice and knoledge regarding this: 1- Is this a good card choice? 2- Will I face any problem with my setup or there is something important I should take into consideration? 3- Will software that uses CUDA (photoshop and premiere, for example) get reinforced with the new card? 4- How much processing power will get lost for the “small” port I will be using? Thanks a lot again, and sorry for my english mistakes!!
-
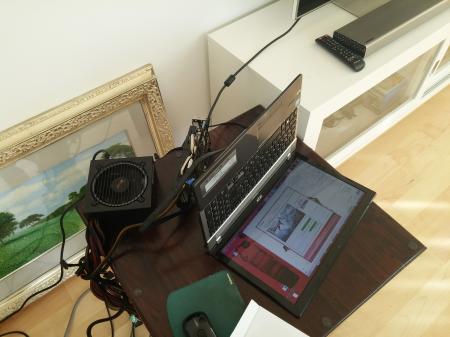
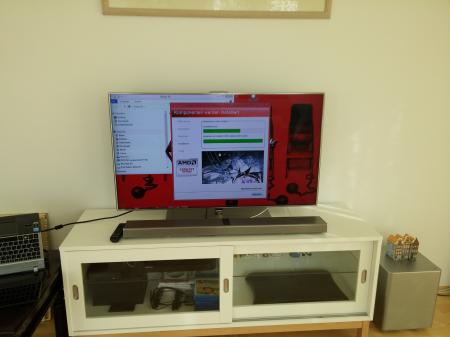
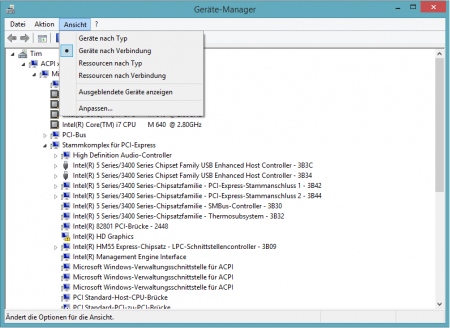
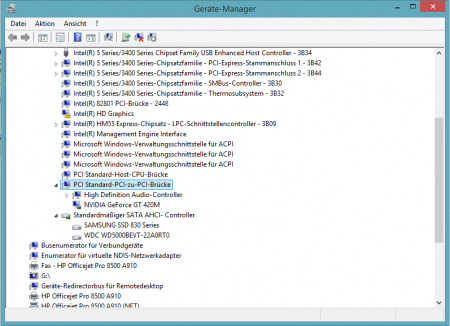
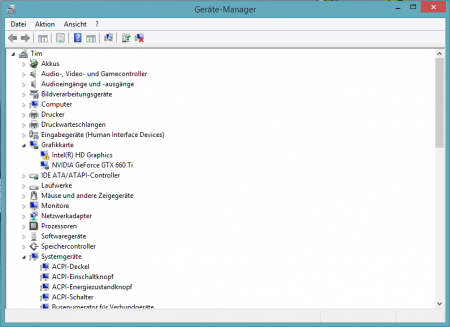
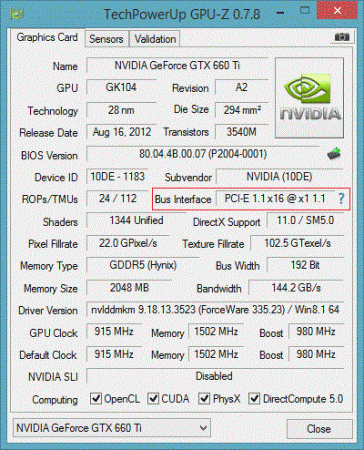
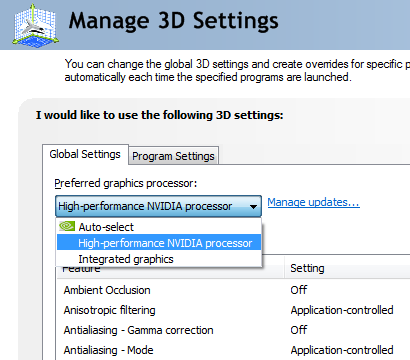
masterblaster 2.0 comment>> This is the first Windows 8.x implementation where a dormant iGPU was activated to enable x1.Opt (x1 pci-e compression) on a 1st gen i-core (dual core) system supplied by the manufacturer with a dGPU only. First I want to say thank you for Tech Inferno Fan for his huge help the whole project and I want to apologize for my bad english. I'm from Germany and still a student so be surprised A long time ago I saw a video with an graphics card running external connect to an notebook. I always thought about doing this by myself and one day I decided to order an eGPU adapter and the graphics card. First the specs of my notebook: Model: Acer Aspire 5742G CPU: i7-640m (upgraded from an i3-370m) with dormant Intel HD iGPU not connect to LCD GPU: Nvidia GeForce GT420m dGPU only RAM: 8GB DDR3 So now we are getting to the things you need: free mPCI slot (unfortunately the Aspire 5742G has only one slot, so you need to remove the Wifi-Card. In my sitution no problem because I'm using lan either way.) PCIe -> mPCIe adapter (PE4L, PE4H or what I used the PE4C) A GPU of your choice (I chose a Nvidia GeForce GTX660Ti) A PSU that has enough power (I used an PSU with 550W found in the basement) Setup 1.x (buy it from Tech Inferno Fan for 25$) -> it's necessary, without you wouldn't be able to run the eGPU A case or something to store you eGPU + GPU (not necessary, but looks tidier) Windows 8.x (I wasn't successful with Win 7. If you want to know more about it, you can read more here.) External Display -> internal isn't working because the dGPU is disabled and the iGPU isn't connected to the LCD Some explanations: The biggest problem about the whole process is that the Aspire 5742G has a iGPU but it's not connect to the LCD and even if you have enabled it via Setup 1.x you are always getting Error 43 in device-manager. As seen on the screen here. So the point is to enable the iGPU and disable the dGPU under Win8.x to get a working x1.Opt setup. The way of just disabling the dGPU via Setup 1.x is ending up in freezing and you have to restart the notebook. So I tried a lot of things with Tech Inferno Fan. So many things and I was close to just give up all. But then he had the great idea to just disable the PCI port where the dGPU is connected on. And that's the way how it's working Let's get started: 1. You need to buy the Setup 1.x from Tech Inferno Fan. Here you will get more information about it. 2. Install it as mentioned in the email. 3. Then navigate to "C:\eGPU" and run the "eGPU-Setup-mount.bat" batch file to install Setup 1.x. Now you will see a new drive named "DIYEGPUIMG (V:)" 4. Go to "V:\config" and just replace the "startup.bat" with my startup.bat startup.zip. (It's just to make the whole process easier. It's configured by Tech Inferno Fan and optimized by me. So it's easy and fast to boot up.) 5. If you have done this all correctly you should get an option "DIY eGPU Setup 1.30" on startup. (When not make you sure you missed no step or done it wrong.) 6. Select the Setup 1.30 and run the "automated startup" (You are now using the startup.bat you have downlaoded an replaced with the stock.) 7. Some lines will now come up and then you get an message that your eGPU isn't connected. Just power on your eGPU (PSU + PCI adapter. Make sure, the switch shows "ON") and connect the mPCI adapter to your notebook. 8. If done correctly you now should be back in the selection menu where you can select Windows 8.x or the Setup 1.30. Now select Windows 8.x. 9. Windows is booting normal and you should see your desktop. (If not -> make sure you did everything right.) 10. Go to device manager and you will see two new devices. Click on install drivers and wait until it finished. (eGPU driver took about 10 minutes so don't be impatient.) Important: It can happen that you get an bluescreen while installing the iGPU driver. I don't know why, perhaps because it isn't connected to the LCD. When this happens just start at point 6. and go on. 11. Now download the graphics card driver that is compabtile to your graphics card. Uninstall your old driver and install the new one. (You can do this step before starting with the eGPU but I don't think there is any difference in doing this after.) 12. When you have successfully installed your Nvidia driver now it's getting tricky but still such simple 13. Go to device manager and select "devices on connection" (German: "Geräte nach Verbindung") and search where the dGPU is connected on and just disable it. (I got an blackscreen and I needed to restart my laptop via the power button. But it doesn't matter you need to restart your notebook anyway to get fully working x1.Opt Setup. 14. After restart (just like point 6. you can check the device manager and you should only see the "Intel HD Graphics [iGPU] and your video card that you bought. In my situation the GTX660Ti [eGPU]. (If not -> check the steps above.). 15. You should now have a fully working (expect the internal screen isn't working) x1.Opt Setup. You can check this in the Nvidia cobtrol panel by checking if the "High-performance Nvidia processor" is available. Or go to GPU-Z and check it there. 16. At the end you can run 3dMark06 or other benchmark tools to compare your results with others. Or just play a game and enjoy it Here is my 3dMark06 score. With the same notebook you should get similar results. (+/- depends in you graphics card.) Something else to say: There are some downsides of using the eGPU Setup with an Aspire 5742G. I'll list some of my established. Need of removing wifi card You need to plug the eGPU in after running the automated startup. Otherwise you'll running into reboot loop. You are not able to go into sleep mode and wake up successfully (biggest downside for me) You won't get the full graphics power as on an desktop computer If you have any question or you think I forget something - feel free to ask me. startup.zip
-
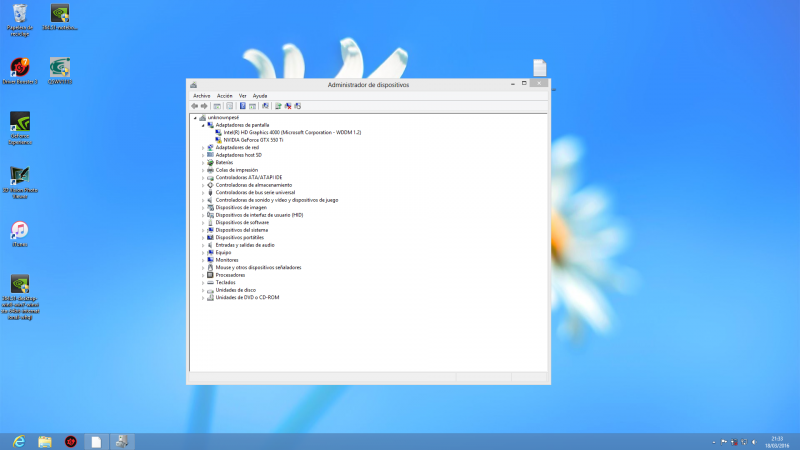
Hi, The first of all, i need to say that my EXP GDC Beast V8.3E works perfect the 3 first days. The problem start when i turn on my computer and i saw that the monitor is not turned on, i check the device manager and i saw that (HORROR) code 43 .My first idea was to unistall it from the device manager and it will fix it, NOPE. Nowadays i try ALL that i can imagine and found on internet*, i dont realy know what is the problem, the first days works PERFECT i realy think that i have the best invention that i can find for a notebook. I have tried unistalling NVIDIA drivers, unplugin the exp gdc completely and leaving it exactly the same like i installed exp gdc the first time, start the pc, install the default notebook NVIDIA drivers and the wifi card, next going to bios and disabling network boot and changing graphics mode to integrated, next i install the drivers of the eGPU (it needs a reboot for unistalling default nvidia drivers) and again restarting the notebook, result= SAME ERROR (Code 43 on device manager and not working monitor) then i try some other solutions but finaly decide to RESET the notebook and installing Windows 8 (Original) with the same process (removing EXP GDC setup and leaving the notebook like the first time and bla bla) with the EXACT same error. I really dont KNOW what is the problem :(, the only thing i think that it can be the problem was a strange factory bug or related. I write this to receive some help from someone that can help me to fix it, i will apreciate it :). Sry of my bad english :S. My Notebook: Processor: Intel(R) Core(TM) i5-3210M CPU @ 3.10GHz (Factory OC) RAM: 8 GB of DDR3 dGPU: NVIDIA GEFORCE GT 630M 2 GB iGPU: Intel(R) HD Graphics 4000 ?GB Model: Acer Aspire V3-571G (supported by the exp gdc beast v8) Bios: 1.12v (i think) EXP GDC: External PSU: 450W Graphic: NVIDIA GEFORCE GTX 550TI 1 GB Driver version 364.51 PCT delay set to 0 EXP GDC Beast V8.0 Mini PCI-E Version (buyed it on banggood)
-
Hi Guys, I hope I'm posting this in the right section and yes, I used Google, the search function and the troubleshooting guide. I'm trying to get an eGPU setup up&running but I encountered some major problems. First of all, here are the specs for the hardware: Laptop: Acer Aspire V3-772G CPU: Intel Core i7-4702MQ, 2.2GHz - 3.2GHz boost dGPU: Nvidia Geforce GTX 760m RAM: 16GB DDR3 eGPU: PE4C-PM060A V3.0 (via mPIC-E) http://www.bplus.com.tw/Adapter/PE4C%20V3.0.html PSU: Cooler Master B600 Ver.2 - 600W/+12V/PCI-E GPU: MSI Geforce GTX 970 4G - 4GB vRAM I don't really know where to start, so lets begin how everything is connected. The Acer-Aspirve V3-772G has 2 mPCI-E Slots. Both were previously occupied (SSD MMC, and an Wifi-Bluetooth card in the half/small port). I tried the following steps on both mPCI-E slots without any changes. For the first try, I just removed my WIFI card and connected the PE4C to my laptop. Next I inserted the new GPU and connected the power from the PSU (1x24p ATX directly from PSU to PE4C, 1x6pin and 1x8pin from the 6/8p output from PE4C to the graphics card). On the first boot, nothing happened, the screen stayed black but the gpu-fans started spinning and the status-leds switchted to green, so I tried different troubleshooting steps. Summary: Different boot-delay settings for the eGPU - made no difference, the screen stay always black (no signal) but it seemed to result in different fan-speeds on the gpu My next steps seemed to work at first, because the GPU-fans started spinning really fast, without any crashes or "not working display". But in every case, neither the GPU or the PE4C could be detected by windows. Turn eGPU ON when windows initializes Turn eGPU ON after standby (booting with eGPU OFF) Hot-Swap WIFI and eGPU (from standby - with and without wifi card on boot) After this, I completly removed the nvidia drivers (for mobile) and deactivated the dGPU via device-manager and repeated the above steps (hot swapping...) but with the same results. Either it halts on boot with "no signal" or it doesnt get detected at all. After further research, my next guess was that the dGPU messes with the eGPU on startup, so I bought eGPU Setup 1.30 After making a USB-Bootable drive, I booted the setup "with menu" First, I booted with the Wifi-Card, wich worked fine (detected) and gave me the pcie port, where my eGPU should be setup. After this I continued with the previous steps (turn egpu on at boot, in menu, hotswapping...) With each variant, (after disabling the dGPU) I tried to initialize , reset, deactivate/activate the correspondent pcie port - including different gen setups. The result stayed the same as in Windows, the eGPU won't get detected in eGPU Setup 1.30 (the pciport shows nothing after his id -> pci3 1.2x: ) Now I am out of ideas and wonder if I am just doing something completly wrong or the eGPU Adapter is simply not working with my laptop. Of course I researched before buying the equipment... which should work fine with my laptop... I also can refund my GPU (today or monday) but would prefer not to I appreciate every helping hand, who can give me a clue how to fix this. cheers, d00t3y
- 10 replies
-
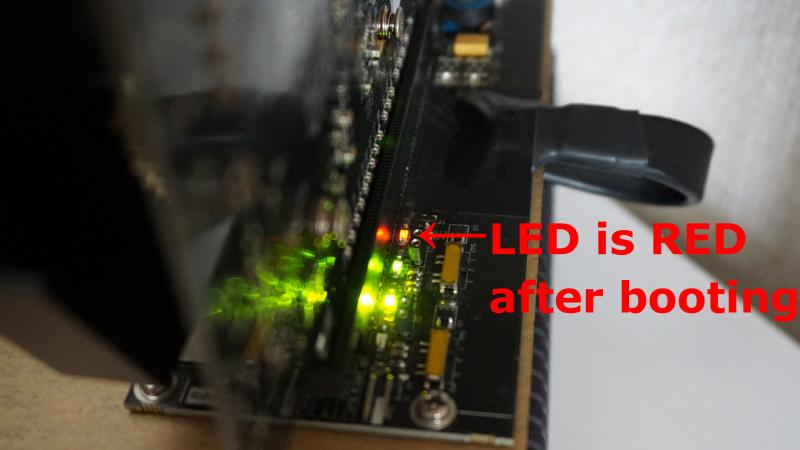
Hi all, I posted a topic to share my successful installation one year ago, here is the topic link : And after a perfect use for almost one year (11monthes and few days), from yesterday the egpu is not detected by Setup1.30 anymore. I didn't change anything on the computer side, nor on the egpu adapter. Same cpu, memory etc. Now when I boot, one of the 4 LED on the egpu adapter turn RED and setup1.30 is no more detecting the egpu card. Also the fan of the gtx750ti is staying at a high speed run. I join the picture of the egpu adapter with the LED turned RED. If anyone have an idea of what happen... One more thing, one time of ten time booting, egpu is working fine. But freeze after around 30mn of use. SPEC : ACER iconia-6210 (dual screen laptop, no physical keyboard) CUP core i5 480M RAM 8gb SSD 256 Windows 10 pro 64bit pe4c v3.0 mPCIE connecter Dell D220P AC adapter Asus GTX750ti
-
Hey, there. Few month ago I bought this laptop and it’s awesome, though it has some cons. I’ll describe everything in this thread. Also I’m searching for someone, who will share his time and help me crack its’ bios Acer Predator G9-593 Intel Core i7-6700HQ (2.6Ghz/3.5Ghz) (https://goo.gl/dehk14) Nvidia GeForce GTX 1070 (8Gb GDDR5) (https://goo.gl/z2aEFL) 15.6inch 1920x1080 (G-Sync) (IPS) (Matte) 16Gb DDR4-2400 / PC4-19200 (2x ACR24D4S7S8MB-8) 1tb HDD + 128gb SSD Windows 10 x64 Nvidia driver - 378.49 4 USB 3.0, 1 USB-C с Thunderbolt 3, HDMI 2.0, Display Port, SD Card reader, Gigabit Ethernet, Audio/mic Several reviews: http://www.notebookcheck.net/Acer-Predator-15-G9-593…iew.187314.0.html http://gearopen.com/computers/acer-predator-15-g9-59…ond-attack-40868/ http://laptopmedia.com/review/acer-predator-15-g9-59…he-second-attack/ Also this laptop has a bigger brother – Acer Predator G9 793, absolutely same laptop but with 17inch panel, 4k variant and 4 speakers. First of all, good sides: Solid construction, soft touch martial all over the case, no glossy parts. Sound is really loud, even basses exists here, though I can’t say its best of the best. Outstanding performance, take a look at this data https://goo.gl/oyF9dl, almost all games run over 60 fps in 1080 and over 30 fps in 4k. Take a look a several gameplay videos that I’ve captures on this beast, all of them were captured in 4k resolution, on ultra settings with no AA: Rise of Tomb Raider - https://youtu.be/rNRMnytsC2c The Witcher 3 - https://youtu.be/dJicr6we0z0 Quantum Break - https://youtu.be/PNofDssIgS4 (1080 with max AA) Crysis 3 - https://youtu.be/H1ja_BhD0-Q Resident Evil 7 - https://www.youtube.com/watch?v=LiF-zhTwNDE Battlefield 1 - https://www.youtube.com/watch?v=ypOEnJ9KbKs Dishonored 2 - https://www.youtube.com/watch?v=Jhtvj4BkiMc Only in Ghost Recon Wildlands I had less then 30 fps https://youtu.be/lbeW9PZvsUo And bad sides: Thought laptop is 15inch, its bulky as hell, thank god it looks okay, not like some previous gaming crap lappys: http://www.notebookcheck.net/uploads/tx_nbc2/toshiba_qosmio_x305_q725_01.jpg Screen has some ghosting, previous static images can stay on screen for some time. Not this laptop, but image illustrates the issue: https://goo.gl/H42OCJ Some laptops has overheating issue on CPU. Though in rarely influence on performance, its still sad thing to have in such big laptop. Issue described in this thread: https://goo.gl/KjNNBN, simple CPU repasting solves the issue: https://www.youtube.com/watch?v=DVEpuZNWLxw Stepback in turms of battery life since g-sync laptops doesn’t support nvidia optimus. Around 4-5 hours of work.
- 3 replies
-
- acer
- nvidia 1070
-
(and 3 more)
Tagged with:
-
Hi everyone, I hope I'm not going to write off-topic; I own an Acer Predator 15 (G951) notebook, and it never gave me problems before; I've never used the integrated audio jack port because I usually listen to music and other stuff through Bluetooth headphones, but few weeks ago I noticed that putting a jack connector in the jack port only deactivates the sound from the pc speakers, but the headphones don't appear in the "devices" section, and the sound coming out from the headphones is really faint and distorted (only if the system slider of sound is at the maximum level and the sound should be very noisy, when the level is lower I don't hear anything at all). Also, when I put a jack in the microphone jack port of the pc I hear the classic sounds of the jack which touches the pin connectors inside the port, but it doesn't happen with the headphones port. I tried almost everything: I changed a lot of headphones, both phone headphones with a single jack and pc headsets with two jacks (for the headphones and for the microphone) but every time it's the same. I installed and reinstalled a lot of different versions of the audio drivers, both from Acer and the productor (Realtek), and nothing changes, I also tried with Ubuntu and it's the same. What could be the cause, and can the problem be solved without any technic intervention? Anyway the warranty for my pc is still valid, but the assistance should be the very last resource (I should do a backup of everything and format and so on). And, the last question, I flashed a custom VBIOS some time ago, does this compromise the warranty? Should I really reflash the original VBIOS or it's not so likely they're going to check on this? Thank you all for your attention!
-
Hi so im decidng which laptop i whould buy to replace my lenovo yoga 500 with a gtx 940m Im deciding between these 2 laptops for gaming and build quality either Acer aspire vx15 Or Dell inspiron gaming 15 7000 For both the 799$ version If you suggest any other laptops please tell me and thanks for reading this
-
Hello, I want to share the modded Bios I created for the Acer Aspire E5-572G notebook. The official bios 1.09 was used as a base. I'm offering three flavours: Microcode 01, Microcode 07 and Microcode 21. Microcode 21 is the latest available microcode, this is the Bios you want to use unless you want the special properties of the other microcodes. Microcode 07 is the latest microcode that allows using the full turbo clock speed on all cores (using single core turbo with all cores). Microcode 01 is the one you should take if you want to try this. I wasn't able to get it to work on mine (i5 4210m, HM86), but your mileage may vary. In case you want to always use an older microcode, I'm offering a script for windows that'll keep the OS from using a newer microcode (compatible with Windows Vista to Windows 10). Frequency and other things can be set up with ThrottleStop (use the latest version). I've also included an overclocking enabled ME firmware that should (hopefully) allow overclocking on the HM87 equipped notebooks. There are two flavours of this notebook available: Ones that use the HM87 chipset and others that use the HM86 chipset. Overclocking is only possible with HM87 as HM86 isn't capable of overclocking (tested it myself). Additionally I offer a collection of Bios, EC, ME and FD files of this device, in case anyone wants to experiment with these for a bit (EC Modding, etc.). I will update this bios in case there are newer parts available. Any feedback is welcome! Features: -Advanced Bios Options unlocked (Advanced, Power tabs and additional options in the existing tabs) -Nvidia 840M/940M VBioses replaced with adapted 940MX VBios with unlocked TDP Limit, unlocked Boost Table and some OC (1306,5MHz GPU/1070MHz Memory - with general usability in mind) + all voltage sliders unlocked -Intel Management Engine: Updated to 9.1.37.1002 + All Locks Unlocked + Overclocking Enabled For HM87 Notebooks + PAVP (Protected Audio/Video Path) Enabled -Flash Descriptor unlocked -Microcode updated to version 21 (respectively downgraded to 07 and 01) -Intel GOP Driver updated to 5.5.1033 -Intel VGA Bios updated to 1042 -Intel RST OROMs updated to 15.1.0.2545 -Realtek Lan OROMs updated to 2.037/2.64 -Applied a few useful BIOS patches by CodeRush (Unlock CPU Power Management Register (useful for Hackintosh Users)/Disable BIOS Lock/Disable SMI Lock) Flash procedure: 1. Copy the BIOS file to an empty and with FAT16/32 formatted usb stick. 2. Unplug the AC adapter. 3. Remove the battery of the notebook - you can unlock the battery on the backside. 4. Plug in the USB flash disk. 5. Press and hold <Fn> and <Esc>, and then plug in the AC adapter while still holding <Fn> and <Esc>. 6. Press the Power button. You can now stop holding <Fn> and <Esc>. 7. The BIOS flash should now begin, the fans will spin up at max speed and the power led should blink. It should take between one to two minutes. 8. After everything is done, you can reinsert the battery and go to the BIOS (F2). There you may want to change some settings (the BIOS flash erases all previously chosen settings). Recommended Bios settings: Main: F12 Boot Menu ---> Enabled D2D Recovery ---> Disabled Advanced: Boot Configuration: Numlock ---> On Thermal Configuration: Cpu Thermal Configuration: Bi-Directional PROCHOT# ---> Disabled Chipset Configuration: RTC Lock ---> Disabled Chipset Configuration: IFR Update ---> Disabled Chipset Configuration: BIOS Lock ---> Disabled ACPI Table/Features Control: TCO WatchDog Support ---> Enabled ACPI Table/Features Control: WatchDog ACPI Table ---> Enabled ACPI Table/Features Control: ACPI Memory Debug ---> Disabled ACPI Table/Features Control: PEP Graphics ---> Disabled Extended ICC: Use WatchDog Timer For ICC ---> Enabled Extended ICC: ICC Locks after EOP ---> All Unlocked Security: User Access Level ---> Full Power: Wake on LAN ---> Disabled Advanced CPU Control: xAPIC Mode ---> Enabled Advanced CPU Control: Package C-State Demotion ---> Enabled Advanced CPU Control: Package C-State Un-Demotion ---> Enabled Advanced CPU Control: ACPI 5.0 CPPC Support ---> Enabled Advanced CPU Control: ACPI 5.0 CPPC Platform SCI ---> Enabled Advanced CPU Control: Package Power Limit MSR Lock ---> Disabled Advanced CPU Control: Long Term Power Limit Override ---> Enabled Advanced CPU Control: Long Term Time Window ---> 128 Module names (for replacement/update): GOP Driver: 7755CA7B-CA8F-43C5-889B-E1F59A93D575_256.ROM Intel RST: 382F560D-17A9-4887-BD9C-EB439C1CC482_1654.ROM and 501737AB-9D1A-4856-86D3-7F1287FA5A55_1781.ROM Intel VGA Bios: 8DFAE5D4-B50E-4C10-96E6-F2C266CACBB6_1743.ROM Nvidia 840M VBios: D336DBCB-33C1-4D15-A06F-C3FF405C6A68_1749.ROM Nvidia 940M VBios: C09F4207-D557-47D0-A4B5-1E4B6459E519_1761.ROM Realtek LAN: 0A33D14A-7B60-4C58-9194-DED0812F9B2B_1767.ROM and E8991F69-D813-4116-A2C2-61E304ECBD72_1533.ROM Intel Microcode (integrated in file): PADDING_2702.ROM Management Engine: Integrated in BIOS image, HEX Editor needed for replacement Credits: -Donovan6000 for his very helpful guides and insights on Insyde bios modding -Andy P whose PhoenixTool I used to replace the modules -Plutomaniac for providing the used Intel ME firmware and the Intel ME System Tools to properly configure it for this notebook -Ultrax5 from TechInferno for providing his OC enabled ME firmware for 8-series systems which I used as a reference to unlock the feature for this notebook -SoniX for his Intel VGA Bios update guide and the OROM, Microcode and Intel VGA Bios database he maintains -Pacman for sharing the latest Intel RST 15.1.0.2545 OROMs -CodeRush for providing the included BIOS patches -WerePug from overclock.net for providing the way to unlock the Nvidia VBIOS voltage sliders for editing in Maxwell II BIOS Tweaker -The author of the Maxwell II BIOS Tweaker which I used for editing the Nvidia VBioses -All the other people who shared the used OROMs/Microcodes/Firmwares/Useful Information etc. Changelog: -13.09.16: 1.09a - Initial release -03.10.16: 1.09b: Unlocked a few more options that I missed before - everything that can be unlocked should be available now Overclocking enabled ME is now included by default (no disadvantages for HM86 notebooks) Applied a few useful BIOS patches by CodeRush (Unlock CPU Power Management Register (useful for Hackintosh Users)/Disable BIOS Lock/Disable SMI Lock) -22.10.16: 1.09c: Changed Nvidia GPU idle voltage from 0,94V to a more correct value of 0,76V - thanks to Maison1 from win-raid.com for bringing this matter to my attention Unlocked all sliders in the Nvidia VBIOSes for editing with Maxwell II BIOS Tweaker - thanks to WerePug from overclock.net for posting the way to do this Files: Acer Aspire E5-572G - BIOS 1.09c - Microcode 01 Acer Aspire E5-572G - BIOS 1.09c - Microcode 07 Acer Aspire E5-572G - BIOS 1.09c - Microcode 21 DeleteMicrocode Script for Windows Acer Aspire E5-572G BIOS-ME-EC-FD Collection
-
I've jus bought a 5750g second hand (i5 2430M 2.4 GHz & nvidia 540M 2GB) and it's running really hot, i'm getting 95+ temperatures on both the cpu and gpu while gaming, so big thermal throttling framerate drops apply. The thing is that the fan looks almost perfectly clean so i'm discarding that option but given the fact that this laptop only have one heatsink for the cpu the gpu and the chipset and that the fan is not providing enough air flow i want to ask you for some cooling tricks to lower the full load temp to 80 or 85. About the fan, it doesn't achieve the same rate under load that the one it gets while booting, just after powering the laptop the fan goes crazy and then drops to it's usual rate and that's not enough. At the moment i'm thinking on: -replacing the stock thermal compound -buying a cooling pad <-not a big fan of this one, i think the system should take care of itself -hacking the fan to bypass the pwm control and soldering it directly to a 5v line, jet engine rpm on demand.
-
Hello ive seen a few people asking about heat and i thought i would chime in and say a few ways to keep down the heat! there are a few ways you go about this with out opening the computer, for those who arent to sure about taking a screwdriver to their laptop it may help you. in saying that, if your fans are dirty then this will not help you at all. I TAKE NO RESPOSIBILITY TO ANY DAMAGE HARDWARE! ANY CHANGES YOU MAKE ARE AT YOUR OWN RISK! INCREASING THE FAN SPEED to control your fans use this http://www.hwinfo.com/download64.html this is a free program that alot of people use on various computers. it work on alienwares well but im yet to test ROG and MSI with it. its pretty simple to use install it and get to this page and click on the sensors button then on the next screen click the small fan icon at the bottom unless you want to manually adjust your fan between each time you play click customer auto and you can edit it from there UNDERCLOCKING download and install NV tools it can manage fan speeds too but its not always 100% in laptops http://www.nvidia.com/object/nvidia-system-tools-6.08-driver.html on the left hand side, under the performance tab, select device settings now just slide it back in small steps until you are comfortable with the temps. remember that if your computer blue screens it DOES NOT mean your computer has been damaged. it is simply a way for the computer to avoid damage. adjust the slider in intervals of about 15mhz to be safe and click apply each time. start on the core clock and finish on the memory. Every now and again it is good to check on your progress to see how far you need to go. (more on this later) MSI after burner is a good one too http://www.guru3d.com/files-details/msi-afterburner-beta-download.html again the fan control is a bit hit and miss with it but it can control your clock speed. ass per the program above keep going untill you hit a STABLE setting you want. TESTING here we will look at the new GPU temps after the tune. MSI Kombustor is a great way to test your heat. http://www.geeks3d.com/20150710/msi-kombustor-v3-5-2-64-bit-v2-6-0-32-bit-download-gpu-stress-test-benchmark/ click on stability and watch the temps. if you see any artefacts stop the test and increase the mhz by 15mhz each fur mark is the one that i use to test the heat of my alienware http://www.ozone3d.net/benchmarks/fur/ aim for about 70-75*C. hope this helps you a bit. PS avoid EVGA's tuning tool on alienware i have heard it can brick your LCD! CLEANING THE FANS Just for the sake of it ill give you a few tips on cleaning your laptops fans out. assuming you already know the basics of using a screwdriver to open a laptop ill cover a few things to help you. REMEMBER, IF YOU REMOVE THE HEATSINK YOU WILL NEED NEW THERMAL PASTE! compressed air is a great way to remove dust and id recommend having a can of it over a compressor. The reason being is that some compressors can fill with a bit of water and can spray it directly into the computer. you can spray the air into the vents and while it wont really "clean" it it may open enough room for air to pass out. i DO NOT recomend this however. after opening up the computer and removing the fan take a paint brush and clean the entire fan, get as much of the dust out as you physically can. you can use toothbrushes too if you dont have anything else. make sure you clean the grill behind the fan too as that is where the dust usually builds up. removing this dust and hair is the most important part of this clean up. now on to thermal paste. remove all the old thermal paste from the heat sink and the CPU with a dry cloth then, use isopropyl alcohol to clean the rest. some people seem to think that more is better but this is completely not true! if you put a large amount of thermal paste on the heatsink you will actuall have hotter temps. this is due to either: A ) the heatsink is not geting enough connectivity to the GPU as the layer of thermal paste is too thick B ) too much of it creates small pockets of air, these air pockets become super hot and that causes more heat on the GPU the correct amount is roughly the size of a pea even that is boarderline too much. Dont spread it around instead place your heat sink over it as even as possible and screw it down in a X pattern for an even spread. really hope this helps you and good luck!
-
Do you plan to purchase a new gaming notebook in the next few months? If so, which brands are you considering and why? Additionally, with the release of Thunderbolt 3 and external enclosures like Razer Core coming to market, is this a contender for you vs a dedicated gaming notebook that is thicker and weighs more?
-
This is my first topic here at techinferno so hopefully i'm doing this right. I'm from Sweden and my native language is not English so bare with me please. I have a; Acer Aspire v3-571g-7363161 S/N NXM7EED0023041284B3400 intel i7-3632QM @2.2 ghz Intel HM77 Express Chipset Nvidia Gforce 730m 16gb RAM I would like to upgrade my GPU. The only game i need it for is CS:GO and i want to play this game with good quality. I also do some CAD work professionally but since the computer is working fine for this today i don't really need to upgrade it for this reason. I like the computer in all aspects but the GPU and that's why i want to upgrade it instead of getting a new one. I also really like the idea of beeping able to upgrade a laptop. After some research i have found that the easiest way to do this is to disconnect the wifi to plug the egpu in there. Is this correct? As i like to use the WiFi in the future i would need to have the wifi from somewhere else. If i were to use a wifi usb stick, do i loose a lot of performance? The Wifi is connected trough a PCI Express? Is this a 2.0 or 3.0? Does this matter? Is there a limit in the bandwidth that will affect the performance? I'm looking at a Nvidia Gforce 960, is this overkill or will i be able to use the power in the card? Do you have any tips or ideas of what eGPU adapter i should get? I'm quite comfortable to shrew the laptop into pieces, i have done so a couple of times to clean it from dust. As it was a while ago i don't remember hos the dGPU (730m) was connected. Is there a way a can connect my egpu to where the dgpu is today? if so, is there any pros and cons i should know of? Do you think this is worth doing? Will a be able to use the computer as a laptop and simply disconnect the Egpu in the future if i connect it trough the PCI port? I have seen some video tutorials of this, but as i'm eager to learn more please don't hesitate to provide me with links! If someone has any other ideas of how to upgrade this laptop i'm up for any ideas. I probably have about 100000 more questions, but i'll leave it for now. Best regards Martin
-
Acer announced a small Dock for Thunderbolt 3 devices, it has a build-in GTX960M. http://www.notebookcheck.com/Acer-Graphics-Dock-eGPU-Dock-bringt-Notebooks-mehr-Grafikleistung-via-Thunderbolt-3.161313.0.html I could only find the german article.
-
Hello, i really need your help. I know there is a BIOS where the Advanced Tab is unlocked, but right now I have a modded BIOS which allows me to do some nice GPU Overclocks: http://forum.techinferno.com/acer/1846-acer-aspire-v3-5xx-series-bios-mods-higher-nvidia-gt640m-clocks.html Unfortunately, this BIOS doesnt have the Advanced Tab unlocked. Can anyone unlock it for me?
-
I work at Best Buy in the Computer and Tablets department and the general consensus between me and my co workers is that Acer has terrible build quality and is highly unreliable. However I would love to hear people who have actually owned Acers and that had the opposite to what I previously stated as I'm just looking for a budget laptop for my Dad.
-
I've been wanting to see what 144hz is all about. Which monitor is better? They both have good reviews but I see a lot more people recommend the Asus one but most don't state a reason other than "It is 3D and G-Sync capable." Also, what about BenQ monitors? Acer GN246HL Asus VG248QE
-
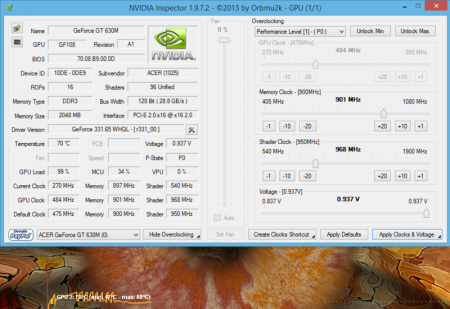
Hi there! My friend has a Packard Bell EasyNote TV44-HC notebook with a Nvidia GT630m 2GB graphics card (renamed 540m). The problem is that no matter what he do, if its temperature reaches 80 celsius degrees (before the BIOS update it was 75C), the GPU frquency drops somewhere to 230Mhz, and after it's cooled down to 70C, it raises back to 663Mhz (or 760Mhz [turbo boost I presume] or something like this), what is obviously not good. So the question is, how can I manually set a normal frequency (like 533 or something near it) to prevent the 80C throttle and to get a balanced performance? Or is there any solution to raise the throttle cap to 85C? In Nvidia inspector, the GPU frequency has been greyed out, so I can't set it to any value. I can't set the FAN speed manually higher, because there is no software that can see the FAN. So after some Furmarking, it fixes to 270 Mhz, and won't go anywhere until I shut down the notebook, and get out the battery for a minute. Please help. Furmark's performance fluctuacion and nvidia inspector problem can be seen on the attached screenshot. Thank you in advance.
-
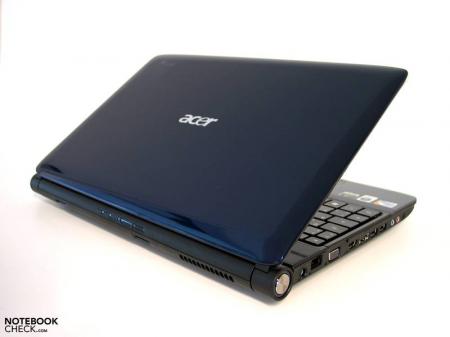
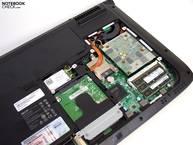
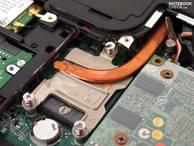
Hello ladies and gentlemen, This thread is for Acer 5739G laptop owners and other laptop owners that have Core 2 DUO/QUAD processor equipped lappys. Some Pictures from Notebookcheck.com Specs: Intel® Core™2 Duo processor T9800 (6 MB L2 cache, 2.93 GHz, 1066 MHz FSB, 35 W), supporting Intel® 64 architecture Intel® Core™2 Duo processor T9600 (6 MB L2 cache, 2.80 GHz, 1066 MHz FSB, 35 W), supporting Intel® 64 architecture Intel® Core™2 Duo processor T9550 (6 MB L2 cache, 2.66 GHz, 1066 MHz FSB, 35 W), supporting Intel® 64 architecture Intel® Core™2 Duo processor T6600 (2 MB L2 cache, 2.20 GHz, 800 MHz FSB, 35 W), supporting Intel® 64 architecture Intel® Core™2 Duo processor T6400 (2 MB L2 cache, 2.00 GHz, 800 MHz FSB, 35 W), supporting Intel® 64 architecture Intel® Core™2 Duo processor P9500 (6 MB L2 Cache, 2.53 GHz, 1066 MHz FSB, 25 W), supporting Intel® 64 architecture Intel® Core™2 Duo processor P8700 (3 MB L2 cache, 2.53 GHz, 1066 MHz FSB, 25 W), supporting Intel® 64 architecture Intel® Core™2 Duo processor P8600 (3 MB L2 cache, 2.40 GHz, 1066 MHz FSB, 25 W), supporting Intel® 64 architecture Intel® Core™2 Duo processor P7450 (3 MB L2 cache, 2.13 GHz, 1066 MHz FSB, 25 W), supporting Intel® 64 architecture GPU: GT 130M, 240M. MXM A 3.0 Module Current Build Processor: T9600 at 2.93Ghz RAM: 6GB clocked at 1066Mhz GPU: AMD 6770M Hardrive: Seagate 7200RPM 500GB Thermal Compound: Arctic Silver 5 note:Thread in development.


