Leaderboard


Popular Content
Showing content with the highest reputation on 03/03/14 in all areas
-
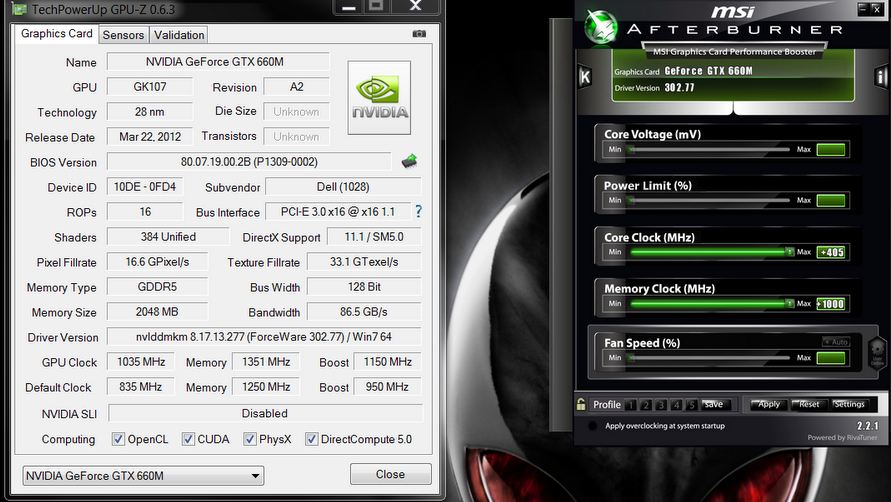
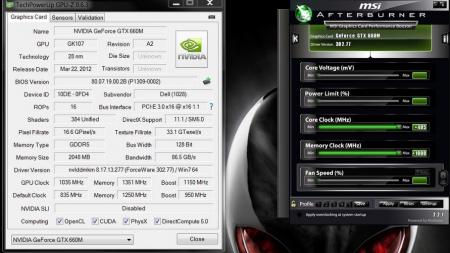
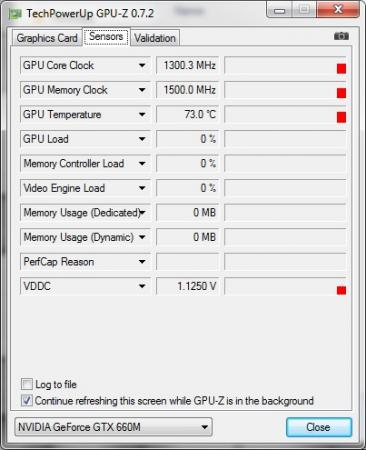
UPDATE: ALL DOWNLOADS LISTED IN THIS POST FOUND HERE. Nvidia 'Kepler' GPUs - modified VBIOS files >>> NOTE: More versions (including voltage mods) exclusive for T|I users can be found in the second post. <<< The 'Kepler' GPUs from Nvidia perform really well, even at increased clocks speeds they stay quite cool - a perfect behavior when it comes to overclocking and improving the performance. Unfortunately the mobile GPUs suffer from an artificial +135MHz core overclocking limit, so you can't go higher by using tools like Nvidia Inspector and similar. The modified VBIOS files listed here have this limit unlocked, some have increased stock clocks or tweaked voltages. Just refer to the description. All files have been modified by myself, if you like them feel free to buy me a drink, donation link can be found below GTX 660m: 660m_OC_edition__VBIOS_[DELL].zip- comes with unlocked software overclocking limits 660m_GHz-Edition_overvolted_VBIOS_[DELL].zip - default 3d clock 1000MHz, base boost 1200MHz,, memory (3d) 1350MHz, increased 3d voltage undervolted editions possible, depends on interest, tba Some screenshots: GTX 680m: Clevo_680m_-_80.04.33.00.10_'OCedition'_revised_01.zip Dell_680m_-_80.04.33.00.32_'OCedition'_revised_00.zip Increased software overclocking limits & optimized for no throttling. Read the included 'Read me' file before flashing. Instructions: I recommend flashing under DOS using nvflash . Donation link in case you want to buy me a beer Thanks and cheers! More to come. Testers: Thanks @eliteone (Dell 660m), @littleone562 (Dell 680m) For all mods: Use at your own risk.
 1 point
 -
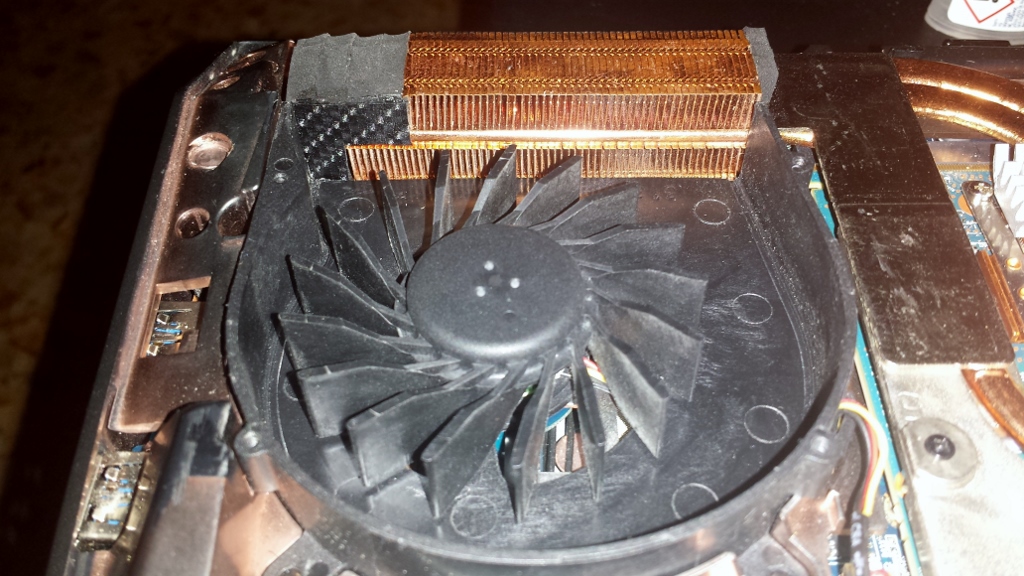
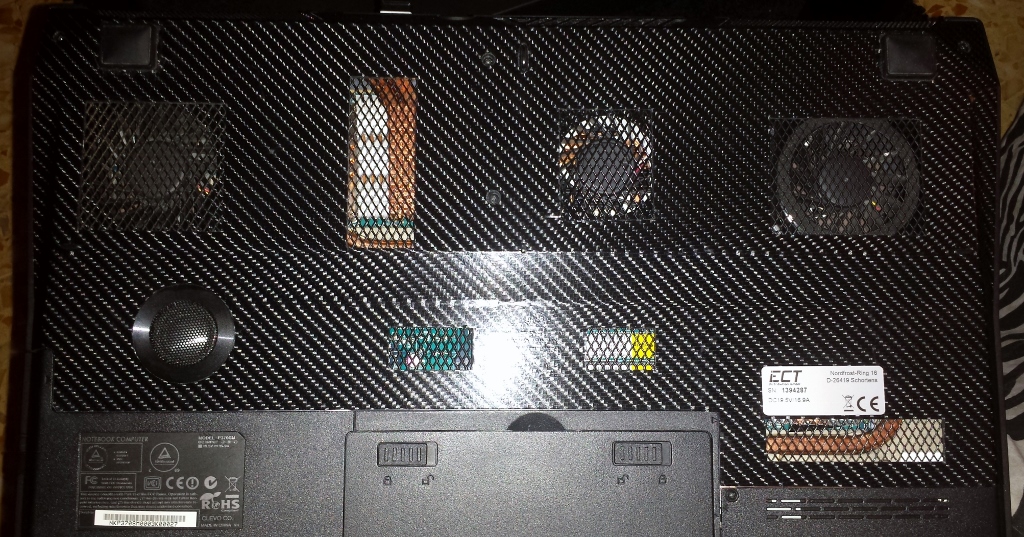
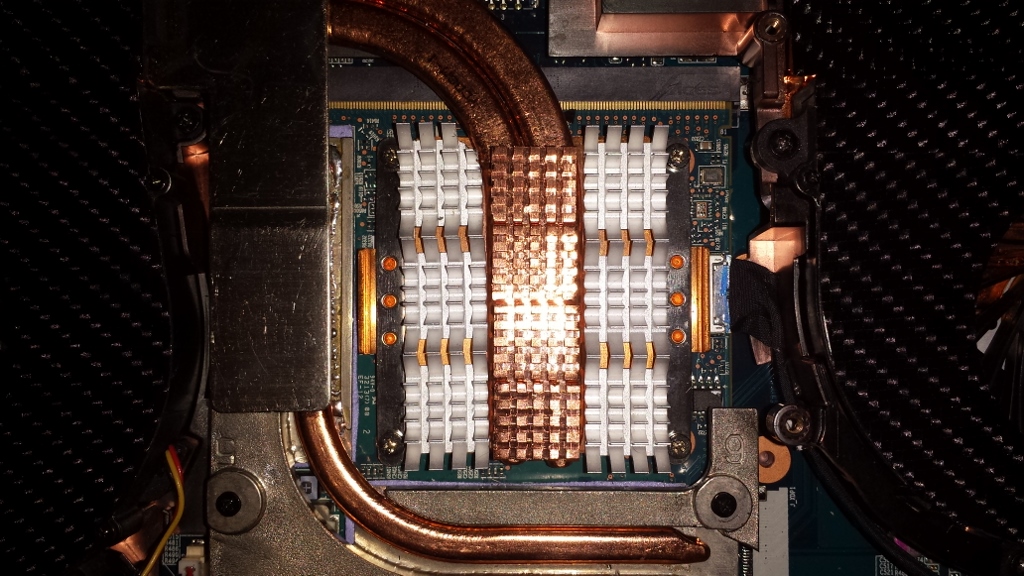
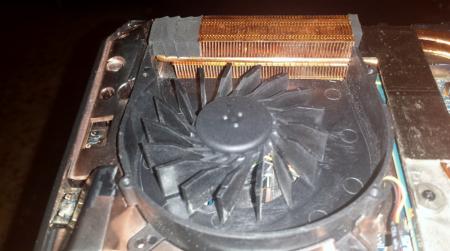
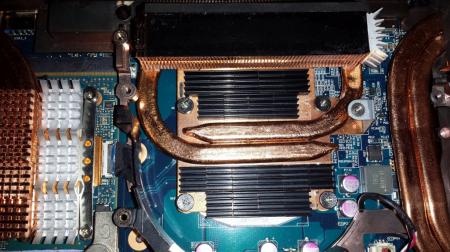
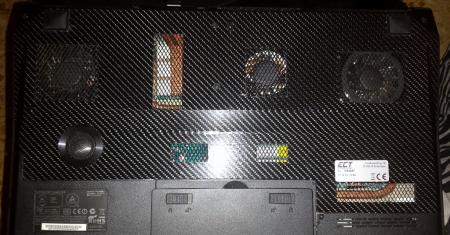
I was removing the cooling system for cleaning and noticed a hole between the fan and the radiator on the GPU # 1 that disperses the air flow. It can solve easily by applying a trimming in PVC, or any other material, closing the hole, avoiding the dispersion of air. (Gain -4 ° C) Before After I also applied the heat sink directly on the block of the GPU and CPU. CPU (gain -2°C) GPU (gain -3°C) I also modified the backcover, by increasing the air flow (Gain -2 ° C) Have Fun!! :not_ripe:

 1 point
 -
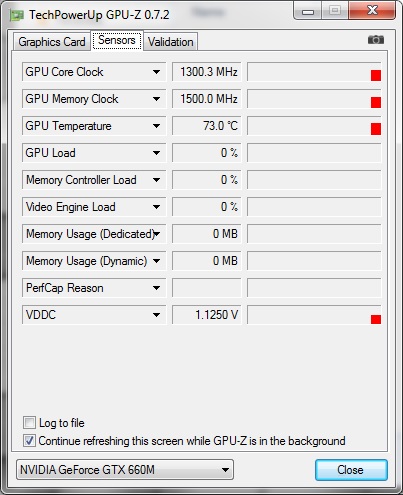
I Finally Managed To Increase The Voltage For Y580 GPU "GTX 660M" Download Link :- "http://www.uploadmb.com/dw.php?id=1372379820" <----------- This Is '1.125V' "Request Any Voltage And I Will PM It To You , Thanks To @schranzmaster @jester_socom - - - Updated - - - Proof =)
 1 point
 -
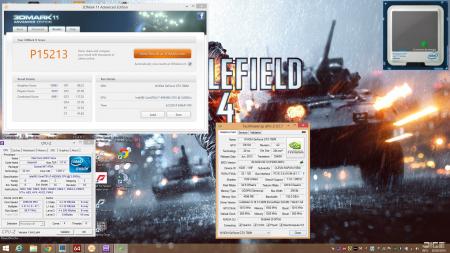
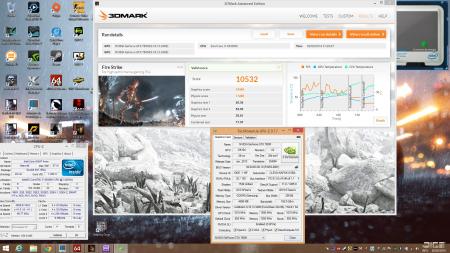
Before I begin I will say this….This is NOT going to be your standard Mobile GPU review. This is the real look at what was, what is and what can be review. For most of you this should be pretty straight forward. And for those of you that it’s not…Well, lets just hope it's not.... When we first heard about this new GPU everyone quickly jumped on the bandwagon and started bashing it. It’s another NVidia rebrand. It has too much video memory for any game out. It’s too hot. It’s too expensive. Is it really worth the upgrade. Is it really better than the 780M and the list of questions goes on….. Well friends, it’s time to address some of these concerns, but from an over clocker / benchers point of view. When I first received the 880M I didn’t have any real expectations other than it “better” be better than the 780M. Nothing more. And when I ran this first set of test I get this. I was in shock! Nvidia, are you serious with this? This is what we can expect from shelling out anywhere between 880.00 to 1200.00 dollars per card for this! Or worse, you just bought a brand new 2000.00 to 4500.00 dollar machine and right out the box you’re playing “Inspector Gadget” Grrrrrrrr! So it’s time to investigate a bit. After a little bit of tinkering, svl7 and I came up with this. Now we are getting somewhere. As usual, stuff is broken out the gate. So now that we have addressed most of the throttling I decide to go ahead and start running some real benchmarks. What I found out was the new drivers break the card! If you crash one to many times your card will always down clock. Why? I have no clue. I had to use 327.23 drivers which ran perfect the whole time. Including gaming. I’ll get into that part much later. It seems that after a few driver not responding errors or driver crash errors your 900.00 dollar card wants to now run like an intel 4k GPU. Even stock will not work correctly anymore. You have to go through a whole lot to correct this situation (Only to crash again and have to go through the whole process again) or just use an earlier driver to bypass this nonsense altogether. Now who thought this would be a great idea, huh? Double Facepalm! This must be at least one of the reasons why there is no official 880M driver yet. This was tested across at least 2 machines (The M15X and the M18XR2) and all drivers in the 331 and higher class. With people who know what they are doing. So there are no speculations here. So now let’s get to some real world “bench” testing. And before you start with the synthetics this and that line of thinking, just stop! This is not that type of review. We already have these types of reviews floating around already. This is for the people who want to know possibilities, before making the plunge. What to expect when things are working optimal. That goes for stock, over clocked and heavily over clocked. So let’s start with 3Dmark11 GPU testing. This is a very good way to find out a cards potential pretty quick. Why? Well because it’s not “influenced” by the speed or how many cores a CPU is running. And for this line of beginning testing I will be using M18xR2 [email protected] Ghz GTX 880M (Single Card) 2133 Mhz Ram 256 GB OCZ Vertex 4 Drivers used: 331.82 & 327.23 & 320.49 In this test 331.82 was used while it worked. This was to simulate a 780M, but with 8 GB video memory instead of 4 GB. Here we run our base clock of 954/1250/954 boost disabled. Over 800 point increase. And how does this make sense? We look at the FPS. Almost a 4 fps gain across the board. And no I’m not about to go into the percentages game. LOL. Now we run its max boost clock with boost disabled. We basically gain another 300 points or in other words 1 FPS from our boost clock. So we are now basically 5 FPS faster than the 780M But wait, how do you know that? That’s not the same as actually running a 780M under the same conditions. Well I’m sorry to say, I have you there as well. And you can’t get any closer than that. Now even though the numbers look nice that temp was hovering around 75C max. Now this could be contributed to user error or this GPU is just that HOT. We shall investigate this further later. Here we run extreme 780M VS 880M. This all seems very standard due to the different core speeds. Considering it’s still the same chip. I’m sure if we over clock the 780M we would get damn near the exact same score. And of course, this goes for all the test ran before this. 780M 880M Now let’s take a look at 3Dmark Vantage. As we can see, there is about a 6 to 8 FPS increase with higher clocks, but we “all” already new this. Now let’s have a look at Fire strike. This test was ran while everything was optimal for stock. Meaning, everything works. I am using NVidia’s 327.23 driver. As you can tell from the first run, everything is perfect. No dips or drops in clocks or voltage. This says a lot! Now we test Catzilla, which is one of the newer benchmark programs for testing. These test are all perfect for anyone to run some side by side comparisons on their own. Starting from the top of the page and work your way down. So feel free to compare and post. 720P 1080P 1440P As you can see, with a working stock Vbios your factory clocked card is capable of some nice runs. Although the temps could use some work. (Could be user error on my part) Now to the really fun part. The part where everyone ask. How well does it over clock. Does it over clock better than the 780M? Does it run Cooler when over clocked? What can we expect under optimal conditions? Well I’m glad you asked. Because I’m just the guy who can show you this. If you are like me when it comes to buying new tech you want to know if it works & more importantly. How high can I over clock it. So we tested it to see if it was in fact better than a 780M since this is the “only” way you are going to know. Because stock for stock. They’re the same. And that goes for over clocking on the high end for the 780M and the mid-range level for the 880M. At the time of this the current world record for 3dmark11 Performance (Single card) is held by the 780M. NVIDIA GeForce GTX 780M video card benchmark result - Intel Core i7-3940XM,Alienware M18xR2 vs 3dmark Vantage NVIDIA GeForce GTX 780M video card benchmark result - Intel Core i7-3940XM,Alienware M18xR2 vs Fire Strike Direct compare. And you will get a kick out of this one. One is ran on Windows 7 and the other Windows 8.1. 780M vs 880M All other benchmarks can be found on hwbot.org under 880M Now on to some gaming and gaming benchmarks. This part will consist of mostly of 15 to 60 second video clips to show what happens when you do more than just stare at the sky for a gazillion fps. LOL. While playing most of these games. They tended to all crash at some point or another. I think it may have to do with me running the osd, but that is not 100 percent confirmed. All Games are set to the highest they can go. Laptop is sitting on a standard cooler running max fans. Batman Arkham City Physics Enabled Metro 2033 Dead Island Skyrim The Witcher 2 In closing. What we do know for sure is the 880M is only a slight upgrade to some and appears to perform pretty much just like the 780M. Is this the 780M killer? HAHA, that's a good one. Not even close! Did they use better memory chips? Yes they did. And it would appear that they may have upped the voltage for it as well. (Pure speculation at this point) The card appears to draw around the same watts as the 780M. I was able to get about 324 max watts. Total system draw on a 3dmark11 and vantage run. This card will give a 240W psu a run for it's money if you're numbers chasing. If you're not, then you should be fine. And that's with a better than average moderate over clock. Now, do not think you are going to just get high scaled numbers like this by having your laptop sitting on the desk and fans on normal. It's just not going to end well over time. All my high end test I used an A/C unit. From just using normal fans and sitting on the desk, temps stayed around 75C to 77C. I don't care about "Hey look at me on my desk" (And a week later you're trying to RMA you're video card because of trying to brag. That's your fault!. So take heed.) responses when it comes to taking care of your 900 dollar card. You are more than welcome to run yours anyway you see fit. And as of today's date no one knows what damages it could have or not have in the long run. I kept temps below 80C for safety concerns (Heavy Over Clocking). At stock it hovered around 75C. With max fans it hovered around 70C. And gaming, max was 70C. And averaging around 58 to 65 most of the time (Max Fans). This card can run as high as 1.2V if unlocked (As far as we can tell). And no it will not go higher. (So don't ask later) It's factory unlocked to 1.137V now. Work with that first before going off the reservation and looking for a max voltage increase. And last but not lease...Yes friends you can under volt this GPU, but of course you'll need to adjust for your own needs. I would like to thank Upgrademonkey.com (Lee) for allowing me to review this card. It has been a pleasure. And of course special thanks to Marco. (svl7) Thanks to Mr Fox for...well....Just being Mr Fox. And Brother DumbDumb for pointing me in the 880M direction in the first place. Thanks for reading.1 point
-
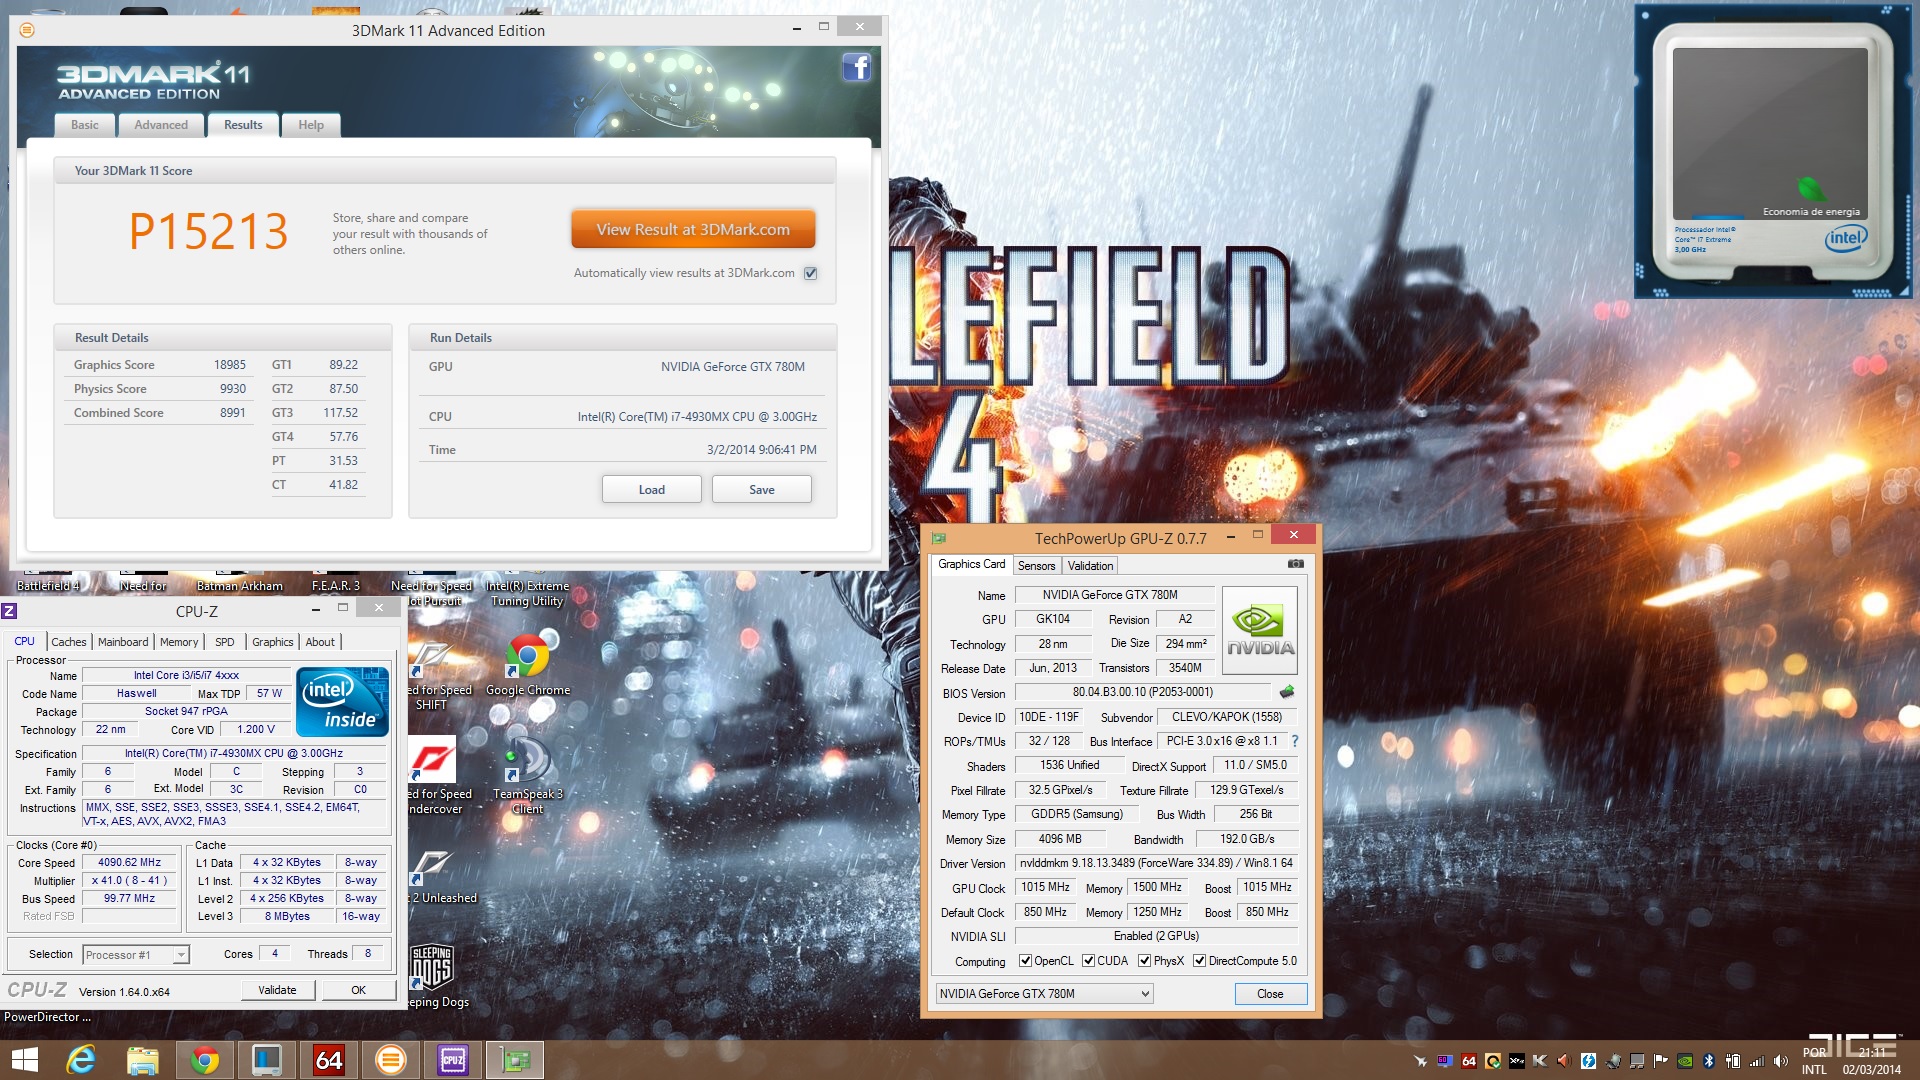
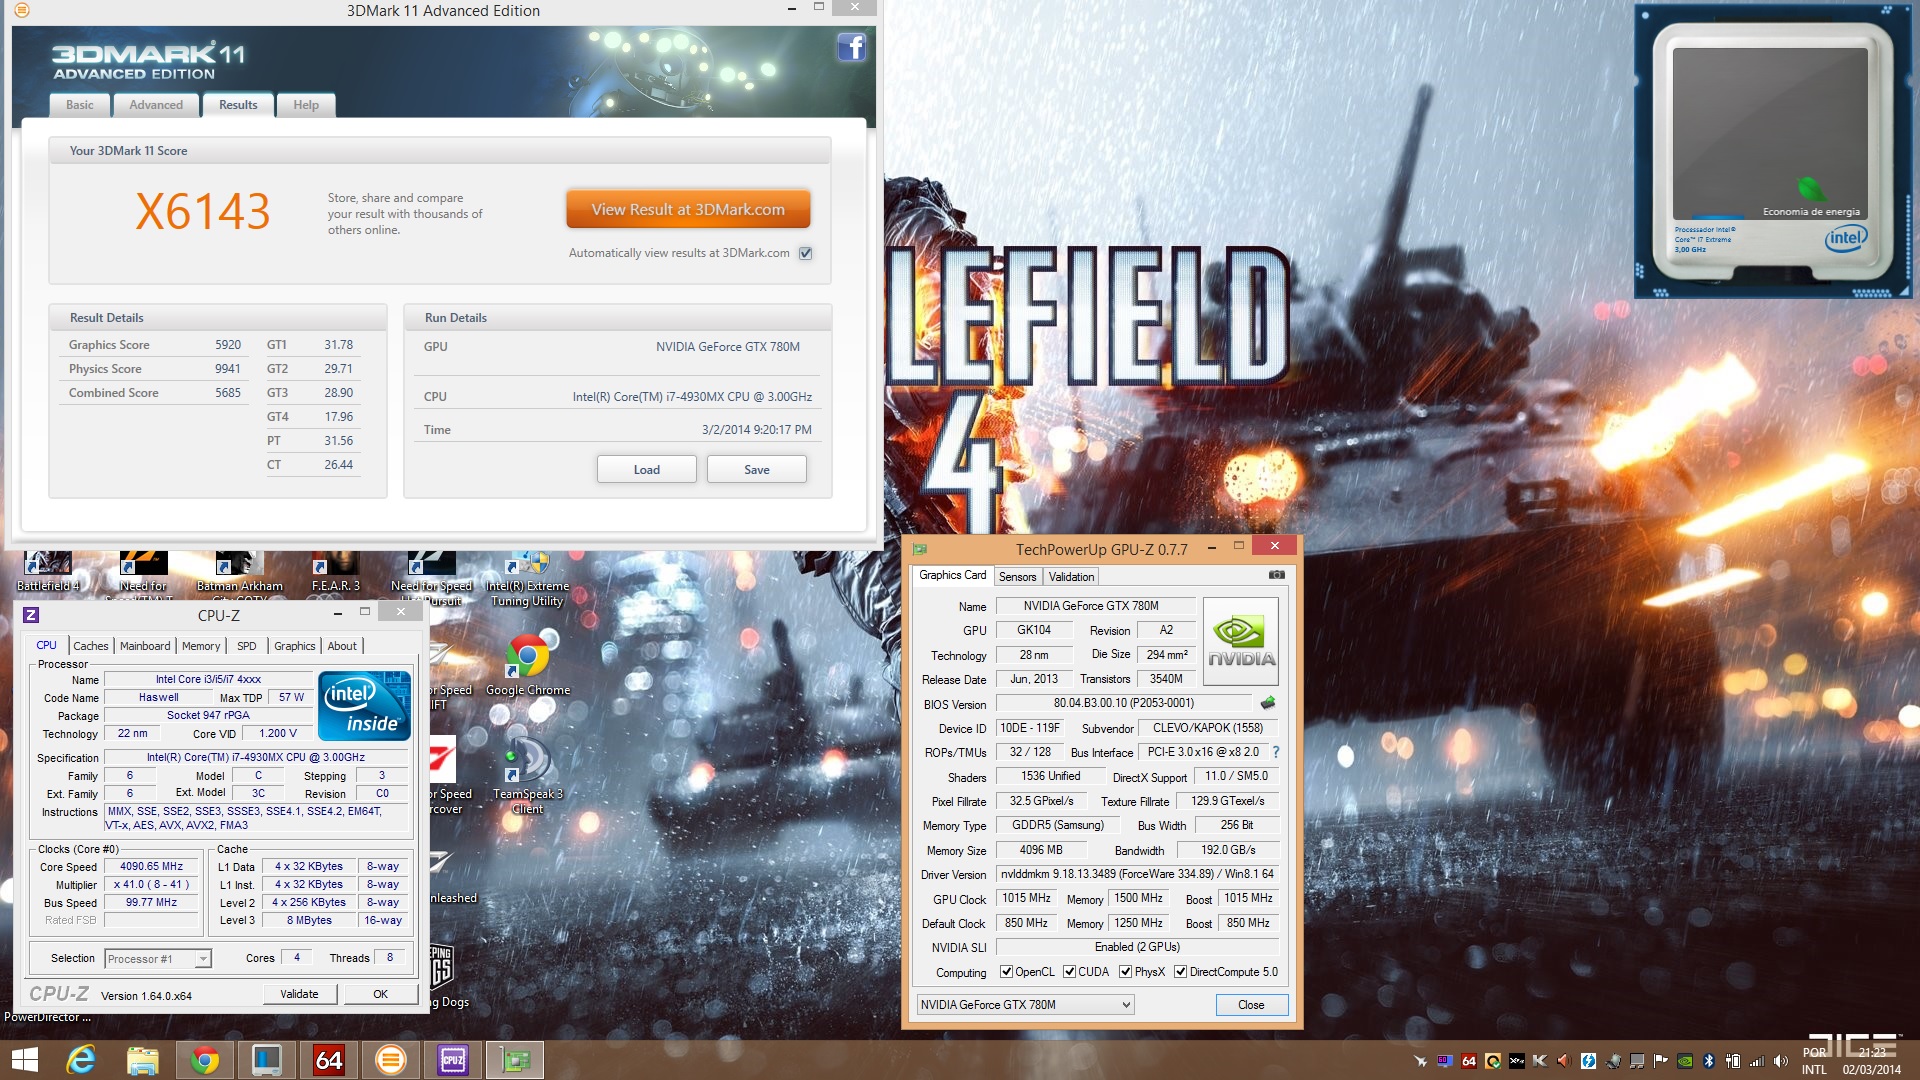
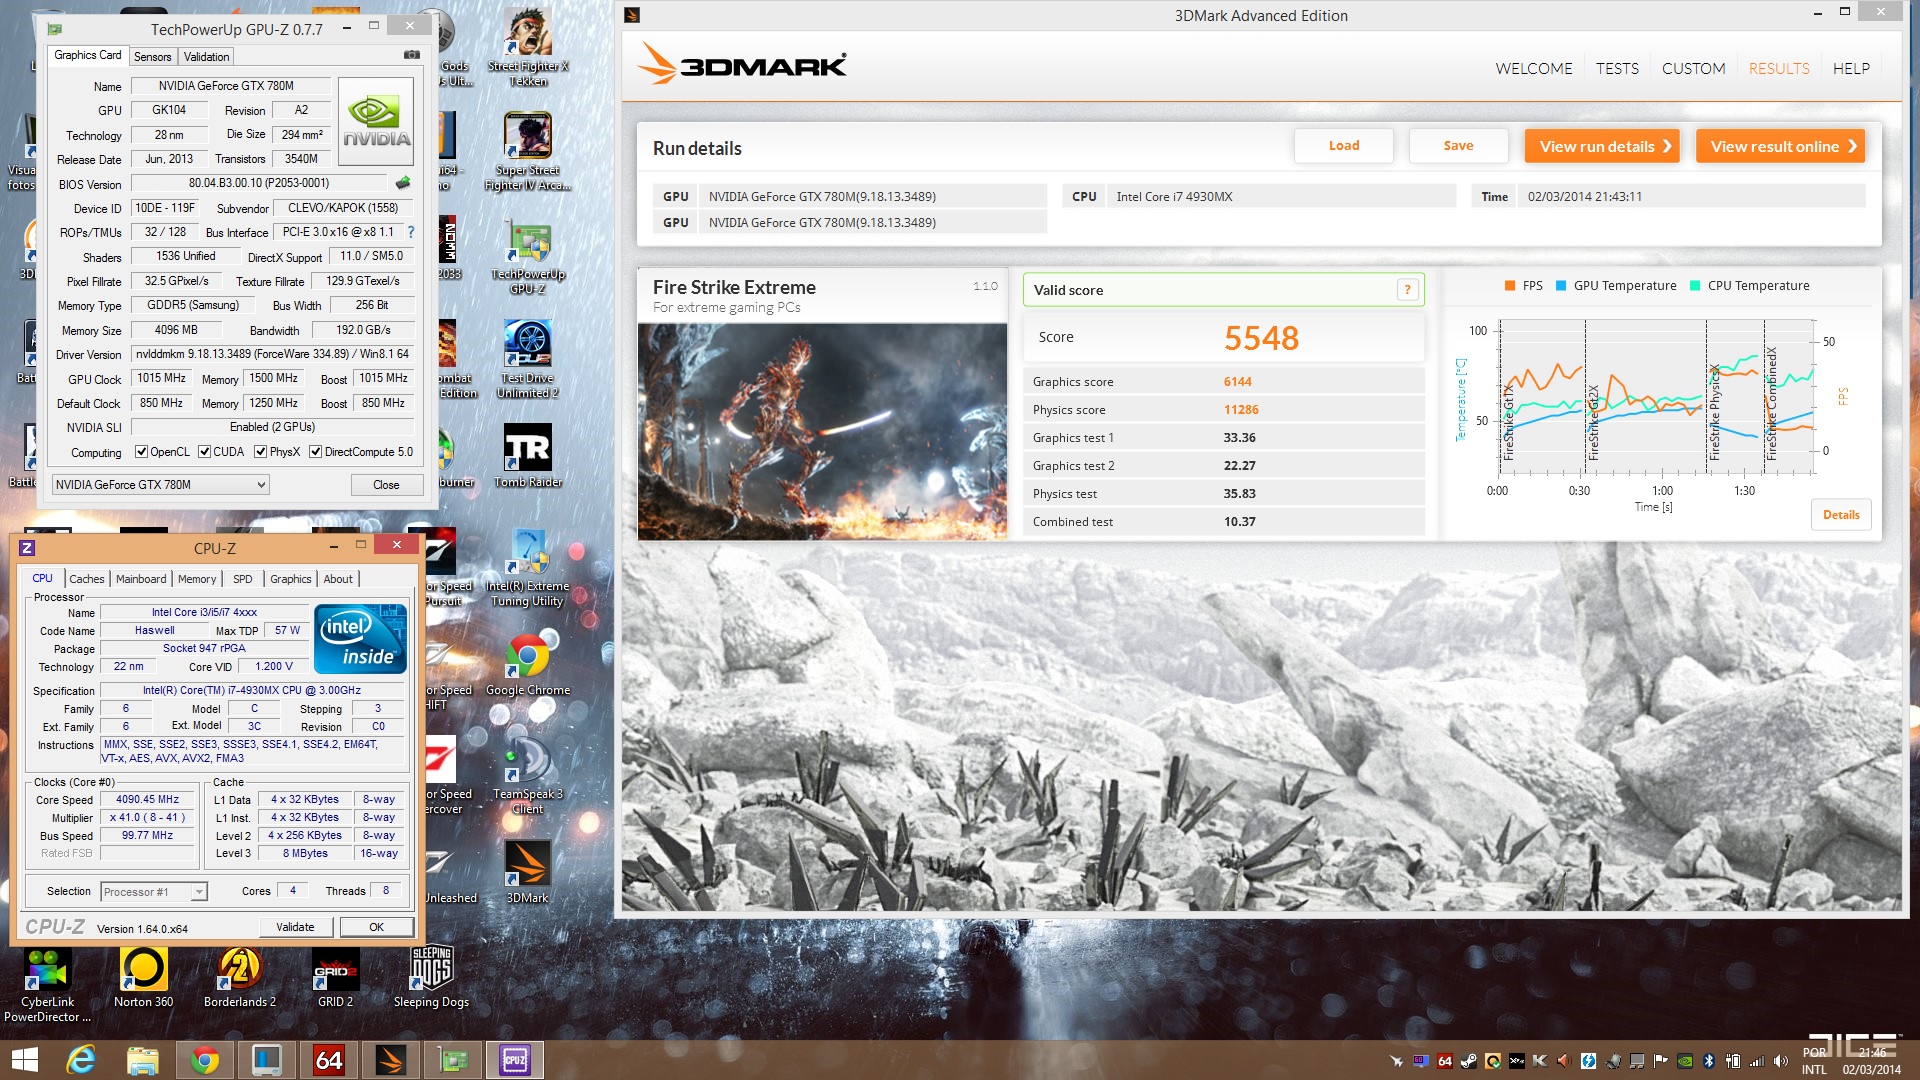
My benchs.

 1 point
 -
It was j95 that gave you the instructions for how to do a clean install of your drivers, so if you're unsure then hopefully he'll be able to come back to you. But according to his instructions I understood it as: 1) Uninstall drivers using Windows control panel 2) Run Display Driver Uninstaller (DDU) V12.4 and choose the first uninstall option (Safe Mode). 3) - Download GeForce 334.89 WHQL 4) Extract the driver using 7-Zip 5) Go to the NVidia 'International' folder in the extracted driver and delete the following folders: -Display.Update -GFExperience -GFExperience.NvStreamC -GFExperience.NvStreamSrv -LEDVisualizer -MS.NET -Network.Service -NvVAD -ShadowPlay 6) In the Display.Driver folder -> copy/overwrite nvdmi.inf with (unzip) nvdmi.inf_v334.89_AW_M17xR3_GTX_770M 7) Run the Setup.exe file in the International Folder, which will sucessfully install the driver All I did there was copy & paste what j95 suggested to you & put in a few of my own words. - - - Updated - - - As long as GPUz is showing that it's recognizing the card in all it's areas then I should think that's fine.1 point
-
So I successfully raised my refresh rate from the default 60Hz to 85Hz with no artifacts on the AUO B156HW01 V4 screen, which is the matte 95% gamut screen found in 15.6" clevo laptops. This was vastly complicated by Intel's strict adherence to the screen's EDID, with no support for EDID overrides. If clevo's had a direct connection option between the dGPU and the screen then I could have just done this by software means, but since the IGP is in control of the display, it was necessary to desolder the EDID chip and place it in my programmer. imgur: the simple image sharer imgur: the simple image sharer The top 8 pins on the programmer insert had to be removed to properly connect the EDID chip, which is solder onto the tiny MSOP8 section of the insert. What I did was I partially disassembled the screen so that the pcb was not directly against the plasting back of the screen so that I could use my heat gun to remove and replace the EDID chip. You can see in the top photo that I also put a file between the screen and pcb to make sure I did not melt the screen. The EDID chip is a GT24C01 and I made the changes to the files with a hex editor. The changes I made were to raise the pixel clock rate for both detailed timing descriptors, raising the default 60Hz to 85Hz, and raising the low power 50Hz mode to 60Hz so that games that did not like non-60Hz refresh rates (diablo 3) could still be run at 60Hz. This required altering the checksum or else the laptop would through out the entire EDID and boot with a very corrupted image. My results were 85Hz with no artifacts on my not broken screen, and 96Hz on my previous damaged screen. 90Hz was almost stable on the unbroken screen, and the 96Hz on the broken screen would occasionally have artifacts depending on the particular plug-in attempt, so it seems that the damaged screen is 5-7Hz better than the undamaged. I thought of swapping the signal processing chips, but that could easily go very wrong and did not seem worth less than 10Hz. Common issues when the refresh rate was too high was the dithering algorithm going haywire so that all colors were messed up, and vertical or horizontal lines. When lowering the refresh rate back down after booting at one that was too high, the lines would not always disappear. http://i.imgur.com/8tgZwPJ.png1 point
-
Clevo (or one of the heroes here) should seriously consider making a triple pipe CPU heatsink. I mean the 4900MQ at 4.2GHz can pull over 100W when running XTU bench. Even with the bottom cover off, using the P370EM CPU heatsink (which actually has 3 pipes) and forcing max fans I can just barely get the CPU to not throttle. Temps start out good but slowly creep up to 95C or above towards the end of the XTU bench. Just imagine how much heat the 4930MX would generate if it was to run a stable 4.5 GHz on all 4 cores. 3 heatpipes isn't optional, it's a MUST.1 point
-
Enjoy my kepler BIOS modding guide. I explained how to overvolt kepler cards. You never know when it may come in handy. Don't try this if you don't know what you are doing. kepler modding guide.zip kepler modding guide.zip1 point