Search the Community
Showing results for tags 'asus'.
-
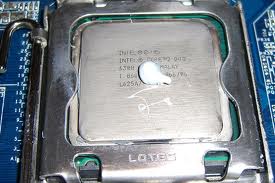
Hello, my laptop motherboard chip is suddenly burned, is there any possibilities to fix or replace the component? The picture is just for example. thanks
-
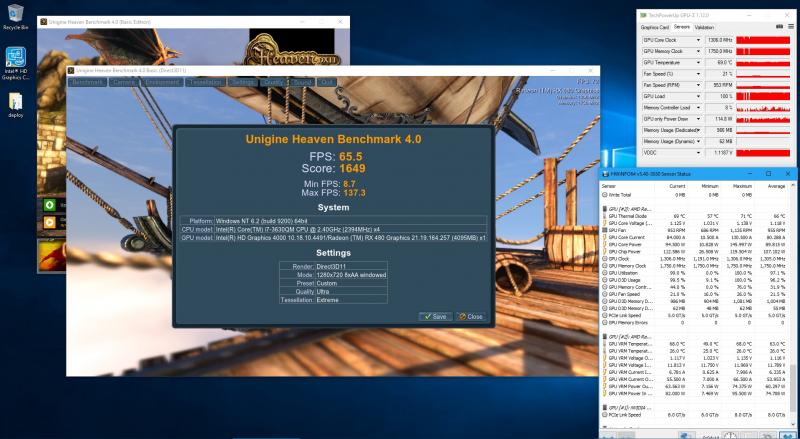
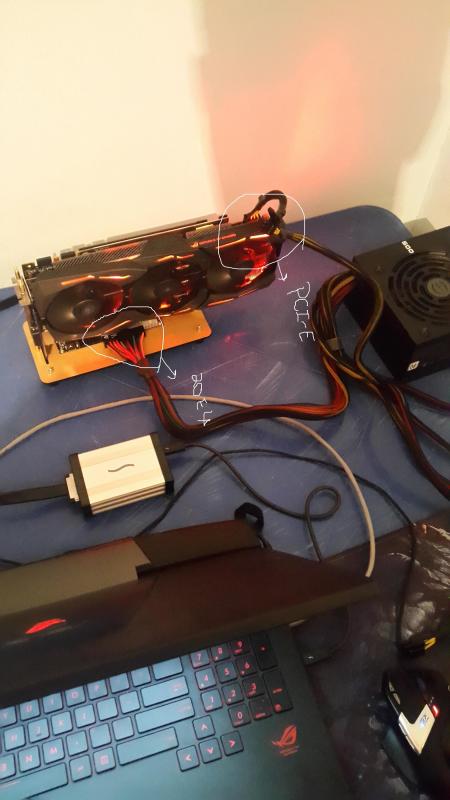
Hello! I have an Asus N76VB (i7-3630QM, HD4000+GT740M, 16GB DDR3, Windows 10 x64) and an EXP GDC v8.3E adapter. I have recently purchased a 4GB Sapphire Nitro+ OC RX 480 and cannot get it to work properly. I got the adapter about two moths ago and tested it with my friend's 2GB MSI GTX 760. Everything ran perfectly. All I had to do was plug it in, uninstall my nvidia driver and install the desktop version. I didn't test it for long, just one or two games, but it worked as expected. I then borrowed a 4GB Palit GTX 760 and tested it for a couple of days. The setup was exactly the same, except I also disabled the Intel and Nvidia gpus from device manager. it worked flawlessly for extended periods of time (4+ hours). I tested Heaven as well with the same clocks and settings I saw in an online result and it was only ~10% slower. The internal display worked on both cards, but the performance was much worse with it enabled, so I only used one external display. Black Friday came, and while I had originally intended to buy a 3GB 1060, I found an RX 480 that had a very good price. I remembered seeing some videos on YT with working RX 480s via the same adapter I have, and even one comment that mentioned it works on the 15 inch version of my laptop (Asus N56), so I thought it was a no-brainer. I picked it up yesterday, plugged it in, uninstalled the nvidia drivers, installed the AMD drivers and... bsod. The driver seemed to crash anywhere from 10s to 2min after logging in. The error was VIDEO_TDR_FAILURE. I looked it up online and concluded that it can mean almost anything. I reinstalled my OS today, Windows 10 x64, same as before, and thought I'd give it another try. The same issue popped up, although I did manage to run a windowed Heaven benchmark. Launching it full screen causes an immediate freeze/crash. Artifacts appear on the screen (green squares, lines, etc.) and soon after my display loses input, so I believe the GPU stops working. Even stranger, after setting TdrDelay to 16s (found this workaround online), I don't get a bsod anymore. Whenever the crash happens, both displays remain black. This only works if I disable both the Intel and Nvidia gpus from device manager. If the Intel gpu is enabled, almost anything will crash it, including the Windows display settings. It sometimes crashed during login (both displays stay black). I confirmed this by looking at the Event Viewer and seeing that LogonUI.exe crashed; the faulting module was atidxx64.dll. Just to be safe, I tested the gpu and the psu in a PC and it works: I uninstalled the nvidia drivers, installed the AMD drivers and everything ran perfectly. I have done everything I could think of, so any and all help is greatly appreciated. In the meantime, I will probably give it to my brother and use his 760. Edit: I also gave Windows 8.1 a try since I saw some people mention that the tdr error might only occur on Windows 10. It made no difference whatsoever.
-
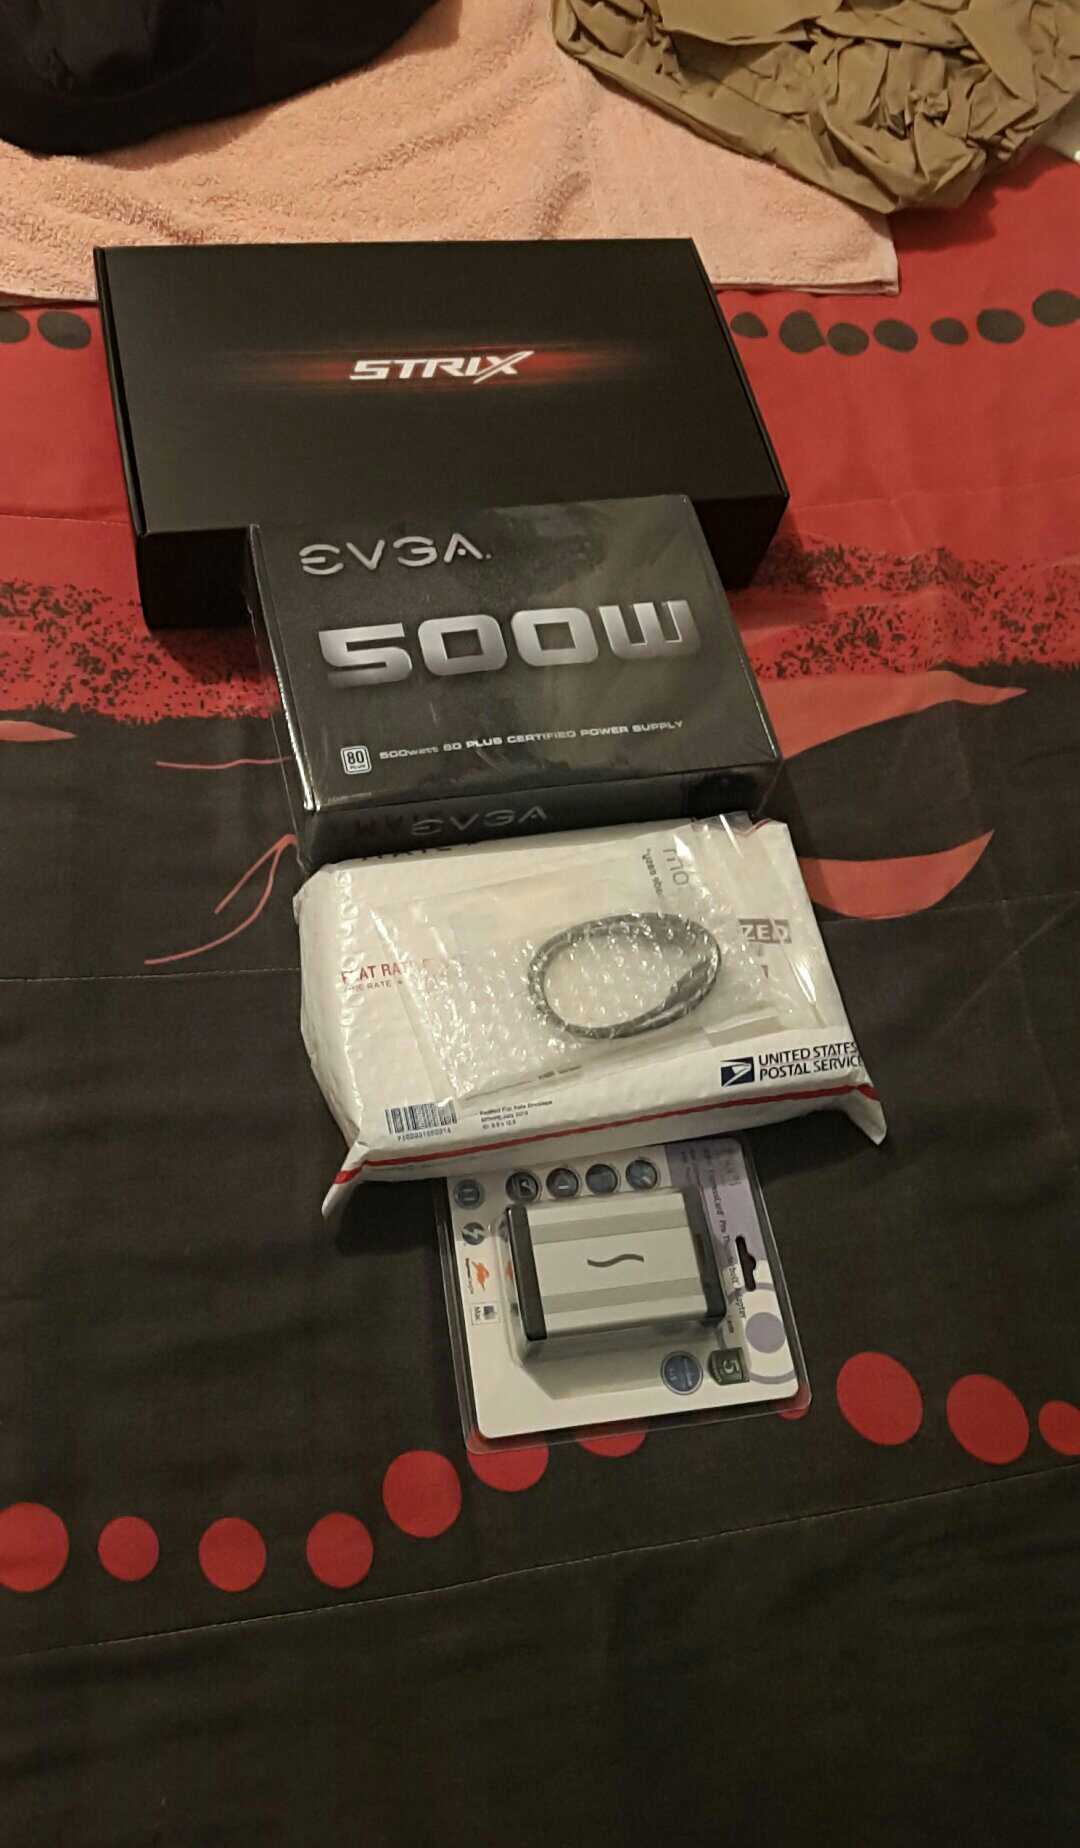
 I bought this thingy-mabob so I can try an egpu build. It's an Sonnet Echo Pro Adapter. what it does is it able to connect to expresscard devices over thunderbolt. I bought the Pe4c (which is the thing to put your gpu at) and I put in an old gt 640 (yes it works). I crossed my fingers AND I prayed but all this shit does is make the fans spin at like 1000rpm (I got a nice little personal fan now). I tried updating BIOS and disabling dGPU I even fresh installed my computer (goodbye porn ) Anyway, I wanted to do this because in the long run, it would have saved me money instead of buying a new computer. All I would have needed to do was buy a new gpu and BAM! 4K gaming. But if anyone wanna help my sorry ass, please do so. I wanna play BF1 but 4 year old gpu is crap. Please anyone with knowledge of this subject or maybe even the legendary Nando4 can help. Thanks.
 -
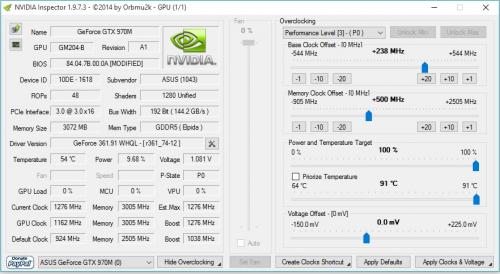
Hello, I have this gaming notebook with a 970m 3gb, I need a custom vbios so I can overclock it, I've been surfing the web but I can't find anything good... Any help? Thanks in advance.
-
 Hello, I just setup an eGPU built with GTX 950 and Asus X555LB (i7 5500U+8GB RAB). I connected an external monitor with 1440x900 resolution. I was able to use this external monitor perfectly on integrated GeForce GT 940M but after I have connected my GTX 950 through GDX Beast PCI-E adapter and drivers installed, I cannot choose 1440x900 resolution neither in Nvidia control panel nor in Windows menu. The OS is Windows 10, 64 bit. How can solve this problem? Thanks
 -

Overclocking 970m, 3 gb -G ASUS G751JT.
Vizenzo posted a topic in Overclocking, Cooling & Build Logs
Hello, i am new to the community, this is my first post, i own an asus Rog, G751JT, and i wish to overlock it, i am using currently ASUS GPU Tweak, however cant seem to Flash a VBIOS and get a GPU Overclock of more than 1175 hz , due to the fact that there the compatibility is different. Could someone plz tell me how to get a VBIOS that i can Flash into my GPU and where to get it, Thank you for your time. -
Hi, Before I would like to congratulate this community Well i'm trying to put together a build that is described in the subject, but i have everything set up but the PC does not recognize the graphic, but the fans and LEDs works to summarize, i got a EVGA souce 500 W (20 and 4-pin) for pe4c plate and an 8-pin auxiliary graphical source and then have an express card connection to the thunderbolt adapter and a cable connection (thunderbolt) thunderbolt adapter for pC, please i need help. What can I do?It will work my build?

-
Hey guys i need help to unlock the +135mhz limitation of my gtx 850m. Klem can u help me? here my VBIOS: https://mega.nz/#!J8cw0aLS!bLGu7R294W7wU52RDgTCvJIeBBF9jxrr066y7JpSg3o PLS POST IN A LINK LIKE MEGA.NZ BECOUSE I DON'T HAVE THE 5 POST! THX
-
 Guessing who will be the first company to include the nVidia Pascal 1080 and AMD Polaris GPU's inside their Laptops: 1- 2- 3- 4-
 -
I want to get an egpu setup going on my F555LA, but I have a few questions and one major roadblock. First, the roadblock. I have no idea where the wifi card is inside the laptop, and therefore can't get to the mPCIe port the adapter needs. Also annoying is the fact that in order to open it up you have to remove the keyboard, but that isn't to big of an issue though because I won't be using it or the track pad when it's hooked up. Questions: Has anyone set up an eGPU on this model or any ASUS laptops? Which adapter should I get? Which GPU should I get? Are eGPU's reliable? Laptop's specs for those who need to know. Processor: i5 5200u iGPU: intel hd 5500 RAM: 12gb HDD: 500gb OS: WIN 10
-
 ok, so, i have a serious problem atm. im trying to mod my bios so that i can go past the normal overclocking limit. however, everytime i try to do it, it always says "file size does not match existing bios size!", and it's really annoying, since i had to find everything myself, as no one else online tried this on my specific model, besides me. (which surprises me, really) this is the guide im following: So this is my detailed description how I managed to mod and overclock my GTX 960M in my Lenovo Y50-70. Please note: it is very dangerous to play with the BIOS, so you need to be very careful! I take NO RESPONSIBILITY for any damage or misuse of the information below! Use it AT YOUR OWN RISK! ------- Necessary tools: A. Fptw64 from Intel (9.5 or above) http://forum.hwbot.org/showthread.php?t=75024 B. PhoenixTool (2.50 or above) C. Maxwell II BIOS Tweaker (1.36) https://www.techpowerup.com/downloads/2562/maxwell-ii-bios-tweaker-v1-36/ ------------------------- How to flash Modded BIOS: 0. Flash the latest (3.03 now) official BIOS 1. From Windows, start 'cmd' as Administrator and read your your BIOS via Fptw64: Fptw64 -d BIOS.ROM -bios 2. Reboot, enter your BIOS and check "Enable downgrading BIOS" feature (we need to downgrade first in order to flash the modded BIOS) 3. From Windows, downgrade to 1.13 (this is necessary because the newer BIOSes have protection against mod-ding) 4. After reboot & reflash, start Windows, then enter standby, wait a bit, then wake up the machine 5. Create your modded BIOS, see separate list below 6. Start 'cmd' as Administrator and write your _modded_ BIOS via Fptw64: Fptw64 -f BIOS_MODDED.ROM -bios ------------------------- How to create modded BIOS (point 5 above): 5.1 Start PhoenixTool.exe from Phoenix Tool 2.50 and open your previously saved original BIOS.ROM from point #1 above .2 The tool analyses it and shows some messages, click OK .3 Now you can find your vBIOS in the "DUMP" subfolder in the folder containing your BIOS.ROM, with the file name: BE13645B-2C2C-44D2-A64F-0EA052C34597_1796.ROM .4 Create your modded vBIOS, see separate list below -> let's call it 960M_OC.MOD .5 Click on "Structure" .6 Open "EFI BIOS" tag .7 Open second "File Volume {7A9354D9-...}" tag .8 DXE Core -> Compressed Section -> Raw section -> File Volume {7A9354D9-...} .9 In the very long list, find the following tag (usually displayed at around 80% of the list): Freeform {BE13645B-2C2C-44D2-A64F-0EA052C34597} This is the item containing the latest vBIOS .10 Open the tag, then "GUID defined section", then click on Raw section. "Internal number" (in the top right corner) should be 1796 for BIOS 3.03. .11 Click on "Replace" and select your modded vBIOS (called 960M_OC.MOD above) .12 Click exit "Exit" and say Yes to "Save changes?" .13 Close the Phoenix Tool; now you should have your BIOS.ROM updated (the original will be saved as BIOS.ROM.OLD for safety) ------------------------- How to create modded vBIOS (point 5.4 above): Use Maxwell II BIOS Tweaker to change BE13645B-2C2C-44D2-A64F-0EA052C34597_1796.ROM; 5.4.1 Open the ROM .2 Change "Boost Clock" on "Common" tab to the new boost-ed maximum value .3 On "Boost table" tab, use the slider in the right bottom corner to increase your max boost-ed value to the same number .4 On "Boost states" tab, at P00 profile, change the MAX values in the GPC, L2C and XBAR fields to the same max boost-ed value .5 Save your modified BIOS and rename it to 960M_OC.MOD (My boost-ed max value was 1359 MHz. I could then use MSI Afterburner's software tuning -> my 960M could reach 1454 MHz without voltage increase.) i know that it's for a different laptop, but its basically the same ill provide more info when im home
 -
ASUS unveiled last month the 950-2G and Mini 950-2G, and both need only 75W and work without power supply. Correct me if I'm wrong, but that basically means I can use the AKiTiO Thunder2 without extra PSU. Which card would you recommend? The Mini size? source: http://www.pcworld.com/article/3043493/hardware/asus-reveals-two-tiny-unique-gtx-950-graphics-cards-that-dont-need-extra-power.html
-
Dear Members, I just want to create this Topic to list all laptop systems supporting (2X) Desktop GTX 980 SLI, and all information related to them, technical, pricing and reviews. In the same time, it will help me and other respected members to decide which one should we buy. 1- MSI GT80S Titan Skylake, SLI GTX980 Desktop GPU https://www.msi.com/Notebook/GT80S-6QF-TITAN-SLI-29TH-ANNIVERSARY-EDITION.html#hero-overview -------------------------------------------------------------- 2- New Asus ROG GX800 watercooled Gaming-Laptop Regards,
-
Version 1.0.0
47 downloads
Klem's_vbios_ASUS_G752VT_970M_GS_UNLOCKED. This mod for ASUS_G752VT_970M with G-SYNC! 1. Unlocked Nvidia core limit +135 MHz. 2. Unlocked Power Limit. 3. Unlocked Power adjustment by software (for example with Nvidia Inspector). 4. Increased Power Limit and Power Target. 5. Enabled some additional tweaks. If you liked my mod, you can buy me some beer: https://www.buymeacoffee.com/timqsh -
Hi! I sent you a PM with a vbios dump for my GTX970M in my Asus ROG G752VT-T7013T (w. G-Sync) and will happily donate if you could consider to make a unlocked vbios for this one
-
Hello ive seen a few people asking about heat and i thought i would chime in and say a few ways to keep down the heat! there are a few ways you go about this with out opening the computer, for those who arent to sure about taking a screwdriver to their laptop it may help you. in saying that, if your fans are dirty then this will not help you at all. I TAKE NO RESPOSIBILITY TO ANY DAMAGE HARDWARE! ANY CHANGES YOU MAKE ARE AT YOUR OWN RISK! INCREASING THE FAN SPEED to control your fans use this http://www.hwinfo.com/download64.html this is a free program that alot of people use on various computers. it work on alienwares well but im yet to test ROG and MSI with it. its pretty simple to use install it and get to this page and click on the sensors button then on the next screen click the small fan icon at the bottom unless you want to manually adjust your fan between each time you play click customer auto and you can edit it from there UNDERCLOCKING download and install NV tools it can manage fan speeds too but its not always 100% in laptops http://www.nvidia.com/object/nvidia-system-tools-6.08-driver.html on the left hand side, under the performance tab, select device settings now just slide it back in small steps until you are comfortable with the temps. remember that if your computer blue screens it DOES NOT mean your computer has been damaged. it is simply a way for the computer to avoid damage. adjust the slider in intervals of about 15mhz to be safe and click apply each time. start on the core clock and finish on the memory. Every now and again it is good to check on your progress to see how far you need to go. (more on this later) MSI after burner is a good one too http://www.guru3d.com/files-details/msi-afterburner-beta-download.html again the fan control is a bit hit and miss with it but it can control your clock speed. ass per the program above keep going untill you hit a STABLE setting you want. TESTING here we will look at the new GPU temps after the tune. MSI Kombustor is a great way to test your heat. http://www.geeks3d.com/20150710/msi-kombustor-v3-5-2-64-bit-v2-6-0-32-bit-download-gpu-stress-test-benchmark/ click on stability and watch the temps. if you see any artefacts stop the test and increase the mhz by 15mhz each fur mark is the one that i use to test the heat of my alienware http://www.ozone3d.net/benchmarks/fur/ aim for about 70-75*C. hope this helps you a bit. PS avoid EVGA's tuning tool on alienware i have heard it can brick your LCD! CLEANING THE FANS Just for the sake of it ill give you a few tips on cleaning your laptops fans out. assuming you already know the basics of using a screwdriver to open a laptop ill cover a few things to help you. REMEMBER, IF YOU REMOVE THE HEATSINK YOU WILL NEED NEW THERMAL PASTE! compressed air is a great way to remove dust and id recommend having a can of it over a compressor. The reason being is that some compressors can fill with a bit of water and can spray it directly into the computer. you can spray the air into the vents and while it wont really "clean" it it may open enough room for air to pass out. i DO NOT recomend this however. after opening up the computer and removing the fan take a paint brush and clean the entire fan, get as much of the dust out as you physically can. you can use toothbrushes too if you dont have anything else. make sure you clean the grill behind the fan too as that is where the dust usually builds up. removing this dust and hair is the most important part of this clean up. now on to thermal paste. remove all the old thermal paste from the heat sink and the CPU with a dry cloth then, use isopropyl alcohol to clean the rest. some people seem to think that more is better but this is completely not true! if you put a large amount of thermal paste on the heatsink you will actuall have hotter temps. this is due to either: A ) the heatsink is not geting enough connectivity to the GPU as the layer of thermal paste is too thick B ) too much of it creates small pockets of air, these air pockets become super hot and that causes more heat on the GPU the correct amount is roughly the size of a pea even that is boarderline too much. Dont spread it around instead place your heat sink over it as even as possible and screw it down in a X pattern for an even spread. really hope this helps you and good luck!
-
Version 1.0.0
17 downloads
Klem's_vbios_ASUS_GTX870M_80.04.F4.00.01_UNLOCKED 1. Unlocked Nvidia core limit +135 MHz. 2. Unlocked Power Limit. 3. Unlocked Power adjustment by software (for example with Nvidia Inspector). 4. Increased Power Limit and Power Target. 5. Enabled some additional tweaks. If you liked my mod, you can buy me some beer: https://www.buymeacoffee.com/timqsh -
 Do you plan to purchase a new gaming notebook in the next few months? If so, which brands are you considering and why? Additionally, with the release of Thunderbolt 3 and external enclosures like Razer Core coming to market, is this a contender for you vs a dedicated gaming notebook that is thicker and weighs more?
 -
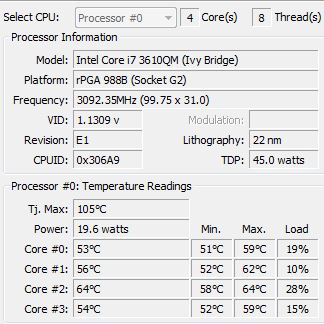
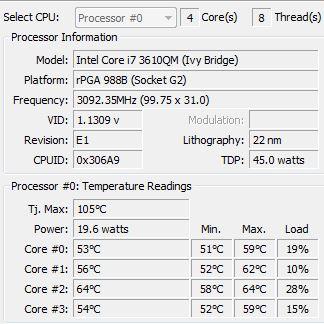
Hi, My sister has this notebook, it's equipped with an i7 4558U, and has a 1440p display. She's experiencing overheating even from the most basic tasks. Was wondering if anyone has a notebook similar to this that has faced similar problems or knows what to do about this.
-
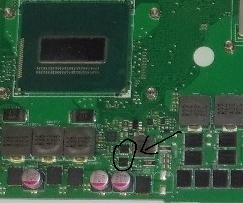
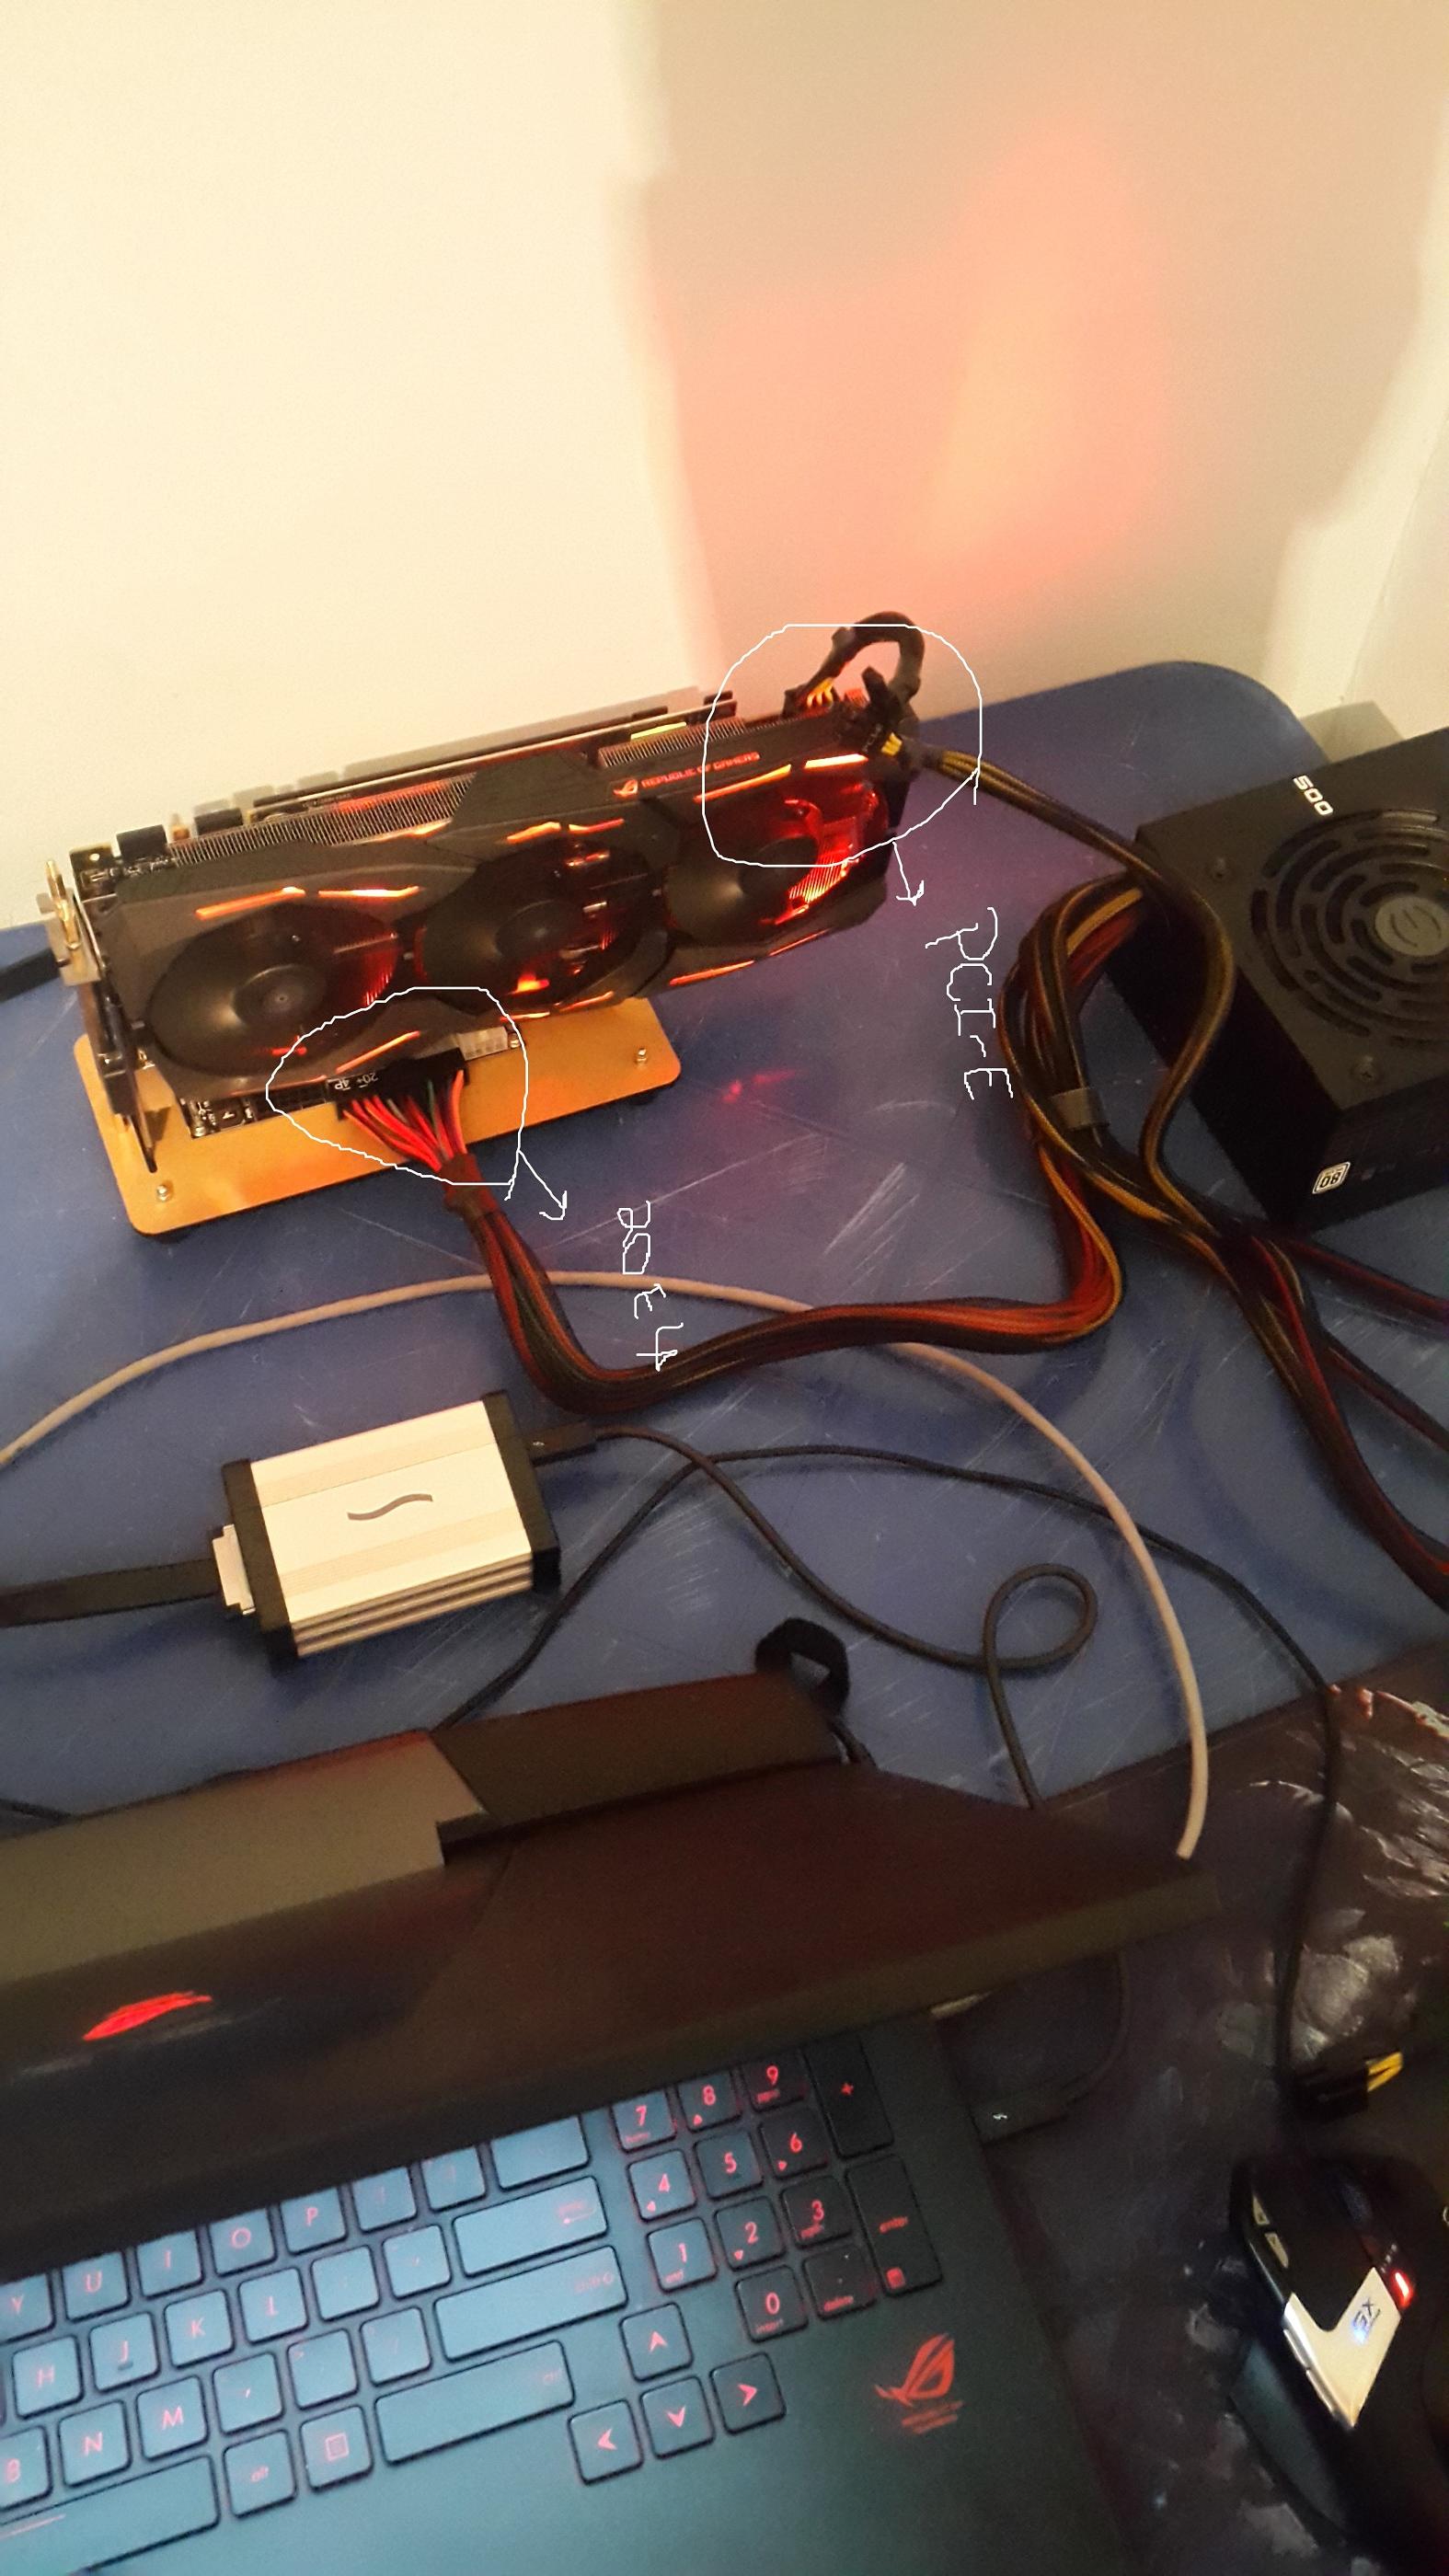
 Original Author: doink Notebook CPU: Intel Core i7-2630QM RAM: 4x2GB 1333MHz iGPU: Intel® HD Graphics 3000 dGPU: Nvidia Geforce GT550m eGPU: ASUS STRIX-R9390X-DC3OC-8GD5-GAMING OS: Windows 10 Pro 64bit EXP GDC Beast Preparation Prepare the pcie memory (you have 2 options): Mod your bios and then you can disable the dGPU, set your TOLUD to 2.25GB and change the pcie port2 speed to gen1. ( guide ) - You can disable the dGPU in the unlocked Chipset tab -> System Agent (SA) Config -> Graphics Config -> iGPU Port configuration = Disabled, and set the Primary display to IGFX - Chipset tab -> Memory Config -> Max TOLUD = 2.25GB - Chipset tab -> CougarPoint (PCH) Config -> PCI Express Config -> PCI Express Root Port 2 -> PCIe speed = Gen1 Do DSDT override and you will disable the dGPU from Setup 1.30 - You can change the pcie port speed back to gen2 after everything works. - Remove your old AMD driver with DDU - Install Setup 1.30 Disassembly The wifi mPCIe port is located under the caps lock LED so you have to get rid off the top cover of the case. Optibay users can cut off the slim part of the bay to get enough space for the hdmi cable. If you have any problems with the disassembly just follow this video: Asus done some wierd mPCIe implementation on this notebook so you have to isolate PIN 22 on the GDC Beast mPCIe connector. (more info from sNullp) You can find the mPCIe pinout here: PCI Express Mini Card (Mini PCIe) pinout diagram @ pinoutsguide.com I just used electrical tape to solve this problem, luckily the neighbour pins are unused so you have enough space for the *magic*. If you don't do it your timing on the GDC Beast won't work (no long green light near the switches) and you can't bypass the POST screen hang with egpu connected -> setup 1.3 never detects your eGPU. (windows will after sleep-plug-wake but with error 12 so its a dead end) Set the switches on the EXP GDC to CTD 6s and PTD 14s. Plug all the cables in and fire up the system. Wait at the os selection page until the green light goes off and the egpu fans starts to work. Enter Setup 1.3 and if you used the bios mod you can simply PCI Compact -> igp+egpu if you done the DSDT override you simply Video Cards -> dGPU off, PCI Compact -> 56.25GB -> igpu + egpu -> force igpu to 32bit Chainload to your os and start windows. Install the Radeon driver, don't reboot with egpu connected (POST hangs with amd gfx), always do shutdown-restart instead. If everything goes, no freezes, no random disconencts then try setting the mPCIe port speed to Gen2. Numbers 3dmark FIRE STRIKE 1.1: 7719@Gen1 | 8438@Gen2 Graphics Score 10412@Gen1 | 11578@Gen2 Physics Score 5903@Gen1 | 6178@Gen2 Combined Score 3116@Gen1 | 3396@Gen2 With my dGPU, i get 830 (820/6200/314) points. SKY DIVER 1.0: 18923@Gen1 | 19766@Gen2 Graphics Score: 35536@Gen1 | 38899@Gen2 Physics Score: 6130@Gen1 | 6219@Gen2 Combined Score: 13757@Gen1 |13910 @Gen2 CLOUD GATE 1.1: 13164@Gen1 | 15158@Gen2 Graphics Score: 48568@Gen1 | 60916@Gen2 Physics Score: 3707@Gen1 | 4177@Gen2 3dmark11: 10123@Gen1 | 11209@Gen2 Graphics Score: 13492@Gen1 | 16003@Gen2 Physics Score: 5969@Gen1 | 6092@Gen2 Combined Score: 5537@Gen1 | 5643@Gen2 Graphics Test 1: 48.35 fps@Gen1 | 61.62 fps@Gen2 Graphics Test 2: 75.07 fps@Gen1 | 82.35 fps@Gen2 Graphics Test 3: 91.53 fps@Gen1 | 104.7 fps@Gen2 Graphics Test 4: 43.0 fps@Gen1 | 51.1 fps@Gen2 Physics Test: 18.95 fps@Gen1 | 19.34 fps@Gen2 Combined Test: 25.76 fps@Gen1 | 26.25 fps@Gen2 Dota2 With the default renderer i get ~25-28fps in every video setting, using the -DX11 arg 60-90fps on highest settings. Not Stable! I currently have random connection issues even on Gen1 speed, the screen hangs for 2-3sec and then usually amd driver restores the egpu. This happens usually after 1-2 hour if im in one game but in 3dmark i can't run all the tests at once at gen2. So no random fps drops only random gpu drops Update: Same issue with PE4C-PM060A V3.0. Thanks for @Tech Inferno Fan helping out with the PIN22 idea and ofc for the awesome Setup1.3 program. View full article
 -
What are the risks of changing the vbios on a asus G751JT-CH71 (GTX 970m 3gb)? Previously I had a desktop that had a GTX 660 and I tried to change it's vbios and resulted in the card not being read by windows but since then I have changed its vbios to its original and works fine. Now I have tried overclocking my card (GTX 970m 3gb) and it worked perfectly with a slight fps boost but I feel like the card can handle more +135 on core isnt much, I have read on other sites that it exists a modded vbios that increases the amount you can add but before so I would like to know the chances of its success and if it really gives a boost that's significant and worth it.
-
Hi guys, I'm interested in increasing the voltage of my graphic card. I followed the tutorial to overclock my card with a custom vbios but i still cant modify the voltage in the nvidia inspector tool. How could i modify my vbios to increase the voltage ? Here is the tutorial im talking about : http://forum.techinferno.com/asus-gaming-notebook-forum/2538-%5Bg75vw%5D-modified-bios-vbios-higher-overclocking.html Thanks a lot
-
 Hi guys, I am new to this forum, so forgive me if I posted this thread in the wrong place. I am a PhD Student in New Zealand. I want to build an eGPU setup to enable my Laptop to have stereo 3D via the external card. I will be testing it with quite a few cards GTX470, GTX570, GTX770(my current desktop driver) and a Quadro K5000 (which I need for my research). I wish to get the eGPU setup for my Stereo 3D research. I am planning on buying the AKiTiO Thunder2 PCIe box and use my laptop's thunderbolt port to connect the eGPU. I will primarily be using the setup for research but also sometimes for gaming. What else other than a PSU and AKiTiO Thunder2 do I need to setup my eGPU? I live in New Zealand, can I ask AKiTiO to ship one here and still avail the 189$ discounted price our group gets? If I am successful I will definitely make a tutorial for the ASUS g501JW eGPU setup. Thanks a lot.
 -
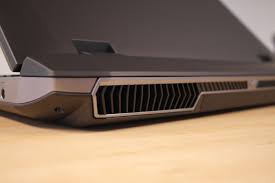
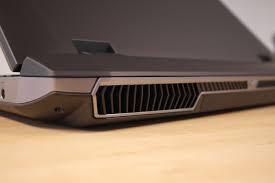
I have tried the following and my laptop still shuts off randomly when playing games: 1. I have already cleaned the fans and parts from dust 2. I have already put brand new Thermal Grease (I followed the recommend amount found on this picture) THINGS I NOTICED: 1. In Safe mode, my laptop does not shutdown randomly 2. My BIOS VERSION : 04.06.05 3. My Core Temps (After Long Use) 4. Hot Air blowing out of the back exhaust[on the right side] after few minutes of start up (idle) SHOULD I UPDATE THE BIOS to this: http://forum.techinferno.com/asus-gaming-notebook-forum/2538-%5Bg75vw%5D-modified-bios-vbios-higher-overclocking.html WILL THIS FIX THE PROBLEM?
-
Since our last thread got deleted, I'll start anew: CURRENT OWNERS: Owner Where Purchased Cost Production Date 5150 Joker (Brian) Amazon.com $732 + tax October 2014 [FONT=Segoe UI][FONT=Roboto][FONT=inherit][FONT=inherit][FONT=inherit][URL="http://www.asus.com/us/Monitors/ROG_SWIFT_PG278Q/#game-detail"][FONT=inherit][/FONT] [FONT=Cuprum][FONT=inherit]Great Graphics for that In-Game Advantage[/FONT][/FONT] [/URL][/FONT] [FONT=inherit][URL="http://www.asus.com/us/Monitors/ROG_SWIFT_PG278Q/#smooth-visual"][FONT=inherit][/FONT] [FONT=Cuprum][FONT=inherit]Enjoy a Smooth, Stutter-free Gaming Experience[/FONT][/FONT] [/URL][/FONT] [FONT=inherit][URL="http://www.asus.com/us/Monitors/ROG_SWIFT_PG278Q/#gamer-features"][FONT=inherit][/FONT] [FONT=Cuprum][FONT=inherit]Gamer-centric Features[/FONT][/FONT] [/URL][/FONT] [FONT=inherit][URL="http://www.asus.com/us/Monitors/ROG_SWIFT_PG278Q/#game-accuracy"][FONT=inherit][/FONT] [FONT=Cuprum][FONT=inherit]Improved In-Game Accuracy[/FONT][/FONT] [/URL][/FONT] [FONT=inherit][URL="http://www.asus.com/us/Monitors/ROG_SWIFT_PG278Q/#advanced-connectivity"][FONT=inherit][/FONT] [FONT=Cuprum][FONT=inherit]Advanced Connectivity with Smart Cable Management[/FONT][/FONT] [/URL][/FONT] [FONT=inherit][URL="http://www.asus.com/us/Monitors/ROG_SWIFT_PG278Q/#extra-comfort"][FONT=inherit][/FONT] [FONT=Cuprum][FONT=inherit]Gamer Ergonomics – Say Hello to Extraordinary Comfort[/FONT][/FONT][/URL][/FONT][/FONT][FONT=inherit]/websites/global/products/t0Xm6iD2xvngT8tR/img/main/view360-bg.jpg) 50% 50% no-repeat;">[/FONT][FONT=inherit][FONT=Cuprum]360° Product View[/FONT] [FONT=inherit][FONT=inherit] [/FONT] [/FONT] [/FONT] [url]http://www.asus.com/websites/global/products/t0Xm6iD2xvngT8tR/img/main/intro-bg.jpg[/url]) 50% 0px no-repeat;">[FONT=inherit][FONT=inherit] [FONT=Cuprum]The World's First WQHD G-SYNC™ Gaming Monitor[/FONT] [FONT=Cuprum]Forged for Gaming Perfection[/FONT] [/FONT] [FONT=inherit][FONT=inherit][FONT=inherit]The ROG SWIFT PG278Q represents the pinnacle of gaming displays, seamlessly combining the latest technologies and design touches that gamers demand.[/FONT] [FONT=inherit]This 27-inch WQHD 2560 × 1440 gaming monitor packs in nearly every feature a gamer could ask for. An incredible 144Hz refresh rate and a rapid response time of 1ms eliminate lag and motion blur, while an exclusive Turbo key allows you to select refresh rates of 60Hz, 120Hz or 144Hz with just one press. The ROG SWIFT contains integrated NVIDIA[FONT=inherit]®[/FONT] G-SYNC™ technology to synchronize the display's refresh rate to the GPU. This technology eliminates screen tearing, while minimizing display stutter and input lag to give you the smoothest, fastest and most breathtaking gaming visuals imaginable. Connectivity is simple, yet robust, with a single DisplayPort 1.2 port to enable NVIDIA[FONT=inherit]®[/FONT]G-SYNC™ and dual USB 3.0 ports for convenience.[/FONT] [/FONT] [FONT=inherit][FONT=inherit]ASUS-exclusive GamePlus Technology enhances your gaming experience further by providing you with crosshair overlays for FPS games and multiple in-game timers for RTS/MOBA games.[/FONT] [FONT=inherit]The ROG Swift has a super-narrow 6mm bezel that begs this monitor to be used in multi-display gaming set-ups. With VESA wall mount capability and an ergonomic stand designed with full tilt, swivel, pivot and height adjustments, the ROG SWIFT is ready for gamers of all shapes and sizes to game comfortably for hours on end.[/FONT] [/FONT] [/FONT] [/FONT] [FONT=inherit][FONT=Cuprum]GREAT GRAPHICS FOR THAT IN-GAME ADVANTAGE[/FONT] [/FONT] [FONT=inherit][FONT=inherit][FONT=Cuprum]The 27-inch WQHD Display that Offers Greater Detail and More Onscreen Real Estate[/FONT] [FONT=inherit][/FONT] [FONT=inherit]The ROG SWIFT PG278Q represents the next generation in gaming displays. This WQHD 2560 x 1440 monitor delivers four times the resolution of 720p, with 109 pixels per inch or 109 RGB matrices per inch. This gives you the benefits of greater image detail and up to 77% more onscreen desktop space than standard Full HD (1920 x 1080) displays. These minor details add up to give you a major in-game advantage.[/FONT] [/FONT] [FONT=inherit][FONT=inherit][FONT=inherit]Conventional 27-inch 1920 x 1080 monitor[/FONT] [FONT=inherit]Shows less detail and spacing with less room for work bars on the side. Images are relatively blurrier.[/FONT] [/FONT] [FONT=inherit][FONT=inherit]ROG SWIFT PG278Q 27-inch 2560 x 1440 monitor[/FONT] [FONT=inherit]See more detail and spacing with more room for working bars on the side. Images are much more crisp and detailed.[/FONT] [/FONT] [/FONT] [/FONT] [FONT=inherit][FONT=Cuprum]ENJOY A SMOOTH, STUTTER-FREE GAMING EXPERIENCE[/FONT] [/FONT] [FONT=inherit][FONT=inherit][FONT=Cuprum]Incredible 144Hz Refresh Rate[/FONT] [FONT=inherit][/FONT] [FONT=inherit][FONT=inherit]Unlock the highest frame rates available, decimate lag and say goodbye to motion blur to gain the upper hand in first person shooters, racers, real-time strategy and sports titles. With twice the frame rate of standard LCDs, the ROG SWIFT PG278Q Gaming Monitor encourages you to never blink again.[/FONT] [/FONT] [/FONT] [FONT=inherit][FONT=inherit][FONT=inherit]Fast Frame Rates[/FONT] [FONT=inherit]The ROG SWIFT PG278Q Gaming Monitor delivers refresh rates of up to 144Hz to deliver the smoothest possible gameplay, even in graphically-intensive fast-paced action sequences.[/FONT] [/FONT] [FONT=inherit][FONT=inherit]Minimal Motion Blur[/FONT] [FONT=inherit]The ROG SWIFT PG278Q Gaming Monitor minimizes motion blur to display more natural movement, making it ideal for first person shooters or real-time strategy games.[/FONT] [/FONT] [/FONT] [/FONT] [FONT=inherit][FONT=inherit][FONT=Cuprum]Incredible 1ms Rapid Response Time[/FONT] [FONT=inherit]Response time and ultra-smooth gameplay are the hallmarks of a true gaming monitor. With a 1ms rapid response time – the fastest available – the ROG SWIFT PG278Q Gaming Monitor eliminates smearing, tearing and motion blur, allowing you to quickly react to your game.[/FONT] [/FONT] [/FONT] [FONT=inherit][FONT=inherit][FONT=Cuprum]Gain a Competitive Edge with NVIDIA[FONT=inherit]®[/FONT]G-SYNC™ Technology[/FONT] [FONT=inherit][FONT=inherit][FONT=inherit]NVIDIA[FONT=inherit]®[/FONT]G-SYNC™ display technology delivers the smoothest, fastest and most breathtaking gaming imaginable. G-SYNC™ synchronizes the ROG SWIFT's refresh rate to the GPU in your GeForce GTX-powered PC, eliminating screen tearing and minimizing display stutter and input lag. Scenes appear instantly, while objects look sharper and more vibrant. Gameplay is fluid and responsive too, ensuring a serious competitive edge.[/FONT] [/FONT] [FONT=inherit][FONT=inherit]The ASUS Display R&D team works closely with NVIDIA to ensure that everything runs smoothly on ASUS G-SYNC™ monitors. The ROG SWIFT PG278Q gaming monitor with built-in G-SYNC™ delivers super smooth and stunning visuals.[/FONT] [FONT=inherit]Note: G-SYNC features require an NVIDIA[FONT=inherit]®[/FONT] GeForce GTX650Ti BOOST GPU or higher. For more detailed information, please refer toG-SYNC Technology Overview | GeForce | GeForce[/FONT] [/FONT] [/FONT] [/FONT] [FONT=inherit][FONT=inherit][FONT=inherit]Without G-SYNC™[/FONT][/CENTER] [/FONT] [FONT=inherit][FONT=inherit]With G-SYNC™[/FONT][/CENTER] [/FONT] [/FONT] [FONT=inherit]Watch Video[/FONT][FONT=inherit][FONT=inherit] [FONT=inherit]NVIDIA[FONT=inherit]®[/FONT]Ultra Low Motion Blur Technology[/FONT] [FONT=inherit] [/FONT][/CENTER] [FONT=inherit][FONT=inherit]Conventional 60Hz monitors show extensive motion blur which detracts from your gaming experience. The ROG SWIFT PG278Q Gaming Monitor with NVIDIA[FONT=inherit]®[/FONT] Ultra Low Motion Blur technology* reduces the effects of motion blur by delivering crisp edges in fast-paced gaming environments for perceivable differences in natural movement.[/FONT] [FONT=inherit]*Users can turn on the Ultra Low Motion Blur function from the OSD setting. This works with titles that do not support the NVIDIA[FONT=inherit]®[/FONT] G-SYNC™ technology. Ultra Low Motion Blur technology works only at 85Hz, 100Hz and 120Hz.[/FONT] [/FONT] [/FONT] [FONT=inherit] [FONT=inherit]NVIDIA[FONT=inherit]®[/FONT] 3D Vision™ Ready[/FONT] [FONT=inherit] [/FONT][/CENTER] [FONT=inherit][FONT=inherit]The ROG SWIFT PG278Q is compatible with the NVIDIA[FONT=inherit]®[/FONT] 3D Vision™ 1 and 2 kits* to support up to three WQHD displays for immersive multi-display 3D gaming experience. ROG SWIFT provides the finest 3D gaming and content viewing experience and thanks to the ever-growing library of over 700 3D Vision™ ready game titles, as well as 3D Blu-ray movies and YouTube 3D Playback support. See everything in a new dimension with the ROG SWIFT.[/FONT] [FONT=inherit]*Requires NVIDIA[FONT=inherit]®[/FONT] 3D Vision™ kit, sold separately. Go to www.nvidia.com andwww.3DVisionLive.com for further details.[/FONT] [/FONT] [/FONT] [/FONT] [/FONT] [FONT=inherit][FONT=Cuprum]GAMER-CENTRIC FEATURES[/FONT] [/FONT] [FONT=inherit][FONT=inherit][FONT=Cuprum]ASUS-exclusive 5-Way OSD Navigation Key[/FONT] [FONT=inherit]The intuitive 5-way navigation key allows you to select OSD settings with just a flick. Switching menu settings have never been so easy.[/FONT] [/FONT] [FONT=inherit][FONT=Cuprum]ASUS-exclusive Refresh Rate Turbo Key[/FONT] [FONT=inherit]The ROG SWIFT features a dedicated hotkey to toggle refresh rate on-the-fly without needing to access the graphic driver control panel. Quickly select from 60, 120, or 144Hz refresh rates and go back to gaming.[/FONT] [/FONT] [/FONT] [FONT=inherit][FONT=inherit][FONT=Cuprum]Keeping It Cool with a Smart Air Vent Design[/FONT] [FONT=inherit]The ROG SWIFT PG278Q Gaming Monitor is designed for marathon gaming sessions. Its smart air vent design aids heat dissipation to keep things cool for extended periods of time.[/FONT] [/FONT] [/FONT] [FONT=inherit][FONT=inherit][FONT=Cuprum]Awesome LED Light-in-Motion Effects[/FONT] [FONT=inherit]The ROG SWIFT PG278Q Gaming Monitor comes with a mysterious and intricately-patterned base that can illuminate with an LED Light-in-Motion feature.[/FONT] [/FONT] [/FONT] [FONT=inherit][FONT=Cuprum]IMPROVED IN-GAME ACCURACY[/FONT] [/FONT] [FONT=inherit][FONT=inherit][FONT=Cuprum]ASUS-exclusive GamePlus Technology[/FONT] [/FONT] [FONT=inherit][/FONT] [FONT=inherit][FONT=inherit][/FONT] [FONT=inherit][/FONT] [FONT=inherit]The ROG SWIFT PG278Q Gaming Monitor features the ASUS GamePlus hotkey with crosshair overlay and timer functions. Select from four different crosshairs to suit your gaming environment, and keep track of spawn and build times with the on-screen timer that can be positioned anywhere along the left-hand edge of the display.[/FONT] [/FONT] [/FONT] [FONT=inherit][FONT=Cuprum]ADVANCED CONNECTIVITY WITH SMART CABLE MANAGEMENT[/FONT] [/FONT] [FONT=inherit][FONT=inherit][FONT=inherit]The ROG SWIFT PG278Q Gaming Monitor includes DisplayPort 1.2 for native WQHD output and dual USB 3.0 ports for convenient pass through connectivity. A cable management design feature found on the back of the monitor allows you to organize and hide your cables to keep your gaming area tidy.[/FONT] [/FONT] [*=center]Power [*=center]USB 3.0 Upstream [*=center]DisplayPort 1.2 [*=center]2 x USB 3.0 Downstream [/FONT] [FONT=inherit][FONT=Cuprum]SAY HELLO TO EXTRAORDINARY COMFORT[/FONT] [/FONT] [FONT=inherit][FONT=inherit][FONT=inherit]The ROG SWIFT PG278Q Gaming Monitor is specially designed for long marathon gaming sessions. Its slim profile and super-narrow 6mm bezel makes it perfect for almost seamless multi-display setups. The ROG SWIFT also has an ergonomically-designed stand with tilt, swivel, pivot and height adjustment so you can always find that ideal viewing position. It can also be VESA wall-mounted.[/FONT] [/FONT] [*=center][FONT=inherit][/FONT] [LEFT][FONT=inherit]Swivel (+60° ~ -60°)[/FONT][/LEFT] [*=center][FONT=inherit][/FONT] [LEFT][FONT=inherit]Height adjustment (0~120mm)[/FONT][/LEFT] [*=center][FONT=inherit][/FONT] [LEFT][FONT=inherit]Tilt (+20° ~ -5°)[/FONT][/LEFT] [*=center][FONT=inherit][/FONT] [LEFT][FONT=inherit]Pivot (90° clockwise)[/FONT][/LEFT] [/FONT] [/FONT] [/FONT] [/FONT]


![[TS] Andrik](https://www.techinferno.com/uploads/monthly_2018_11/0c2a07998a1fe6e1f8b286b734f9545ccafb35b5_full.jpg.bdc4227696701f061b9e58944d392f81.jpg)