Leaderboard


Popular Content
Showing content with the highest reputation on 12/15/12 in all areas
-
Original world record holder is back in town. Without a/c and sitting on the desk. Running stock cpu clock. With a/c, but really not needed.2 points
-
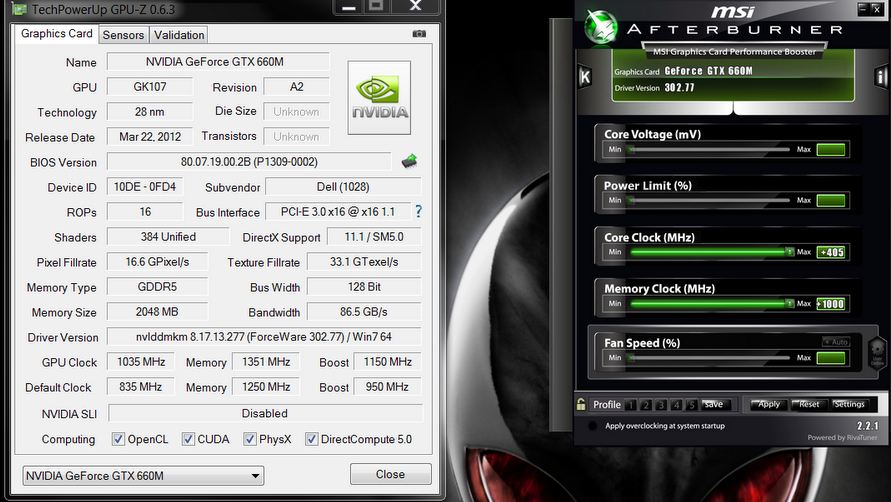
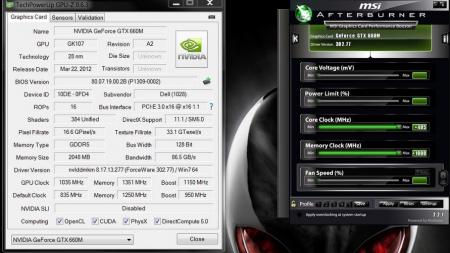
UPDATE: ALL DOWNLOADS LISTED IN THIS POST FOUND HERE. Nvidia 'Kepler' GPUs - modified VBIOS files >>> NOTE: More versions (including voltage mods) exclusive for T|I users can be found in the second post. <<< The 'Kepler' GPUs from Nvidia perform really well, even at increased clocks speeds they stay quite cool - a perfect behavior when it comes to overclocking and improving the performance. Unfortunately the mobile GPUs suffer from an artificial +135MHz core overclocking limit, so you can't go higher by using tools like Nvidia Inspector and similar. The modified VBIOS files listed here have this limit unlocked, some have increased stock clocks or tweaked voltages. Just refer to the description. All files have been modified by myself, if you like them feel free to buy me a drink, donation link can be found below GTX 660m: 660m_OC_edition__VBIOS_[DELL].zip- comes with unlocked software overclocking limits 660m_GHz-Edition_overvolted_VBIOS_[DELL].zip - default 3d clock 1000MHz, base boost 1200MHz,, memory (3d) 1350MHz, increased 3d voltage undervolted editions possible, depends on interest, tba Some screenshots: GTX 680m: Clevo_680m_-_80.04.33.00.10_'OCedition'_revised_01.zip Dell_680m_-_80.04.33.00.32_'OCedition'_revised_00.zip Increased software overclocking limits & optimized for no throttling. Read the included 'Read me' file before flashing. Instructions: I recommend flashing under DOS using nvflash . Donation link in case you want to buy me a beer Thanks and cheers! More to come. Testers: Thanks @eliteone (Dell 660m), @littleone562 (Dell 680m) For all mods: Use at your own risk.
 1 point
 -
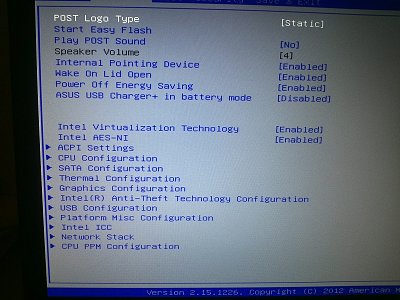
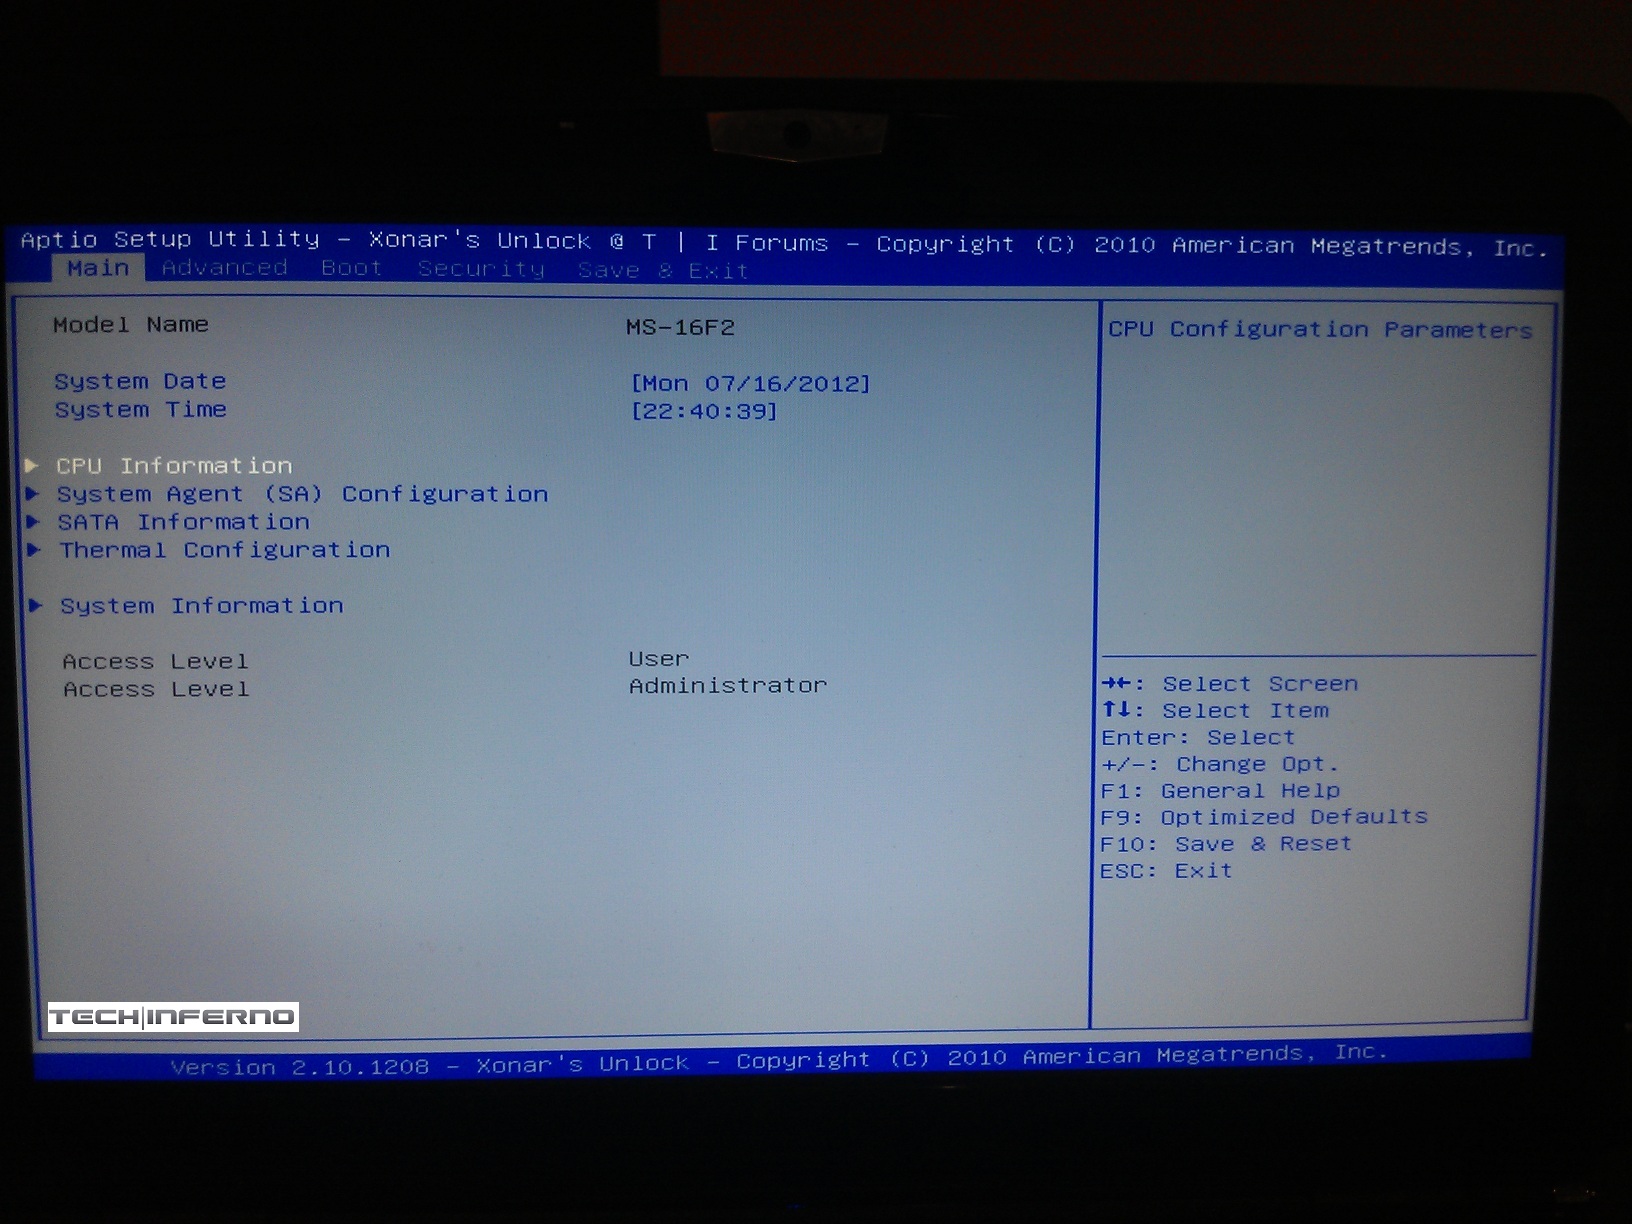
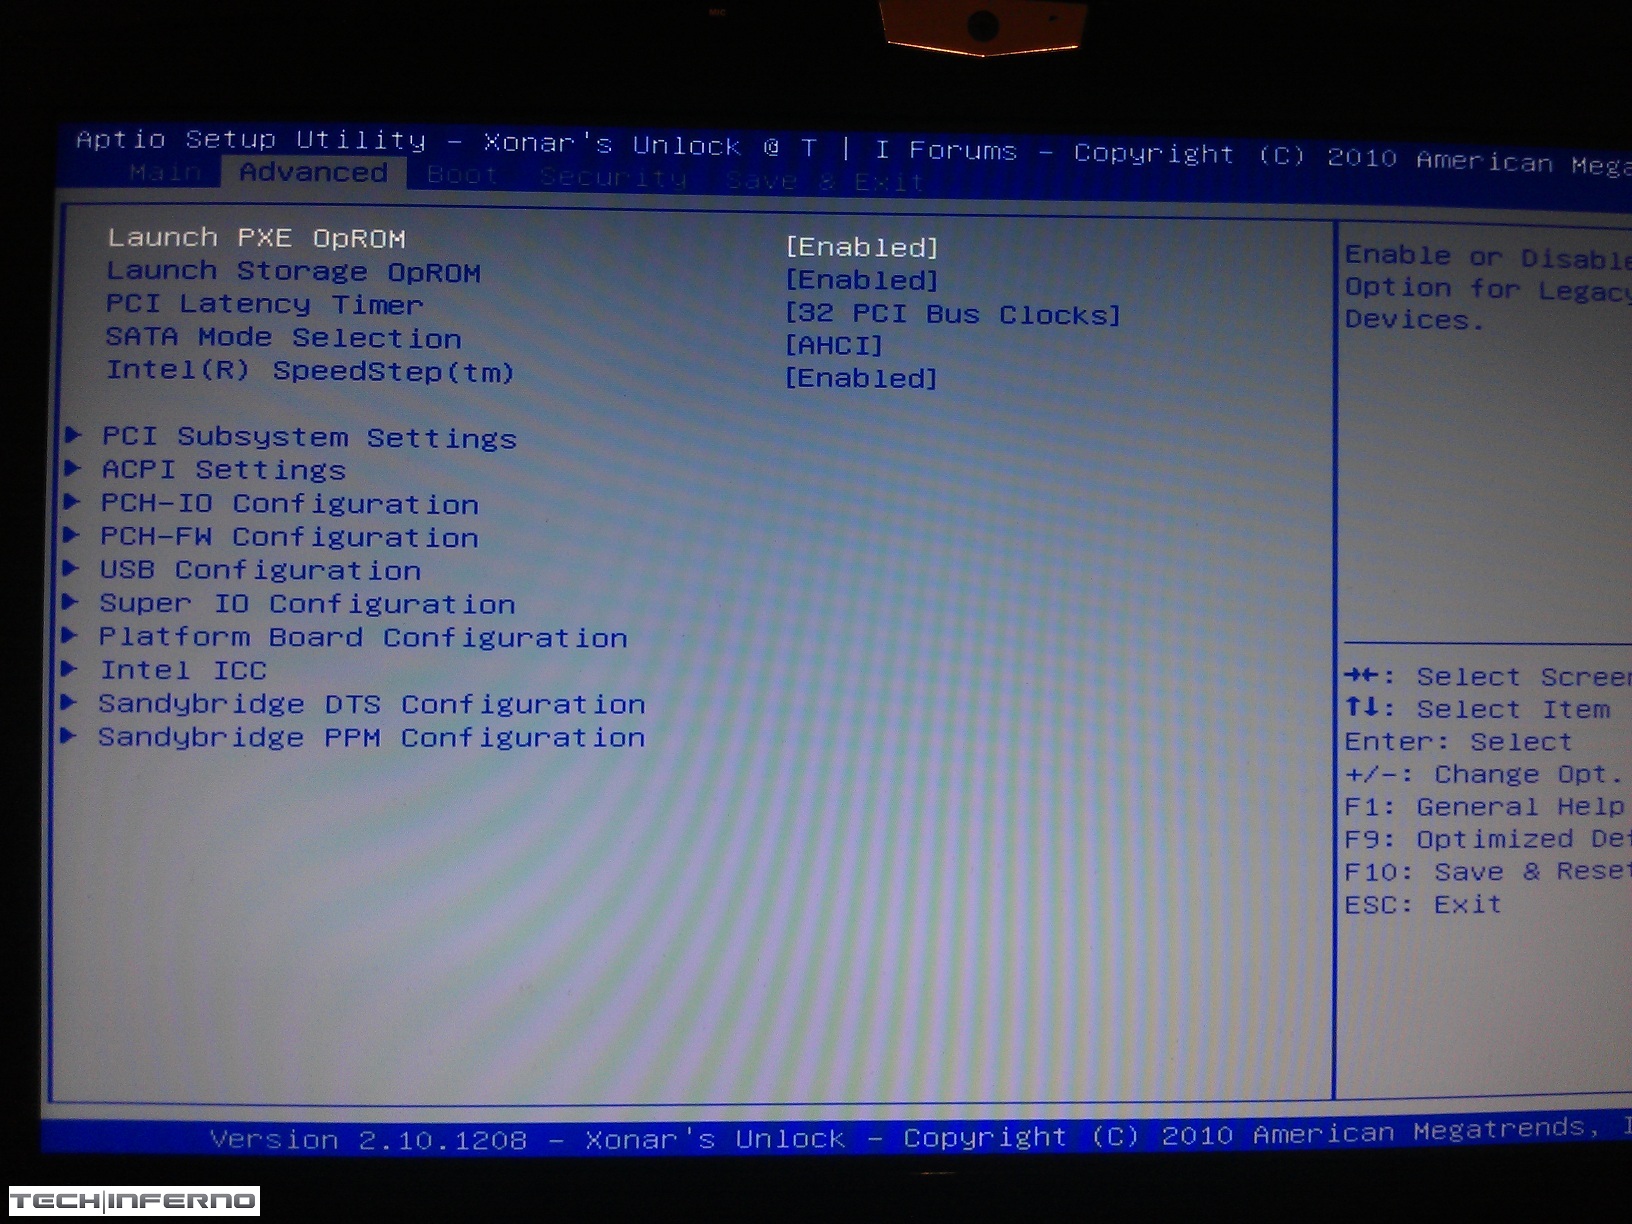
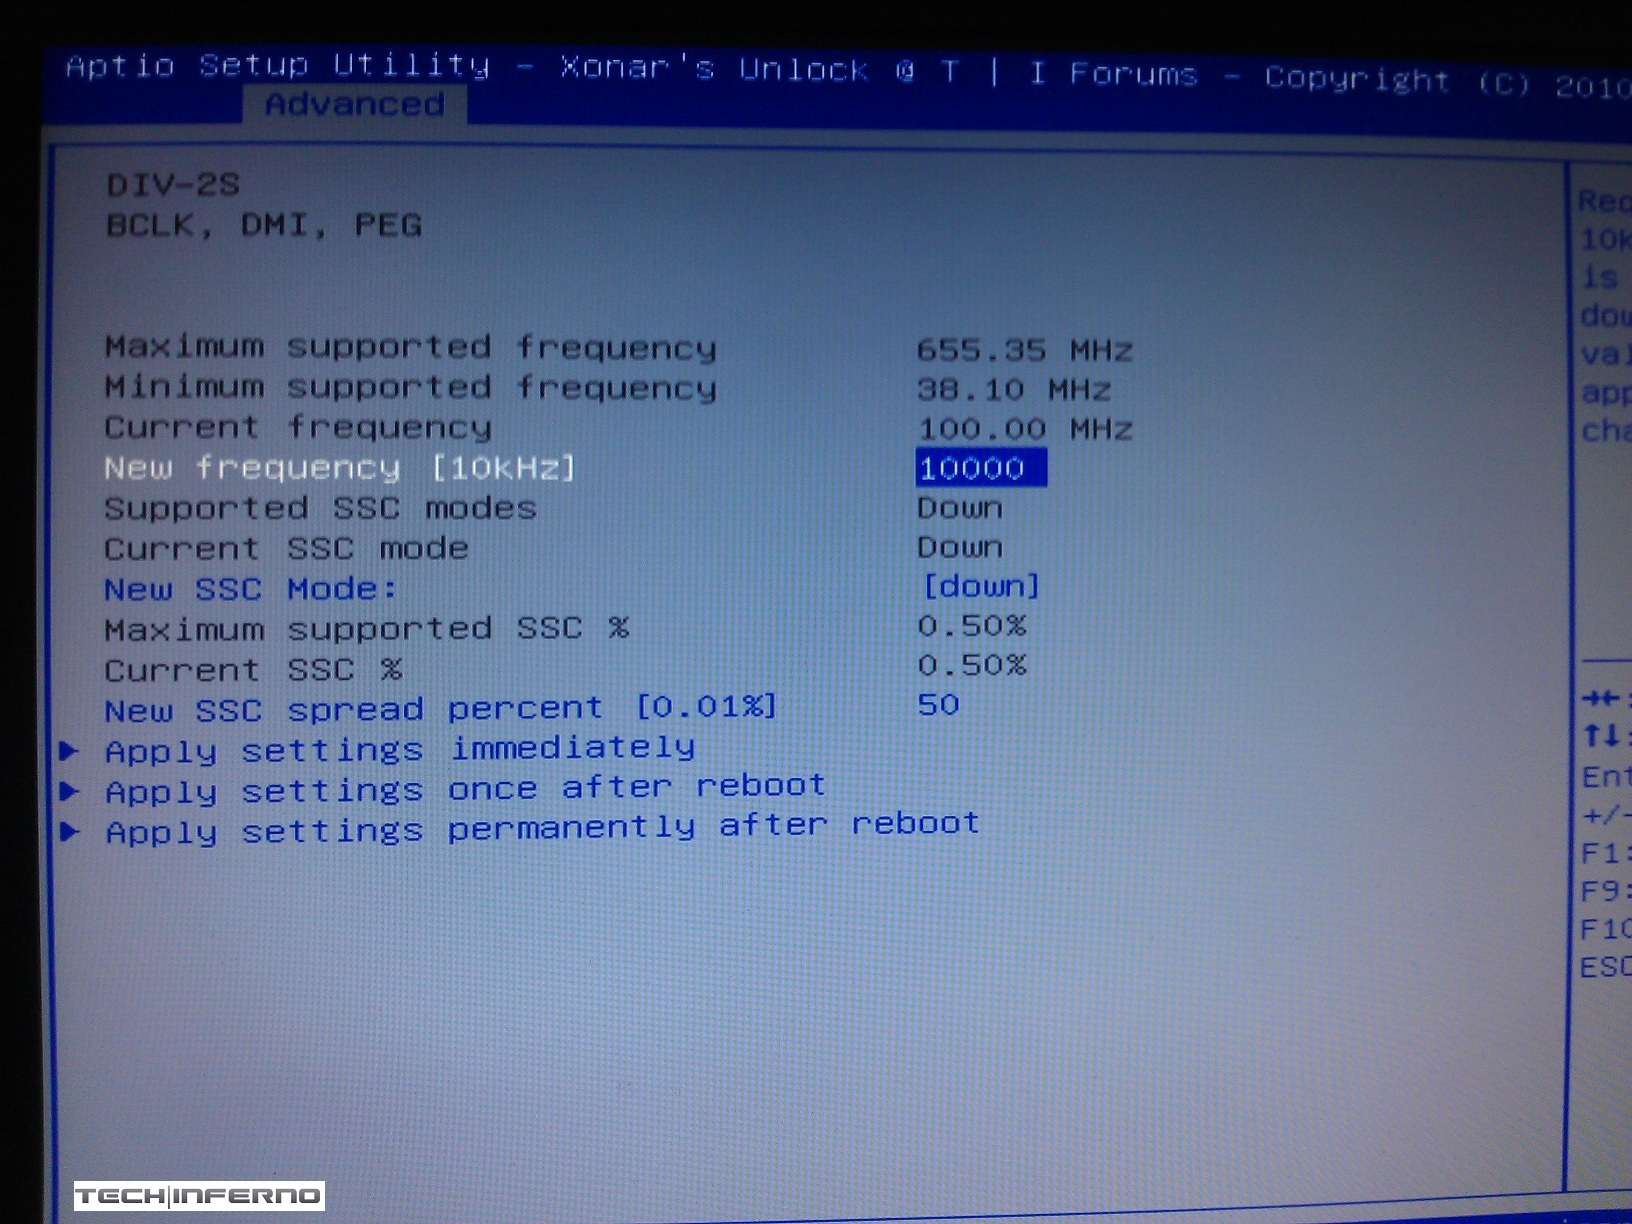
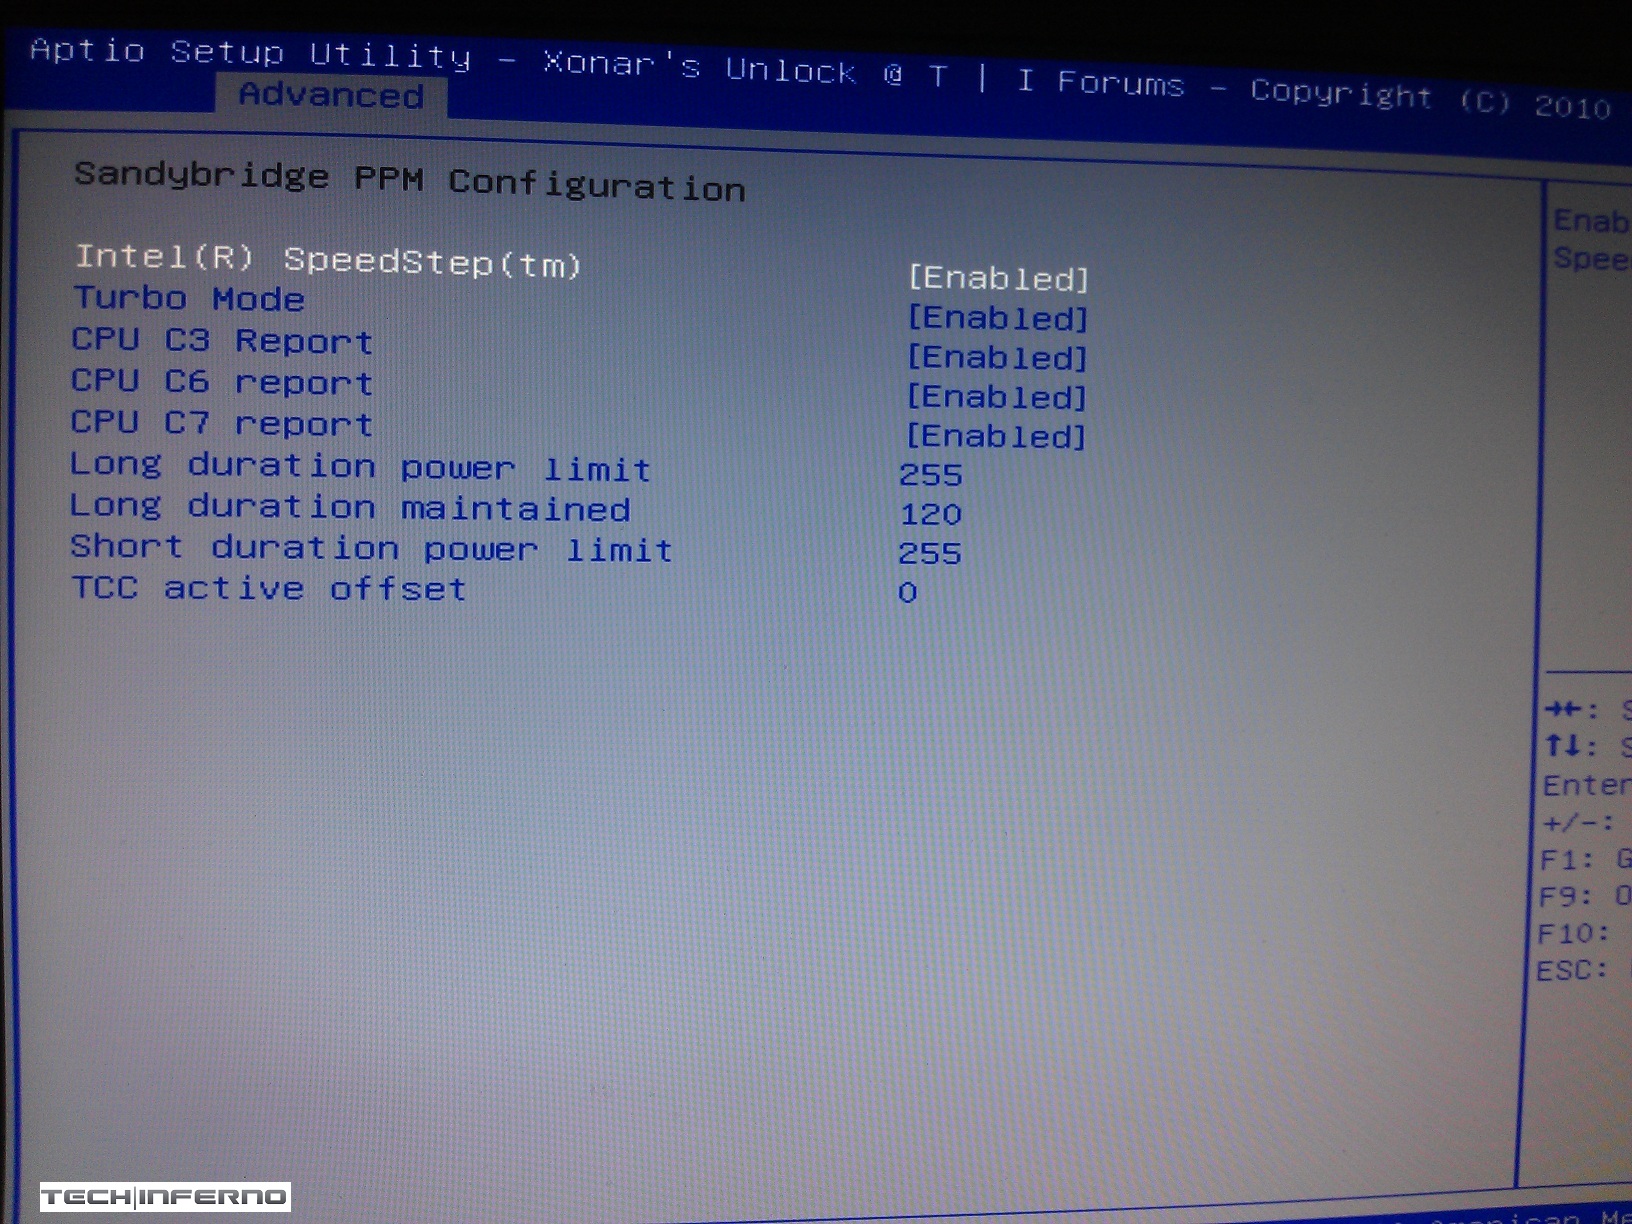
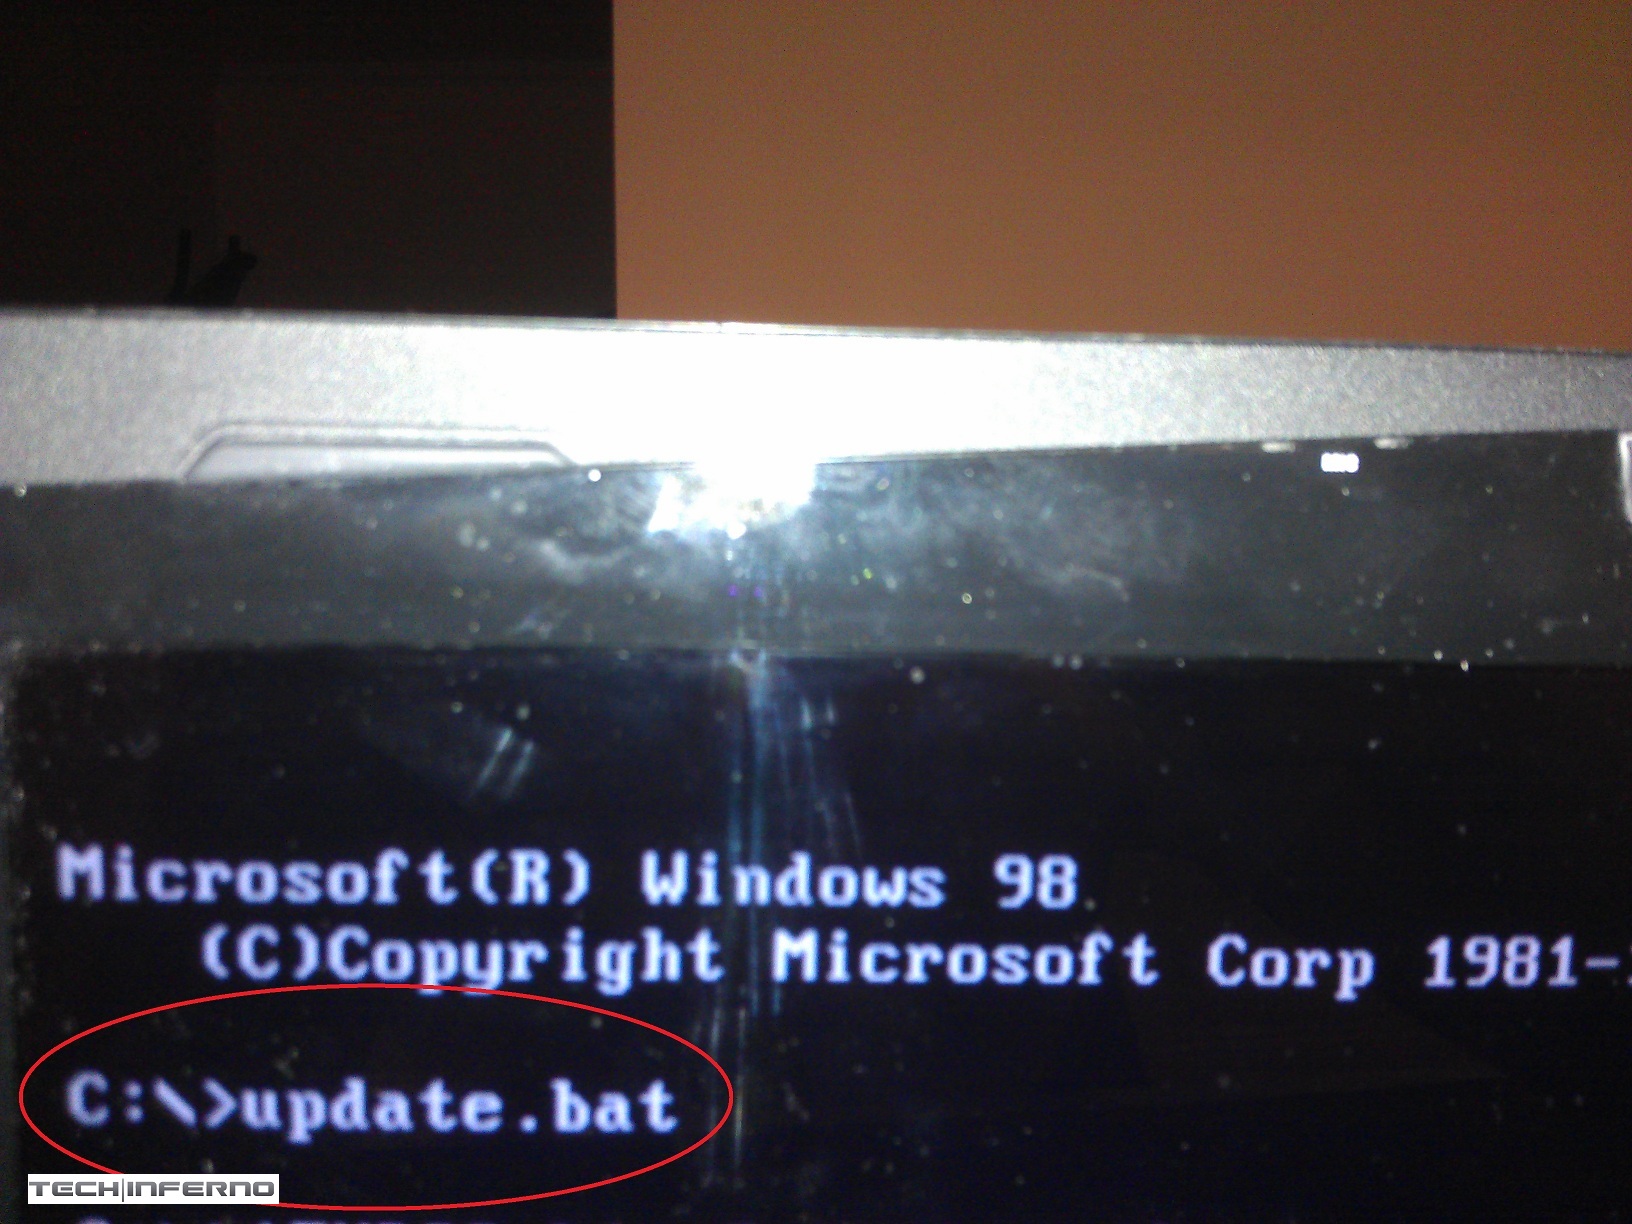
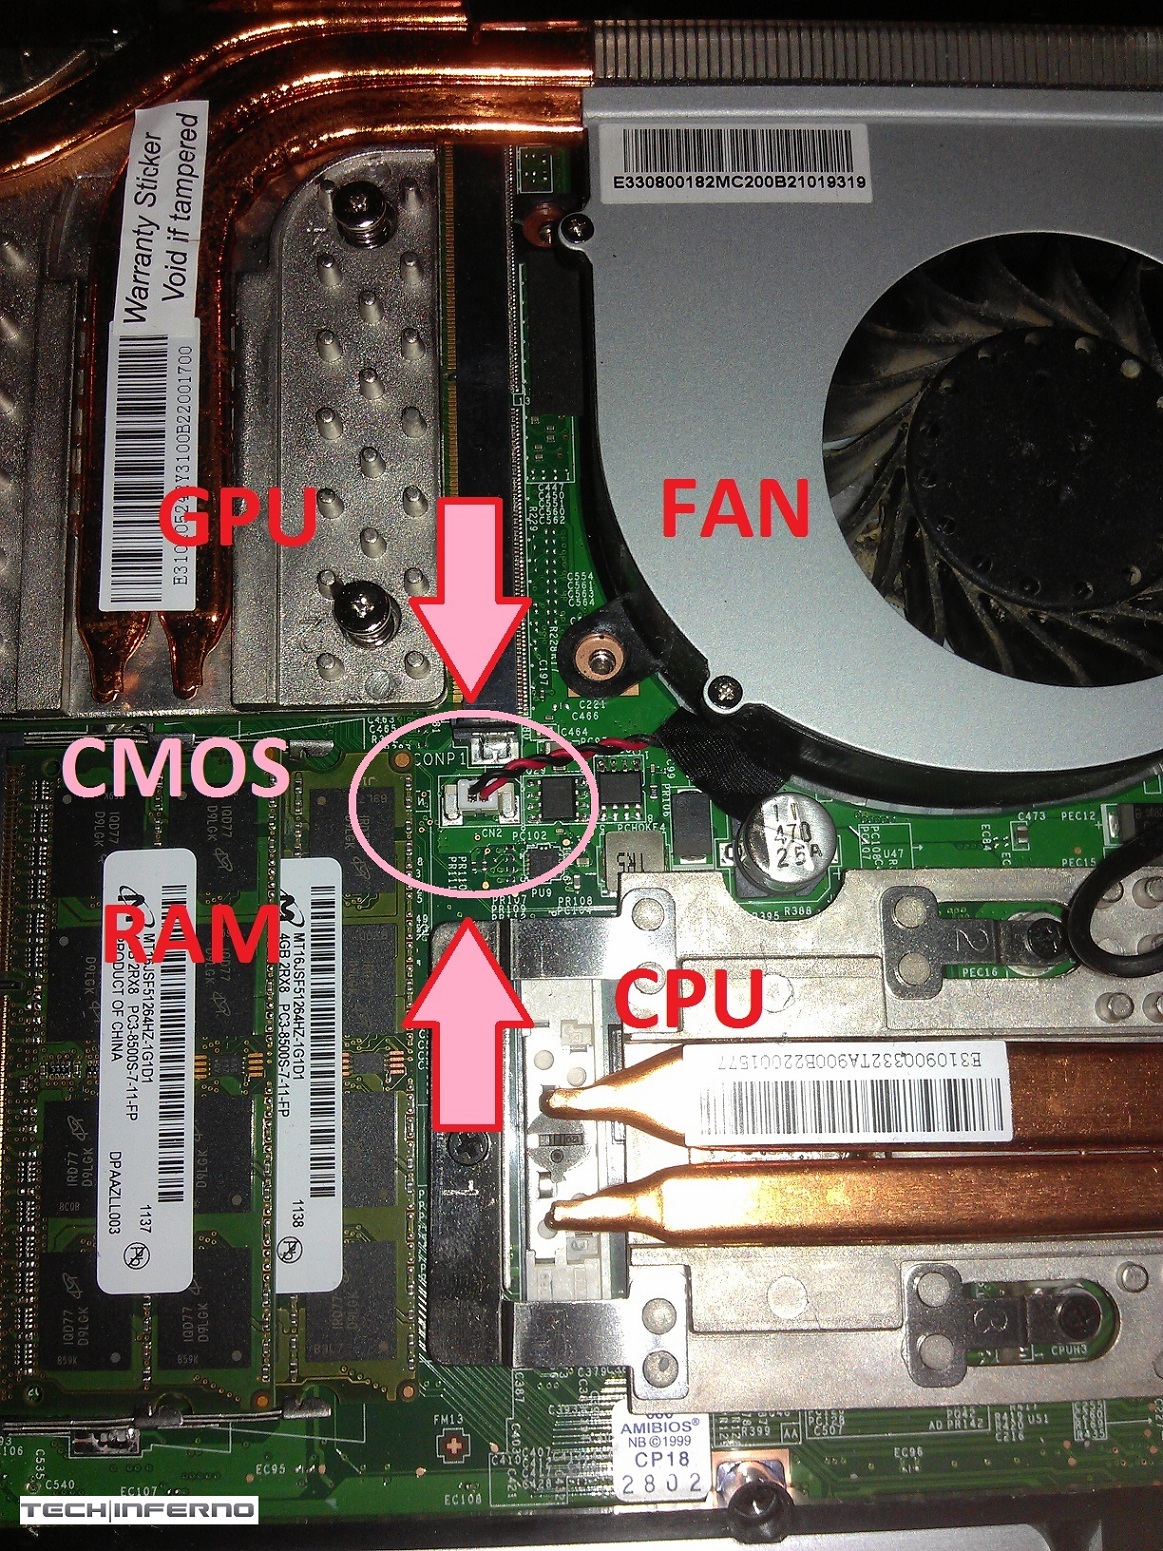
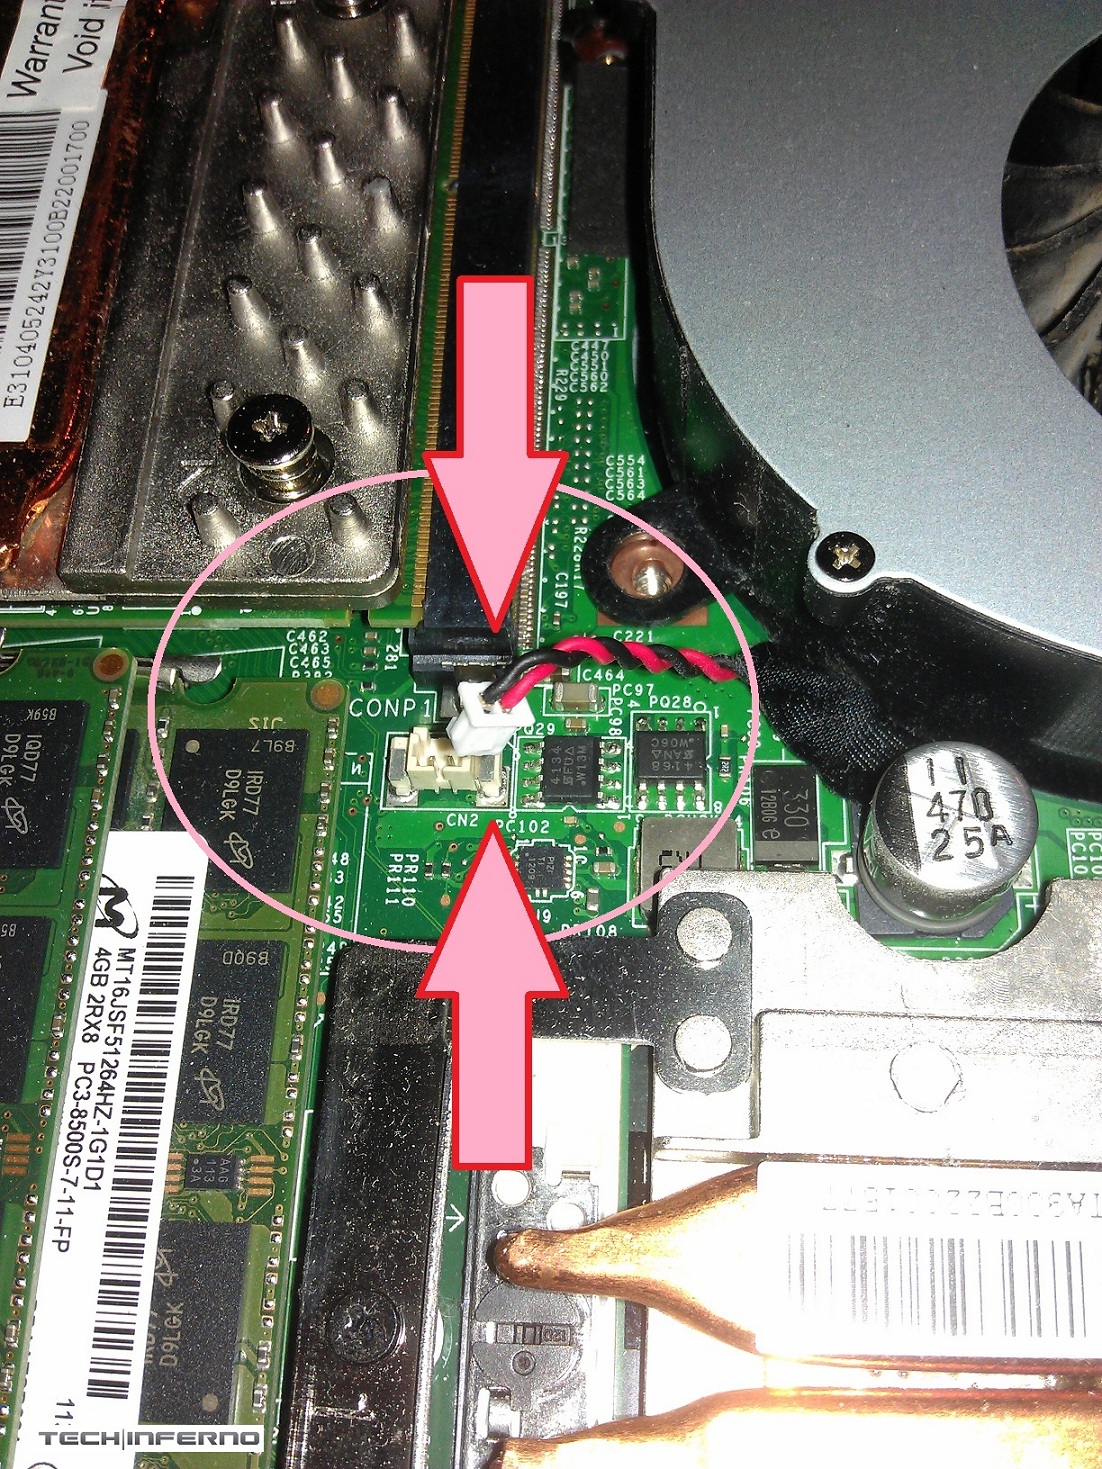
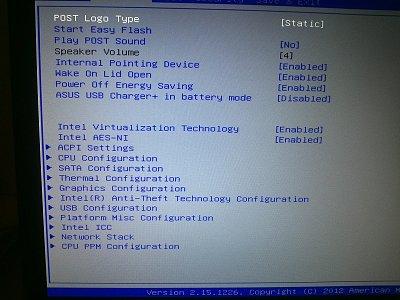
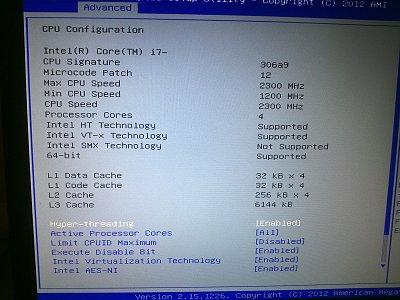
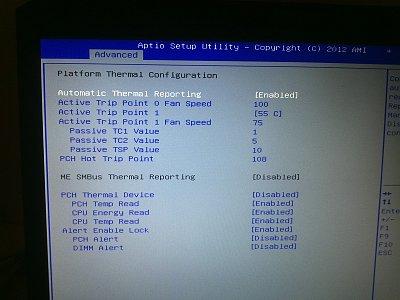
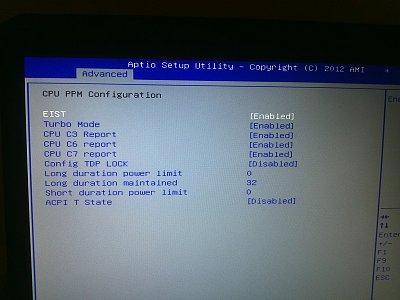
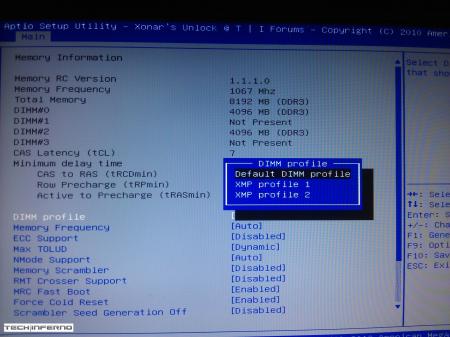
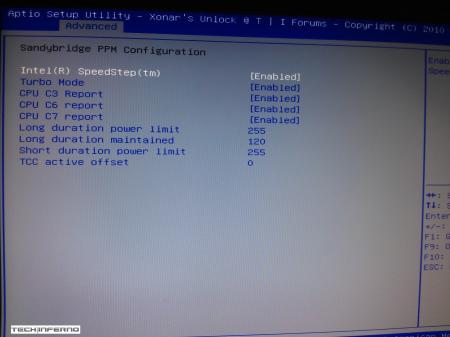
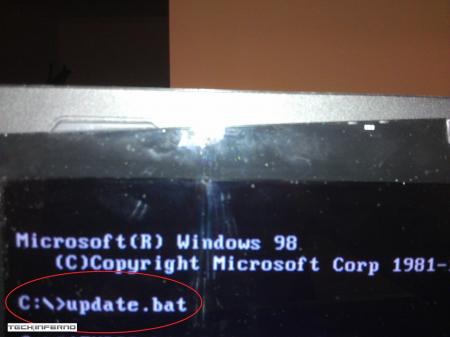
____________________________________________________________________________________________________________________________________________________________________________ *Note: This page is no longer updated, I am not taking requests anymore. Please do not PM me, because I will not respond. Other people have graciously posted their unlocked BIOS's within this thread, so you will have to do some searching to find the right one. I may come back to unlocked more later... I just don't have any time. Sorry. ____________________________________________________________________________________________________________________________________________________________________________ Welcome to my unlocked BIOS thread for MSI G-series gaming notebooks! Anytime you see an asterisk (*), it means that pictures for that part are included in the 2nd post. Introduction: In this thread you will find a list of MSI G-series gaming notebooks with their BIOS’ fully unlocked. Just about every feature that MSI has hidden is now available to be changed by the end user. This thread may be of particular interest to techies who love to squeeze every ounce of performance out of their notebooks or even the average person who is looking for a particular feature that has previously been locked. Should I Flash These BIOS? Anyone that owns one of the listed MSI G-Series notebooks is eligible. Who this does NOT apply to: - If you are afraid to brick your notebook, this is NOT for you. There is always a possibility for errors and accidents to occur. - If you do not understand what any or most of these acronyms mean, this is NOT for you. You will probably find little use for the unlocked features and the potential for risk is much greater than the reward. Who this applies to: - If you have an understanding of most of this thread and are willing to learn, continue reading. - If you are an enthusiast who loves modding and overclocking and have experience with this field, continue reading. Features: So what are these features that MSI had locked out? A short list would include: *- XMP RAM support (Up to 2133Mhz) [Warning: 4 DIMMs at 1866Mhz(+) may not be stable, 2 DIMMs are stable at 2133Mhz]. - BCLK Overclocking (Up to 5%, your mileage may vary, no guarantees). - TPL limits unlocked (With the combination of ThrottleStop, CPU throttling can be overcome). Necessary Tools & Knowledge: We’re going to need a couple things before we start flashing: 1. A bootable USB drive in DOS/ME/98. Guides can be found all over the internet. 2. The required BIOS file(s) for your specific notebook. 3. AC Adapter plugged into notebook. 4. Some common sense and bravery. Disclaimer: I claim no responsibility for any accident, damage, or brick caused by this, nor do I guarantee any technical assistance. Flash at your own risk. I am in no way affiliated to MSI, nor is MSI obligated to provide any support with these files. Proceed with caution! Your notebook's warranty will be compromised in the event of a repair! Redistribution of these files is not permitted without prior approval from me. You must contact me BEFORE you plan on hosting them. Thank you. Directions: 1. Add the three (3) files: "BIOS".ROM, AFUDOS.exe and update.bat to your flash drive. The root folder works best. Double check the READ ME.txt that you are about to flash the correct BIOS for your notebook. 2. Plug in USB drive and shut down your notebook. 3. Power on the notebook and during POST hit F11. This will bring up the boot menu, select your USB drive and hit enter. 4. In DOS, type:* This will start the flashing process. Warning: Once you hit enter, you CANNOT stop the flashing process. If you interrupt it via shutdown or remove its power source, you will brick your notebook with 100% certainty. 5. Sit back and wait for the process to complete itself. Note: Your fan will spin at 100% speed, it will be very loud. This is normal. Once your BootBlock has been verified and the command prompt comes back up, the process is complete.* Press Ctrl + Alt + Delete to restart your notebook and hit Delete to enter the BIOS. If your BIOS looks exactly the same as before and the flashing process came back with no errors, then you have to boot into Windows and shut down your notebook, NOT restart. Then check it out. Warning: The BIOS might reset the SATA mode into RAID. Please double check in the 'Advanced' tab that it is set to whichever mode you were using or else your boot manager may get corrupted. If this does happen, you will need to use your Windows 7 CD and repair the start-up process. Downloads: This part is under construction! More will be added. Taking requests as well. MSI Notebook Models: Version: Download Link: 1st-Gen Core-i Retail: MS-GX740(17''): 1.0F ms_gx740.zip Whitebook: MS-16F1(15.6''): 1.0L MSI 16F1 Unlocked.zip 2nd-Gen Core-i: Retail: MS-GT680/683(15.6''): .30Z MSI GT683 Unlocked.zip MS-GT780/783(17''): .30H MSI GT783 Unlocked.zip Whitebook: MS-16F2(15.6''): 3.05 MSI MS-16F2 Unlocked.zip MS-1761(17''): 3.06 MSI MS-1761 Unlocked.zip 3rd-Gen Core-i: Retail: MS-GT60(15.6''): .30M MSI GT60 Unlocked.zip MS-GT70(17''): .30M MSI GT70 Unlocked.zip Whitebook: MS-16F3(15.6''): MS-1762(17''): 3.0G MSI 1762 Unlocked.zip AMD APU MS-gx60(15.6'') 3.05 SecondGenAMDAPU.zip Recovery: Directions for making your notebook function properly if you encounter any errors. Case 1: In case of a GOOD flash, but you still cannot enter BIOS or boot into Windows: Common symptoms include: Endless looping reboots, inability to access the BIOS, permanent black screen, persistent BSODs in Windows or stuttering. The most likely cause was that your image was successfully overwritten, but some values may have changed internally and the BIOS may be having a hard time accepting them. If everything was a success and your notebook boots into one of the situations mentioned above, before trying a blind-flash recovery, UNPLUG the wire leading to your CMOS battery for 5-10 seconds.* This will RESET the stored values in the BIOS to their defaults. If this does not solve the problem, then a blind-flash will be required. Case 2: In case of a BAD flash, a blind-flash will be required. 1. Remove any files from your USB that aren't the necessary bootable DOS files. 2. Pick a ROM you want to flash (doesn't have to be the original), but it MUST be one for your notebook specifically. 3. Rename the file.ROM to AMIBOOT.ROM and put it on your flash drive. 4. Plug in your flash drive in a USB 2.0 slot. 5. As soon as your notebook turns on and nothing is displayed, spam Ctrl + Home (In my case, the MS-16F2 is Ctrl + Fn + PgUp or Ctrl + Shift + NumPad 7). 6. You should hear four (4) beeps and the BIOS should begin flashing itself. --------------------------------------------------------------------------------------------------------------------------- Redistribution of these files is not permitted without prior approval from me. You must contact me BEFORE you plan on hosting them. Thank you.1 point
-
Asus G75VW - modified BIOS / VBIOS Here's a modified BIOS for the Asus G75VW. It enables some more options and settings in the BIOS setup. It also contains a tweaked VBIOS for the 660m. Detailed version information: mod02 'GHZ edition' - 660m 3d clocks at 1000MHz core - 670m @ 715/1650 (only in 'overclock edition') additional BIOS menus Pics of the most interesting BIOS settings (thanks @bobby7): Instructions: Download the BIOS you want to flash, as well as the flash tool (Win64). Put the modified BIOS (and included files) in the same folder as the flash tool . Make sure that your current BIOS version is the same as the one you want to flash. Then create a backup of your BIOS by executing the backup.bat file. . Download the 'G75VW-BiosFixer.zip, put it in the same folder as the flash too and run it. Follow the instructions on the screen, it will ask you for the BIOS backup you just created, as well as the modified BIOS file which you already downloaded. . If the tool doesn't come up with an error message, go ahead and flash the created file by executing the included flash.bat file. . Wait until the flashing is done, in case everything's okay you can reboot. NOTE: It's a good idea to go to load the default BIOS settings after flashing. Also I really recommend flashing the official version before applying the modified BIOS, as mentioned in the instructions. >>> Here's my donation link, if you like my mods feel free to buy me a beer <<< As always with such mods, use at your own risk. The program I provide here (BiosFixer) comes with absolutely no warranty to the extent permitted by applicable law. *** Asus G75VW - BIOS v223 - [unlocked] [overclock edition].zip G75VW-BiosFixer.zip Asus G75VW - BIOS v223 - [unlocked].zip
 1 point
 -
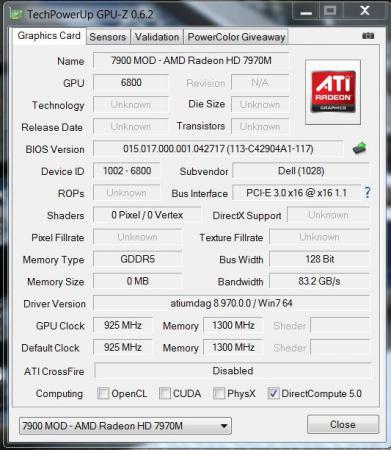
ADMIN EDIT 12/15/15: The original referenced zip pack is now restored. Did some tests with the VBIOS of the AMD 7970m, here's what I've got so far: - Overvolting: So far no success, when I increase the 3d voltage the card simply stays at the 2d profile. Fixed that Be aware that overvolting should only be done by experienced users and can seriously harm your GPU, shorten the life of its components and lead to unsuspected effects and / or system instability. I take no responsibility for any possible damages. Overvolting has been tested by me and @widezu69 (thanks!). It works, but can lead to instability, you need to find your limit. The M15x doesn't handle it well. I noticed similar behaviour as with my overvolted 6970m, drops in clocks, instability etc. At 1.15V even immediate crash at GPU load. The M17x R3 seems to handle it a bit better, there's probably more headroom in the voltage supply circuits which are providing the voltage for the GPU. I was able to run some vantage tests at 1Ghz with a 0.05V overvolt, my previous core clock limit was at about 950Mhz... so it definitely works. Different systems will behave in different ways, only way to find it out is to test it. Don't do it if you lack overclock experience. - Undervolting: Only did some quick tests, but it seems to work. The driver crashed all the time at clocks which normally worked fine. And at more sane clocks the card worked as expected. - Update: Yes, works very well - Core / memory clocks: Works fine so far, I only tested the 3d settings, but I assume it also works for the other clock profiles. In the GPU-Z screenshot you can see the changed clocks: A package with a selection of modified VBIOS files can be found here: AMD 7970M vbios pack There's quite a bit of work behind this, so just in case you want to buy me a beer... Here's a list of what the package contains. The names are pretty self-explanatory. "uv" for undervolt, "ov" for overvolt, clocks are "core-memory" Keep in mind that you need to rename the files before flashing due to the 8 character file name limit in DOS. Modified clocks: Dell7970m-900-1250.ROM Dell7970m-925-1300.ROM Dell7970m-940-1350.ROM Dell7970m-940-1400.ROM Dell7970m-950-1350.ROM Dell7970m-950-1400.ROM Undervolted: Dell7970m-uv-0950v.ROM Dell7970m-uv-0975v.ROM Dell7970m-uv-1000v.ROM Overvolted: Dell7970m-ov-1125v.ROM Dell7970m-ov-1150v.ROM Overvolted & modified clocks: Dell7970m-900-1300-ov1075v.ROM Dell7970m-900-1300-ov1100v.ROM Dell7970m-950-1400-ov1100v.ROM All files are based on the OEM Dell 7970m VBIOS. Instructions: For flashing refer to this guide: There's a list with the checksums of all files included in the VBIOS package, I highly recommend to check the integrity of the file before flashing it. This can easily be done with ATIflash, if you don't know how please check the guide linked above. And as always, flash on your own risk, you are responsible for your system and the changes you make on it. Feel free to ask questions, feedback is welcome as well!
 1 point
 -
Anyone try this game yet? If not, here's the download link for the beta: Hawken - War Is A Machine1 point
-
At last, it works (again?). The sequence I'm following now: Initialising the eGPU, Compacting PCI with 32-bitA method (iGPU and eGPU - not "All": that breaks the mSATA drive) Initialising the eGPU again (mostly for superstition - I haven't done proper checks to see whether it's the first, second, or both initialisations that are needed - just that at least one seems to be) Chainloading with the menu.win above (probably not required for most. It's like that to cope with the /bootmgr partition being on a different disk from the Windows partition) All is good. I had some BSODs until I ditched the $10 eBay special 80W PSU. Now with the PSU from my old desktop powering things it's rock solid. Last thing I need to do is read up on automating all that through startup.bat. Thanks again Tech Inferno Fan for your efforts.1 point
-
I'm having fun with it so far. Probably the most fair mech game at the moment.1 point
-
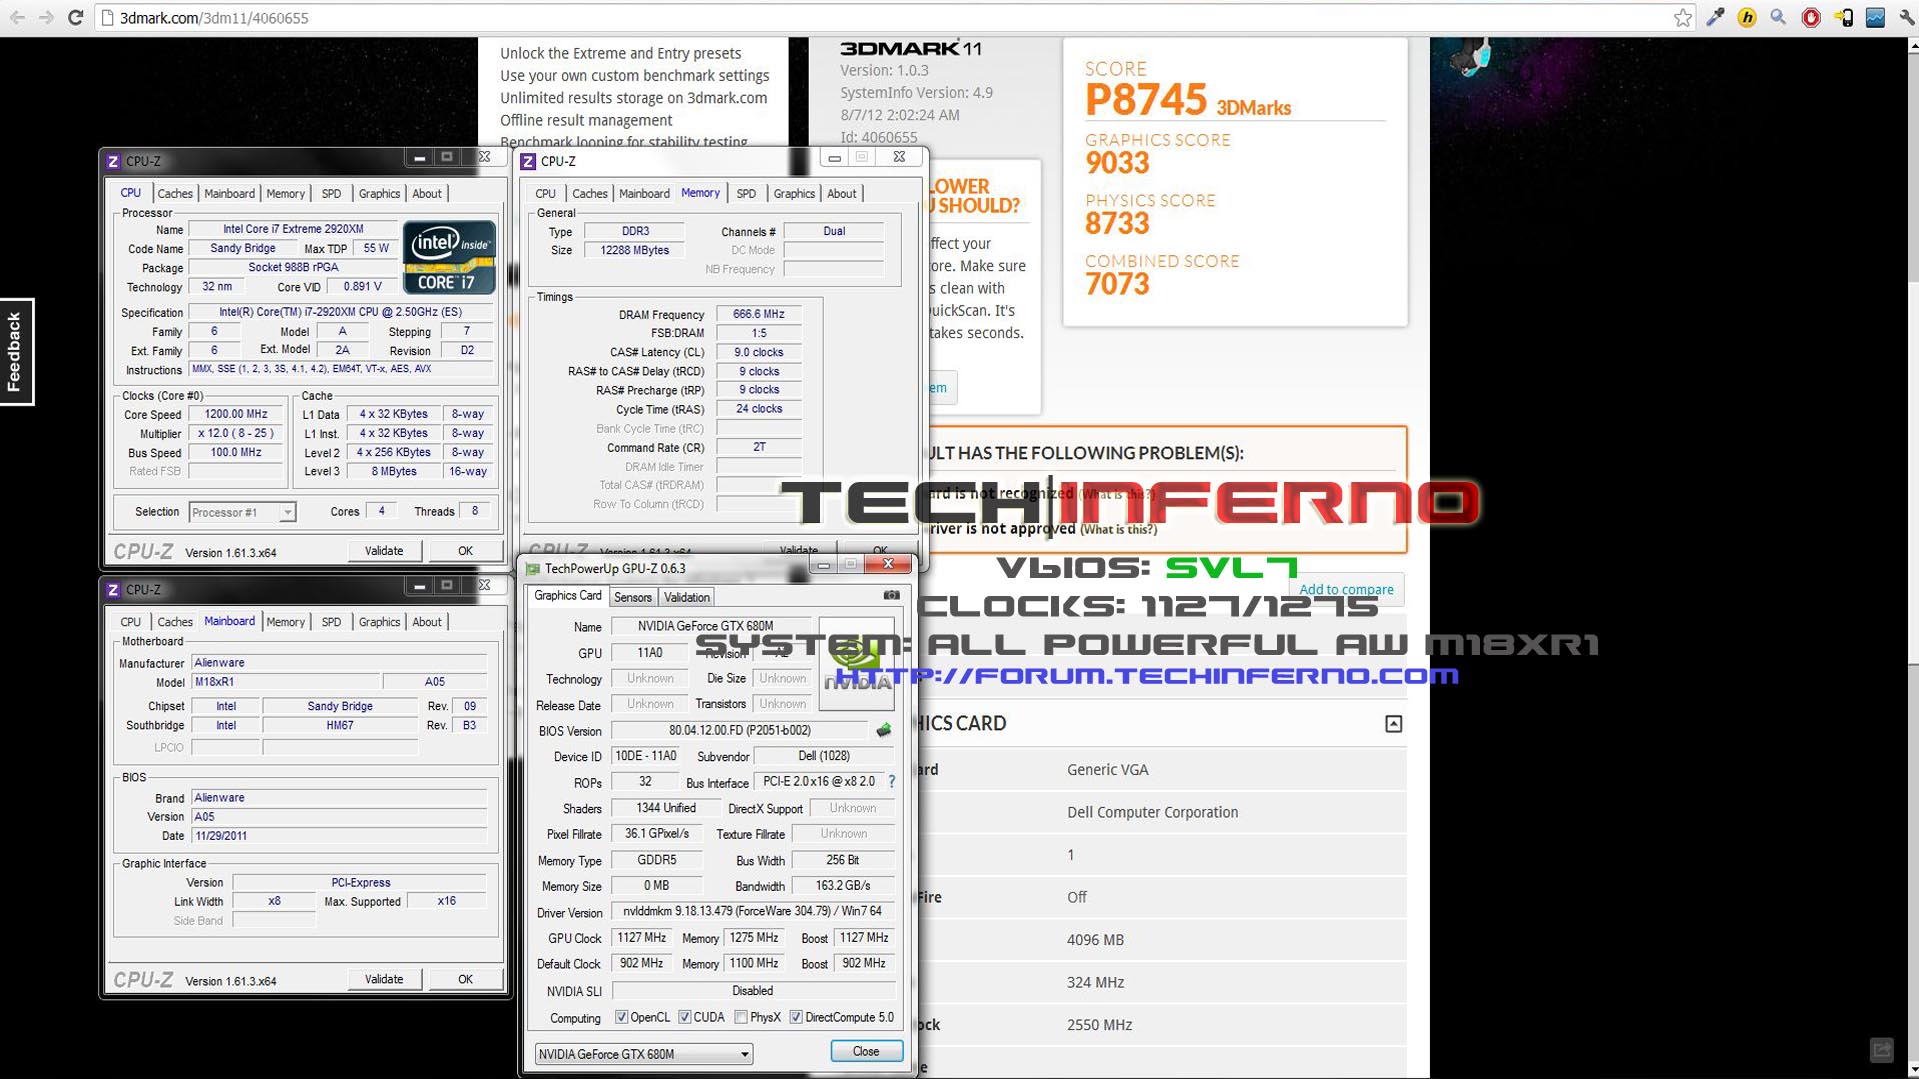
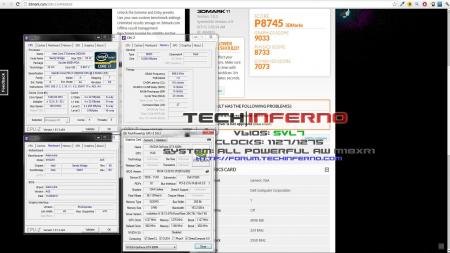
Well we've done it, the M18x-R1 just crossed the 9k GPU barrier with a SINGLE video card! Major props to @svl7 for his vbios, to nVidia for building Kepler (what an amazing GPU) and to Alienware for designing some awesome cooling, without any of the aforementioned this wouldn't be possible.
 1 point
 -
I want to thank svl7 for this modded vBIOS. I'm successfully gaming at ~1160Mhz core / 1450Mhz mem. Great stuff! It's put new life into this laptop. It's been years since I've done any real benchmarking, but here's a 3DMark 11 Performance run: http://www.3dmark.com/3dm11/51469961 point
-
More stuff exclusive for T|I users, voltage mods: All the vbios listed here are attached at the end of the post. ******************************** Nvidia 800m series: Nvidia GTX 880m (8GB version only): 'OC edition' -> unlocked overclocking limits, voltage adjustable, power target adjustable, optimized performance at higher clocks Can be used for all current 880m (Clevo, MSI and Dell). Nvidia GTX 870m: 'OC edition' -> see above Nvidia GTX 860m (GK104 variant): 'OC edition' -> see above. Refer to the file name to know which version is suited for your system. NOTE: Only for the Kepler version of the 860m. Silly Nvidia started giving different GPUs the same name. ******************************** Nvidia 700m series: Nvidia GTX 780m: 'OC edition' -> unlocked overclocking limits, voltage adjustable, power target adjustable, optimized performance at higher clocks Can be used for all current 780m (Clevo, MSI and Dell). Nvidia GTX 770m: 'OC edition' -> see above Nvidia GTX 765m: 'OC edition' -> see above. Refer to the file name to know which version is suited for your system. ********************************* Nvidia 600m series: MSI GTX 680m (4GB version): 'OC edition' revised -> higher limits for software overclocking, stock default clocks ----------------------- Dell GTX 680m (2GB version) vbios: 'OCedition' revised -> higher limits for software overclocking, stock default clocks same with increased 3d voltage ('OV') -> refer to the file name ----------------------- Clevo GTX 680m (4GB version) vbios: 'OCedition' revised -> higher limits for software overclocking, stock default clocks. For P1xxHM based systems I recommend only using version 80.04.29.00.01 !! Some users reported issue with other vbios versions (stock or modified, doesn't matter). EM users make sure you're on the latest BIOS / EC same with increased 3d voltage ('OV') -> refer to the file name (Same warning as above applies to P1xxHM users). ----------------------- K3000m: (Nvidia) K3000m - 80.04.3A.00.07 'OCedition' -> higher software overclocking limit Should work on all K3000m, unless you got a board ID mismatch. (HP) K3000m - 80.04.33.00.2E - 'OC edition' - > same as above, but probably the better choice if you use a HP machine ----------------------- K5000m: (Dell) K5000m - 80.04.33.00.35 - 'OCedition' -> higher software overclocking limit, stock 3d clocks 758MHz It's Dell but should work on all K5000m, unless you get a board ID mismatch. ----------------------- GTX 670mx: MSI 670mx (1.5GB) - 80.04.5B.00.A5_'OCedition'_rev00 -> higher software overclocking limits, tweaked performance at high clocks. Same board as the Clevo card. Clevo 670mx (3GB) - 80.04.58.00.03_'OC edition'_rev02 -> same as above, plus voltage is adjustable per software. ---------------------- MSI GTX 675mx: MSI 675mx (2GB) - 80.04.58.00.14_'OCedition'_rev00 -> higher software overclocking limits, tweaked performance at high clocks. MSI 675mx (4GB) - 80.04.58.00.0E_'OCedition'_rev00 -> same as above, vbios for 4GB card (!) ----------------------- Clevo GTX 675mx: Clevo 675mx (4GB) - 80.04.58.00.05_'OCedition'_rev00 -> higher software overclocking limits, tweaked performance at high clocks. ----------------------- ASUS G75VW BIOS: - 660m at 1000MHz core / 1400MHz memory - additional BIOS menus http://forum.techinferno.com/asus-gaming-notebook-forum/2538-%5Bg75vw%5D-modified-bios-vbios-higher-overclocking.html ------- Donation link in case you want to buy me a beer Thanks and cheers! *** FILE DOWNLOAD LOCATION:1 point
-
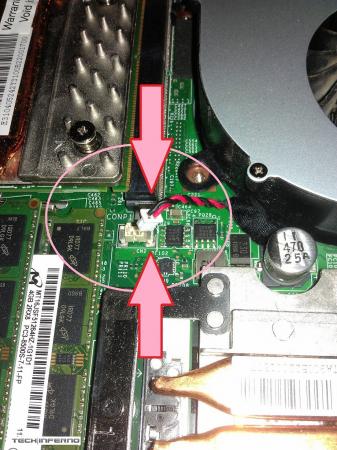
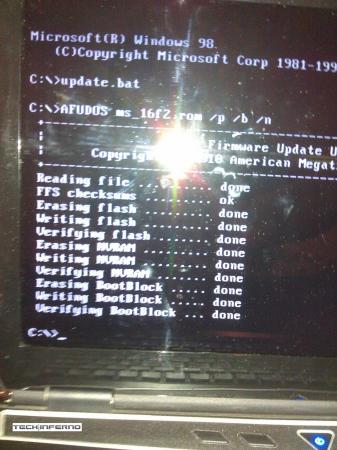
Pictures: Flashing Process: BIOS Options: Resetting CMOS Battery & Clearing the BIOS:


 1 point