Leaderboard


Popular Content
Showing content with the highest reputation on 07/11/12 in all areas
-
Funny video: 24 256GB Samsung MLC SSD's (RAID) Awesomeness3 points
-
I received the second PSU from Dell today and just a teaser...
 2 points
 -
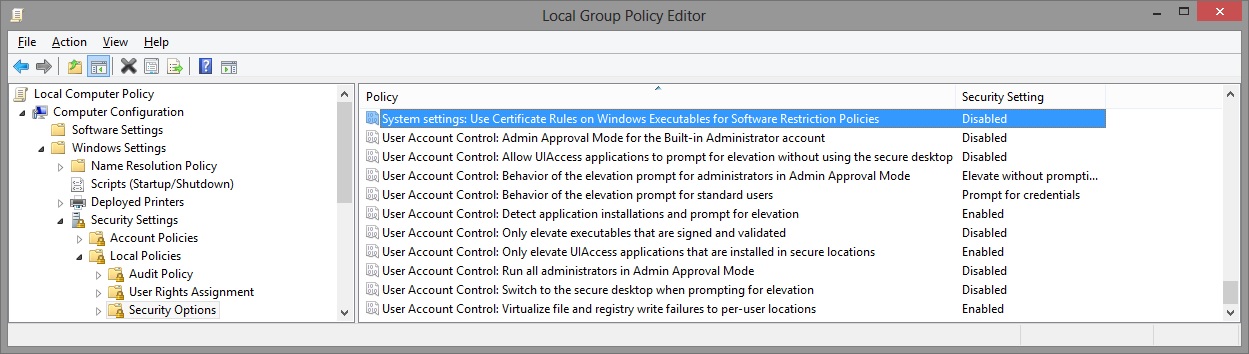
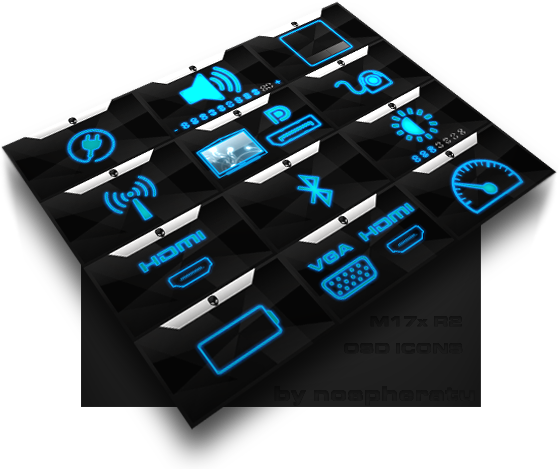
I've recreated the OSD Icons for the R1/R2/R3/R4 and R5 aka 17 as the standard ones are a bit dated. It should also work with the M15x though as my old M15x had the same setup for the OSD app. Regarding the R3 OSD, it seems its the same install for the M18x as well so it should work for you M18x owners too. I've also added the AW 17 OSD to the list. This exe is also compatible with the 14 and 18 as Dell uses the same OSD for all the new machines. There's also a set for you Area-51 m17 R1 owners. I've tried to give it a simular feel to the Invader Icon pack by Alienware. Hope you guys like it Install Instructions for R1 1. You need to end the OSD process in Task Manager since it may be using some of these icon files. Ctrl+Shift+Esc then find the OSD process and end it. 2. Backup your current icons if you want to revert to the originals (You can also uninstall and re-install the OSD application if you want to go back to the original icons) 3. Extract the attached "M17X R1-R2 & M15X.zip" contents to C:\Program Files (x86)\OSD\picture\. Overwrite if prompted. 4. Restart the OSD application. It is located in C:\Program Files (x86)\OSD\Launch.exe 5. Done! Install Instructions for R2 /M15x 1. You need to end the OSD.exe process in Task Manager since it may be using some of these icon files. Ctrl+Shift+Esc then find "OSD.exe" and end the process. 2. Backup your current icons if you want to revert to the originals (You can also uninstall and re-install the OSD application if you want to go back to the original icons) 3. Extract the attached "M17X R1-R2 & M15X.zip" contents to C:\Program Files (x86)\OSD\ICONs\. Overwrite if prompted. 4. Restart the OSD application. It is located in C:\Program Files (x86)\OSD\Launch_OSD.exe 5. Done! Install instructions for R3 / R4 / M18x 1. You need to end the OSD process in Task Manager since it may be using some of these icon files. Ctrl+Shift+Esc then find the AlienwareOn-ScreenDisplay.exe process and end it. 2. Backup the existing AlienwareOn-ScreenDisplay.exe by renaming it to "AlienwareOn-ScreenDisplay.exe.BAK" for example. Its in C:\Program Files (x86)\Alienware On-Screen Display\ 3. Extract the AlienwareOn-ScreenDisplay.exe from the appropriately named file depending on your OS and model to the C:\Program Files (x86)\Alienware On-Screen Display\ folder. 4. Restart the OSD application by double-clicking the file. 5. Done! Install instructions for 14 / 17 / 18 ** 1. You need to end the OSD process in Task Manager since it may be using some of these icon files. Ctrl+Shift+Esc then find the AlienwareOn-ScreenDisplay.exe process and end it. 2. Backup the existing AlienwareOn-ScreenDisplay.exe by renaming it to "AlienwareOn-ScreenDisplay.exe.BAK" for example. Its in C:\Program Files (x86)\Alienware On-Screen Display\ 3. Extract the AlienwareOn-ScreenDisplay.exe from the "AW 14-17-18 (Windows 8).zip" file to the C:\Program Files (x86)\Alienware On-Screen Display\ folder. 4. Restart the OSD application by double-clicking the file. 5. Done! The Area-51 m17-R1 install should be similar to the steps for the other laptop revisions above. They all basically follow the same process anyway, apart from filenames/paths. @robby_hd was kind enough to make a red version of these icons for the M17x R3 / M18x R1 which can be downloaded from his post here. **There seems to be a security issue with Windows 8/8.1 at this point in time since it doesn't allow modified exe's. I will update this post with a solution once it has been found. Also a few Alienware owners are having an issue with the unmodified OSD and Windows 8. Only the default Windows 8 OSD displays and not the Alienware version. Try the solution posted by Dell here and then attempt installing the mod. The below screenprint is a workaround by editing the security policies to allow the unsigned exe to run in Windows 8. If you are not aware of what these settings do and the repercussions of changing them, please do not attempt it. - Open the Group Policy Editor by typing "gpedit.msc" in the search or run text box. - Duplicate the settings below. Area-51 m17-R1.zip M17X R1-R2 & M15X.zip M17X R3-R4 & M18X R1-R2 (Windows 7).zip M17x R4 & M18X R2 (Windows 8).zip AW 14-17-18 (Windows 8).zip M17X R4 & M18X R2 (Windows 8.1).zip

 1 point
 -
I came across this utility called atiman and it is similar to driver sweeper, but specifically for AMD drivers. I didn't have the opportunity to test it yet, but I will on the next catalyst release. In the meanwhile here is the link if you want to try it first Atiman Uninstaller v.7.0.2.msi1 point
-
Had the exact same problem you were having on my R2 and figured out it was the CF cable through a continuity tester as well. Called Dell tech support and tried to explain to them the issue was the CF cable, not the cards. 3 visits by techs & 3 card swaps later, I gave up on Dell to get the part I needed. In short, I was able to get a CF replacement from mythlogic.com. Tell them what you got and they'll set you up with the right sized cable to get your CrossFire working. Good luck.1 point
-
I dont think he is very happy with its M14x R2 and i know alot of artists who are also unhappy with these issues (some are using new MBP`s with Ivy Bridge). Still waiting for a clear statement from Dell / Alienware about this problem... 4 days ago now you wanted to ask your friend. What did he said about the M14x R2 cant handle "isochronous streaming" which is needed for every audio / video interface for djing / producing or vjing. Its USB 1.1 and USB 2.0 compatible but not USB 3.0 yet. And USB 3.0 is not downwards compatible with 2.0 in all aspects. Dell was aware of this and integrated a controller chip from Renesas in the M14x R1 so this notebook had no issues. My big question for you as a Dell representive is now: Why is there no such cheap controller integrated in the R2 when Dell knew about the incompatibility of Intels USB 3.0 to USB 2.0 devices such as audio interfaces due to the lack of the "isochronous streaming" capabilitys?1 point
-
Interesting suggestion. In any case now you know you should use some form of backup for your documents. Dropbox / GDrive and similar cloud services are really great for this kind of stuff.1 point
-
Another version for M14x R2 users... A similar mod works very fine on the Clevo 650m with DDR3 RAM, so let's see how the M14x can keep up with this 925MHz default clock, 1100MHz boost, 1350 MHz memory. If you flash it, let me know how it goes. GPU-Z log would be appreciated. It might not work perfectly on all M14x, but we'll see... I've now seen a couple of 650m of other systems running at such speeds, some even at 1200MHz and more. EDIT: File removed, need to tweak something.1 point
-
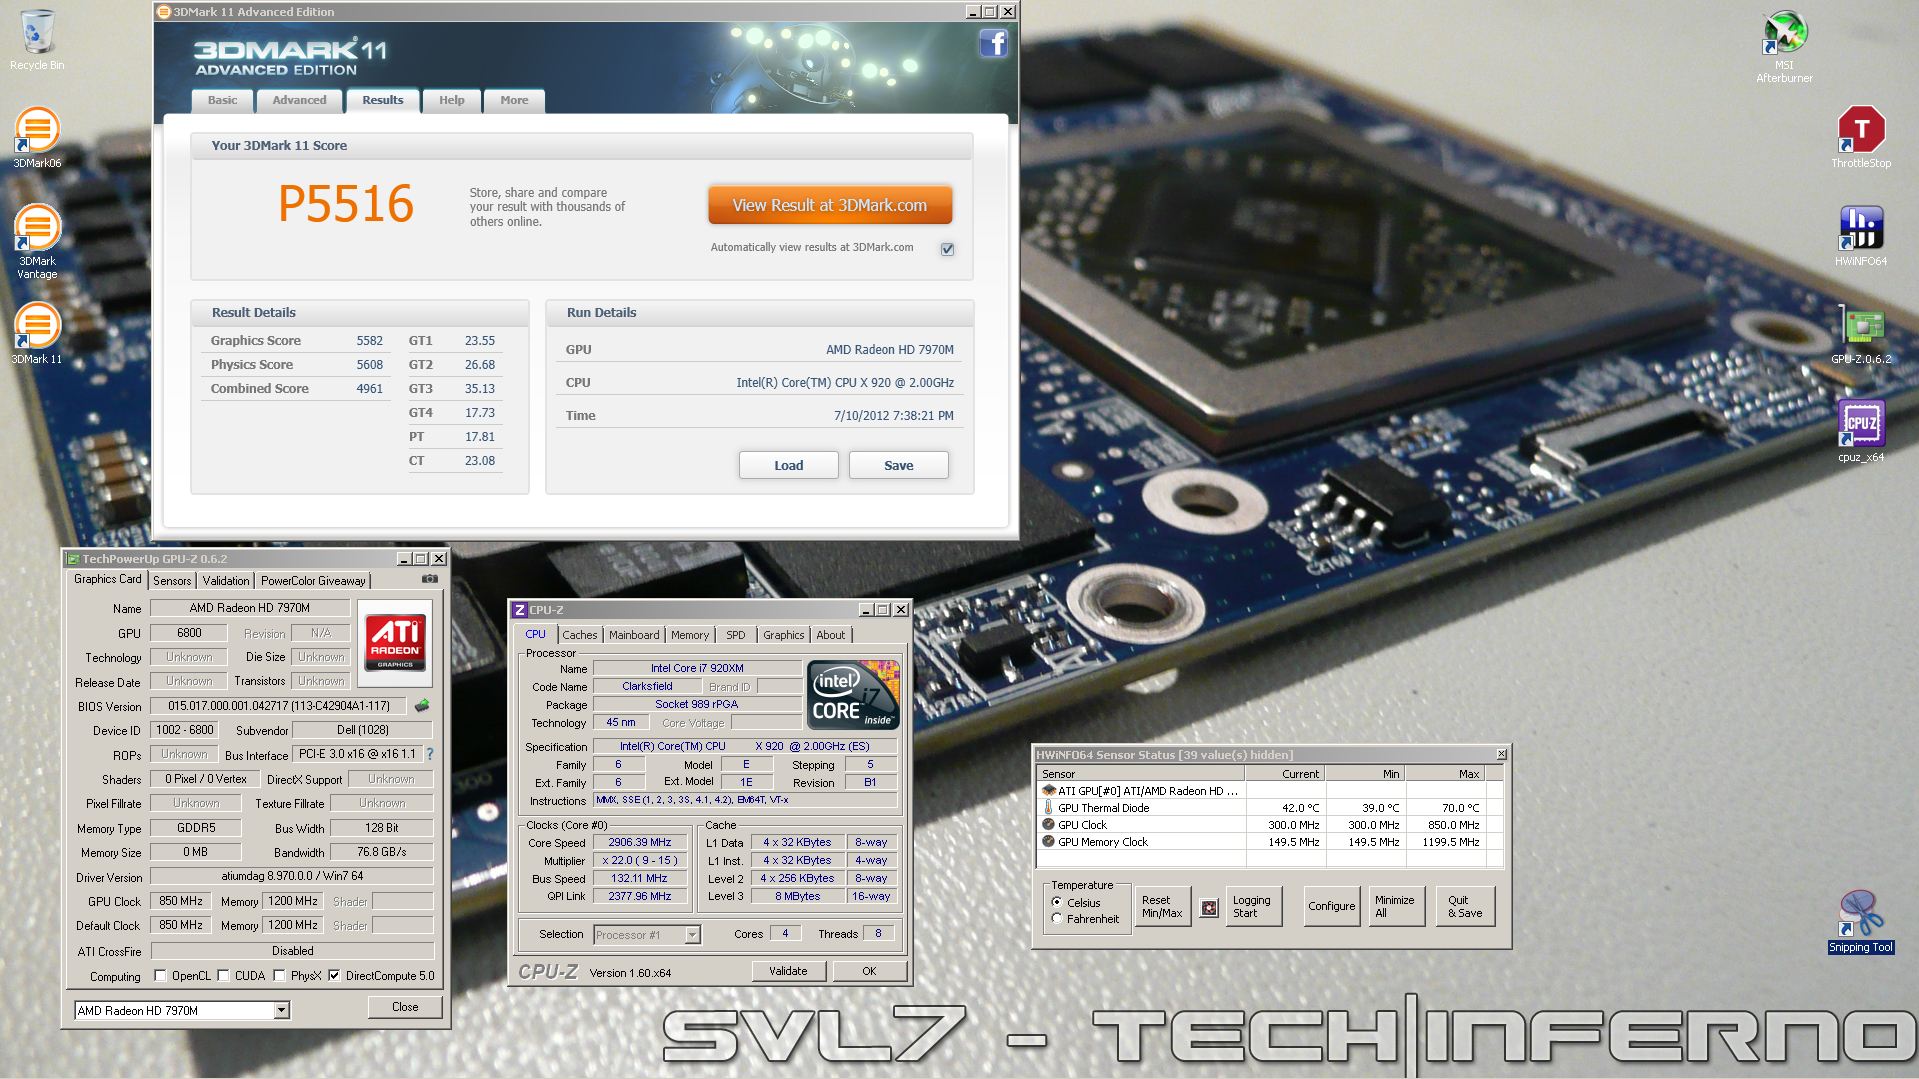
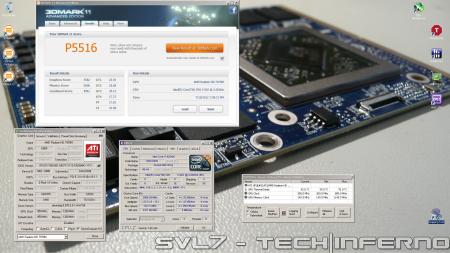
Oh, by the way... I can confirm that the 7970m from mxm-upgrade works fine, I'll update the first post in the near future. An issue is the fan control... fans are always at a high speed, you need HWiNFO to automatically control them, but once you set it up (including autostart and custom fan profile) you don't notice a difference, works like a charm. Idling is very cool and performance is excellent. Here's a 3dMark11 bench of the card in my M15x, everything at stock - Catalyst settings, CPU, GPU:
 1 point
 -
I don't think I can thank you enough for this. I messed my bios playing around and thought I was done for. THANK YOU THANK YOU THANK YOU.1 point
-
Heyhouu, first benchmark-post here ever 3D Mark 11 3D Mark Vantage UYL already send me the newest drivers on a dvd, exemplary! TDP is at 80 now, no overclocking to my 7970m babe <3 Go for 10k Stam!1 point
-
It's most likely the graphics card, your bios beep code underlines this assumption. Windows error code 43 does not automatically mean that the card is dead or damaged. I had this problem twice, the first time with one of my Asus MarsII cards, it was not properly connected to the PCIe, reseating the card solved the problem. The second time it was a defective vram module, accordingly the card was no longer usable. I can only give the advice to check, if the card is correctly connected to your MXM port...otherwise a replacement seems to be the only solution.1 point
-
lol I've given serious thought with the idea of calling Dell and extending my warranty on the m14x. It's still good for a year, but after what happened to the m11x...that's an expensive loss. I finally found a Seagate Constellation that was on sale, but the z-clearance height is 14-15mm...not gonna fit. Looks like the best I can do is 750GB at 9mm. m11x= DeLorean after being hit by a train in Back to the Future 3 m14x= Time travelling locomotive (It runs on STEAM! hahaha)1 point
-
Well, I can't tell you how your m14 r2 will behave with a HDD as second drive. But I can tell you that 5400 rpm drives are no fun at all, in fact they can become the bottleneck of your system. However their existence can be justified by the amount of power they save. I have made good experiences with 5400 rpm drives, but those were desktop drives in a raid configuration and used for large continuous reads. As primary disk a 5400 rpm HDD is a no-go, but if you only use the as 2nd drive for storage of large files like movies the 5400 rpm drive is ok, in fact it may buy you even some extra mobility. If you plan to install applications or games only a 7200 rpm drive or an SSD can satisfy you. The way i see it, installing an 5400 in a m14x R2 is like installing a cheap set of tires on a sports car. PS: I have swaped my CD-ROM drive for a 7200 rpm drive for storage purposes and am quite happy about it, except that after a long time of no access the disk has to spin on again which takes about 0.5-1 sec. Acceptable but absolutely inconvenient. PPS: What's with the Delorean? - Is that beauty yours?1 point
-
Well, a jumper is essentially nothing more than an electric bridge between two pins. I have seen pictures where the pins were connected with alumnium foil, but you have to be careful not to touch other pins. This is of course no permanent fix, but I am sure you can get such jumpers on ebay or dealextreme for a few dollars.1 point
-
(finished) So after seeing Inap's wonderful paintings I decided to give it a shot. I'm thinking orange! It will be the first time im going to completely disassemble my system. So thought i would share my progress and hopefully an awesome result. Firstly i bought a new pair of magnesium covers for my lappy in case of something went wrong. The alien head was glued on to the lcd cover and the plastic plate was welded on. I used a heat gun for the head and a small drill for the plate. Rest of the stuff was kinda straight forward off. Just a screw here and there (ie. battery lock) With the bare magnesium set i went to get rid of the old paint at a chemical cleaning called Danclean. Could maybe have done it myself if I had any knowledge of the actual paint. Now I have covered (blue heat resistant tape from the powder coating place) the areas of the magnesium set where I don't want it powder coated. Since it's the first time I do this I wanted to make sure everything would fit inside afterwards. I will have some more pics to share soon... ... which is now! It's not perfect but here it is to enjoy!1 point