Leaderboard


Popular Content
Showing content with the highest reputation on 12/02/11 in all areas
-
USFA Arson Awareness Week2 points
-
Crazy right?2 points
-
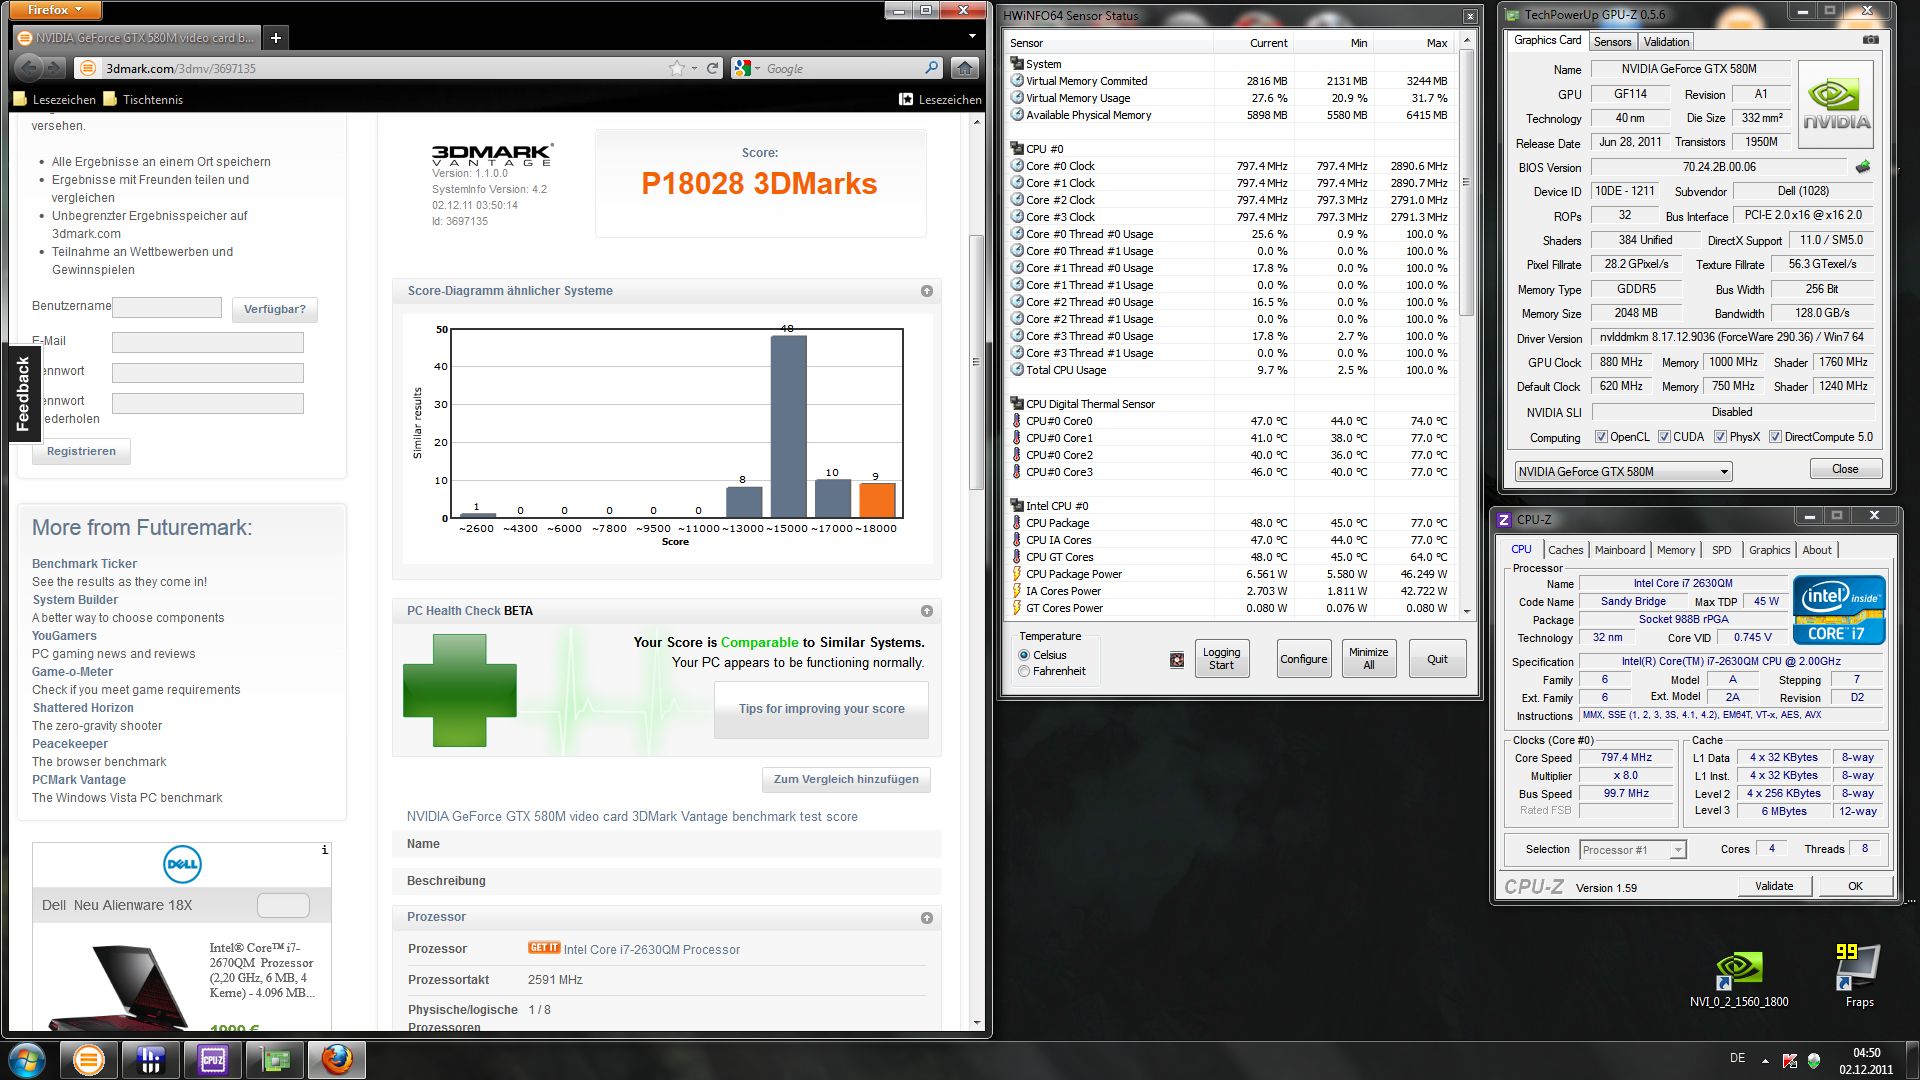
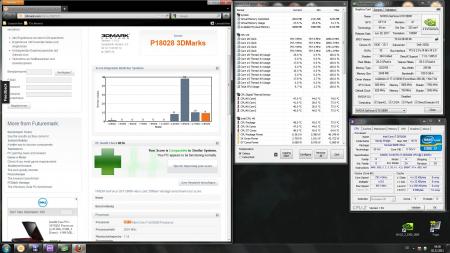
Finally managed to hit the 880Mhz on the GTX580M. Vbios is modded to 0.92V, using System Bios A08, Forceware 290.36. No CPU overclocking, stock cooling, repasted with Arctic Silver 5 and using Notebook Cooling Pad 3DMark Score 18028 3DMarks Graphics Score 18147 CPU Score 17677 Jane Nash 54.52 FPS New Calico 51.74 FPS AI Test 2433 operations/s Physics Test 23 operations/s
 2 points
 -
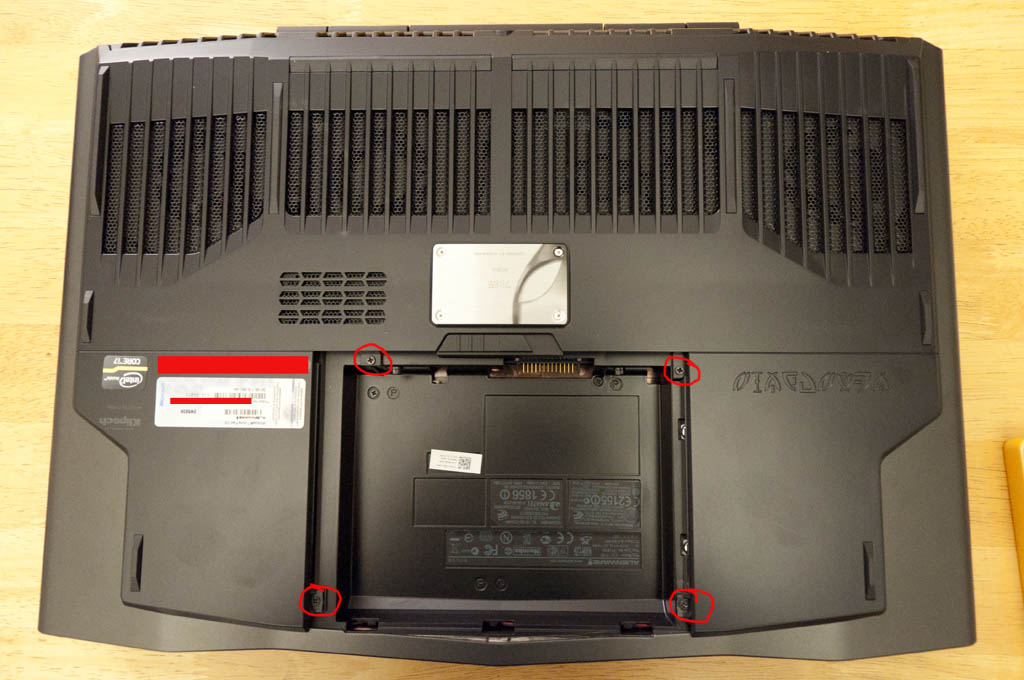
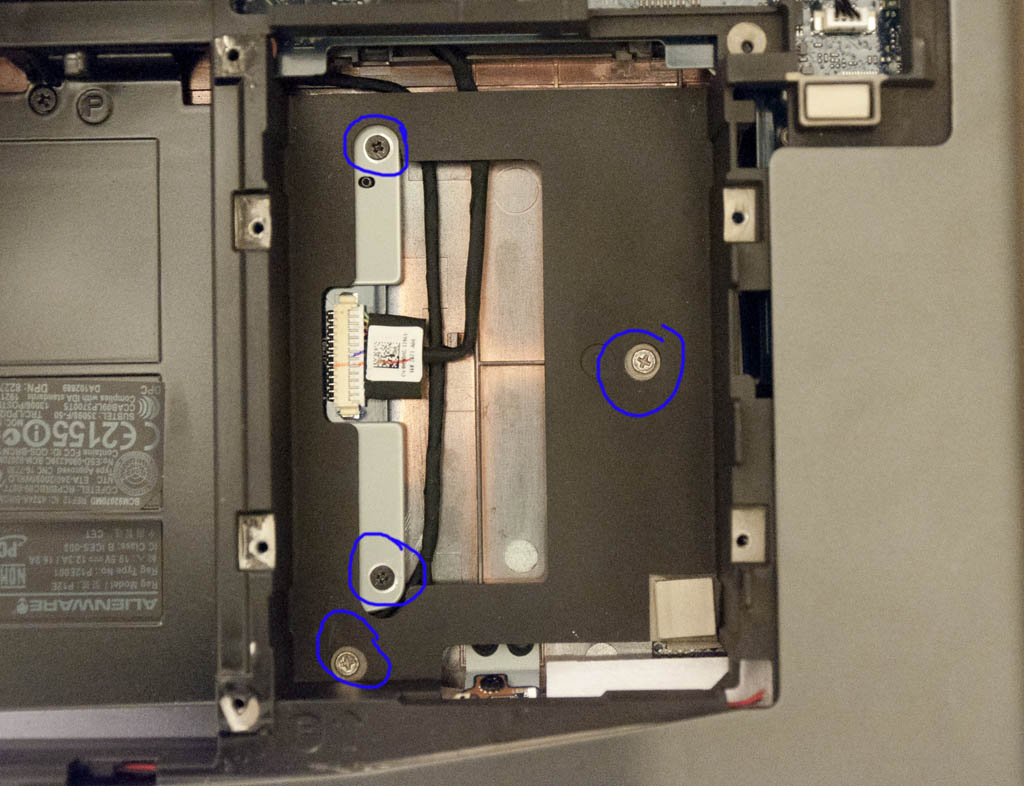
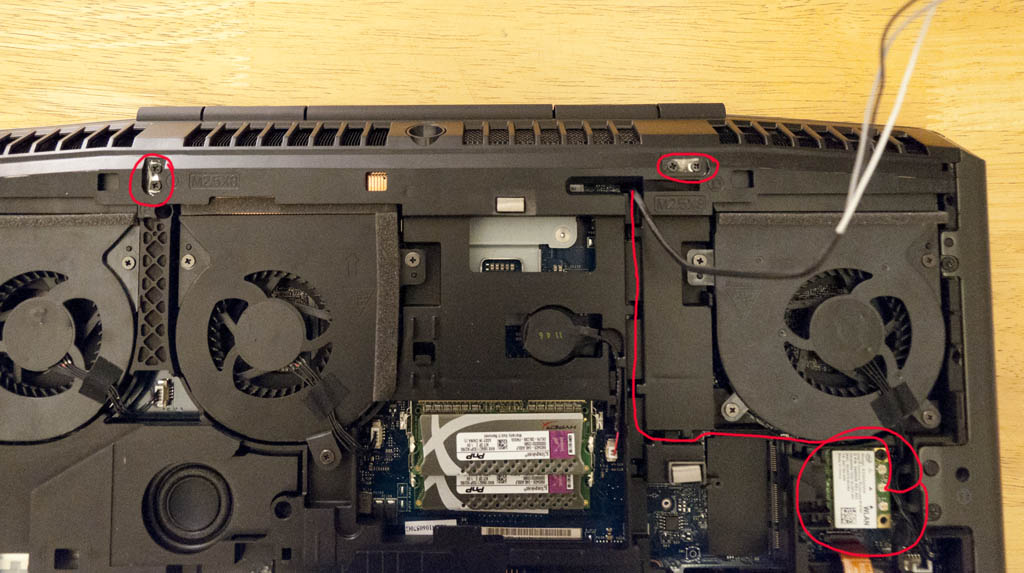
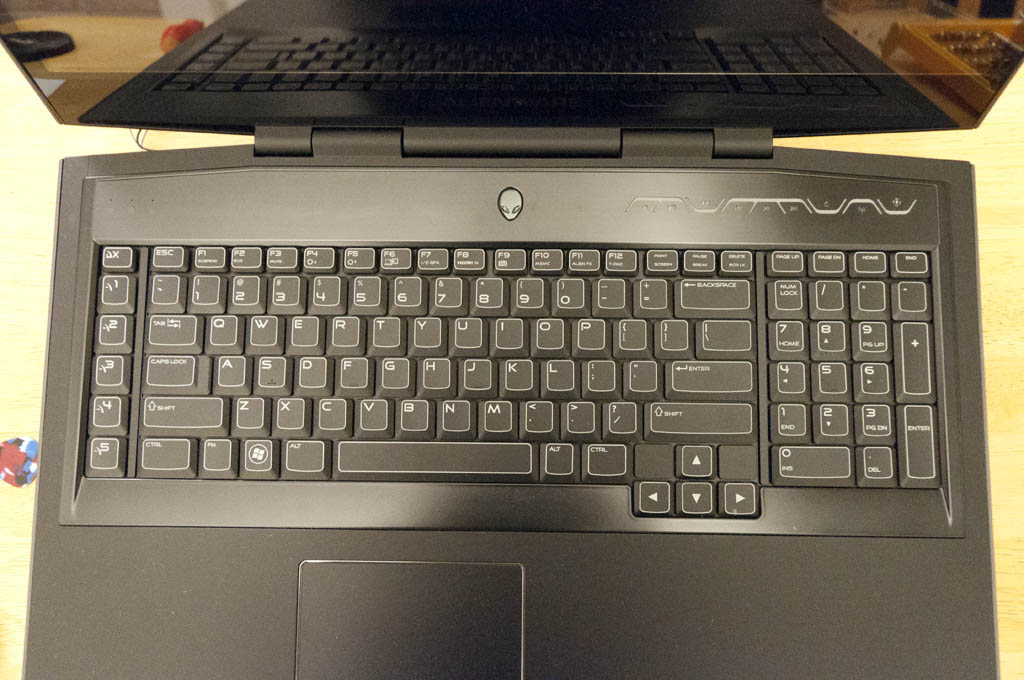
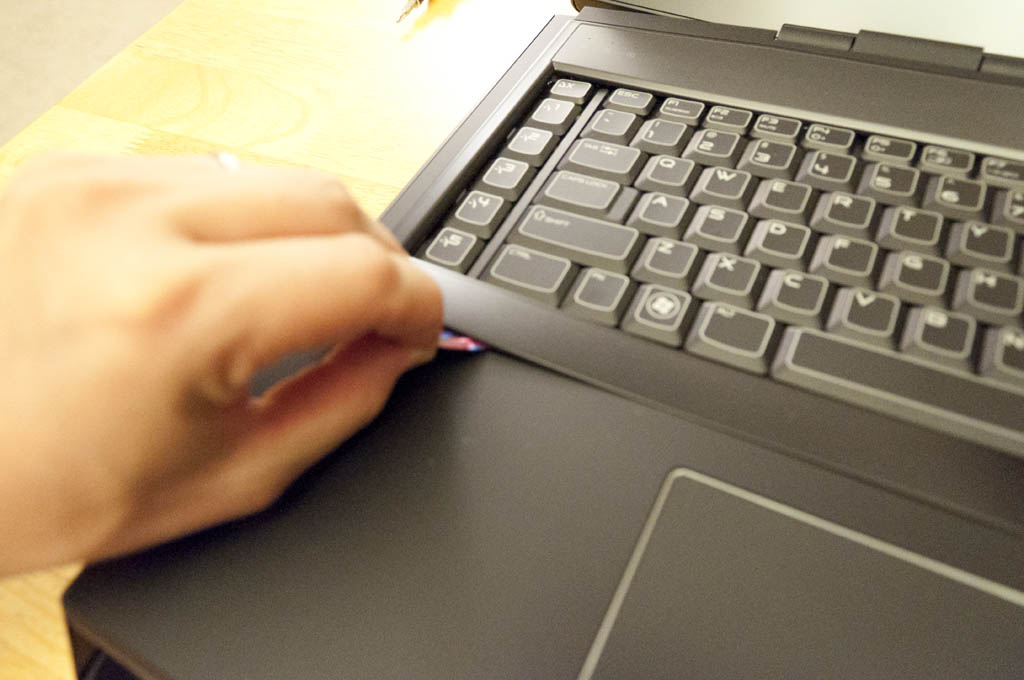
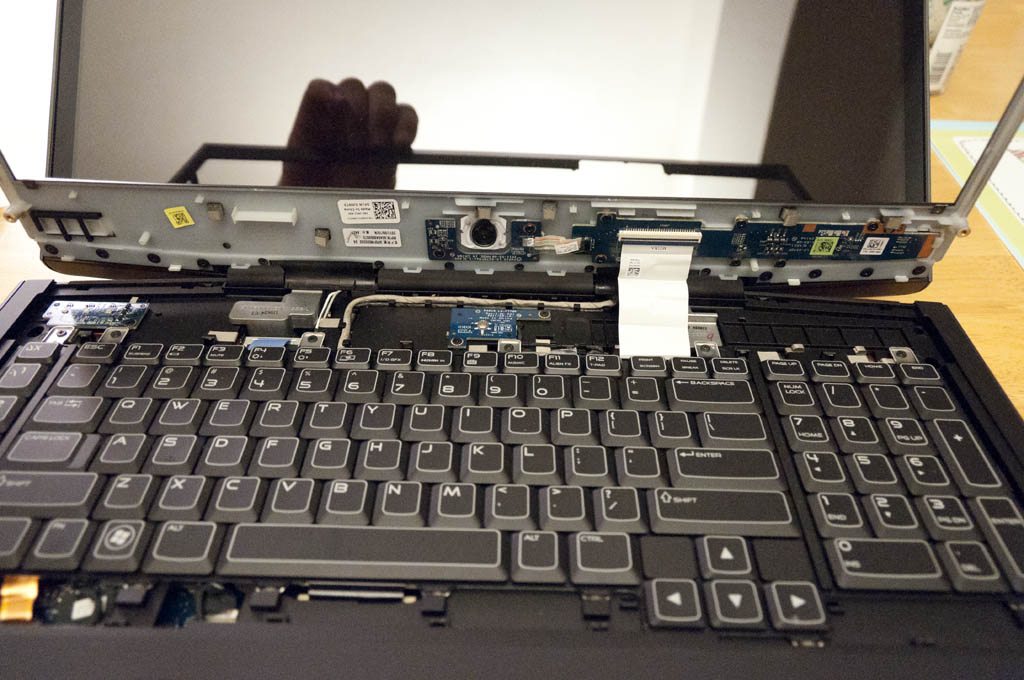
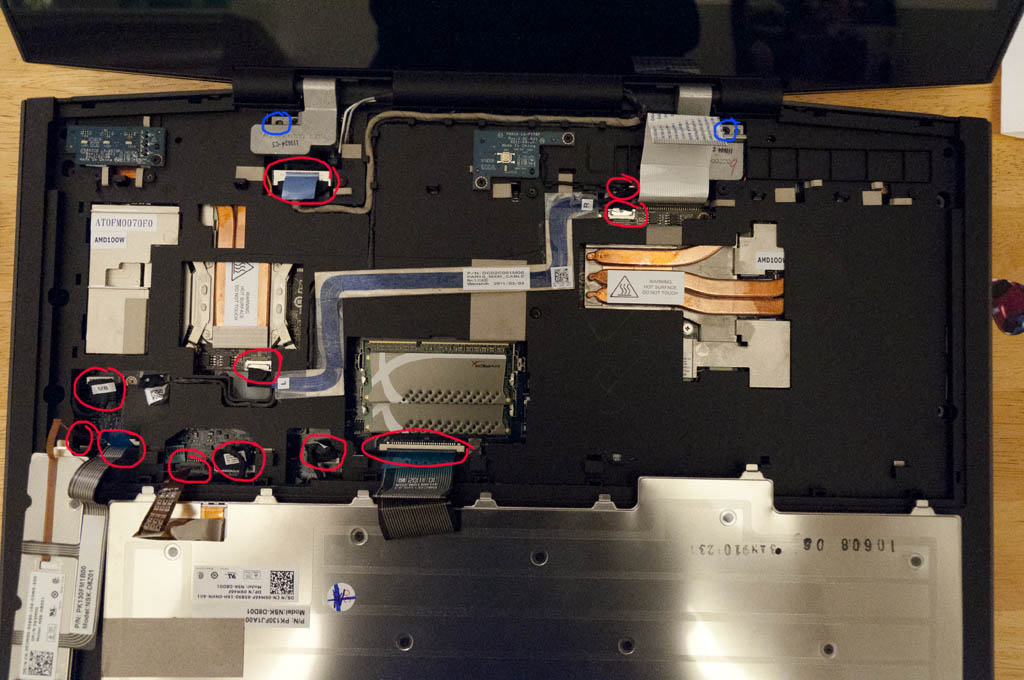
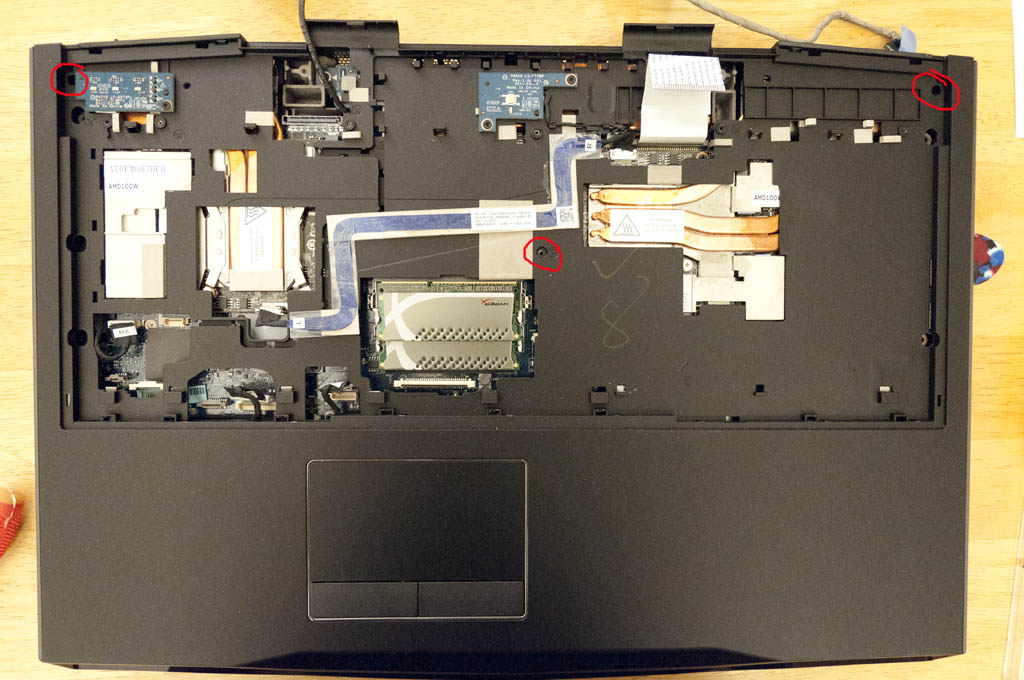
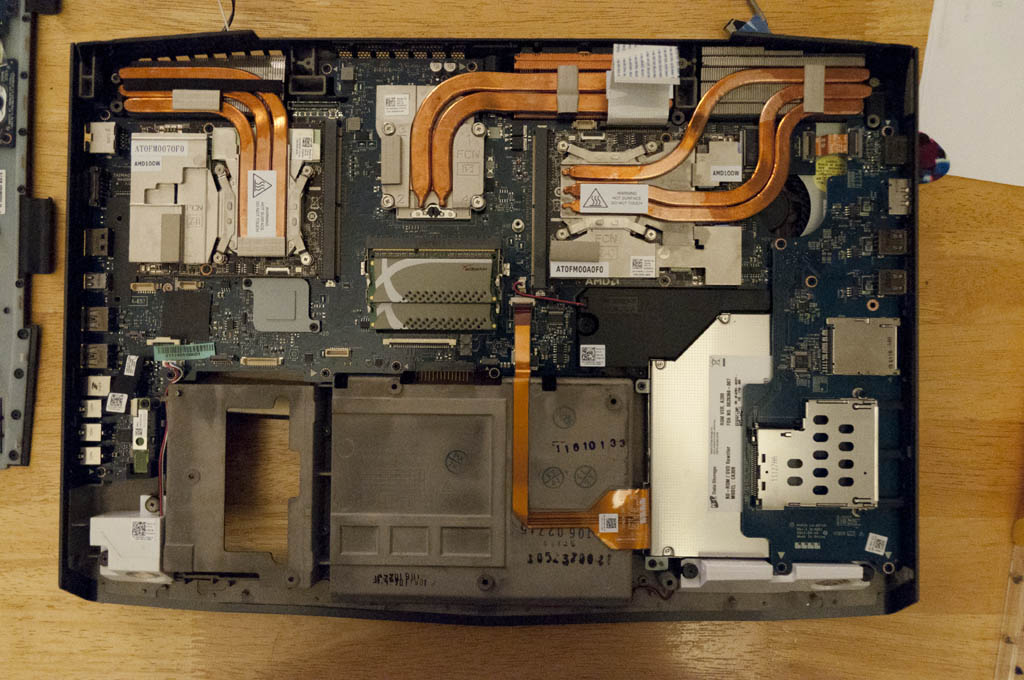
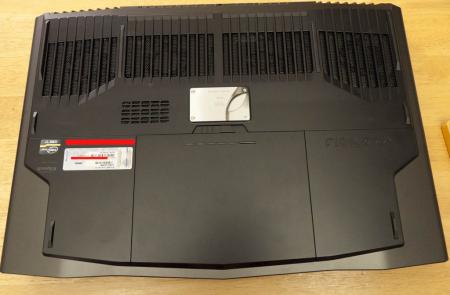
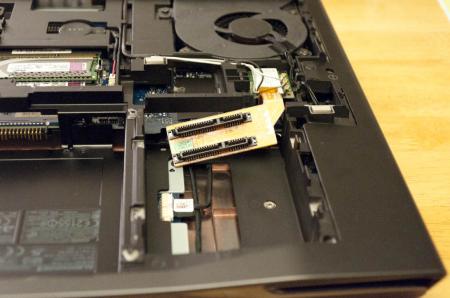
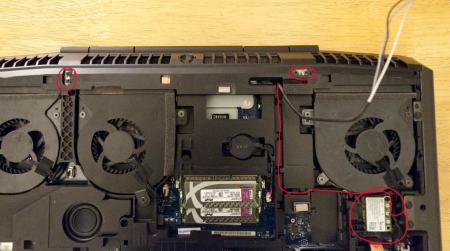
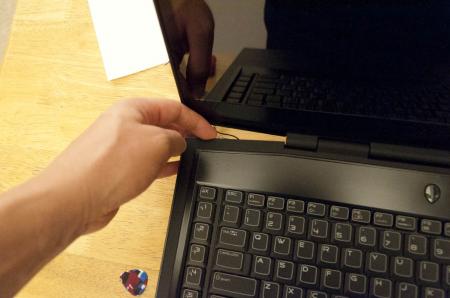
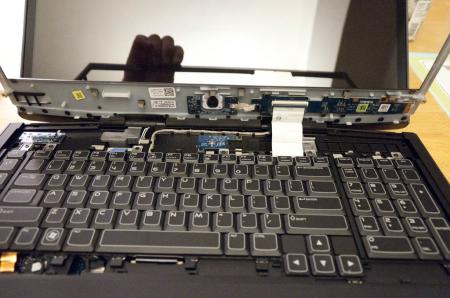
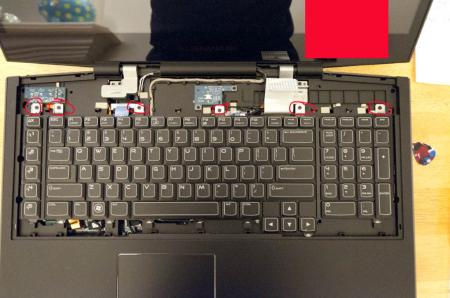
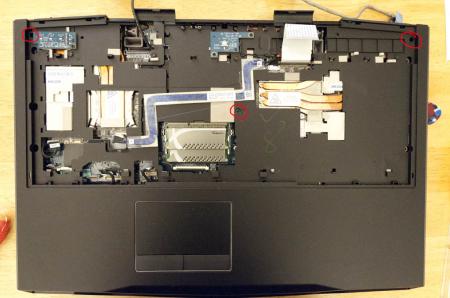
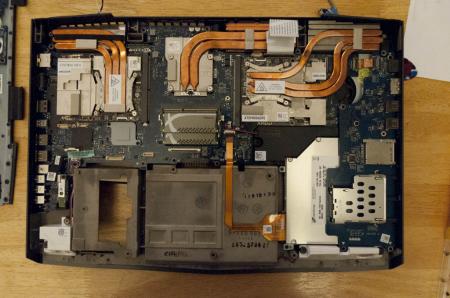
OK, people have been asking for this for a while so I thought since I can tear this down in about 10min, I should do a quick write-up. Like the title said, I did this quick so pictures wont be the best but you will get a better understanding on how to teardown the system enough to at least repaste etc.. Here we go 1 - Shot of the underside 2 - Remove battery and the 4 screws in red to remove bottom cover 3 - Bottom Cover Off: Remove Screws Labeled I (5 of them in Red), P ( 5 in Blue), and HD Bay screws (4 in Green) 4 - Remove Hard Drives 5 - Remove Screws In Empty Hard Drive Bay (4 in blue) 6 - Remove the LCD Hinge Screws ( 4 in Red) and disconnect the wireless antennae (circled and traced in Red) 7 - Flip System over and open screen 8 - Pop off the media control panel by lifting the back right and left corners until it "pops" off. I find using my guitar pick helps with this 9 - Once the back corners have popped loose, run the guitar pick around the edges to loosen the rest (around the keyboard) 10 - Picture of the media panel loose but still connected with the ribbon cable (disconnect this now) 11 - Remove the Keyboard and macro keyboard screws ( 6 in Red) 12 - Disconnect all cables from the motherboard and graphic cards ( 11 in total) and 2 more lcd screws ( 2 in blue) This includes: 2 ribbon cables for the macro keyboard 2 ribbon cables for the keyboard 3 for the handrest/trackpad (2 on bottom, 1 near the right crossfire cable connector) 2 for the screen (one toward the bottom left, one at the top left) 2 for the crossfire cable (labeled L and R on the cable) 13 - Remove 3 more screws securing the cover ( 3 in Red). You will need to pop off this cover starting at the back... just lift until it pops off. If it is being difficult, make sure all screws labeled "P" on both the top and bottom are removed. 14 - Once the cover is off, remove the screws (going from #1-4) on your heatsinks.... clean and repaste. If anyone wants pics of the heatsinks removed just let me know (I took a couple but not really necessary for this guide). Once again, I did this all very fast so I know it is not as polished as it could have been.... but I wanted this out sooner than later for everyone to use. Let me know if anything is unclear etc... D.


 1 point
 -
An interesting point of view1 point
-
I normally don't comment on yahoo news stories but I felt this one was a pretty good one: Anonymous 'Secret Santa' Brings Christmas Cheer - Yahoo! If more people with money out there gave out cash randomly to poverty stricken people, it would go a long way. It's pretty sad that in a nation that calls itself a superpower, there are people that can't pay their heating bills or haven't eaten in days. It makes me ashamed of this country and ultimately tells me that our government has failed us in a huge way. It's somewhat comforting to know there are citizens out there like this guy that take action in place of an impotent government.
 1 point
 -
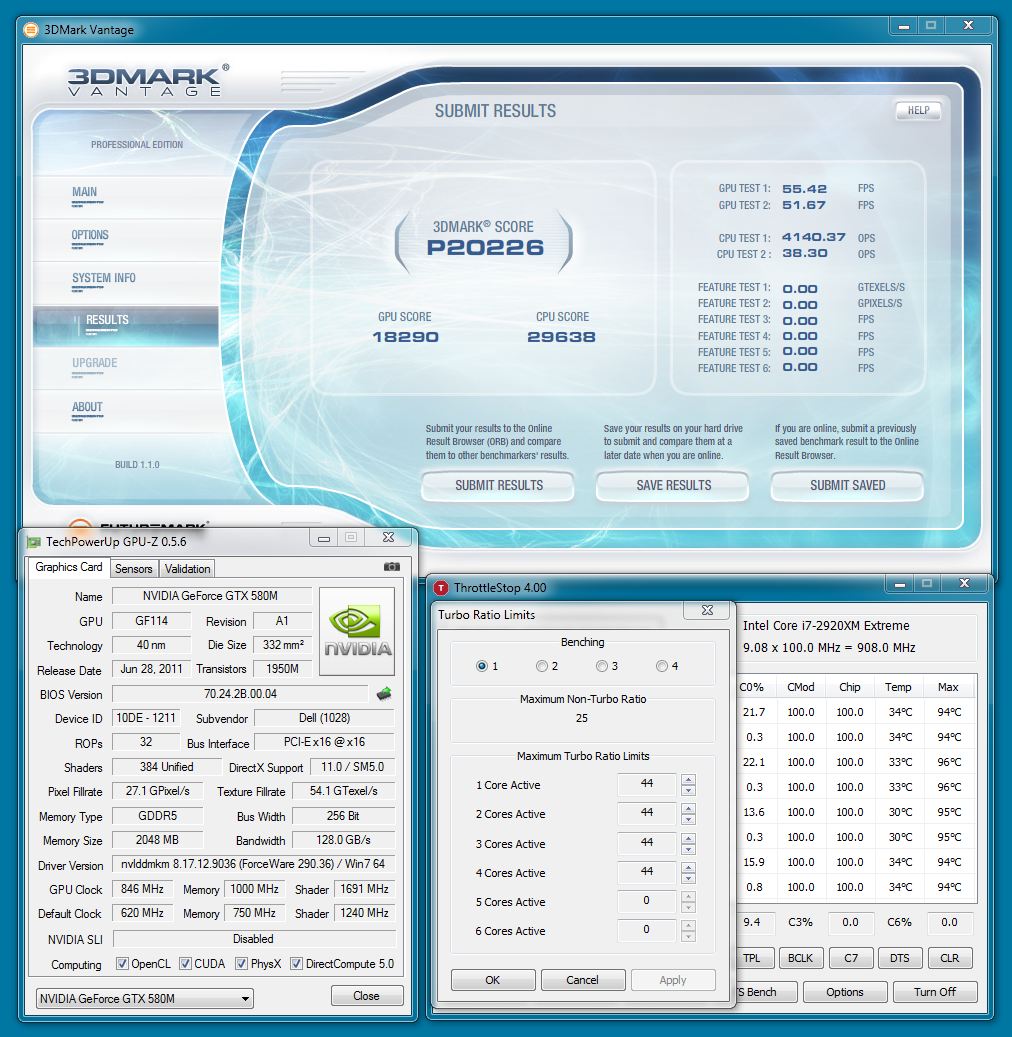
Sup guys, did another Vantage run today:
 1 point