Leaderboard


Popular Content
Showing content with the highest reputation on 03/07/13 in all areas
-
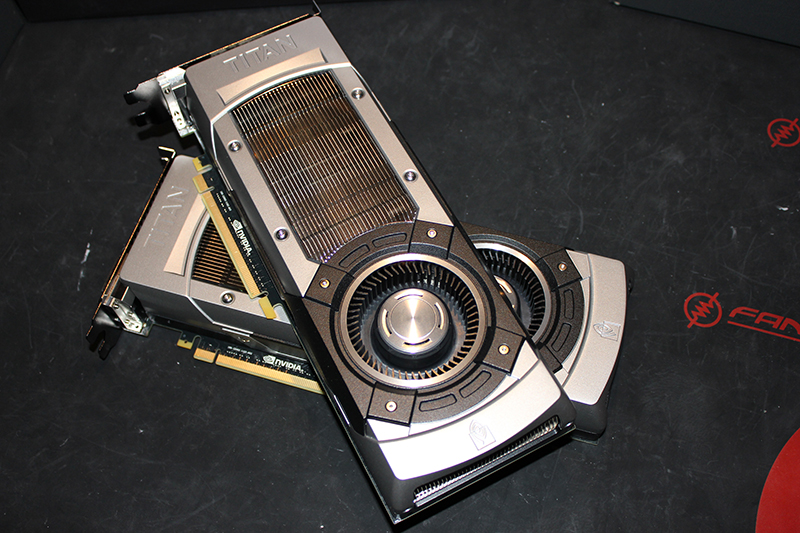
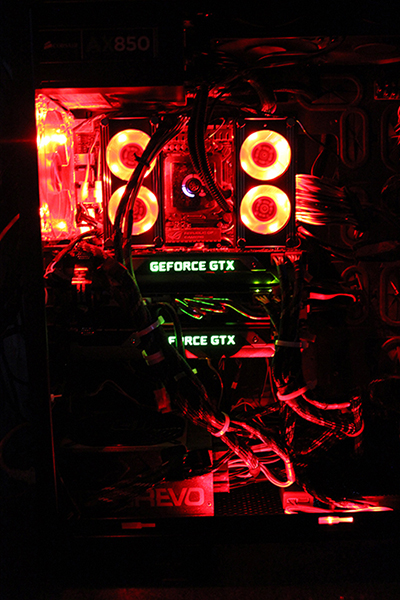
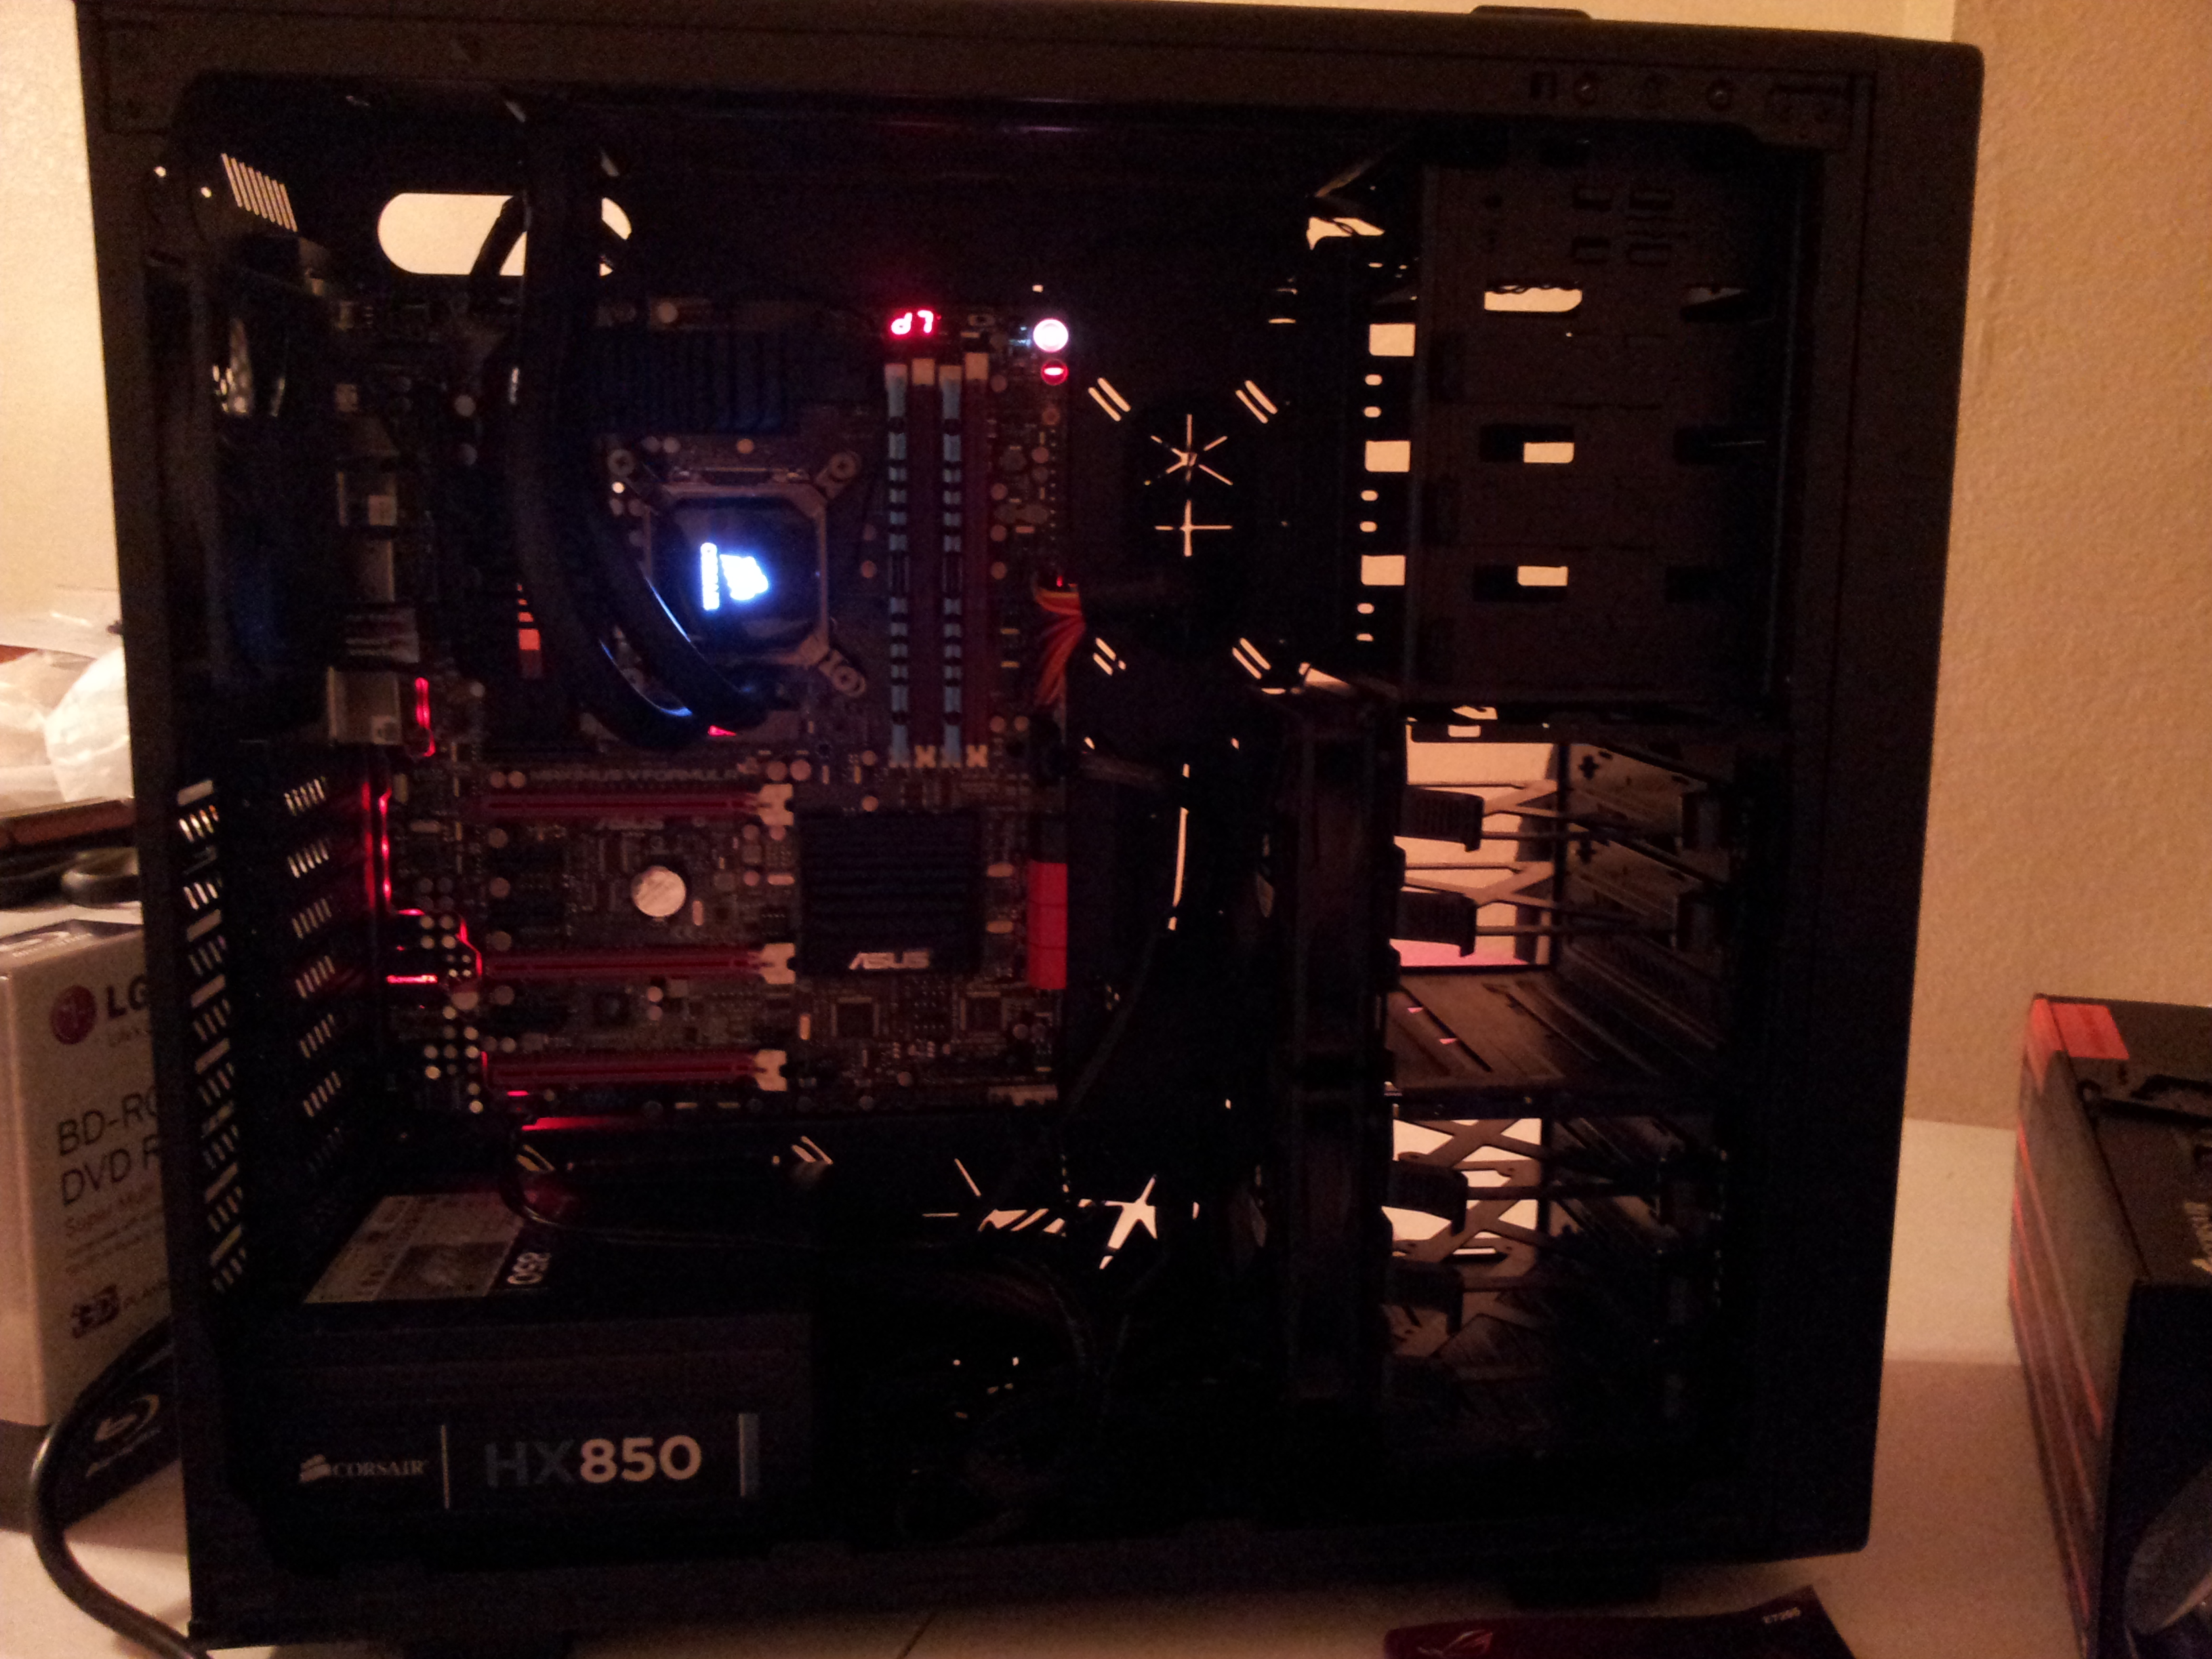
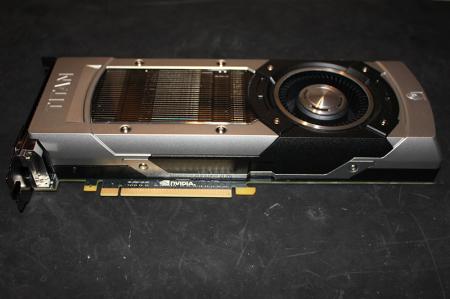
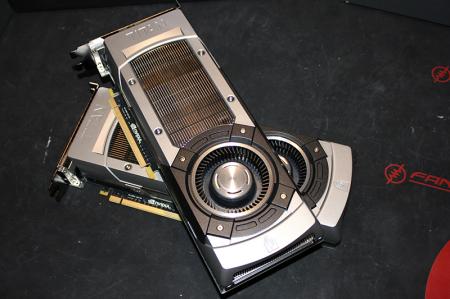
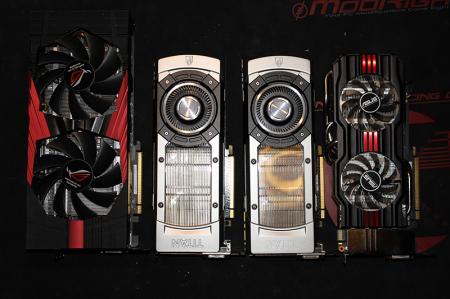
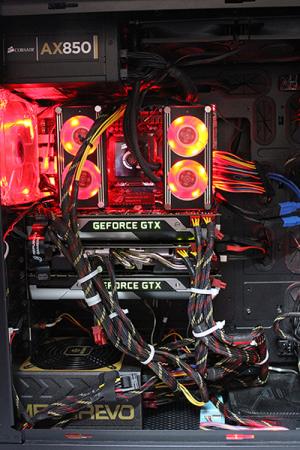
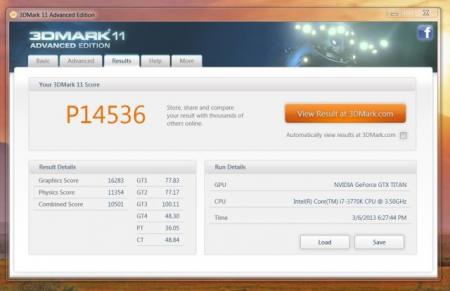
Nvidia GTX Titan SLI or as @Brian says "Damn you Conkers!" So there it is, the real successor of the GTX580 chip, how much rumour was out there over the months. Nvidia broke my resistance, I had to buy at least one card. I managed to get two of those beasts, I know the price is ridiculous but for a triple display setup it's totally worth it. The cards are working in my Xigmatek case along with the GTX670, which is now dedicated to Physx. At the time Intel will release Haswell processors, I'll move the cards in a smaller case with an mATX board. My Xigmatek Elysium case is reserved for another project, which I will show to you at a later date, maybe by the end of this week or next week. Comparison: Asus MarsII vs Asus GTX Titan vs Asus GTX670 DCII Top System overview: Benchmark results: [email protected]|GTX Titan SLI@997/1036/1502 (core/boost/memory) all screenshots viewable on SkyDrive link below 3DMark (2013): Ice Storm: 174921 Cloud Gate: 37593 Fire Strike: 15669 Fire Strike Extreme: 9056 (9999GPUscore damn ) 3DMark11: Entry: 26584 Performance: 22121 Extreme: 10498 3DMark Vantage: Entry: 94976 Performance: 60240 Extreme: 48495 Unigine Heaven: Extreme: 3350 / 133.0FPS Unigine Valley: ExtremeHD: 5061 / 121.0FPS Full resolution pics and benchmarks: Click here
 3 points
 -
To do list: 1. Keep looking at picture of stacked titans. 2. Summon hatred. 3. Nurture burning coal of jealousy. 4. Fan the flames of revolution. 5. Lead horde to Switzerland. 6. Claim Titans in bloody coup. 7. Now THAT is a desktop. Can't wait to see more benches, builds and ideas, hope they treat you well.2 points
-
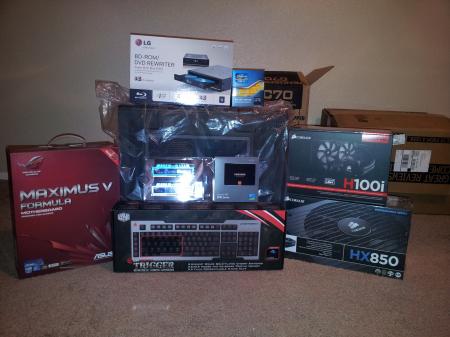
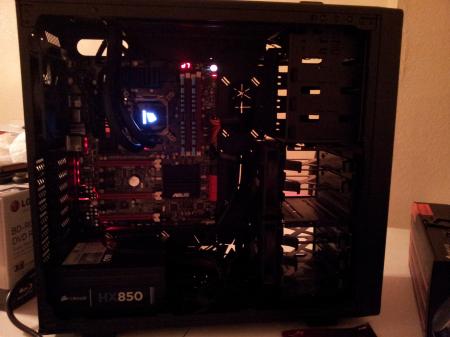
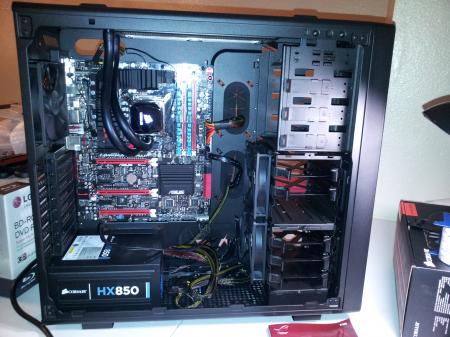
Parts Arrival Received partial shipments of the parts today. Still waiting on the Corsair Vengeance ram (sending the G.skill back), the display and video card. First Power On Test (no discrete GPU yet)
 2 points
 -
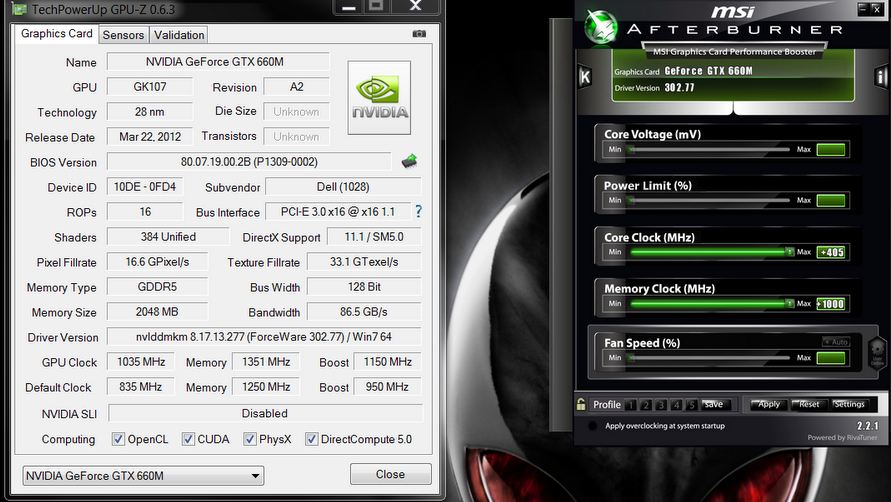
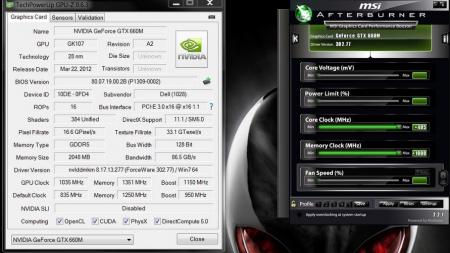
UPDATE: ALL DOWNLOADS LISTED IN THIS POST FOUND HERE. Nvidia 'Kepler' GPUs - modified VBIOS files >>> NOTE: More versions (including voltage mods) exclusive for T|I users can be found in the second post. <<< The 'Kepler' GPUs from Nvidia perform really well, even at increased clocks speeds they stay quite cool - a perfect behavior when it comes to overclocking and improving the performance. Unfortunately the mobile GPUs suffer from an artificial +135MHz core overclocking limit, so you can't go higher by using tools like Nvidia Inspector and similar. The modified VBIOS files listed here have this limit unlocked, some have increased stock clocks or tweaked voltages. Just refer to the description. All files have been modified by myself, if you like them feel free to buy me a drink, donation link can be found below GTX 660m: 660m_OC_edition__VBIOS_[DELL].zip- comes with unlocked software overclocking limits 660m_GHz-Edition_overvolted_VBIOS_[DELL].zip - default 3d clock 1000MHz, base boost 1200MHz,, memory (3d) 1350MHz, increased 3d voltage undervolted editions possible, depends on interest, tba Some screenshots: GTX 680m: Clevo_680m_-_80.04.33.00.10_'OCedition'_revised_01.zip Dell_680m_-_80.04.33.00.32_'OCedition'_revised_00.zip Increased software overclocking limits & optimized for no throttling. Read the included 'Read me' file before flashing. Instructions: I recommend flashing under DOS using nvflash . Donation link in case you want to buy me a beer Thanks and cheers! More to come. Testers: Thanks @eliteone (Dell 660m), @littleone562 (Dell 680m) For all mods: Use at your own risk.
 1 point
 -
____________________________________________________________________________________________________________________________________________________________________________ *Note: This page is no longer updated, I am not taking requests anymore. Please do not PM me, because I will not respond. Other people have graciously posted their unlocked BIOS's within this thread, so you will have to do some searching to find the right one. I may come back to unlocked more later... I just don't have any time. Sorry. ____________________________________________________________________________________________________________________________________________________________________________ Welcome to my unlocked BIOS thread for MSI G-series gaming notebooks! Anytime you see an asterisk (*), it means that pictures for that part are included in the 2nd post. Introduction: In this thread you will find a list of MSI G-series gaming notebooks with their BIOS’ fully unlocked. Just about every feature that MSI has hidden is now available to be changed by the end user. This thread may be of particular interest to techies who love to squeeze every ounce of performance out of their notebooks or even the average person who is looking for a particular feature that has previously been locked. Should I Flash These BIOS? Anyone that owns one of the listed MSI G-Series notebooks is eligible. Who this does NOT apply to: - If you are afraid to brick your notebook, this is NOT for you. There is always a possibility for errors and accidents to occur. - If you do not understand what any or most of these acronyms mean, this is NOT for you. You will probably find little use for the unlocked features and the potential for risk is much greater than the reward. Who this applies to: - If you have an understanding of most of this thread and are willing to learn, continue reading. - If you are an enthusiast who loves modding and overclocking and have experience with this field, continue reading. Features: So what are these features that MSI had locked out? A short list would include: *- XMP RAM support (Up to 2133Mhz) [Warning: 4 DIMMs at 1866Mhz(+) may not be stable, 2 DIMMs are stable at 2133Mhz]. - BCLK Overclocking (Up to 5%, your mileage may vary, no guarantees). - TPL limits unlocked (With the combination of ThrottleStop, CPU throttling can be overcome). Necessary Tools & Knowledge: We’re going to need a couple things before we start flashing: 1. A bootable USB drive in DOS/ME/98. Guides can be found all over the internet. 2. The required BIOS file(s) for your specific notebook. 3. AC Adapter plugged into notebook. 4. Some common sense and bravery. Disclaimer: I claim no responsibility for any accident, damage, or brick caused by this, nor do I guarantee any technical assistance. Flash at your own risk. I am in no way affiliated to MSI, nor is MSI obligated to provide any support with these files. Proceed with caution! Your notebook's warranty will be compromised in the event of a repair! Redistribution of these files is not permitted without prior approval from me. You must contact me BEFORE you plan on hosting them. Thank you. Directions: 1. Add the three (3) files: "BIOS".ROM, AFUDOS.exe and update.bat to your flash drive. The root folder works best. Double check the READ ME.txt that you are about to flash the correct BIOS for your notebook. 2. Plug in USB drive and shut down your notebook. 3. Power on the notebook and during POST hit F11. This will bring up the boot menu, select your USB drive and hit enter. 4. In DOS, type:* This will start the flashing process. Warning: Once you hit enter, you CANNOT stop the flashing process. If you interrupt it via shutdown or remove its power source, you will brick your notebook with 100% certainty. 5. Sit back and wait for the process to complete itself. Note: Your fan will spin at 100% speed, it will be very loud. This is normal. Once your BootBlock has been verified and the command prompt comes back up, the process is complete.* Press Ctrl + Alt + Delete to restart your notebook and hit Delete to enter the BIOS. If your BIOS looks exactly the same as before and the flashing process came back with no errors, then you have to boot into Windows and shut down your notebook, NOT restart. Then check it out. Warning: The BIOS might reset the SATA mode into RAID. Please double check in the 'Advanced' tab that it is set to whichever mode you were using or else your boot manager may get corrupted. If this does happen, you will need to use your Windows 7 CD and repair the start-up process. Downloads: This part is under construction! More will be added. Taking requests as well. MSI Notebook Models: Version: Download Link: 1st-Gen Core-i Retail: MS-GX740(17''): 1.0F ms_gx740.zip Whitebook: MS-16F1(15.6''): 1.0L MSI 16F1 Unlocked.zip 2nd-Gen Core-i: Retail: MS-GT680/683(15.6''): .30Z MSI GT683 Unlocked.zip MS-GT780/783(17''): .30H MSI GT783 Unlocked.zip Whitebook: MS-16F2(15.6''): 3.05 MSI MS-16F2 Unlocked.zip MS-1761(17''): 3.06 MSI MS-1761 Unlocked.zip 3rd-Gen Core-i: Retail: MS-GT60(15.6''): .30M MSI GT60 Unlocked.zip MS-GT70(17''): .30M MSI GT70 Unlocked.zip Whitebook: MS-16F3(15.6''): MS-1762(17''): 3.0G MSI 1762 Unlocked.zip AMD APU MS-gx60(15.6'') 3.05 SecondGenAMDAPU.zip Recovery: Directions for making your notebook function properly if you encounter any errors. Case 1: In case of a GOOD flash, but you still cannot enter BIOS or boot into Windows: Common symptoms include: Endless looping reboots, inability to access the BIOS, permanent black screen, persistent BSODs in Windows or stuttering. The most likely cause was that your image was successfully overwritten, but some values may have changed internally and the BIOS may be having a hard time accepting them. If everything was a success and your notebook boots into one of the situations mentioned above, before trying a blind-flash recovery, UNPLUG the wire leading to your CMOS battery for 5-10 seconds.* This will RESET the stored values in the BIOS to their defaults. If this does not solve the problem, then a blind-flash will be required. Case 2: In case of a BAD flash, a blind-flash will be required. 1. Remove any files from your USB that aren't the necessary bootable DOS files. 2. Pick a ROM you want to flash (doesn't have to be the original), but it MUST be one for your notebook specifically. 3. Rename the file.ROM to AMIBOOT.ROM and put it on your flash drive. 4. Plug in your flash drive in a USB 2.0 slot. 5. As soon as your notebook turns on and nothing is displayed, spam Ctrl + Home (In my case, the MS-16F2 is Ctrl + Fn + PgUp or Ctrl + Shift + NumPad 7). 6. You should hear four (4) beeps and the BIOS should begin flashing itself. --------------------------------------------------------------------------------------------------------------------------- Redistribution of these files is not permitted without prior approval from me. You must contact me BEFORE you plan on hosting them. Thank you.1 point
-
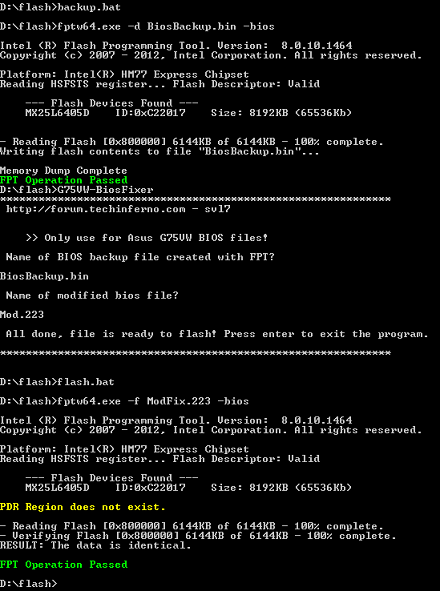
Instructions for flashing the VBIOS of a NVIDIA video card: You'll need: A VBIOS file you want to flash The latest version of NVflash, a DOS utility to flash the VBIOS of Nvidia cards. A USB drive, formatted to boot DOS, in order to use NVflash How to create a bootable USB flash drive: The flashing procedure: Put the NVflash files to the root of your prepared (DOS bootable) USB drive. Do the same with the Vbios you want to flash. NOTE: DOS has a limit of 8 characters per file name (not counting the extension). So make sure to rename your files appropriately before putting them on the USB drive. Make sure the USB drive is plugged into a port which is active at boot, reboot the system and go to the boot manager. Choose to boot from your prepared USB drive. As soon as you see the command line you're ready to go, write dir and hit enter to display all the files on the USB drive. Display all Nvidia adapters in the system: nvflash -a or alternatively the longer version of the command: nvflash --list This command will return you a list with all Nvidia adapters present in your system. Here's an example output of this command run on my M15x with a 680m in it: NVIDIA Firmware Update Utility (Version 5.117) NVIDIA display adapters present in system: <0> N13E-GTX (10DE,11A0,1028,02A2) H:--:NRM B:02,PCI,D:00,F:00 The number in the <> brackets is the index of the corresponding device. SLI users will have more than one entry and flash each card separately. Backup your current VBIOS: Never forget to keep a backup of your original VBIOS before you flash anything non-stock. Use this command to save a copy of the firmware to your USB drive: nvflash -b filename.rom or with nvflash --save filename.rom Flash the VBIOS to your card(s): For a single card it's really straight forward, you don't need to worry about the adapter indices. Just use this command: nvflash -6 vbiosname.rom -6 will allow you to override mismatches of the PCI subsystem ID. In case of a mismatch you'll need to confirm the flash with 'y'. NOTE: Users with a non-US keyboard might need to press 'z' or similar, because the 'y' isn't at the same location for all keyboard layouts. SLI users will need to flash each card separately. The concept stays the same, but you will need to use the corresponding adapter index to flash a card. How to figure out the adapter nr. is described above. Flashing goes like this: nvflash -i[index] -6 vbios.rom [index] represents a number, namely the index you found with the 'nvflash -a' command. So a command example to flash a card which has index 0 is: 'nvflash -i0 -6 vbios.rom' When the flashing starts, just wait until it says that it's done. Then reboot with Ctrl+Alt+Del and remove your USB drive. Pro tip: Let me know if I missed anything important or if you have questions.1 point
-
Go to start and in the search bar type cmd. Then run the command prompt as administrator and navigate to folder and repeat the steps. It should look just like Voegelchen's last post...
 1 point
 -
Ok, so I went and picked up my card today and i must say, I'm liking it far better than my 7970.
 1 point
 -
As Nando already stated, our BIOS, even the modified ones by capitankasar (from NBR) cannot actually disable the dGPU. The GT540M is basically on "all the time", in the BIOS we can only specify whether we want to boot Windows with the iGPU or the dGPU. There is a setting for changing the TOLUD value in the modified BIOS, but Windows 7 (haven't tried Win 8) does not respect this value. For example, by default my TOLUD value was set to 3GB in the BIOS, and Windows 7 recognises this (as evidenced in the Device Manager). However, changing the TOLUD in the BIOS to values like 2.5GB and 3.5 GB did not show in Windows 7; the device manager in Windows 7 always reported a value of 3GB. Without any tinkering, I don't think one with our laptop models (L501/L502) would be able to get the eGPU working without first disabling the dGPU. At least for me, I absolutely have to use Setup 1.x to get my eGPU going.1 point
-
List of all nvflash (DOS) commands (as of version 5.117): NVIDIA Firmware Update Utility (Version 5.117) -- Primary Commands -- Update firmware: nvflash [options] <filename> Save firmware to file: nvflash [options] --save <filename> Compare adapter firmware: nvflash [options] --compare <filename> Verify adapter firmware: nvflash [options] --verify <filename> Update TV data: nvflash [options] --tv <filename> Display version: nvflash [options] --version [<filename>] Display firmware bytes: nvflash [options] --display [bytes] Check for supported EEPROM: nvflash [options] --check Write protect EEPROM: nvflash [options] --protecton Remove write protect: nvflash [options] --protectoff Change soft straps: nvflash [options] --straps=<straps> Set IEEE 1394 GUID: nvflash [options] --guid=<guid> Set IEEE 1394 GUID source: nvflash [options] --guidsource=<location> List adapters: nvflash [options] --list List PCI firmware blocks: nvflash [options] --pciblocks List applied patches: nvflash [options] --listpatches Press 'Enter' to continue, or 'Q' to quit. -- Commands and Options -- help ? Display this screen. save b <filename> Read EEPROM and save to <filename>. compare k <filename> Read EEPROM and compare with <filename>. verify h <filename> Verify <filename> matches EEPROM if flashed. tv x <filename> Transfer TV data from file to EEPROM. version v <filename> Display file version and ~CRC32 (if no filename, acts on display adapter). listpatches Display list of runtime ROM pack patches applied at boot (primary only). display d [bytes] Display 256 the first bytes of the EEPROM (default is 256 bytes) check c Check for supported EEPROM. protecton w Write protect EEPROM (only on some EEPROM's). protectoff r Remove EEPROM write protect (only on some EEPROM's). straps m <straps> Change soft straps. format is: AND Mask 0, OR Mask 0, AND Mask 1, OR Mask 1 Press 'Enter' to continue, or 'Q' to quit. guid q <guid> Set the IEEE 1394 GUID in the firmware image (GUID is in the form of 16 hex digits). guidsource 1 <location> Set the source of the IEEE 1394 GUID. main - main EEPROM image dedicated - separate serial EEPROM part list a List all NVIDIA display adapters found in the system. pciblocks List all the PCI ROM Images stored in the EEPROM. upgradeonly Only allow upgrading of firmware based on version. overridetype 5 Allow firmware and adapter PCI device ID mismatch. overridesub 6 Allow firmware and adapter PCI subsystem ID mismatch. reboot y Reboot the PC after other tasks completed. keepstraps g Keep the soft straps already present in the EEPROM after flashing the new image. romstrap j Override the ROM strap setting to allow flashing an image when grounding the STRAP_SUB_VENDOR pin. This allows flashing a corrupted or erased EEPROM. Note: Make sure there is a physical EEPROM present when using this option index i <index> Force a specific device index. filterdevid f <value>[,<mask>] Filter device list by device ID and optional mask. fwindex F <fw index> Index of which firmware image to use from a firmware bundle. auto A When possible, run without user intervention. directpci n Bypass the PCI BIOS. Press 'Enter' to continue, or 'Q' to quit. silence s Silence all audio beeps. beep ! Beep to signal updating progress. nolight l Do not light keyboard LEDs. override o <level> Override safety check level: default unknown EEPROM | NV adapter aborts application. level=1 unknown EEPROM acceptable for read operations. level=2 unknown NV adapter acceptable for read operations. level=3 Combined effect of 1,2 (cannot write to unknown EEPROM or adapter). log L <log file> Create a log file. Use a single dash ("-") to use the single letter version of a command. Use a double dash ("--") to use the longer descriptive version of a command. Use equals ("=") to specify parameters, with separating commas (","). -- Sample Usage -- nvflash --index=1 nv30nz.rom Press 'Enter' to continue, or 'Q' to quit. -- Supported EEPROM's -- AMD AM29LV001B 128Kx8 2.7vV, 1B page, 16k blk, ID=(01,006D) AMD AM29LV010 128Kx8 2.7vV, 1B page, 16k blk, ID=(01,006E) AMD AM29LV001T 128Kx8 2.7vV, 1B page, 16k blk, ID=(01,00ED) Atmel AT49F512 64Kx8 5.0,3.0,2.7V, 1B page, 0k blk, ID=(1F,0003) Atmel AT49F001T 128Kx8 5.0V, 1B page, 0k blk, ID=(1F,0004) Atmel AT49F001 128Kx8 5.0V, 1B page, 0k blk, ID=(1F,0005) Atmel AT49BV/LV010 128Kx8 2.7-3.6V, 1B page, 0k blk, ID=(1F,0017) Atmel AT29LV/BV010A 128Kx8 3.0V, 128B page, 0k blk, ID=(1F,0035) Atmel AT29LV512 64Kx8 3.0V, 128B page, 0k blk, ID=(1F,003D) Atmel AT25F1024 1024Kx1S 2.7-3.6V, 256B page, 32k blk, ID=(1F,0040) Atmel AT29C512 64Kx8 5.0V, 128B page, 0k blk, ID=(1F,005D) Atmel AT25F1024 1024Kx1S 2.7-3.6V, 256B page, 32k blk, ID=(1F,0060) Atmel AT25F2048 2048Kx1S 2.7-3.6V, 256B page, 64k blk, ID=(1F,0063) Atmel AT25F512 512Kx1S 2.7-3.6V, 128B page, 32k blk, ID=(1F,0065) Atmel AT49F010 128Kx8 5.0V, 1B page, 0k blk, ID=(1F,0087) Atmel AT29C010A 128Kx8 5.0V, 128B page, 0k blk, ID=(1F,00D5) Atmel AT25DF021 2048Kx1S 2.3-3.6V, 256B page, 4k blk, ID=(1F,4300) Atmel AT25DF041 4096Kx1S 2.3-3.6V, 256B page, 4k blk, ID=(1F,4401) Atmel AT25FS010 1024Kx1S 2.7-3.6V, 256B page, 4k blk, ID=(1F,6601) ST M25P05 512Kx1S 2.7-3.6V, 128B page, 32k blk, ID=(20,0005) ST M25P10 1024Kx1S 2.7-3.6V, 128B page, 32k blk, ID=(20,0010) ST M29W512B 64Kx8 2.7-3.6V, 1B page, 0k blk, ID=(20,0027) Press 'Enter' to continue, or 'Q' to quit. Num M25P10-A 1024Kx1S 2.3-3.6V, 256B page, 32k blk, ID=(20,2011) AMIC A25L512 512Kx1S 2.7-3.6V, 256B page, 4k blk, ID=(37,3010) AMIC A25L010 1024Kx1S 2.7-3.6V, 256B page, 4k blk, ID=(37,3011) AMIC A25L020 2048Kx1S 2.7-3.6V, 256B page, 4k blk, ID=(37,3012) XLNX XCF128XFTG64C 8192Kx16 9.5,8.5,2.0,1.7V, 8B page, 128k blk, ID=(49,016B) Tenx ICE25P05 512Kx1S 2.7-3.6V, 128B page, 32k blk, ID=(5E,0001) PMC Pm25LD512 512Kx1S 2.7-3.6V, 256B page, 4k blk, ID=(7F,9D20) PMC Pm25LD010 1024Kx1S 2.7-3.6V, 256B page, 4k blk, ID=(7F,9D21) PMC Pm25LD020 2024Kx1S 2.7-3.6V, 256B page, 4k blk, ID=(7F,9D22) PMC Pm39LV512 64Kx8 3.0-3.6V, 1B page, 4k blk, ID=(9D,001B) PMC Pm39LV010 128Kx8 3.0-3.6V, 1B page, 4k blk, ID=(9D,001C) PMC Pm25LV512 512Kx1S 2.7-3.6V, 256B page, 4k blk, ID=(9D,007B) PMC Pm25LV010 1024Kx1S 2.7-3.6V, 256B page, 4k blk, ID=(9D,007C) SST SST29EE010 128Kx8 5.0V, 128B page, 0k blk, ID=(BF,0007) SST SST29LE/VE010 128Kx8 2.9,2.7V, 128B page, 0k blk, ID=(BF,0008) SST SST29LE/VE512 64Kx8 2.9,2.7V, 128B page, 0k blk, ID=(BF,003D) SST SST45VF010 1024Kx1S 3.0-3.6V, 1B page, 4k blk, ID=(BF,0042) SST SST25LF020 2048Kx1S 3.0-3.6V, 256B page, 4k blk, ID=(BF,0043) SST SST25LF040 4096Kx1S 3.0-3.6V, 256B page, 4k blk, ID=(BF,0044) SST SST25VF512 512Kx1S 2.7-3.6V, 256B page, 4k blk, ID=(BF,0048) SST SST25VF010 1024Kx1S 2.7-3.6V, 256B page, 4k blk, ID=(BF,0049) SST SST29EE512 64Kx8 5.0V, 128B page, 0k blk, ID=(BF,005D) SST SST39SF010 128Kx8 5.0V, 1B page, 4k blk, ID=(BF,00B5) SST SST39VF512 64Kx8 2.7-3.6V, 1B page, 4k blk, ID=(BF,00D4) Press 'Enter' to continue, or 'Q' to quit. SST SST39VF010 128Kx8 2.7-3.6V, 1B page, 4k blk, ID=(BF,00D5) MX MX29F001T 128Kx8 5.0V, 1B page, 0k blk, ID=(C2,0018) MX MX29F001B 128Kx8 5.0V, 1B page, 0k blk, ID=(C2,0019) MX MX25L512 512Kx1S 2.7-3.6V, 256B page, 4k blk, ID=(C2,2010) MX MX25L1005 1024Kx1S 2.7-3.6V, 256B page, 4k blk, ID=(C2,2011) MX MX25L2005 2048Kx1S 2.7-3.6V, 256B page, 4k blk, ID=(C2,2012) MX MX25L4005A 4096Kx1S 2.7-3.6V, 256B page, 4k blk, ID=(C2,2013) GD GD25Q512 512Kx1S 2.7-3.6V, 256B page, 32k blk, ID=(C8,4010) GD GD25Q10 1024Kx1S 2.7-3.6V, 256B page, 64k blk, ID=(C8,4011) GD GD25Q20 2048Kx1S 2.7-3.6V, 256B page, 64k blk, ID=(C8,4012) GD GD25Q40 4096Kx1S 2.7-3.6V, 256B page, 64k blk, ID=(C8,4013) WBond W39L010 128Kx8 3.3V, 1B page, 4k blk, ID=(DA,0031) WBond W39L512 64Kx8 3.3V, 1B page, 4k blk, ID=(DA,0038) WBond W29C011A 128Kx8 5.0V, 128B page, 0k blk, ID=(DA,00C1) WBond W29EE512 64Kx8 5.0V, 128B page, 0k blk, ID=(DA,00C8) WBond W25X10A 1024Kx1S 2.7-3.6V, 256B page, 4k blk, ID=(EF,3011) WBond W25X20A 2048Kx1S 2.7-3.6V, 256B page, 4k blk, ID=(EF,3012) WBond W25X40A 4096Kx1S 2.7-3.6V, 256B page, 4k blk, ID=(EF,3013) WBond W25X80A 8192Kx1S 2.7-3.6V, 256B page, 4k blk, ID=(EF,3014)1 point