Leaderboard


Popular Content
Showing content with the highest reputation on 02/27/13 in all areas
-
I found that to recovery flash the bios I had to put the USB drive into the port closest to the HDMI port, not closest to the user. I have a 3610QM version of the PC2 points
-
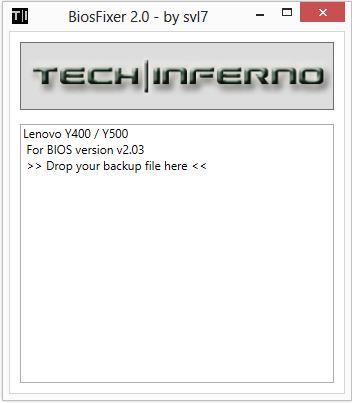
This is continuation of this thread (http://forum.techinferno.com/lenovo-ibm/2690-lenovo-y500-unlocked-bios.html) with all the necessary information in the first post in order to make it easier to find all the stuff. Lenovo Y400 / Y500 - 'unlocked' BIOS / wwan-wlan whitelist removal + modified VBIOS for higher overclocking The Lenovo Y500 comes with a pretty locked down BIOS, and in addition to this with a whitelist which prevents the user from getting 3rd-party wwan/wlan cards to work properly. The modified BIOS versions here will take care of this. Keep in mind that not necessarily all options available in the modified bios will work. Some might not do anything at all, others could possibly leave your system in a state which will prevent it from booting. Use care when changing stuff in the modified bios, don't touch things you're not familiar with. Use all the mods and software posted here on your own risk. Read the instructions carefully. NOTE: This will only flash the bios region. It won't reset the nvars set in the bios. *************** ONLY FLASH A MOD OF THE SAME VERSION AS YOUR CURRENT BIOS VERSION!!! If you're on 2.02 or 2.03 you can safely use the 2.04 update, *************** Attached you'll find modified versions of the Y400 / Y500 BIOS v1.03 and v1.05. Removed as they're outdated. Better updated to v2.02. The bios contains your Windows 8 license, therefore you can't just flash any file, else you'll have issue with your Windows activation. Furthermore the serial numbers, service tags etc. are stored there as well. You don't want to loose them. I wrote a little program that will take care of this issue and personalize the modified bios for you, so that you won't end up with an invalid Windows or no service tags. *************** Preparation to get to BIOS v2.02 (coming from any earlier version): Generally it's a good idea to keep the BIOS up to date. We're luck to have an official BIOS update to v2.02 apparently thanks to a leak on the net. (Lenovo is really bad when it comes to providing firmware updates and fixing issues). The leaked version must be genuine, else it wouldn't flash by using the regular method. If you want to update your system to v2.02 then grab the update here, extract it and flash the bios by executing the included InsydeFlash utility. Once the update is completed you can continue with the instructions below to get a modified version on your system. *************** Instructions for flashing a modified version: As a reminder - the modified BIOS needs to be the same version as you have on your system (2.02 to 2.04 is ok). Prepare an USB stick which can boot DOS. If you don't know how to do this, follow this short guide: Download the flash tool, for flashing you'll need the DOS version, but for creating the backup of your current BIOS the Win64 version will do as well, and it is faster. Get the prr tool as well. Grab the modified BIOS you want to flash, it comes as a tool which will patch the bios for you. Make sure you grab the version that corresponds with your BIOS version. Create a backup of your current BIOS using the flash tool you downloaded (first step) by runing the included backup.bat, or by using the Win or Dos version flash tool with this command: If the .bat doesn't work then open an administrator command prompt in your working directory and run the .bat per command line or type the command written above. In case you get an 'error 104' replace the parts file with the one that can be found in the 'error 104 fix' attachment at the end of the post. And if you still have issues after doing all of the steps above then please leave a reply in the thread and describe your problem. Open the downloaded tool and execute it. Drag and drop your BIOS backup file on it, it will create the mod for you. It will look like this: Put the modified BIOS, the prr.exe tool and the fpt.exe (along with the fparts.txt file) on the root of your prepared DOS bootable USB drive, restart your system and boot from that drive. Execute the prr.exe, if you don't get an error message continue by pressing enter. Then flash the bios by using this command (filename.bin obviously needs to be replaced with the name of the file you want to flash). If you can't remember the name of your file, use the command dir to display all the files on your drive. Flash with this: fpt.exe -f filename.bin -bios NOTE: The name of the BIOS file mustn't exceed eight characters (not counting the extension)! That's a DOS limit, so make sure the name of your file isn't too long. Wait until the process is done. After flashing it will verify the data, in case there's something wrong with the flashed data it will tell you. In that case don't reboot, just flash again. *************** Flashing the ultra bay 650m - only for SLI users with BIOS v2.02: The modified BIOS v2.02 also contains a vbios which will allow you to overclock your 650m past the 135MHz limit. As the ultra bay GPU has it's own vbios module you need to flash it separately. You'll need an USB drive which can boot DOS (just as the one you used for flashing the BIOS). *************** It might look a bit complicated at first, but that's the easiest way I could think of. Let me know if anything is unclear. >> Here's the 'buy me a beer' link in case you like this << Use at your own risk, you are responsible for your system and the changes you make on it. My programs come with absolutely no warranty to the extent permitted by applicable law. Grab file archive here:
 1 point
 -
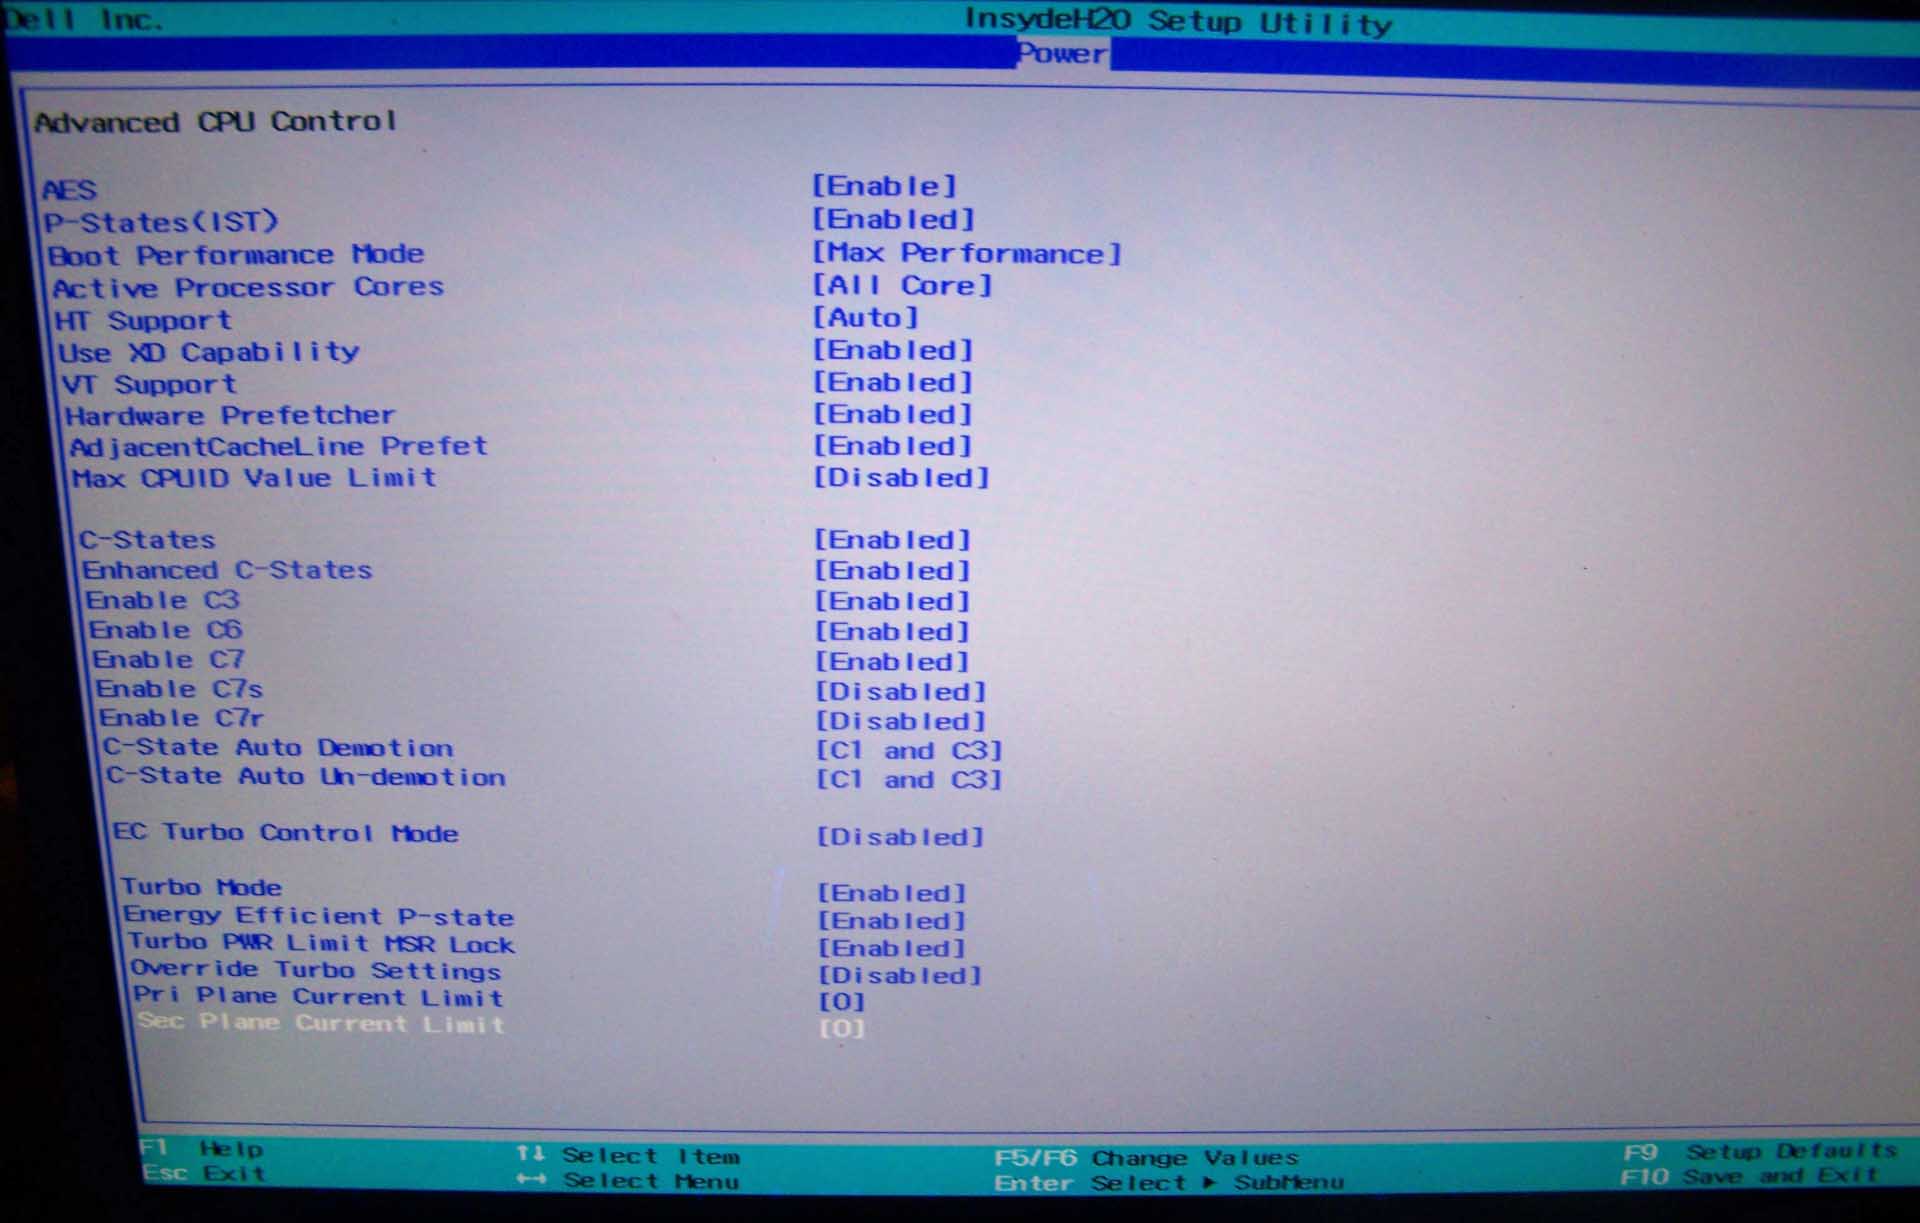
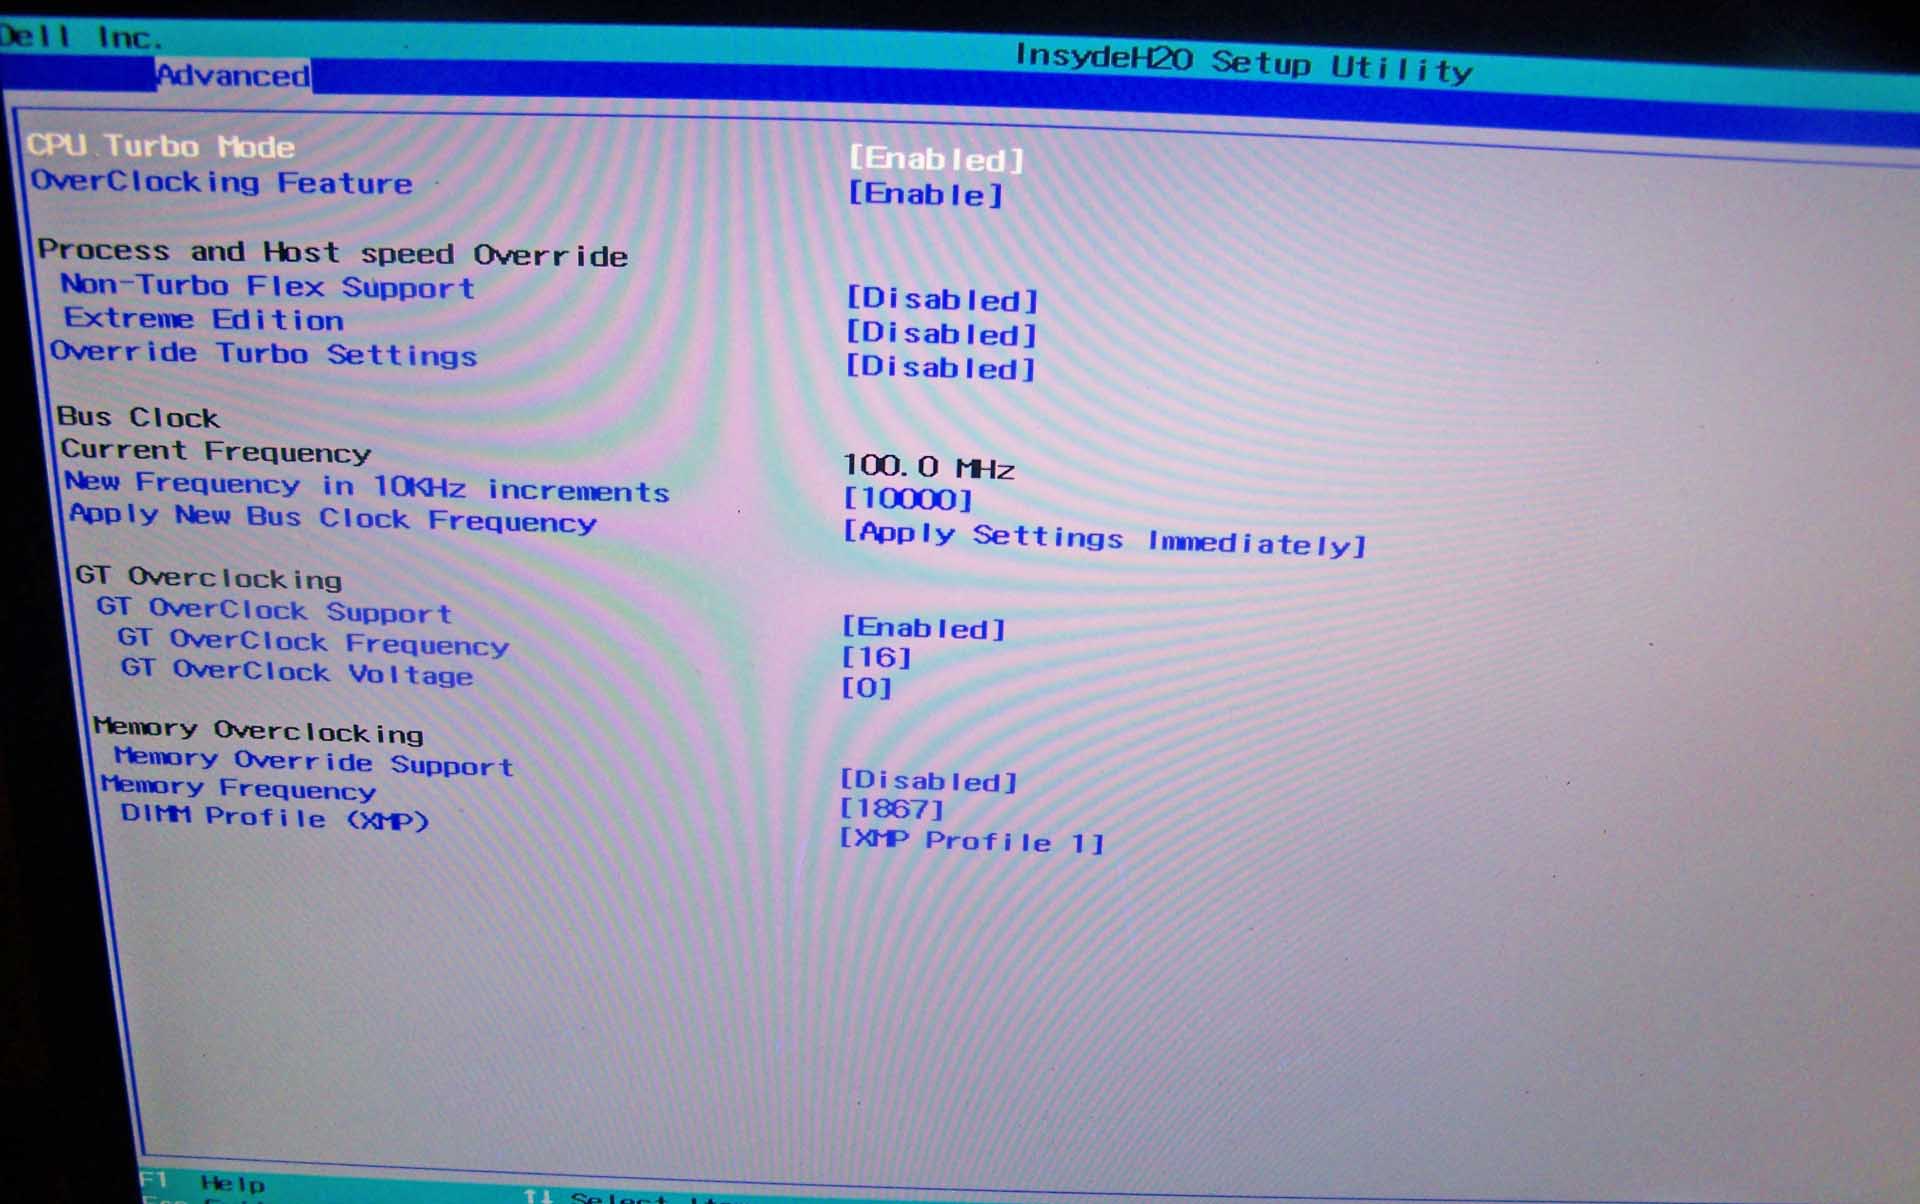
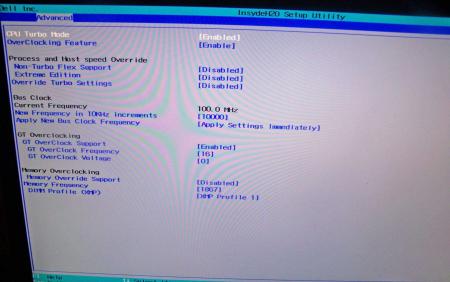
.If you're interested why not all modified BIOS versions can be flashed the 'usual' way with the official tools, read this:http://forum.techinferno.com/alienware/2252-information-about-bios-updates-a07-a08-higher-m14xr2-m17xr4-m18xr2.html M18x R2 - 'unlocked' BIOS versions The following BIOS of the Alienware M18x have been modified so that all hidden menus and options are visible. It will allow you to further tweak your system and optimize its peformance. Most of the options are only meant for advanced users. Don’t change anything you’re not sure about. It's possible that you see options which don’t work for your system, so be careful when changing settings. In case you mess up and your system refuses to boot applying new settings, remove the AC adapter, battery and coin cell battery in order to clear the non-volatile ram of the BIOS. This should fix most issues. *UPDATE*Instructions: There are two ways to flash the modified BIOS: Downgrade to stock A03 by using the USB recover procedure. (Thanks @Scott Matusow for summarizing the procedure). Make sure to closely follow the instructions, and wait until the system is done with the flash. Once you're on A03 flash the modified BIOS using the regular way (using the tools provided by Dell)..This method seems to work very well on the M18x R2, at least as long as you do as instructed. It can be a bit scary though since you can't see what's happening. .. Flash the BIOS from DOS with the FPT tool. This will only flash the BIOS part and leave out the EC and so on. It's a really safe option when done properly and less scary since you see the progress and information on the screen. For the USB recovery method follow the instructions in the link above. Second possibility - flashing from DOS: Prepare an USB drive so that it can boot DOS. If you don't know how to do this, check the instructions in the spoiler. . Grab the DOS version of fpt for flashing, and my 'prr tool' to circumvent write protection.. Download a '[FPT]' labeled version of the unlocked BIOS. Put the DOS version of the flash tool on the root of the prepared USB stick (fpt.exe and fparts.txt), along with the prr.exe and the file you want to flash (plus the included flash.bat). . Restart the system and boot from your USB stick. Run prr.exe, then flash the bios by executing the flash.bat file. Wait until the tool completes the flash. If the verification is okay, reboot, else flash again.. Go to the bios, load the default settings and reboot. Done. NOTE: If you want to use an unlocked BIOS newer than A03 I highly recommend to first flash the desired version of the unmodified BIOS (grab it at the Dell download site). Once you're on the version you want to unlock, follow the DOS flashing procedure described above. If you want to go A03 or earlier, the best thing to do is using the USB recovery method. Here two pics of the most interesting options: ********** Thanks @Riri-Fifi for the pics and testing! Thanks @johnksss for testing my prr tool! ********* Flash and use at your own risk. I don't take any responsibility for possible damage on your system. ___ The software which I provide here ('prr tool') comes with absolutely no warranty to the extent permitted by applicable law. Download the bios files referened in this post from here:

 1 point
 -
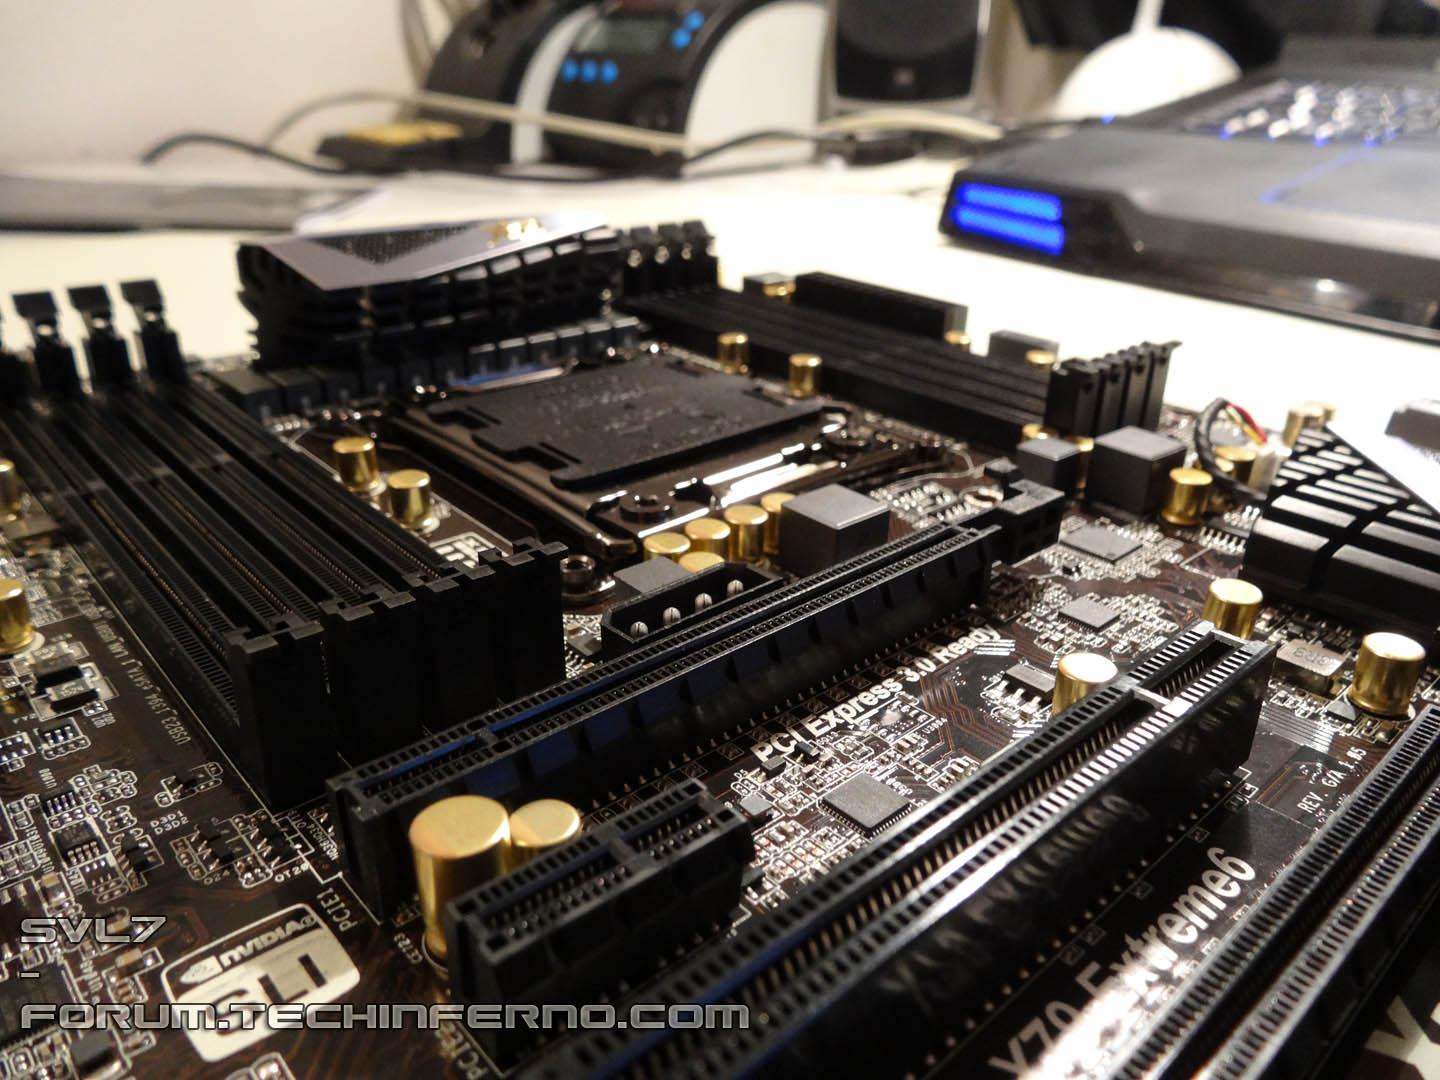
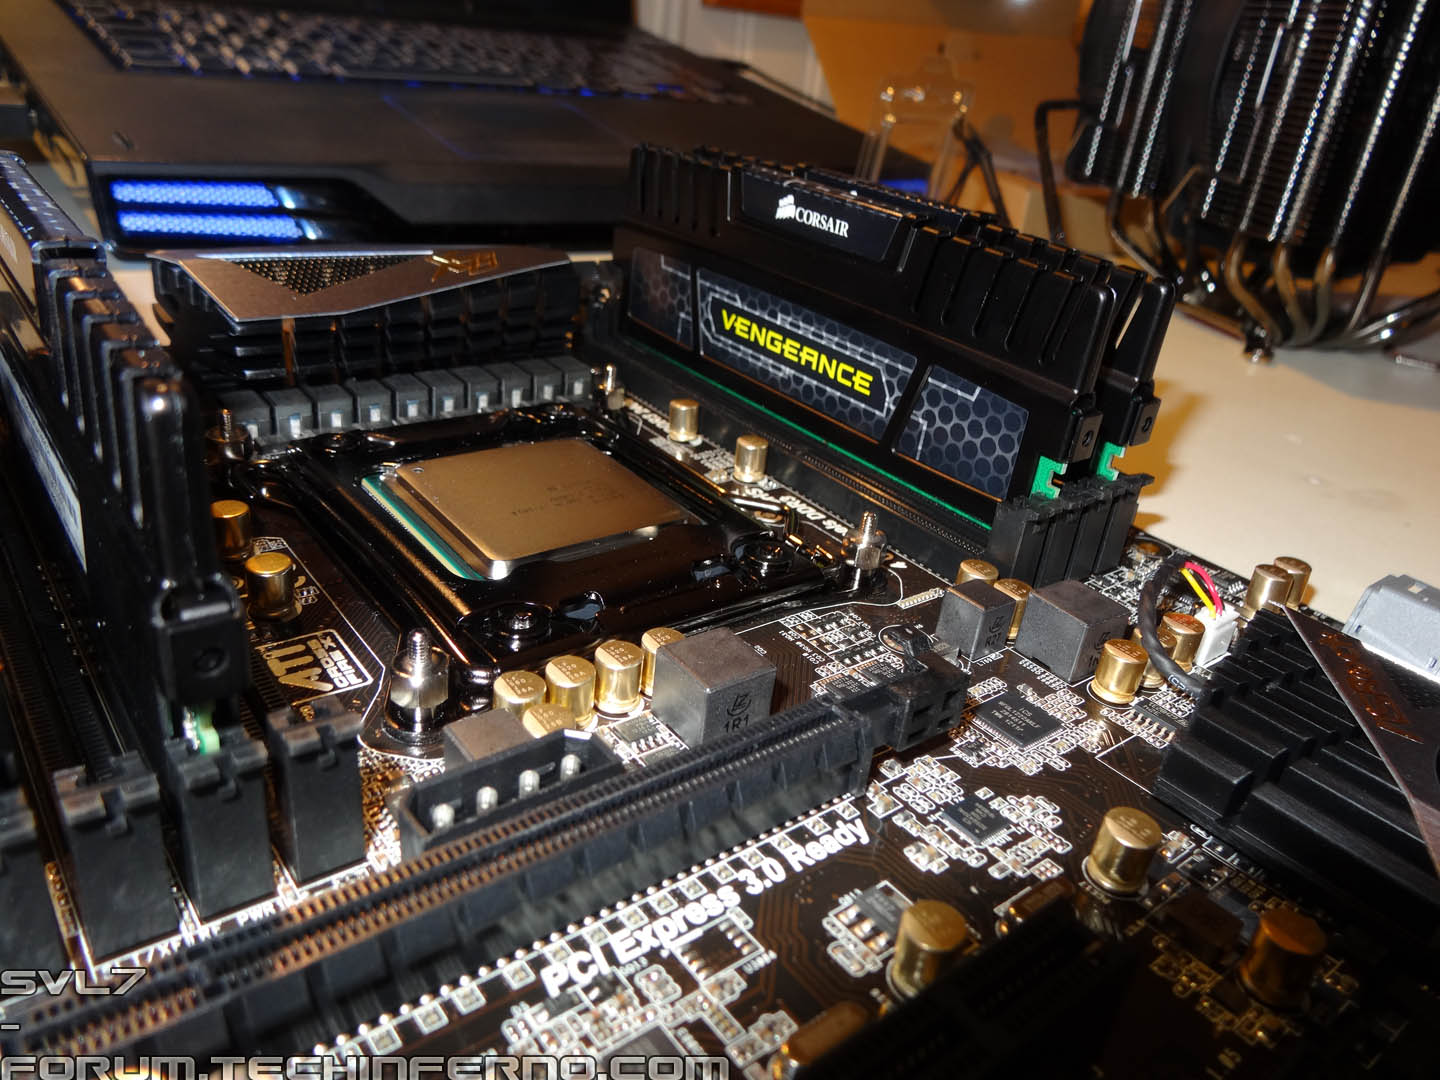
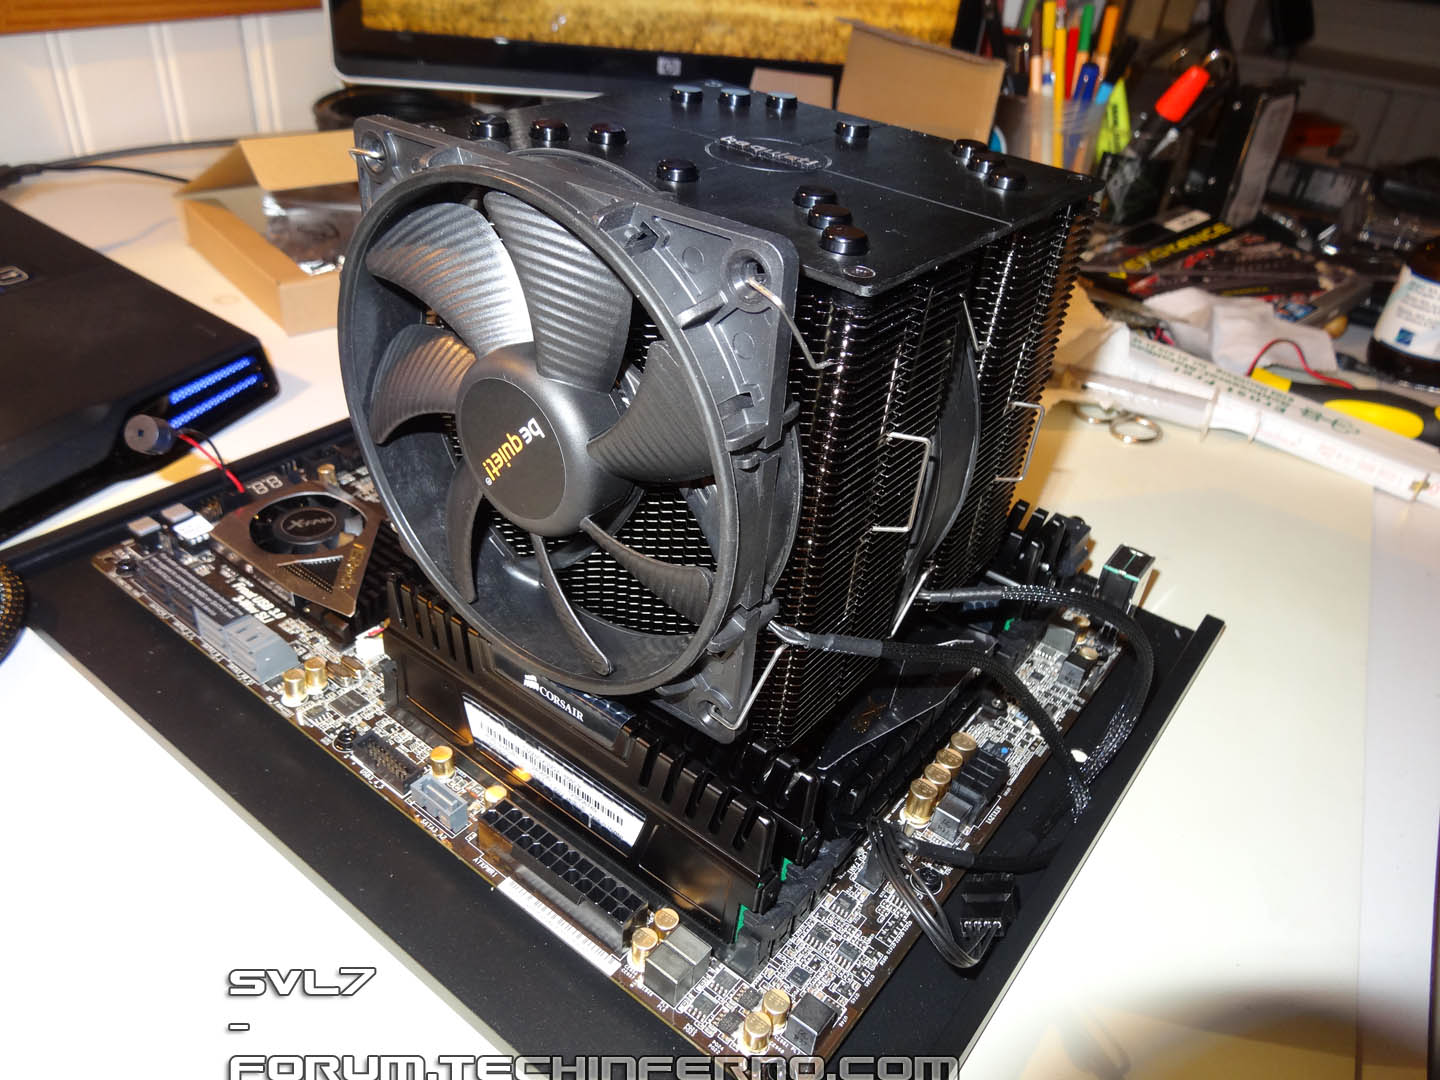
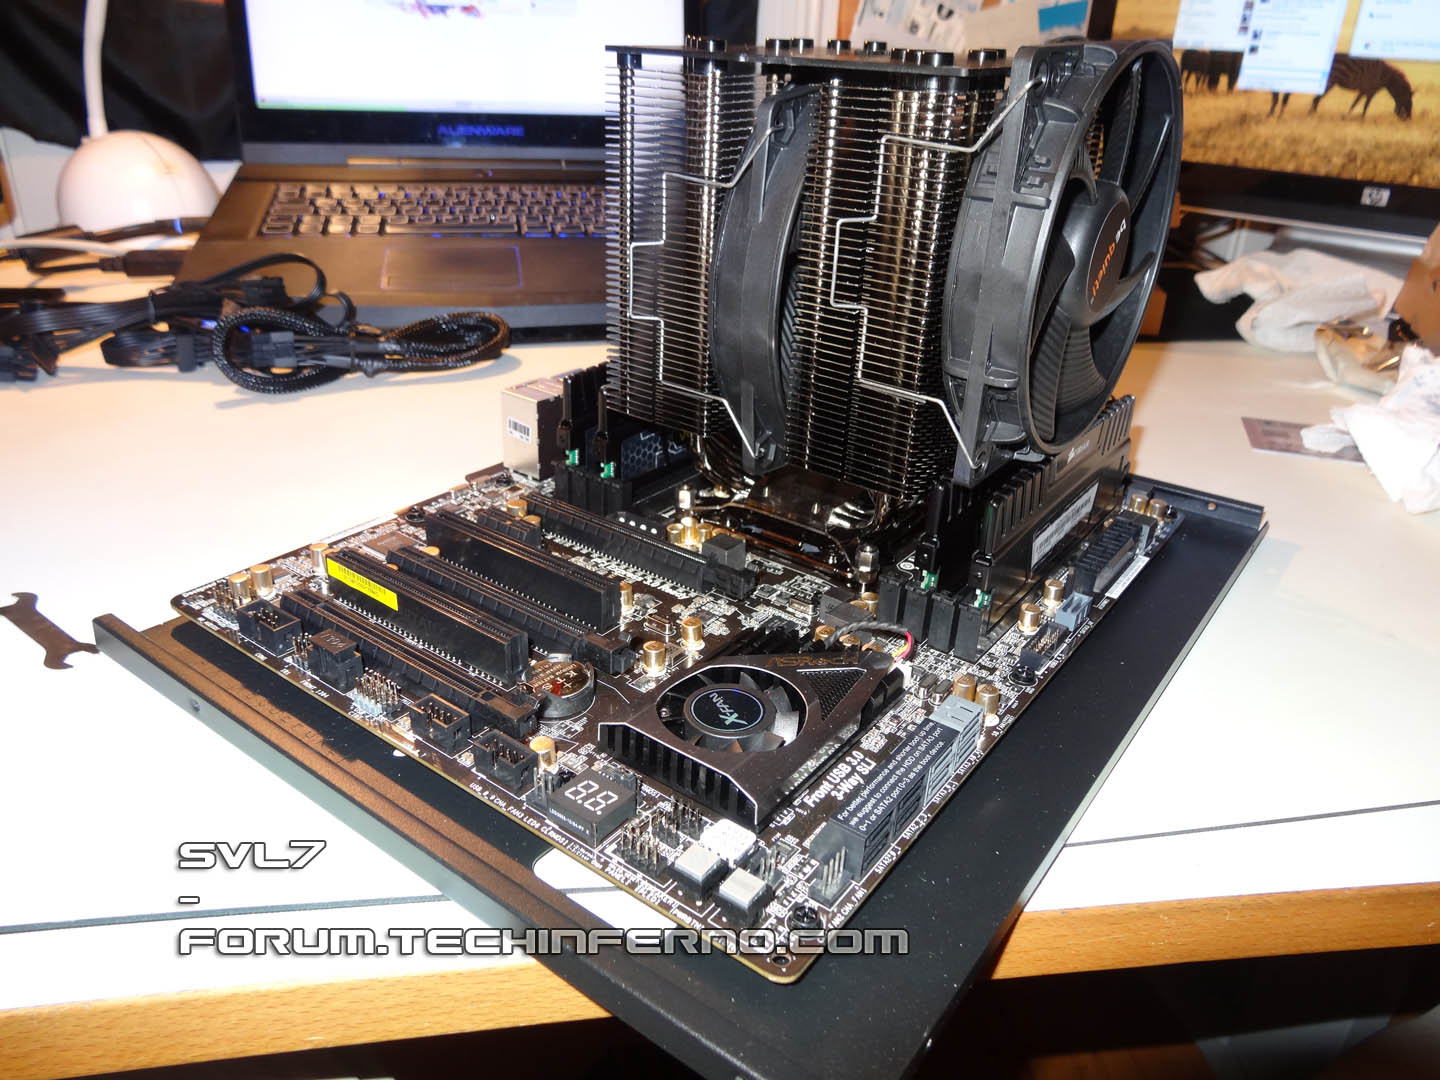
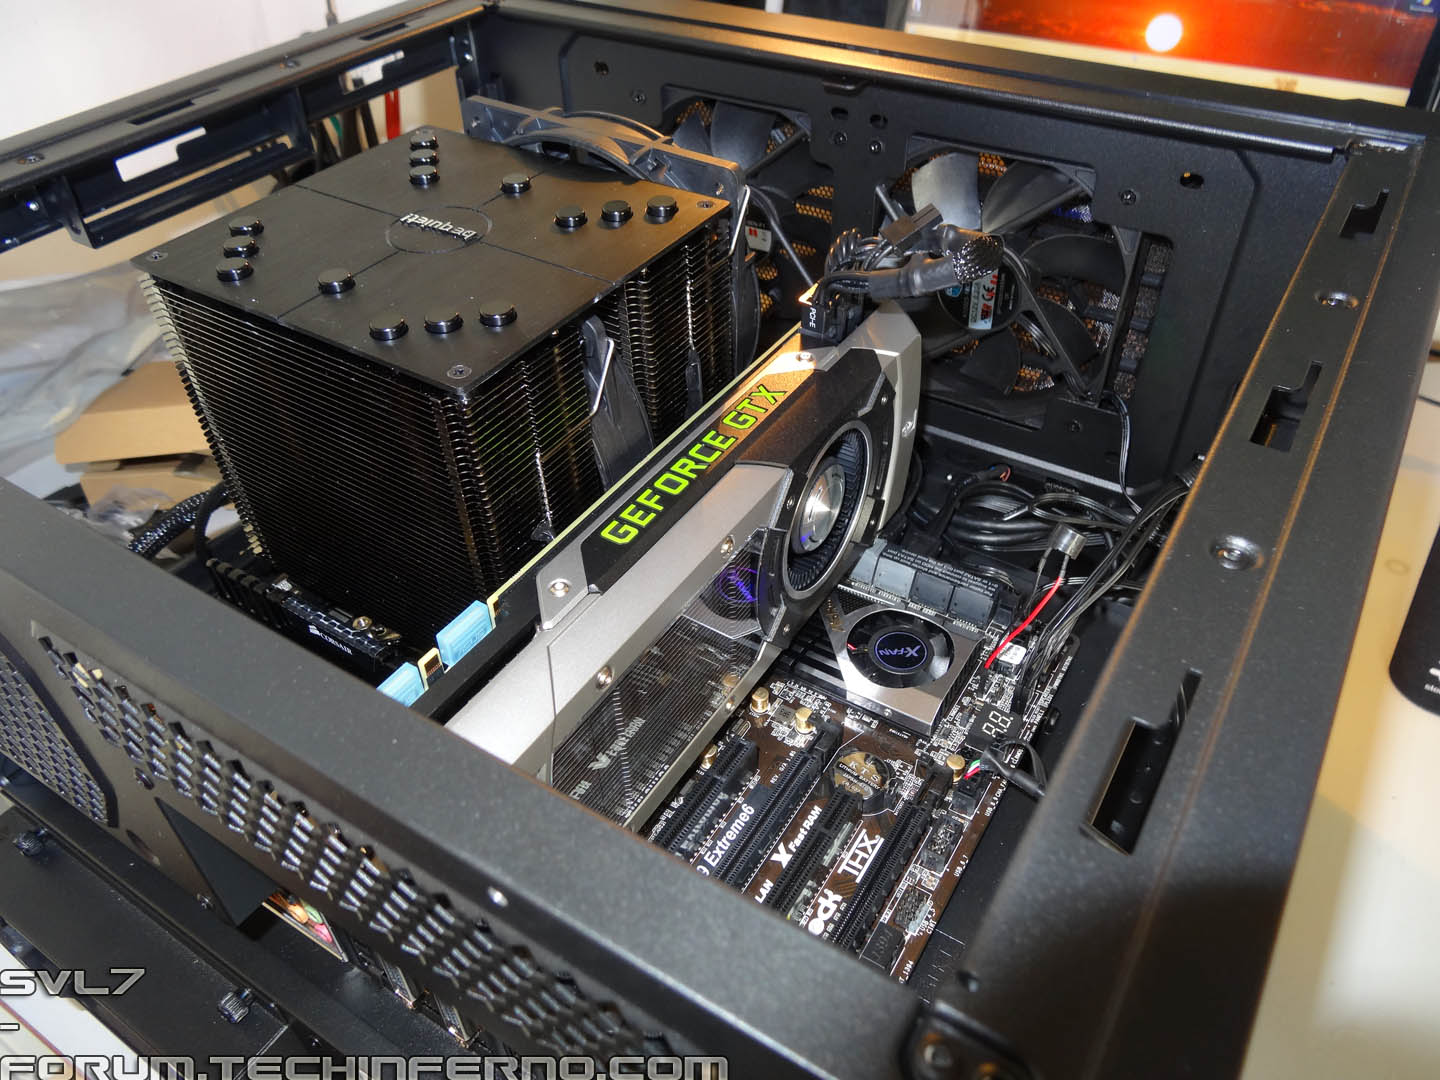
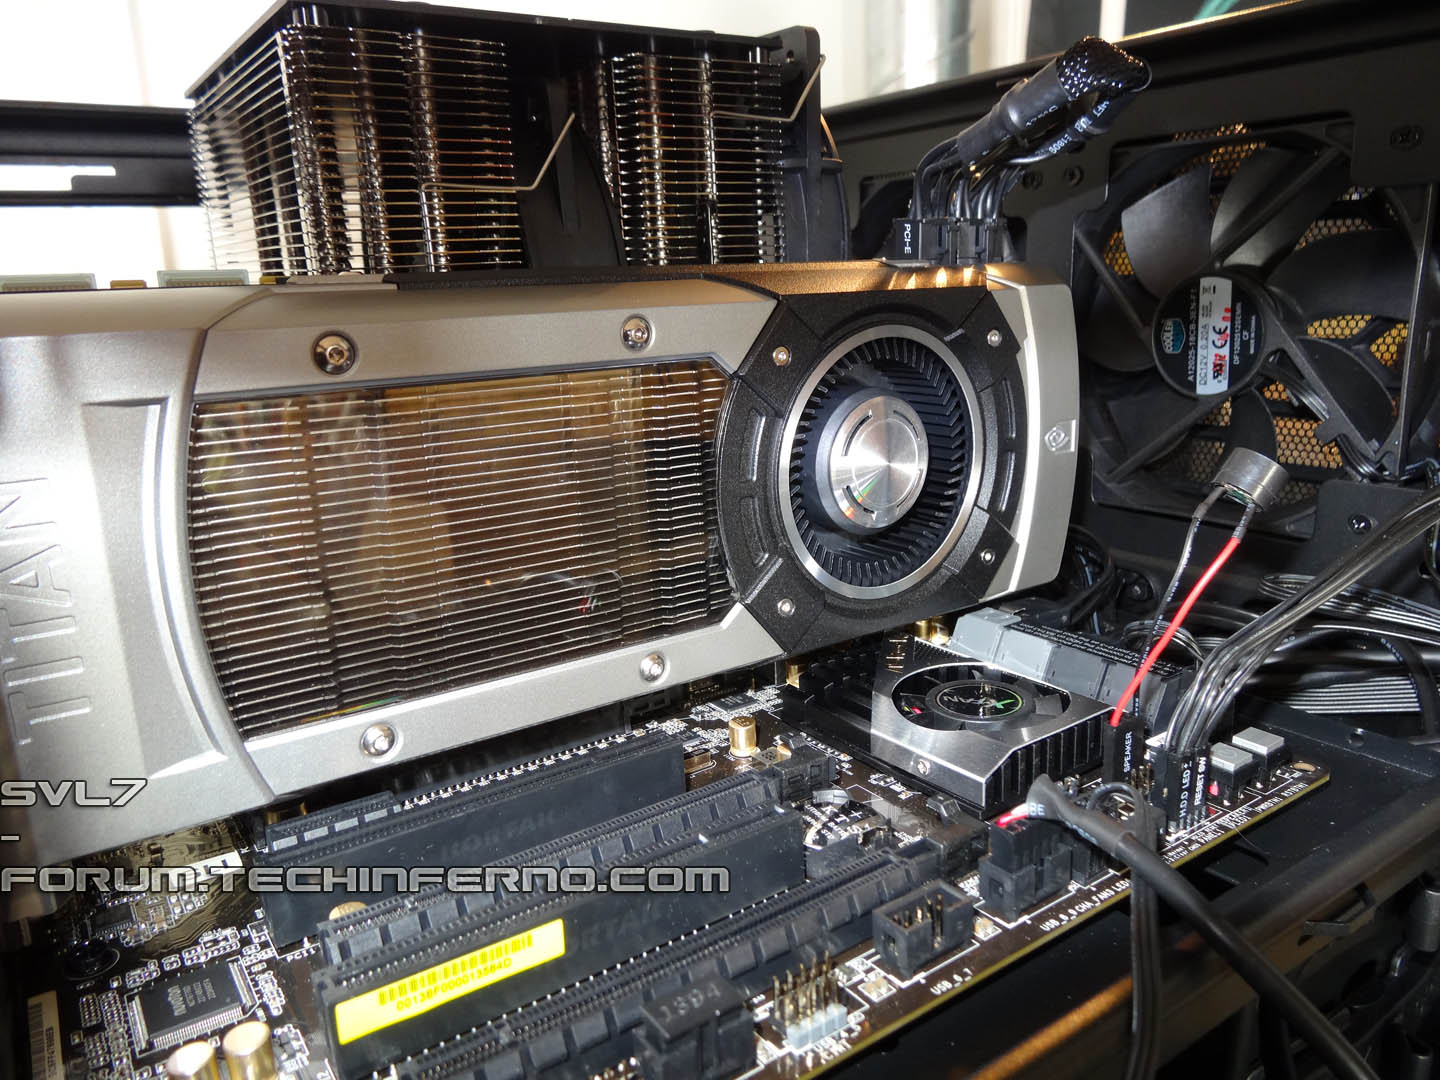
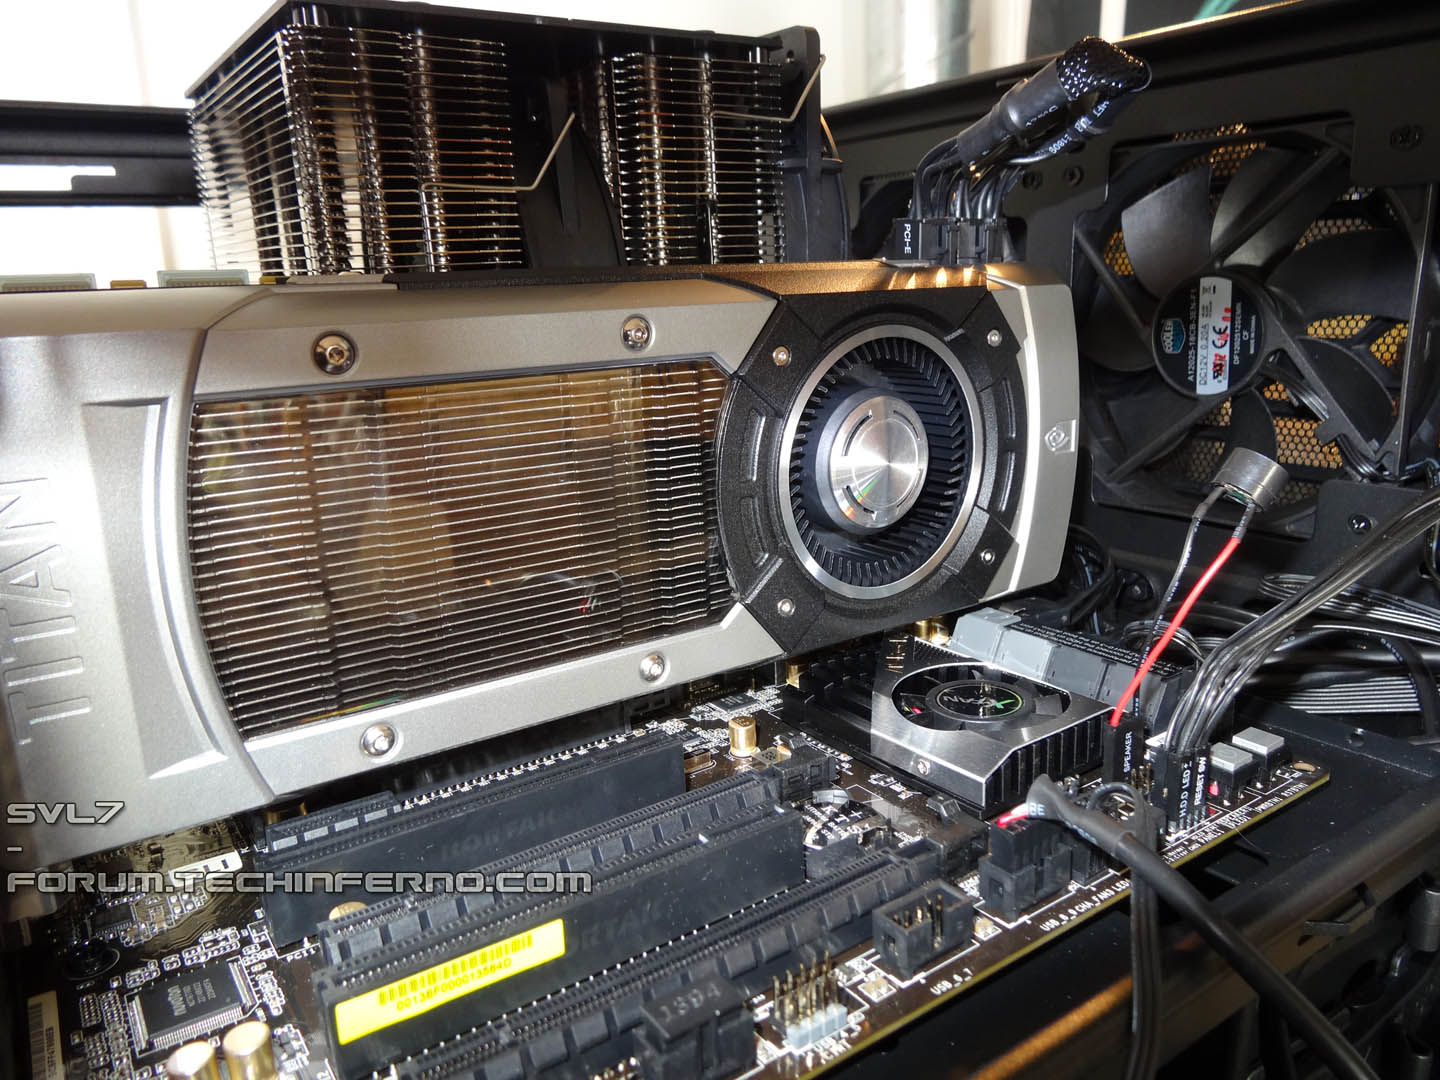
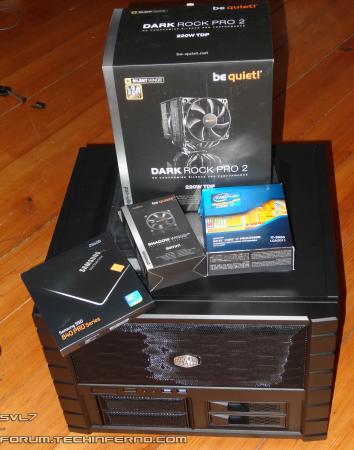
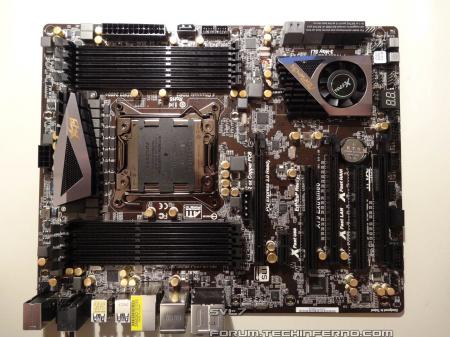
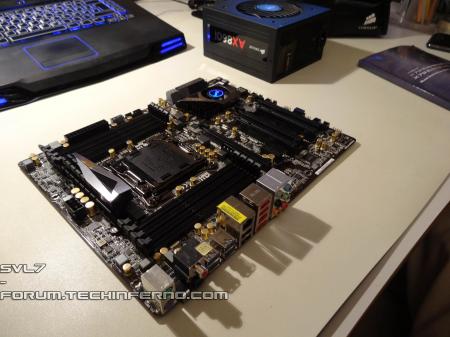
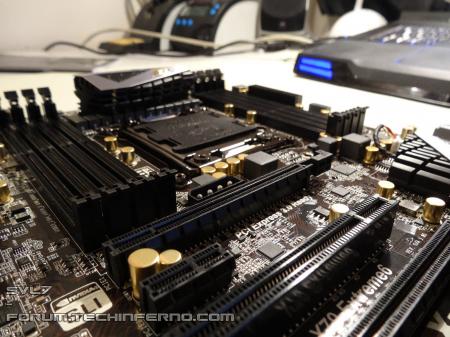
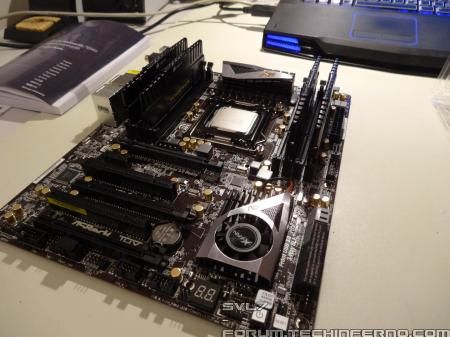
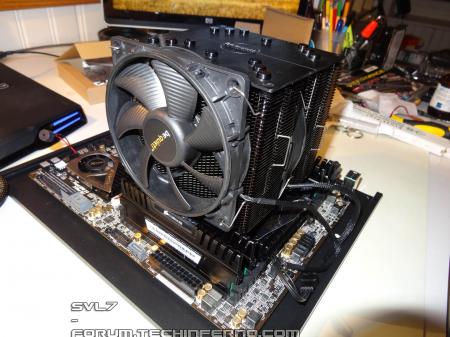
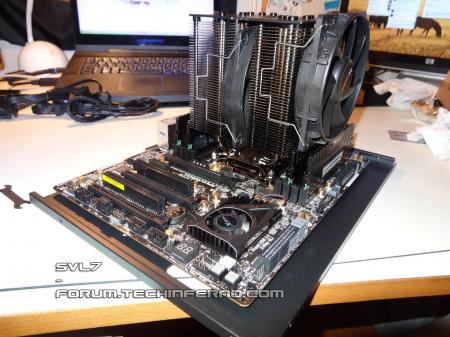
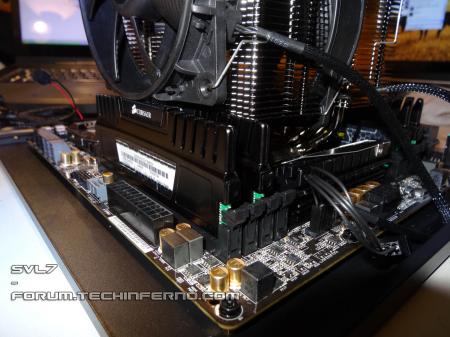
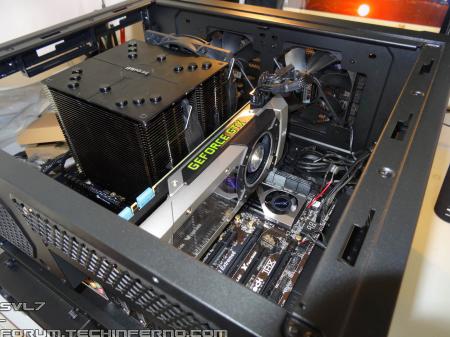
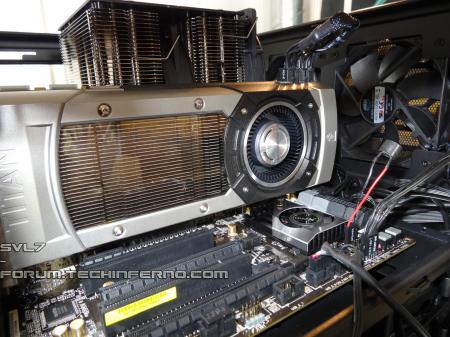
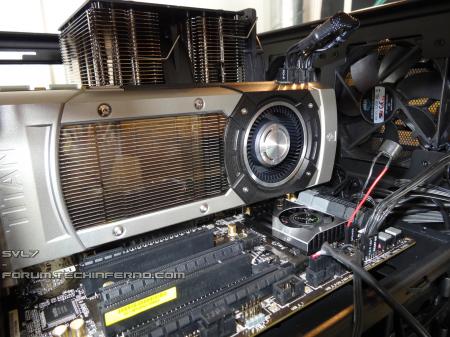
I ordered some desktop parts... gonna build a rig. Never had a custom desktop, so it should be fun Here's a pic of the parts which already arrived: Still waiting for a new monitor, PSU, motherboard, and... a certain graphics card I´ll update this once I get the rest of the things. ----------------------------------------- So... here's my first ever desktop build Was quite a tight fit with the RAM modules and the CPU heatsink... I didn't think about this, only noticed it when I put the stuff together. The heatsinks of the memory modules are too big, but as I only have four modules it happens to work just ok. Fortunately none of the slots next to the CPU needs to be occupied when only one module per channel is installed. Titan and CPU heatsink is a close fit as well, but it works. Setting up the system now, will see how this will work out... hehe.

 1 point
 -
Yeah, these little guys are quite impressive. Considering the (relatively) low price and size there seems to be a lot of overhead in this design.1 point
-
Not everyone will be able to clock that high on the vram, als I don't recommend such a high memory overclock for daily use.1 point
-
Nobody can tell you exactly what your GPU is capable of, though they may be able to set some guidelines. Overclocking is always a process of seeing what the particular CPU/GPU/RAM you have is capable of, that's half the fun!1 point
-
Oops! This is exactly what I have missed. 1. Flash to A11 stock 2. Boot from USB stick 3. Run ppr 4. Run Flash 5. Shut down 6. Reboot and viola! Michael / svl7, thank you both very much.1 point
-
@ Quix Omega I Tried your setting on my M14x r2. and it performs very very well. When i was using the stock A11 when i play black ops 2 on all max settings the game lags when to much is happening on the screen. But when i used your overclock setting everyhting runs smoothly no lags at all haha!!!1 point
-
Unfortunately I can't speak for ATI cards. What you can try to do is disable your onboard graphics and then see if the ATI card is enabled in device manager. If you are still seeing error 12, then go and disable every unnecessary device until you get it to a configuration that works. If you can never get to a working configuration, you might be out of luck. Compaction is known to have some bugs in it, and Nando had indicated there was a fix coming. I've never heard of a follow up, so you might want to check with him. If you do get the ATI card into a working state without error 12, even with everything disabled, write down the MMIO ranges. You'll have to set them up manually in your pci.bat file by using setpci. A quick google search will tell you what the syntax is for setting the BAR registers to mimic the working MMIO range. From here you will have to slowly enable all your devices and not which ones cause error 12s on your ATI card. Whenever a device causes an error 12 on your ATI card, you'll have to append that device to your pci.bat file and manually set the BAR registers with setpci for that specific device. This is really slow and time consuming, and honestly I don't think it's worth your time. Just use the nVidia card. As for why you're not able to output to external display, I'm not sure. Have you tried native DVI or HDMI output to input? Are you able to render on the laptop's internal display? - - - Updated - - - Also, are you booting up with external monitor connected, or are you connecting after poweron?1 point
-
I think you failed to read the instructions... you need to run my prr tool before flashing.1 point
-
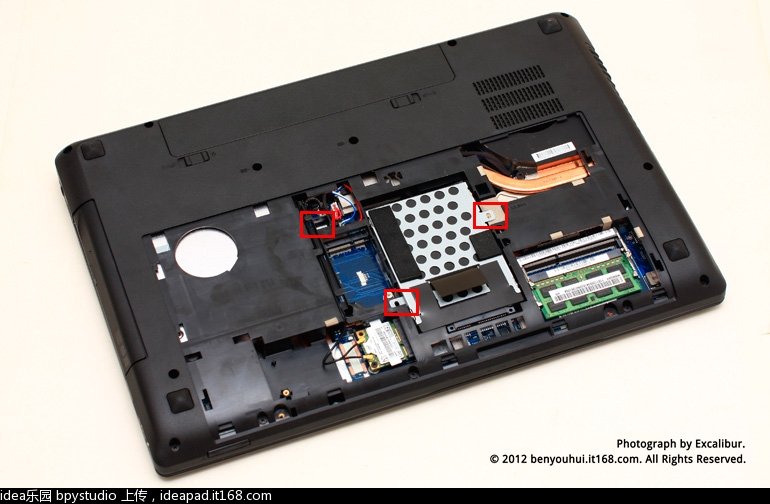
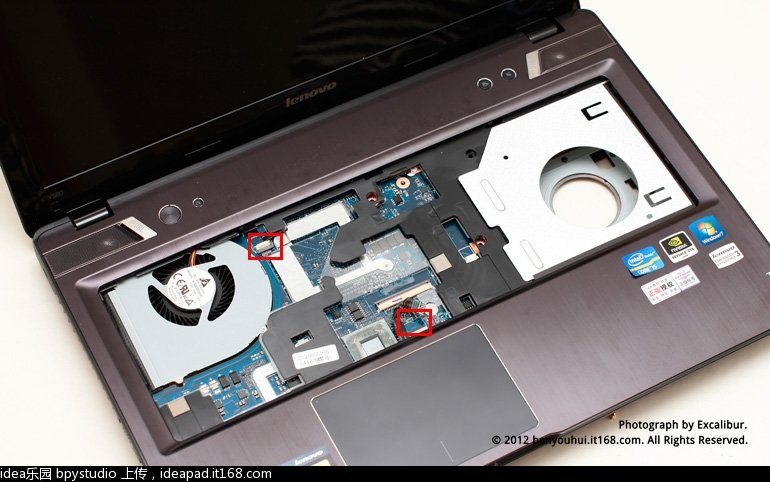
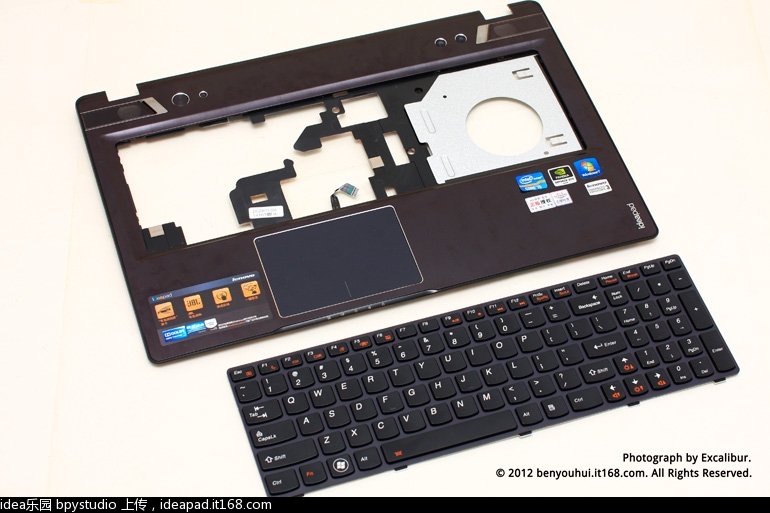
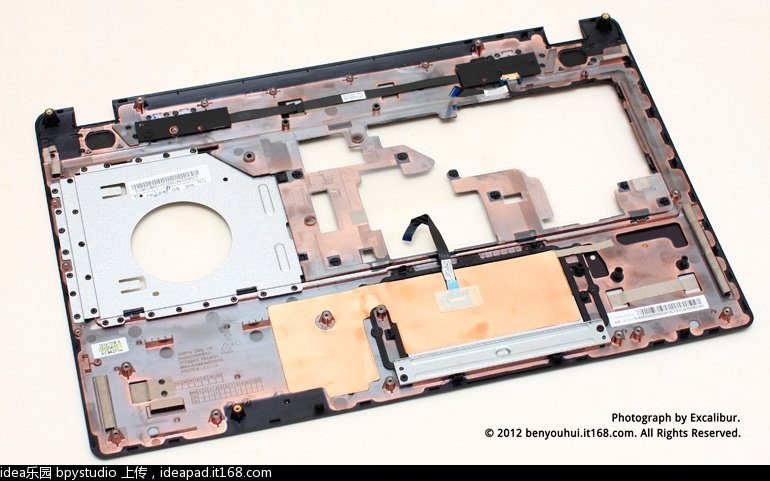
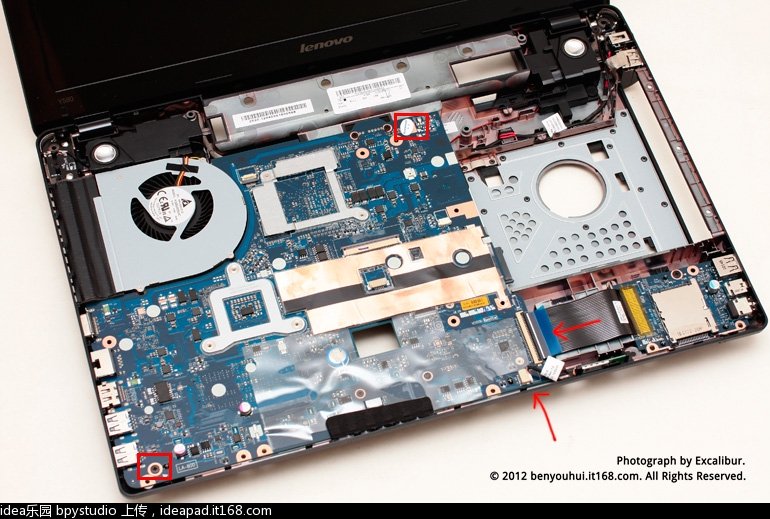
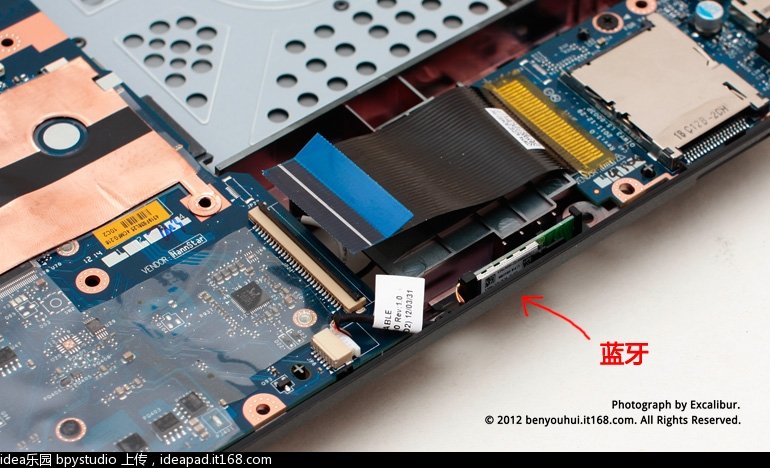
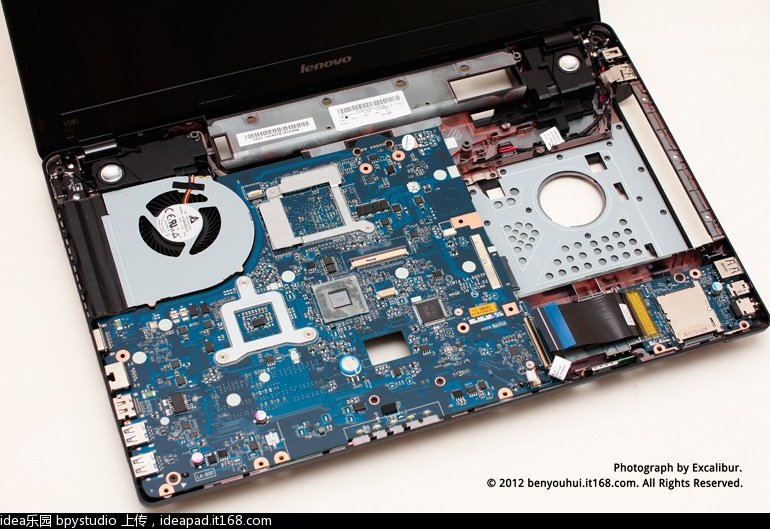
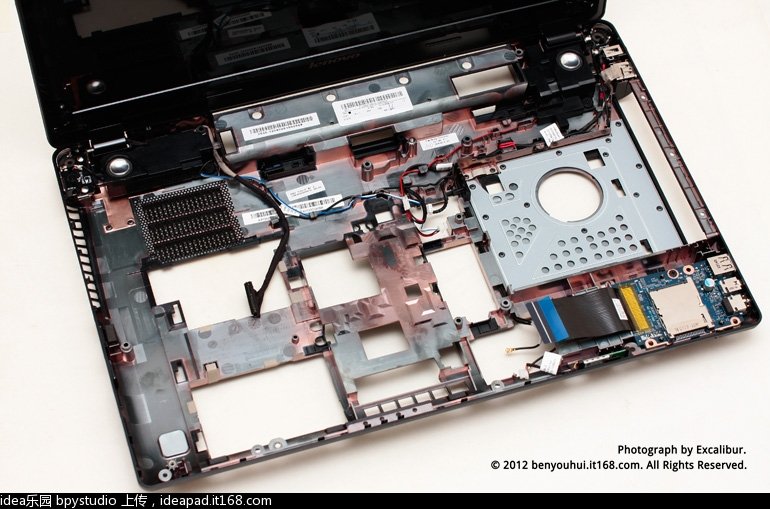
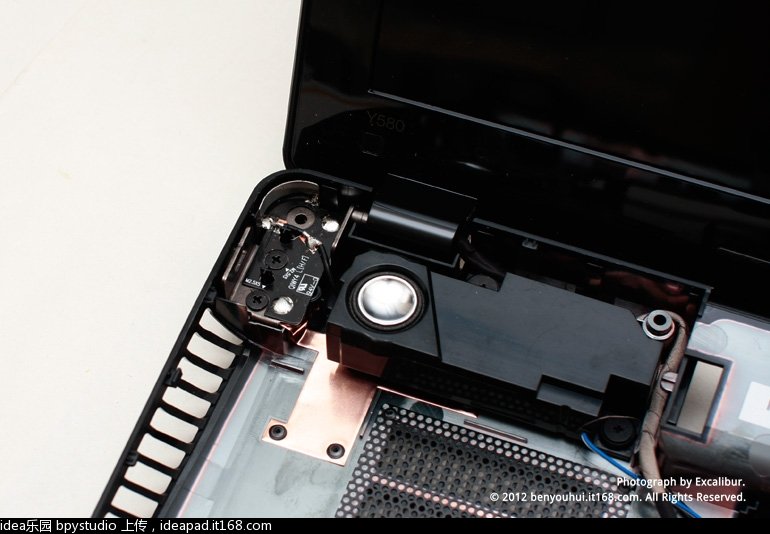
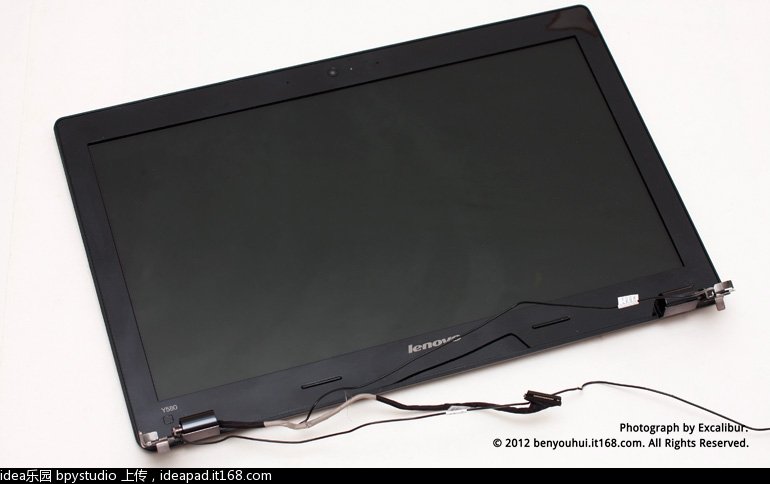
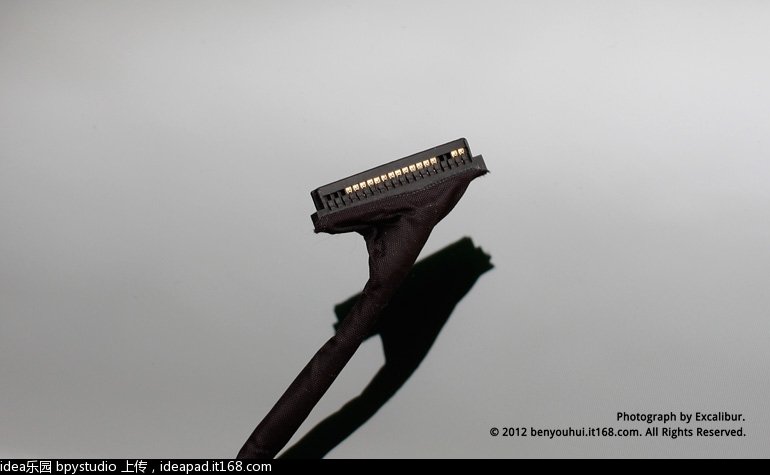
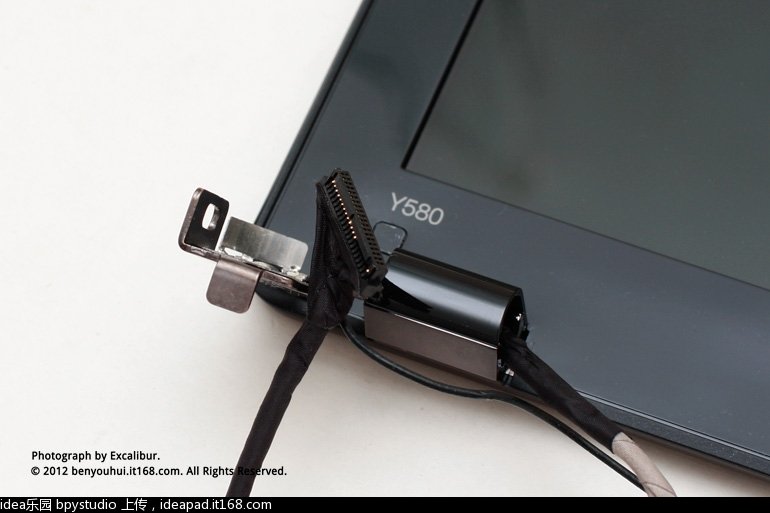
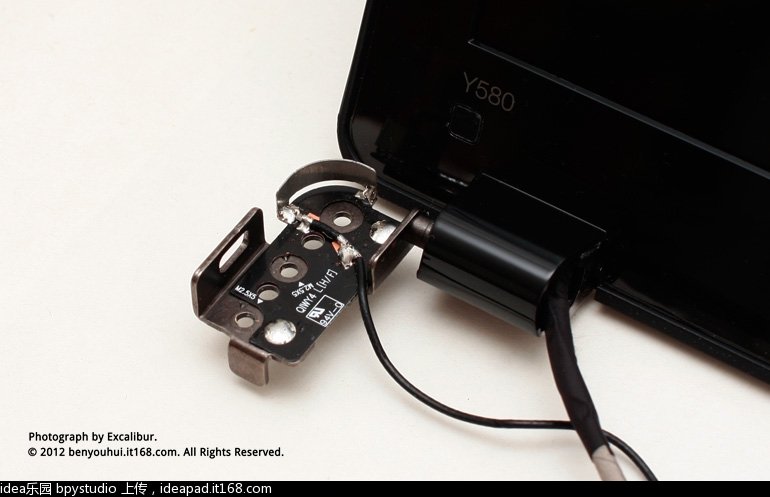
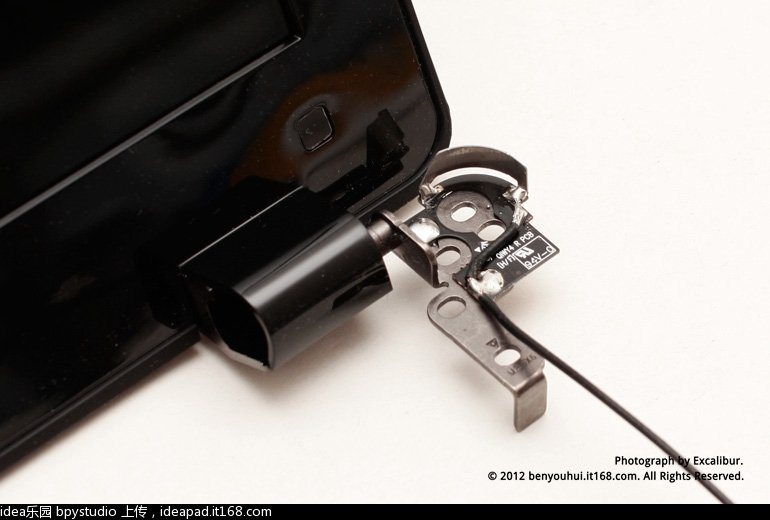
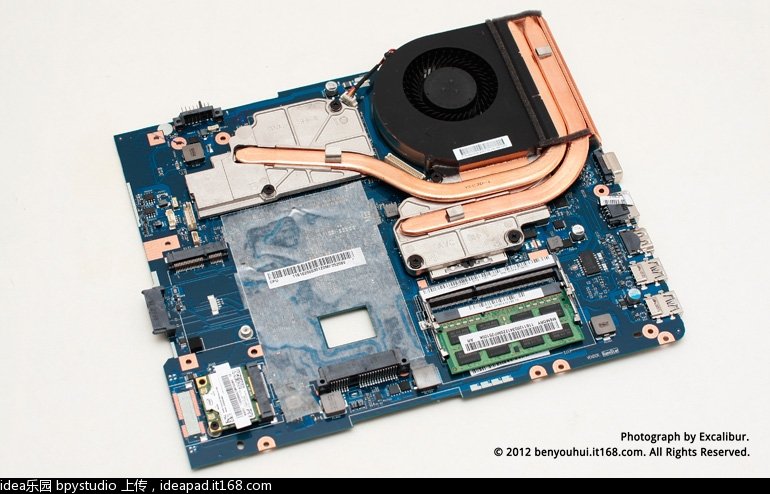
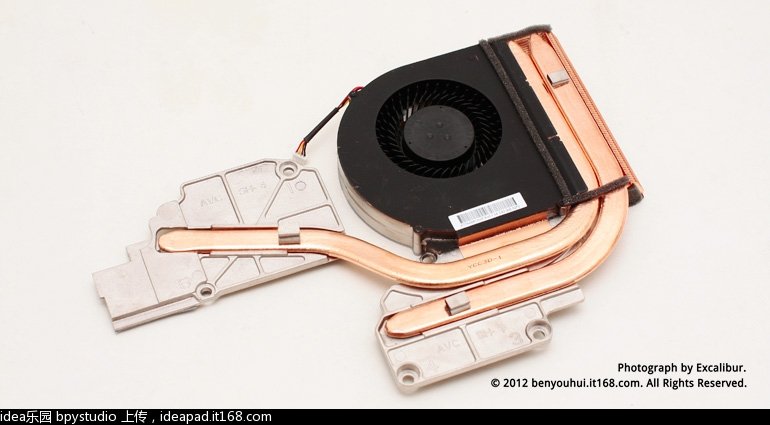
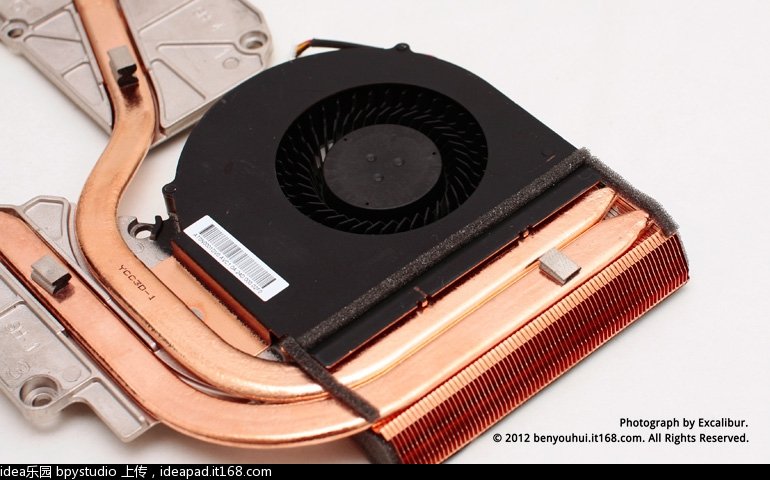
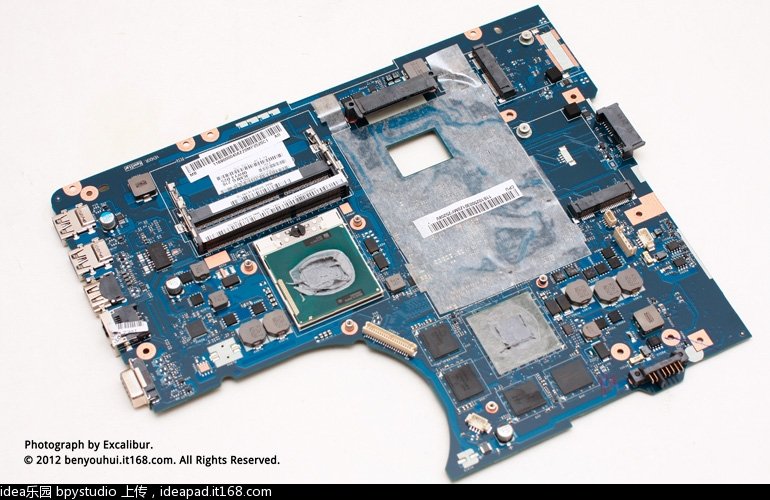
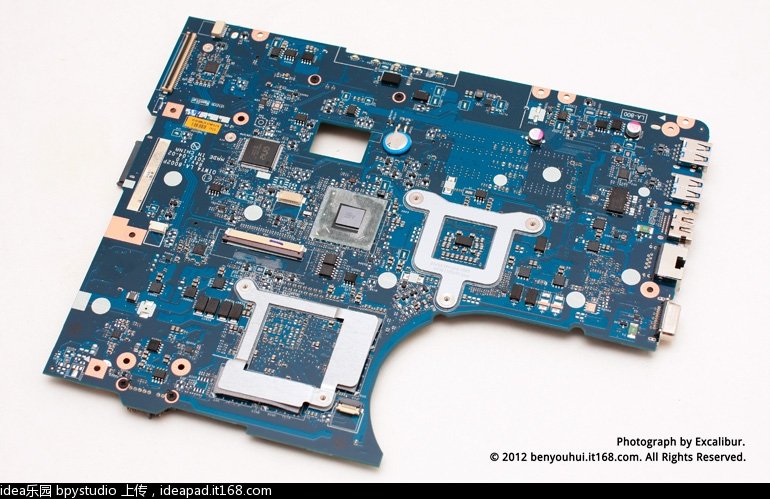
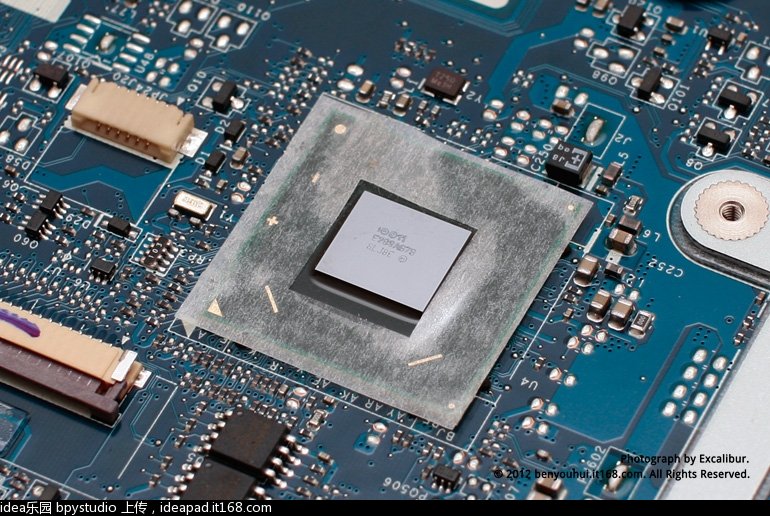
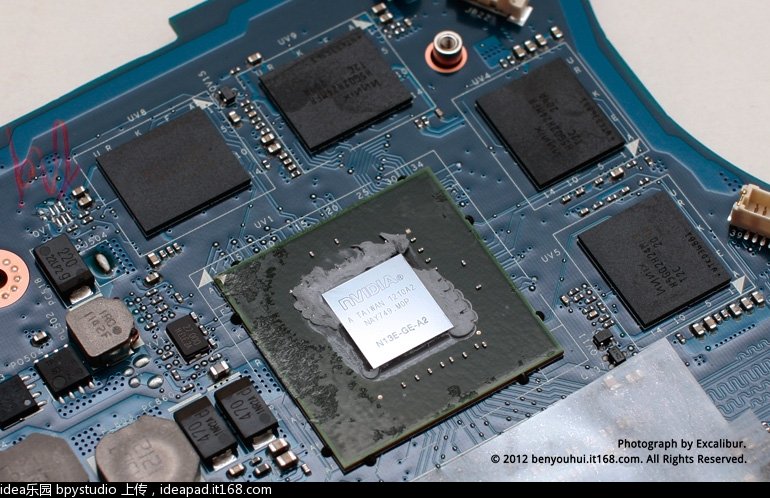
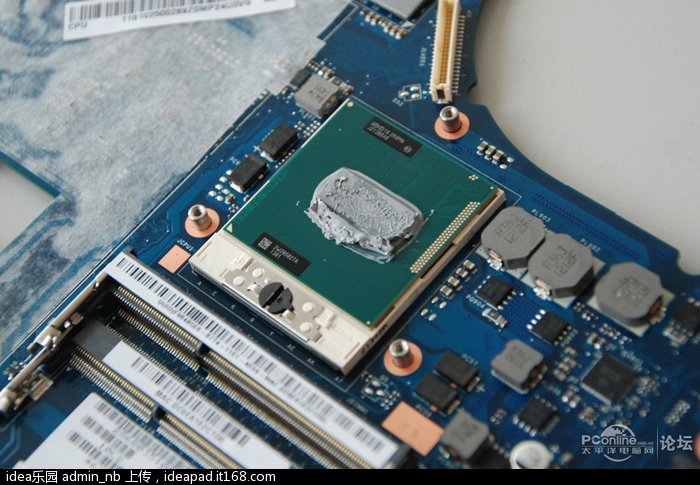
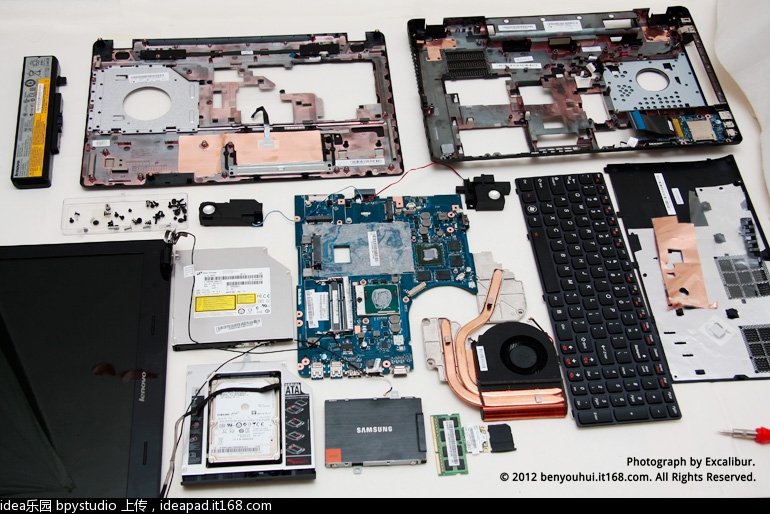
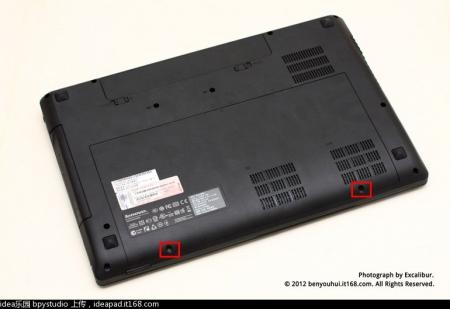
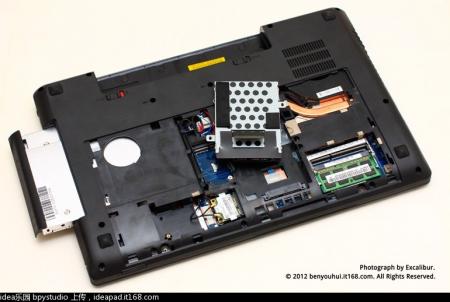
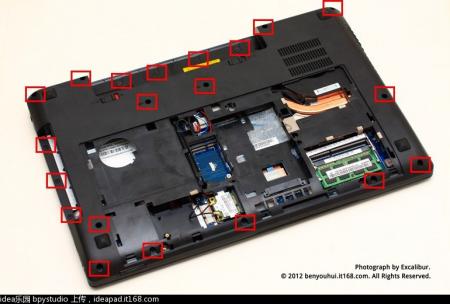
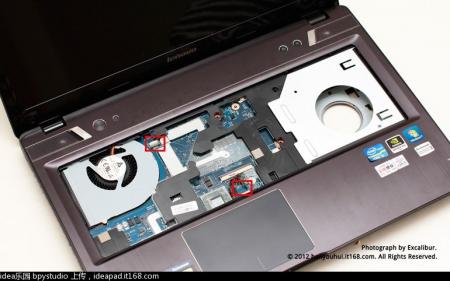
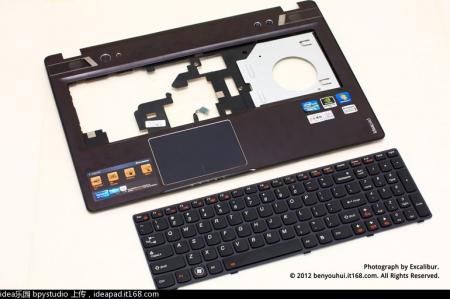
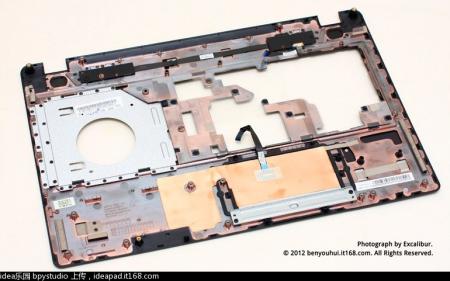
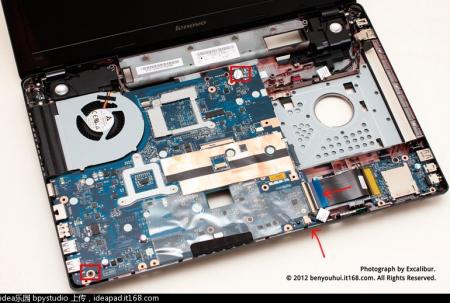
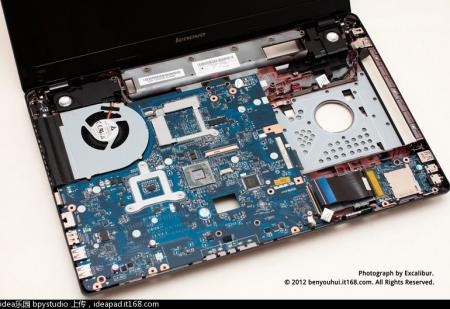
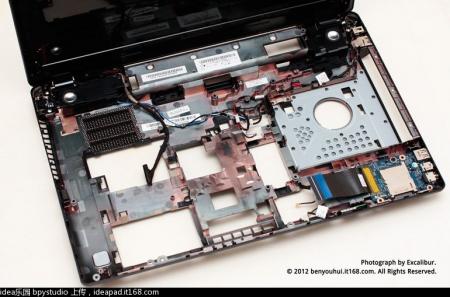
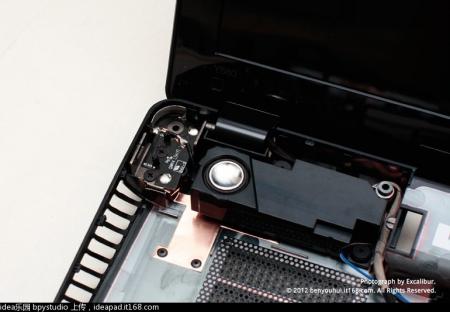
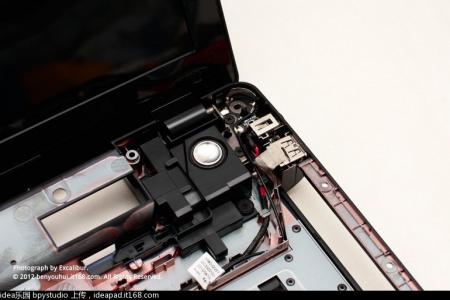
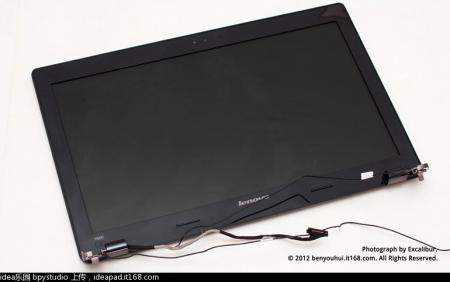
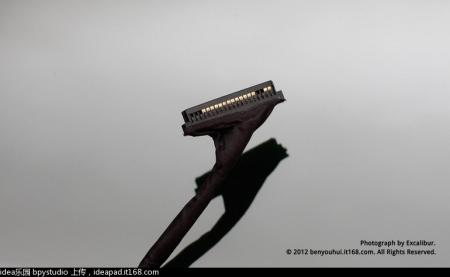
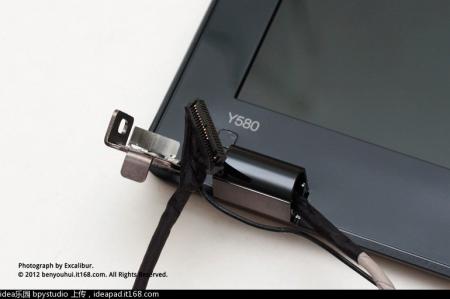
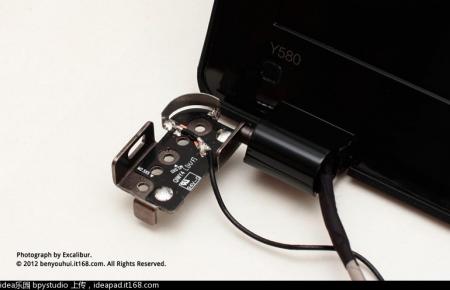
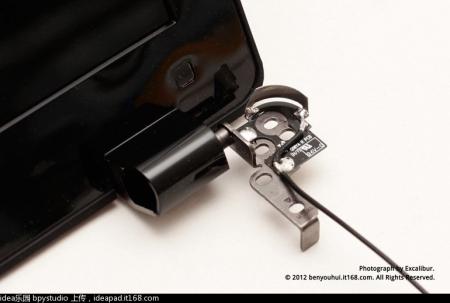
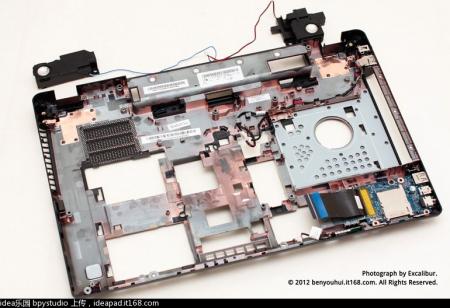
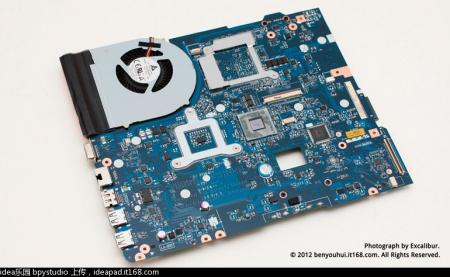
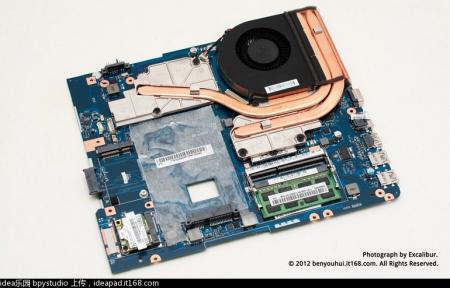
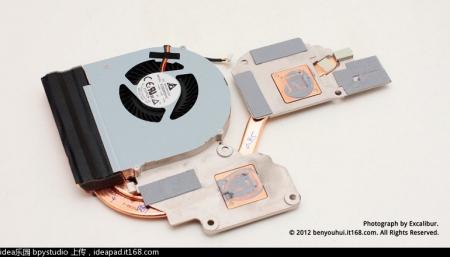
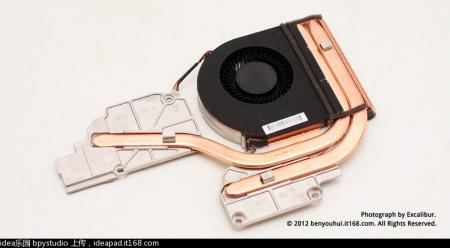
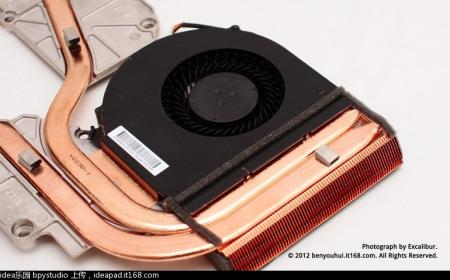
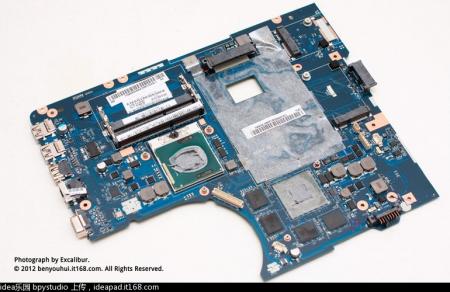
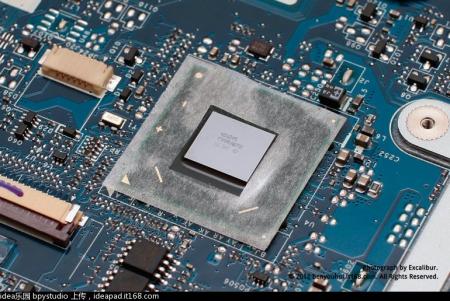
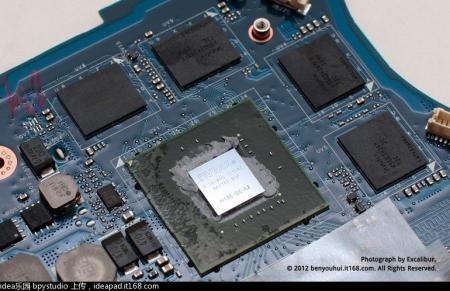
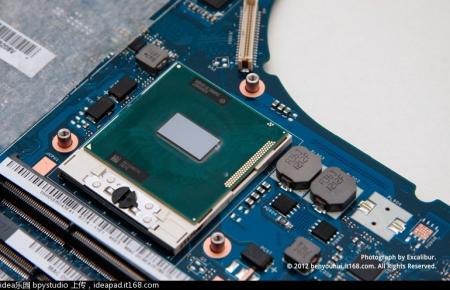
Hi all, http://download.lenovo.com/consumer/mobiles_pub/ideapad_y480_y580_hmm_1st_edition_mar_2012_english.pdf 1. It's not my photos, originally posted at: DIY 2. Last link is to PDF manual created by Lenovo 3. ENJOY


 -1 points