Leaderboard


Popular Content
Showing content with the highest reputation on 12/23/12 in all areas
-
ETA is not too soon. I am giving my best, but I have a lot of high priority work to do. Also svl7 has more important work to do and it is not always easy to find a time frame for knowledge transfer. Please keep in mind that reverse engineering is a time consuming and expensive job (regular hardware isn't cheap, latest hardware least of all). Putting that knowledge into actual code is relatively cheap (lots of coke), but still a lot of work.3 points
-
Tweaked MSI vbios added to the second post. Should perform just as the Dell and Clevo 'OCedition' mods. Let me know.3 points
-
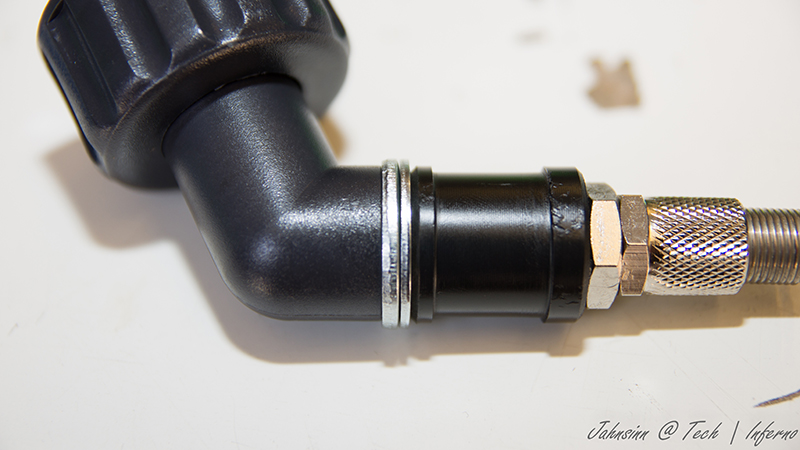
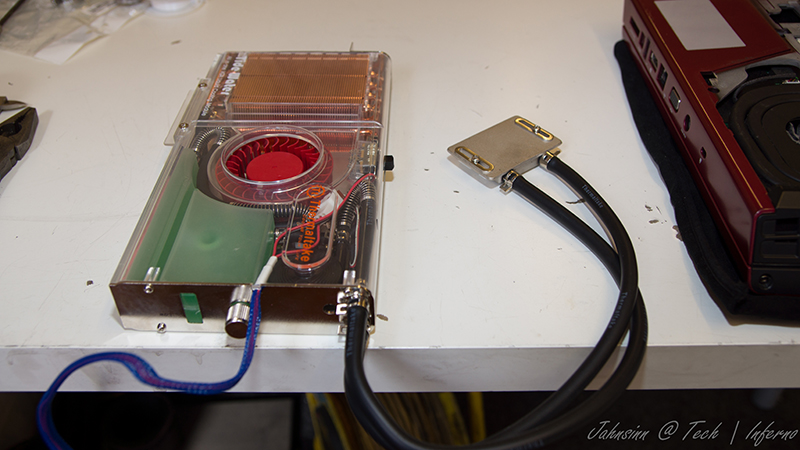
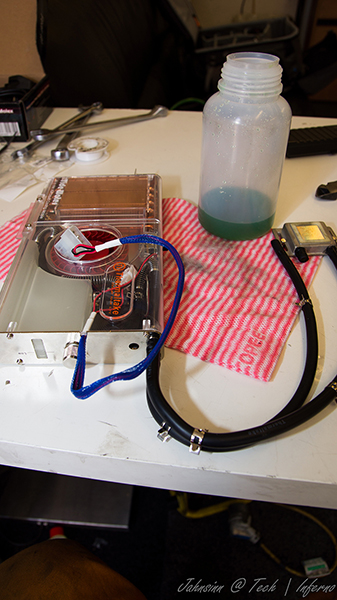
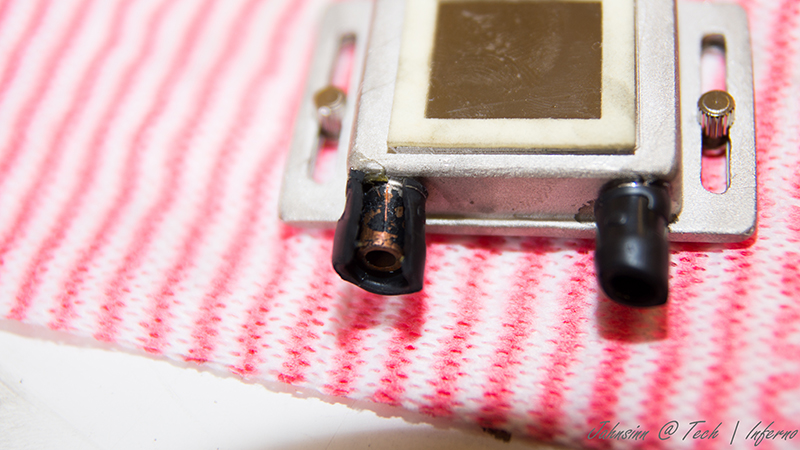
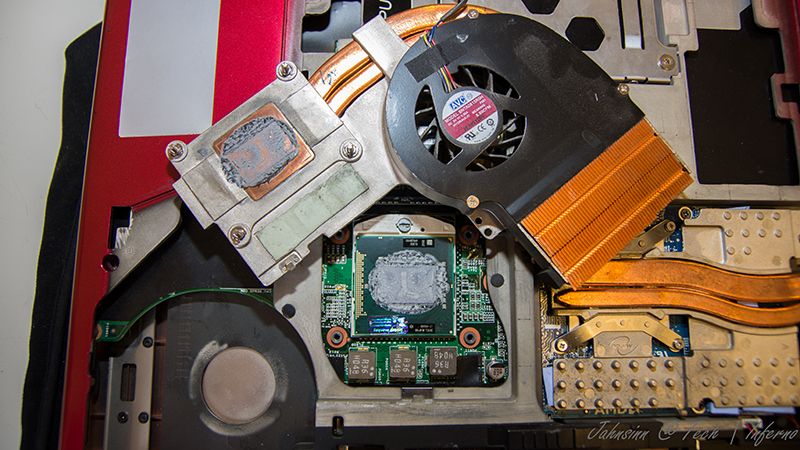
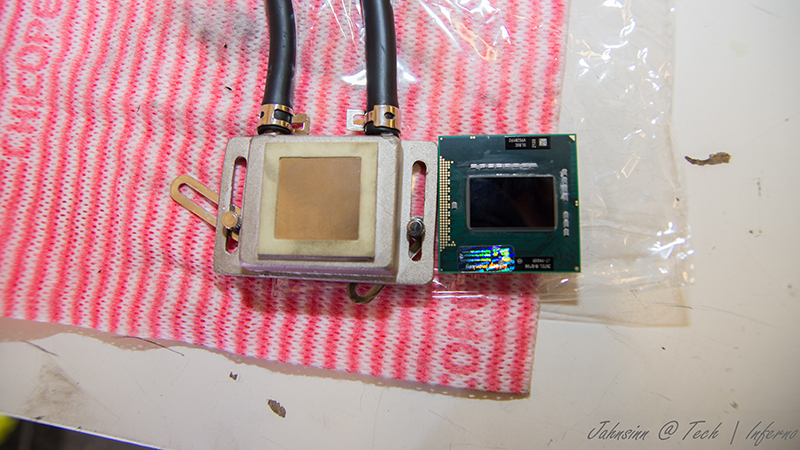
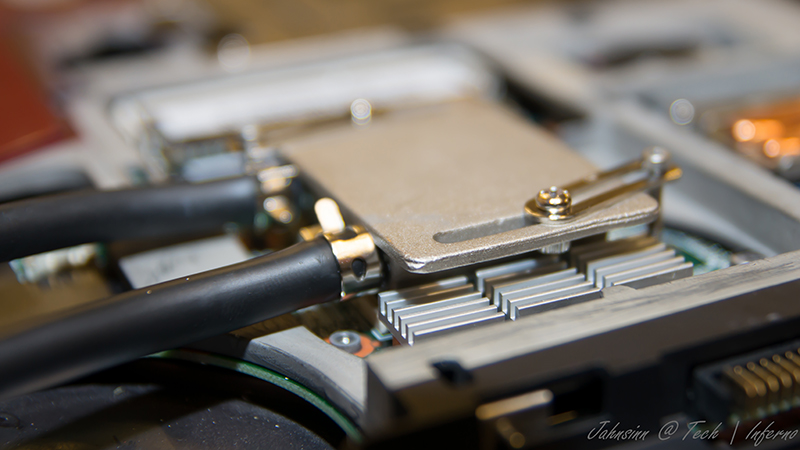
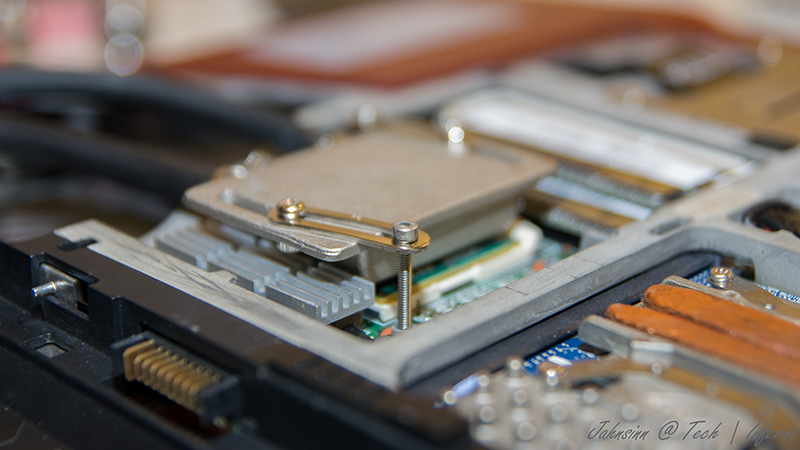
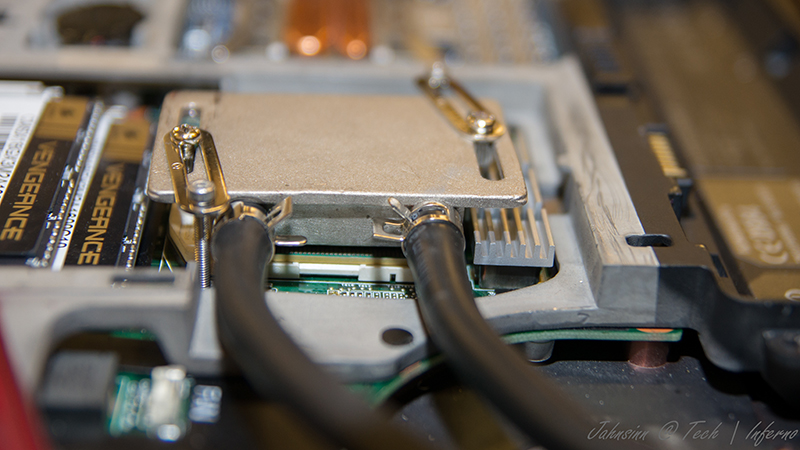
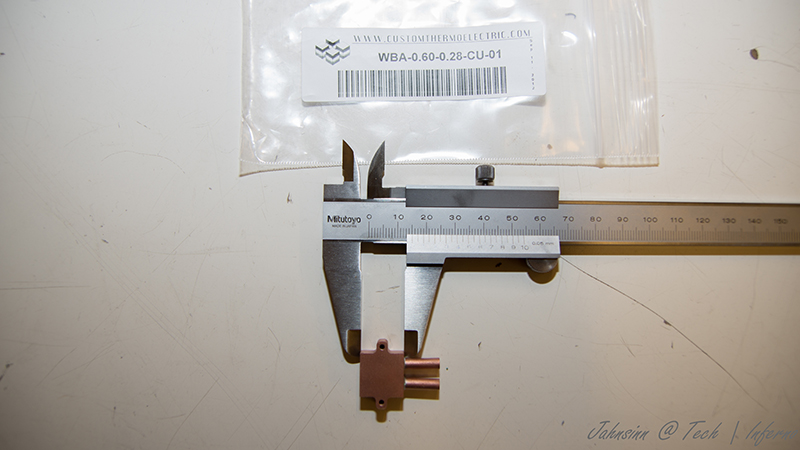
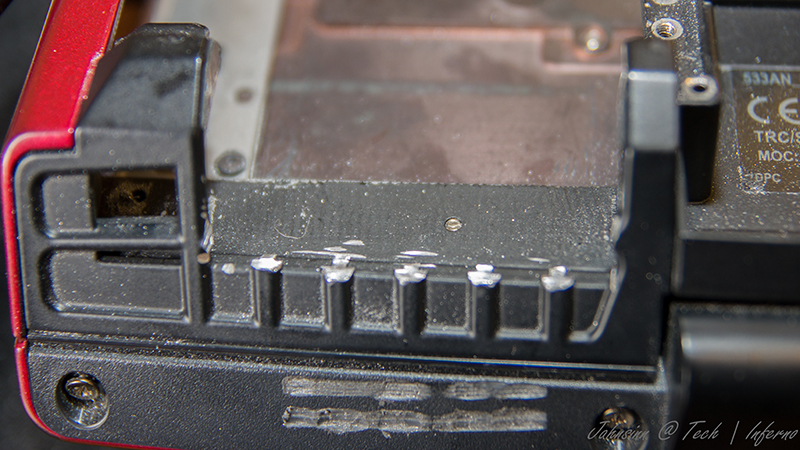
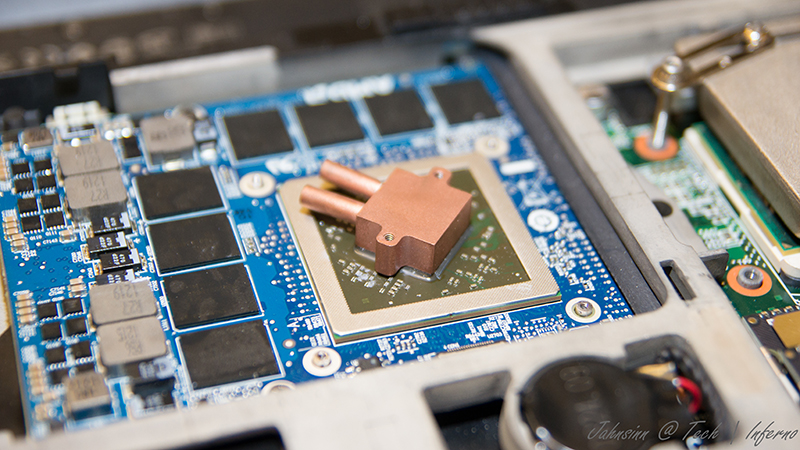
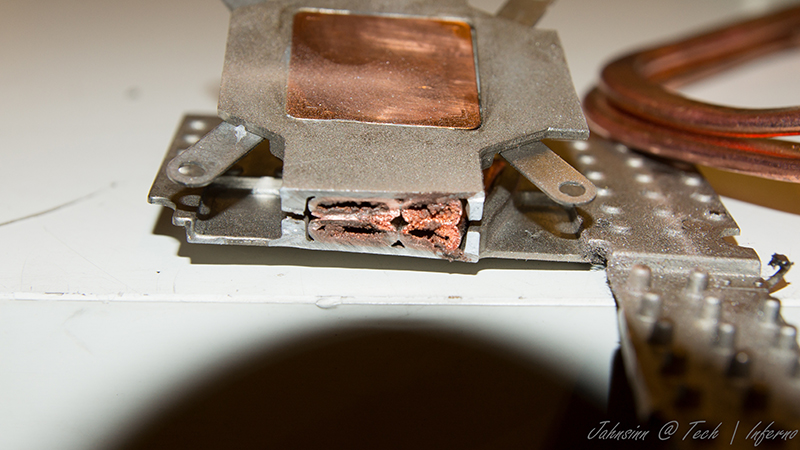
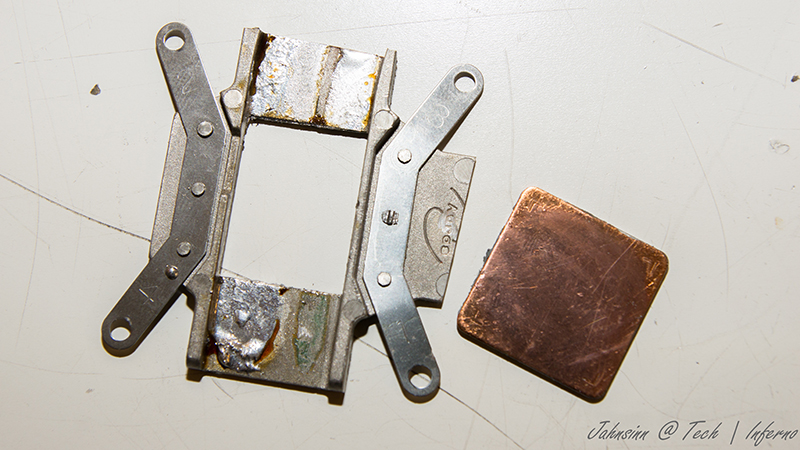
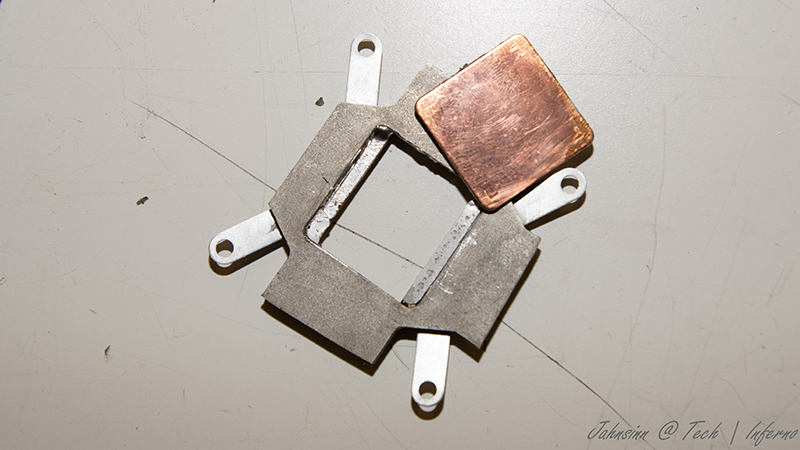
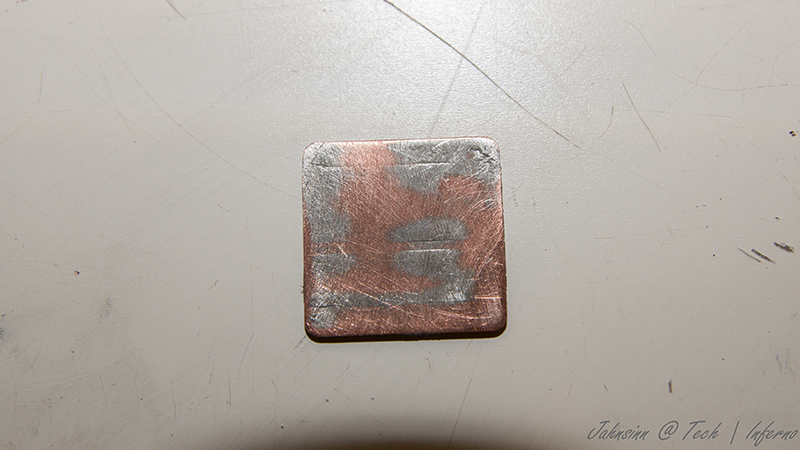
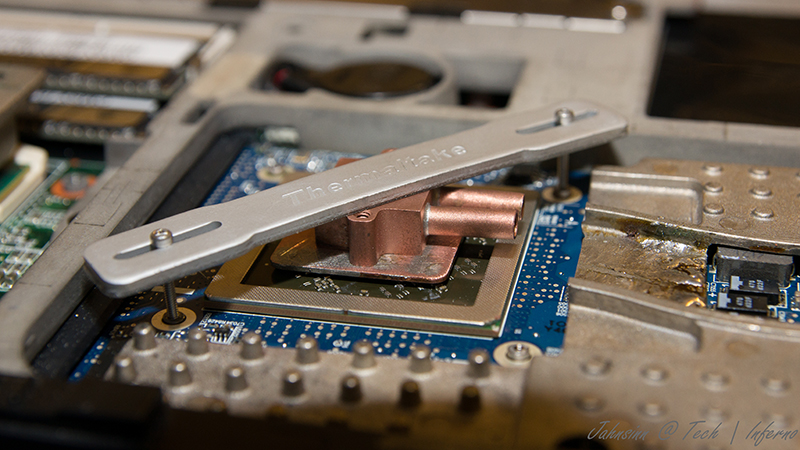
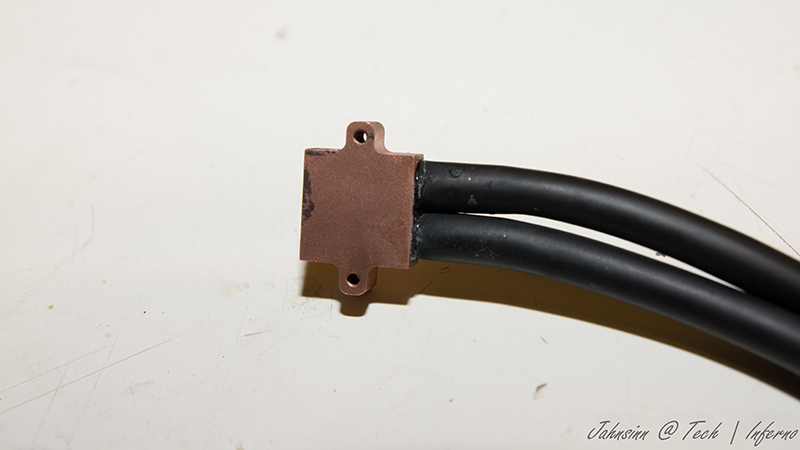
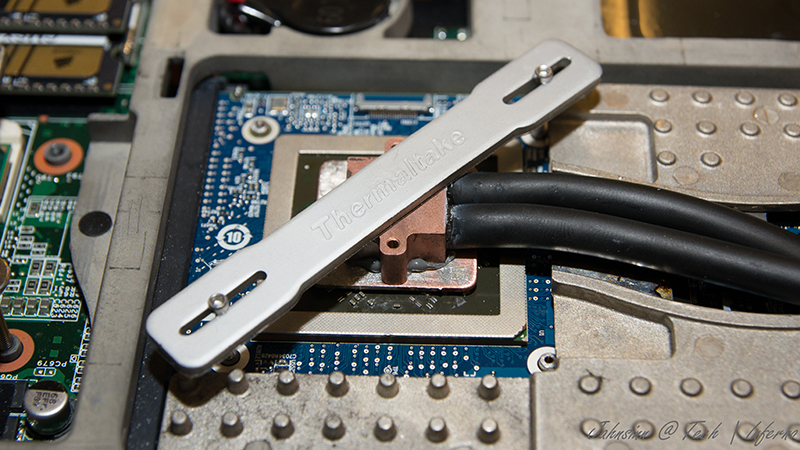
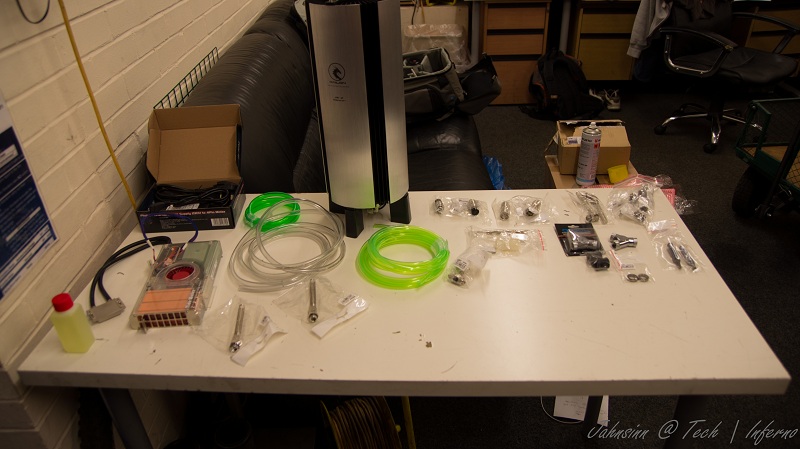
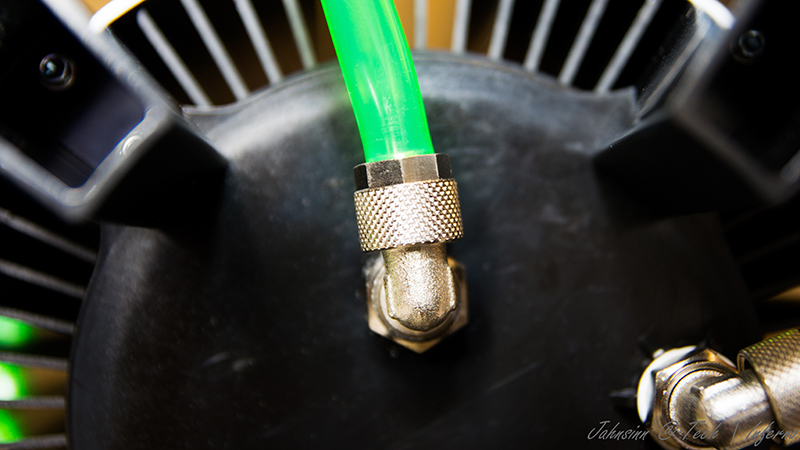
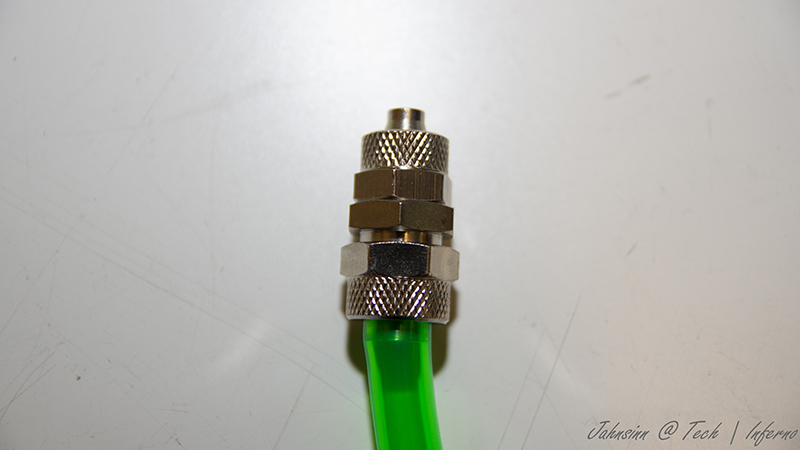
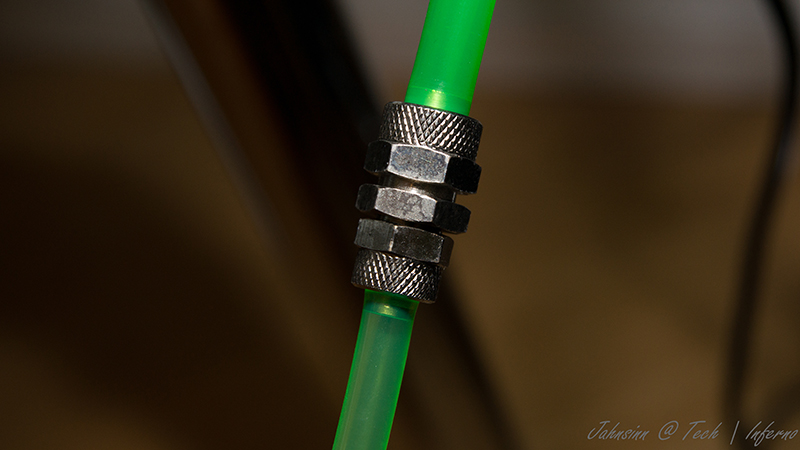
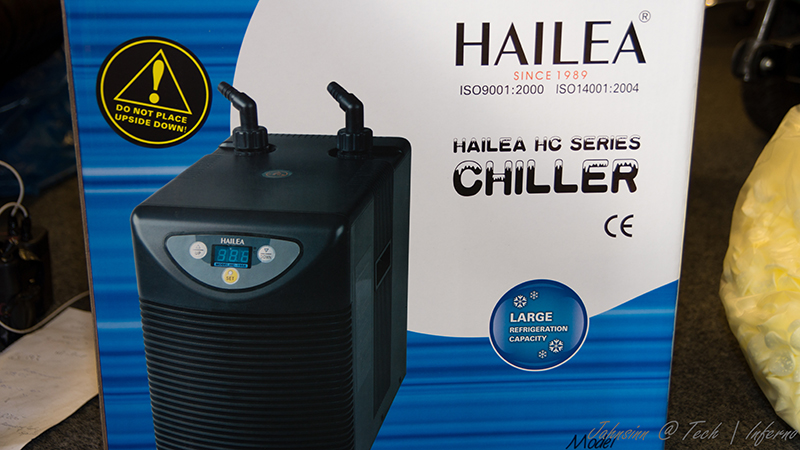
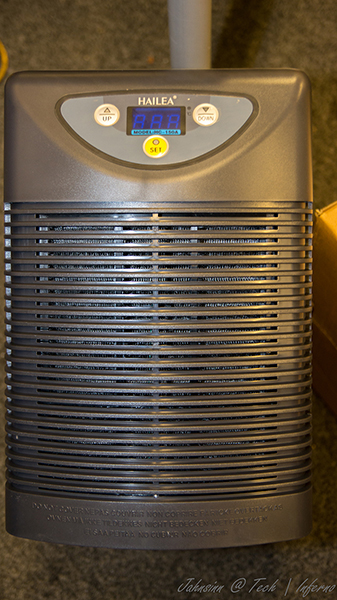
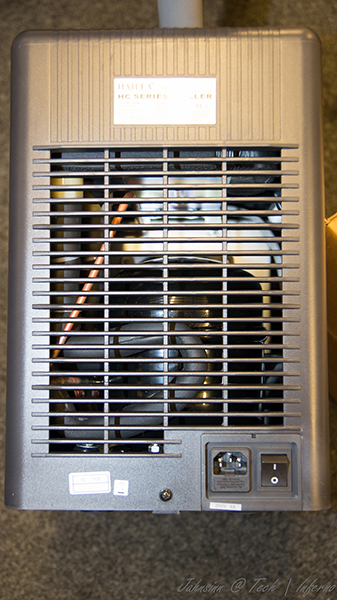
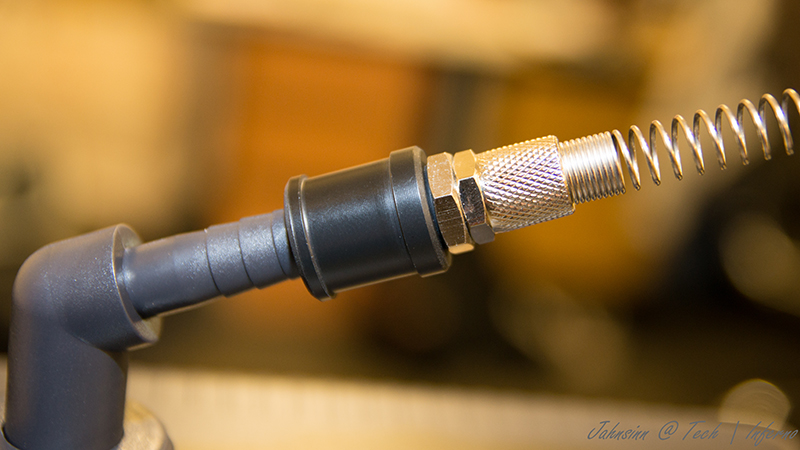
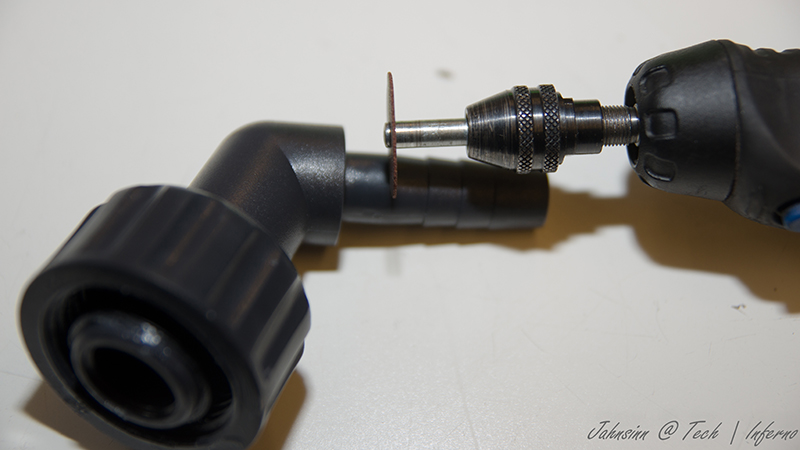
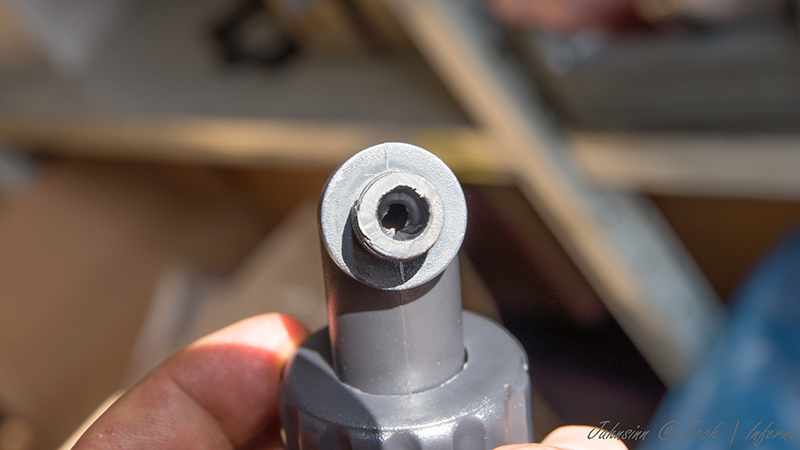
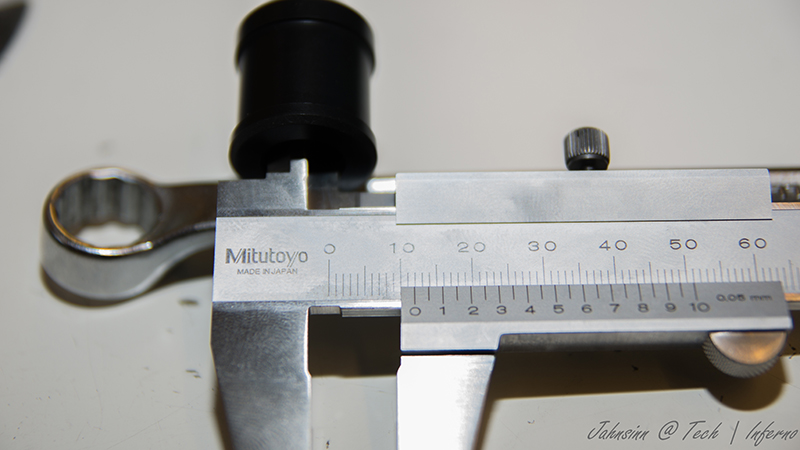
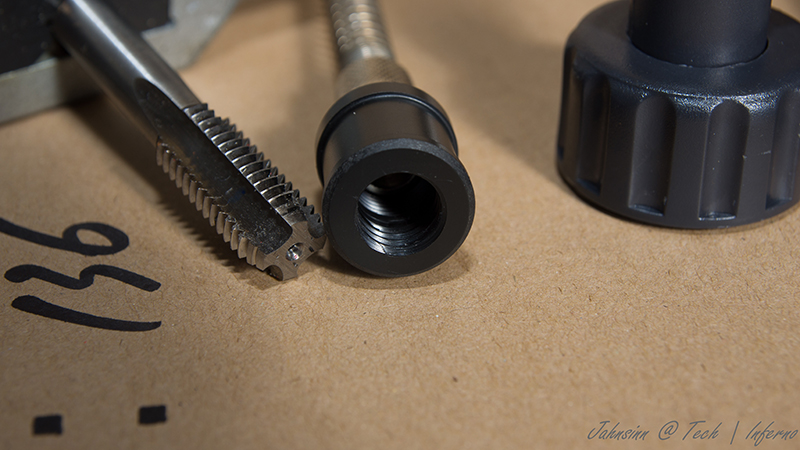
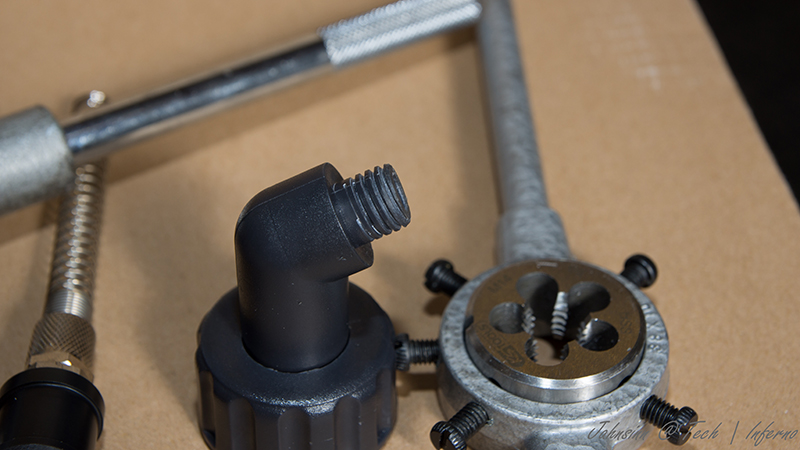
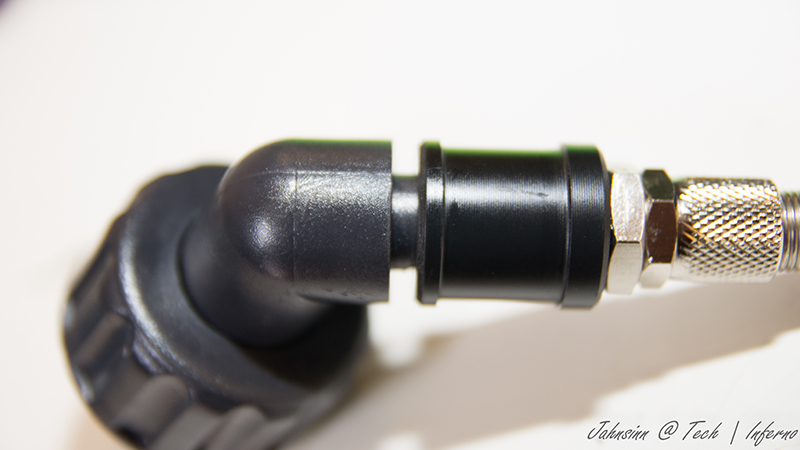
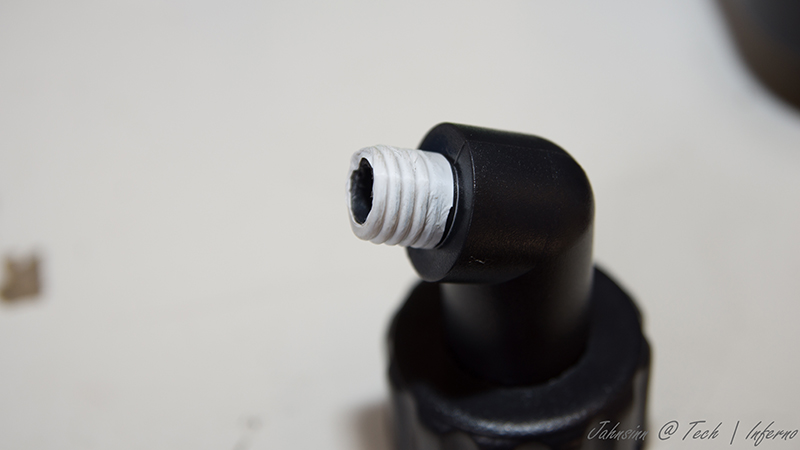
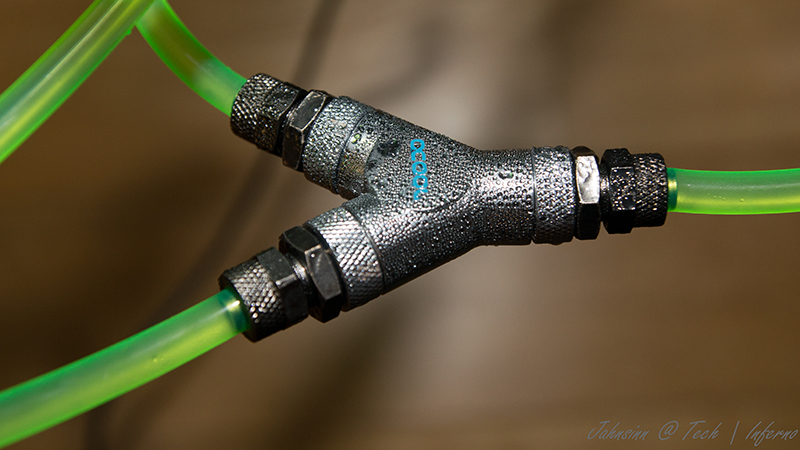
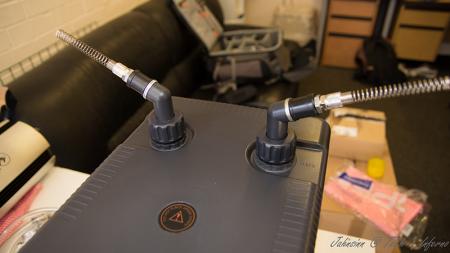
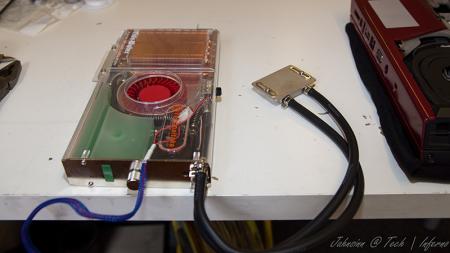
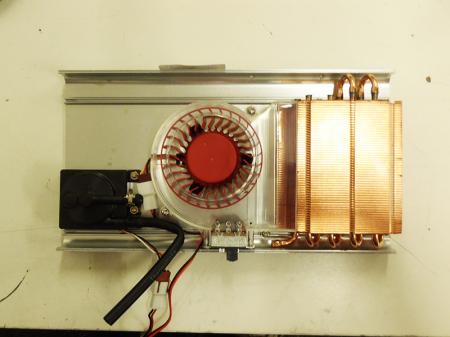
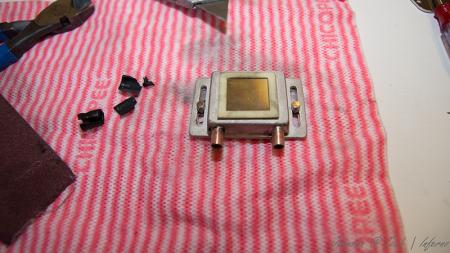
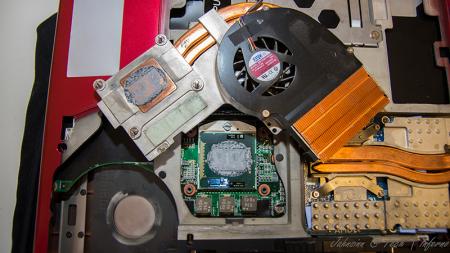
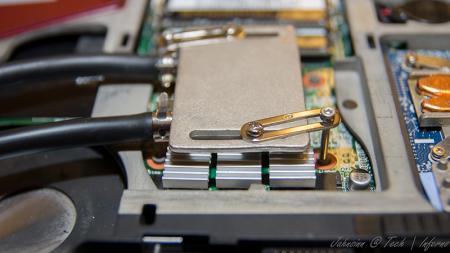
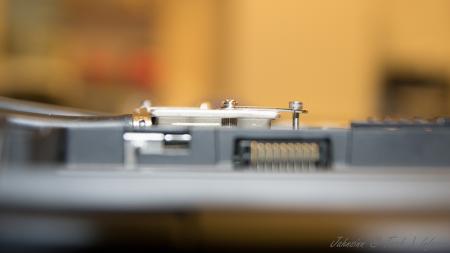
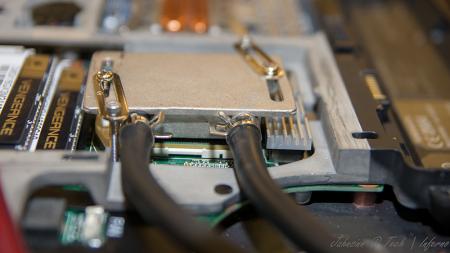
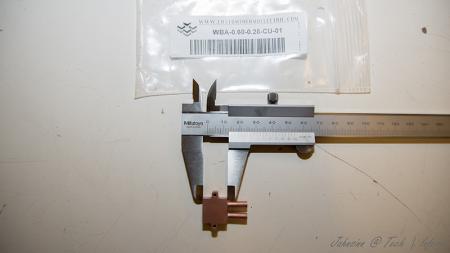
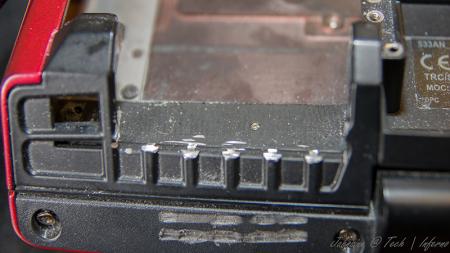
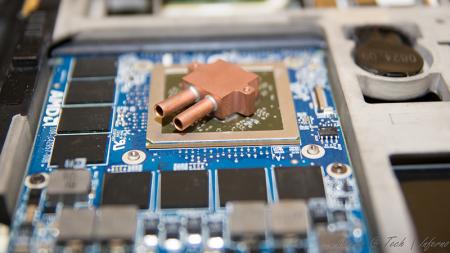
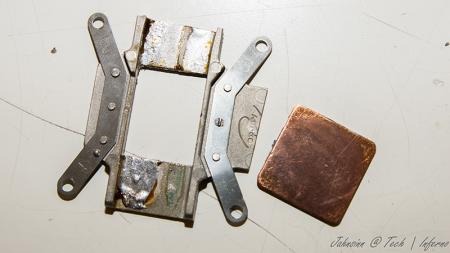
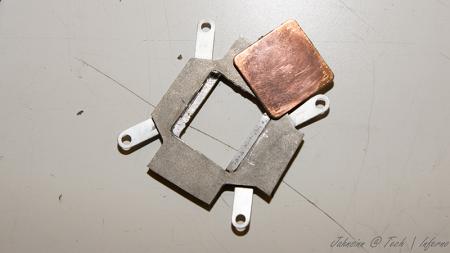
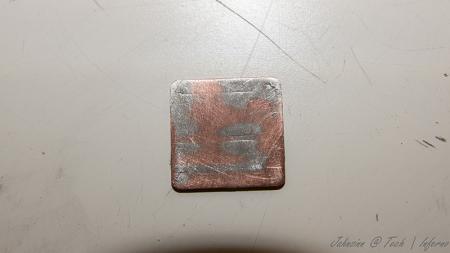
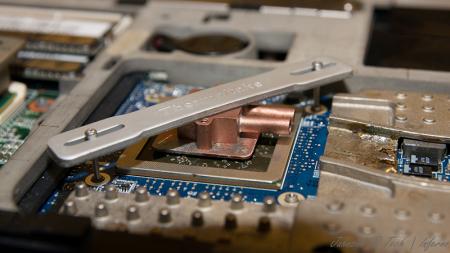
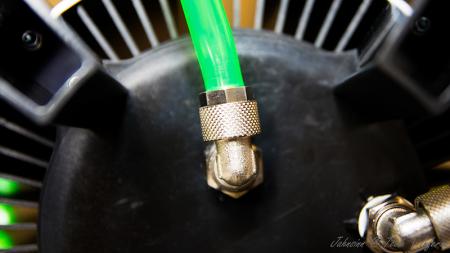
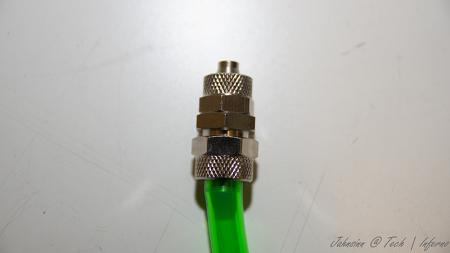
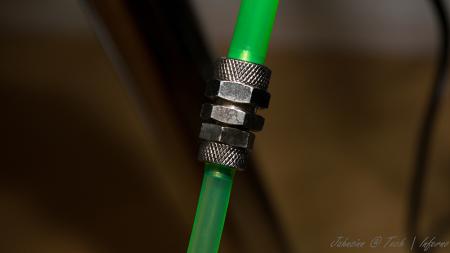
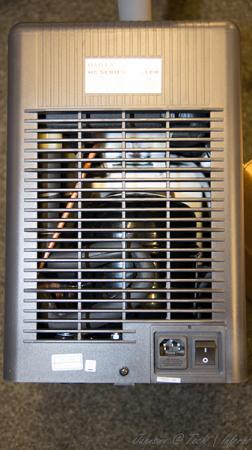
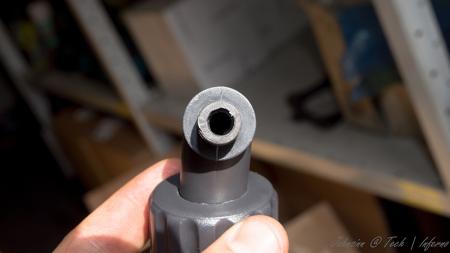
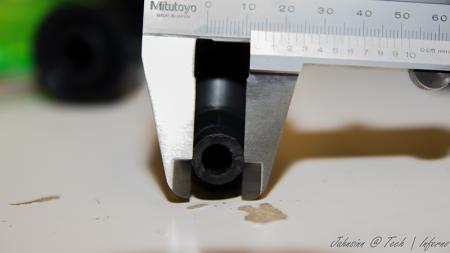
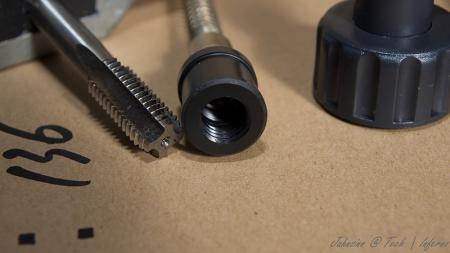
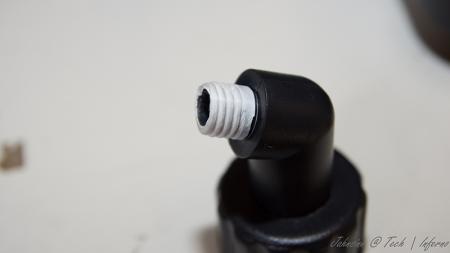
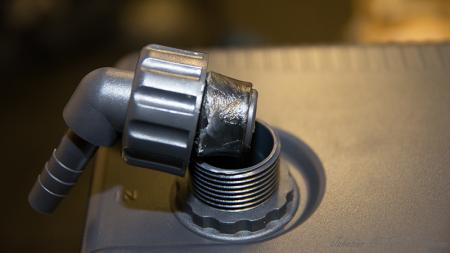
First of all, let me say I haven't finished yet. I'm still working on it and will update this thread from time to time due to much work at the moment. When I fitted my 940xm and the 7970m I got really mad of the heat and the fan noises even in idle mode. So I decided to get it all cooled with a silent, most important quiet, external water cooling system. I checked the internet and found evth I need to get it done. The most difficult thing was to find slim water blocks to cover the dies. I will list all the parts I used with article number and website if you're interested at the end of this post. First the overview. These parts are going to be used: Actually not much, so let's start. I start tubing at the inner hose socket of the reserator. This is the place where the pump is placed behind. You have to use a 10/8mm hose. By this, 10mm means the outside diameter of the hose, 8mm means the inside diameter. This is very important to know by everything you do on water cooling systems due to different fittings, barbs or reducers. Fit the hose and tighten it well with a spanner. Now you need a reducer to get on a 8/6mm hose. This is necessary to get in fitted to the chiller. At the other end you need to fit the 8/6mm hose. After this is done the 8/6mm hose leads into the chiller. A chiller pushs down your temps to a predefined value set by you, the minimum you can get theoretically is +3°C. Basically you can say it works like a refrigerator. This is very helpfully when you start gaming or other intense work on the laptop to keep the temps low. Here are some pics of it. To get the hose fitted the first custom made had to be done. Maybe I didn't know how it actually works, but I had no clue how else to do it without a modification... As you can see on the picture, the 1/4" adapter didn't fit to the chiller's nozzle. I really don't know what's the original idea by the developers. So the first adjustment had to be made. Cut the end of the nozzle as you can see on the pic. When this was done I noticed really pour casting quality inside the nozzle. This would massively reduce your flow speed. So I used a drill to get it out. Finally I got an outside diameter of 13mm at the nozzle. The adapter has 12mm inside diameter So just perfect to cut a M14 thread to both parts. Unfortunately I couldn't get closer due to the layout of the die. two washers solve this problem to get it proper tightened. To get it proper sealed I used teflon tape. Just the best way to get something sealed. Don't do it without any sealing! Use some Vaseline before you stick in the nozzles. Do the same with second side of course. At the end it'll look like that. Let's get to the CPU water block. I purchased the Thermaltake CL-W0052 Tide Water, originally made for desktop PCs to cool down the graphics card, on ebay to get all the stuff I'll need to do it. I chose that one because the water block has just a height of 8mm. Also all the hoses and clamps will be helpful. First drain the coolant. Then I opened the chassis and robbed all hoses and clamps. You'll need them in a couple of minutes. They're all bonded quite well, so just cut them at the ends. I also cut and removed the hoses of the water block itself, just to make sure everything is okay. I didn't want to get upset when I filled the system with water. So I cut them and removed the old adhesive. I then removed the original cpu heatsink and compared the die with the water block The water block as it was out from the box was just a touch too small to fit correctly onto the die. So I just removed the tape around the block. Now it was ready to get fitted. All I needed to do was loosing the existing bolts on the water block and tightened it with M2.5x20 hex nut bolts into the existing holes. At the end it looks like that. By the way, the mosfet heatsinks came with the tide water vga cooler. I also fitted the black hoses as they were, just without the glew and it still seals perfectly. To get the hoses guided out of the laptop you need to remove your fan control at the back of your laptop. When you're doing this, be careful not to touch the chassis as I did with whatever you use. I used the dremel and didn't see it for a while. What a shame! Nevermind, so let's get over to the gpu side. I bought a very tiny water block with just 15x15x7mm dimensions to not to exceed the height. So may be later I will be able to fit the backplate cover again. The water blocks would actually fit on the die, perfectly. But due to the layout of the gpu die the block just fits in diagonal postion. So useless for me. To get the water block in the right direction I unsoldered the copper plate of the original heatsink. That one has got the right dimensions to get this solved. Clean the copper plate from the old tin on top by using the Dremel or sandpaper. At the end that's the way it should work. Just to mention, also the holder came with Thermaltake tide water cooler. The bolts I bought seperatly on ebay. They are M1.6x20 but too long, so I cut them down to 15mm. Now they fit into the existing holes and push down the block properly Use now the -->small<-- black hoses robbed from Thermaltake chassis. These are the inside hoses, they're smaller. You need to use some adhesive because the clamps coming with the hoses are just a way too big and don't keep it tight to nozzle. Now just add some thermal paste between copper plate and die, and copper plate and water block. Tighten it all down. Finally it looks like that. [ATTACH=CONFIG]5105[/ATTACH] hoses leaded through the fan grill, gpu side. I mention again, just temporarily cause I'm still waiting for parts. in progress... [ATTACH=CONFIG]5107[/ATTACH] [ATTACH=CONFIG]5106[/ATTACH] cpu side [ATTACH=CONFIG]5108[/ATTACH][ATTACH=CONFIG]5109[/ATTACH] The hose laying is actually just in common sense. Nothing particular I should mention. Reserator -> 10/8mm hose -> 10/8mm to 8/6mm reducer -> 1/4" compression fitting -> 1/4" adapter for chiller -> chiller nozzle -> chiller -> nozzle, adapter, fitting -> 8/6mm hose -> Y-splitter first end hose -> 8/6mm hose -> quick coupling -> black hose (termaltake tide water) -> cpu block inlet-> cpu outlet -> black hose -> quick coupling -> 8/6mm -> Y-splitter second end hose -> 8/6mm hose -> 6mm barb -> small black hose (thermaltake tide water) -> gpu block inlet -> gpu outlet -> small black hose -> 6mm barb -> 8/6mm hose -> Y-splitter | Y-splitter -> 8/6mm hose -> 10/8 to 8/6mm reducer -> reserator update in progress...


 1 point
 -
svl7, a member on notebook review, in the thread regarding owners of the Dell 7720, uploaded the batch file for flashing and the two mods, 00 and 01. I previously read through this TI thread and had some understanding of what your VBIOS mod intended to do. If you look through notebook review thread, I believe the post including your modifications is somewhere around page 148.1 point
-
It works, but you have to modify the nvidia driver INF's to recognize the card. I really don't care for having to do that, so I just continued using the stock VBios for now. Waiting for Svl to put out a new vbios for use with the MSI GT70.1 point
-
Dude you're reaching 93c which is dangerously high and you're testing with furmark which is a gpu killer. In addition the 680m has throttling built in for furmark. Use 3dmark 11 for testing. Sent from my GT-N70001 point
-
Can someone explain to me why i can only change my 2d voltage but not my 3d?1 point