Leaderboard


Popular Content
Showing content with the highest reputation on 08/15/12 in all areas
-
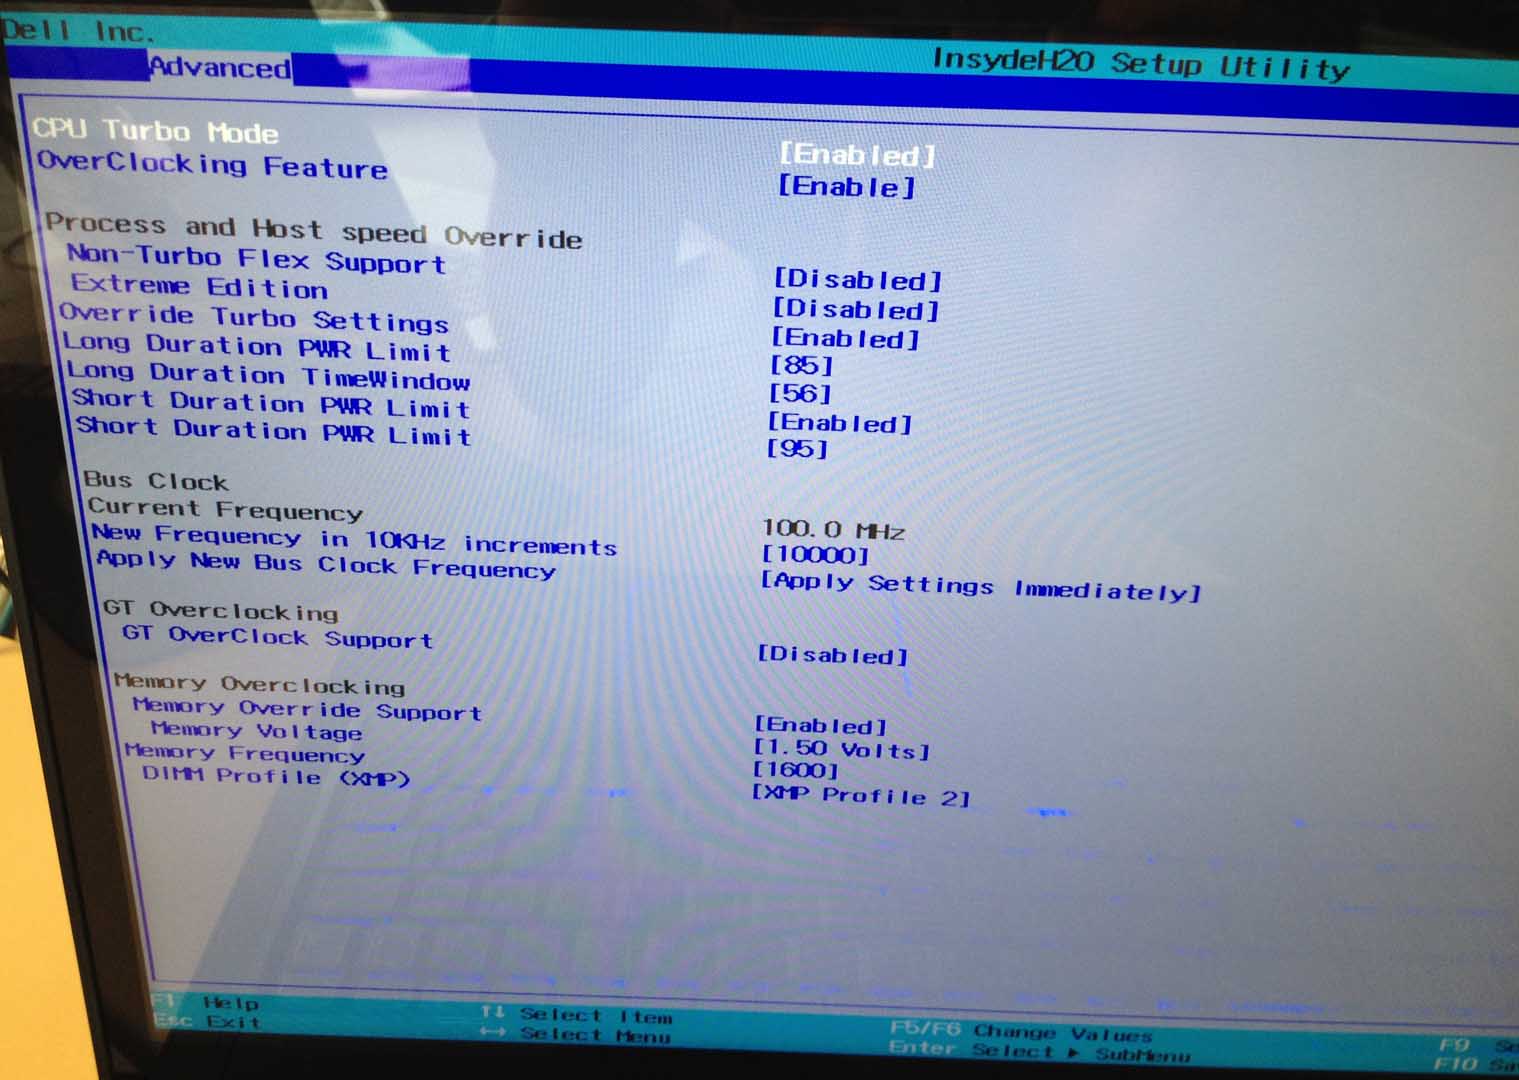
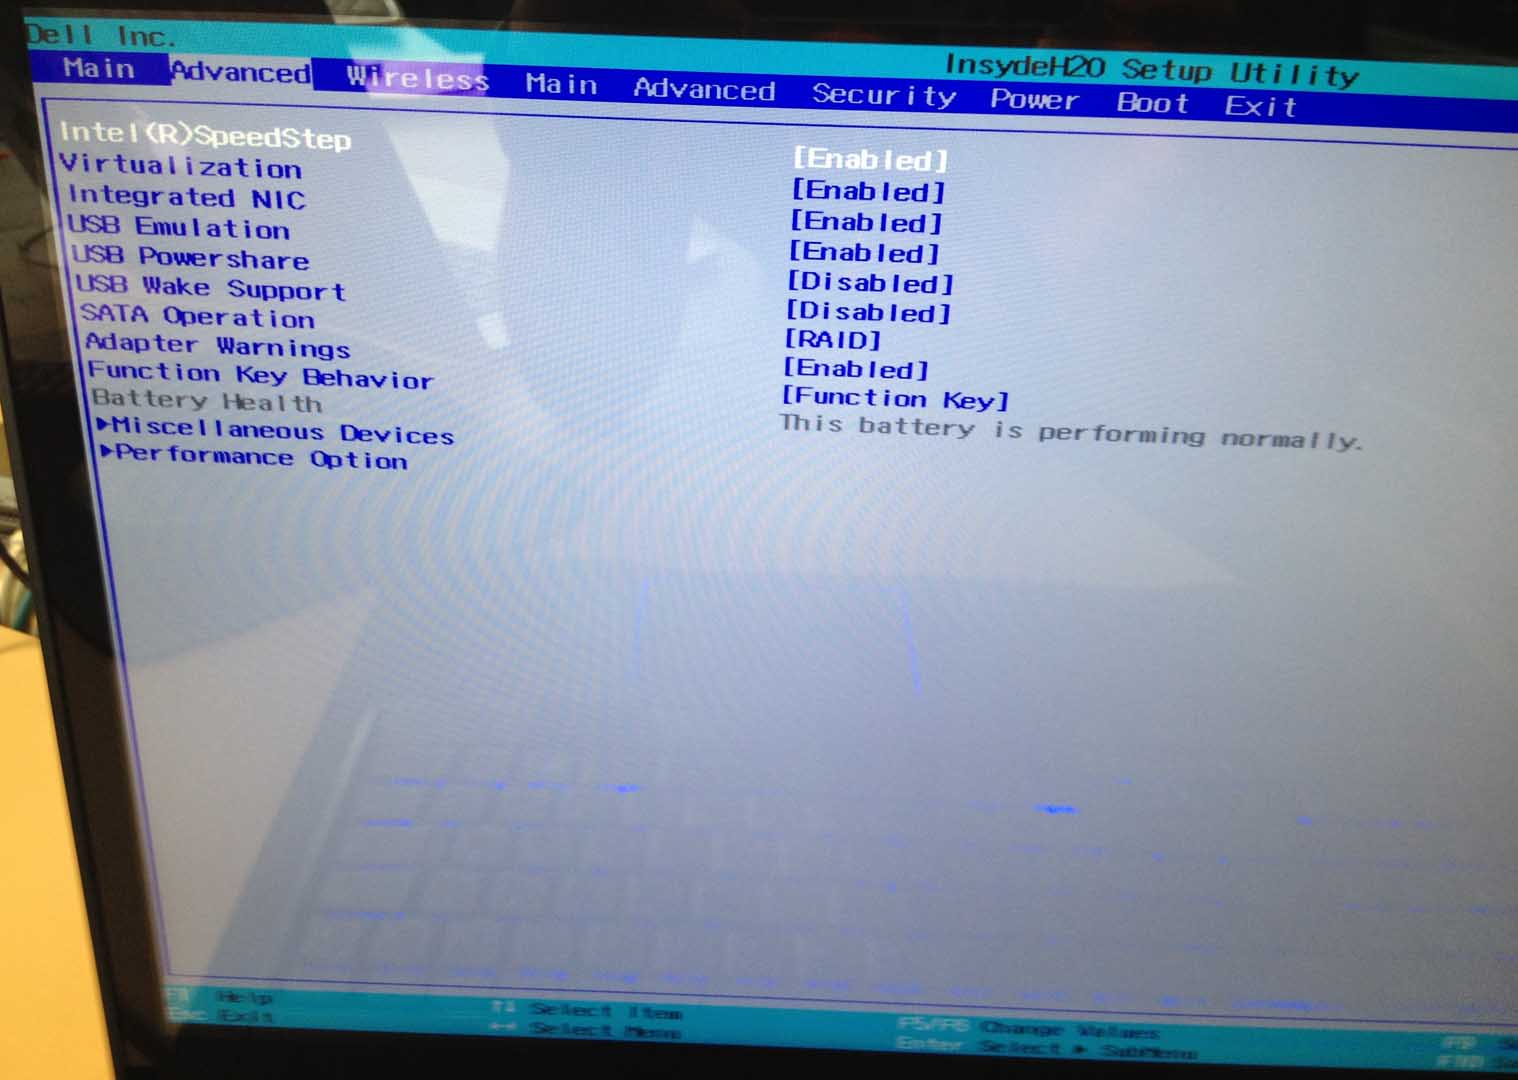
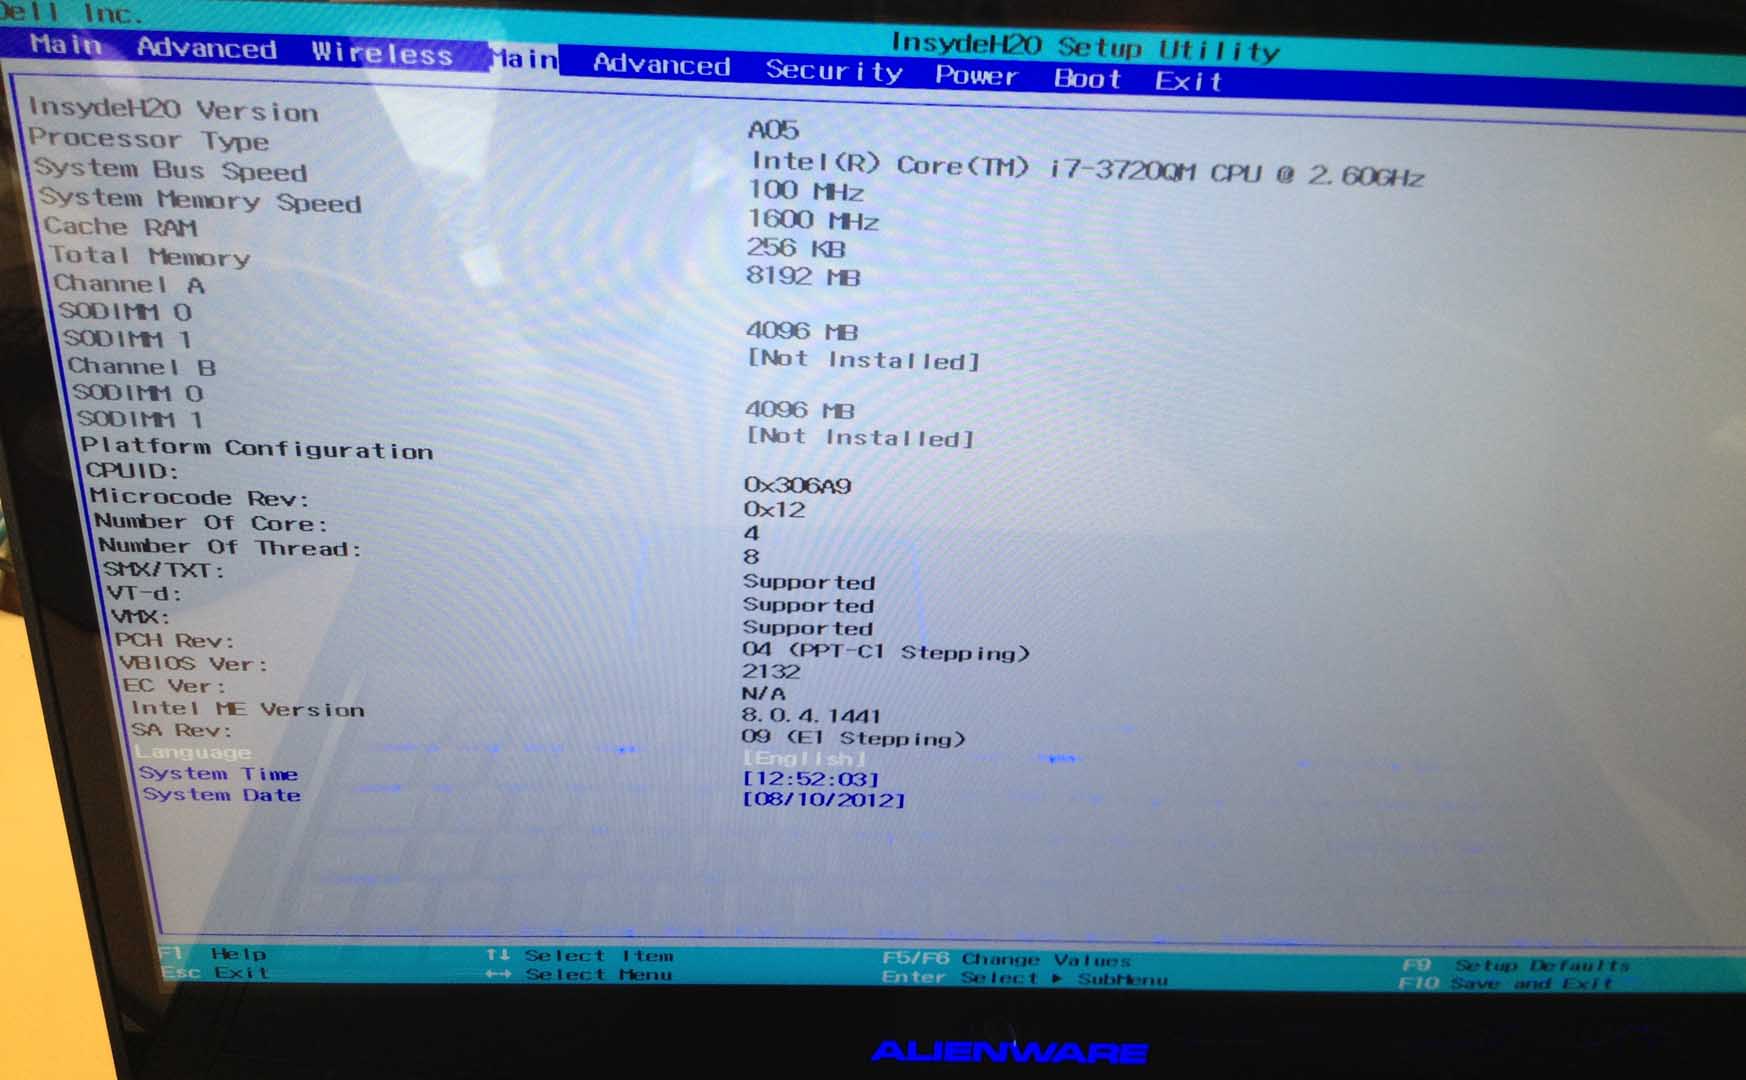
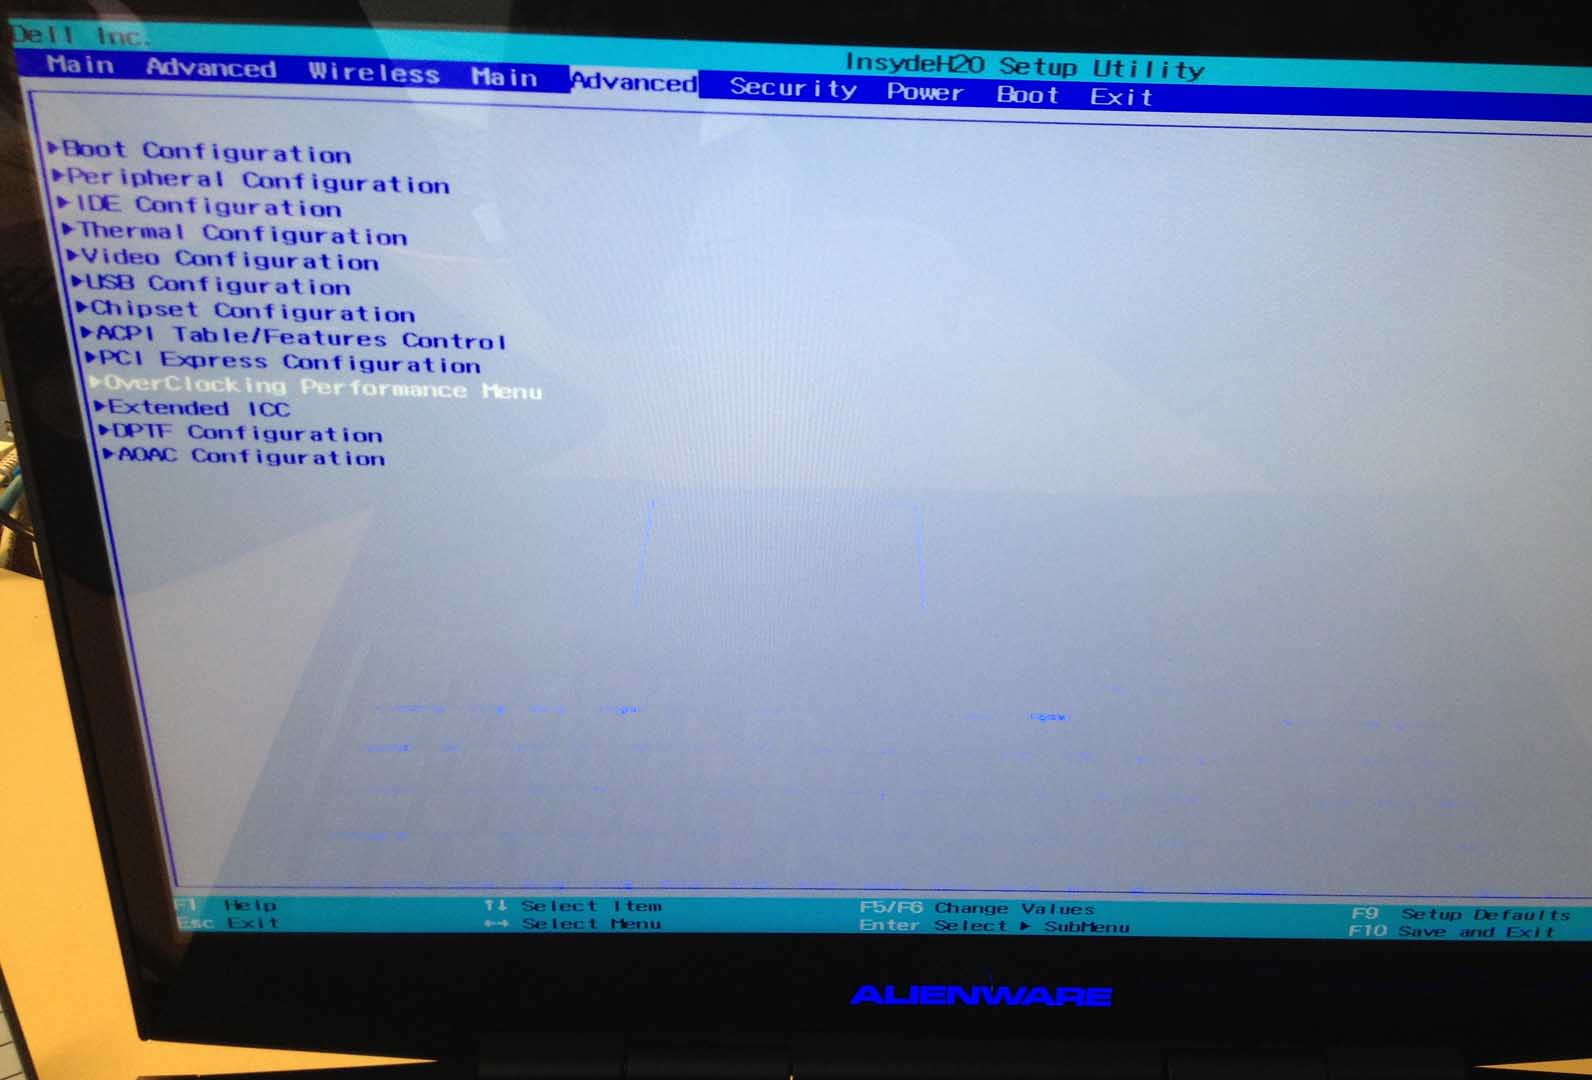
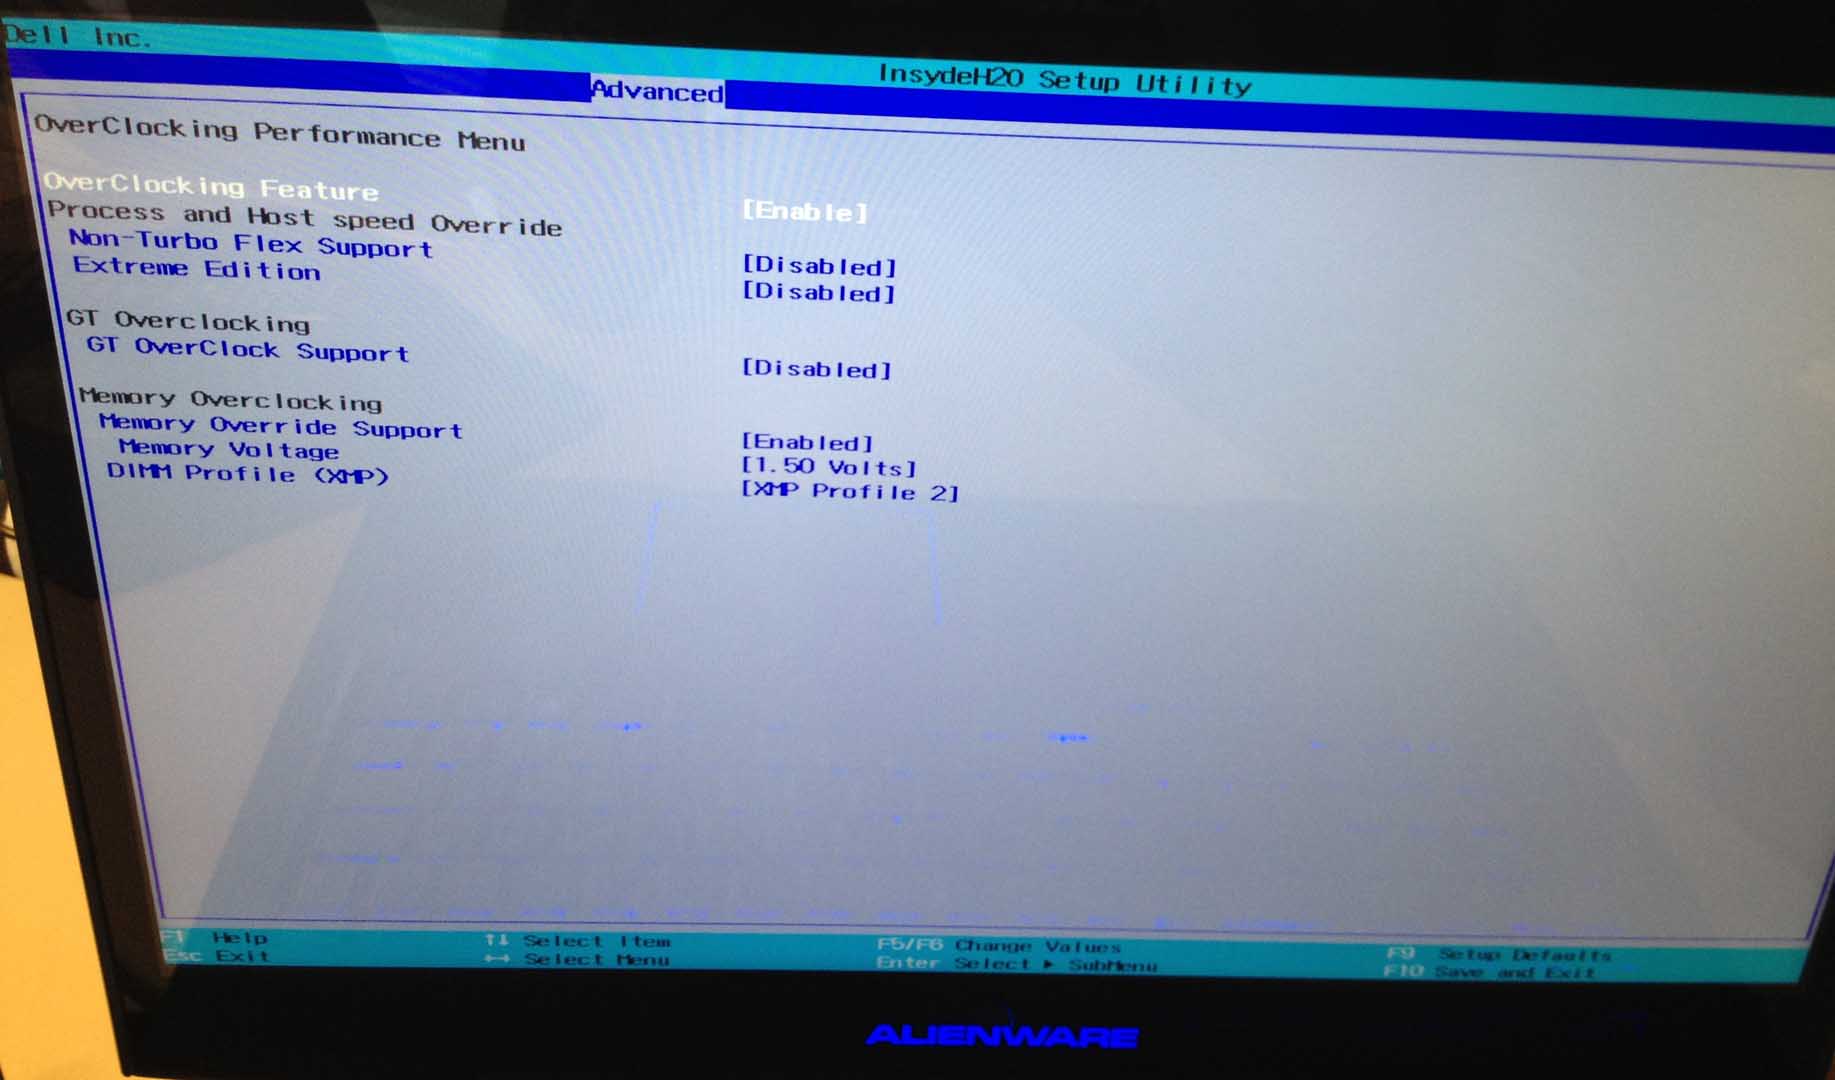
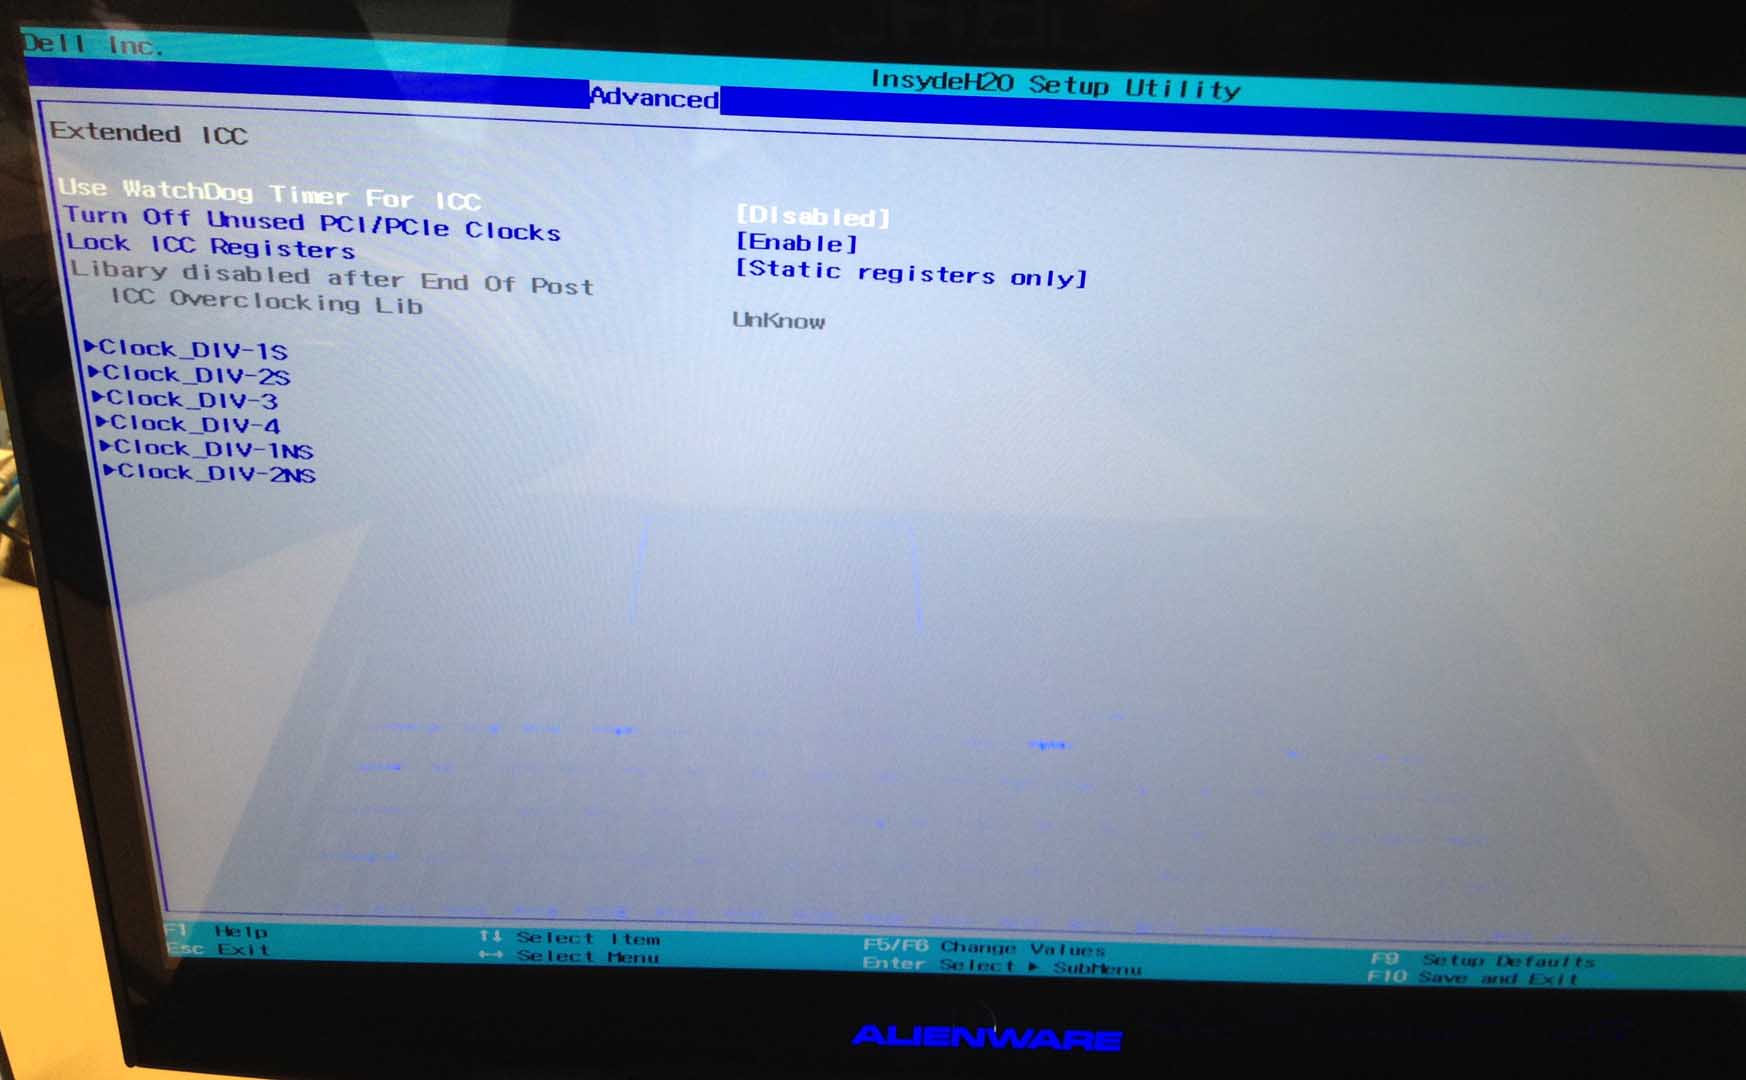
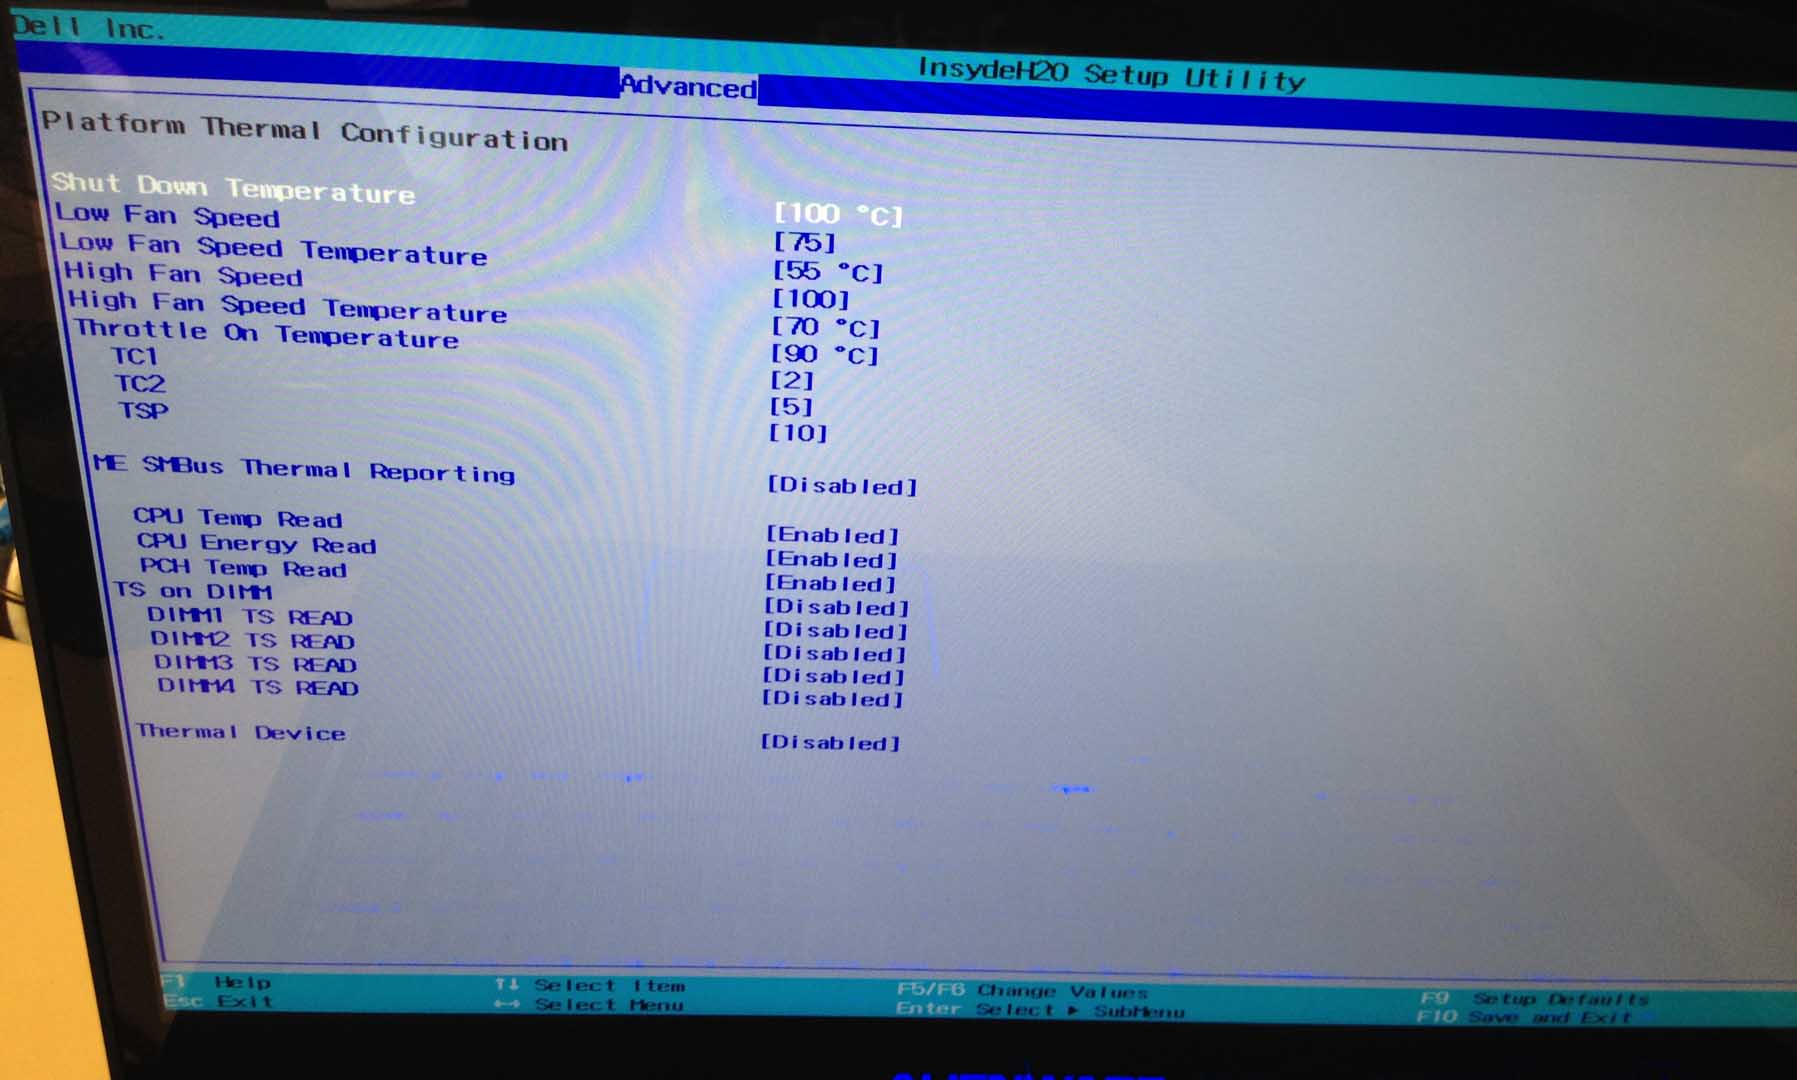
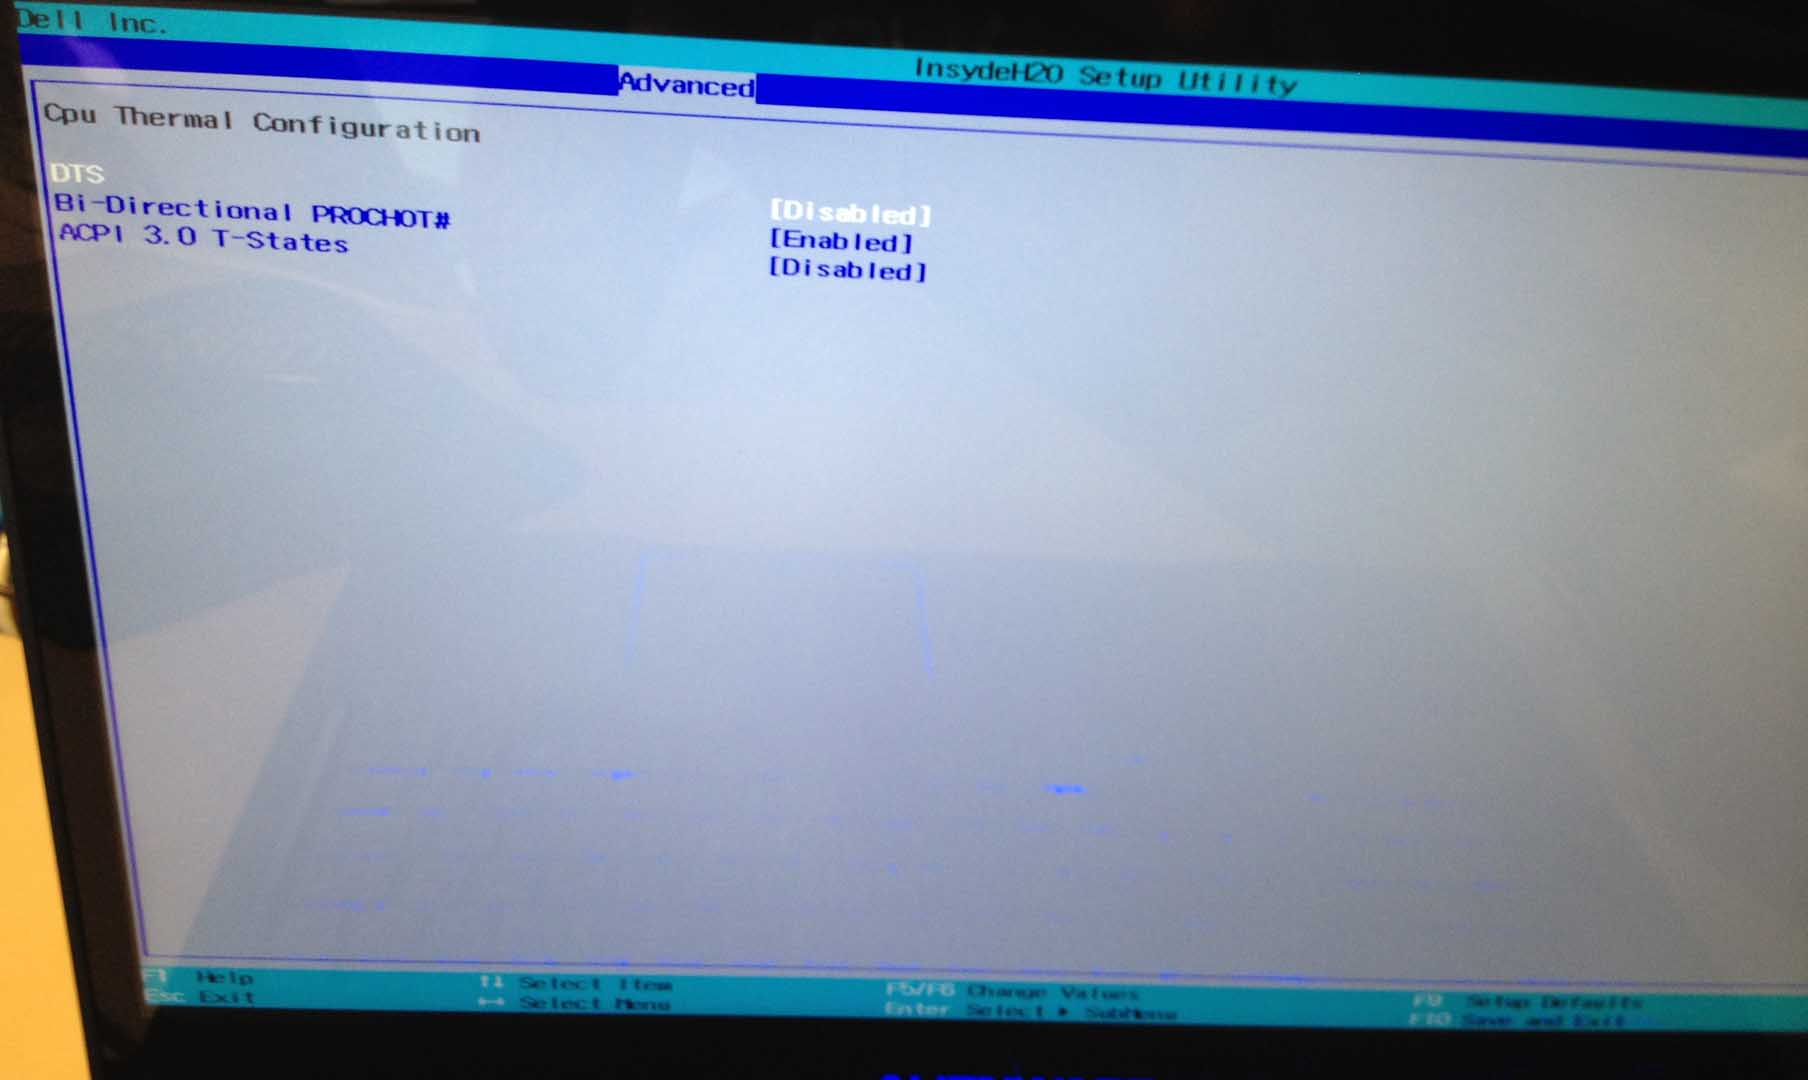
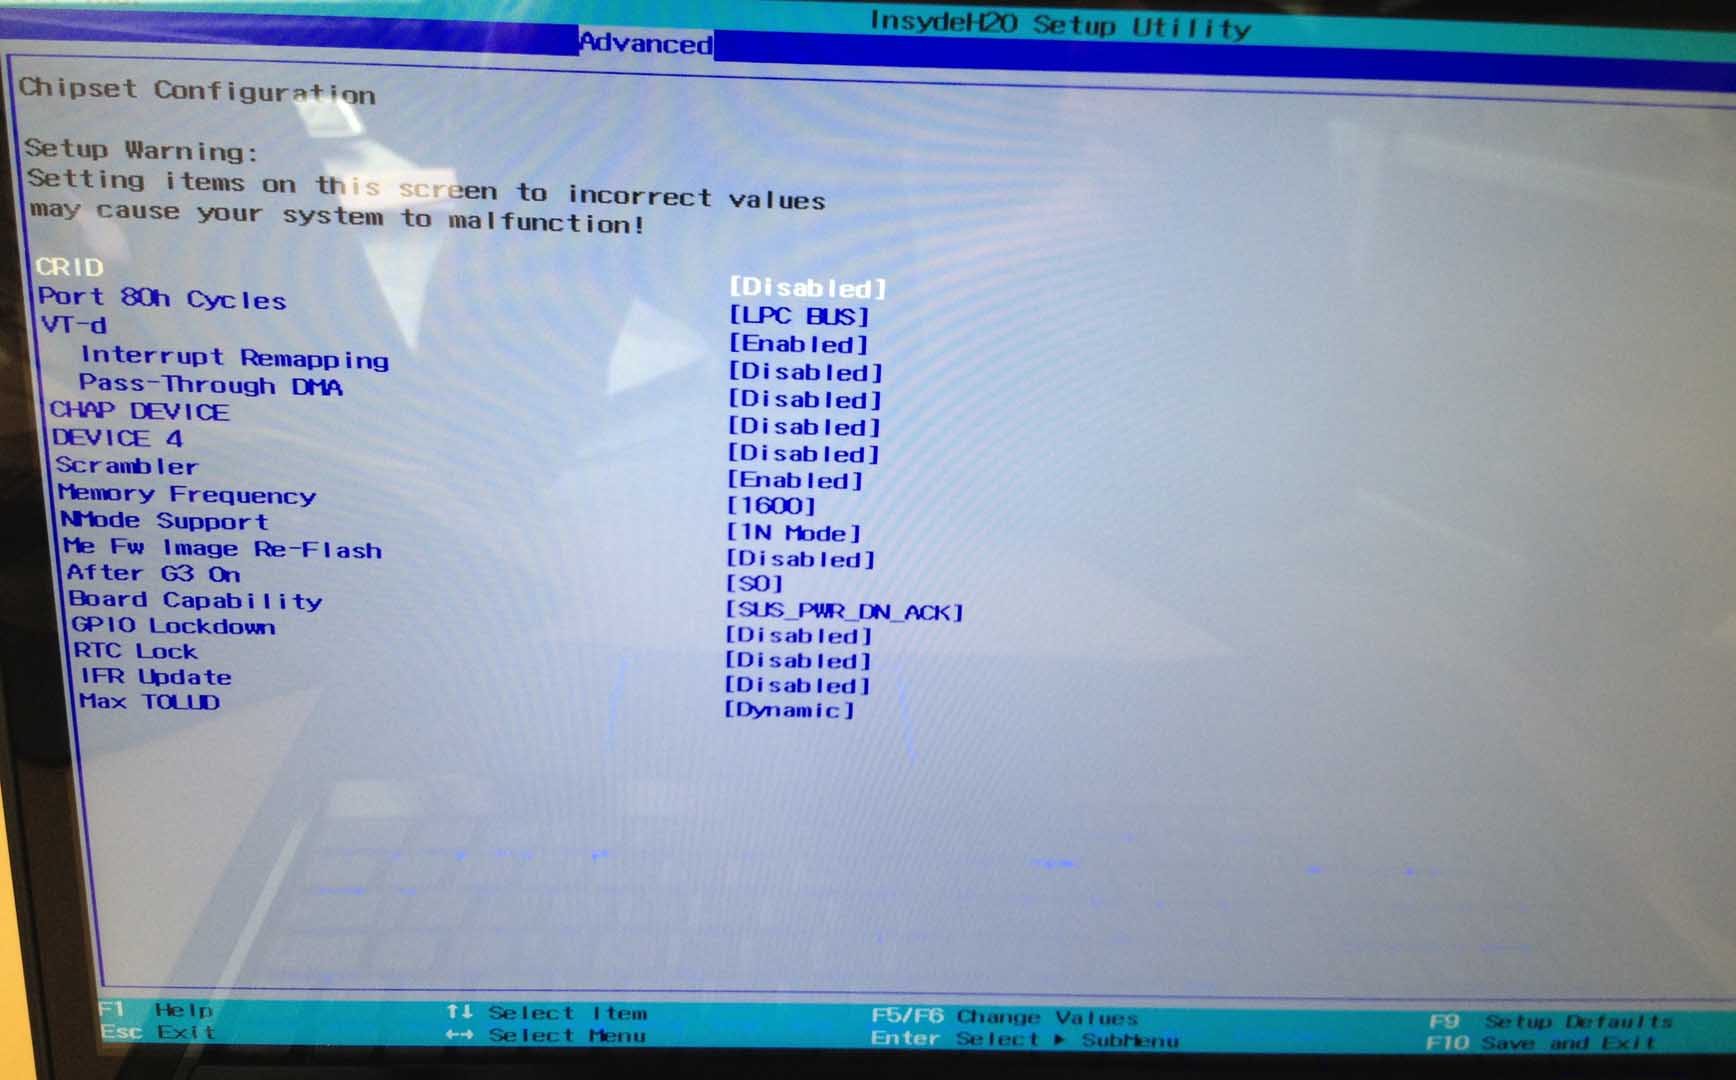
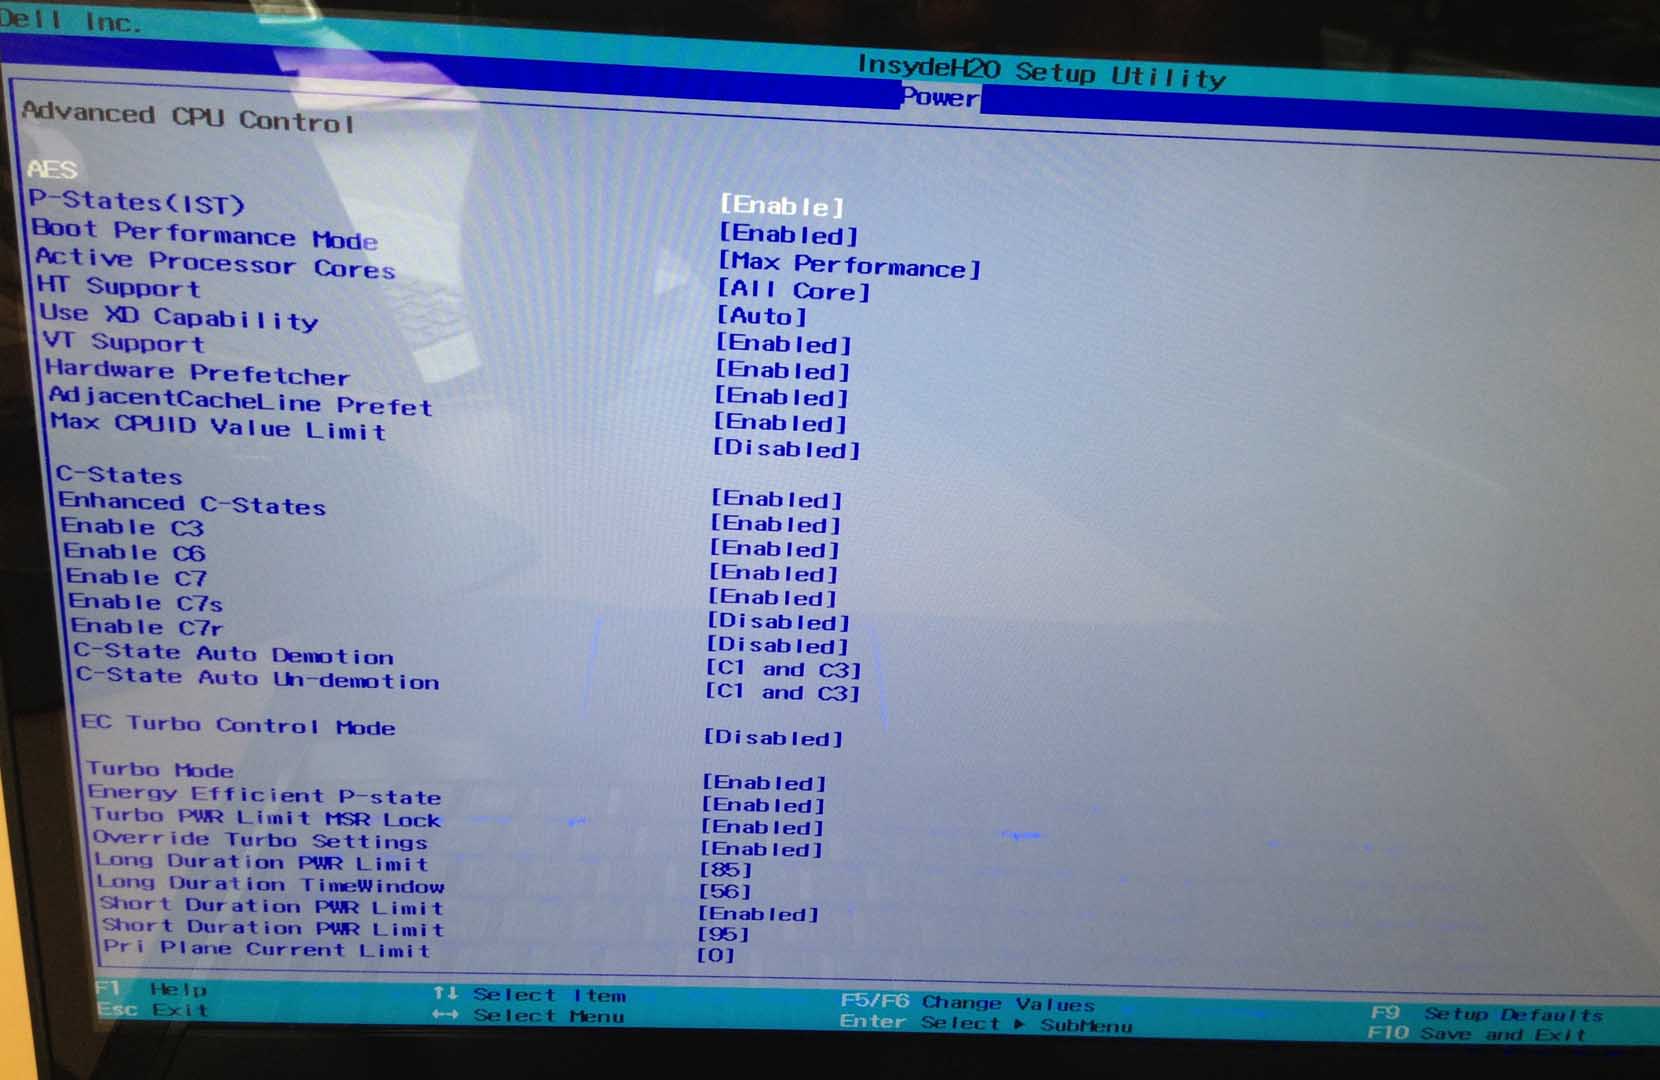
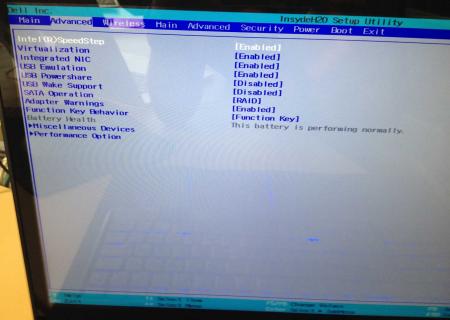
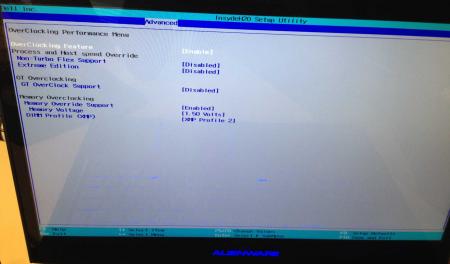
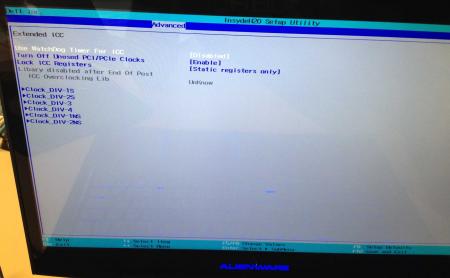
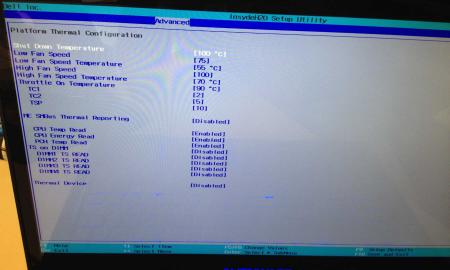
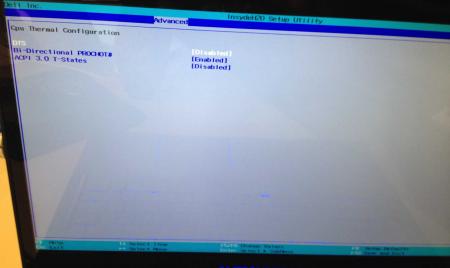
Dell has hidden a lot of options in the BIOS of the Alienware M17x R4, the modified BIOS versions here will show you all the hidden menus and allow you to further tweak your system and optimize its performance. Don't change anything you're not familiar with. There might be functions available which don't work on your system, so use this BIOS with care. It should only be used by advanced users. In case you mess up and your system refuses to boot after applying the changes you make, remove the AC adapter, battery and coin cell battery in order to clear the non-volatile ram of the BIOS. This should fix most issues. *********************** Instructions: If you're on A05 or an earlier version, you can flash the modified bios by simply using the InsydeFlash utility provided with the official bios update on the Dell support site. However, once you're on a version newer than A05, things get a bit more complicated. There are two options then: - Method 1: Revert to stock A05 or earlier by using the Insyde USB bios recovery method, and then flash the modified bios by using the official tools (InsydeFlash). - Method 2 (recommended): Flash the modified Bios from DOS by using the FPT tool: . Grab the DOS version of fpt for flashing, and my 'prr tool' to circumvent write protection.. Download a '[FPT]' labeled version of the unlocked BIOS. Put the DOS version of the flash tool on the root of the prepared USB stick (fpt.exe and fparts.txt), along with the prr.exe and the file you want to flash (plus the included flash.bat). . Restart the system and boot from your USB stick. Run prr.exe, then flash the bios by executing the flash.bat file. Wait until the tool completes the flash. If the verification is okay, reboot, else flash again.. Go to the bios, load the default settings and reboot. Done NOTE: The flashing from DOS as described above will only update the BIOS, not the rest of the firmware. Therefore I strongly advise you to first flash the stock version of the bios you want by using the official update provided by Dell, and once that's done you can go ahead and flash the modified version of your bios by following the instructions above. Download links to the unlocked M17x R4 BIOS versions: M17x R4 - BIOS A05 [unlocked] M17x R4 - BIOS A08 [unlocked] - see attachment M17x R4 - BIOS A09 [unlocked] - see attachment M17x R4 - BIOS A10 [unlocked] - see attachment [FPT] M17x R4 - BIOS A10 [unlocked] - see attachment [FPT] M17x R4 - BIOS A11 [unlocked] - see attachment Donation link, in case you want to buy me a beer Here some pictures of the menus (thanks a lot for the pics @deadbydawn!) I want to thank @widezu69 for testing !! It's hard to find users who are willing to risk their system in order to test a mod, I greatly appreciate this! Thank you!! ********* Flash and use at your own risk. I don't take any responsibility for any possible damages on your system. The software which I provide here ('prr tool') comes with absolutely no warranty to the extent permitted by applicable law. ___ M17x_R4_-_BIOS_A08_[unlocked].zip M17x_R4_-_BIOS_A09_[unlocked].zip M17x_R4_BIOS_A10_-_[unlocked].zip [FPT]-M17x_R4_BIOS_A11_-_[unlocked]V2.zip [FPT] M17x R4 - BIOS A10 [unlocked].zip M17x_R4_-_BIOS_A05_[unlocked].zip


 1 point
 -
I make this thread for people who have bricked their bios on their r4(not the vbios), since the release of the A05 I have seen multiple people bricking their bios. The solution to this problem is really easy. Go to Drivers en downloads | Dell [Nederland] and download the .exe file. Use winrar to extract this file, you will have a file named like this QBR00EC.fd, rename it to M17R4.hdr. Now format an USB stick to fat/fat 32, and ONLY put this file on it. We are almost done!!! Unplug the battery from your laptop and be sure the power adapter is not plugged in, and put the USB in the eSate(NOT USB SLOT). Now hold the end button and plug in the adapter, your alienware should come back to live now!!!! It will beep some times and restart few times. Note: Leave CMOS battery in, or it wont work Thanks to SVL7/Brian, clearing things up for me, just go back into bios flashing1 point
-
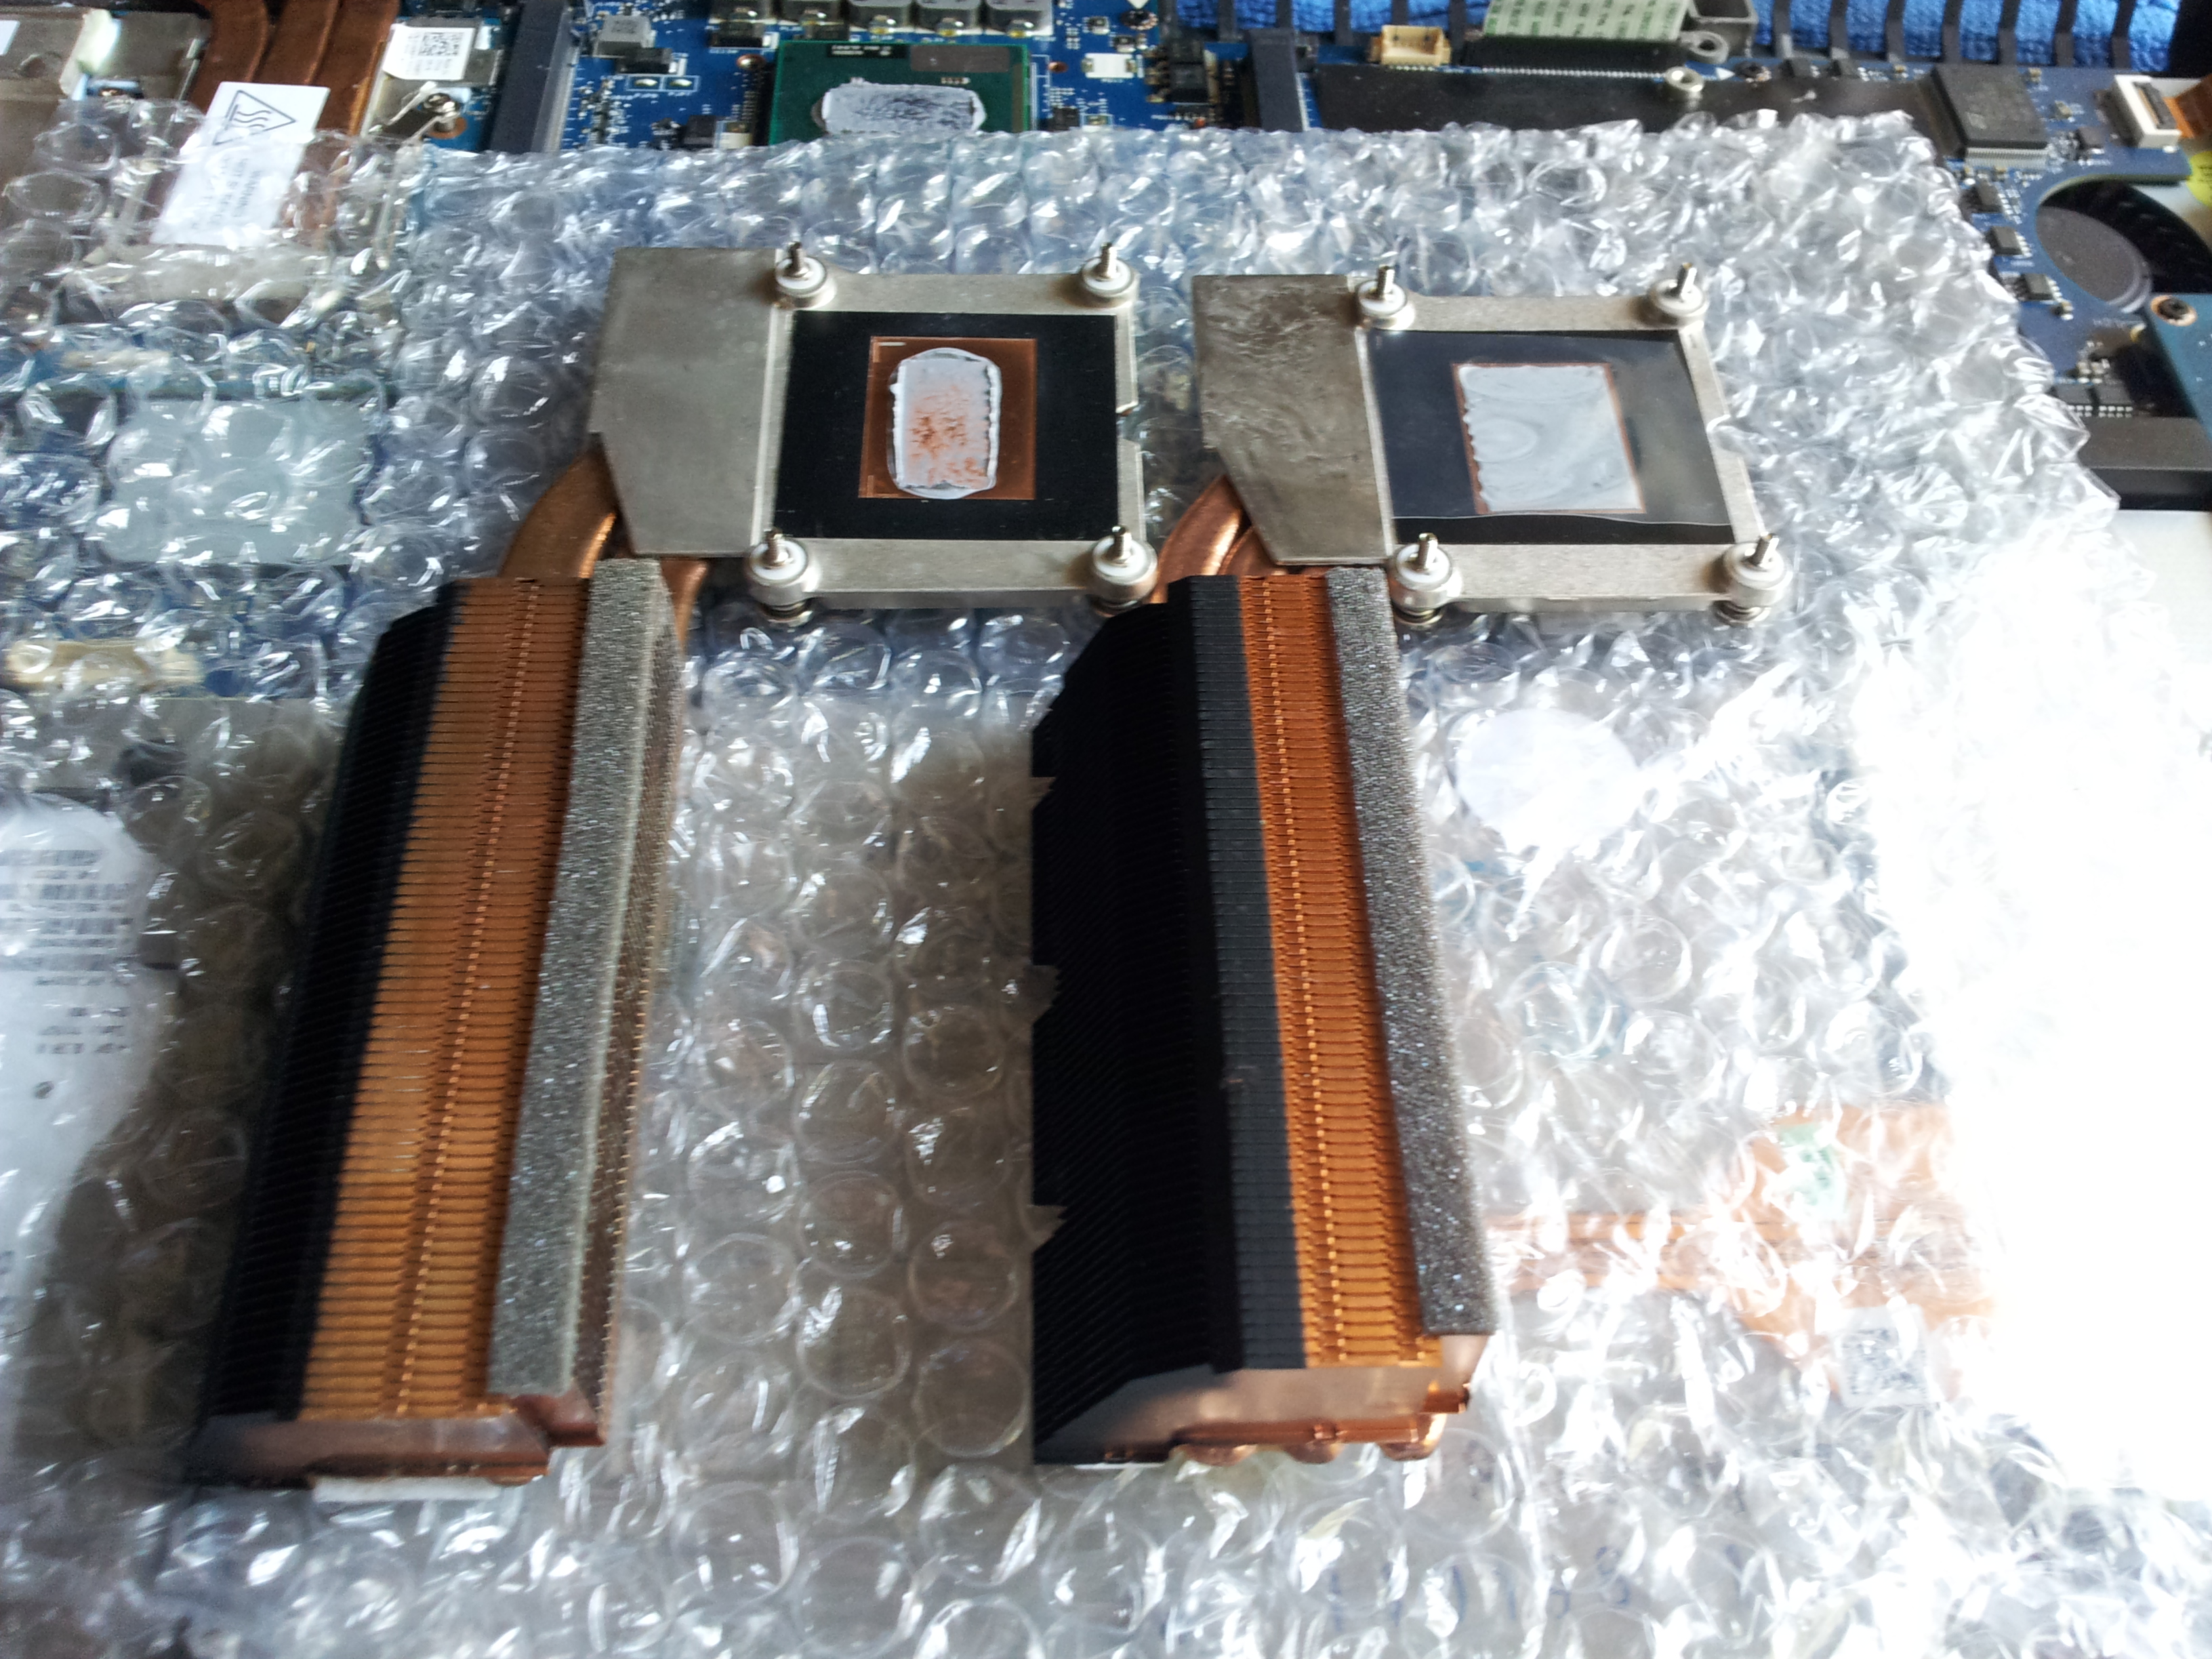
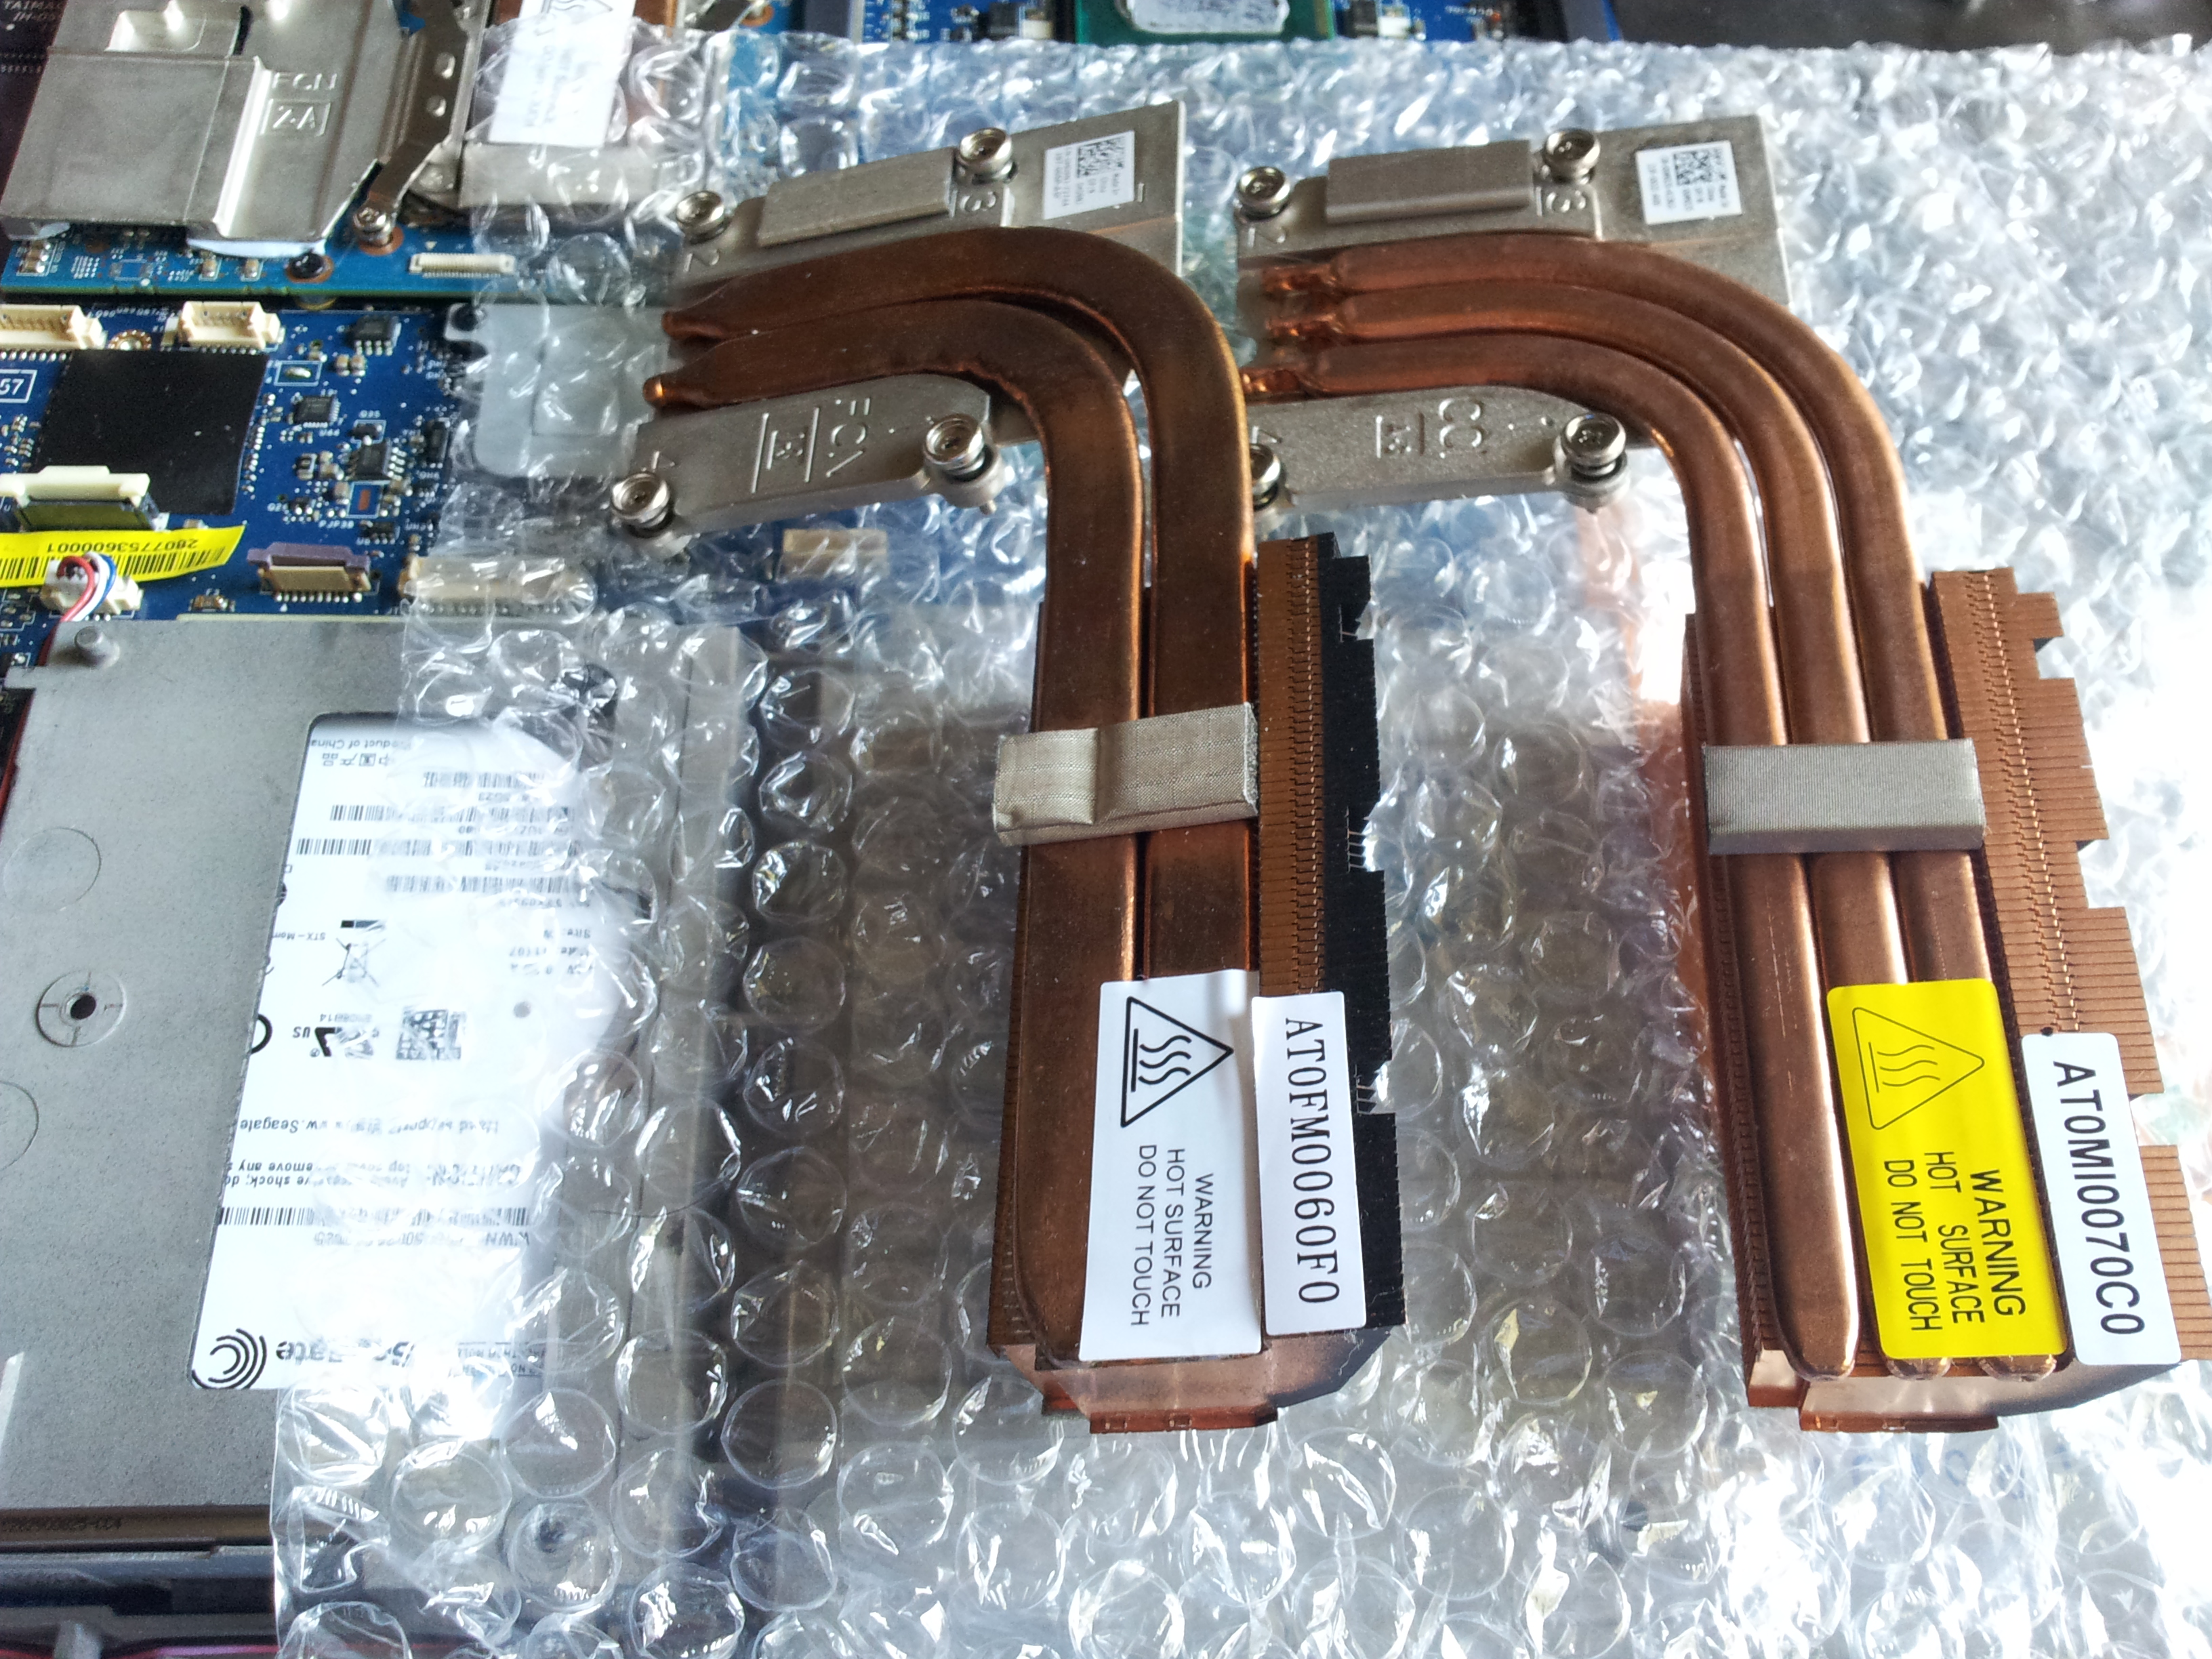
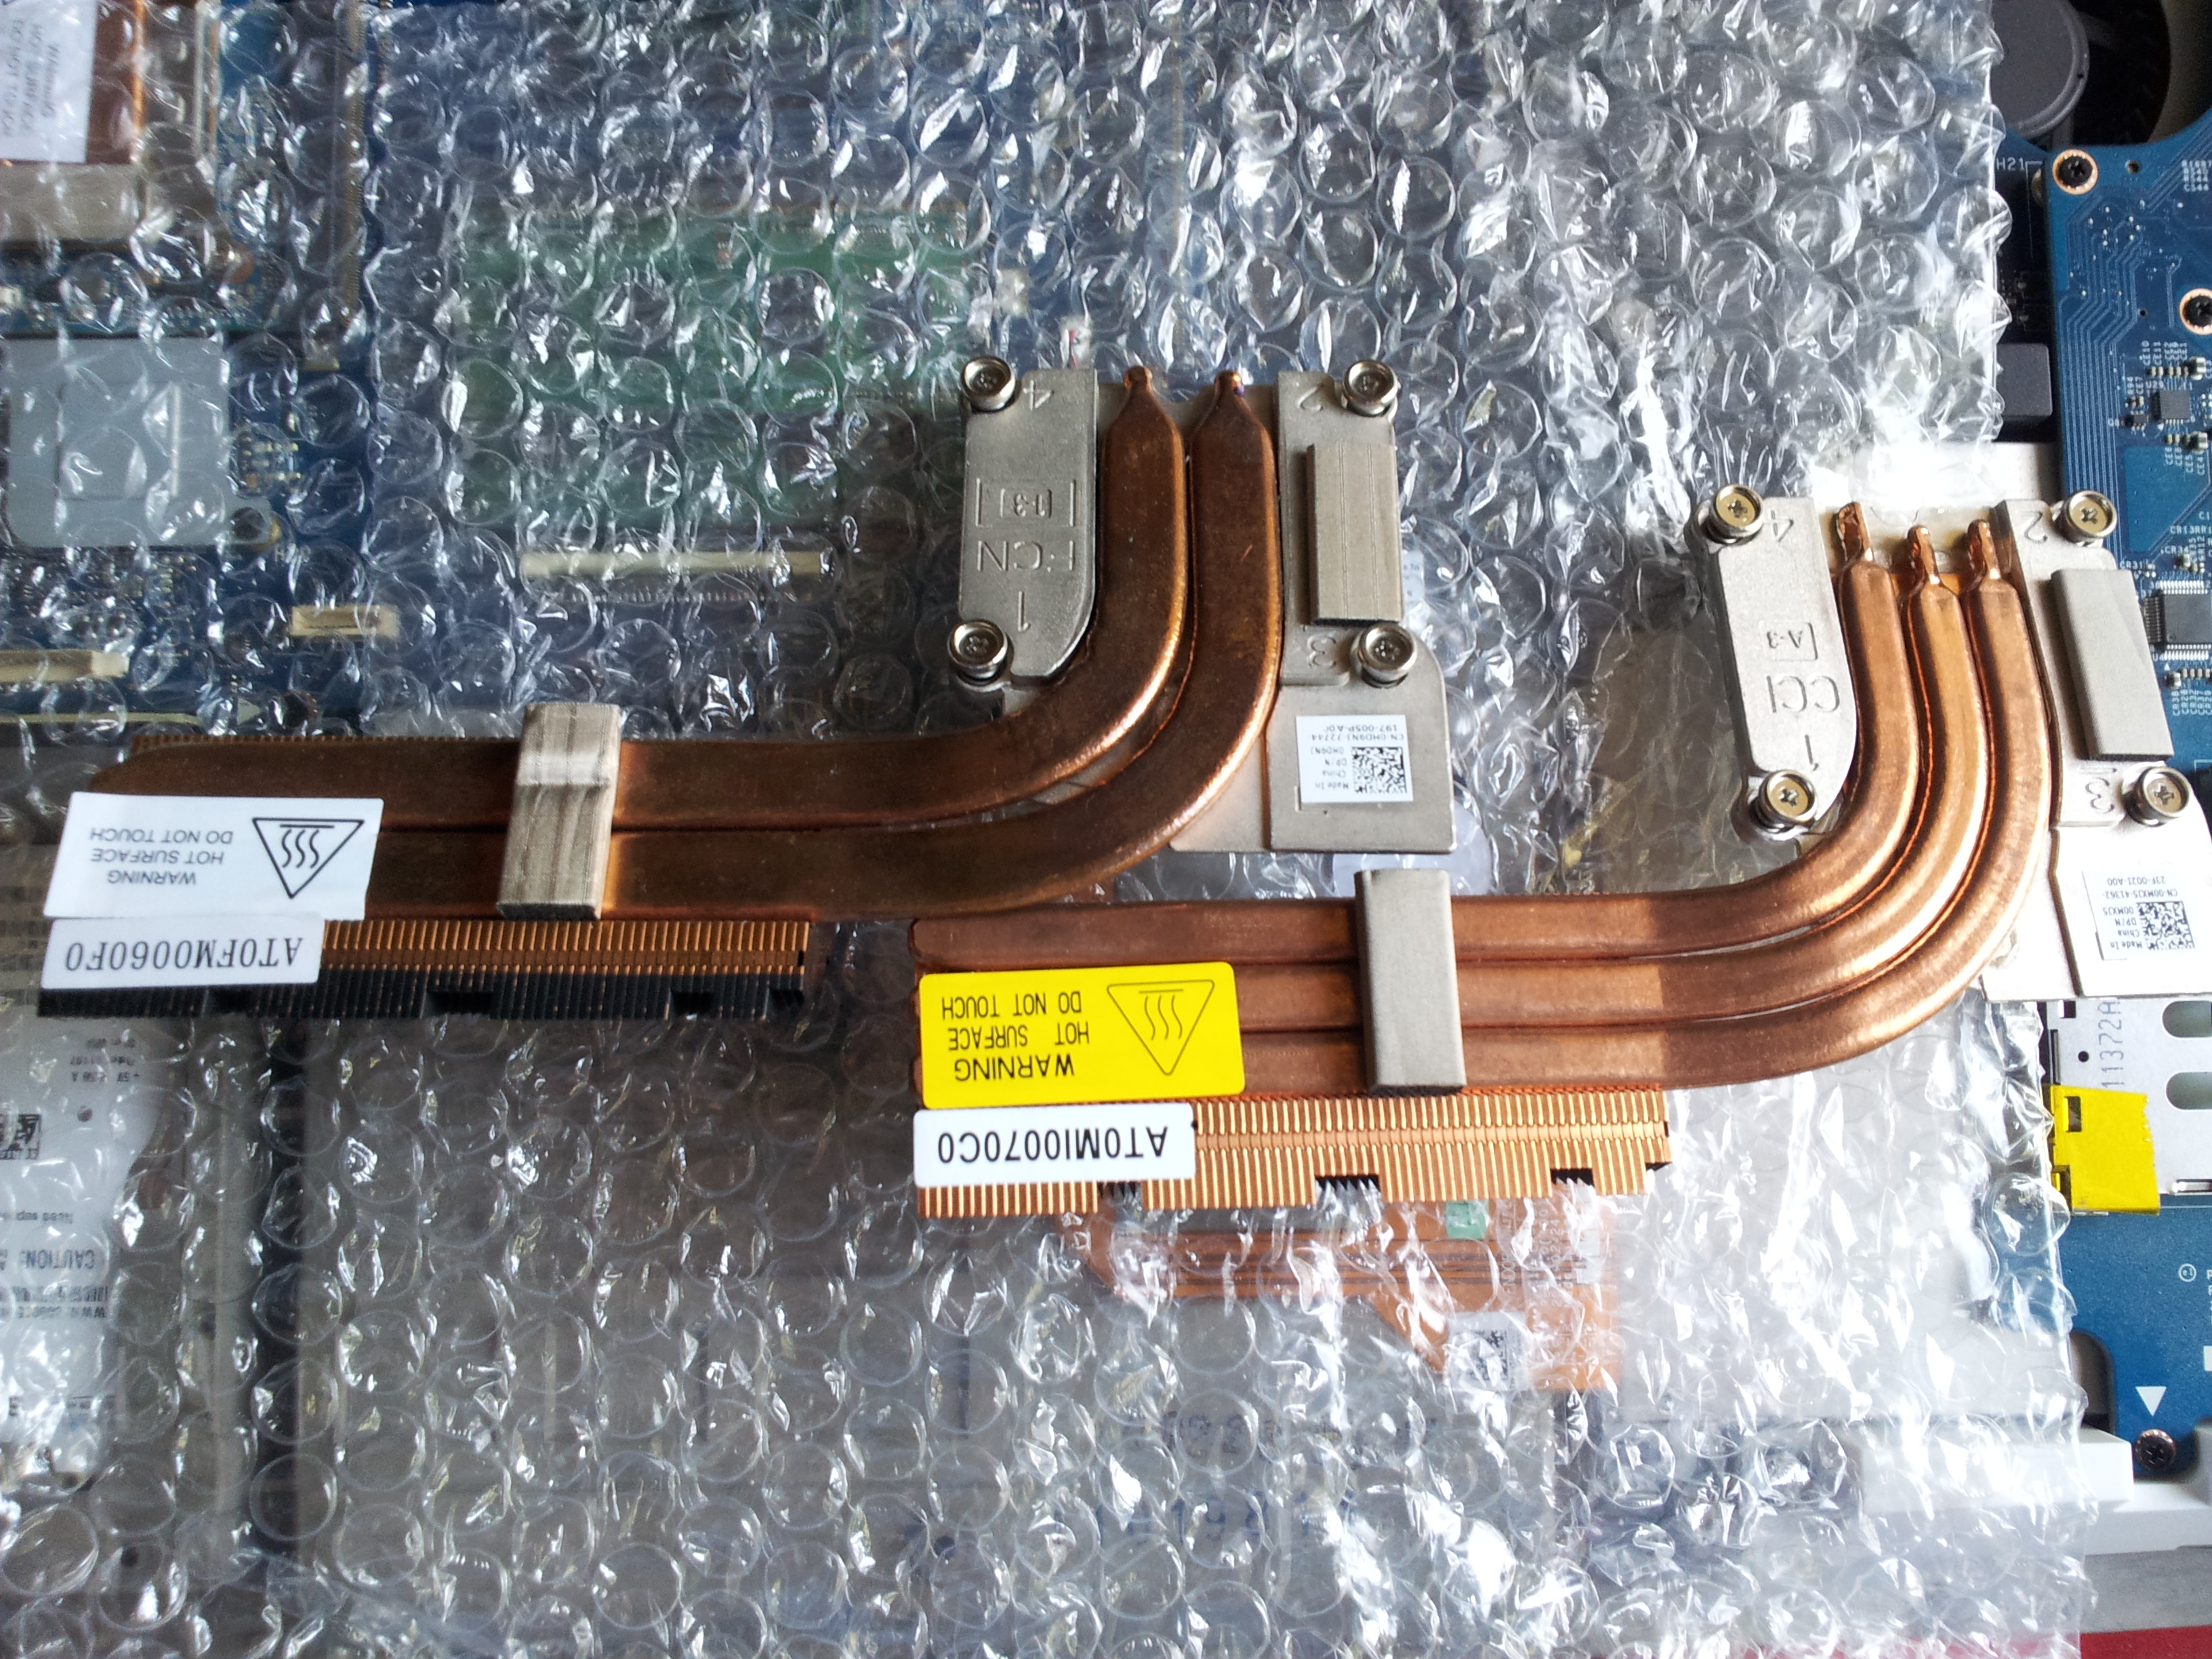
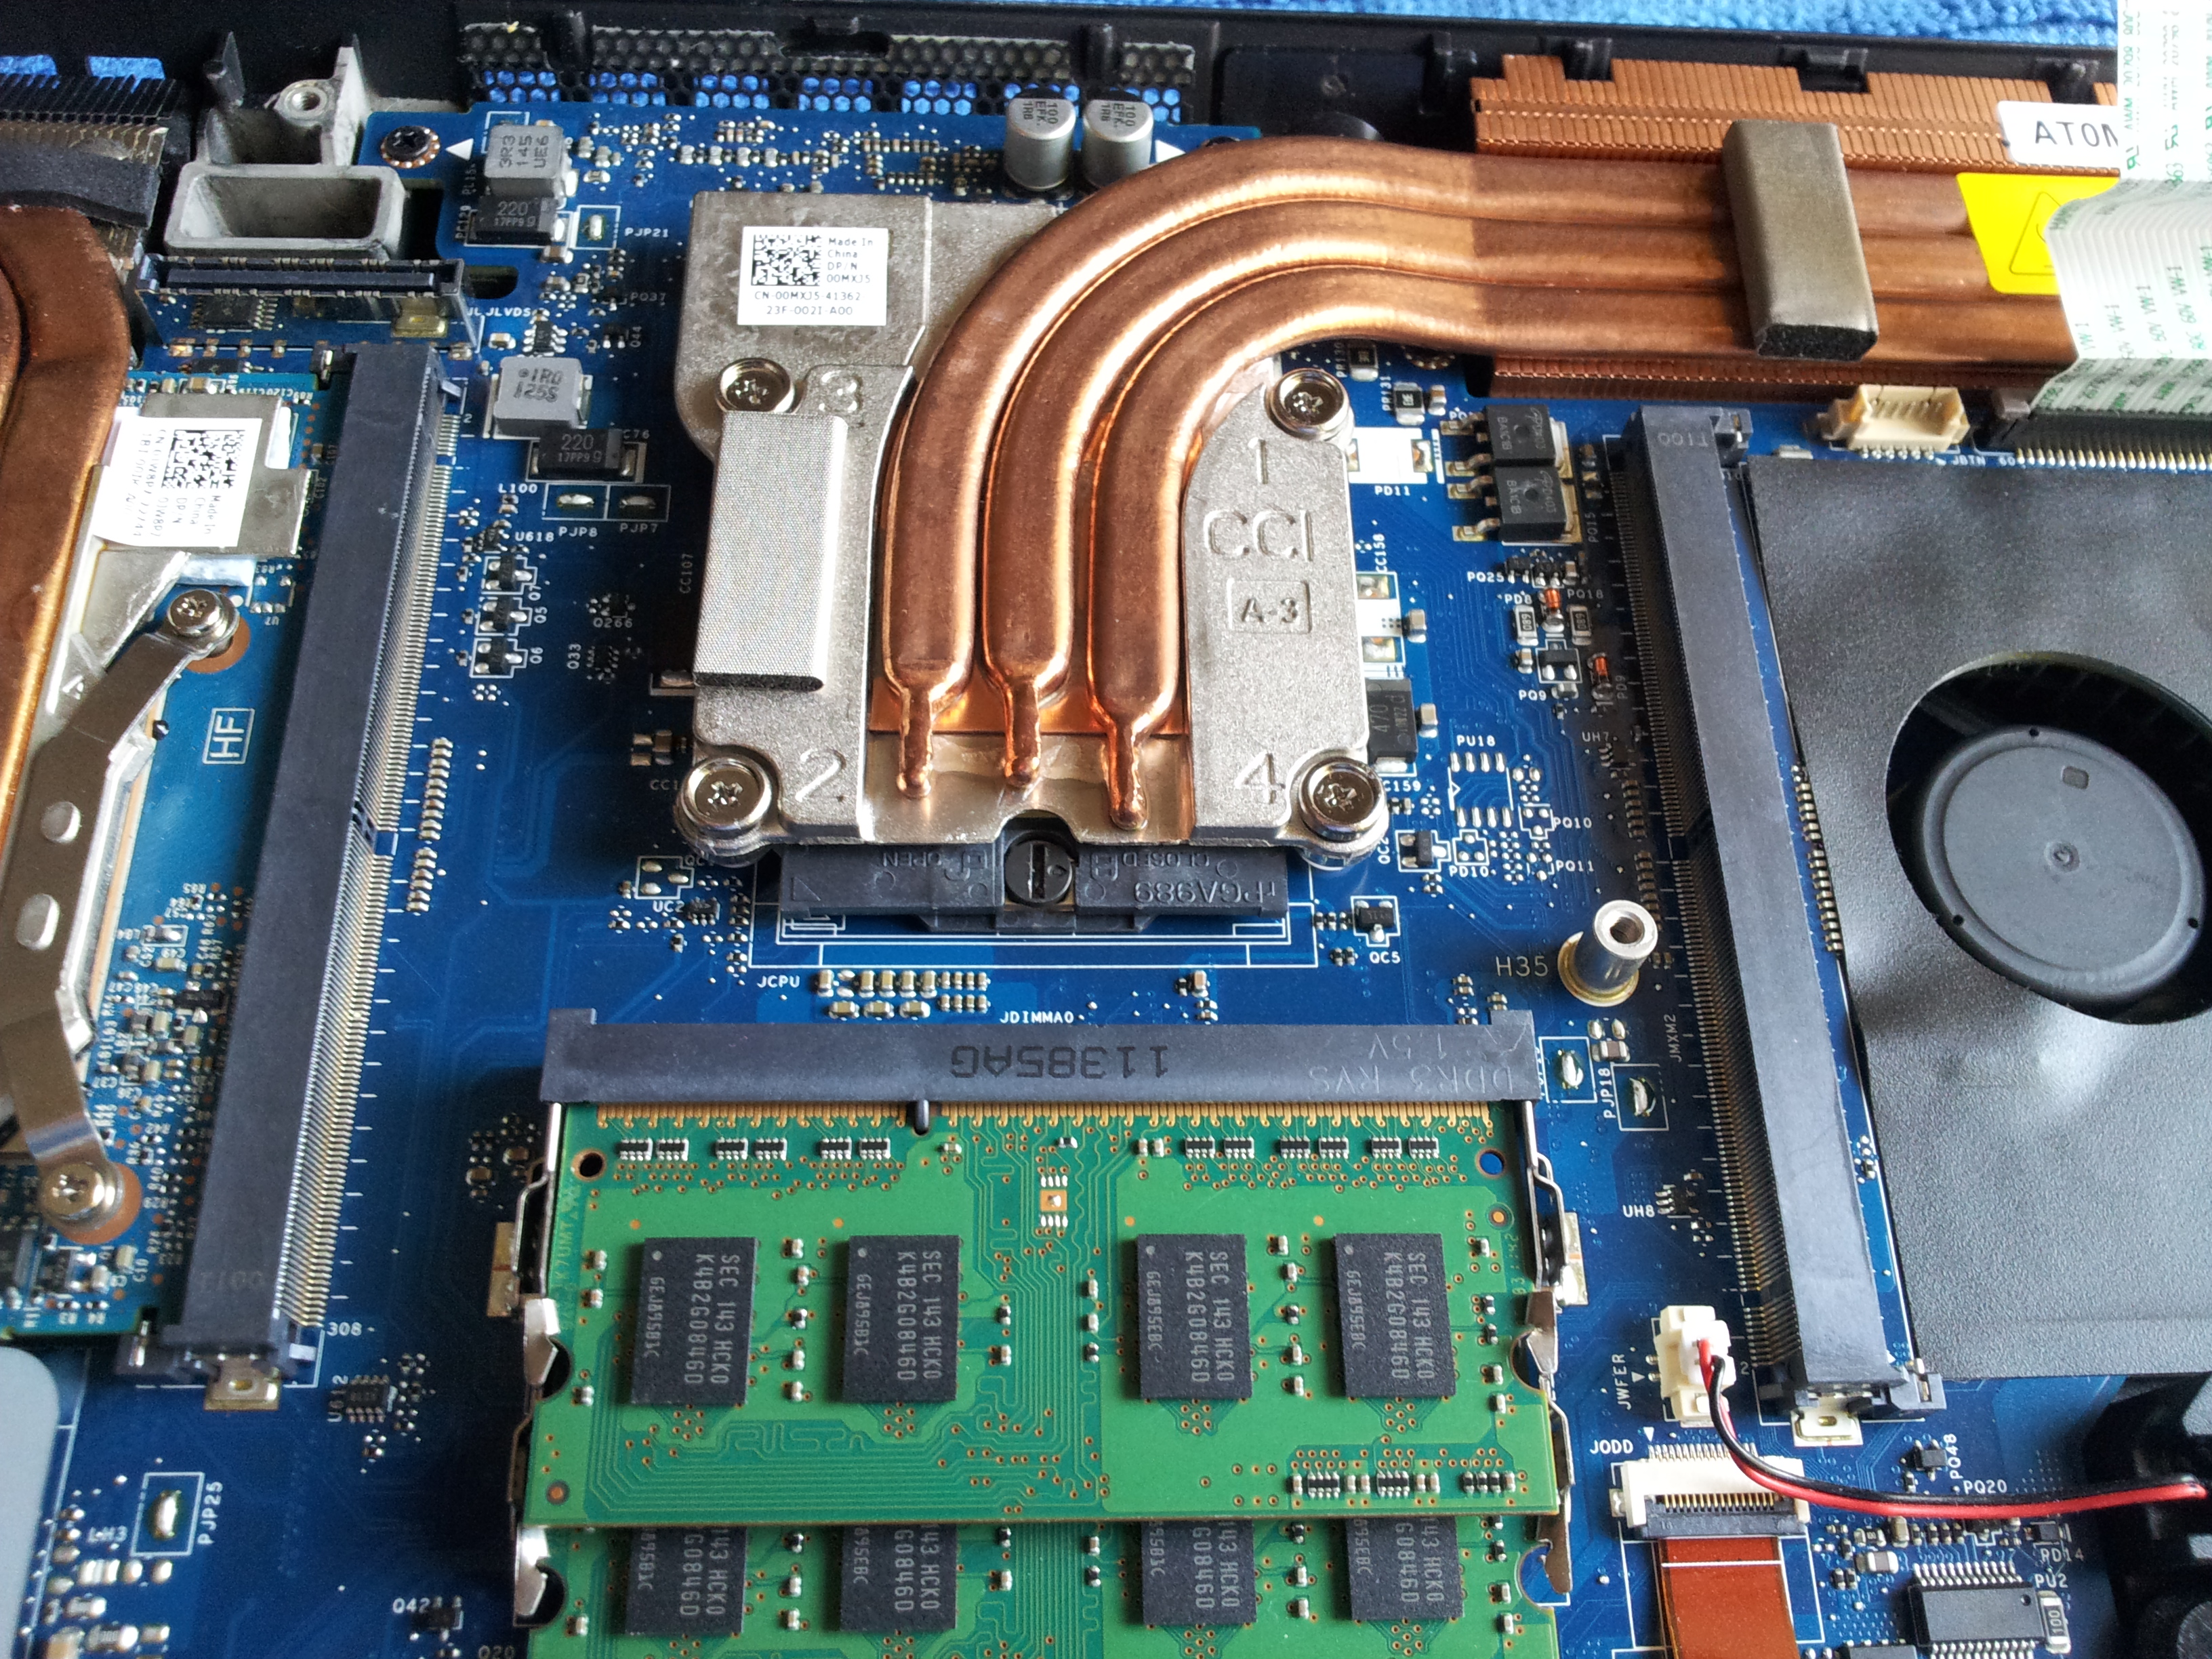
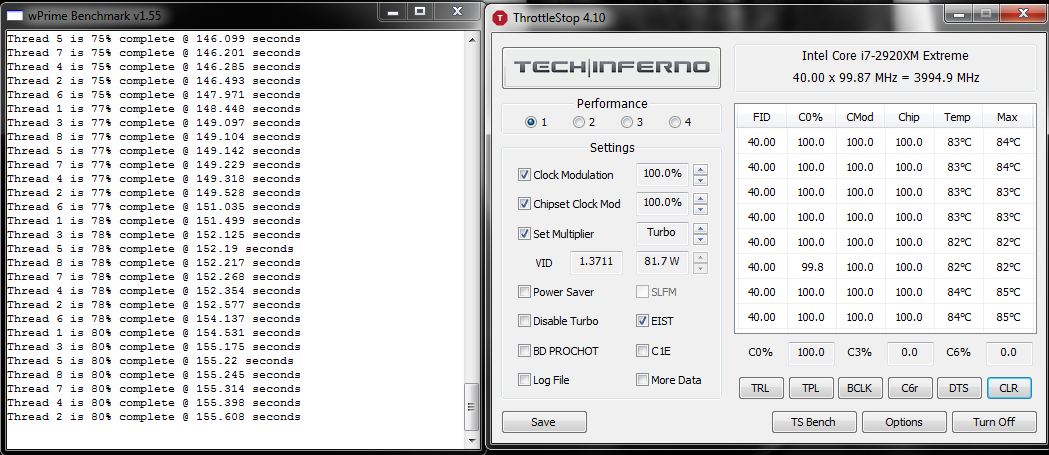
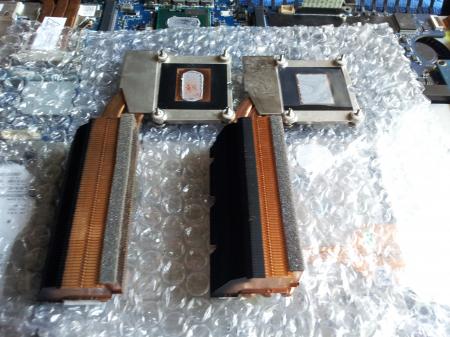
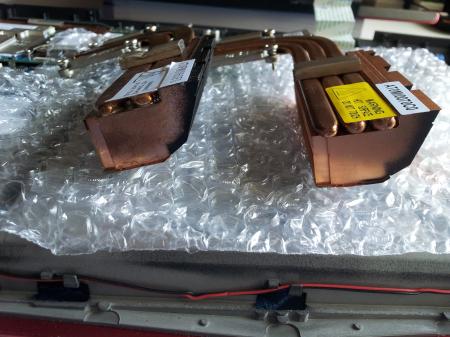
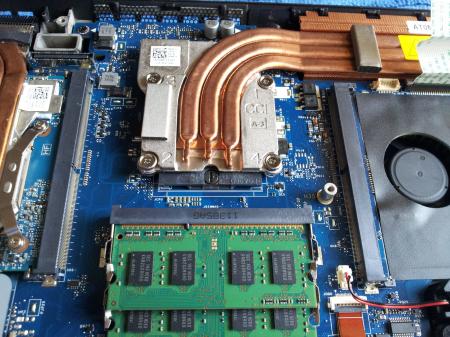
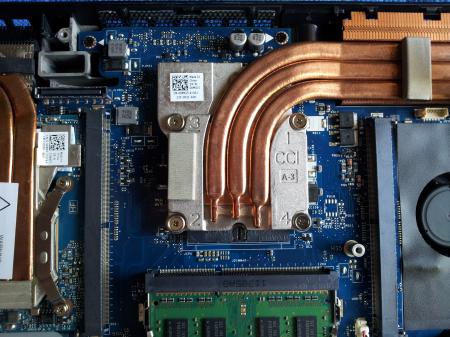
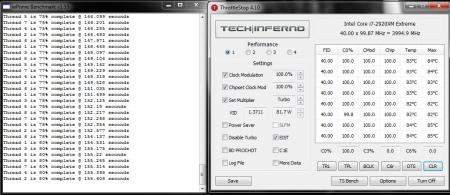
I ordered the M18x-R2 triple pipe CPU sink from Alienware last week and today it finally arrived. Since I had a new palm rest + control cover sitting around to install, I figured I'd get them all out of the way at the same time. Initially I was a bit skeptical about how it would perform vs the 2 pipe CPU sink I already had since the 2 pipe CPU sink has thicker pipes vs the 3 pipe one. However, after installing it (and sticking with the Dell thermal paste), I was simply blown away by the results! The 2 pipe CPU sink with FRESH MX-4 running at 4 GHz would often yield temperatures ranging from 92-98C and was simply not feasible for daily use in this hot Arizona weather so I had to drop my clocks to 3.8 GHz. However, with the 3 pipe CPU cooler, this has all changed and I think I can easily go above 4 GHz. The best part about this upgrade is that the CPU does not throttle to base multiplier after extended use, instead it stays at a constant 4 GHz so performance is markedly improved with sustained load times. Here's some installation photos + comparison shots of the 2 pipe vs 3 pipe: Performance and temperature at 4 GHz: M18x triple pipe cpu cooler part number: 0MXJ5, cost is around $32. Special Thanks: @Alienware-Pablo_R


 1 point
 -
The latest version of the AMD GPU driver suite is up, check the spoiler for the change log: Have fun testing, let us know how it performs! Download link for the mobile version: AMD Catalyst1 point
-
As you may or may not know, enabling IGP via FN+F7 does not work when a Clevo 680M is used in the M18x. However, when an unlocked bios is used, you can go into the advanced menu section, then video configuration and force IGP as the primary display (rather than PEG). Once the system reboots, it'll be in IGP mode BUT and I can't stress this enough, DO NOT press FN+F7 to switch back to discrete else your system will go into an endless loop. If that happens, you have to take out the 680M and blind flash the system with a recovery usb. So save yourself the trouble and don't press FN+F7. To re-enable the PEG, just turn it back on as primary in the bios and reboot. I've been playing with the PowerXpress settings but none seem to be able to work with regards to FN+F7, I figured dynamic would do it but apparently not. UPDATE: The PARTIAL fix is very simple Download the unlocked A05 M18x-R1 Bios Boot into the Bios, go to advanced-->video configuration and change the display from PEG to SG (switchable graphics). Keep PowerXpress as FIXED MUX. Reboot and now you will be able to use FN+F7 to switch between discrete and IGP. NOTE: You will again need to set SG in the bios after using FN+F7 one time since it resets back to PEG. Thanks to @johnksss for the SG tip.1 point
-
GPU and Memory voltage are independent, but you can't change the memory voltage unless you go with a hardware mod.1 point
-
ASIC quality is crazy I admit, I got 97.5% so not sure if that's really a good indication Use the V2, I think this is the most stable - I'm using the Saltius vbios which has a slight lower voltage.1 point
-
Hello naldor, I am new here and just ordered the clevo 680m for my m18xr1, I found drivers listed at laptopvideo2go that should/could work, they list from Dell. v302.77 Windows 7/Vista 64bit | Dell Mobile v302.77 Windows 7/Vista 64bit | Dell Mobile - 30x Series GeForce Driver release - LaptopVideo2Go Forums1 point
-
here you go , sorry it took soo long, I was asleep lol wait didn't realize the the last 4 digits changed brb nvcv.zip1 point
-
More stuff exclusive for T|I users, voltage mods: All the vbios listed here are attached at the end of the post. ******************************** Nvidia 800m series: Nvidia GTX 880m (8GB version only): 'OC edition' -> unlocked overclocking limits, voltage adjustable, power target adjustable, optimized performance at higher clocks Can be used for all current 880m (Clevo, MSI and Dell). Nvidia GTX 870m: 'OC edition' -> see above Nvidia GTX 860m (GK104 variant): 'OC edition' -> see above. Refer to the file name to know which version is suited for your system. NOTE: Only for the Kepler version of the 860m. Silly Nvidia started giving different GPUs the same name. ******************************** Nvidia 700m series: Nvidia GTX 780m: 'OC edition' -> unlocked overclocking limits, voltage adjustable, power target adjustable, optimized performance at higher clocks Can be used for all current 780m (Clevo, MSI and Dell). Nvidia GTX 770m: 'OC edition' -> see above Nvidia GTX 765m: 'OC edition' -> see above. Refer to the file name to know which version is suited for your system. ********************************* Nvidia 600m series: MSI GTX 680m (4GB version): 'OC edition' revised -> higher limits for software overclocking, stock default clocks ----------------------- Dell GTX 680m (2GB version) vbios: 'OCedition' revised -> higher limits for software overclocking, stock default clocks same with increased 3d voltage ('OV') -> refer to the file name ----------------------- Clevo GTX 680m (4GB version) vbios: 'OCedition' revised -> higher limits for software overclocking, stock default clocks. For P1xxHM based systems I recommend only using version 80.04.29.00.01 !! Some users reported issue with other vbios versions (stock or modified, doesn't matter). EM users make sure you're on the latest BIOS / EC same with increased 3d voltage ('OV') -> refer to the file name (Same warning as above applies to P1xxHM users). ----------------------- K3000m: (Nvidia) K3000m - 80.04.3A.00.07 'OCedition' -> higher software overclocking limit Should work on all K3000m, unless you got a board ID mismatch. (HP) K3000m - 80.04.33.00.2E - 'OC edition' - > same as above, but probably the better choice if you use a HP machine ----------------------- K5000m: (Dell) K5000m - 80.04.33.00.35 - 'OCedition' -> higher software overclocking limit, stock 3d clocks 758MHz It's Dell but should work on all K5000m, unless you get a board ID mismatch. ----------------------- GTX 670mx: MSI 670mx (1.5GB) - 80.04.5B.00.A5_'OCedition'_rev00 -> higher software overclocking limits, tweaked performance at high clocks. Same board as the Clevo card. Clevo 670mx (3GB) - 80.04.58.00.03_'OC edition'_rev02 -> same as above, plus voltage is adjustable per software. ---------------------- MSI GTX 675mx: MSI 675mx (2GB) - 80.04.58.00.14_'OCedition'_rev00 -> higher software overclocking limits, tweaked performance at high clocks. MSI 675mx (4GB) - 80.04.58.00.0E_'OCedition'_rev00 -> same as above, vbios for 4GB card (!) ----------------------- Clevo GTX 675mx: Clevo 675mx (4GB) - 80.04.58.00.05_'OCedition'_rev00 -> higher software overclocking limits, tweaked performance at high clocks. ----------------------- ASUS G75VW BIOS: - 660m at 1000MHz core / 1400MHz memory - additional BIOS menus http://forum.techinferno.com/asus-gaming-notebook-forum/2538-%5Bg75vw%5D-modified-bios-vbios-higher-overclocking.html ------- Donation link in case you want to buy me a beer Thanks and cheers! *** FILE DOWNLOAD LOCATION:1 point
-
Voltage mod for the Nvidia GT 555m of the M14x This is an Alienware M14x BIOS containing a modified VBIOS which has a slightly increased GPU core voltage at 3d clocks. The increased voltage will allow you to overclock the GPU core a bit more. So far people got it up to 850MHz, but each chip is different. The system will draw a bit more power and run warmer than before. If you want to see some results, -voltage-increase-nvidia-gt-555m-8.html#post12013"]P1900 and -voltage-increase-nvidia-gt-555m-8.html#post12027"]even more is possible in 3dMark11, thanks to this mod. Since the VBIOS of this system is part of the BIOS, modifying it isn't as easy as playing with a vbios of a dedicated GPU. I had find and extract the VBIOS file from the BIOS. Since I don't have a lot of practice with modifying Nvidia bios files I needed some help there, so thanks to Saltius from MVKtech for identifying the voltage strings and modifying the VBIOS. Also thanks @n3ocort3x for starting this project and @Ninjahunter for testing it, and thanks to everyone else involved! INSTRUCTIONS: Attached is the repacked BIOS which contains the modified VBIOS. Extract it and simply execute InsydeFlash.exe and it the flashing procedure will start. Remember to close all applications in the background before doing this and make sure your system doesn't accidentally shutdown during the process. After flashing, I highly recommend going to the BIOS, load the default settings, apply and reboot. This will cause the system to reinitialize the hardware and can save you from some issues in certain cases. As already mentioned, overvolting always comes with raised temperatures. Make sure your system can handle the additional amount of heat. Check the airflow, a dust-free system is important and reapplying the thermal paste can lower your temperature by several degrees.And keep in mind that this only changes the core voltage of the GPU, not the memory voltage. So this will only affect the maximum overclock on the core. Update: Repacked the unlocked BIOS A03 with the modified VBIOS, check the attachements. Update 2: Repacked BIOS A05 with the modded VBIOS. Update 3: Repacked the unlocked BIOS A05 with the modded VBIOS. Update 4: Repacked BIOS A07 & A08 with the modded VBIOS, attached below. Update 5: Unlocked A07 & A08 with modded VBIOS added. Update 6: New version of A08 uploaded, volt mod now works for GF116 as well. Users with the newer 555m revision (GF116 - check GPU-Z) seem to have issues with the original mod. So please use the updated A08 version attached at the end of the post ("GF116 fix"). It will also work for GF106 systems. I will upload a fix for the unlocked version of A08 as well, as soon as I get around to do so. UPDATE: Two new versions of A08 added which bring back the SATA behavior of A05, so GF116 users can enjoy more SATA speed as well. Or for all GF106 users which want to use the latest BIOS but keep the SATA behavior from A05. Standard and unlocked versions added. *************** If you like these BIOS releases, please consider a donation to Tech|Inferno. *************** _____________________________ #As always with such mods: You are responsible for all the changes at your system and do this at your own risk _____________________________ M14x A01 voltmod flash package.zip M14x unlocked A03 with GT555m volt mod.zip M14x A05 incl VBIOS volt mod.zip M14x unlocked A05 incl VBIOS volt mod.zip M14x [unlocked] A08 with voltmod.zip M14x A07 - voltmod.zip M14x A08 - voltmod.zip M14x A08 - voltmod - GF116 fix.zip M14xR1_A08_voltmod_incl_GF116_support_&_SATA_fix.zip M14xR1_A08_[unlocked]_voltmod_incl_GF116_&_SATA_fix.zip1 point