Leaderboard
Popular Content
Showing content with the highest reputation on 03/23/11 in all areas
-
I've decided that it's time to open my beast after i've noticed that one of my 4870's memory climbed above 93 degrees while playing Mass Effect. The idea behind photographing the process is to allow a better perspective than what the service manual gives. What was done? Cleaning the fins on both video cards heatsinks with compressed air Replacing thermal paste on both GPUs and the CPU to Shin Etsu G751 Replacing memory thermal pads on both GPUs from crappy stock ones to those Modding the retention clip as described here. All Credit goes to Ashtefere please rep him for that, he deserves it! Tools used small Phillips screwdriver - it matches all the screws inside your Alienware can of compressed air a small plastic prying tool that Dell once sent me, i used it to pry open the center control cover. Materials used Shin Etsu G751 thermal paste - i bought mine on eBay, but there are a lot of places that sell it. The reason i used it is because according to a lot of reviews this is one of the best performing pastes, only problem is that it's a pain to apply (there are guides for that too ) Thermal pads Step by step (More or less) Ok, here we go. Try to remember the sizes of the screws you are pulling out, and store them somewhere so they don't get lost (i use a vodka shot glass ) Removing the Center control cover i started with placing a towel on my working area to make sure i do not scratch the laptop while i work on it and removed the charger and battery. Unscrew two screws as shown to remove the compartment door. Unscrew the two screws located on both sides of CPU Fan, they are marked as M2.5XL17. Now turn the laptop around and open the screen as far as possible. using the pry tool, or a flat screwdriver, gently pry the control cover up. I found that in my case it's best to start from the right side. Be careful as there's a cable you need to disconnect before you pull it out. EDIT: For those of you who struggle a lot with taking the cover out, make sure you read this mod by Aikimox. Keyboard Unscrew the 5 little screws holding the keyboard and then gently pull it up. lift the keyboard up,disconnect those two cables and remove the it. Video cards. Since both video cards are going to get the same treatment, i'll describe just the master. We are going to pull it out, remove the heatsink, clean it and perform Ashtefere's retention clip mod Keep in mind that it will void your warranty! Remove the bracket. unscrew both screws that hold the video card. Disconnect the CF cable from the card, i used my nails to do it. Note that the location of the CF connector on the second card is under the heatsink and you'll need to remove the heatsink before disconnecting the CF cable there. Now pull the card up from it's outer side to remove it and expose the fan. blow compressed air to clean the heatsink and the fan. Unscrew the 4 screws that hold the heatsink down, following the numeration next to those screws. Now, after unscrewing those screws, the heatsink will probably be still attached to the video card pretty hard. Pry it up gently using the pry tool but make sure to do so where there's no electronic stuff under the tool. This is what you'll see. Next, clean the old thermal paste using alcohol pads, and remove the old thermal pads from the memory. Reapply thermal paste on the video card. I replaced the old thermal pads with with new ones, Ashtefere suggests applying a thick thermal paste on the memory (Shin Etsu would work since it's very thick).. Next, Ash's retention clip mod. I will not repeat him, he explained it beautifully in his guide. This is just to demonstrate how the screw looks like with the washer on it. Follow his guide to reassemble the heatsink on top of the card and return the card to it's place. (Don't forget the crossfire cable). Repeat with the slave card. CPU To access the heatsink of the CPU we will be removing the palmrest and the magnesium cover. With both video cards back in place and screwed in, turn the laptop, and unscrew three screws inside the battery compartment that are marked M2.5XL5 to release the palmrest. With the pry tool pry the palmrest down and then lift it up to remove the little cable that connects the touchpad. Ok, here i forgot to take a number of pictures so I will explain everything on this one. Basically what we're going to do is remove the magnesium cover. before we do that we will need to: disconnect LCD/Wifi/BT cables. They are marked with yellow. Next we will need to open the 10 screws that hold the cover down, those screws are marked with red and with a P letter on the cover itself. Disconnect the Crossfire cable from the master video card so you can pull it out. Finally, after the cover is removed, we'll unscrew those four screws that hold the heatsink down. They are marked with blue Clean the CPU and the heatsink from the old thermal paste with alcohol pads. Next i reapplied Shin Etsu G751 thermal paste on the CPU and replaced the thermal pad on the heatsink with a new one. That's it. Next, reversing the steps i reassembled the whole thing. I had a hard time putting the LCD cable back in place, took me maybe 3 tries before i got it right. Results Those are readings before and after, both after about 30 minutes of playing mass effect 2 so to me this comparison looks valid. Thanks to Ashtefere's mod,replacement of thermal paste and pads to better ones and cleaning the dust I can see about 5-7 degrees temperature drop on the CPU, and i have reason to believe that it'll keep dropping as Shin Etsu has about 3 days settle in time 11-19 degrees GPU temperature drop (!!!) 11-18 degrees GPU DISP/IO temps drop 19-24 degrees GPU /IO temps drop 15-20 degrees Shader temps drop 5 Minutes Furmark run No game warms the GPUs as furmark does, so after running it for 5 minutes and seeing the temperatures stabilize where they did i am very happy overall. EDIT: Additional Resources M17x Service Manual1 point
-
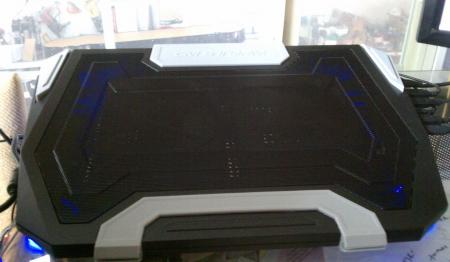
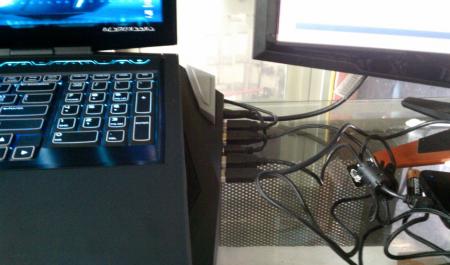
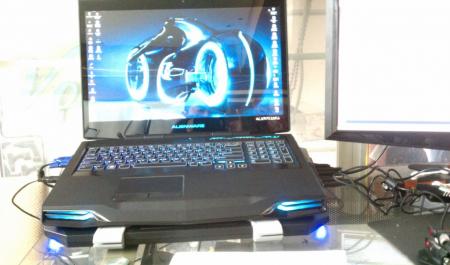
been using the cooler master sf-19 at work. i would highly recommend this one, the fans are nice and strong. it has 4 addition usb ports, two of them are usb 3.0 which is nice. using it more as a dock then a cooler. it has some lighting effect that is real nice that goes along with alienware laptop very well. at home i just use a logitech lapdesk n500, no fans but the padding makes it very nice to use on your lap, and gaves a nice angle for typing on your desk.1 point
-
Frustrated with my temps and knowing Dell didn't do a thorough job I decided to do a cleaning myself. It went great thanks to your guide. I didn't have paste to re-paste with so I did everything except repasting the GPU's, CPU and replacing the thermal pads. There was plenty of dust to get rid of since my system will be pushing a year old as of July this year. I decided to do the retention mod too. I will redo this when I re-paste everything with shin-etsu and add new thermal pads, I simply can't afford to get these for awhile. I placed cardboard insulating washers made for seating a mother-board to a tower's chassis without grounding out. I cut them straight in from outer edge straight in to the inner circle of the washer so when I was done I had 6 C shaped washers. http://forum.techinferno.com/members/brian-k--albums3-200.htm I did this so I can slide the washers in between the gpu's tension screws top and the retention bracket arm to create more tension on the gpu chip without the need to remove anything at all from the gpu cards since I wasn't repasting and had no need to disrupt the seating of the heatsink and thermal paste. I didn't remove the retention clips or loosen any screws. I tightened the screws down to a tightness that felt safe first to be sure they were tight. The screws labeled on the retention braket arms that were marked 1 were extremely tight and could not be improved. The screws labeled 2,3 and 4 were loose enough to screw them in a small fraction on each and this was on both cards. I noticed by the description in Michael's guide and Ashtefere's explained the need when reassembling the gpu heatsink after a repasting and thermal pad replacement, to retighten these screws in the order of screw one first then two, three and finally 4. What I noticed is that the tension of these screws as labeled is less as the labeled number goes up. So the screw and retention arm one has the most tension on the gpu chip and the second is not as tight as the first with the subsequent screw three having even less tension on the gpu chip and screw four has the least tension on the gpu chip from factory shipped condition. The gpu retention arm and screws labeled 1 are the tightest and need no added tension. Screw 2, 3 and 4 each have subsequently less tension. I placed my fingernail under the edge of screw 2 and wedged carefully the washer in place between top of the retention arms screw and the arm pressing down on the gpu chip. When I did this I was very careful because you can hear the stress from this tightening as you do this, which I determined when I pushed my fingernail between there so I know that they definately need to be tighter but also if your not careful you'll hear as StamatisX calls it... the crack! To remind everyone the screw labeled 1 was too tight for any improvement because I couldn't tighten screw any more sfely nor get my finger nail under the head of the screw which showed me compared to the others this one had no slack and seems sufficiently pressing tightly to the gpu chip. I proceeded by pushing my nail under outer edge of the screw head and the retention arm. You can find a small enough tool or flat head screw driver to hold the arm in place, push the washer into the space created by finger nail or thin prying tool like a wedge. The washers will hold enough tension on the 3 of the 4 heat sink retention bracket arms and the C shape we cut makes it easier to slip on without loosening or removing these screws like the clips that are used in the system. Proceed after adding the washer to screw labeled 2, to do this to 3 next and then 4 last. Just to be sure all this stays true for you before adding tension to the same ones I did first by trying to lightly pry under the screws head and the retention arm to see if it gives and allows you to put space in between them while not forcing anything so you don't crack the gpu chip. So with both this guide and Ashtefere's mod guide, it wasn't all too hard but before I started it seemed very delicate. I also added tape to the areas that seemed to me and were described and pictured in detail to be letting hot air back into the system on the heat sinks. So for those looking to do some cleaning you can do the retention mod, clean the system and seal the heatsinks leaking heat ducts with the tape mod even if you don't plan on repasting yet. Plus if you are removing both GPU's in a crossfire setup, the second card you need to remove has the crossfire cable that you detach from the first card, leave the cable attached to the second card, unscrew and remove both cards without removing the crossfire cable because you don't need to in this case and it's not accessible for removal without completely removing the heat sink from second Gpu card anyway. I can't say that without paste you wl see a huge improvement in temperatures but I can say it must be an improvement over standard configuration. Thanks for the great guide Michael and Ashtefere!1 point
-
AH-MAZING! What a steal.. ipad 26 can suck it.1 point
-
1 point
-
Wow what a bargain. That tablet is so fast it created a wormhole through time from the future to the present just so we could buy it for $299.99.1 point
-
Fujipoly Premium System Builder Thermal Pad - 1/4 Sheet - 150 x 100 x 0.5 - Thermal Conductivity 6.0 W/mK - FrozenCPU.com Fujipoly Premium System Builder Thermal Pad - 1/4 Sheet - 150 x 100 x 1.0 - Thermal Conductivity 6.0 W/mK - FrozenCPU.com Arctic Cooling MX-4 Super High Performance Non-Conductive Thermal Compound (4g) - FrozenCPU.com Tuniq TX-4 High Performance Thermal Grease - 3.0g - FrozenCPU.com Shin-Etsu X23-7783D Silicone Thermal Compound - 1g - FrozenCPU.com1 point


