Search the Community
Showing results for tags 'laptop'.
-
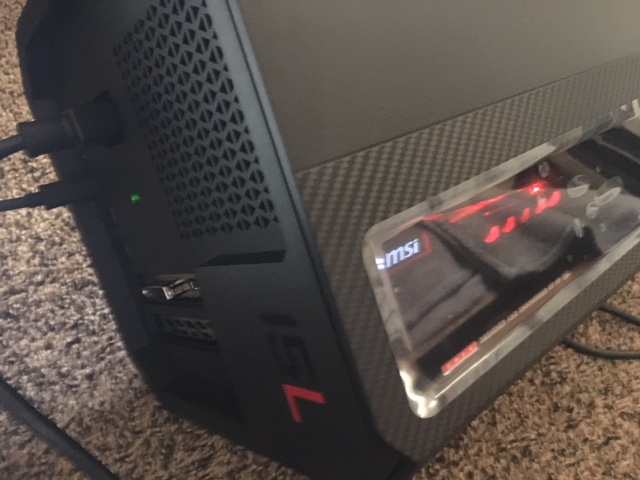
Hello everyone, I currently use my laptop for school/work and I know I could have gotten a better one but I didn't pay for it was given to me from my job. I recently purchased an HP omen accelerator and put a MSI 1050 ti in it. Knowing this set up wasn't going to work. My laptop is a i7 HP ENVY x360 Convertible-15m-bp0xx, it doesn't have any thunderbolt ports, it has a USB Type-C port with HP Sleep and Charge. I provided the picture, look at my ignorance. Please help. Is there another way around this, I feel like intel could have came up with a substitute by now.
-
Hello TechInferno Fans! I'm a newbie to the site, but not a newbie to computers. I've been working on them and with them since 1996. I have always been a bit confused with RAM memory specifically the following aspect. I'm building a Clevo P870TM (a.k.a Sager NP9877, Eurocom SkyX9C) laptop with an i9-9900k Intel CPU. The CPU Memory specs are as follow: Max Memory Size (dependent on memory type) 128 GB Memory Types DDR4-2666 Max # of Memory Channels 2 Max Memory Bandwidth 41.6 GB/s ECC Memory Supported No Laptop Service manual states the following: Four 260 Pin SO-DIMM Sockets Supporting DDR4 2666MHz Memory (The real memory operating frequency depends on the FSB of the processor.) Memory Expandable from 8GB (minimum) up to 128GB (maximum) with i9 CPUs. Compatible with 4GB, 8GB, 16GB & 32GB Modules. Supports XMP 2666/3000 MHz. XMP is processor dependent and works with four DIMMs in dual channel or two DIMMs in single channel. The computer has four memory sockets for 260 pin Small Outline Dual In-line (SO-DIMM) DDR 4 type memory modules. The total memory size is automatically detected by the POST routine once you turn on your computer. Note that four SO-DIMMs are only supported by Quad-Core (and greater) CPUs; Dual-Core CPUs support two SO-DIMMs maximum. Two primary memory sockets are located under component bay cover (the bottom case cover), and two secondary memory sockets are located under the keyboard (not user upgradable). If you are installing only two RAM modules then they should be installed in the primary memory sockets under the component bay cover. Note that the RAM located under the keyboard is not user upgradable. I have no idea why the manual states "not user upgradable." The only thing I can think of is if the memory modules under the keyboard were soldered in place. Then they are not user upgradable. The CPU I have is an eight (8) core CPU, which means it supports four (4) SO-DIMMS in Dual Channel or two (2) SO-DIMMS in Single Channel. 16GB mem specs: Capacity: 16GB Memory Type: DDR4 ECC: Non-ECC DIMM Type: SODIMM Rank: 2Rx8 Speed: 2666 Voltage: 1.2V Density: 8G Depth: 2G Pins: 260 pin Width Height: x64/LP Width: x64 Die Generation: 4th Package Type: Flipchip Die Package: SDP Organization: x8 CL: 19 TRCD: 19 TRP: 19 32GB mem specs: Capacity: 32GB Memory Type: DDR4 ECC: Non-ECC DIMM Type: SODIMM Rank: 2Rx8 Speed: 2666 Voltage: 1.2V Density: 16G Depth: 4G Pins: 260 pin Width Height: x64/LP Width: x64 Die Generation: 2nd Package Type: Flipchip Die Package: SDP Organization: x8 CL: 19 TRCD: 19 TRP: 19 The obvious differences between the two type of memory are the specs on density, depth and die generation. I would like to buy 2x32GB memory sticks for $168 as opposed to 4x16GB for $192 and spend the difference on sea salt caramel ice cream (seriously). What are the PROS and CONS of 64GB in the Primary Single Channel (2 memory sticks) as opposed to 64GB in Dual Channel configuration (4 memory sticks). I really appreciate your help. PS (future questions should be WAY shorter than this.)
-
Hello, guys! The situation is the following. I am a 3D artist and I work for a Ukrainian company. After the events in our country, most employees moved to safer cities, while the rest have to work remotely. I purchased a non-working Clevo p750dm-g from my hands. The reason for the inoperability is that the owner tried to flash the BIOS with coffee lake support, but something went wrong and he stopped showing the picture (black screen), but the laptop itself starts up, the fans spin, the keyboard lights up, the SSD heats up (too much). I tried flashing the bios using a USB programmer, but that didn't work. I would be very grateful if someone could help revive this car. It is imperative to return to the functional system at work.
-
Hi, I've recently got my hands on an M17x R4 Alienware Laptop from 2013 which I love. I've replaced the screen, keyboard, RAM, and hard drive to make it into a fully modern laptop. However, I'm currently waiting on a replacement for the 680m GPU with a 980m from ebay. My question for you all is, do I need to do anything with the BIOS to make this 980m work? Is there a way to prevent the laptop from using Intel HD Graphics with Optimus? I think the Intel HD Graphics on this laptop are currently broken as I see static-looking dots flash on the screen. (See image below for example). My theory is that because Intel HD Graphics with Optimus is still in-use while in-game, the dots are being caused by it. Thanks for any help in advance. - M
-
So I just received a 980m in the post and after installing it I was greeted by multiple system crashes on my Alienware m17xr4 and was unable to install new drivers. Is there a step in the intallation process I missed? A bios setting I was supposed to change? The laptop is already set to UEFI mode in preperation for this and upon putting the old 680m back in the system it now works again. I have heard that I need to change INI files to install drivers but I expected it to at least function without large bugs such as these. Do you think that this GPU is faulty or have I done something wrong? Thanks for any help you can give. - M
-
I am very aware of the healthy skepticism of most if not all of you. I therefore kindly ask of you not to spew out the fact that its impossible to build a laptop at me but instead attempt to help me to make this somewhat possible for the next person interested in the idea. I already have: somewhere to buy a screen: https://www.laptopscreen.com/English/ somewhere to buy a motherboard, CPU, GPU, RAM, storage and other things although I would be very interested should you recommend other places where I can get these I will build the cooling system myself I need: somewhere to buy a laptop shell (I am aware of how difficult it is to find one and am therefore very flexible on all other components) somewhere to buy a power supply Thank you very much for helping me and pushing the possibility of building a custom laptop ever so slightly more realistic Toloni
-
I recently got a 2010 27" iMac for free! Some further research concluded that the MXM slot in the iMac has been proven to work with a GTX 880m, including Mac OS! I used to play with a 7970 ghz edition, but ended up selling it for some more projects. I've been lagging along on a 5870 2gb and thought that with my switch to the free iMac, I might as well update my gpu. Heres the problem I was faced with: the 880m is a little underpowered on stock clocks. So, after even more research I discovered that the 980m was around the same as a 7970 performance wise. I ended up grabbing a deal on an 880m for only 160$, but I did want to share my findings with you guys. *WARNING* ONLY 2009, 2010, AND 2011 IMACS HAVE THE MXM SLOT!!!! IF YOU ARE USING A 2012+ YOU CANNOT UPGRADE YOUR GPU So the 980m used to work all the way up to mac os sierra. It's now high sierra, but the fix is still pretty simple. What you will need: -thermal pads -copper ram heatsinks/ one of the specialized backplates that cools MXM memory modules. -Your graphics card -YOU NEED an imac 2011 gpu heatsink -GOOD thermal paste (Preferably liquid metal if youre comfortable with that) -IMAC 2010 power supply *As far as i know the power supply's between these 3 imac's are interchangeable, but the largest one is the 2010 variant, at the 310 watts, and the others are much lower. *Just from tdp we know that the 980m is 115w and the cpu's on these guys are most commonly 95w, thats allready 200 with out hdd, all the other components etc. -nvidia web drivers READ THE FOLLOWING DIRECTIONS CAREFULLY Step 1: You must have all your mac os/ windows partitions set up with bootcamp, and MAKE SURE it boots into Mac OS and wont boot into anything else when you start it up AFTER the upgrade. *Remember nvidia web drivers must be installed before you upgrae Step 2: dremel/ cnc/ remove a couple parts of the VRM section of the imac 2011 heatsink, (You want your card IN HAND so you are able to make sure it fits correctly. step 3: Assemble the gpu assembly step 4: Re assemble the imac, with the new gpu. *This is where is gets slightly harder* step 5: You want to reset your iMac's System Management Controller, otherwise known as SMC. *DO NOT FLASH NVRAM OR PRAM, or you will have to redo the whole process, after you put your old gpu in to fix all the bootcamp problems and such *You can do this by plugging the power cord into your imac, waiting 30 seconds and NOT turning it on, unplug your power cord, wait 30 seconds, then plug it back in. Wait another 30 seconds, then turn it on. (But not before reading the following to be prepared:) step 6: You need to force Mac OS to work with an unsupported card. this is a pretty simple process if you are comfortable with terminal. * I couldn't have found this without this page: https://www.ifixit.com/Story/18646/Successful_iMac_Upgrade_to_GTX_880M " To make a non-apple provided Nvidia graphics card work in macOS Sierra you need to do the following… Start the computer in safe mode by holding shift. Get your BoardID by running this command in terminal echo "<result>$(ioreg -rd1 -c IOPlatformExpertDevice | awk -F'["|"]' '/board-id/{print $4}')</result>" Open the AppleGraphicsControl Kext using this command sudo nano /System/Library/Extensions/AppleGraphicsControl.kext/Contents/PlugIns/AppleGraphicsDevicePolicy.kext/Contents/Info.plist Use the arrow keys to go down until you see <key>ConfigMap</key> followed by a bunch of keys and strings. LOOK FOR YOUR BOARD ID… IF IT IS LISTED: Change the string to <string>none</string> IF IT IS NOT LISTED: Add it in the same format as the ones listed. Save the file by pressing Ctrl+O, then enter. Exit by pressing Ctrl+X Rebuild the kernel cache using the following two commands: sudo kextcache -system-prelinked-kernel AND sudo kextcache -system-caches Have Fun! Theoretically this should work, and I would love for somebody to try as I got an 880m instead. Just keep in mind this is all from research and has not been proven to work. Be sure to research this subject before you try it.
-
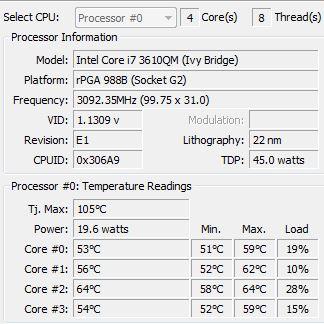
I have tried the following and my laptop still shuts off randomly when playing games: 1. I have already cleaned the fans and parts from dust 2. I have already put brand new Thermal Grease (I followed the recommend amount found on this picture) THINGS I NOTICED: 1. In Safe mode, my laptop does not shutdown randomly 2. My BIOS VERSION : 04.06.05 3. My Core Temps (After Long Use) 4. Hot Air blowing out of the back exhaust[on the right side] after few minutes of start up (idle) SHOULD I UPDATE THE BIOS to this: http://forum.techinferno.com/asus-gaming-notebook-forum/2538-%5Bg75vw%5D-modified-bios-vbios-higher-overclocking.html WILL THIS FIX THE PROBLEM?
- 7 replies
-
- asus
- asus g75vw
-
(and 3 more)
Tagged with:
-
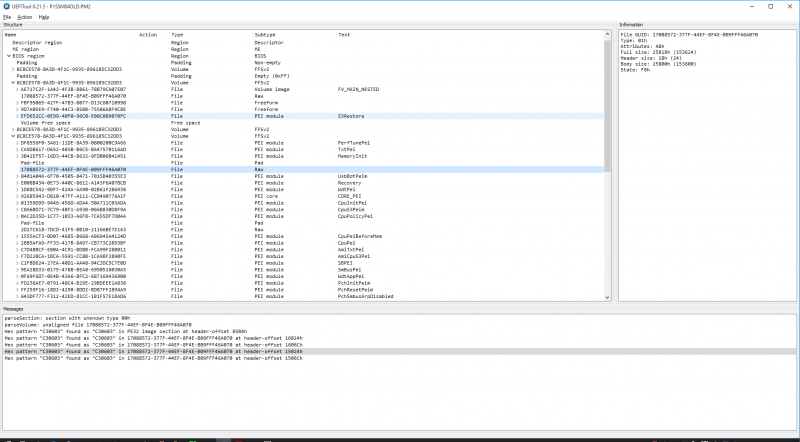
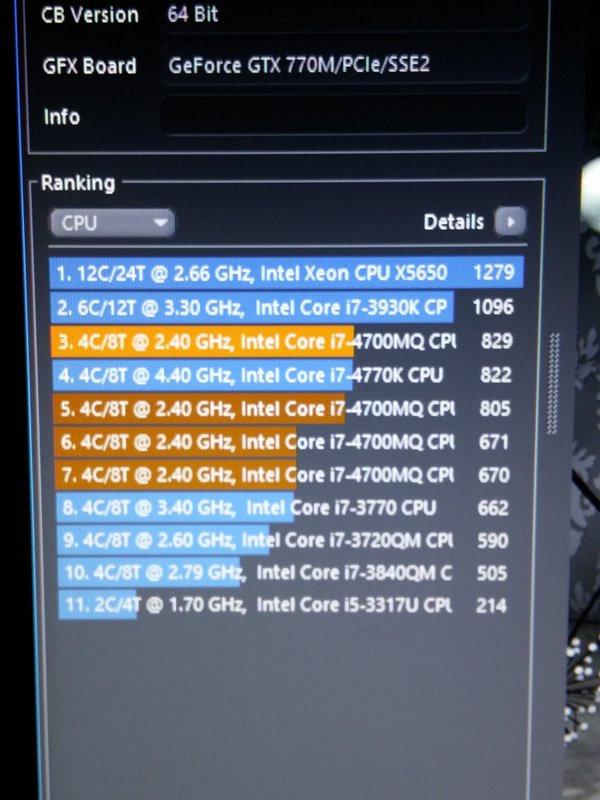
Hi all, After I saw this result: http://hwbot.org/submission/2830783_0.0_cpu_frequency_core_i7_4700mq_4550_mhz , I got interested to replicate it with a similar method and decided to share my steps to score higher than a desktop 4.4ghz 4770k (according to cinebench ;)) Intel Stock microcode has a Turbo multiplier bin glitch that allows unlimited multiplier increase, I used prema's bios and removed a cpu microcode update to let the cpu run the stock glitched microcode. I will share the bios file, use it at your own responsibility and if you know what you are doing. 1) Download or dump your BIOS, if your bios is ami (my case) then use AFUWINx64 2) Get AMI Aptio UEFI MMTool v5.0.0.7 and UEFITool, HxD (or your fav hex editor) 3) Open your BIOS image with UEFITool, then File>Search, in our case Haswell has the following ID: , enter C3 06 03 in Hex pattern dialog click OK 4) You can see the last four Hex pattern result, double click the first result and a structure item in the main dialog will be highlighted, right click>Extract as-is to a folder (be sure to be neat and organized or you will mess things up) 5) Do the same with the third result and save it as a diff name other than the first one 6) Now in the folder you have saved the 2 files from step 4&5, open the first one with HxD(any hex editor) and look for be sure to choose Datatype:Hex-values then hit search 7) Press F3 to find again till you reach this pattern(highlighted): 8) (1) Indicates the microcode version, 17 in this case, we want 00 (cpu stock), (2) the platform ID (the search context we reached at) (3) the microcode length = 5000 (in my case) in reverse (important to know when the microcode ends in order to remove). 9) Adjust the cursor on the beginning of the highlight text/microcode (01) right click>Select Block>Length>5000 or whatever in your case 10) Delete the highlighted blocks (after step 9) then save the file 11) Do the same with the second result from step 3 to 10 then save 12) go back to UEFITool, double click the first result like you did in step 4, right click the highlighted structure in the main dialogue > Replace as-is then choose the FIRST file you edited in HxD 13) Double click the third result and follow step 12 with the SECOND file you edited in HxD 14) You will see "Rebuild" in action row, File>Save image as> P15SM04.PM2 in my case (can be any name as long as your flashing tool recognize it) 15) Open AMI Aptio MMTool > Load Image > your modified rom > CPU Patch Tab and verify there is no 06C3 in CPU ID 16) Be brave and flash your BIOS Windows Mod to remove auto update microcode on boot: Click on Start Type CMD in the Search box Right-click on CMD and choose Run as Administrator In the Command Prompt window and change to the directory where the file is located. To do this, use the CD command. You can follow the example below. to change to the Windows\System32 directory you would enter the following command and Press Enter cd \windows\system32 Now use the DEL command to delete the offending file. Type DEL mcupdate_GenuineIntel (and backup) Done! Overclocking: 1) Check CPU MCID:Download AIDA64 , open AIDA64>Motherboard>CPUID and look at IA Brand ID, it should be 00h 2) Download the latest beta Throttlestop (not stable) in my case 810b2 3) Make sure you don't have XTU installed or running (especially at startup) or it will reset any changes in Throttlestop 4) Open throttlestop, click FIVR and look at "[checkbox] Overclock [DIALOG] Max" and note it down 5) Now here is the magic! close FIVR and open it again, [DIALOG] Max value should increase by 2 (up to 80x max ~ 8ghz) everytime you open and close FIVR aslong as long as you increase one of the cores, LOL 6) Increase "Set multiplier" to maximum after your final changes in FVIR (Iv set mine to 42x all cores, so I increased set multiplier to 42 aswell - note voltage ID is messed up ignore it) 7) Increase voltage in FVIR for stability by using cinebench run 3 times instead of prime95, as it stresses FPU which increases heat and tdp instead... 8) Unlock maximum TDP and turbo wattage in TPL, in my case: 9) Done! Changes should be persistent as long as you dont save and exit from BIOS, here is my result in Cinebench with temp throttling (from 4.3 to 3.9 ghz), room temp 25-27 XD: (no.1 at 4.2ghz, no.7 stock latest microcode) UPDATE: OCed RAM from 1600 to 1866, [email protected], +200mV adaptive vcore: I'm also getting 852 with 4.5ghz with this adaptive voltage-like method: Note: You can maintain maximum turbo multiplier bin with latest microcode after setting it in throttlestop (imp: no crash when testing; make sure its stable) then flash the latest microcode for bug fixes (more stable on my side at x45 with only +230mv, depends on your CPU, i7-4800+ will require less voltage), and you will still be able to set the bin high (up to 80x) as long as you don't crash... Post your results and I'll copy it here. Tips: I highly recommend lapping heatsink and use liquid metal thermal paste or any decent tp ( I used collaboratory liquid ultra) before doing this -If your cpu throttles no matter what, try decreasing dynamic voltage in FVIR and look at maximum value the package power indicate while stressing, decrease the value by 10% in order to avoid rapid throttling (happens with bad TP) -Do not attempt the OC if you are looking after long service life wear&tear (I expect 2 years from now if I stress the cpu everyday for an hour, which i never do :P) Happy overclocking, and don't melt your laptop Thanks to Intel if they leaked this on purpose, kinda futureproofed my machine XD P150SM 1.03.05 modded bios (at your own risk): MOD EDIT: link removed, please use a clean BIOS base because of legal implications with Intel :
-
Intel starts sending Kaby Lake Processors to Laptop and Desktop Manufacturers Kaby Lake is the first Intel CPU to break the ‘tick-tock’ cycle, retired this year. Looking ahead, each manufacturing process of Intel will have three cycles to get the maximum performance of each process node in the future. The Intel Kaby Lake will be the third and final 14nm chip, then in 2017, Intel will make the jump to 10nm withCanonlake, then we will remain in lithography of 10nm until 2020 and you can expect a new range of processors every year. Is expected that new CPUs will have a TDP up to 95W and provide native support for several current technologies such as USB 3.1, HDCP 2.2 and Thunderbolt 3. This is an ‘optimization’ CPU, so it will be based on the technology introduced in Broadwell and Skylake, so hopefully new processors won’t a compared to Skylake CPUs launched huge performance leap last year. New CPUs will also be presented in the new Surface tablets in early 2017. Source First details of Intel’s 7th Generation Kaby Lake Core i7-7700K Regarding the specifications of Core i7-7700K, this flagship processor of the company (for that platform) is equipped with four cores with HyperThreading technology, it has a total of 8 logical cores at a base frequency of 3.60 GHz reaching the 4.20 GHz with TurboBoost frequency, far from the 4.00 GHz Base and 4.20 GHz Turbo-Boost of the current Core i7-6700K, although it could be changed as for now we are talking about an engineering sample. The information is supplemented with HD graphics with 24 Execution Unit , 256 KB cache Level 2 (L2) per core, 8MB distributed to the L3 cache, and its launch would take place at the end of the current year, so there is still enough time ahead. Source View full article
-
Hello guys, I've a really weird problem. My laptop has started beeping when use nvidia gpu yesterday. I dissambled my laptop and tried to plug out every single hardware and test them one by one. There's 22 beeps and equal interval beetween them. It goes shutdown after that 22 beeps. My laptop is Clevo W650SJ and it uses Nvidia 840M gpu. That problem isn't causing because of windows or installed driver cos i tried to reinstall windows but it started to beeping when w10 installer check devices. Also I've bios password on startup , if i don't type password and hit the enter , it starts beeping after 10-15 sec. Also fan speed goes up to maximum and it doesn't slow down untill i shut it down or shutdown itself. If i use any program or run a game which uses nvidia gpu , it starts beeping but if i close the game on first beeps , beeping is stops. But fan speed still maxiumum until i shutdown to pc. I am looking a way to fix it. I didn't make any changes on my pc before than this problem.
-
Hi, I have an XMG u705 with the an í7 4790k, a Geforce GTX 980M 8GB, G-Sync Monitor, 32GB DDR3 RAM, etc. and I am damn annoyed by both the Mainboard Bios and Vbios, because both are the cause for a ton of driver issues under Windows 10. Also I can't use my lately bought Samsung 970 Evo, even though technically there should be nothing preventing it. Heck I was even able to install Windows 10 on it, because the Windows 10 installer detected it, just not the Bios which is logically why I cannot boot from it. -.- So in search of a solution, I searched the web and found out that there are several mods for both bios made by devs like Prema. Unfortunately some Bios mods I found are heavily outdated, unfinished, ... or not anywhere secure and I couldn't find any location where I could download Prema's Mods for this device, especially not on his Site (just a Subscribe banner there) or his older Wordpress site (errors). There is also nothing here under Downloads/Clevo/P77xZM. I would be really thankfull if someone could help me.
-
Hi all, I'm debating whether or not to replace the thermal paste in my Lenovo y510p. I've started overclocking a bit, and I have an external fan, but I would like to not have to run the fan as fast because it is a little loud. I have been reading a bit about different thermal pastes, and I'm wondering if there is even a big difference between stock thermal paste, and something like the liquid metal from thermal grizzly. It sounds like it'd work better, but I don't want to fall for a good marketing scheme. If anyone has experience with this and has or hasn't seen big differences, your input would be greatly appreciated. Thanks in advance! -Web
- 6 replies
-
- thermal paste
- laptop
-
(and 4 more)
Tagged with:
-
Hey all, I updated my Alienware 17 R5 Ranger (2014) to the latest Dell bios "AW17A14". I went around to look for possible fixes, I found that I should be uploading the last Bios I had through a USB stick formatted to FAT32. Now that's pretty simple so far (keep in mind the laptop only turns on the LED's and CPU/GPU fans at full speed looking for a bios file). I downloaded the Bios file from Dell but they have it as an .EXE program. I need it in the proper format to be read by InSyde Bios. I have no idea how to convert it from EXE to the right format. I tried using CMD to run AW17A14.EXE -writehdrfile, but that wouldn't work. This happened right after Dell replaced the MB for the same reason. The second time, my warranty had just expired. I don't wanna pay Dell 359.99$CAD for a new MB because of an issue inflicted by them. Thanks,
-
Hi, I just found out there is a new Clevo seller in the US. They have quite a good price. I read some information about them in European forums and they seem to be fine. They have most of the Clevo models. If you want to check you can find them here https://dreammachines.io As far as I know in US they were selling so far mice (I saw it on other forum: But I thought if someone is looking for something new and wanna try they might be quite interesting.
- 3 replies
-
- clevo
- dreammachines
-
(and 2 more)
Tagged with:
-
Asus' new Vivo Book S has Mac Book-like looks
joemars posted a topic in General Notebook Discussions
Asus presented a Vivo Book S PC line at Computes prior this year, and now it's propelled another expansion to that line. Called the S510, it includes a 15.6-inch Full HD (1920 x 1280) show, seventh-age Intel Core i7 processor, 8GB of RAM, up to 1TB of capacity, and a few ports including USB-C, USB Type-A, USB 2.0, HDMI, a 3.5mm jack, and a SD card peruser. It weighs 3.7 pounds, has a 7.8mm-thick bezel, and looks simply like a Mac Book. This Vivo Book S accompanies a brushed aluminum body. Be that as it may, when we looked at the Vivo Book Pro S15, which begins at £600, we saw it doesn't have a full aluminum body; the base is plastic, with a brushed metal top and deck. We're accepting the S510 is a similar way, however we've reached Asus for more subtle elements. Asus Zenbook Flip S: Super thin convertible stick stuffed with top-rack unit.Asus ZenFone 3 Zoom review: The mid-officer camera phone The VivoBook S S510 runs Windows 10 Home out of the crate and begins at $699. It goes up to $799 contingent upon your coveted design, Asus Customer Service notwithstanding. We're not yet beyond any doubt about UK estimating or accessibility, but rather in the US, you can get the ultra book now through Asus, ABT, B&H, Computer Upgrade King, and Newegg. We figure this PC would be awesome for those of you who need a powerful, ultra versatile PC with MacBook Air-level takes a gander, at a value that is somewhat less demanding to swallow. Furthermore, on the grounds that it doesn't run Windows 10 S, you don't need to stress over constrained usefulness, for example, the powerlessness to download outsider applications. -
Hey Everyone, I'm looking for some testers to see if we can get LEGACY SUPPORT for the m17xR4. Furthermore, I've also done MANY updates on this bios, too... I updated RAID (EFI & LEGACY) to v12.9.0.2006 (This may need to be downgraded as the chipset you have may NOT support this raid version, but this is the latest version that will work IF youre running RAID. It also supports TRIM in RAID0. If you are not running raid, I can update to v13 if you want, but we need to test one at a time!) Updated GOP Drivers & GOP Policy Updated vbios from 2098 to 2171 Updated Microcode for all cpu's Added M.2 Support Added NvMe support Updated Atheros Lan Firmware & PXE Boot Firmware Updated To Possibly Give Legacy Support, BUT....... I NEED TESTERS!!! Please contact me if you want to try. Understand, HOWEVER, that am NOT responsible for ANYTHING that happens to your system if it goes wrong. (Just a SMALL disclaimer, heh) Thanks, Swick
-
So, i have a GT72VR with a 1060 , and after some testing i saw that it is beeing underused. Even using MSI Afterburner the core only reaches ~1800Mhz (in 100% usage , and 9000Mhz on the memories ). This happens because it reaches the Power limit ( 100% , and its blocked) ; is there a custom BIOS (or any other way) to unlock it ? In terms of temperatures it has more than room for it, it only reaches ~75ºC at ~60% fan speed, and it has a 230W PSU (more than enough to push the 1060 further) Thanks
-
Hello. I recently cleaned my laptop and changed thermal paste, so GPU has a lot of headroom for OC. At full load it's at 60c. And throttling only starts at 87c for both CPU and GPU. I searched everywhere, but it seems no one really modded this laptop's VBIOS. I found one person who does it, but he requires a donation for it. Since I don't have a lot of money I didn't even try to donate and see if it's enough. So maybe someone can help me out here? The laptop is with i7-4720HQ downclocked to 3.0 Ghz instead of 3.6 Ghz due to temperatures at full load, 16 GB of DDR3 ram and a GTX 970M 3GB. Added link for original VBIOS file. https://www.msi.com/Laptop/support/GE72-2QF-Apache-Pro-4.html#down-firmware Direct download link from MSI. Driver version for the lazy - 84.04.26.00.29.
-
Obviously I'm trying to get over the stupid OC limit on my laptop. I tried flashing the vBIOS for the entire day with no succes. I used NVflash. This guy says I have something called 'optimus'. He also states that there's a different way to actually flash. https://gyazo.com/11a12fe3b609f35fa541b119f03f3c3c4 Any help would be appreciated, and if someone has a trustworthy modded gtx950m bios they want to share with me that'd be great. I have one but I'm not sure it's going to work with this one. My laptop :http://www.laptopshop.be/product/698368/hp-pavilion-gaming-15-ak120nb-azerty.html?ref=266231&label=22734-AGI-39546111721-ASI-161986568190-698368&gclid=Cj0KEQiAyuPCBRCimuayhb3qqvwBEiQAgz62kaVpOfeAf8QYFp0dJzFlNLHiAkBn_v2lZKYi9TbCoEsaAq6w8P8HAQ
-
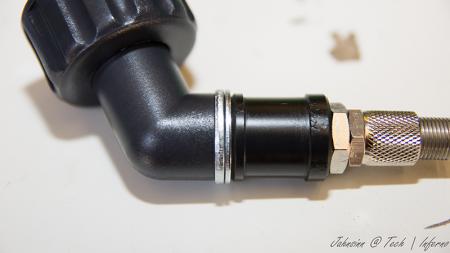
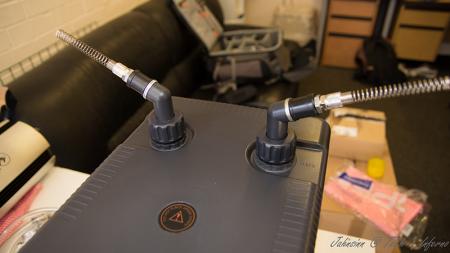
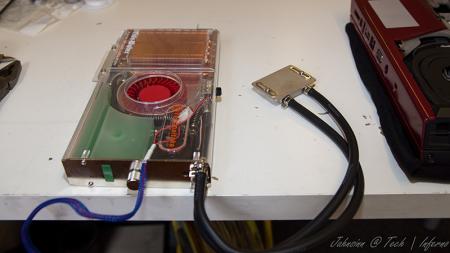
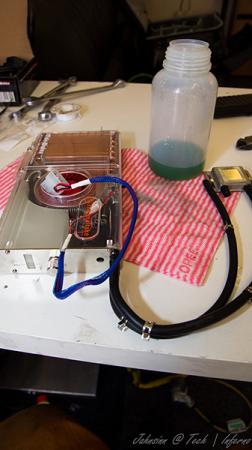
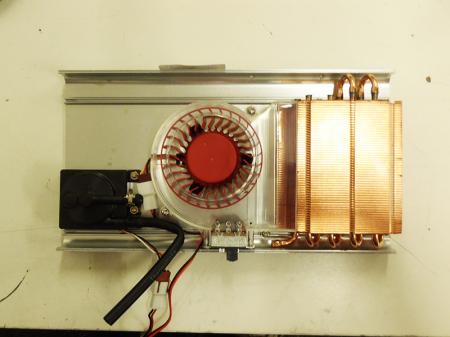
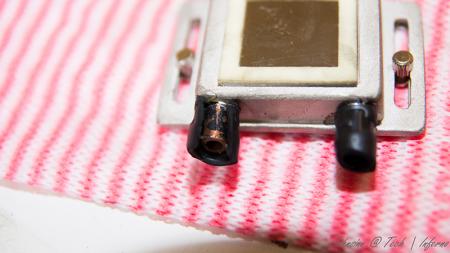
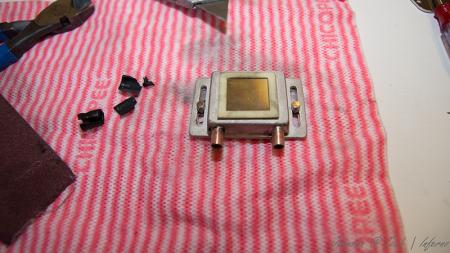
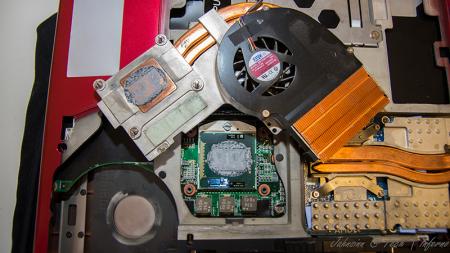
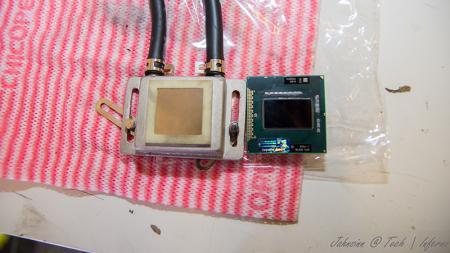
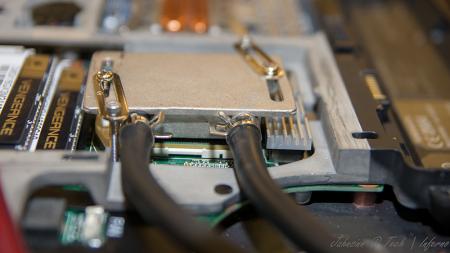
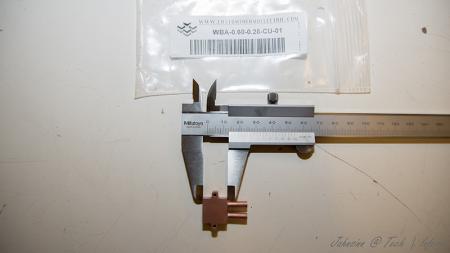
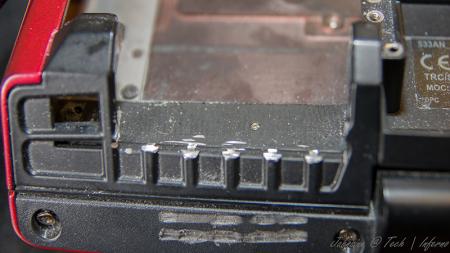
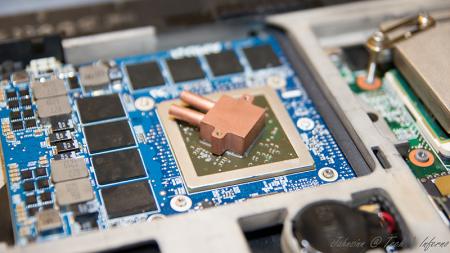
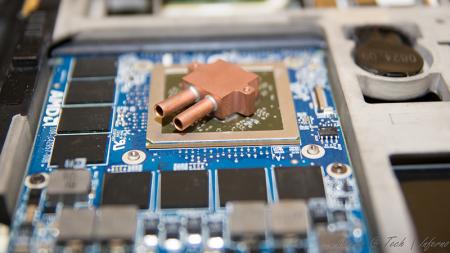
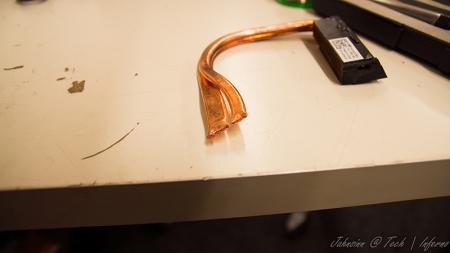
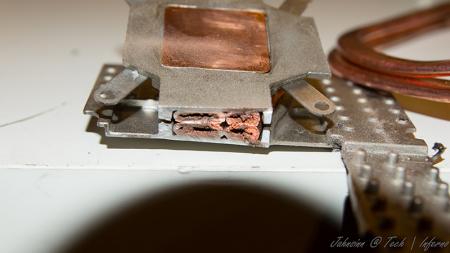
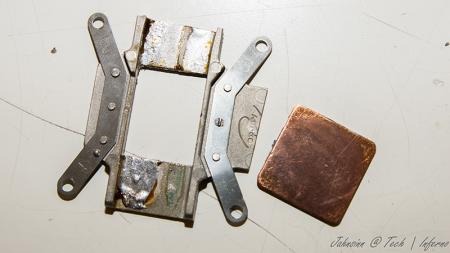
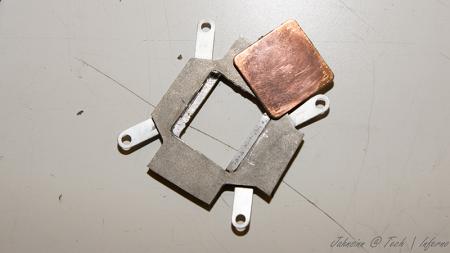
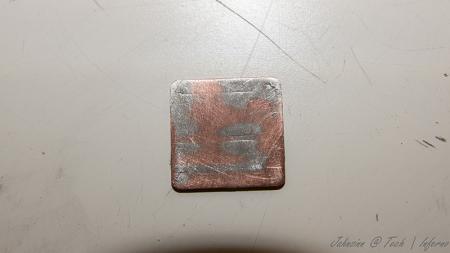
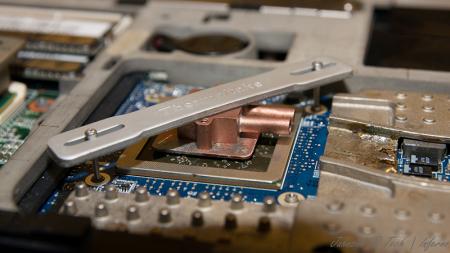
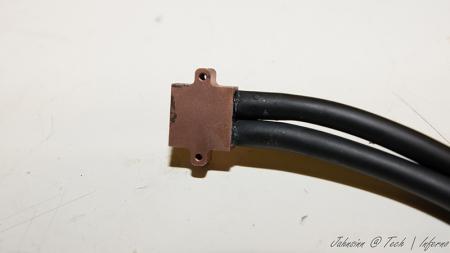
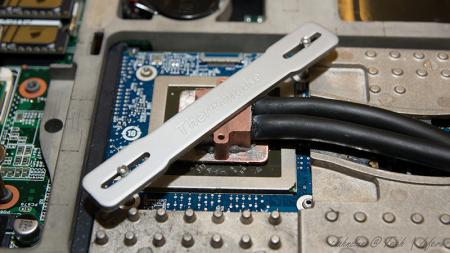
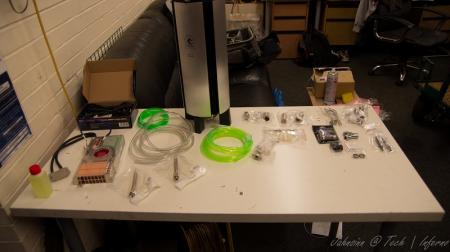
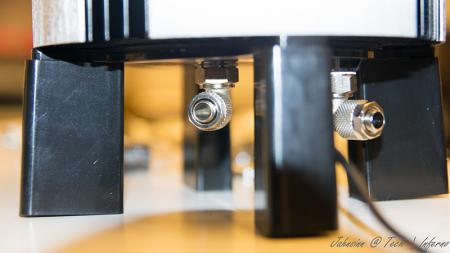
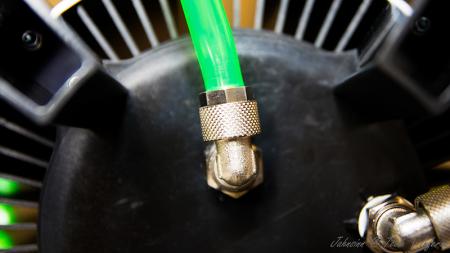
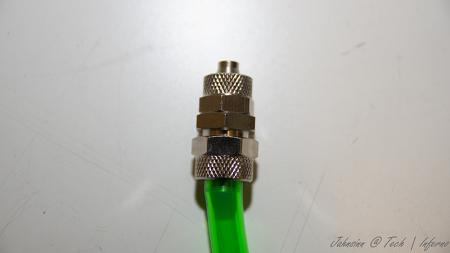
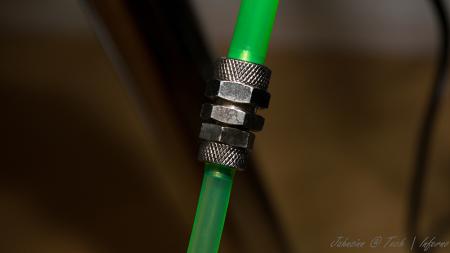
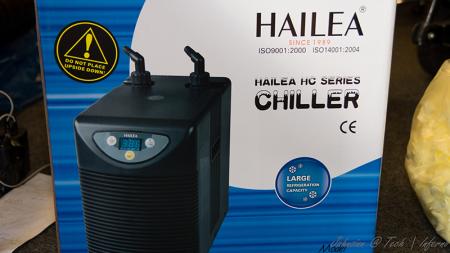
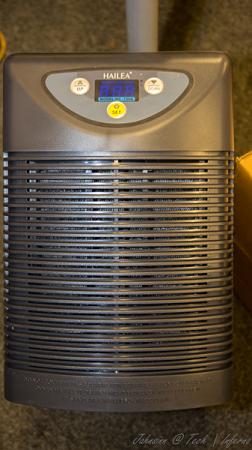
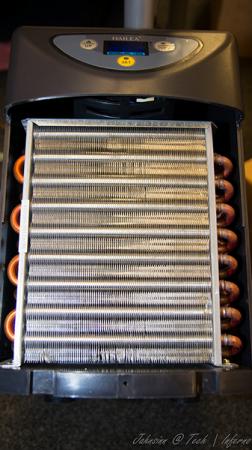
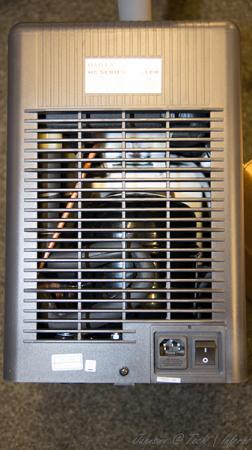
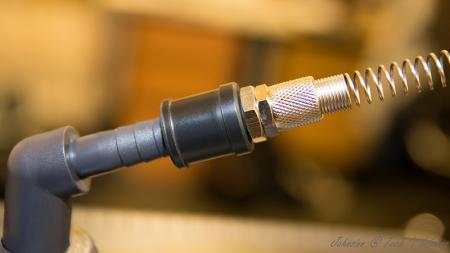
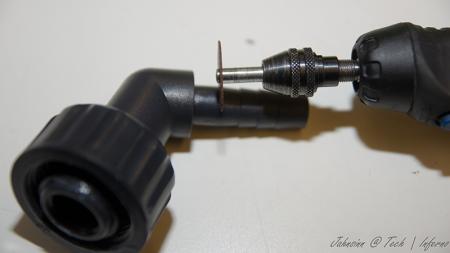
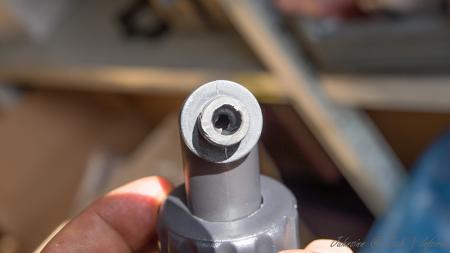
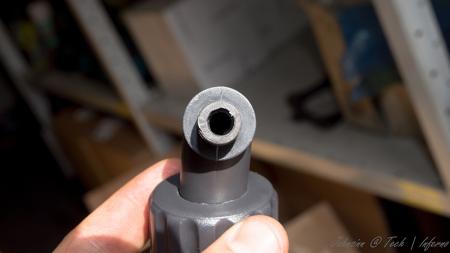
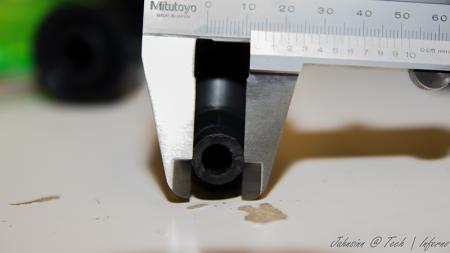
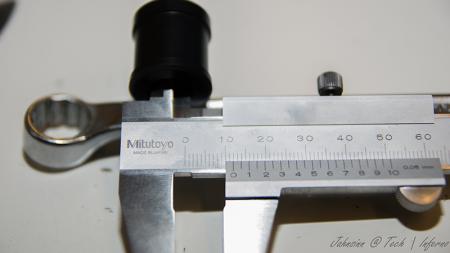
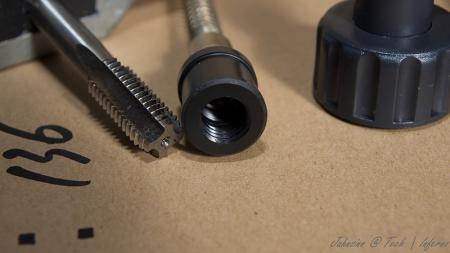
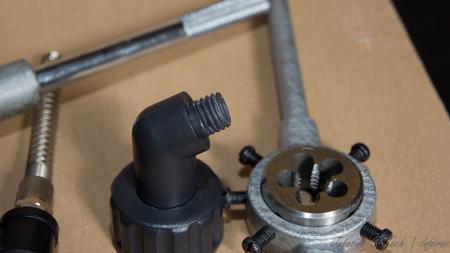
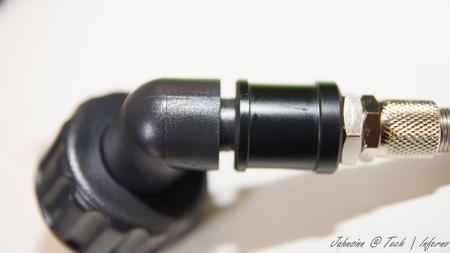
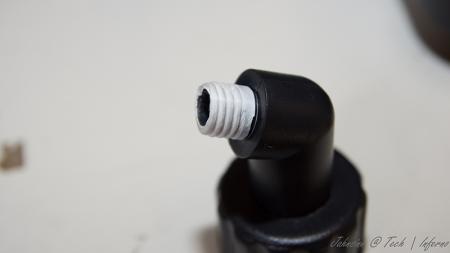
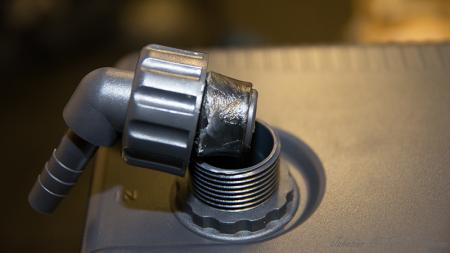
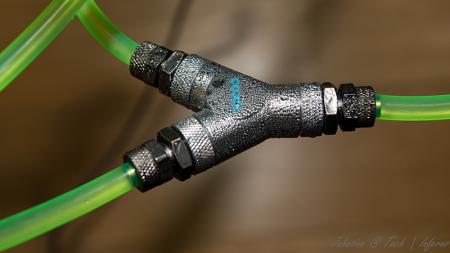
First of all, let me say I haven't finished yet. I'm still working on it and will update this thread from time to time due to much work at the moment. When I fitted my 940xm and the 7970m I got really mad of the heat and the fan noises even in idle mode. So I decided to get it all cooled with a silent, most important quiet, external water cooling system. I checked the internet and found evth I need to get it done. The most difficult thing was to find slim water blocks to cover the dies. I will list all the parts I used with article number and website if you're interested at the end of this post. First the overview. These parts are going to be used: Actually not much, so let's start. I start tubing at the inner hose socket of the reserator. This is the place where the pump is placed behind. You have to use a 10/8mm hose. By this, 10mm means the outside diameter of the hose, 8mm means the inside diameter. This is very important to know by everything you do on water cooling systems due to different fittings, barbs or reducers. Fit the hose and tighten it well with a spanner. Now you need a reducer to get on a 8/6mm hose. This is necessary to get in fitted to the chiller. At the other end you need to fit the 8/6mm hose. After this is done the 8/6mm hose leads into the chiller. A chiller pushs down your temps to a predefined value set by you, the minimum you can get theoretically is +3°C. Basically you can say it works like a refrigerator. This is very helpfully when you start gaming or other intense work on the laptop to keep the temps low. Here are some pics of it. To get the hose fitted the first custom made had to be done. Maybe I didn't know how it actually works, but I had no clue how else to do it without a modification... As you can see on the picture, the 1/4" adapter didn't fit to the chiller's nozzle. I really don't know what's the original idea by the developers. So the first adjustment had to be made. Cut the end of the nozzle as you can see on the pic. When this was done I noticed really pour casting quality inside the nozzle. This would massively reduce your flow speed. So I used a drill to get it out. Finally I got an outside diameter of 13mm at the nozzle. The adapter has 12mm inside diameter So just perfect to cut a M14 thread to both parts. Unfortunately I couldn't get closer due to the layout of the die. two washers solve this problem to get it proper tightened. To get it proper sealed I used teflon tape. Just the best way to get something sealed. Don't do it without any sealing! Use some Vaseline before you stick in the nozzles. Do the same with second side of course. At the end it'll look like that. Let's get to the CPU water block. I purchased the Thermaltake CL-W0052 Tide Water, originally made for desktop PCs to cool down the graphics card, on ebay to get all the stuff I'll need to do it. I chose that one because the water block has just a height of 8mm. Also all the hoses and clamps will be helpful. First drain the coolant. Then I opened the chassis and robbed all hoses and clamps. You'll need them in a couple of minutes. They're all bonded quite well, so just cut them at the ends. I also cut and removed the hoses of the water block itself, just to make sure everything is okay. I didn't want to get upset when I filled the system with water. So I cut them and removed the old adhesive. I then removed the original cpu heatsink and compared the die with the water block The water block as it was out from the box was just a touch too small to fit correctly onto the die. So I just removed the tape around the block. Now it was ready to get fitted. All I needed to do was loosing the existing bolts on the water block and tightened it with M2.5x20 hex nut bolts into the existing holes. At the end it looks like that. By the way, the mosfet heatsinks came with the tide water vga cooler. I also fitted the black hoses as they were, just without the glew and it still seals perfectly. To get the hoses guided out of the laptop you need to remove your fan control at the back of your laptop. When you're doing this, be careful not to touch the chassis as I did with whatever you use. I used the dremel and didn't see it for a while. What a shame! Nevermind, so let's get over to the gpu side. I bought a very tiny water block with just 15x15x7mm dimensions to not to exceed the height. So may be later I will be able to fit the backplate cover again. The water blocks would actually fit on the die, perfectly. But due to the layout of the gpu die the block just fits in diagonal postion. So useless for me. To get the water block in the right direction I unsoldered the copper plate of the original heatsink. That one has got the right dimensions to get this solved. Clean the copper plate from the old tin on top by using the Dremel or sandpaper. At the end that's the way it should work. Just to mention, also the holder came with Thermaltake tide water cooler. The bolts I bought seperatly on ebay. They are M1.6x20 but too long, so I cut them down to 15mm. Now they fit into the existing holes and push down the block properly Use now the -->small<-- black hoses robbed from Thermaltake chassis. These are the inside hoses, they're smaller. You need to use some adhesive because the clamps coming with the hoses are just a way too big and don't keep it tight to nozzle. Now just add some thermal paste between copper plate and die, and copper plate and water block. Tighten it all down. Finally it looks like that. [ATTACH=CONFIG]5105[/ATTACH] hoses leaded through the fan grill, gpu side. I mention again, just temporarily cause I'm still waiting for parts. in progress... [ATTACH=CONFIG]5107[/ATTACH] [ATTACH=CONFIG]5106[/ATTACH] cpu side [ATTACH=CONFIG]5108[/ATTACH][ATTACH=CONFIG]5109[/ATTACH] The hose laying is actually just in common sense. Nothing particular I should mention. Reserator -> 10/8mm hose -> 10/8mm to 8/6mm reducer -> 1/4" compression fitting -> 1/4" adapter for chiller -> chiller nozzle -> chiller -> nozzle, adapter, fitting -> 8/6mm hose -> Y-splitter first end hose -> 8/6mm hose -> quick coupling -> black hose (termaltake tide water) -> cpu block inlet-> cpu outlet -> black hose -> quick coupling -> 8/6mm -> Y-splitter second end hose -> 8/6mm hose -> 6mm barb -> small black hose (thermaltake tide water) -> gpu block inlet -> gpu outlet -> small black hose -> 6mm barb -> 8/6mm hose -> Y-splitter | Y-splitter -> 8/6mm hose -> 10/8 to 8/6mm reducer -> reserator update in progress...
- 25 replies
-
- 15
-

-
Hello people of Tech Inferno. I am trying to get my laptop withing with an eGPU, i have: Lenovo e540 laptop, EXP GDC Beast 8.4d with mPCIe connector, Nvidia GTS 450, Power X3 450W PSU, eGPU setup 1.30 Initially I would get a black screen when trying to boot with the eGPU connected and when trying with plugging the mPCIe connector in during boot I got this error: "0187: EAIA data access error. 2201: Machine UUID is invalid." Connecting the GPU to an external monitor has no effect. I got around this by putting tape on one of the pins as per this post. After that I no longer get the black screen but windows 7 does not detect the GPU, the fan on the GPU still spins when the laptop turns on and there is a green light on the EXP GDC. I followed the guide on this post but I got this BSOD once rebooting after applying the DSDT override in step 2: "The BIOS in this system is not fully ACPI compliant. Please contact your system vendor for an updated BIOS. Technical information: ***STOP: 0x000000A5 (0x0000000000000006,0xFFFFFA80066BCD50,0xFFFFFA8007103CAB,0XFFFFFA80074FD340)" Does anyone have and suggestions or advice? Thank you in advance. UPDATE: Was able to get Win 7 to detect the GPU when swapping the mPCIe connector while in sleep mode but now I have error 12. UPDATE: Tried the DSDT override guide here but loading dsdt-modified.aml as a registry override causes a blue screen and setup 1.3 hangs when loading the dsdt-modified.aml as an in-memory substitution, it does not hang when the SATA mode is changed from AHCI to Compatibility but it is too fast for me to tell what it does and it causes windows to freeze on boot once it is done with no effect on memory for the next boot. Got it working, just trying to get the laptop to switch to the eGPU now.
-
Hello, i have barebone laptop MS-16F3. I buy this from computer seller company with brand name Forsa. I think this company just import this laptop and rebrand it. The real name is Rabook Firebook F640. Okay, i want to ask, can i update my BIOS Laptop with MSI GT60 BIOS? Because i can use the driver for MSI GT60. Sorry for the bad english, thanks for respond
-
Hello Everyone. This is my first post, I'm not really that well educated in the world of laptops, so please go easy, I might need a bit of hand holding here. my laptop is the GT70-0nc, its the barebones MS-1762 I believe, I bought it from a custom laptop builder online. The 675m is fried I think, BSOD all over the place, disabling it and switching to my HD4000 integrated fixed the BSOD. I'm looking into upgrading the GPU of my laptop except there's some things that have me completely baffled... 1. Which GPU's are actually compatible? - I was looking at the 680m but if there are newer gpu's that work I'd love consider those too. 2. I have read a lot about flashing my BIOS, this really confused me. I get the American Megatrends Logo on boot up, so I tried checking out their BIOS but everything i've read says use the MSI VBios? I have a good bit of experience with the hardware in my laptop, I've taken it apart quite a few times like to change thermal paste / general maintinence and upgrade my WIFI card. it's the software and compatibility issues that are really getting me stuck. Any help would be massively appreciated! Thanks


.jpeg.6d03112fc15275dbcc0ee9dd4c1abd98.jpeg)
