Search the Community
Showing results for tags 'heatsink'.
-
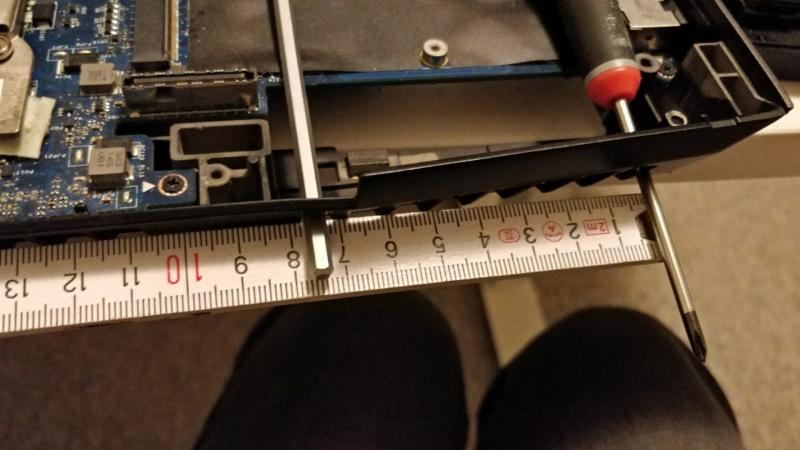
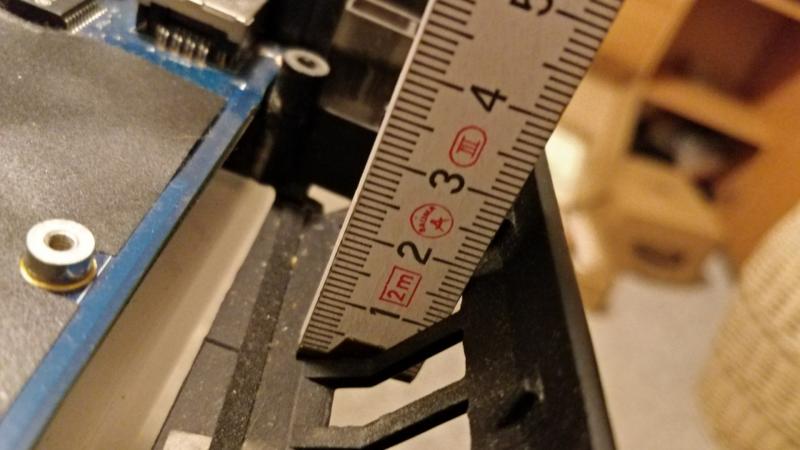
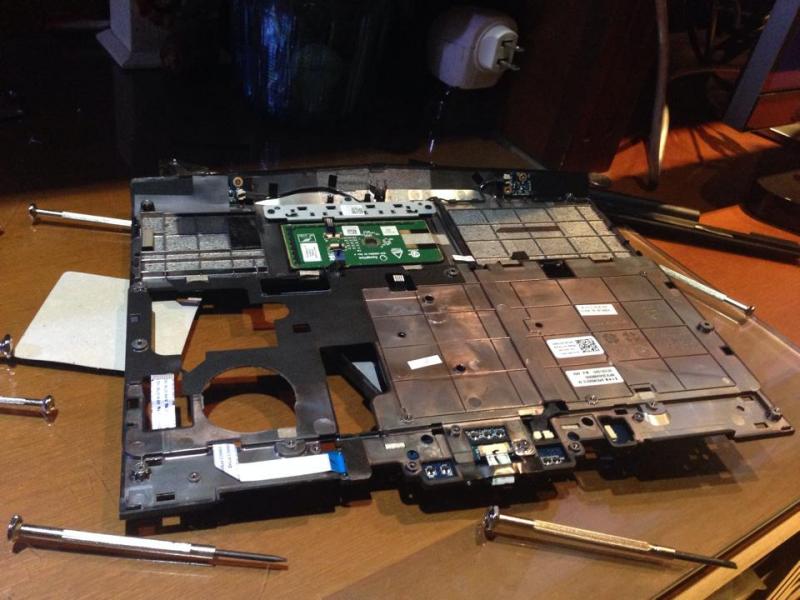
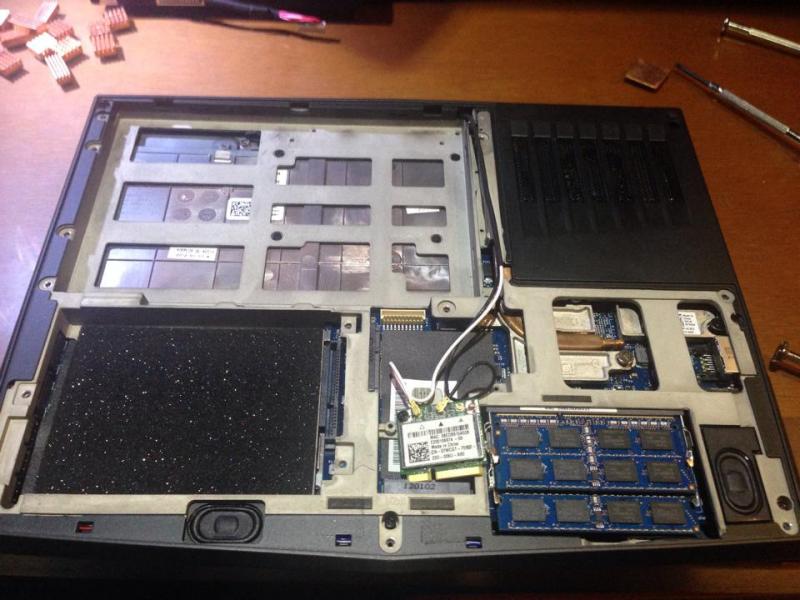
First I want to thank the community, who have inspired me to do this project. I will give you guys the chance to follow me on this journey. I hope you will all help me come up with ideas, techniques and parts that could become handy. This modding may be possible to convert to allot of laptops. Let's begin! Here is the measurement of the went hole. 77mm X 16mm I have 2 ideas for what can be done.
- 35 replies
-
- water cooling
- alienware m18x
- (and 11 more)
-
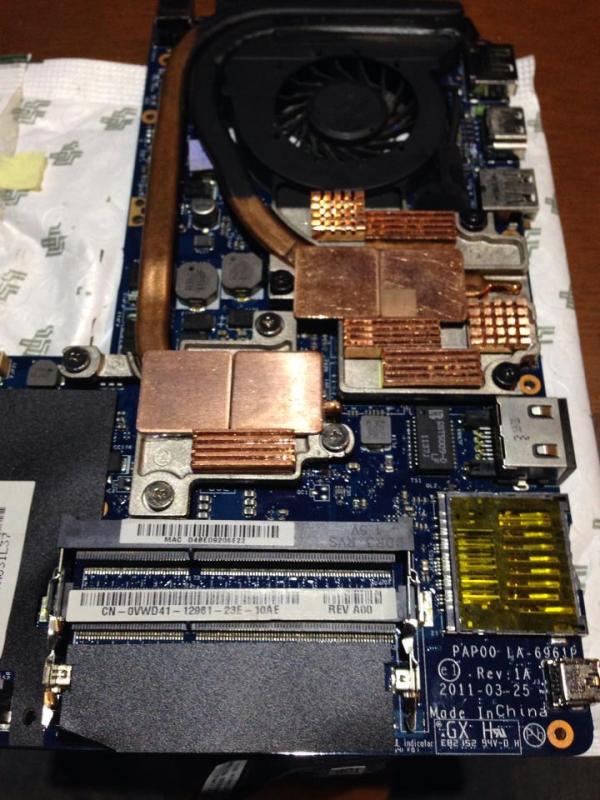
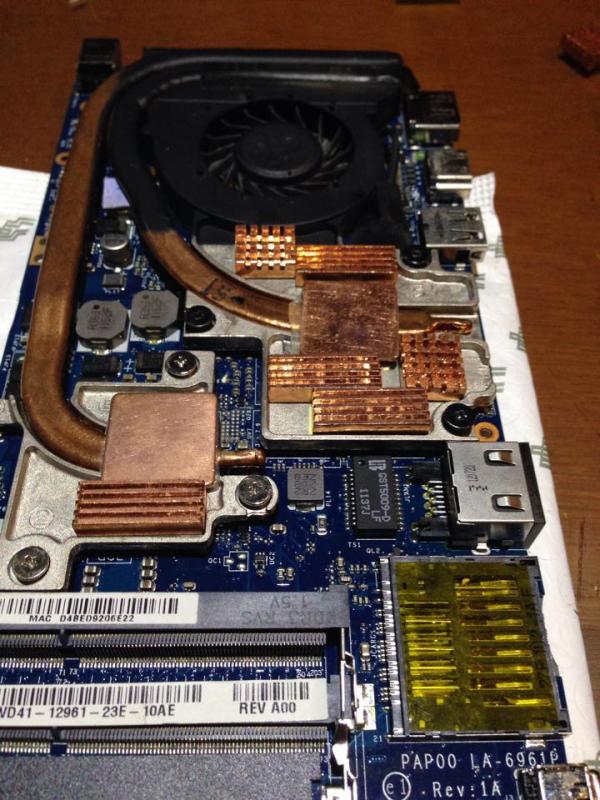
Hi all, I just wanted to share with you, this mod I made for the heat sink in the M11x R3, obviously it is the same procedure for the M11x R1, R2 and R3. 1) I used Artic Silver 5 in the CPU and GPU 2) Between the CPU, GPU and the heatsink plate there is a 100% copper plate in the middle with artic Sivler 5 on both sides. 3) On the heat sinks as you can see there are several plates of different sizes made of copper. 4) Ram cards have Copper heatsinks, didn't take pics of those, forgot it. 5) NOT GAMING MODE, I can use the laptop in regular mode (not playing games) Working on office, browsing the web, etc with no problem on any surface the temps drop to 40-50 Celcius, while playing games, with CPU and GPU overclocked they reach 80 Celcius, the palm rest feels hotter but it is because the volume inside the laptop increased, the density of materials, therefore now the copper with the heat sink is closer to the palm rest, but it doesn't mean it is hotter inside, it is just that the heat is getting transferred closer to your hands.
-
Hey guys, first post, but I thought I’d discuss my heatsink fan retrofit in my old M14x r1. Old fan was loud and not very efficient: the air transfer rate was around 2 cfm (I’m assuming cubic feet per minute). Finally had enough and decided to swap out the crappy r1 fan/coughing pinwheel for a r2 fan (rated at 10.4cfm). I found an old r2 heat sink on eBay (beware though that the heat sink for the r2 will NOT fit the gpu/cpu configuration for the r1. HOWEVER, the fan of the r2 heat sink it is attached to is a carbon copy fit into the r1 MoBo. A few philips head screws and a seal of good electric tape and BAM, you’ve got a significantly cooler and MUCH quieter intake fan in your old R1. My CPU temps from before were around 87-88 max load in FSX, 65 for the GPU; bear in mind this is after a repaste. Now with the new fan, I’m not going over 77 degrees on the CPU, and the gpu stays around 58, all while being MUCH quiter. I’ll post pics of the walkthrough if anyone is interested. Just thought I’d share with all you fellow loonies trying to squeeze every last frame and degree out of our “portable toaster ovens with a screen and keyboard”.
-
Over the last 10 years I've found laptops throttle the processor speed in order to keep fan noise down. I prefer the fan to run noisily, and the processor to run at full speed. I've developed tried and true mods for lappies and have demonstrated their effectiveness. I have two Lenovo W541 laptop workstations with I7-4940MX processors and discrete nVidia graphics. On one I overhauled the cooling. Copper shim between CPU and hsf, AS5 on both sides. Shims between hsf and inductors near CPU and gpu, and shim on the gpu. Used 'thinkpad_acpi' Linux kernel module to set fan to max speed. Ran mprime (prime95 for Linux) AND Unigine Heaven, alternating, to cure the AS5. Then ran mprime. Temps were slightly high. But laptop processors tend to run hot. The I7-4940MX is a 3.1 GHz, 4.0GHz. Turbo processor. The modded machine ran at 3GHz. continuously running mprime, for weeks. The unmodded machine with the same max-fan-speed software tweak and stock thermal-interface material, throttled to 1.7GHz. at the same running temps. Clearly, laptop manufacturers are robbing performance off the top, by inferior cooling hardware and materials. Granted, getting the cooling mod to all fit together correctly with smooth, flat surfaces requires hours of work and materials not normally found sitting around the house. I normally do not mod the CPU die. I abrade copper surfaces down to 1500 grit paper, and then polish with scapings from a bar of buffing compound. Everything is done on 1/2" plate glass to maintain flatness. The final mirror polish is done with the compound granules on a clean, damp cloth. Desktop processors mostly have slightly raised corners, so smoothness is not as much of concern. You're going to get thermal-interface compond completely covering the center of the processor. The ideal is to fill the microscopic gaps between the cpu die and the hsf, but where there is metal on metal, have it be. Metal to metal provides 100s to 1,000s times the heat transfer of thermal paste. But, on a desktop, there are more effective cooling solutions than moving air. Most user are satisfied with their laptops, because the processor doesn't run full speed long enough to make a difference. But I enjoy tweaking, and I do processor-intensive work, like batch editing 100s of large images, video rendering, security testing, password recovery, network testing; that are all severely compromised by poor, stock laptop cooling solutions.
-
As per @coolane's request, I figured I'd make a separate thread for this modification. In the original thread (https://www.techinferno.com/index.php?/forums/topic/265-benchmarks-the-official-thread/&page=34) coolane shows their heatsink modifications and results which I think were ingenious. Initially I didn't think it was possible to use the 980DT heatsink with the MSI 1070 without modification, though with coolane's post showed potential and I figured I may as well give it a try since there's no chance in hell or any other place that I would be able to do a 1070 SLI configuration. Thanks to coolane, they provided further detail into their mod and it was very straightforward enough for me to warrant an attempt. So, I ordered: 10pcs of 8.8mm x 8.8mm heatsinks 1 sheet of thermal transfer tape 400 - 3000 grit sandpaper and I am waiting for those parts to arrive to my location before I begin and I post when they do. EDIT: I may do some minor changes to their attempt like not adding additional heatsink pipes since i have no idea on how to even attach them so this will be a basic modification. EDIT2: Original content EDIT 3: I learned from @J95 and @Prema that the vbios mod used by coolane was stolen from Prema by some crappy Chinese hacker so this thread is specifically for the modding of the heatsink itself. EDIT 4: I ended up getting the following to complete the mod so far. 1. Stanley hacksaw - $10AUD 2. Sandpaper 80 grit and 180 grit emery (for soft metals like copper), 400 grit W&D, 800 grit W&D, and 1200 grit W&D - $10AUD approx (though i spent more ordering more from Amazon which won't be used now but good to have :p) 3. Protective gloves - $12AUD EDIT 5: Ordered some thermal adhesive to glue a bit of copper plate to cover the power phase chip. Sure, a mini-heatsink might do the job though it might be better if it was going through the heatpipes.
-
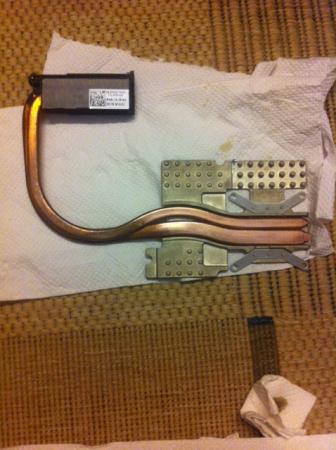
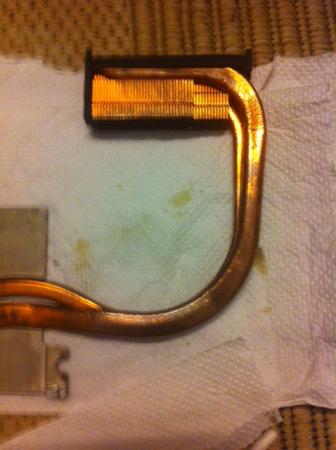
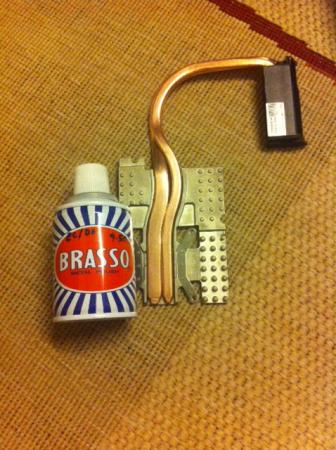
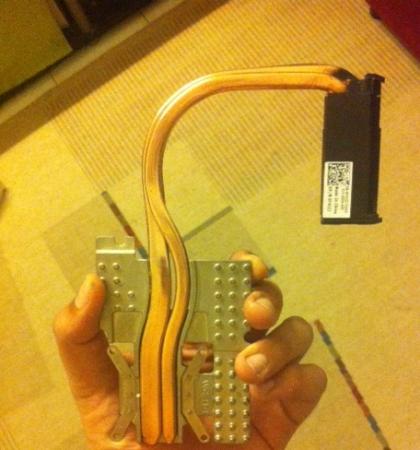
Hello all 1. Just want to share one of the solutions how to clean up the burnt heatsink for the GPU by using Brasso. Make your heatsink shine like new again! 2. Attached some photos for the reference. Good luck! BEFORE AFTER
- 3 replies
-
- 4
-

-
- burnt heatsink
- clean
-
(and 3 more)
Tagged with:
-
I was looking to open up my y50-70 and replace the thermal compound with liquid metal, but I can't find any information on the heat sink. I know you can't use LM on an aluminum heatsink, so how do I find this info? Didn't see it in the user manual- does anybody know if it is safe to use liquid metal on this heatsink?
-
- liquid metal
- lenovo
- (and 8 more)
-
Hello, i recently bought a x7200 with one gtx 680m in it. now im planning to upgrade to sli with an other gtx680m. but i can't find a heatsink with fan. so the question is: does the p570wm GPU heatsink fit into the x7200? they look very similar. or does someone sell parts of a x7200? thanks in advance
-
Was wondering if the 3 pipe heatsink i have for my 6970m that died, would work on a 6990m if i upgraded? trying to figure out so i can order. Speedy responses are much appreciated
-
Hey guys, I'm about to design a custom heatsink for my system. I've got a little question and I'd like to hear your thoughts about this. As you probably know, the screws which are fixing the heatsink on the GPU are hold by two pieces of spring steel which get slightly bent when the heatsink gets screwed on the GPU. Now one possibility is, I could try to design the heatsink in a way that allows me to reuse those two pieces for holding the screws and fix them to the heatsink. The other option would be to just make a copper plate with holes for the heatsink screws. Do you think this would work as well? I imagine it'd require some care when mounting the heatsink on the GPU in order to prevent to much force getting applied on the die. I somehow think it may be difficult to get the heatsink flat on the die with such a design. What do you think? Are these spring steel screw holders necessary or not? Here's a pic in case you're not 100% sure what I'm talking about, it's the stripped down heatsink (no heatpipes, no copper plate, only the two pieces which are holding the screws are attached).
- 87 replies
-
- 5
-

-
- copper heatsink
- custom designed heatsink
- (and 6 more)
-
Hello all, after successful upgrade from 670M to 970M, I want to eliminate high temperatures. I'm using 670M heatsink (I prefer to stick with it) which has been modded a little bit. GPU idling at 30-33 C. I hit 88 C in Far Cry 4, max settings. This is with the laptop sitting on the table. I will report back new temperatures after using laptop cooler. Does anyone have an idea how to bring temps down? (except new heatsink)
-
As the title suggests my laptop gets absurdly hot. I have a Fujitsu T901 (see sig), and have disassembled and cleaned it out with some canned air (but this did nothing, it was clean) I have CoreTemp sitting in my notification tray to monitor these insane temperatures. I'm on a fresh install too. My computer idles in the mid-70 range (77/78). When it is at load (music conversion [using all threads at 100%], gaming, or p95) it stays in the high 90 range. 98-103 C No shutdown from high temps (somehow). I deem 60s and below cold. My fan does not (barely) ramps up, and I have not found a single application that can control this, there is just no fans detected on my system. I do get an error on boot if there is no fan plugged in though. Even having the fan ramp up would help a ton. I found this: TheRandomLab: Laptop cooling mod I was thinking about doing this, thoughts? Or suggestions on other things to do that would help? (if you look on eBay for a Fujitsu T5010 heatsink, mine is similar but the pipe length going to the CPU is longer, and the fins are smaller) I used to put a box fan pointed upward on high, remove the panels, and that kept me at the high-50 to mid-60 range at load. Of course, bringing a box fan with me is silly. I do have a 2nd heatsink from a T901 without the dedicated graphics, I could almost stack them, but I don't know how much that would help. I can cut the fins on the 2nd one and put it where the spacer goes (between the fan and the heatsink) and solder it to the current heatsink maybe, thoughts? I'll also note my CPU does not turbo at all, even though SpeedStep is enabled in BIOS. ThrottleStop does nothing. I would guess this may be due to the high temps and the CPU trying to stay cool. I would love to put a quad-core in here (2760QM or 2920XM [anyone have one lying around they don't mind 'losing']) but I figure the heat issue should be resolved first. I'm pretty much just scraping for ideas here in a very unorganized manner. Thanks, atn
- 58 replies
-
- heatsink
- heatsink mod
-
(and 1 more)
Tagged with:
-
I have an ASUS G50VT-X1 model (getting a little old, I know) and i was wondering exactly how and where to put a new thermal compound, and how to remove the older thermal compound. specifically I'm looking to put it on the heatsink for the graphics card unit but if i have enough I suppose i might as well replace it on the CPU as well.


