Search the Community
Showing results for tags 'guide'.
-
Hi all, I thought it would be helpful to summarize in one post all the useful links I go through before I am purchasing any PC component. Typically I go over more or less "techy" guides, as I want to at least get some rough idea what I should be looking for when I am purchasing components, rather than just blindly following the sexy numbers that manufacturers like to put out and brag with. These are not review links, but links that should help buyers understand what is it they are buying and what to look for. Some of them are opinionated posts and contain recommendations for specific products. I am kind of picky when it comes to components, so I often (time-permitting) do a lot of research. SSD How SSDs work: Solid-state revolution: in-depth on how SSDs really work | Ars Technica This article goes into tech details of how Flash memories in SSD work, what an SSD controller actually does, what is TRIM, garbage collection and all that cool stuff. SSD reviews thread: SSD Reviews Thread - Storage Forums Links to tons of review articles for tons of SSDs. SSD info - http://thessdreview.com/category/ssd...ginners-guide/ Mice The Truthful Mouse Guide: The Truthful Mouse Guide Great guide explaining the technical stuff about mice, why DPI is pretty much irrelevant, talk about different sensors and sensor types and give some opinions on particular mice. Overclocking the USB port to 1000 Hz polling rate: vexed.ca: a whole new way of wasting your day » article » MOUSE optimization – 1000 hz mouse polling on 64 bit systems. These are the generic USB mouse drivers that can be overclocked for high polling rates -- mainly useful for improving the performance for older mice. Network SmallNetBuilder: Router Charts - WAN to LAN Throughput - SmallNetBuilder Here they test do all kinds of funky tests with wireless routers, helpful when choosing a new router. Benchmarks galore! And lot's of it! Monitors LCD Monitor guide: LCD Monitor Buyer I think this is the best LCD guide I found online. They explain how different LCD matrices work, differences between TN, IPS and PVA, monitor response times, and so on. Monitor info - Monitor Specifications More monitor stuff - http://www.flatpanelshd.com/ Sound This is the most helpful thread I found online about gaming headphones and headsets, but it mostly just includes very short reviews on lots of headphones, speakers, sound cards, etc. They are also sorted based on whether they are used for music, gaming, or a bit of both. In-Ear-Monitor (Earphones) reviews of 240 products: Multi-IEM Review - 240 IEMs compared (Spiral Ear SE 3-way Reference added 06/03/12) Head-Fi Shootout reviews of 102 headphones: Shootout: 102 Portable Headphones Reviewed (Panasonic RP-HTF600 added 04/29/12) Frequency responses of headphones: Frequency Response Of Headphones - Head-Fi.org Community Techy stuff. Mhm. I'll keep updating this if/when I find more stuff, hopefully someone else finds it useful. EDIT (Oct 31st 2012): As per suggestion of sgogeta4 I made this thread sticky. If you'd like to add something just post it below and I'll update this original post. Thanks to sgogeta4 for links as well. EDIT (May 05th 2013): Removed links to unfriendly forums.
-
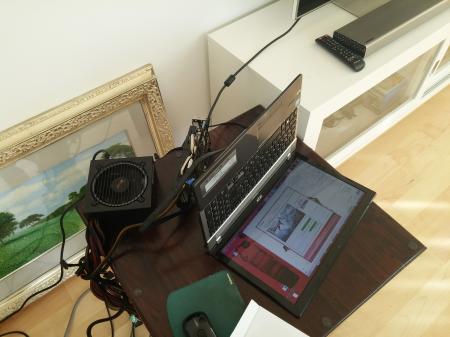
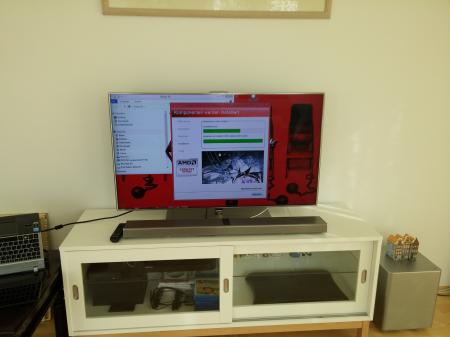
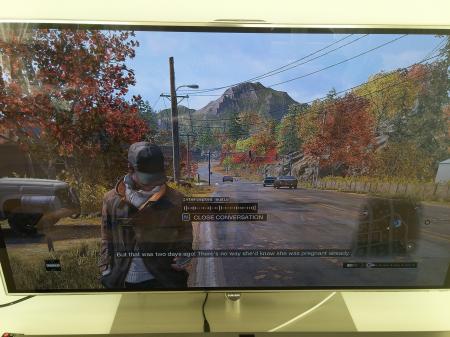
(Watchdogs runs very smoothly if you wanted to know) I finally got my eGPU working on my Acer Aspire V3 - 517G. All credits goes to @Tech Inferno Fan for providing the DIY setup and helping me out with some problems. System configuration Acer Aspire V3 - 517G Intel core i7 - 3632QM @ 2.2GHz (with Turboboost up to 3.2GHz) 8GB RAM (I added 4 GB) iGPU : Intel HD 4000 dGPU : Nvidia Geforce 710m (2GB dedicated VRAM) Windows 8.1 / 64 bit eGPU AMD R7 260X ASUS Directcu II OC (1GB) 500w PSU (has a 115W TDP any ATX PSU can drive it) PE4L 2.1b DIY eGPU Setup 1.3 software Setup If you own the exact laptop then you don't have to worry about the TOLUD value (it is 2.5 GB = no "error 12"). But there is a poblem (I had the problem) when you want to install the Setup 1.3 Software (you need it to deactivate the dGPU). Your Hard Drive must be in MBR NOT in UEFI/GPT. You will face the problem right after you installed Setup 1.3 Software and executed it. There are different ways to solve it. I solved the problem by changing my Hard Drive to MBR with a program called "AOMEI Partition Assistant". But after I booted my laptop there was no OS found. If you did it like me just press any F[Number] button (I can't remember which button it was) next to the "Escape" button. It will show you the BIOS and the only thing you have to do is changing from UEFI boot to the normal boot (you can now select Windows 8.1 or Setup 1.3). Like I just said there are many ways to solve the problem. One easy method is (I am not sure if this works) to do a fresh Windows 8 install. After you finished installing Setup 1.3 turn off your System / Laptop. Connect the eGPU (disconnect the WLAN card) which is connected with PE4L 2.1b and with the external monitor. Turn on your ATX PSU which is connected to the PE4L 2.1b AND to the eGPU. Turn on your Laptop and in the booting screen go to the Setup 1.3 (if you installed Setup 1.3 properly there will be a selection between Windows 8.1 and Setup 1.3). In Setup 1.3 select the "menu - based..." and then it will detect your eGPU automatically. Go to Video Cards and select your dGPU (Geforce 710m) and make sure it says in brackets "off" (like this : "dGPU: Nvidia 710m[OFF]"). Go to Chainload selection and select test run. It will take you back to the booting screen where you can choose either to boot in Windows 8.1 or Setup 1.3 . Select Windows 8.1 . When you go to the Device Manager you will notice no "Nvidia Geforce 710m". Instead a new device called "VGA Adapter" or something. Put the CD (the one it was in the box with the GPU) into the Laptop to install the new driver. Wait till the Setup is finished and reboot! (Don't forget to go to Setup 1.3 and deactivate the dGPU every time and boot into chainload!) Questions and Troubleshootings Q: How is the performance with an AMD GPU? The performance is surprisingly better than expected. Q: I got a problem with the AOMEI program you used! Don't forget to click "apply" button left upper corner. Then change your boot mode. Q: The Setup 1.3 can't find my eGPU! (THAT was MY problem) - There are different ways to do it (it is also for those who do not have the exact same Laptop) : - Search in the Forum for "Anti - Whitelisting of the WLAN Card" because it may be possible that the card is whitelisted and it won't detect your eGPU (almost all Acer Laptop have a whitelisted card but mine wasn't whitelisted). - Try "hot plugging" - Try switching or "correcting" the switches on the PE4L 2.1b (there are tiny switches called SW1 (it should be on 1 - 2) and SW2 (this should be in 2 - 3) ). - Check that everything is connected to each other (for example, check if the ATX PSU is connected to the GPU as well) - The fans of the eGPU is working the ATX PSU is powering everything alright, I checked the connection twice, but for some reason my eGPU can still not be detected! - Go and check if your GPU is defect. I checked my GPU at my friends' Desktop PC and it could not be found either. It IS a rare case because the chances are pretty low that you buy a defect GPU or that the GPU dies fast. Tip : Go or contact the person you bought the GPU from. I got a refund and could get a new one. - I checked the GPU and it could be detected on a Desktop PC but it can't still be detected on my PE4L? - Now it can be anything. Your PE4L, or the ATX PSU, or etc... You would have to test everything out till you get the defect hardware. Benchmarks I've forgot to do a benchmark. I will update this post as soon as possible with a benchmark. Acknowledgements Thank you to all the others so I could do researches and solve my problem as soon as possible. And espescially, thank you @Tech Inferno Fan by helping me and keeping in touch by mailing! And also sorry for my bad english / mistakes. I am a Korean who lives in Germany
-
I followed the youtube video Lenovo Y400 Y500 Full Disassembly - YouTube. However, the video was probably created with a prototype y500 because some of the layout of the laptop did not match mine. Most noticeably is that there are *three* screws holding the keyboard down not *two*, I almost ripped the keyboard trying to pull it off with one screw still in there. Also, a few of the ribbons are located in different places which I think is an improvement over the y500 in the video. Finally, the hardest part of the entire process was to remove the back cover because it is held on by plastic tabs facing in different directions so the best way is to wiggle it left and right while lifting and not lift directly up. That is just regular white thermal paste on the heatsinks. The OEM thermal paste resembled AS5 in color and thickness and I recommend that it be left alone if the temperatures are good. I have since replaced the cheap stuff I put on there with AS5 and still have not seen the temperatures I saw when it was stock (still 3-5C higher). Here is what I did to stop the twitchy touchpad (issue is well documented in the Lenovo support forum) and the random extra characters the keyboard would add while typing (less known issue).
- 191 replies
-
- 17
-

-
I posted this in NBR but I wanted to share the love here as well. It benefited me a lot since I don't have a need for an optical drive and my SSD is only 80 GB. This is the optical bay I bought... SATA Hard Drive Caddy Bay Macbook PRO 13" Unibody A1278 - eBay (item 260760330830 end time May-28-11 02:09:19 PDT) You do not have to buy the same optical HDD caddy but it does have to be 9.5mm in height. Anything bigger will not fit. Do this at your own risk. I take no responsibility for any mishaps you encounter along the way. Before you do this, install your SSD as you would normally, and install windows from the DVD with the optical disc drive still in the M14x. IF NOT THEN YOUR COMPUTER WILL BOOT FROM THE HARD DRIVE YOU HAVE WINDOWS OS ON REGARDLESS WHICH SATA SLOT IT IS IN. Step 1. Optical Bay I Purchase from eBay Step 2. Opening the bottom panel Step 3. This is the DVD optical disc bay that comes in the M14x Step 4. Removal of screws. (GO TO STEP 5 BEFORE REMOVING STRIP) Step 5. Careful removal of the SATA strip Step 6. Optical disc bay vs Optical HDD bay Step 7. How to remove the SATA strip from optical disc bay Step 8. The SATA strip Step 9. Removing the caddy from the optical disc drive Step 10. Attaching the strip on the optical HDD bay exaclty as it was on the optical disc bay. Step 11. The optical HDD bay with strip attached. Step 12. The gap filler provided with the optical bay. It's to fill the space between the HDD and the optical HDD bay. Step 13. What the gap filler looks like with the HDD in the optical HDD bay Step 14. Removal of black panel form optical HDD bay. * must be removed for it to fit inside the M14x * Step 15. Optical HDD bay with black panel removed. Step 16. Placement of optical HDD bay inside M14x Step 17. Drivers automatically installed. Step 18. Computer detecting secondary hard drive Step 19. HWinfo with the both the SSD the HDD in the info (Sata II 3Gb/s) I will fix it up and add any additional pictures if needed as time goes on. If you don't like the guide, please don't criticize. This is for the visual people out there who need help and want to enjoy the additional hard drive. If you have any questions, please feel free to ask
- 93 replies
-
- 18
-

-
- alienware m14x
- guide
- (and 6 more)
-
Hi i searched alot and could not find any help regarding external gpu for my hp pavilion model 15-e020tx. Even though its not a really old laptop. Would appreciate if some 1 could guide me to a link if it has already been shared. I want e gpu for playing a game dota 2. specifications of laptop
- 1 reply
-
- egpu
- hp pavilion
-
(and 1 more)
Tagged with:
-
Hi all! Figured since there aren't many avenues out there as of yet that properly show how to dissect your phoenix, I'd try to take up the mantle with my own experience in upgrading the LCD panel from FHD 1080 to the 4K panel. Before we get started, I'd like to present a list a useful tools to have beforehand if you intend to pursue this endeavor. I'll be providing pictures of my own tools as well as links to various components you need for purchase if you intend to follow-suit: MOD EDIT: ATTENTION HUGE PICTURE LOAD AHEAD!
-
-
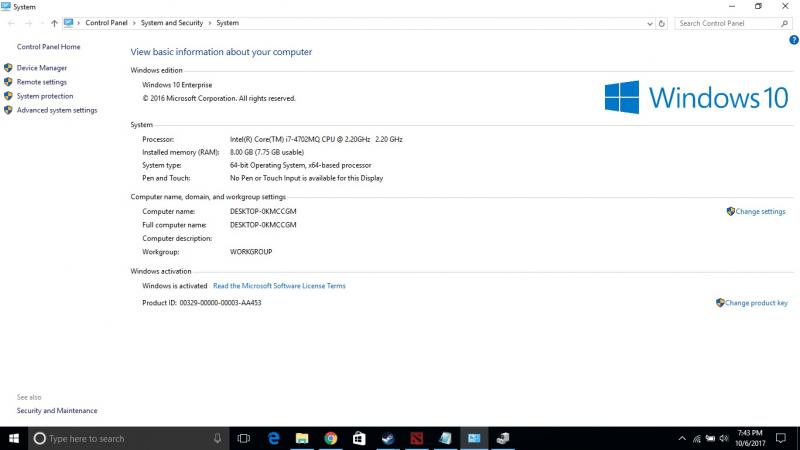
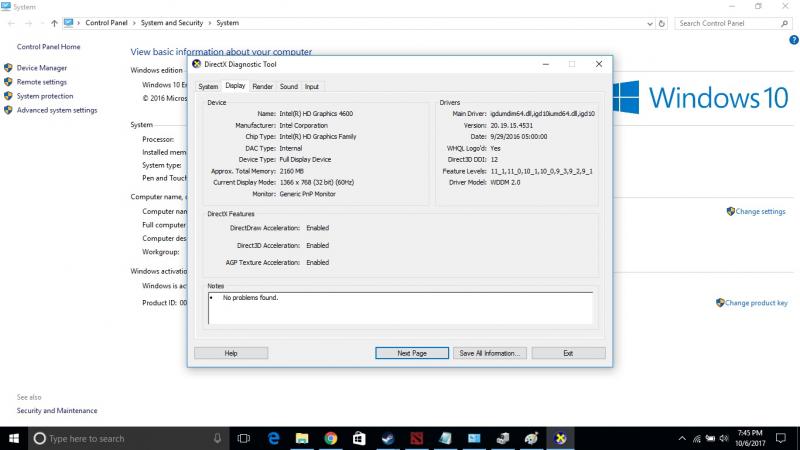
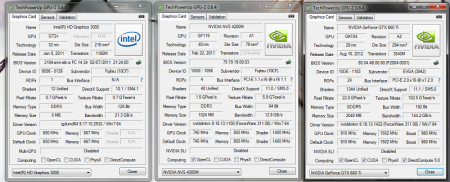
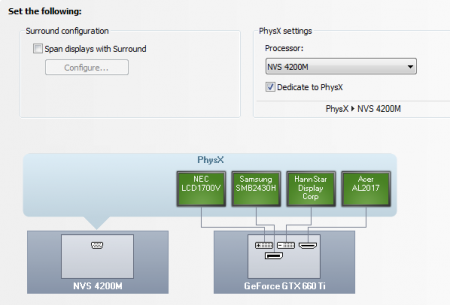
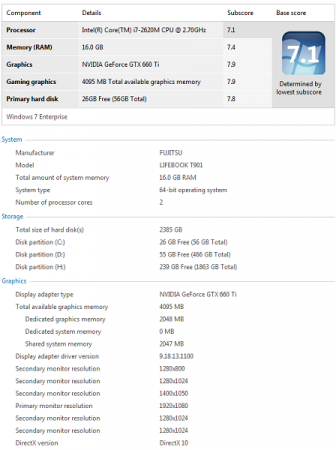
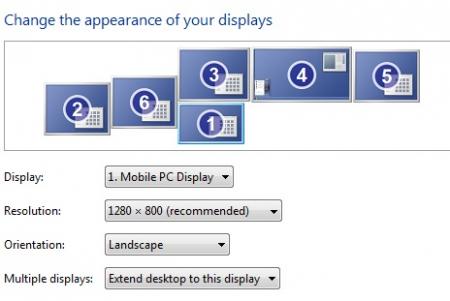
Please ask for support in the main DSDT Override or DIY eGPU Experiences Thread. I have been out of the eGPU realm for too long to provide adequate support. Here is a guide to performing a DSDT override with hopefully less misery, and setting up your computer to have your iGPU, dGPU, and eGPU working at the same time! Oh boy this is going to be fun. This is my system specs (Fujitsu T901): i7-2620M 16GB RAM NVS 4200M GTX 660 Ti Windows 7 Enterprise x64 Now it begins.. Disconnect your eGPU until I say so. If you can, you should perform a DSDT override. The method shown in the official thread was really hard at How to perform a DSDT override: Now for the fun part........ Disconnect your eGPU Uninstall ALL (ALL MEANS ALL) (dGPU included!!!) Nvidia drivers (keep the Intel graphics driver) Use Driver Sweeper and check all the Nvidia options, run, reboot, turn off computer -- don't install the driver for the dGPU yet Connect eGPU and go to Setup 1.x Set your eGPU port to G2 (assuming your have an adapter that supports G2, and your computer as well - if not, then skip setting the port to G2) dGPU off 32-bitA compaction for iGPU eGPU chainload to your OS Windows may yell at you to reboot due to hardware changes, don't quite yet Check device manager, you might (I did) have error 43 Attempt to install the latest Nvidia drivers for you eGPU -- still don't install drivers for your dGPU If your lucky, it will install, if not: shutdown/reboot Setup 1.x do the same as before (dGPU off and such) Attempt to install the Nvidia drivers again for your eGPU After a few hours of fiddling around, you should get them installed (keep your dGPU off this whole time) ONLY AFTER YOU GET YOUR eGPU DRIVERS INSTALLED!! (and as such, error 12 in device manager) Go to Setup 1.x Set port G2 on your eGPU port (again, if you support G2) 32-bitA compaction for iGPU dGPU eGPU (or choose 36-bit if you performed a DSDT override) chainload You will probably get the reboot due to new devices again, but before you do, check device manager Might have a generic VGA device or something instead of the NVS 4200M Attempt to install the drivers for you dGPU now If no luck, reboot and do the same Setup 1.x as before (with dGPU on) Attempt to install dGPU drivers again Reboot after you get your dGPU drivers installed Keep the same Setup 1.x method If your lucky you should have your iGPU dGPU and eGPU show up fine in device manager. You can go to the Nvidia control panel and dedicate your dGPU as your PhysX processor, it works really well. (If you play stuff that supports PhysX and have an at least somewhat useful dGPU) ------------------------------------ I hope this helps. ^ over 20 hrs of fiddling around well spent ;-; ------------------------------------ HOW TO: Update drivers (probably): Note: You can check your driver version for both your eGPU and dGPU in the System Information dialogue box under 'Help' in the NVIDIA Control Panel (you can even check your Bus here too (PCI Express x1 Gen2 as shown for my eGPU). Results::::: iGPU + dGPU + eGPU dGPU PhysX dedicated: WEI: ALL THE MONITORS (and all different resolutions too ): Weeee~~~~~~~~~~~~~~ Check out a video here:
- 95 replies
-
- 12
-

-
THIS IS A PROVISIONAL GUIDE THAT IS INCOMPLETE, CHANGES ARE BEING MADE CONSTANTLY, USE AT YOUR OWN RISK After about 3-4 days of researching, I'm confident enough to start a provisional guide for 2015 Edition Macbook Pro Retinas both 13" and 15" that have dedicated AMD GPUs instead of nVidia GPU's. A few people have stated that it is impossible to use an eGPU with the new 2015 Macbook's but I believe this is simply not true. After chatting with 2 different Apple engineers at a Genius Bar, I was told that no changes were made to the new 2015 line of Macbook's that would effect the application of a eGPU build, and that it's highly possible to do so. With this in mind I decided to continue with my project and was able to do some extensive research on what parts I would need and what I would need to do with the software. The hardware remains the same, meaning there's nothing extra you should buy, that you would not have bought if you were building an eGPU for any other Macbook. The software, from what I can see is where it gets tricky but I'll get to that later. First off I purchased these: Power Supply - Used to power parts. GPU/Graphics Card - The thing that's going to play Star Wars Battlefront on High Settings at 60 FPS (hopefully) Akitio Case - Used to make GPU thunderbolt Compatible. (You're connecting your thunderbolt cable to this, as GPU's don't have thunderbolt ports). Barrel Plug - Used to attach Dell DA-2 Power supply to Akitio Case and GPU. Super HD Drawing of how the Connections look like Imgur You set up the Hardware like you would any eGPU build. 1. Connect Graphics Card to Akitio Case. 2. Connect barrel plugs 8-pin PCIe end to the Dell DA-2's 8-pin plug. 3. Connect one of the 6 pin PCIe plugs coming from the Barrel into the Graphics Card 4. Connect the Barrel to the Akitio case in order to power the case. 5. You have now powered the GPU and the Akitio case. 6. Your hardware is ready. Now onto the provisional software guide: The software is currently being worked on until my eGPU parts come in to test if it actually works (thus this being a provisional guide) (Requirements: Windows 8.1) At first I thought that the software would be just like any other Apple e-GPU project. Meaning, connect eGPU, install drivers etc. However, the new 2015 line of MBPr's that have dedicated GPU's (dGPU), use AMD rather than nVidia. What this means is that you can no longer use nVidia's Optimus technology in order to connect the eGPU to the new Macbooks with dedicated GPU's. What Optimus does is if it detects that there are 2 nVidia cards connected to the device (the one in the Macbook and the eGPU), it switches to the one with the most power, which would be the eGPU, automatically disabling the default dGPU for you. This allows someone with a 2014 Macbook that has a dedicated GPU, to use the internal LCD screen (the Macbook screen). This is not the case with the new MBPr's with AMD dGPU's. So now, we have to figure out a way to disable the default AMD dGPU and enable the Intel iGPU, which should allow you too use the eGPU for the internal monitor. The problem is that device manager doesn't show the Intel iGPU by default, as that's the way Bootcamp is optimized. It is explained in more detail in the thread below. If you have one of the new 2015 MBPr's with a dGPU and you were to go into device manager on Windows, you would only see the AMD dGPU. You wouldn't see the Intel iGPU. In order to solve this issue I looked at THIS thread. This thread basically solved the whole problem, thanks to users @ah- for providing the file that makes it so device manager shows Intel's iGPU (Intel Iris Pro 5200). The instructions for device manager to show your iGPU are as follows: (Huge thanks to @juniordiscart , wouldn't be able to do this without him) 1. Install reFIND via Windows. 2. Reboot your computer, you should now see a new boot screen. You will see this every time you boot up from now on. Boot back into Windows. 3. Download THIS file and place it on your desktop. 4. Open up Command Prompt, run as administrator. 5. (Thanks to @juniordiscart for the clear and concise instruction) Enter the following commands: mountvol S: /S This will mount the EFI partition in Windows and assign it the drive letter S. You won't be able to see it appear in "My Computer" however, it remains hidden. S: cd EFI dir Check the output after these commands. If you see a directory for refind, then you have refind installed and you can proceed with the next set of commands. Otherwise, make sure you follow the installation instructions for rEFInd for Windows onthis link: The rEFInd Boot Manager: Installing rEFInd xcopy /E C:\Users\YOURUSERNAME\Desktop\apple_set_os.efi S:\EFI\custom\ This last one copies the efi file to the custom folder of the EFI partition. Make sure you get all of the "\" right and that your path to your apple_set_os.efi file is correct. It should ask you to create any custom directory if you don't have one already. 6. Now that you've done the hard part, when you reboot you should be brought to the reFIND boot screen and there should be a new option called something like "apple_set_os.efi". Open this up. 7. It should flash the screen quickly and bring you back to the reFIND boot screen. (If it opens up and stays on the screen for more then a minute, shut off your computer and try again) 8. Boot to Windows. 9. Check device manager. Your Intel iGPU should now show up. Congrats you've done the hard part! Now install your Intel Drivers ( https://downloadcenter.intel.com/ ) BUT WAIT------ While installing your Intel drivers your screen will flash black and most likely freeze up. Let it sit like that for a couple of minutes or so and shut down your computer by holding the power button till it turns off. Turn it back on, and REPEAT STEPS 6-7 above. Every time you shut down your computer you have to first start up the "apple_set" efi file, then start Windows. Or else your iGPU won't show. Now you have the latest Intel drivers. Disable your dGPU in Device Manager (right click it, disable), your Macbook should auto switch to the Intel iGPU. Personally, all of the above worked great for me. I was able to disable the dGPU and use my iGPU. The speed at which the 2880 resolution screen ran was evidence enough that it worked. Now, we wait Since my parts haven't come in yet I'm not able to see if connecting the eGPU will allow me to use the Mac's internal display, but they should be here soon so I'll update as soon as I get them. (To be continued.....) Edit: If anyone can explain to me what error 12 is and how it occurs please do . Thanks!
-
Hi guys, i have several question that i want to ask.... Before i want to upgrade my m15x, i just want to make sure of it 1. Is nVidia GTX 765M compatible with alienware M15x ? 2. if its compatible, then what requirement that i need to upgrading my m15x? 3. will the old X bracket will fit for GTX 765M(and also maybe a guide to remove the old GPU to the new GPU, cause i'm really noob at this)? 4. and lastly what driver or bios/vbios i need to install it? Here is my m15x profile.. Operating System: Windows 7 Home Premium 64-bit (6.1, Build 7601) Service Pack 1 (7601.win7sp1_gdr.120830-0333) BIOS: Ver A03 1.00 Processor: Intel® Core i7 CPU Q 720 @ 1.60GHz (8 CPUs), ~1.6GHz Memory: 4096MB RAM Graphic Card : nVdia GTX 260M
-
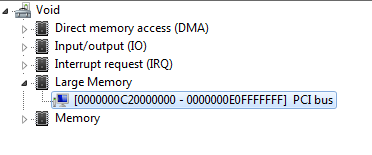
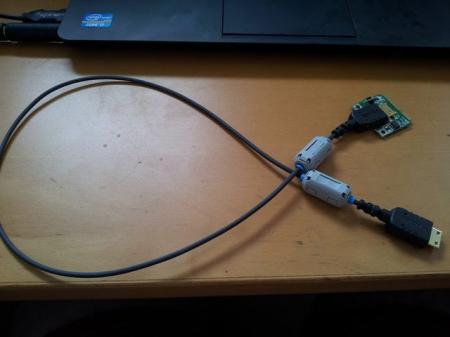
Hi, this thread will be my "Blog" of the experiences and troubles with my S430 and the eGPU Setup. I am currently collecting the pictures and make videos of how I build my case. Updates will come regularly. Update from 12.06.2013: Hey, I got my PE4L 2.1b mod to work. Sadly I rarely have issues with the connection. I think that a downgrade to Gen1 link speed could fix the issue. Bplus now has a cable for the PE4H 2.4 that will allow me to run Gen2 and lucky as I am I was able to get my hands on a Cheap PE4H 2.4 from ebay. I also purchased the new cable from BPlus already. The plans about my case have also changed, I wanted to make a metal one and already had the plans layed out. But with the announcemend of payable Thunderbolt adapters in (hopefully) early 2014 I decided to just make a "cheap" case for these 6 Months that I'll use it. When the cases that come with the Thunderbolt adapter do not fit my needs I'll use the materials and layouts I gathered/made to make a metal case for the Thunderbolt eGPU solution. I will also make some minor changes to the XBOX 360 PSU. So until my new hardware arrives in approx. two weeks there will be no updates. Sorry. Until then Lets start with my System specs: Lenovo S430 3364-57G Core I7 3520M 2 x 2,9Ghz HT 2x 4GB Hyundai DDR3 1600Mhz Plextor 128GB M5S Travelstar Z7K500 500GB Intel HD4000 Zotac GTX 560 Multiview Windows 7 64bit Professional eGPU Setup Specs: PE4L 2.1b with PM3N XBOX 360 Power Brick 203 Watt ( 12V @ 16,5A = 198W , 5Vsb @ 1A = 5W ) DELOCK HUB USB 2.0 4 Port ext. ZSlimZ Molex wire from an old PC PSU Diagnostic Tools: Imgur album: Lenovo S430 eGPU with GTX560 - Imgur 1.2opt ≈368MiB/s H -> D ( ≈ 385MB/s ≈ 77% of 2.0 x1 ) ≈403MiB/s D -> H ( ≈ 422MB/s ≈ 84,5% of 2.0 x1 ) Benchmarks: 3DMark06 -- 20584 ≈ 80% of 25800 3DMark -- Ice Storm: 86378 ≈76% of 113619 ---- Graphics: 125785 ≈ 82,5% of 152566 ---- Physics: 41201 -- Cloudgate: 9652 ≈ 55% of 17605 ---- Graphics: 20463 ≈ 93% of 21922 ---- Physics: 3388 -- Fire Strike: 2398 ≈ 87,5% of 2738 ---- Graphics: 2638 ≈ 91% of 2886 ---- Physics: 4834 ---- Combined: 984 -- 3DMark11 3706 ≈ 91% of 4060 ---- Graphics: 3645 ---- Physics: 4222 ---- Combined: 3507 Software DSDT Override: Windows 8 DSDT Override: I tried, I read several guides on the topic, because I didn't want to setup a new OS, but I haven't found the solution, I experimented a bit myself, but to no avail. Windows 7 DSDT Override: File: DSDT Override + S430.zip The file contains a guide in german aswell. Die Datei enthält auch eine Deutsche Anleitung. DSDT Override for Lenovo S430 (3364-57G) and other Notebooks ===================================================== There is a short guide for the S430 and a long one for other Notebooks. USE AT OWN RISK. NO WARRANTY! If you have a S430 (3364-57G) and Windows 7 installed: Step 1: Open CMD in Admin Mode. Windowskey -> type "cmd" -> right click on it -> start as admin. Step 2: Navigate to this directory. Step 3: Type "asl /loadtable DSDT-S430.aml" into the commandline. Step 4: Reboot. Check Device Manager -> view -> resource by connection. If you have a "Large Memory" entry now, you're done. ===================================================== ===================================================== If you have no Lenovo S430 you have to go the full way. Step 1: Open your Device Manager and click on view -> ressources by connection. Step 2: Search for the last "PCI bus" entry. It should have a lot of subentries, including "Motherboard resources". Step 3: Write down or memorise the last digits of the second value inside the brackets. e.g. Entry: [00000000BFA00000 - 00000000FEAFFFFF] PCI bus Value to memorise would be "FEAFFFFF". Step 4: Open CMD in Admin Mode. Windowskey -> type "cmd" -> right click on it -> start as admin. Step 5: Navigate to this directory. Step 6: Type "iasl -g" into the command line. You should have some new files in your directory now. One of them should end with ".dsl". Step 7: Open the .dsl file with the editor. Step 8: Press STRG + F and search for the memorised value. Step 10: You will see a bunch of "DWordMemory" Methods, go to the end of that list, put your cursor behind the last "TypeStatic)" ( yes after the bracket ) press Enter and now copy the following at the place: QWordMemory (ResourceProducer, PosDecode, MinFixed, MaxFixed, Cacheable, ReadWrite, 0x0000000000000000, // Granularity 0x0000000C20000000, // Range Minimum, set it to 48.5GB 0x0000000E0FFFFFFF, // Range Maximum, set it to 56.25GB 0x0000000000000000, // Translation Offset 0x00000001F0000000, // Length calculated by Range Max - Range Min. ,, , AddressRangeMemory, TypeStatic) It should look like this: Now indent if you like for better readability. ( Notice the Method you inserted is a 64bit QWordMemory not DWordMemory ) Step 11: Go to the top of the textfile, you should see two lines that start with "AHCI" delete both and save the file. Step 12: Switch to the command line again. Type "iasl <name of="" the="" file="" you="" got=""><dsl file="" name="">.dsl". Step 13: Check the output, if there are 0 Errors you are fine if not check some DSDT sites like: DIY eGPU experiences - Page 1003 tonymacx86 Don't forget to thank them for their efforts. Step 14: If you got 0 Errors you'll get a "DSDT.aml" file. Type "asl /loadtable DSDT.aml" into the command line. Step 15: Reboot. Check Device Manager -> view -> resource by connection. If you have a "Large Memory" entry now, you're done. Hardware & Case XBOX360 PowerBrick: Q: Won't 198W be too much for a Molex wire to handle? Aren't you afraid of cable fire? A: Yes you are right, 198Watt would be too much for a single Molex wire, but I have a GTX560 that just consumes 150Watt. Molex oficially handles up to 11A per lane, what would make 132W on the 12V lane. I know I am slightly above that and tested the wire heat while my GPU was on maximum Load during a 3DMark benchmark. it got warm, but far from Hot. I would guess that the single 12V cable had about 26°-30°C and I decided that this is okay for me. Edit: I tested the temperature with a device now, the cables surface got 24,3°C warm. So please keep 11A per lane in mind and be careful! Cable fire is very dangerous. Test thoroughly beforehand! Q: Why do 5Vsb and PSU Enable go into the red lane? A: When you plug in the XBOX PSU it will be on standby and only provide 5V on the 5Vsb lane ( Vsb = Volt Standby ), to wake the PSU up there must be a 1,5V to 5V current on the PSU Enable lane. Only then you'll have power on the 12V lane to power your GPU. Q: Why did you seperate the GND lanes? A: I noticed that the 3 lanes get a bit too thick for my shrinking hose, so I split it up. The thinner wires handle up to 8A per lane and my GPU needs 12,5A so I am safe with my GTX560 in this case. The male Molex connector is connected with the female one on the XBOX PSU. The female connectors are for the PCI-E power adapters and the female floppy for the PE4L. I just cut them off from an old ATX PSU. Discontinued attempts PE4L Socket and Plug: I tried to connect the PE4L via a HDMI cable to get more mobility. Sadly it didn't work. I soldered everything right, but it seems that the impedance of 4 soldered bridges and one HDMI connection is too much. Here are some pictures: Photo Album - Imgur Ferrit Cores for the PCI-EMM060B Cable: Short: It didn't work no Gen2 Speeds: to be continued...</dsl></name>
-
This will hopefully be a somewhat useful guide to getting your eGPU working. I will try my best to extend the guide to system configurations outside of my own (that I cannot test). This is only for Windows based systems. I will cover Windows 7 and Windows 8/8.1. I have my system (Fujitsu T901) running with an eGPU with Windows 7, Windows 8, and currently Windows 8.1. I will try to be as general as possible, but bear in mind that it is based on getting my system running with an eGPU. So if you have a Fujitsu T901, this will help you get your eGPU setup. Before you continue, make sure you read, re-read, read read read till you get sick of it - the official page: http://forum.techinferno.com/diy-e-gpu-projects/2109-diy-egpu-experiences-%5Bversion-2-0%5D.html This guide is more to show the steps for a single application. Mine just so happens to require all of the troubleshooting steps to get working correctly. Pain to setup, but good for a guide. ---------- For the T901 you will need to have Setup 1.x and will require the following steps (covered in this guide): If you do not want the dGPU active: 32bit compaction with Setup 1.x. If you do want the dGPU active: 36bit compaction of the eGPU with Setup 1.x and a DSDT override is required (whether it is loaded into the registry if you are using Windows 7 or loaded into memory during boot if you are using Windows 8/8.1). This is my system (Fujitsu T901): i7-2620M 16GB RAM NVS 4200M GTX 660 Ti From this: I have a 6-series chipset. 6-series and later (guessing probably all that come later) support PCIe 2.0 ports for use for an eGPU. Essentially - the ExpressCard or mPCIe ports can run at Gen2 speeds. My iGPU in this case would be Intel HD 3000. My dGPU is the Nvidia NVS 4200M. My eGPU is a Nvidia GTX 660 Ti. The RAM amount (since it is over 3.25GB) means that I might run into memory allocation issues (which I do). There are some exceptions to this. ---------- Seeing my laptop has ExpressCard, I got the PE4L-EC060A adapter for use with my eGPU. If you don't have express card, but have a mPCIe slot free (or can be made free by removing your WiFi card), you can get teh PE4L-PM060A. With some testing (MikjoA, naturbo2000, and myself) we determined that getting the 100cm cable doens't hurt performance, longer cables might however. See here: http://forum.techinferno.com/diy-e-gpu-projects/2109-diy-egpu-experiences-%5Bversion-2-0%5D-38.html#post67617 You will need a separate power supply (PSU) to power the eGPU. I use a modular (to cut cable clutter) 550W PSU. Certainly a bit overkill since it is only powering my eGPU. Some people have used the XBOX 360 power supply as well. If you haven't decided on what card you want for your eGPU, you get to read the main post that you are now probably muttering in your sleep. Tech Inferno Fan explains here: http://forum.techinferno.com/diy-e-gpu-projects/2109-diy-egpu-experiences-%5Bversion-2-0%5D.html#whichcard You may need Setup 1.x here (usually a pretty good idea to get this - needed in most situations): http://forum.techinferno.com/diy-e-gpu-projects/2123-diy-egpu-setup-1-x.html I have two videos of me using Setup 1.x here to hopefully help walk through the process: http://forum.techinferno.com/diy-e-gpu-projects/2123-diy-egpu-setup-1-x.html#post78919 ---------- Hardware wise, this it is a fairly simple procedure - especially for ExpressCard applications, mPCIe applications will require an extra few steps not covered here but you can see MikjoA's procedure here: http://forum.techinferno.com/diy-e-gpu-projects/2158-diy-egpu-guide-sony-vaio-vpc-z2-svz13.html Plug power from your external PSU into your eGPU and adapter (floppy connector). And that's about it really. Plug in your PSU and plug your adapter into your computer. Harder part is making your own enclosure. I use a stripped mini-ITX case. Once you have it all plugged in and whatnot. Turn on your laptop and see if it works! Once you get to your desktop, go to device manager. If you don't see any flags on your video card you should be good to go (lucky you ). But..... if you are like me, you will have a whole series of errors. In a nutshell: Error 12 - Memory allocation issue. You might get by with using Setup 1.x to perform PCI compaction to get it working. I perform a DSDT override to get mine working correctly (which I'll cover later). Error 43 - Yay you don't have error 12 (my reaction). Means you need to install the video card driver. ...but if you are like me, it won't go easy. I'll cover this later. ---------- If you see nothing in device manager, check your connections. If that all checks out, make sure your ExpressCard / mPCIe port is active in BIOS. If it is, you either have something going wrong, or an extreme case of error 12. How to (probably) fix error 12: How to (probably) fix error 43: ---------- DSDT override info: Readup here first please: http://forum.techinferno.com/diy-e-gpu-projects/2109-diy-egpu-experiences-%5Bversion-2-0%5D.html#dsdtoverride Link to my guide showing how I performed my DSDT override and how it allowed iGPU+dGPU+eGPU: http://forum.techinferno.com/diy-e-gpu-projects/3539-guide-dsdt-override-simultaneous-igpu-dgpu-egpu.html If you are running Windows 8 or 8.1 you will want to take a look here too: http://forum.techinferno.com/diy-e-gpu-projects/2109-diy-egpu-experiences-%5Bversion-2-0%5D-6.html#post31421 ---------- Upgrading video drivers. --- This pretty much ends this guide. Since you have it all up and running, you are pretty much set. Hope this helped you! ---------- My setup: The pictures were all too big for the forum to handle so just see this imgur album instead: eGPU setup - Imgur 1. eGPU case 2. side pic 3. top view showing awful dremel skills and custom IO shield 4. internal pic. PSU mounted with steel pipe hanger. GPU on modified rubber stoppers and held in place with more steel pipe hanger 5. case is just a smidge too small, so the PCIe power cables poke out a little bit, not much though 6. custom PSU power plug thing 7. shows adapter and ATX switch board, plus my GPU with a little dirty fan... 8. showing it all hooked up, I can reach my finger inside and flip the switch directly on the PSU to turn the eGPU on/off 9. full setup, no laptop 10. full setup, up and running!
-
I got myself a GT70 (one with 675mx and 3630QM) but the stock settings were not good enough so I tried overclocking the GPU to see if i can get better performance. Using afterburner, I get around 800mhz for the core and +650 to the memory, but I think it can go a little more temps are still fine at around 75-80C under load (CPU goes way up to around 90C ) so I wondered if there's any way to overclock the core further cuz it seems to have reached its limit for the memory. PS. I have no experience with flashing vbios or modding. So please keep it simple guys


