J95
-
Posts
1399 -
Joined
-
Last visited
-
Days Won
79
Content Type
Profiles
Forums
Downloads
Everything posted by J95
-
Yeah with most games you don't need to OC at all....I've never ruined anything by overclocking....museum Learn about AA settings using Nvidia Inspector NVidia Anti-Aliasing Guide (updated)
-
985/6000 higher memory bandwidth useful for AA highest settings (anti-aliasing), stock voltages will improve temps.
-
M17xR2 GTX 680M, editing nvdmn.inf nvdmn.inf (Dell) v314.22 Device manager>Display Adapters>Details>Device Description>Hardware Ids. 10DE&DEV = Nvidia, 11A0 = GTX 680M, 043A = M17XR2, 1028 = Dell (PCI\VEN_10DE&DEV_11A0&SUBSYS_043A1028) 10DE&DEV = Nvidia, 119F = GTX 780M, 0490 = M17XR3, 1028 = Dell (PCI\VEN_10DE&DEV_119F&SUBSYS_04901028) M17xR2 GTX 680M example. PCI\VEN_10DE&DEV_11A0&SUBSYS_05511028 = M17xR4/60Hz GTX 680M Edit four "sections" 2,3,4,5 (Nvidia drivers v314.22 three sections), look for "%NVIDIA_DEV.11A0.0551.1028% = Section210, PCI\VEN_10DE&DEV_11A0&SUBSYS_05511028" replace 0551 with 043A. ------------------------------------------------------------------------------------------------------------------------------------------------------------------------------------------------------------------ M17xR1 edit 5 sections, GTX 260M/280M -nvidia drivers v331.40 GTX 260M = 0618 %NVIDIA_DEV.0618.02A2.1028% = Section033, PCI\VEN_10DE&DEV_0618&SUBSYS_02A21028, replace 02A2 with 02A1 GTX 280M = 060A %NVIDIA_DEV.0618.02A2.1028% = Section033, PCI\VEN_10DE&DEV_0618&SUBSYS_02A21028, replace both 0618 / 02A2 with 060A / 02A1 respectively. ------------------------------------------------------------------------------------------------------------------------------------------------------------------------------------------------------------------- "Sections / Windows versions", [Manufacturer]%NVIDIA_A% = NVIDIA_SetA_Devices,NTamd64.6.0,NTamd64.6.1,NTamd64.6.2,NTamd64.6.3 1 [NVIDIA_SetA_Devices.NTamd64.6.0] %NVIDIA_DEV.0407.01F1.1028% = Section004, PCI\VEN_10DE&DEV_0407&SUBSYS_01F11028 %NVIDIA_DEV.0407.01F2.1028% = Section004, PCI\VEN_10DE&DEV_0407&SUBSYS_01F21028 %NVIDIA_DEV.0407.0228.1028% = Section004, PCI\VEN_10DE&DEV_0407&SUBSYS_02281028 ------------------------------------------------------------------------------------------------------------------------------------- 2 [NVIDIA_SetA_Devices.NTamd64.6.1] %NVIDIA_DEV.0407.019C.1028% = Section001, PCI\VEN_10DE&DEV_0407&SUBSYS_019C1028 %NVIDIA_DEV.0407.01F1.1028% = Section001, PCI\VEN_10DE&DEV_0407&SUBSYS_01F11028 %NVIDIA_DEV.0407.01F2.1028% = Section001, PCI\VEN_10DE&DEV_0407&SUBSYS_01F21028 ------------------------------------------------------------------------------------------------------------------------------------- 3 [NVIDIA_SetA_Devices.NTamd64.6.2] %NVIDIA_DEV.0407.019C.1028% = Section002, PCI\VEN_10DE&DEV_0407&SUBSYS_019C1028 %NVIDIA_DEV.0407.01F1.1028% = Section002, PCI\VEN_10DE&DEV_0407&SUBSYS_01F11028 %NVIDIA_DEV.0407.01F2.1028% = Section002, PCI\VEN_10DE&DEV_0407&SUBSYS_01F21028 ------------------------------------------------------------------------------------------------------------------------------------- 4 [NVIDIA_SetA_Devices.NTamd64.6.3] %NVIDIA_DEV.0407.019C.1028% = Section003, PCI\VEN_10DE&DEV_0407&SUBSYS_019C1028 %NVIDIA_DEV.0407.01F1.1028% = Section003, PCI\VEN_10DE&DEV_0407&SUBSYS_01F11028 %NVIDIA_DEV.0407.01F2.1028% = Section003, PCI\VEN_10DE&DEV_0407&SUBSYS_01F21028 ------------------------------------------------------------------------------------------------------------------------------------- 5 [strings] DiskID1 = "NVIDIA Windows (64 bit) Driver Library Installation Disk 1" NVIDIA = "NVIDIA" NVIDIA_A = "NVIDIA" NVIDIA_DEV.0407.019C.1028 = "NVIDIA GeForce 8600M GT " NVIDIA_DEV.0407.01F1.1028 = "NVIDIA GeForce 8600M GT" NVIDIA_DEV.0407.01F2.1028 = "NVIDIA GeForce 8600M GT "
-
Test 985/6000(+500)stock voltage.
-
ASIC quality ? 985/6000 is more than enough.
-
Open GPU-Z click left icon>Read ASIC quality... For gaming 985/1006(+157) / 6000(+500) try first with stock voltage, not stable add 12.5 mV and test again...right click "create clock shortcuts" create clock startup task. Nvidia drivers 331.40 1006/6000 12.5 mV 1.012v, with previous drivers stock voltage was stable.
-
Thanks man I completely forgot the XTU trick...With Flex 99 Pri 8191 booted up 1.55v but when stressed it still drops to 1.22v 67W, XTU 255W 56 255W no go, it seems the issue here is not Ivy voltages but the processor's default settings 68W 3.4GHz it won't override turbo settings so it could be locked somewhere, I'm only stressing the CPU so there's no GPU load involved NVIDIA GeForce GTX 780M video card benchmark result - Intel Core i7-2960XM Processor,Alienware M17xR3 tried disabling Energy Efficient P-State but freezes at boot, there are plenty watchdog related settings... this one renders v. files 4.4GHz 86C-90C w/ modded double pipe heatsink, I can try my triple pipe mod project and give Ivy a chance but only after I'm certain that it wont work... R3 Modded CPU/GPU/PCH heatsinks, 3DMark11.
-
So I upgraded my M17xR3 w/ R4 board, M18xR2/i7-2960XM users could help me out... A11 unlocked BIOS settings @43x 896-pri 0-flex 99w 56 99w level 3 overclocking, extreme enabled, msr lock disabled when stressed the cpu pckg power is stuck at 67W and 1.22v, changing pri to 960 and adding Flex v 1,2,5,10,15,25 w/ThrottleStop still 67W 1.22v 3.4GHz 72C (1.446v idle peak). R3's board 896-pri flex 0 pckg power 95W 1.361v, 1.366v 4.4GHz 99w 56 99w, the voltage tables are different/Ivy Bridge i7-3920XM 1.201v 4.492 GHz [MENTION=119]Mr. Fox[/MENTION] http://forum.techinferno.com/alienware-m18x-aw-18/1039-official-m18x-benchmarking-thread-41.html#post61844 xtu/sandy bridge all versions are unlocked with this board, I'm currently using v4.2.0.8, system PCI-e 2.0 due to sandy bridge configuration but stuck with ivy's voltages when stressed...
-
Yeah I need both SATA III Ports + caching/upgrading drives, the sound issue did speed up things.
-
Both Dragon/Firefox portable + Sandboxie -a -s 2048M -m J: -p "/fs:NTFS /v:RAMDisk /q /y" /c md J:\IE_Cache
-
That was my first attempt but couldn't boot in normal mode/installed IDT in safe mode, upgraded the board without a single beep both SATA III ports + mSATA and audio working fine, tweaking latest XTU 4.2.0.8 sandy bridge supported with this board...
-
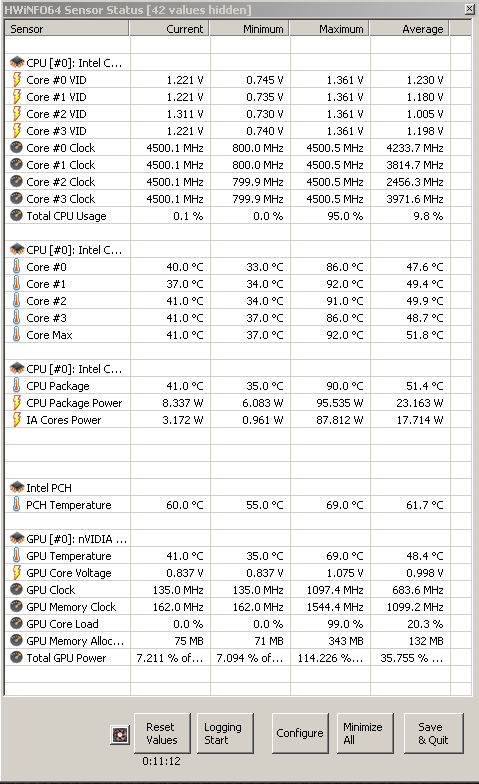
No worries... shows what is limiting performance, 'Util' GPU not fully utilized so it downclocks.
-
It is a different issue but you could try it anyway...seems like someone had success enabling SLI using 320.49 Y500 SLI doesn't work after Windows 8.1 preview - Lenovo Community
-
Mine is still disabled, tried many workarounds...guide updated http://forum.techinferno.com/alienware-m17x-aw-17/4132-alienware-m17x-r3-upgrading-gtx-780m-post57970.html#post57970 yeah you could start a thread discussing the issue.
-
https://forums.geforce.com/default/topic/615173/geforce-drivers/official-nvidia-331-40-beta-display-driver-feedback-thread-released-9-30-13-/post/3957733/#3957733 1379957 - 331.40 bug "TDR in SLI mode with UEFI enabled upon reboot/driver install (will be fixed in next beta release. Disable UEFI as temporary workaround)" Try disabling secure boot, use legacy mode instead...it may work with previous drivers too.
-
Latest driver http://forum.techinferno.com/nvidia/4804-modded-nvdmn-inf-v331-40-alienware-m17xr2-r3-r4-3d-m18xr1-r2-nvidia-gtx-680m-780m.html
-
M17xR1 260m/280m nvdmn.inf_M17XR1_GTX260M_280M_v331.40.zip
-
This Game Ready driver is recommended for GeForce owners playing the Battlefield 4 open beta. Performance Boost Increases performance for GeForce 400/500/600/700 Series GPUs in several PC games when compared to the GeForce 327.23 WHQL drivers. Software Modules NVIDIA PhysX System Software - v9.13.0725. HD Audio Driver - version 1.3.26.4. GeForce Experience - version 8.3.14.1 Graphics Implemented Horizon Based Ambient Occlusion plus (HBAO+) for DirectX 9 and DirectX 11 applications. Visit GeForce.com for more info about HBAO+.OpenGL Added support for OpenG 4.4 NVIDIA SLI Technology Added or updated the following profiles: • Assassin's Creed IV: Black Flag - updated • Batman: Arkham Origins - updated; • Battlefield 3 - updated • Battlefield 4 - updated • Crisis - added SLI profile; • Dirty Bomb - added profile for DirectX 9 • Dying Light - added profile for DirectX 11 • F1 2013 - updated • FIFA 14 - added SLI profile, • Natural Selection 2 - added profile for DirectX 11 • Outlast - added profile for DirectX 9 • Space Hulk - updated • Splinter Cell: Blacklist - updated • State of Decay - added profile for DirectX 9 • Watch Dogs - added profile for DirectX 11 • Crysis 3 - added AO profile • FIFA 14 - added O profile "Bugs for 331.40 - 1379957 - TDR in SLI mode with UEFI enabled upon reboot/driver install (will be fixed in next beta release. Disable UEFI as temporary workaround)" Fixes Since Previous WHQL Driver Version 327.23 [OpenGL][solidworks Flow Simulation plugin]: Some features of the plugin do not work. [1368330] [GeForce 6/7 Series]: GPU clock speed does not get higher than 405 MHz. [1356542] [sLI][splinter Cell Blacklist]: TXAA option is missing when SLI is enabled. [1353668] [surround]: Driver installation fails if NVIDIA Surround is enabled.[1353369] [3D Vision][Rainbow Six: Raven Shield]: Stereoscopic 3D works for the game only if played in windowed mode. [1318923] [Multi-GPU]: After clicking the Multi-GPU balloon message to open the NVIDIA Control Panel, pressing F1 does not open the Help. [1349589] [stereoscopic 3D]: After switching the refresh rate switched to 120 Hz using the NVIDIA Control Panel and then running a 3D stereo application, the refresh rate automatically switches back to the previous refresh rate upon closing the 3D stereo app. [1343087] [3D Surround], 3xGeForce 500/400 Series: When sending output to a fourth display outside of the GPU Surround group, the Surround resolution (3-wide) switches to a non-Surround resolution (single display). [736859] [Quad SLI] [GeForce GTX 295]: “SLI connector is missing” balloon pops up even if the SLI bridge connector is attached.[919269] Display Driver Uninstaller (DDU) V7.7.1 / first uninstall option. GeForce 331.40 - BETA Driver nvdmn.inf_M17XR2_R3_R4_3D_M18XR1_R2_GTX680M_GTX780M_v331.40.zip
-
Open GPU-Z>Read ASIC quality, nice sample you got 1070/2450 1.025v, for gaming 1006/2450 stock v. enough.
-
With GeForce 327.23-WHQL Driver Use this tool to remove previous drivers Display Driver Uninstaller (DDU) V7.6.1 check remove C:\Nvidia folders/first uninstall option.
-
Secure boot enabled ? if so disable it. Disable driver signing. 1) Open command prompt (Admin). 2) Type "bcdedit /set {current} testsigning yes" (without quotes) enter>reboot. 3) Install>reboot 4) Exit test mode "bcdedit /set {current} testsigning no" reboot.
-
Place the .inf file (unzip) under C:\NVIDIA\DisplayDriver\327.23\Win8_WinVista_Win7_64\International\Display.Driver>Run setup.exe within the extracted Nvidia\International folder. Windows version? NVMIn.inf_PCIVEN_10DE&DEV_11A0&SUBSYS_05511462_v327.23.zip
-
You need to reinstall drivers, open device manager>Display adapters>Details>Hardware Ids
-
Lets enable overclocking on all 6 and 7 series laptops
J95 replied to Khenglish's topic in General Notebook Discussions
Try this version 2.1.408.41 GIGABYTE - Support & Downloads - Utility - Motherboard Intel downloads v2.1.408.35, uninstall under programs and features first Intel®SMBus then Watchdog Timer Driver, device manager show hidden devices uinstall IOCBIOS and lastly XTU>reboot. Both versions work fine with win8.1 RTM. SHA1 6c2f9387f7f7aea876342402aec280726df219b9 setup.exe 2.1.408.41 http://download.gigabyte.us/FileList/Utility/mb_utility_xtu.exe SHA1 efe113cbbd32d4efeb75e9899c267b0f9813f0a0 setup.exe 2.1.408.35 -
Lets enable overclocking on all 6 and 7 series laptops
J95 replied to Khenglish's topic in General Notebook Discussions
Try reinstalling IOCBIOS, Programs and Features>uninstall Watchdog Timer Driver>Open device manager>show hidden devices>uninstall IOCBIOS>reboot>folder options show hidden folders>C:\ProgramData\Intel\IOCBIOS folder>run setup.exe> Watchdog Timer Driver-IccWdtDriver>setup.exe>reboot. Better backup those drivers folders before uninstalling, you also can find XTU drivers under C:\Program Files (x86)\Intel\Extreme Tuning Utility\Drivers, check logs C:\Intel\Logs.