Leaderboard


Popular Content
Showing content with the highest reputation on 12/04/15 in all areas
-
The Thunderbolt Twitter Chat happened, and here is a summary of important points and I'd say they look good: Yes, internal LCD mode will work! Yes, they will be certifying empty chassis!3 points
-
____________________________________________________________________________________________________________________________________________________________________________ *Note: This page is no longer updated, I am not taking requests anymore. Please do not PM me, because I will not respond. Other people have graciously posted their unlocked BIOS's within this thread, so you will have to do some searching to find the right one. I may come back to unlocked more later... I just don't have any time. Sorry. ____________________________________________________________________________________________________________________________________________________________________________ Welcome to my unlocked BIOS thread for MSI G-series gaming notebooks! Anytime you see an asterisk (*), it means that pictures for that part are included in the 2nd post. Introduction: In this thread you will find a list of MSI G-series gaming notebooks with their BIOS’ fully unlocked. Just about every feature that MSI has hidden is now available to be changed by the end user. This thread may be of particular interest to techies who love to squeeze every ounce of performance out of their notebooks or even the average person who is looking for a particular feature that has previously been locked. Should I Flash These BIOS? Anyone that owns one of the listed MSI G-Series notebooks is eligible. Who this does NOT apply to: - If you are afraid to brick your notebook, this is NOT for you. There is always a possibility for errors and accidents to occur. - If you do not understand what any or most of these acronyms mean, this is NOT for you. You will probably find little use for the unlocked features and the potential for risk is much greater than the reward. Who this applies to: - If you have an understanding of most of this thread and are willing to learn, continue reading. - If you are an enthusiast who loves modding and overclocking and have experience with this field, continue reading. Features: So what are these features that MSI had locked out? A short list would include: *- XMP RAM support (Up to 2133Mhz) [Warning: 4 DIMMs at 1866Mhz(+) may not be stable, 2 DIMMs are stable at 2133Mhz]. - BCLK Overclocking (Up to 5%, your mileage may vary, no guarantees). - TPL limits unlocked (With the combination of ThrottleStop, CPU throttling can be overcome). Necessary Tools & Knowledge: We’re going to need a couple things before we start flashing: 1. A bootable USB drive in DOS/ME/98. Guides can be found all over the internet. 2. The required BIOS file(s) for your specific notebook. 3. AC Adapter plugged into notebook. 4. Some common sense and bravery. Disclaimer: I claim no responsibility for any accident, damage, or brick caused by this, nor do I guarantee any technical assistance. Flash at your own risk. I am in no way affiliated to MSI, nor is MSI obligated to provide any support with these files. Proceed with caution! Your notebook's warranty will be compromised in the event of a repair! Redistribution of these files is not permitted without prior approval from me. You must contact me BEFORE you plan on hosting them. Thank you. Directions: 1. Add the three (3) files: "BIOS".ROM, AFUDOS.exe and update.bat to your flash drive. The root folder works best. Double check the READ ME.txt that you are about to flash the correct BIOS for your notebook. 2. Plug in USB drive and shut down your notebook. 3. Power on the notebook and during POST hit F11. This will bring up the boot menu, select your USB drive and hit enter. 4. In DOS, type:* This will start the flashing process. Warning: Once you hit enter, you CANNOT stop the flashing process. If you interrupt it via shutdown or remove its power source, you will brick your notebook with 100% certainty. 5. Sit back and wait for the process to complete itself. Note: Your fan will spin at 100% speed, it will be very loud. This is normal. Once your BootBlock has been verified and the command prompt comes back up, the process is complete.* Press Ctrl + Alt + Delete to restart your notebook and hit Delete to enter the BIOS. If your BIOS looks exactly the same as before and the flashing process came back with no errors, then you have to boot into Windows and shut down your notebook, NOT restart. Then check it out. Warning: The BIOS might reset the SATA mode into RAID. Please double check in the 'Advanced' tab that it is set to whichever mode you were using or else your boot manager may get corrupted. If this does happen, you will need to use your Windows 7 CD and repair the start-up process. Downloads: This part is under construction! More will be added. Taking requests as well. MSI Notebook Models: Version: Download Link: 1st-Gen Core-i Retail: MS-GX740(17''): 1.0F ms_gx740.zip Whitebook: MS-16F1(15.6''): 1.0L MSI 16F1 Unlocked.zip 2nd-Gen Core-i: Retail: MS-GT680/683(15.6''): .30Z MSI GT683 Unlocked.zip MS-GT780/783(17''): .30H MSI GT783 Unlocked.zip Whitebook: MS-16F2(15.6''): 3.05 MSI MS-16F2 Unlocked.zip MS-1761(17''): 3.06 MSI MS-1761 Unlocked.zip 3rd-Gen Core-i: Retail: MS-GT60(15.6''): .30M MSI GT60 Unlocked.zip MS-GT70(17''): .30M MSI GT70 Unlocked.zip Whitebook: MS-16F3(15.6''): MS-1762(17''): 3.0G MSI 1762 Unlocked.zip AMD APU MS-gx60(15.6'') 3.05 SecondGenAMDAPU.zip Recovery: Directions for making your notebook function properly if you encounter any errors. Case 1: In case of a GOOD flash, but you still cannot enter BIOS or boot into Windows: Common symptoms include: Endless looping reboots, inability to access the BIOS, permanent black screen, persistent BSODs in Windows or stuttering. The most likely cause was that your image was successfully overwritten, but some values may have changed internally and the BIOS may be having a hard time accepting them. If everything was a success and your notebook boots into one of the situations mentioned above, before trying a blind-flash recovery, UNPLUG the wire leading to your CMOS battery for 5-10 seconds.* This will RESET the stored values in the BIOS to their defaults. If this does not solve the problem, then a blind-flash will be required. Case 2: In case of a BAD flash, a blind-flash will be required. 1. Remove any files from your USB that aren't the necessary bootable DOS files. 2. Pick a ROM you want to flash (doesn't have to be the original), but it MUST be one for your notebook specifically. 3. Rename the file.ROM to AMIBOOT.ROM and put it on your flash drive. 4. Plug in your flash drive in a USB 2.0 slot. 5. As soon as your notebook turns on and nothing is displayed, spam Ctrl + Home (In my case, the MS-16F2 is Ctrl + Fn + PgUp or Ctrl + Shift + NumPad 7). 6. You should hear four (4) beeps and the BIOS should begin flashing itself. --------------------------------------------------------------------------------------------------------------------------- Redistribution of these files is not permitted without prior approval from me. You must contact me BEFORE you plan on hosting them. Thank you.1 point
-
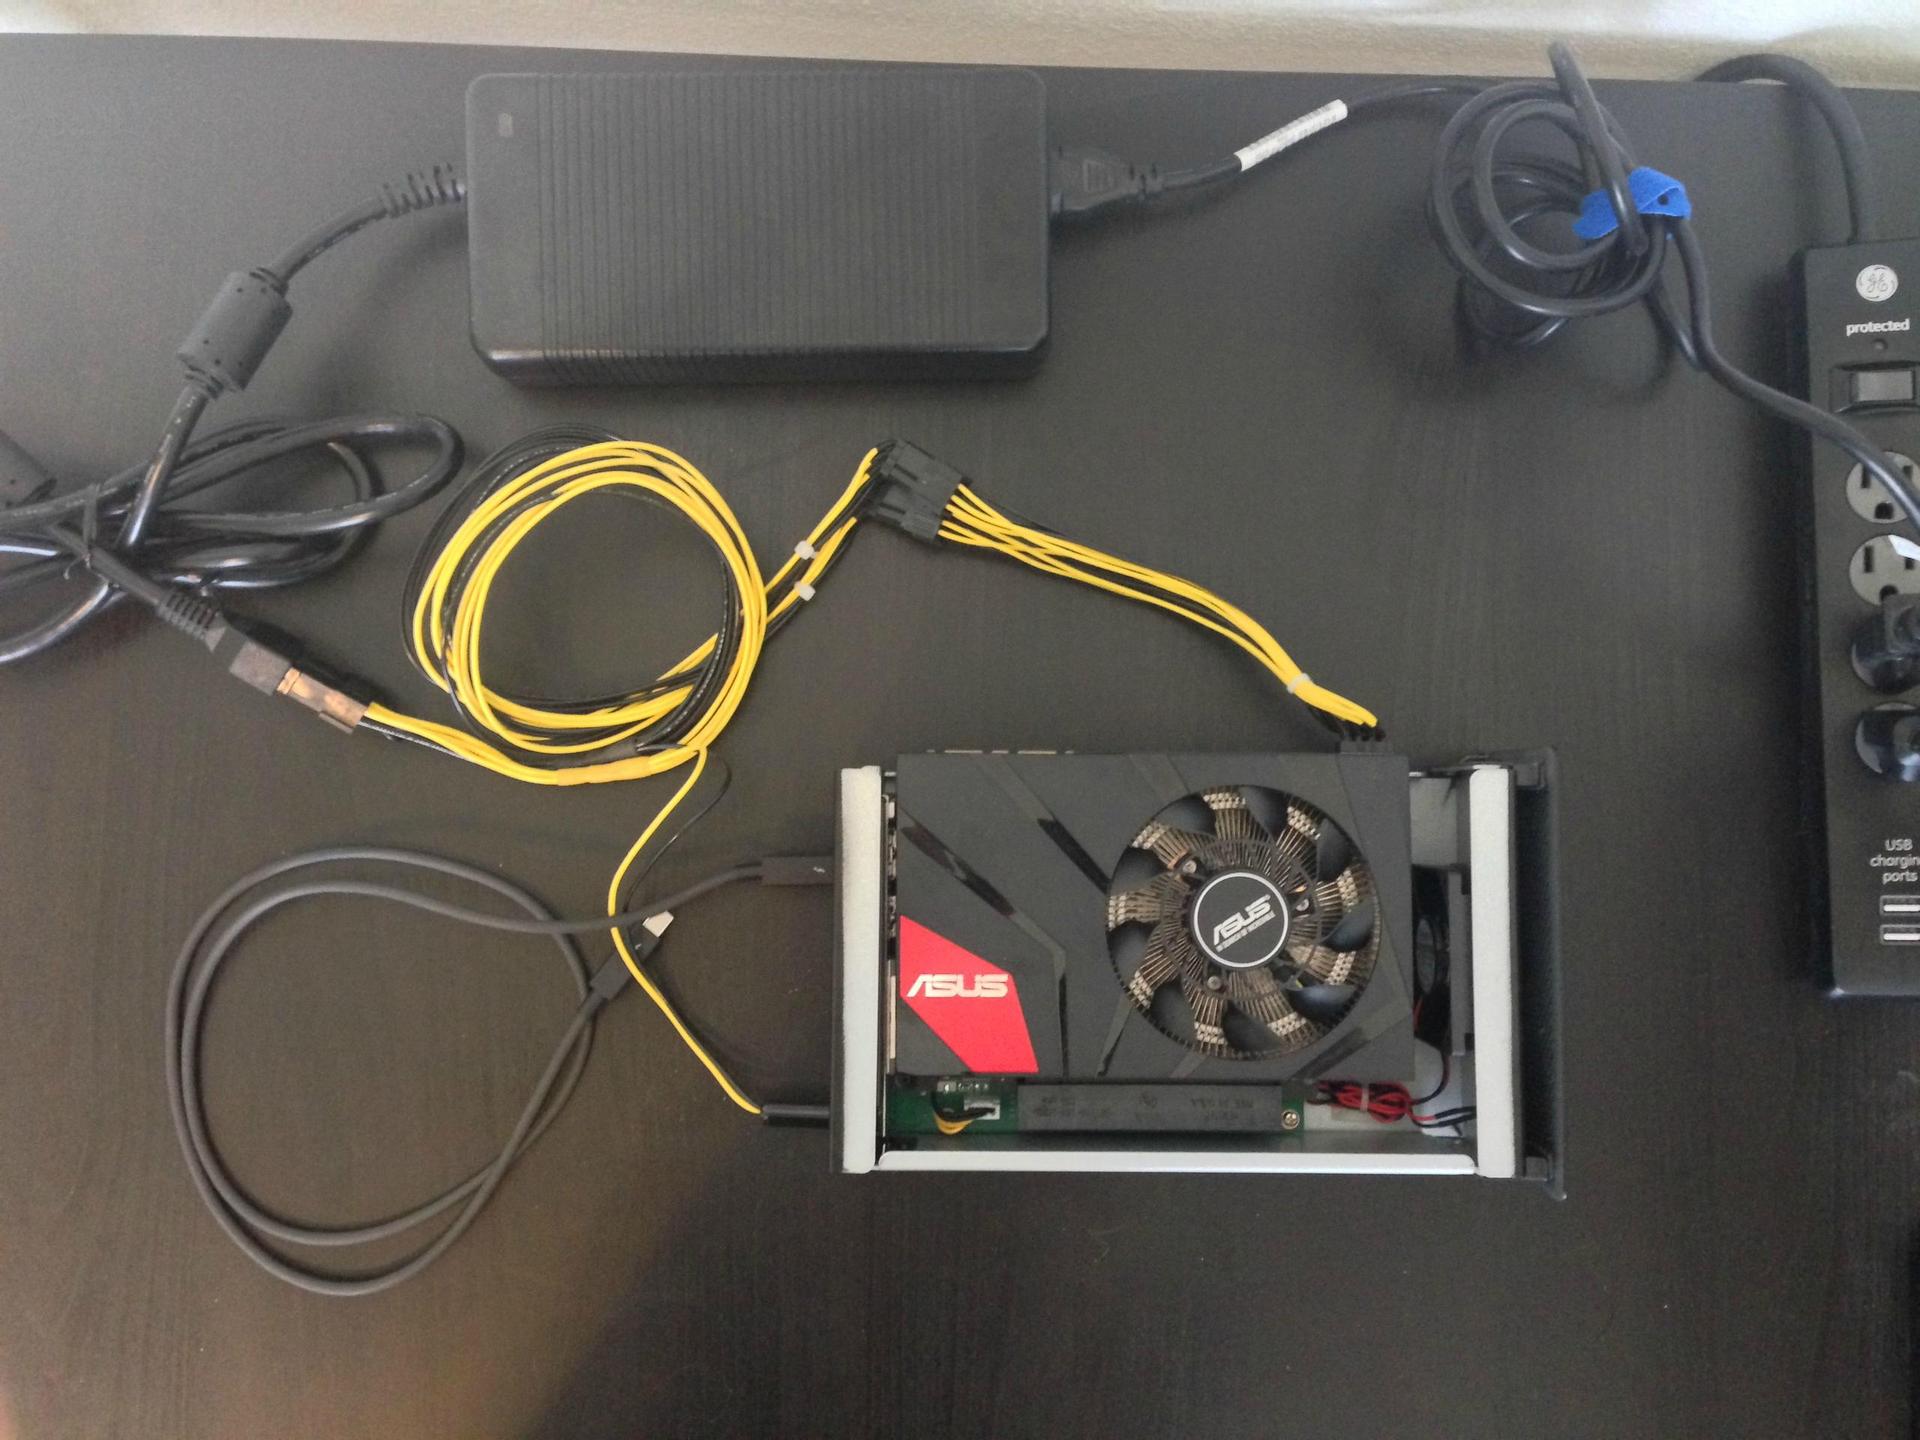
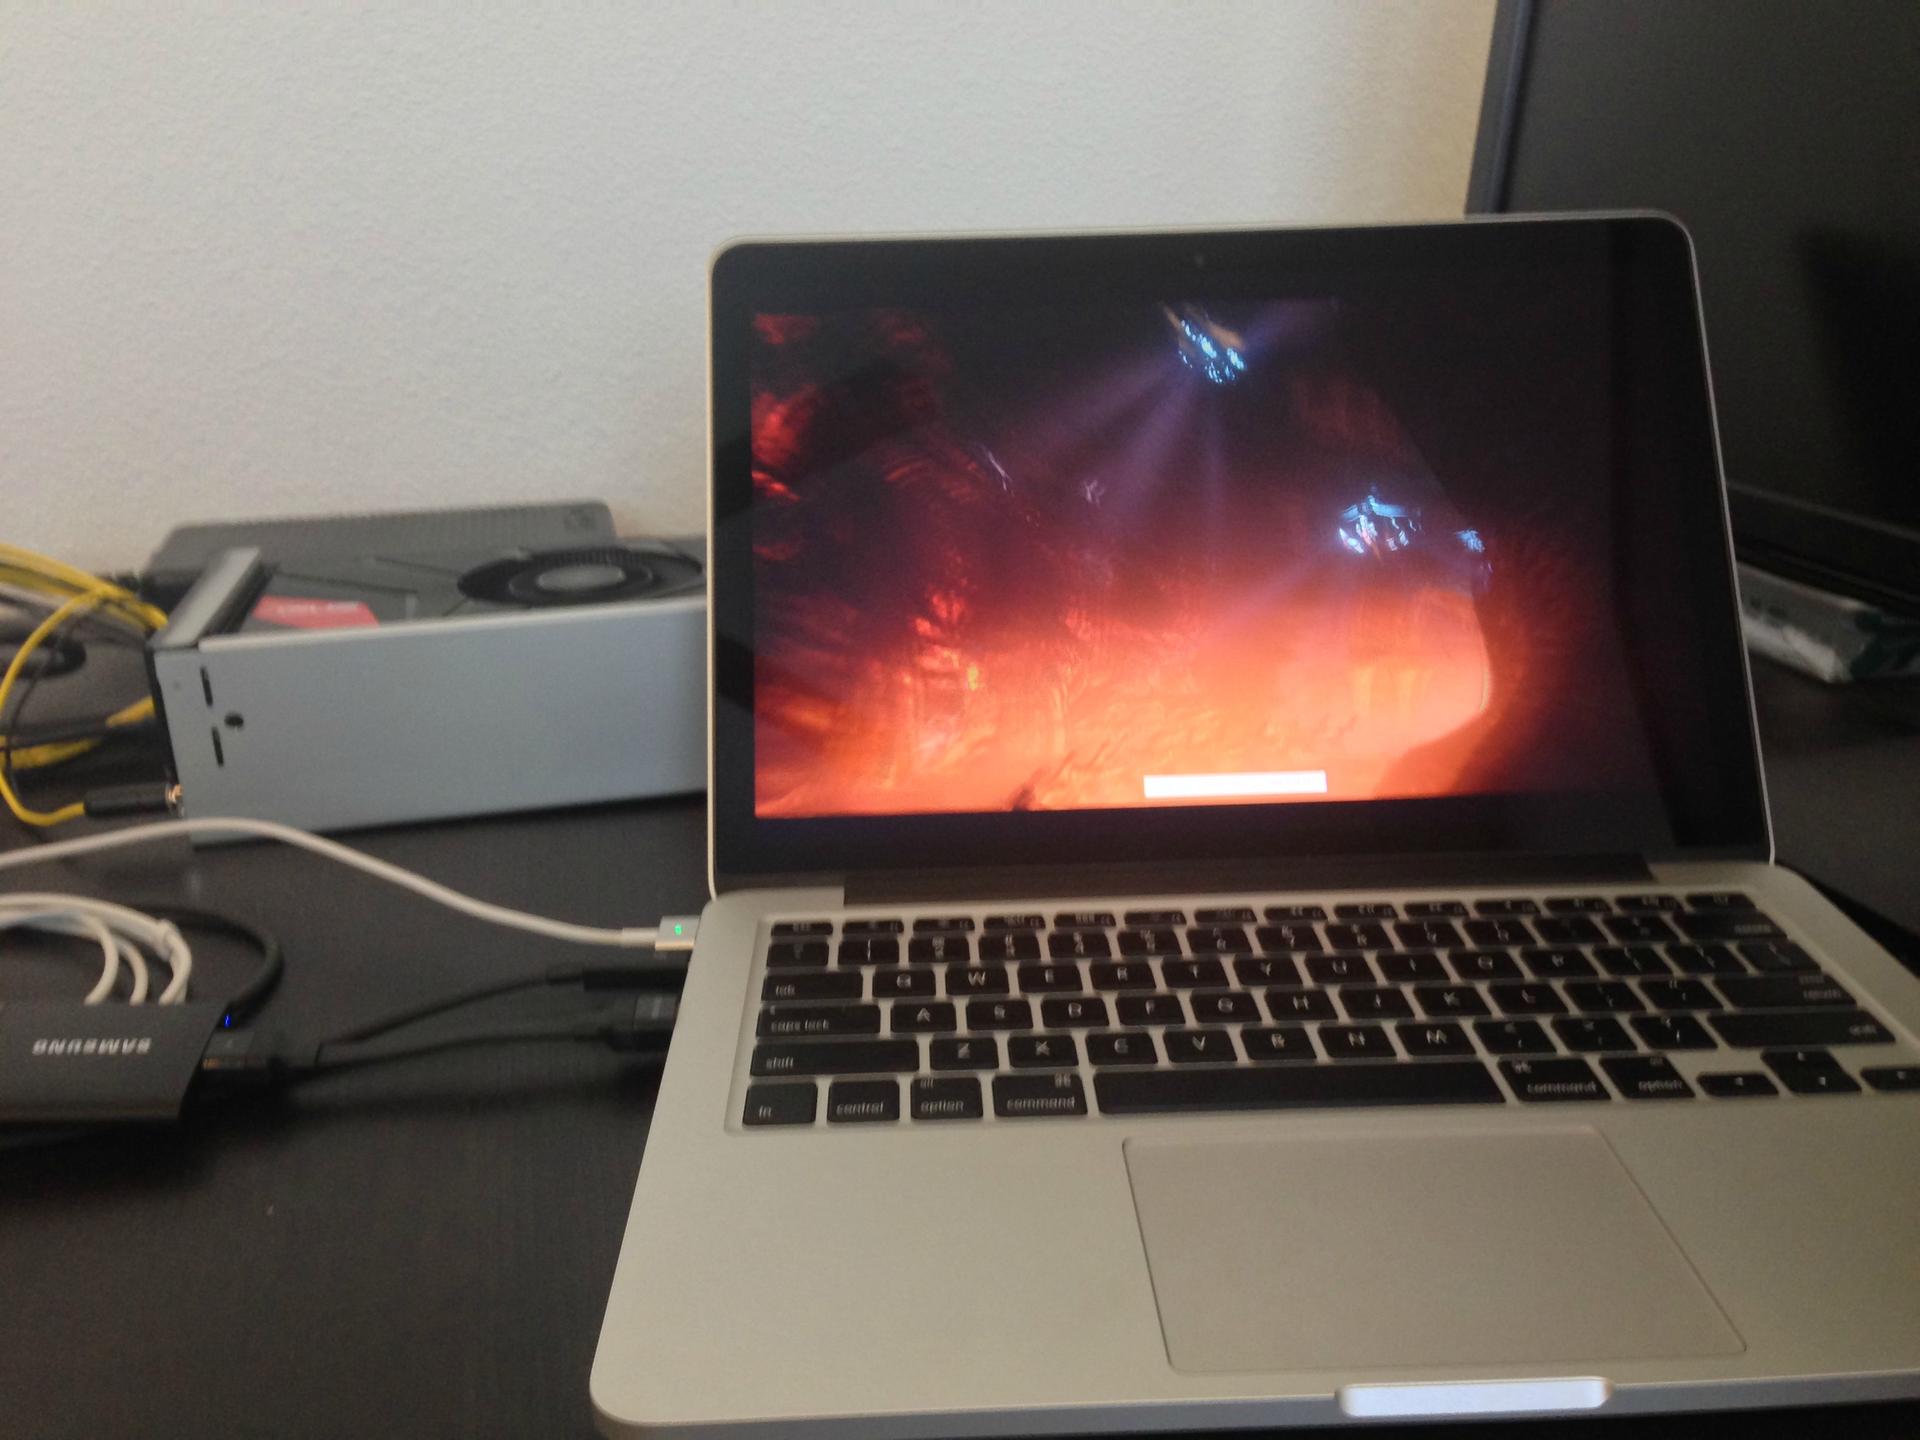
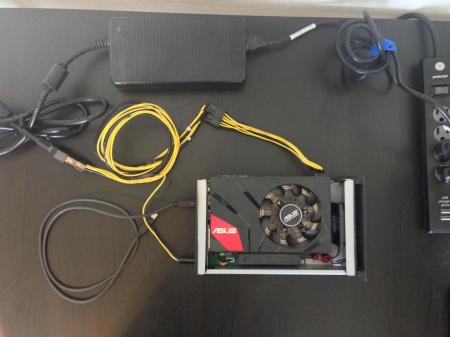
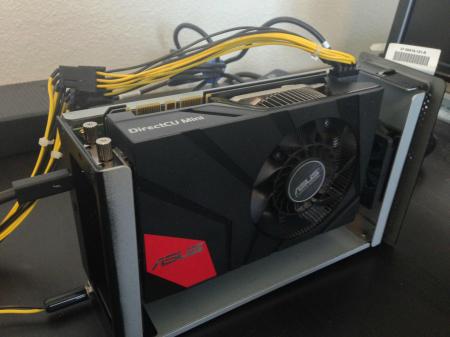
After two weeks of fiddling around with my eGPU setup I have finally found a method that works well with my hardware. There are many suggested modifications on this forum (Evo*'s modified boot files, DSDT overrides*see note bottom of post, DIY eGPU setup), but it seems that these modifications are not necessary for the 2015 13" MBP. The setup includes easy plug-and-play hardware setup, fairly easy software setup (little bit of command line), and installation of Windows 8 on an external drive. Many users with 2015 MacBook Pros seem to have trouble booting up consistently with the eGPU on 2015 MacBooks, so hopefully the power up process I've found works on other MacBooks. Hardware: AKiTiO Thunder2 PCIe Box ASUS DC MINI NVIDIA GTX970 (fits in AKiTiO case without physical modification, but unable to close the case) Dell DA-2 AC Adapter Samsung T1 Portable SSD Cables: These cables from ebay are what make the hardware just plug and play Akitio Egpu 8 Pin to 2 x PCI E 6 Pin Super Low Profile No Latch 1 x Barrel | eBay Two PCI E 6 Pin to One PCI E 8 Pin 90 Degree Bend Right Low Profile USA Made | eBay Hardware installation: - Do not use the PSU that came with the AKiTiO enclosure - Really simple installation, just plug everything in (there aren't many cables and ports to figure out). Just make sure none of the 6-pin and 8-pin plugs are upside down, but it should be easy to tell. Note that for my software installation below, everything was done right after I reset the MBP to factory settings. eGPU and OS X: Goalque's automate-eGPU.sh script makes OS X very easy to setup for eGPU use. (http://forum.techinferno.com/mac-os-x-discussion/10289-script-automating-installation-egpu-os-x-inc-display-output.html) 1) Boot into OS X without eGPU connected 2) Download automate-eGPU.sh and then move it to desktop 3) Press command + space and type in terminal to open up a terminal instance 4) Run the following commands in the terminal - cd ~/Desktop - chmod +x ./automate-eGPU.sh - sudo ./automate-eGPU.sh 5) Go through the commands with "y" and then shut down 6) Go through the Power up process described below Bootable Windows 8 on external SSD: Follow this detailed guide (BleepToBleep: Mac: Install Windows 7 or 8 on an external USB3 or Thunderbolt drive without using bootcamp) - In step 3 part 1, enter the command 'cd C:\imagex' (or wherever you put the imagex.exe file) eGPU and Windows 8: 1) Boot into Windows 8 without eGPU connected 1a) Install Boot camp drivers if not done so already. 2) Perform Windows Update ignoring the suggested intel graphics update (not sure if ignoring intel graphics update is neccesary) 3) Download latest NVIDIA drivers 4) Power on eGPU and connect the thunderbolt cable to the MacBook 5) Check Control Panel > Administrative Tools > Device Manager > Display Adapters for a new display adapter entry 6) If nothing is there or you got a BSOD just restart MacBook and try again 7) Install NVIDIA drivers, selecting custom installation, and include all the options 8) Shut down 9) Go through Power up process described below I sometimes run into a Windows 8 boot up hang, but they don't seem to happen often so just power off and try again. Power up process: This is the power up process I always use to consistently have a successful boot without any black screen issues. 1) Have everything powered off 2) Connect thunderbolt cable to eGPU and MacBook 3) Power on the eGPU power supply (use a power strip with on/off switch) 4) Wait ~15 seconds 5) Power on the MacBook while holding option key 6a) Select the boot partition you want 6b) If you run into a blank black screen: - Force power off for MacBook - Power off eGPU power supply - Disconnect thunderbolt cable from MacBook - Power on the MacBook while holding option key - Boot into OS X, log in, and shut down - Go back to step 1 (there will be no black screen issues for at least the next boot up) - If you still are getting black screens after repeated tries then try a NVRAM clear (https://support.apple.com/en-us/HT204063) - Note that the NVRAM clear does mess with the changes implemneted by automate-eGPU. So you'll need to run 'sudo ~/Desktop/automate-eGPU.sh -skipdriver' to re-enable the changes - If the NVRAM clear doesn't help then try enabling -a mode with automate-eGPU by running 'sudo ~/Desktop/automate-eGPU.sh -a' Benchmarks: I have run 3DMark Fire Strike on the internal display and external display for the GTX 970 at stock manufacturer settings. - There is a 18% difference between internal and external display graphics performance - There is a 16% difference between external display eGPU and desktop GPU graphics performance - The external display eGPU (stock settings) performance is on par with the top overclocked desktop GTX 960s Here is a link to the comparisons: Results - They are ordered as: Desktop GTX 970 (stock) | Desktop GTX 960 (overclocked) | external display eGPU GTX 970 (stock) | internal display eGPU (stock) - The cpu is definately a bottle neck Thanks to @goalque for all his help in getting my setup for the 2015 MBP up and running! I would be interested in knowing if my power up process works for others out there, or if it's just a fluke. I am not sure if every step in the process is necessary (booting in OS X versus just waiting with everything off) edit: I went through this procedure a second time for a clean install, and it still works mostly fine. For some reason now only the thunderbolt port closest to the MagSafe port works for eGPU recognition in Windows 8. Both ports are usable for eGPU in OS X though. edit2: I am using the dsdt override as suggested here (http://forum.techinferno.com/diy-e-gpu-projects/7476-%5Bguide%5D-dsdt-override-fix-error-12-a-2.html). It doesn't seem to hurt or help, but I am just noting what I am using now.
 1 point
 -
Currently I can't test this mod...980M undergoing steroids treatment... Follow instructions to the letter to avoid throttling (nv_dispi.inf / single GPU) GeForce 353.00 PEG MOD Win7/8.11 point
-
Feedback from me. I've used 10.11.1 with second nVidia web driver 346.03.03f02 for 2 weeks and it has been working fine. No more freeze up and Kernel panic though I might not found it yet but compare to the previous driver I have to say it's good enough. Maybe the second driver fix the issue. (I tried 10.11 again for a week and everything still working fine never has any issue for this version except Safari a bit lack when using Expose .)1 point
-
Hey guys, I've been using this site for research to plan for a future eGPU project and it's been very helpful. I just want to share something I came across while looking for a laptop candidate for eGPUs. Will Your CPU Bottleneck Your Graphics Card? - Maximum PC In case link is broken: Examples of the CPU Bottleneck in Action The Test Setup Here's the hardware we're using for this demonstration: To simulate different levels of processing power, the CPU will be tuned to four different settings at the BIOS level. Using PassMark's PerformanceTest software, scores can be used to roughly compare what the CPU achieves versus other CPUs. The Games These games will be used to determine whether a CPU bottleneck occurs. They were chosen as a mix of older and newer games of varying genres. Unless noted otherwise, all games were tested at 1080p using the highest quality preset or options and no anti-aliasing, unless it was part of the preset. If a game did not have a benchmarking utility, FRAPS was used to capture a minute of data and the game was run under a repeatable test. Test Results With this as the baseline, the GTX 460 SE is certainly under almost full load for most of the games, but the CPU is under a high load of above 70 percent as well. This configuration will definitely bottleneck a video card upgrade. The question is, how much? While there is improvement across most games with a better video card, the system show signs of CPU bottlenecking, as expected. The GTX 980 should perform much faster, rather than up to double the performance improvement over the old GTX 460 SE. Adding 50 percent more clock speed to the CPU shows a similar increase in performance across all games. In an interesting case, Unreal Tournament 3 was able to really stress the CPU to the point of bottlenecking, despite being a game from 2008. To explain the lower GPU loads in some games despite having higher frame rates, the video card was running at full speed throughout this test. In the previous test, the video card didn't consider itself busy enough to run at full speed. Another increase in speed gives the video card more render commands and the frame rate goes up accordingly. Still, with the average CPU load above 70 percent in most of these games, it may bottleneck future upgrades. At its fullest potential (at stock speeds), the CPU is able to keep the video card busy most of the time. A future video card upgrade wouldn't be bottlenecked, assuming CPU requirements for games don't increase dramatically. Will Your CPU Bottleneck that Video Card? In short, depending on the game, if the CPU's load is consistently very high already, the CPU will very likely hold back the performance of video card upgrades. By profiling the CPU and GPU load of games you normally play, you can make better decisions for your upgrade path. Based on the results from this test: * If the CPU load is maxed out at 100 percent across the board, the CPU needs to be upgraded first. * If the CPU load is hovering between 70 percent and 100 percent, a video card upgrade will still offer an improvement, but the upgrade path is limited. Unless you plan on upgrading the CPU in the near future, avoid high-end video cards. A GeForce GTX 960 or Radeon R9 280 is about the most powerful card that should be considered. * If the CPU load is below 70 percent most of the time, any video card upgrade will likely not be bottlenecked. However, with lower overhead APIs such as Mantle, DirectX 12, and Vulkan, one can expect a bit more life out of old CPUs in the future. Also, if anyone is curious, the conclusion I came down to as of 11/30/2015 is that this http://www.amazon.com/Acer-VN7-592G-71ZL-15-6-inch-Notebook-Windows/dp/B015XBKY6U/ref=sr_1_1?ie=UTF8&qid=1448859541&sr=8-1&keywords=acer+aspire+nitro (Acer Aspire Nitro v15/17) is the best option in terms of price-performance (possibly currently the most affordable 6th gen i7 quad-core) and future upgradability (swapping for an SSD, thunderbolt 3). If someone has a better candidate please let me know!1 point
-
GeForce 353.00 PEG MOD *Install drivers at your own risk* Windows 10 + GeForce Drivers are Killing Samsung and LG Notebook LCD Display Panels nv_dispi.inf: PEG/Dedicated All Models (including Optimus/M17xR4) excluding AW 2015 - GTX 980M , 970M , 965M , 880M , 870M , 860M , 780M , 770M , 765M , 680M , 675MX , 670MX nvcvi.inf: Optimus Alienware 17 / 05AA (only) GTX 980M - 970M - 965M Uninstall both EVGA PrecisionX & MSI Afterburner (Keep RTSS) Flash @Prema's CLEVO_8GB_GTX980M_OC_PM_v1.1.1 (please consider donating to Prema) DDU "Clean & Shutdown" Disable DSE cmd (Admin) bcdedit /set {default} bootmenupolicy legacy -> reboot -> F8 -> select 'Disable Driver Signature Enforcement'. Download -> GeForce 353.00 PEG MOD.rar <- Extract driver package using 7-Zip Display.Driver folder -> copy/overwrite nv_dispi.inf -> run setup.exe -> don't reboot yet <- NV Inspector -> Driver Profile Settings -> Import User Defined Profiles -> Import (replace) all driver profiles (Nvidia text format) -> Full_Profiles_11_v353.00.txt NV Inspector -> restore current profile to Nvidia defaults -> reboot Open NVCPL -> Manage 3D settings -> Set High Performance etc... NV Inspector -> P0/P1 matching -> Copy nvidiaInspector folder and included batch files to C:\ root directory ( Single/980M_Single_GPU_NVI...zip or SLI/980M_SLI_NVI...zip) Stock 1127/2505 P0/P1 or 1127/2705 P0/P1 (vram OCing - check stability) Task scheduler -> import task .xml -> one task at a time...:D or disable current task or edit task/Actions (System tasks/hidden command prompt window). GeForce 353.00 PEG MOD >latest profiles< Update: Full_Profiles_11_v353.00.txt (no need to reinstall drivers) nv_dispi.inf_v353.00_AW_PEG_GTX_980M_970M_965M.zip Full_Profiles_11_v353.00.txt.zip Full_Profiles_10_v353.00.txt.zip Full_Profiles_9_v353.00.txt.zip Full_Profiles_8_v353.00.txt.zip Full_Profiles_7_v353.00.txt.zip Full_Profiles_6_v353.00.txt.zip Full_Profiles_5_v353.00.txt.zip 980M_Single_GPU_NVI_Task_bat.zip 980M_SLI_NVI_Task_bat.zip1 point