Leaderboard


Popular Content
Showing content with the highest reputation on 05/12/15 in all areas
-
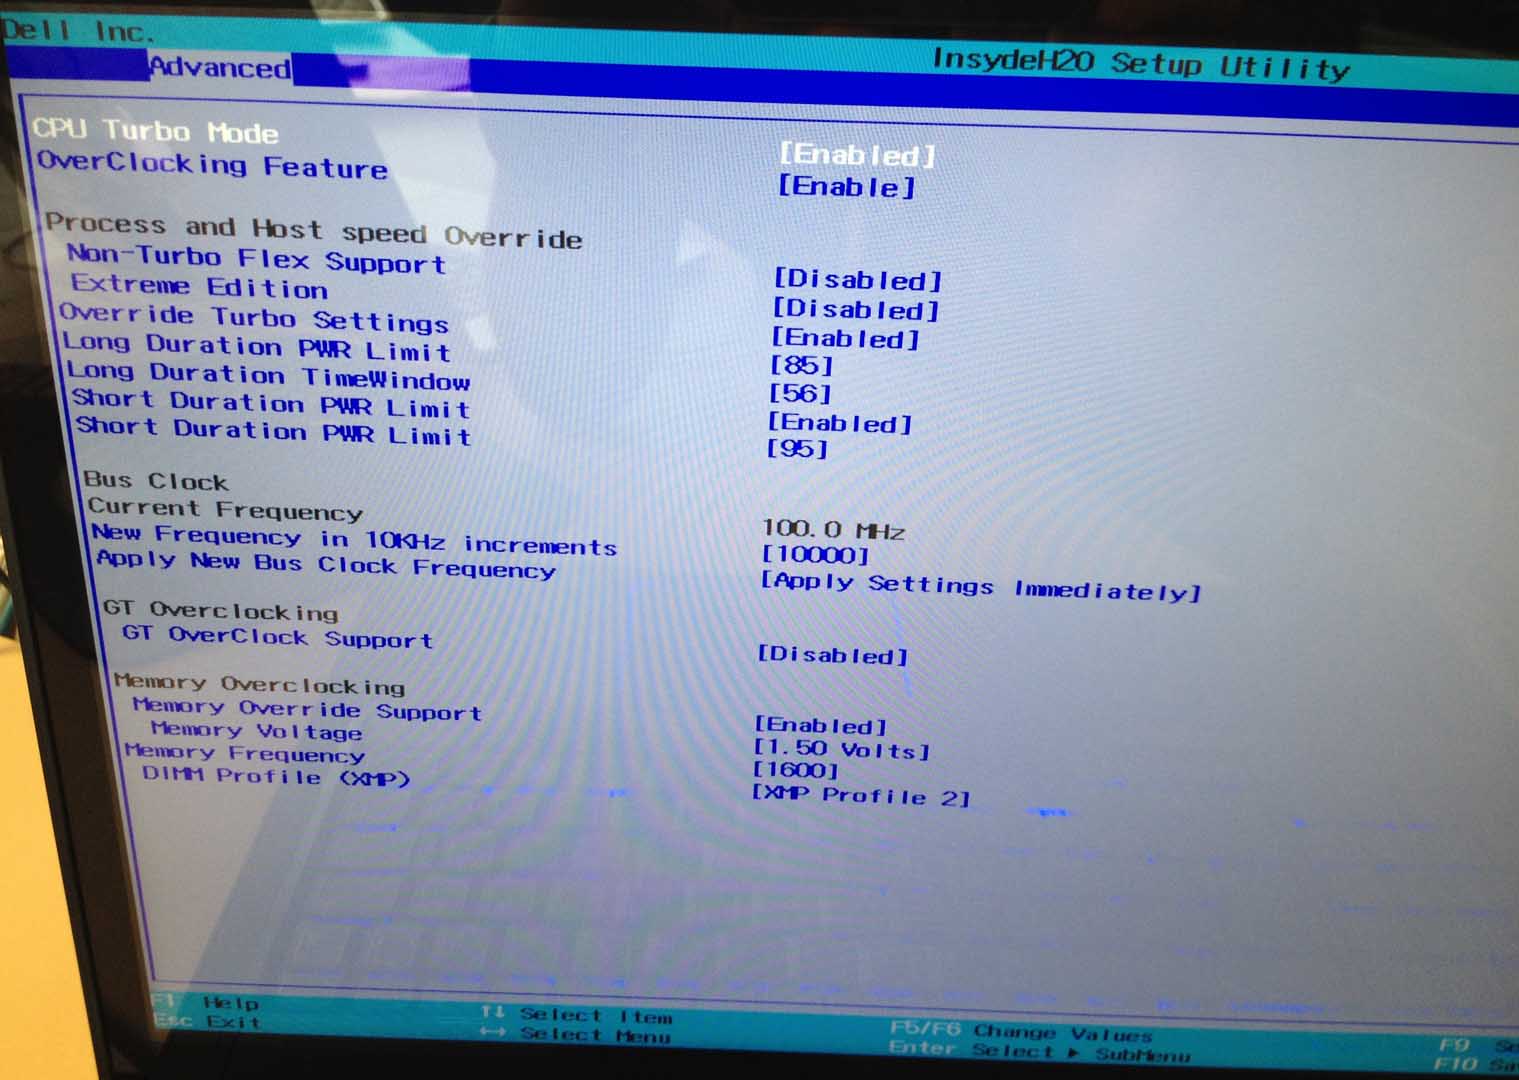
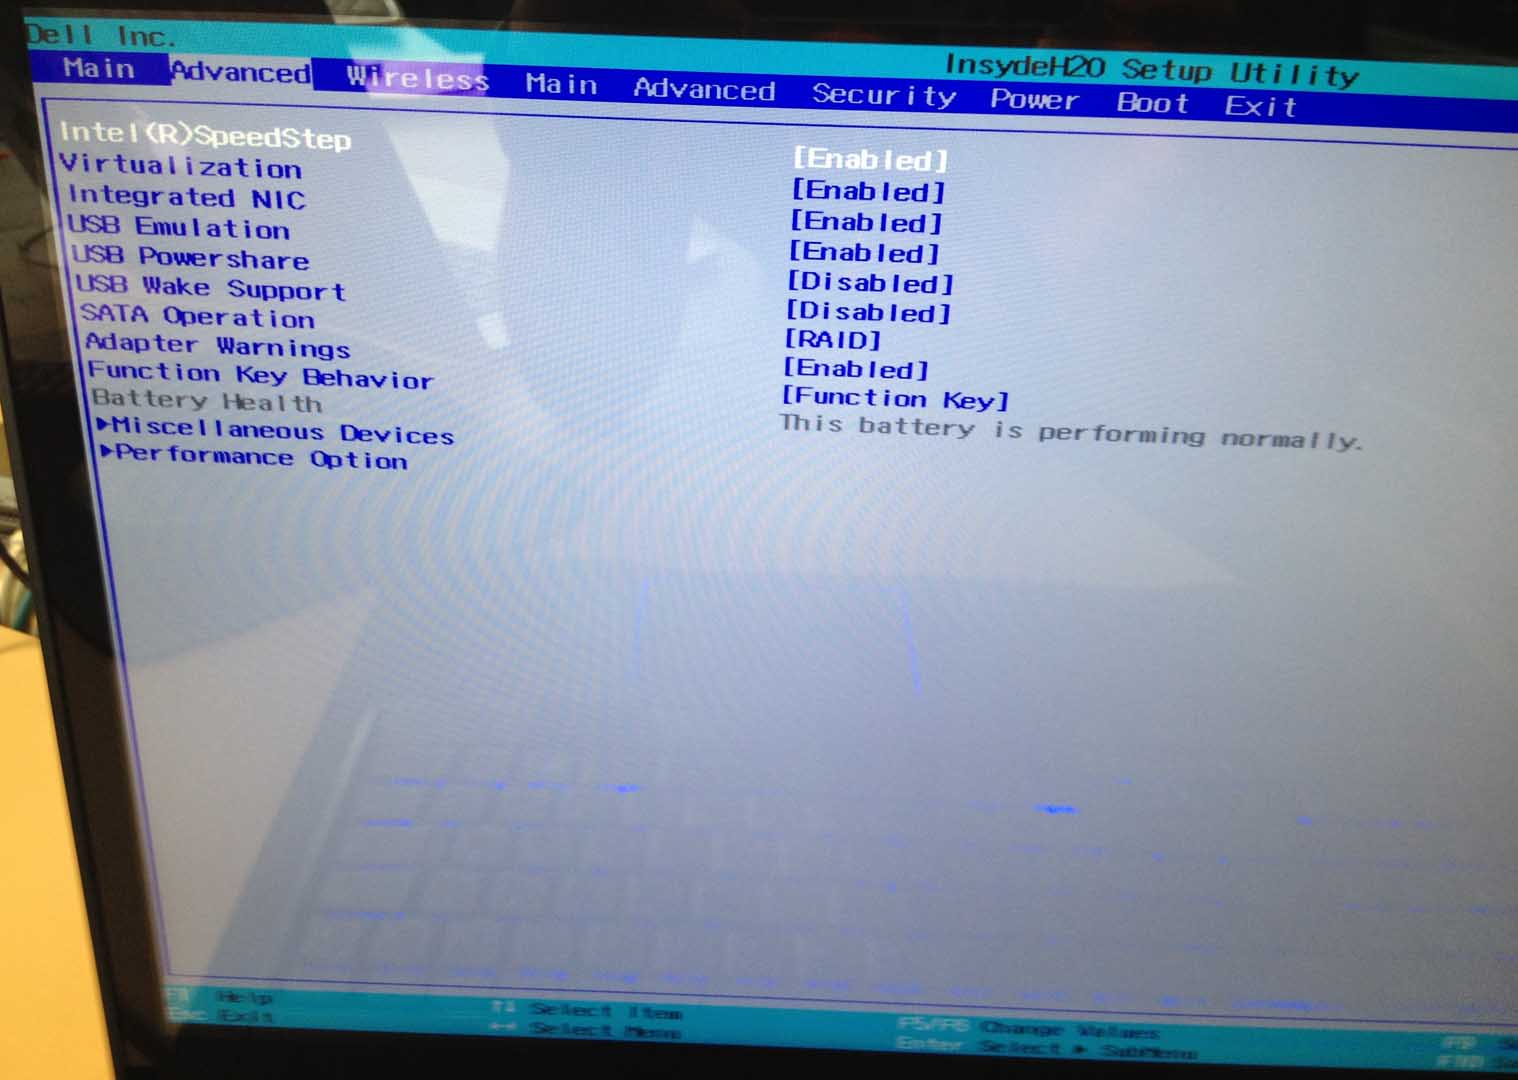
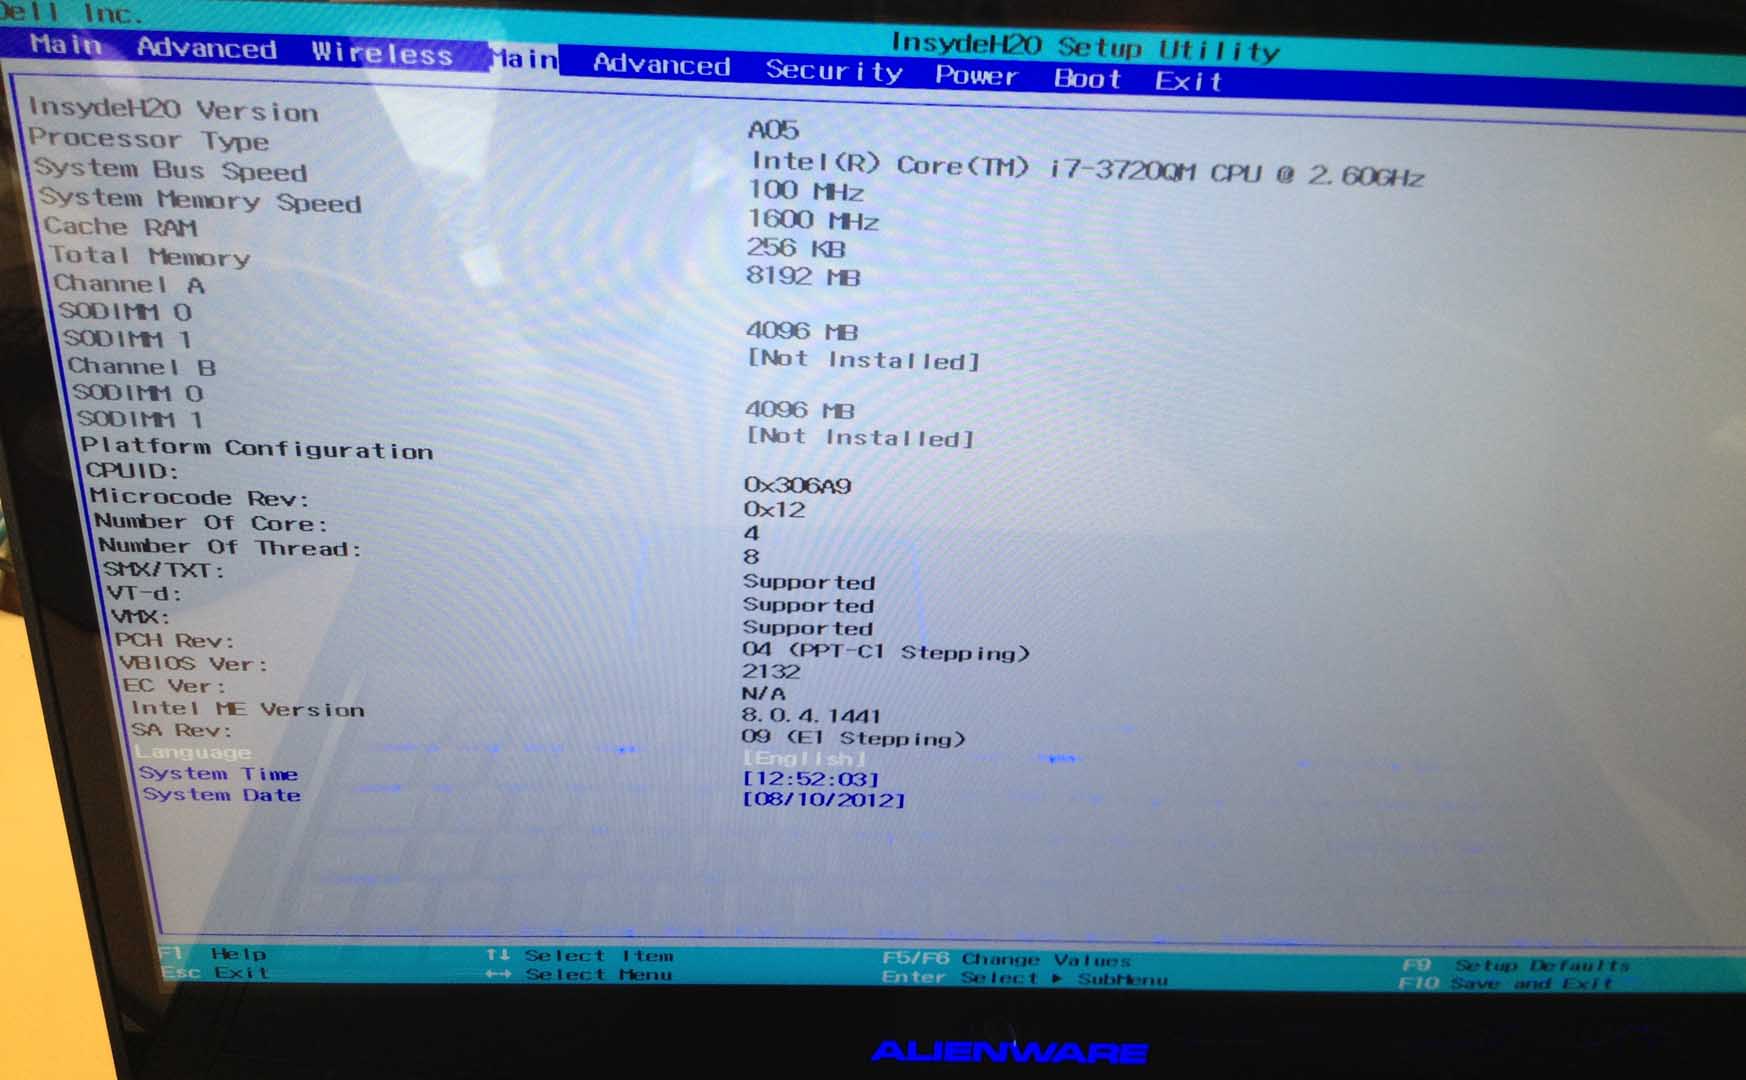
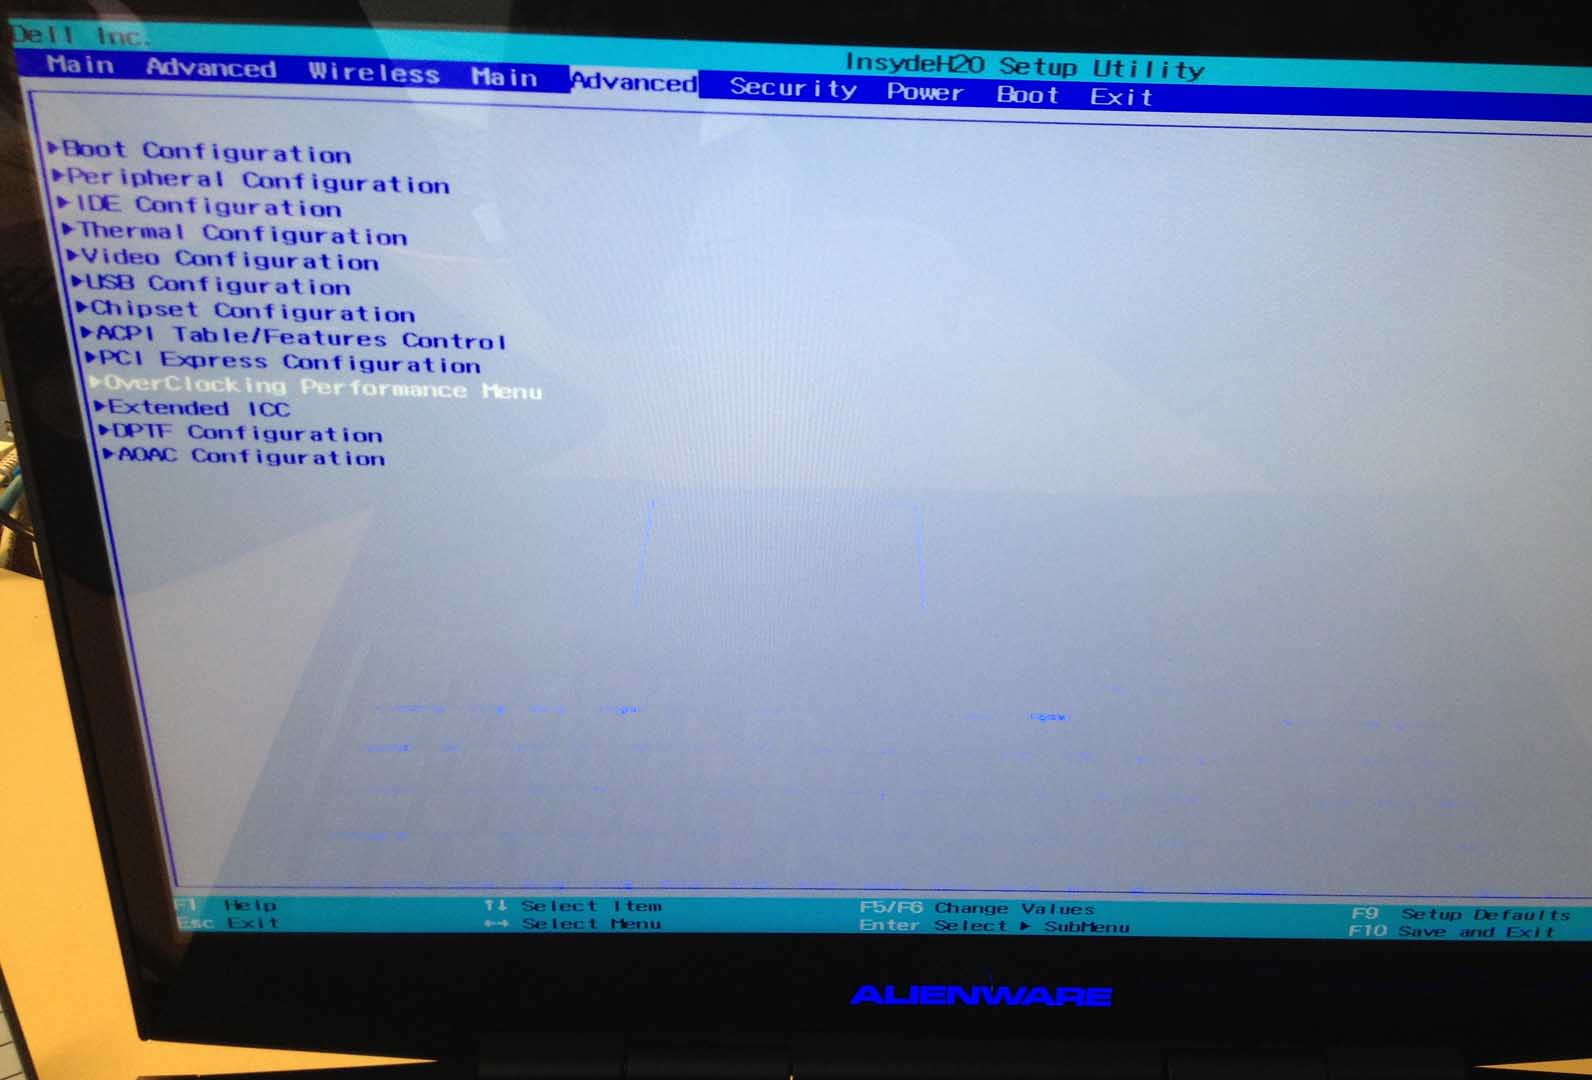
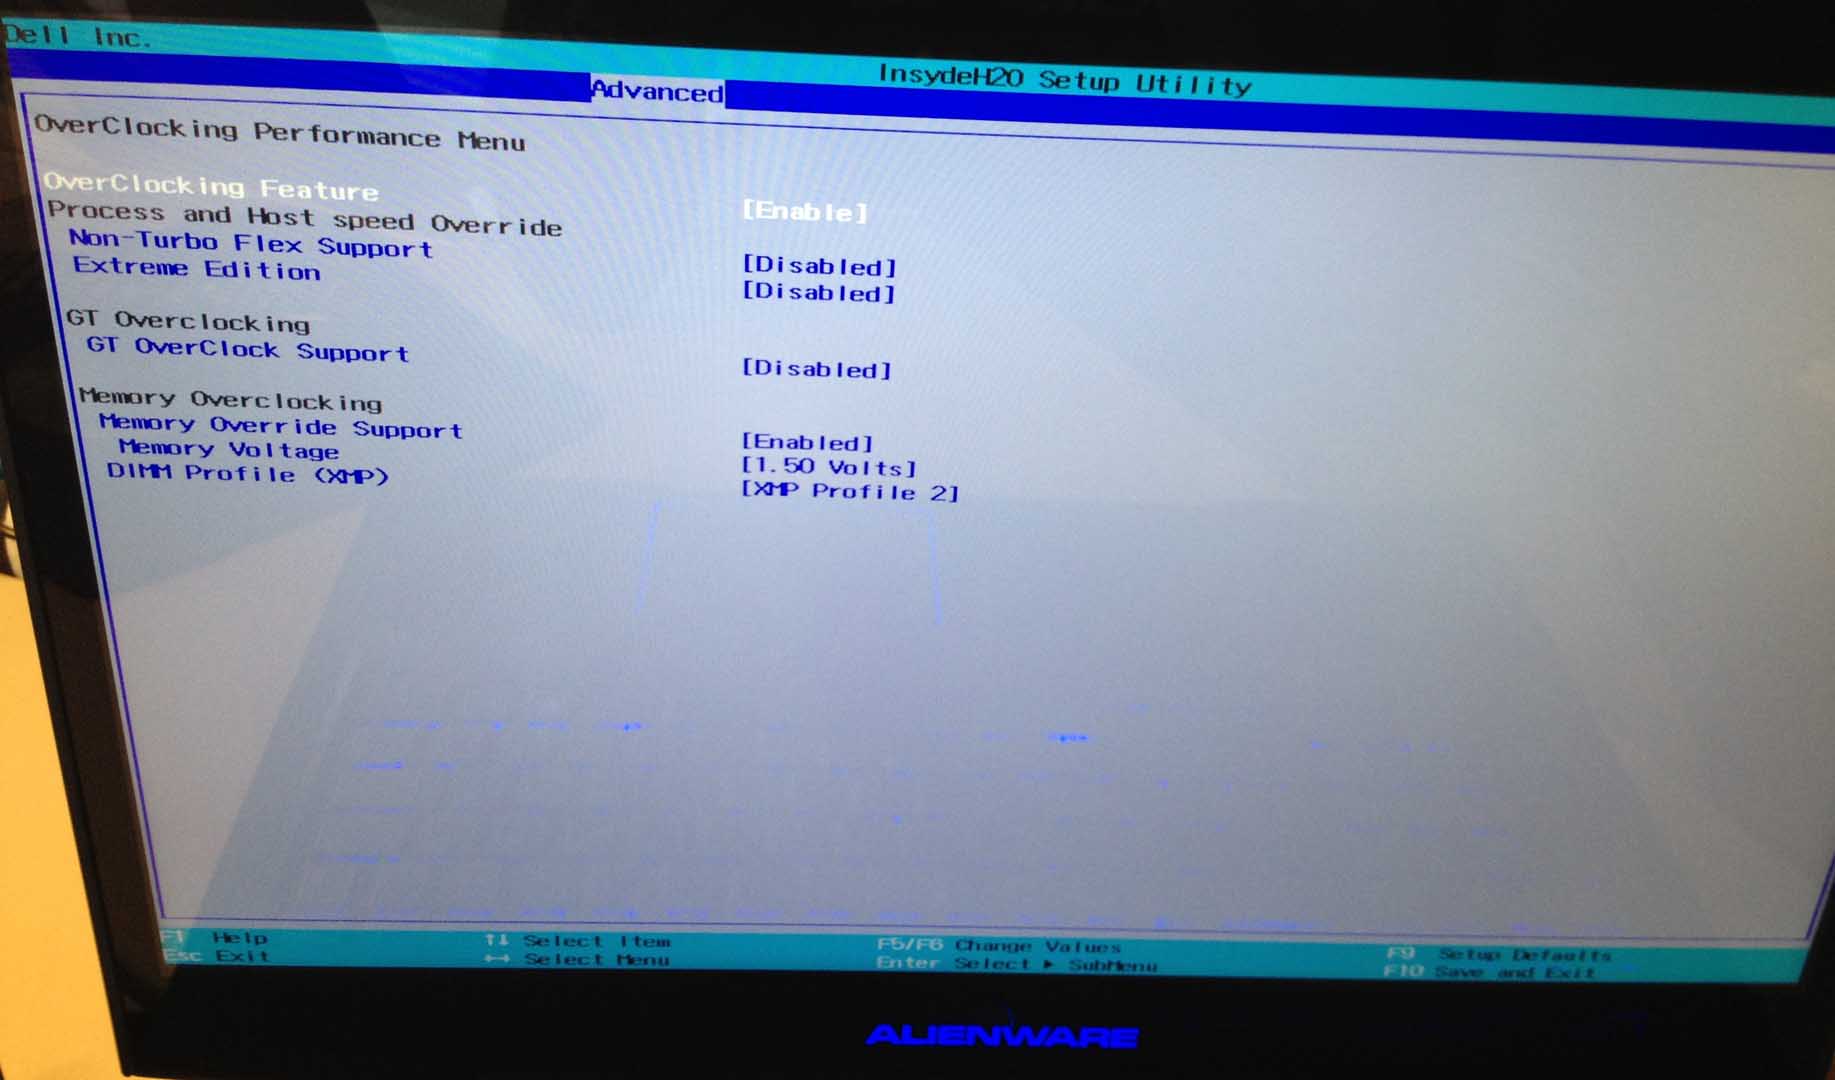
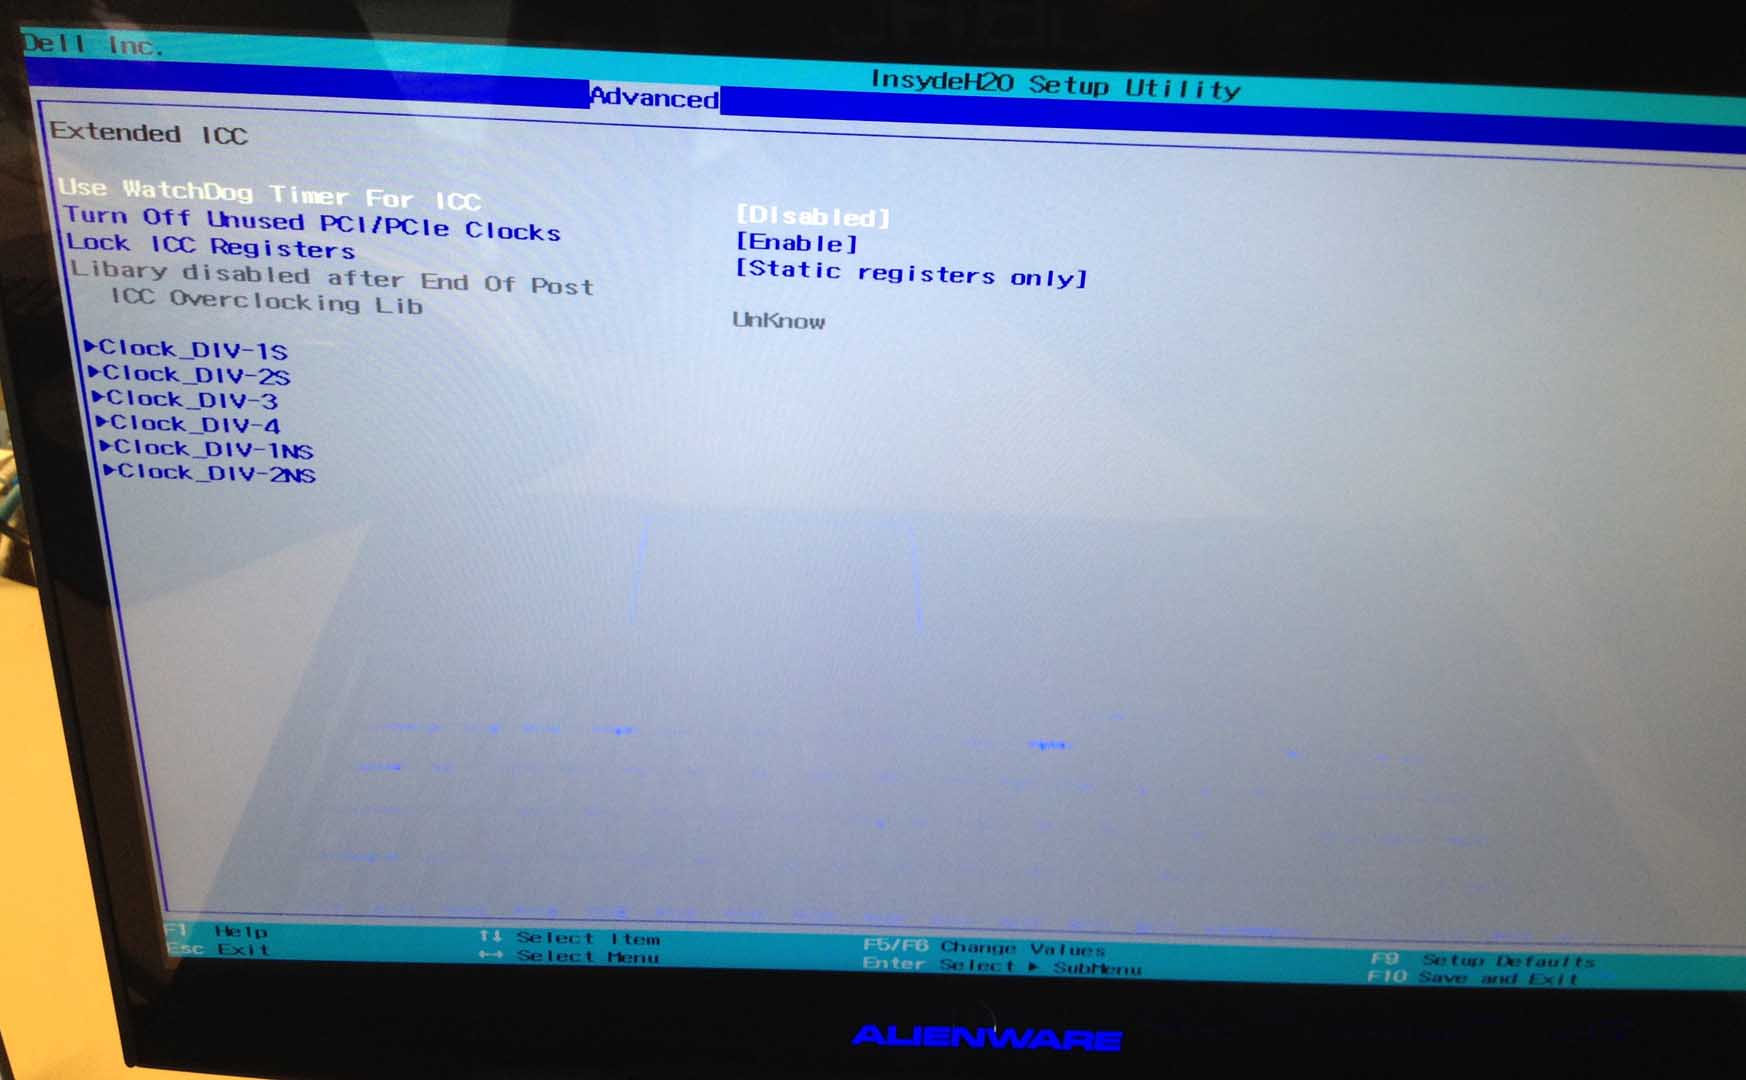
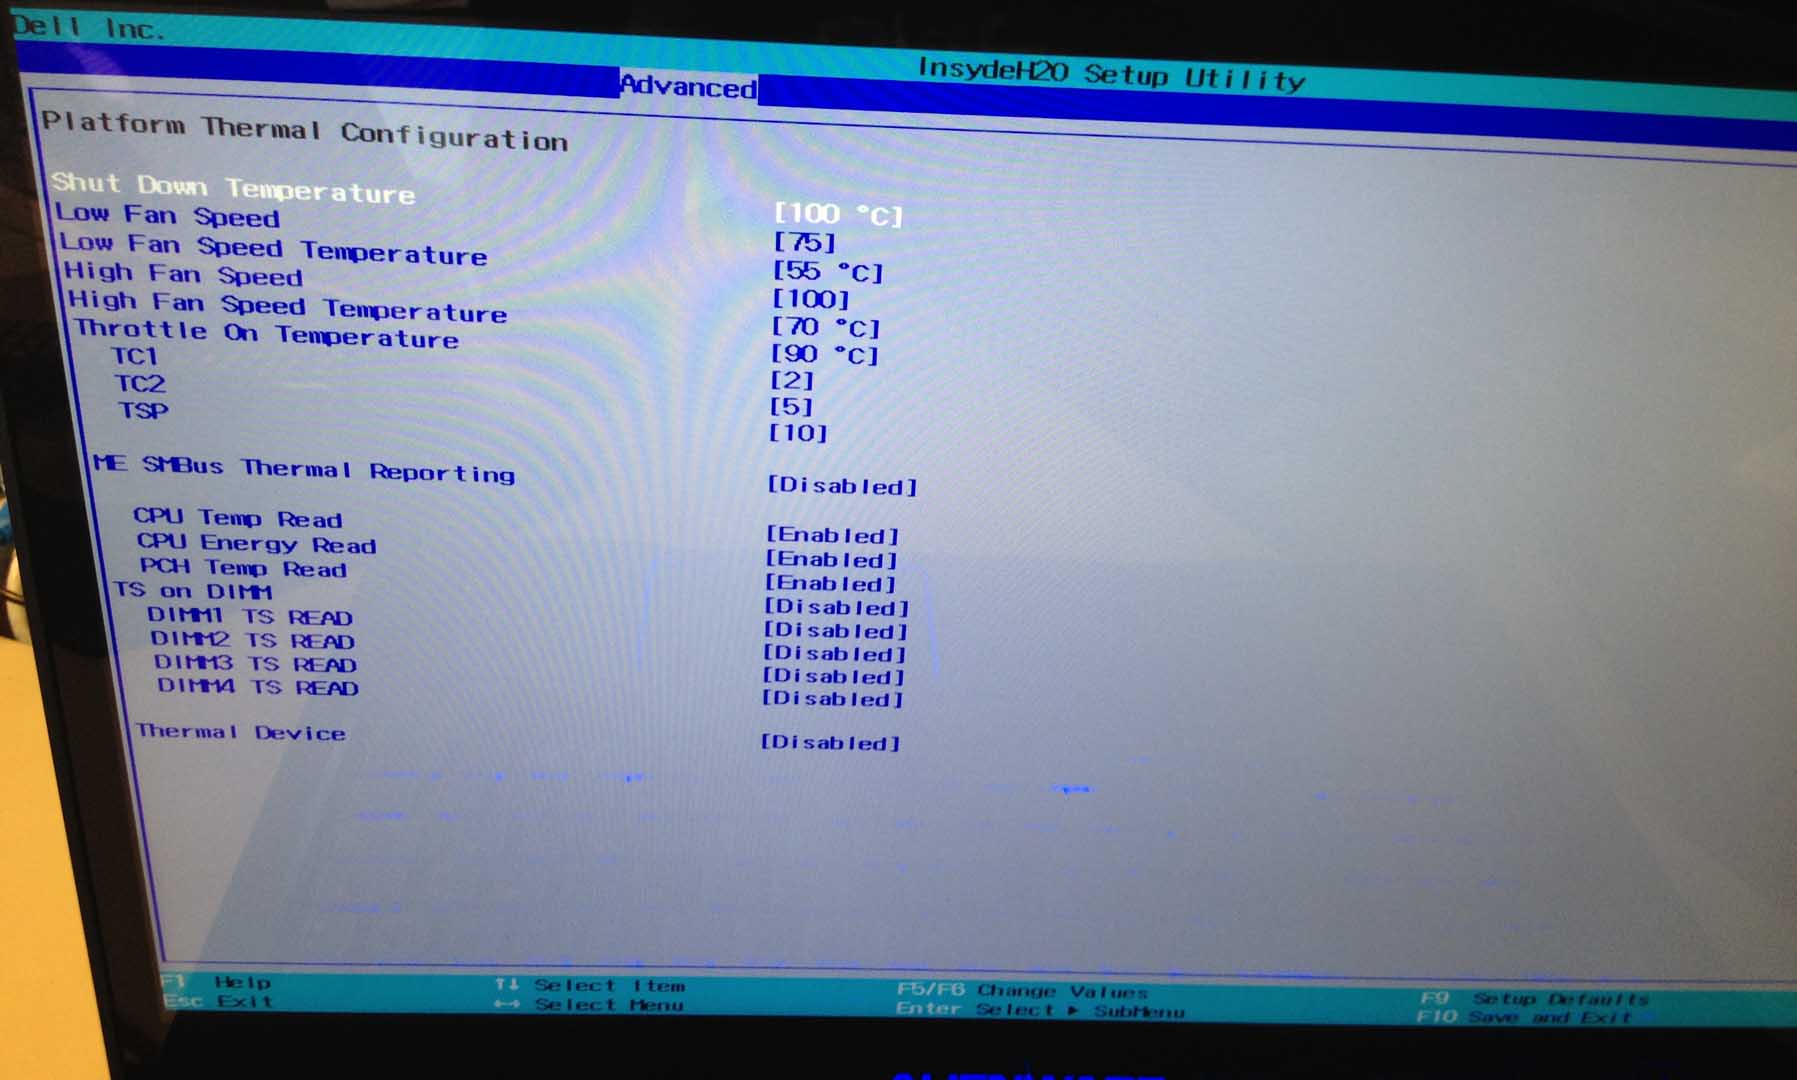
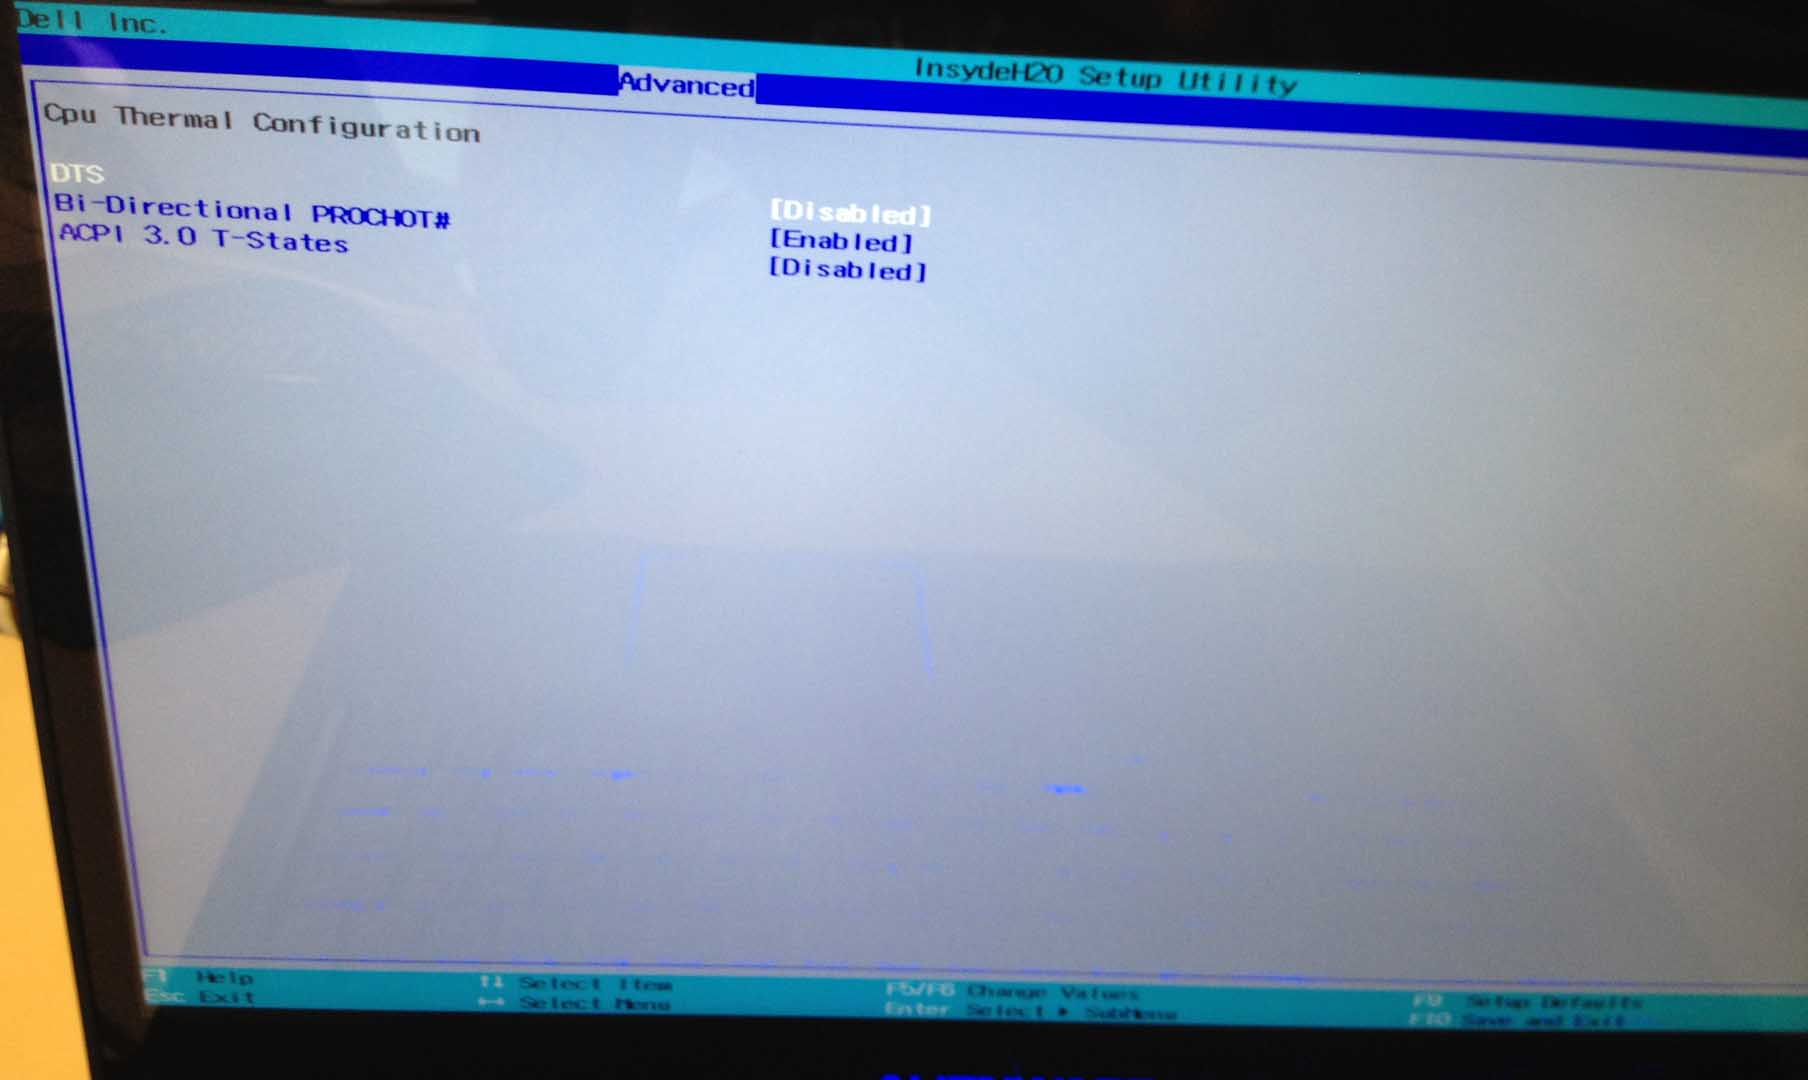
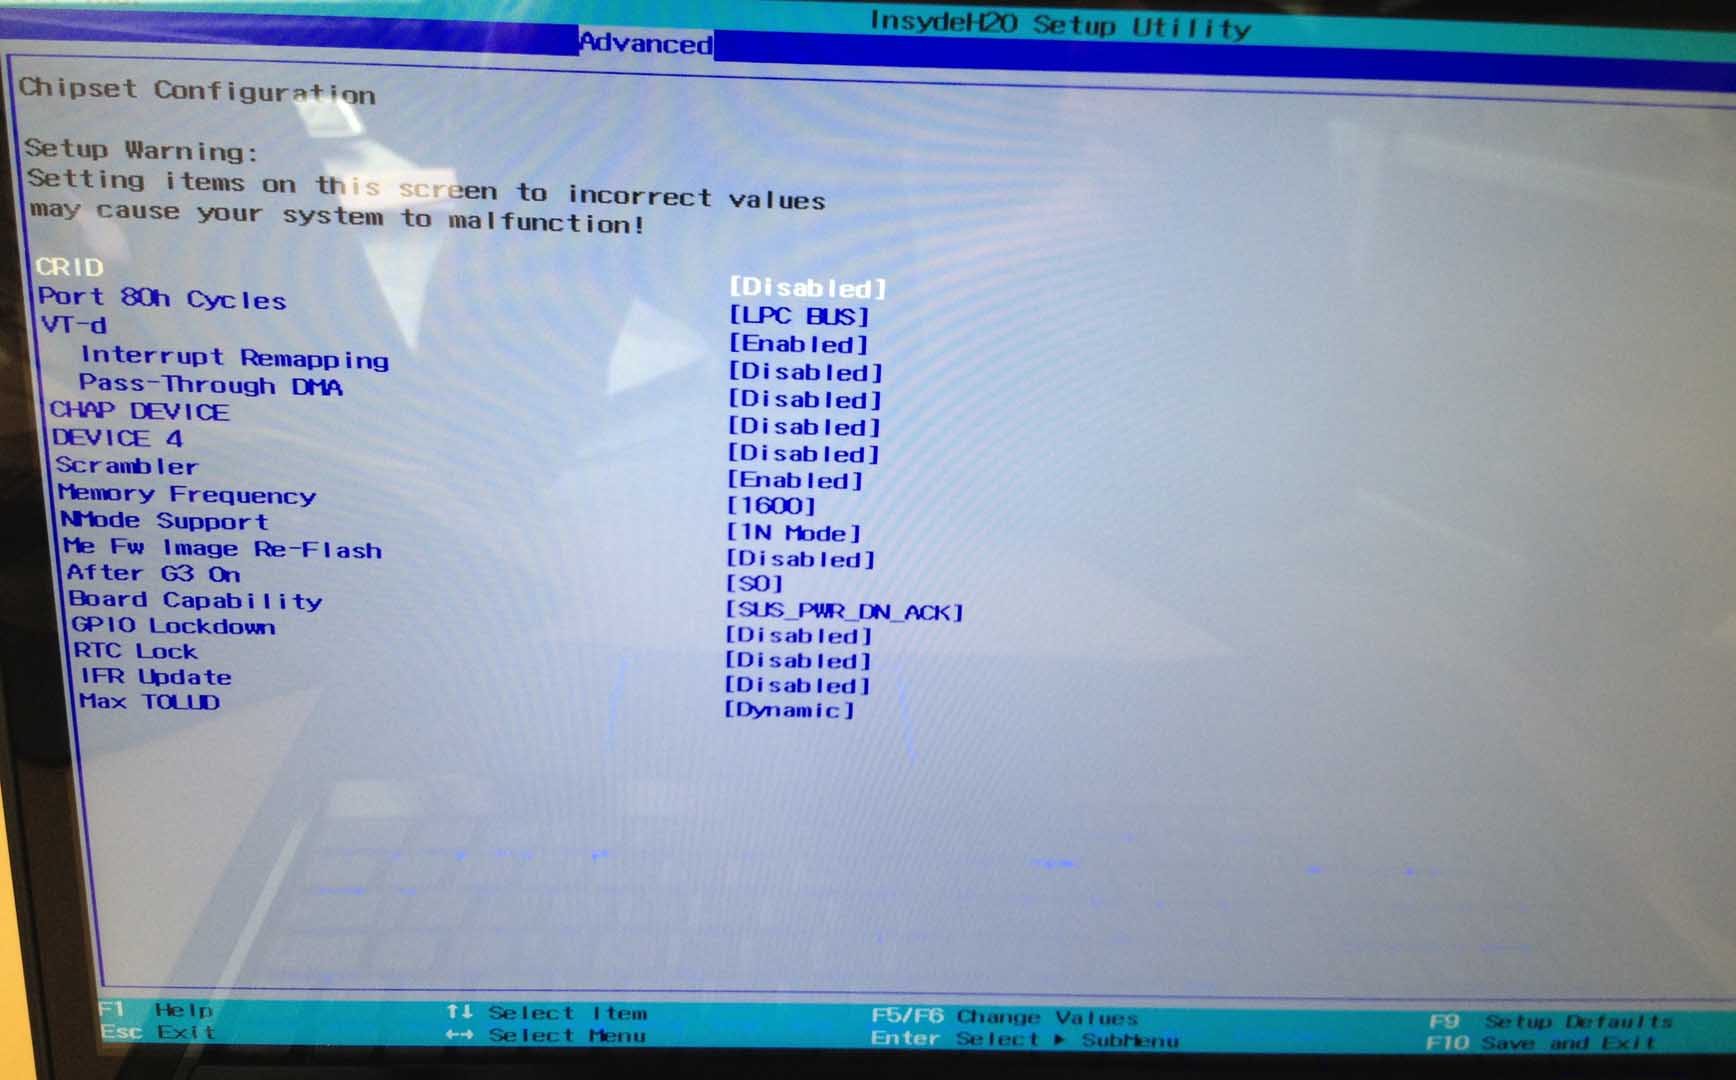
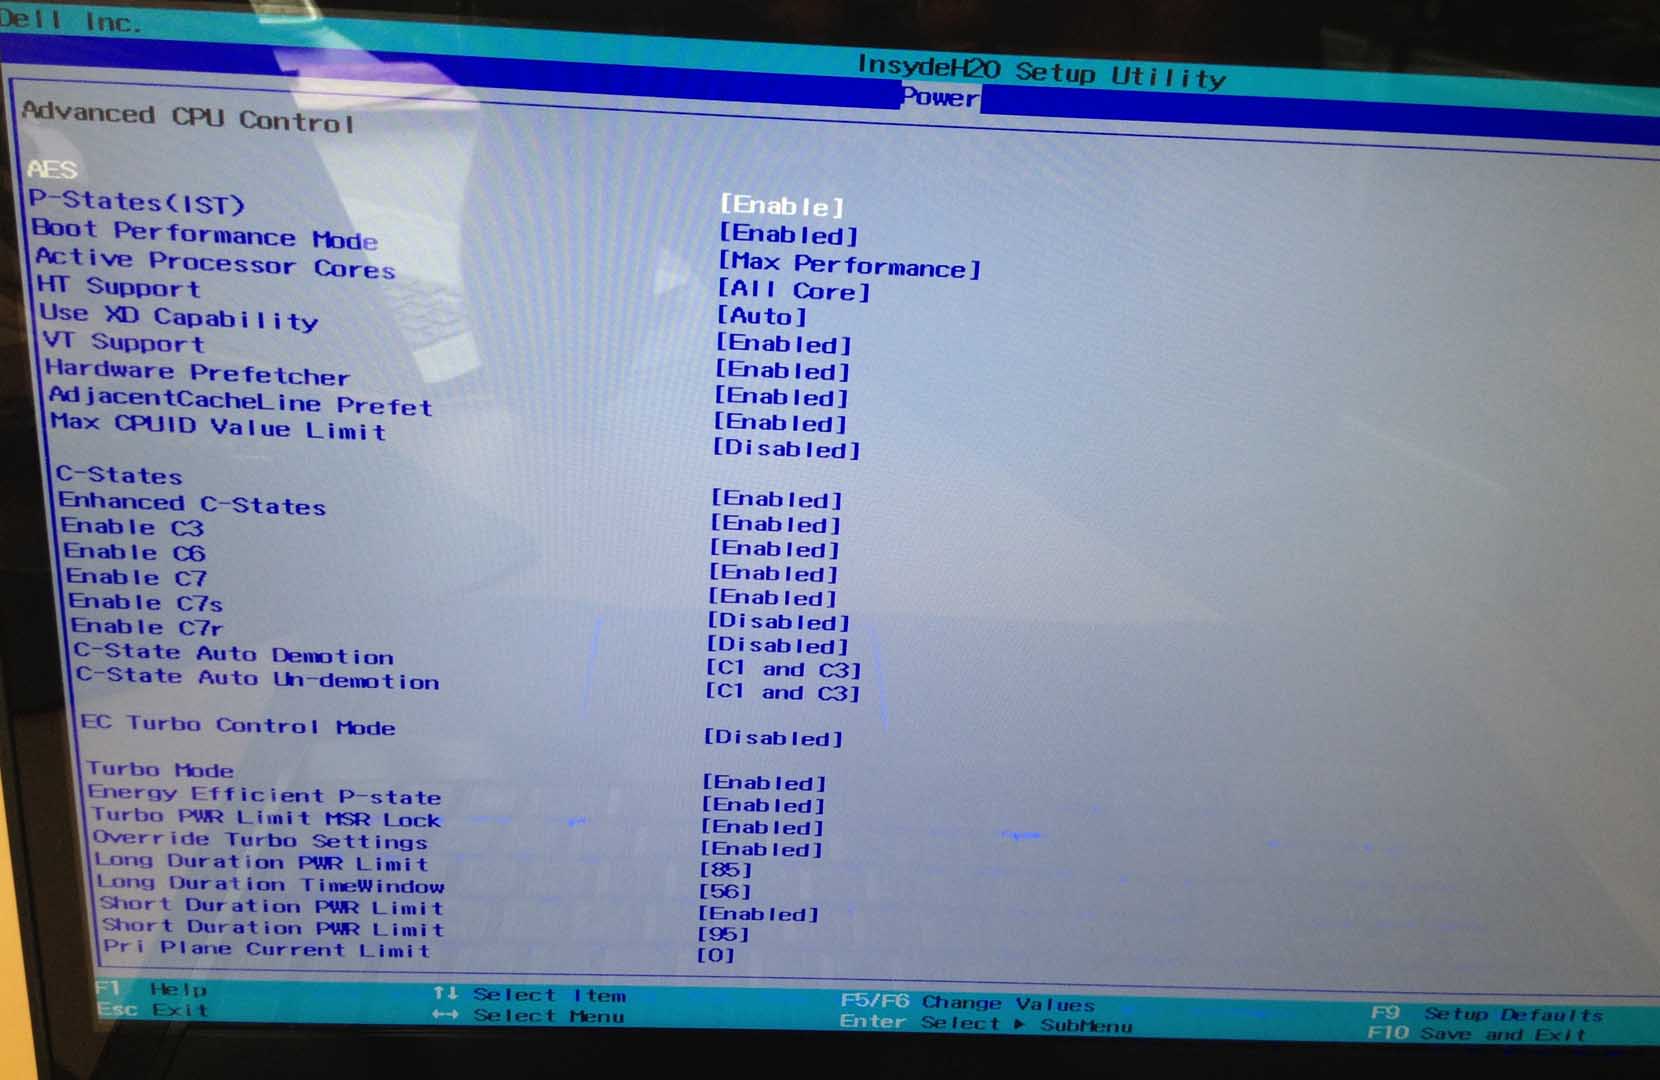
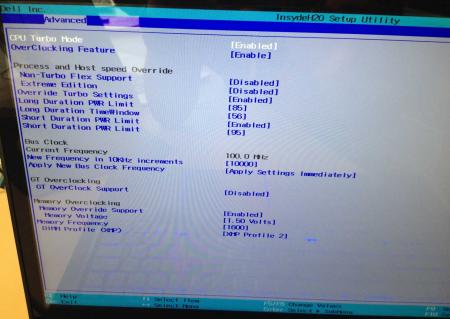
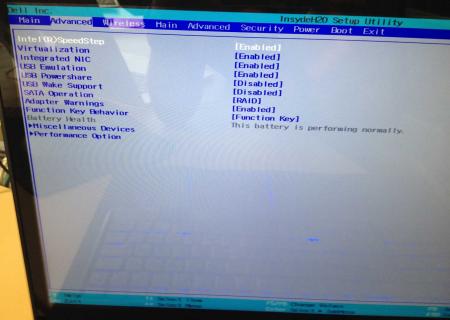
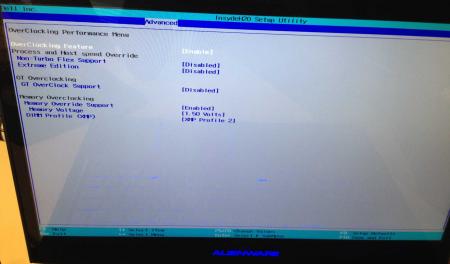
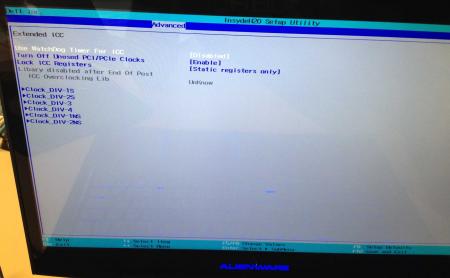
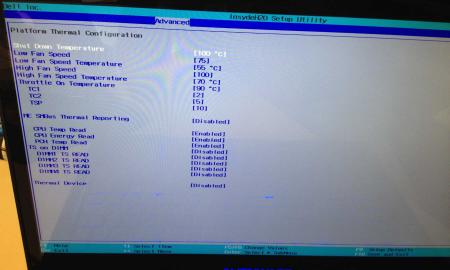
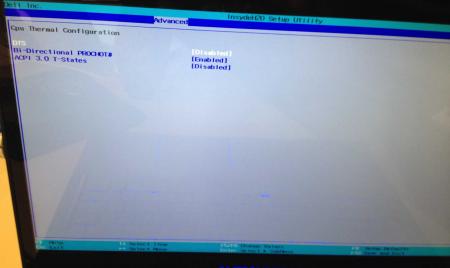
Dell has hidden a lot of options in the BIOS of the Alienware M17x R4, the modified BIOS versions here will show you all the hidden menus and allow you to further tweak your system and optimize its performance. Don't change anything you're not familiar with. There might be functions available which don't work on your system, so use this BIOS with care. It should only be used by advanced users. In case you mess up and your system refuses to boot after applying the changes you make, remove the AC adapter, battery and coin cell battery in order to clear the non-volatile ram of the BIOS. This should fix most issues. *********************** Instructions: If you're on A05 or an earlier version, you can flash the modified bios by simply using the InsydeFlash utility provided with the official bios update on the Dell support site. However, once you're on a version newer than A05, things get a bit more complicated. There are two options then: - Method 1: Revert to stock A05 or earlier by using the Insyde USB bios recovery method, and then flash the modified bios by using the official tools (InsydeFlash). - Method 2 (recommended): Flash the modified Bios from DOS by using the FPT tool: . Grab the DOS version of fpt for flashing, and my 'prr tool' to circumvent write protection.. Download a '[FPT]' labeled version of the unlocked BIOS. Put the DOS version of the flash tool on the root of the prepared USB stick (fpt.exe and fparts.txt), along with the prr.exe and the file you want to flash (plus the included flash.bat). . Restart the system and boot from your USB stick. Run prr.exe, then flash the bios by executing the flash.bat file. Wait until the tool completes the flash. If the verification is okay, reboot, else flash again.. Go to the bios, load the default settings and reboot. Done NOTE: The flashing from DOS as described above will only update the BIOS, not the rest of the firmware. Therefore I strongly advise you to first flash the stock version of the bios you want by using the official update provided by Dell, and once that's done you can go ahead and flash the modified version of your bios by following the instructions above. Download links to the unlocked M17x R4 BIOS versions: M17x R4 - BIOS A05 [unlocked] M17x R4 - BIOS A08 [unlocked] - see attachment M17x R4 - BIOS A09 [unlocked] - see attachment M17x R4 - BIOS A10 [unlocked] - see attachment [FPT] M17x R4 - BIOS A10 [unlocked] - see attachment [FPT] M17x R4 - BIOS A11 [unlocked] - see attachment Donation link, in case you want to buy me a beer Here some pictures of the menus (thanks a lot for the pics @deadbydawn!) I want to thank @widezu69 for testing !! It's hard to find users who are willing to risk their system in order to test a mod, I greatly appreciate this! Thank you!! ********* Flash and use at your own risk. I don't take any responsibility for any possible damages on your system. The software which I provide here ('prr tool') comes with absolutely no warranty to the extent permitted by applicable law. ___ M17x_R4_-_BIOS_A08_[unlocked].zip M17x_R4_-_BIOS_A09_[unlocked].zip M17x_R4_BIOS_A10_-_[unlocked].zip [FPT]-M17x_R4_BIOS_A11_-_[unlocked]V2.zip [FPT] M17x R4 - BIOS A10 [unlocked].zip M17x_R4_-_BIOS_A05_[unlocked].zip


 1 point
 -
It is a 4k screen? Somebody had problems setting up the eGPU with a 4k display. After setting it up with another full HD screen, he was good to go with 4k.1 point
-
I believe EXP GDC V6 has some voltage fluctuation/filtering issue that causes signal loss at times which you result indicates has happened. I'd suggest ask you vendor for a EXP GDC Beast which supposedly fixes the problem.1 point
-
After validating properly my GTX970M overclock, I finally made FS 7515 (NVIDIA GeForce GTX 970M video card benchmark result - Intel Core i7-3610QM Processor,CLEVO P170EM)... I'm waiting K5-PRO thermal paste, Coolaboratory Liquid Ultra and copper heatsink to push it further.1 point
-
I did have a few hiccups during the process such as: 1. No display output during boot. I had originally tried fixing this by creating a connection between the JCMOS2 contacts underneath the RAM on the mobo (couldn't remember blind key strokes to reset BIOS). Unfortunately that sent the system into a constant 5-10 restart. The laptop would fire up, fans would spin, then lose all power right away. Simple fix, I hadn't put the RAM back in. After inserting the RAM, the system booted but still did not display video (maybe JCMOS2 does not reset modified BIOS? I did not investigate this further.) I was then easily able to fix the display by following the keystrokes here in the first step. Edmar Hobby - Electronic: Lenovo Ideapad Y580 Insyde Bios Reset/Recovery 2. "Unauthorized slave VGA device" error during boot. This one had me worried, as searching google only came back with results such as Overheated GPU and broken GPU in general. After I realized I had removed/reinserted the Ultrabay GPU multiple times during my troubles with setting proper video settings in Linux (dual booting with Windows 8.1), I noticed the Ultrabay hadn't been inserted all the way judging by the unlocking mechanism on the bottom of the Y510P (it was not all the way down). After correctly inserting the Ultrabay did this problem disappear. I only came here looking for a way to manually turn on my Integrated graphics with both GT 750M's in so I can have access to both Nvidia GPU's while using Pyrit in Kali Linux. Unfortunately Debian 8 does not currently support legit Intel drivers for the 4600HD, so I can not use both Nvidias yet in Linux. I do now have all 3 GPU's active and configured in Windows 8.1 though thanks to your modified BIOS. I really appreciate your work with the BIOS and may stick around judging by the active Y510P community here. Thank you much! Oh yeah, and I sent you some beer funds!1 point
-
Videos by @<u><a href="http://forum.techinferno.com/member.php?u=35129" target="_blank">Balchov</a></u>1 point
-
I had a 7970m-CF setup previously and I think I found the version number either in GPU-Z or when looking inside the vBIOS of it.1 point