Leaderboard


Popular Content
Showing content with the highest reputation on 01/11/14 in all areas
-
Hello there, This is Lee from upgrademonkey.we are get 4 pcs of 880M for testing tomorrow.apart from the usual 3Dmark staff ,anything also do you guys want me to test on? and the N15E-GT is the 870M , it is around the corner. Codename N15E-GX-A2 Pipelines unified Memory Bus Width 256 Bit Memory Type GDDR5 Max. Amount of Memory 8192 MB Shared Memory no technology 28 nm Cheers Lee- - - Updated - - - btw, we are happy to lend the cards to media/ forum members. I can see you guys doing a more through test.3 points
-
First version of my test. I will edit it and add a few pictures the next days :) My Setup: [FONT=arial]Notebook:[/FONT] [FONT=Helvetica][FONT=arial]MacBook Pro Retina ´13 (Late 2013)[/FONT] [/FONT] [FONT=arial]CPU[/FONT] [FONT=Helvetica][FONT=arial]Intel Core i7 (4558U „Haswell“) 2,8GHz[/FONT] [/FONT] [FONT=arial]Internal Memory[/FONT] [FONT=arial]16GB Ram[/FONT] [FONT=arial]HDD[/FONT] [FONT=arial]256GB SSD[/FONT] [FONT=arial]Graphics Card(internal)[/FONT] [FONT=Helvetica][FONT=arial]Intel Iris 5100[/FONT] [/FONT] [FONT=arial]Graphics Card(external)[/FONT] [FONT=Helvetica][FONT=arial]NVIDIA GTX 570[/FONT] [/FONT] [FONT=arial]Operating System[/FONT] [FONT=Helvetica][FONT=arial]Windows 8.1[/FONT] [/FONT] [FONT=Helvetica] [/FONT] [FONT=Helvetica]My results and comparisons consist on my own setup and don’t reflect the full gamut of other notebook-vendors and other setups. [/FONT] [FONT=Helvetica] [/FONT] [FONT=Helvetica] [/FONT] [FONT=Helvetica] [/FONT] [FONT=Helvetica]VillageTronic Vidock 4 Plus Overdrive[/FONT] [FONT=Helvetica] [/FONT] [FONT=Helvetica]The ViDock comes with two 6-pin power connectors and can handle up to 320Watt. A double width and full length graphics card fits in it. But you need to take care of the width, because more than the exact dopple width of 1.4inch (5,08cm) won’t fit. [/FONT] [FONT=Helvetica] [/FONT] [FONT=Helvetica]Installation:[/FONT] [FONT=Helvetica] [/FONT] [FONT=Helvetica]1. Turn your MacBook off[/FONT] [FONT=Helvetica]2. Connect only the Sonnet Echo Pro to your MacBook[/FONT] [FONT=Helvetica]3. Press the Power Button while pressing the ALT-key.[/FONT] [FONT=Helvetica]4. Choose your Windows partition and press „Enter“[/FONT] [FONT=Helvetica]5. After pressing „Enter“ plug your ViDock directly in your Sonnet Echo (easy-to-transport in a bag[/FONT][/FONT] [FONT=Helvetica] [/FONT] [FONT=Helvetica][FONT=Helvetica]well working online-support for any issues[/FONT][/FONT] [FONT=Helvetica] [/FONT] [FONT=Helvetica]Sonnet Express III-D[/FONT] [FONT=Helvetica] [/FONT] [FONT=Helvetica]The ViDock comes with one 6-pin power and three PCIe-Slots. All conventional graphics cards will fit in it, because there is much space in the width and length. To connect newer graphics card you need another PSU .[/FONT] [FONT=Helvetica]Installation:[/FONT] [FONT=Helvetica] [/FONT] [FONT=Helvetica]Only start your notebook with plugged in Sonnet Express III-D[/FONT] [FONT=Helvetica][FONT=Helvetica]Pros[/FONT][/FONT] [FONT=Helvetica][FONT=Helvetica]Cons[/FONT][/FONT] [FONT=Helvetica][FONT=Helvetica]By the end of January 2014 Thunderbolt 2 x4 speed[/FONT][/FONT] [FONT=Helvetica][FONT=Helvetica]extremely expensive[/FONT][/FONT] [FONT=Helvetica][FONT=Helvetica]only one device[/FONT][/FONT] [FONT=Helvetica][FONT=Helvetica]no NVIDIA Optimus driver, means only external display[/FONT][/FONT] [FONT=Helvetica][FONT=Helvetica]can handle more devices at the same time[/FONT][/FONT] [FONT=Helvetica][FONT=Helvetica]tools are necessary to open the case[/FONT][/FONT] [FONT=Helvetica][FONT=Helvetica]quiet, temperature-controlled fans[/FONT][/FONT] [FONT=Helvetica][FONT=Helvetica]only one 6-pin auxiliary power connector[/FONT][/FONT] [FONT=Helvetica][FONT=Helvetica]easy installation[/FONT][/FONT] [FONT=Helvetica][FONT=Helvetica]with Thunderbolt 1 (10Gbits) not as fast as a ViDock[/FONT][/FONT] [FONT=Helvetica][FONT=Helvetica]bigger cards fits too [/FONT][/FONT] [FONT=Helvetica][FONT=Helvetica]you need an extra PSU for the most graphics cards[/FONT][/FONT] [FONT=Helvetica] [/FONT] [FONT=Helvetica][FONT=Helvetica]Sonnet gives no support for using a graphics card[/FONT][/FONT] 3Dmark06 3DMark11 3DMarkVantage Intel Iris 5100 8159 1443 5895 ViDock with external display 21779 5018 16762 ViDock withinternal display 17247 4965 15269 Sonnet Echo Express III-D (TB 1 with 10Gbits) 17776 4759 16018 I hope Thunderbolt 2 and a newer graphics card gives the sonnet more performance^^ [FONT=Helvetica][FONT=Helvetica]3DMark11[/FONT][/FONT] [FONT=Helvetica] [/FONT] [FONT=Helvetica][FONT=Helvetica]Intel Iris 5100[/FONT][/FONT] [FONT=Helvetica]http://www.3dmark.com/3dm11/7736320[/FONT] [FONT=Helvetica][FONT=Helvetica]ViDock external[/FONT][/FONT] [FONT=Helvetica][FONT=Helvetica]http://www.3dmark.com/3dm11/7737387[/FONT][/FONT] [FONT=Helvetica][FONT=Helvetica]ViDock internal[/FONT][/FONT] [FONT=Helvetica][FONT=Helvetica]http://www.3dmark.com/3dm11/7737309[/FONT][/FONT] [FONT=Helvetica][FONT=Helvetica]Sonnet Echo Express[/FONT][/FONT] http://www.3dmark.com/3dm11/7738973 [FONT=Helvetica] [/FONT] [FONT=Helvetica] [/FONT] [FONT=Helvetica][FONT=Helvetica]3DMark Vantage[/FONT][/FONT] [FONT=Helvetica] [/FONT] [FONT=Helvetica][FONT=Helvetica]Intel Iris 5100[/FONT][/FONT] [FONT=Helvetica][FONT=Helvetica]http://www.3dmark.com/3dmv/4911503[/FONT][/FONT] [FONT=Helvetica][FONT=Helvetica]ViDock external[/FONT][/FONT] [FONT=Helvetica][FONT=Helvetica]http://www.3dmark.com/3dmv/4911403[/FONT][/FONT] [FONT=Helvetica][FONT=Helvetica]ViDock internal[/FONT][/FONT] [FONT=Helvetica][FONT=Helvetica]http://www.3dmark.com/3dmv/4911453[/FONT][/FONT] [FONT=Helvetica][FONT=Helvetica]Sonnet Echo Express[/FONT][/FONT] [FONT=Helvetica][FONT=Helvetica]http://www.3dmark.com/3dmv/4911736[/FONT][/FONT] [FONT=Helvetica] [/FONT] [FONT=Helvetica] [/FONT] [FONT=Helvetica][FONT=Helvetica]3DMark06[/FONT][/FONT] [FONT=Helvetica] [/FONT] [FONT=Helvetica][FONT=Helvetica]Intel Iris 5100[/FONT][/FONT] [FONT=Helvetica][FONT=Helvetica]http://www.3dmark.com/3dm06/17487918[/FONT][/FONT] [FONT=Helvetica][FONT=Helvetica]ViDock external[/FONT][/FONT] [FONT=Helvetica][FONT=Helvetica]http://www.3dmark.com/3dm06/17487930[/FONT][/FONT] [FONT=Helvetica][FONT=Helvetica]ViDock internal[/FONT][/FONT] [FONT=Helvetica][FONT=Helvetica]http://www.3dmark.com/3dm06/17487973[/FONT][/FONT] [FONT=Helvetica][FONT=Helvetica]Sonnet Echo Express[/FONT][/FONT] [FONT=Helvetica][FONT=Helvetica]http://www.3dmark.com/3dm06/17488077[/FONT][/FONT]3 points
-
Just to make sure Lee doesn't hand out cards to just anyone on TI, I've PM him setting very specific criteria for his protection. Sent from my RM-937_apac_hong_kong_222 using Tapatalk2 points
-
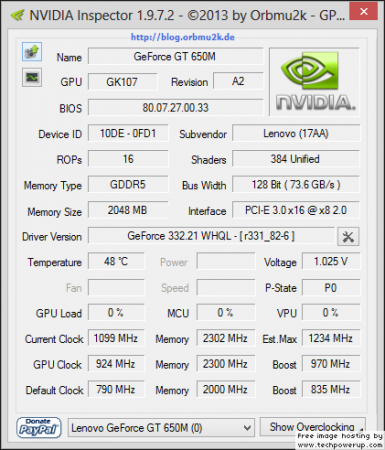
Voltage 1.025 V on GPUClock: 1100, MemoryClock: 2300
 2 points
 -
GPUClock: 1000-1100 MemoryClock: 2200-23002 points
-
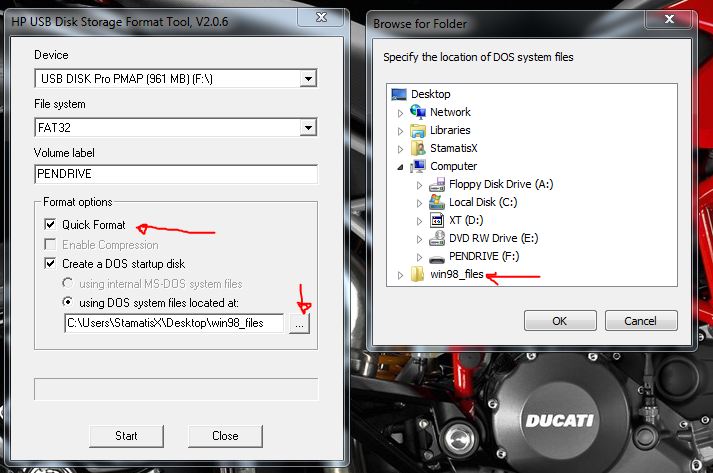
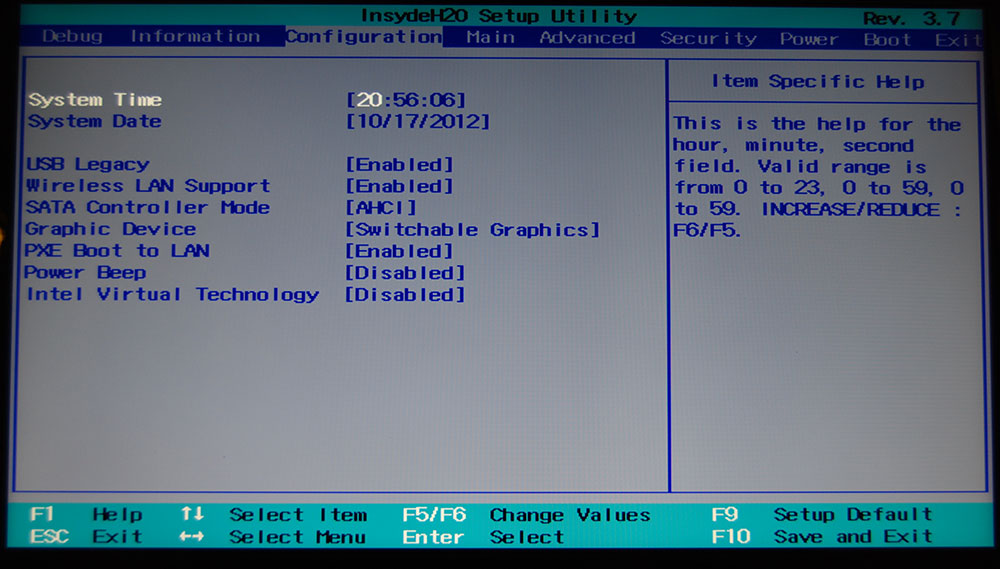
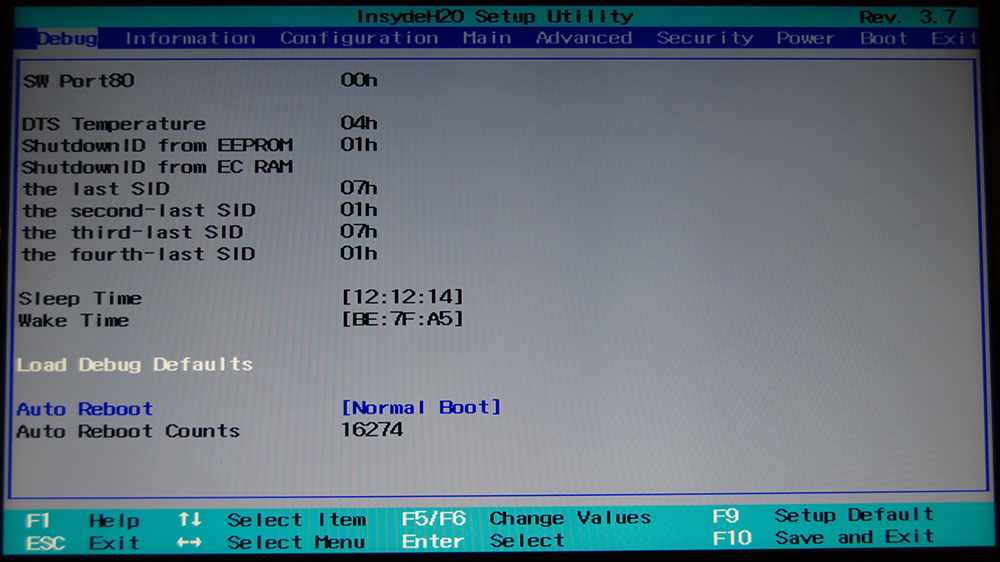
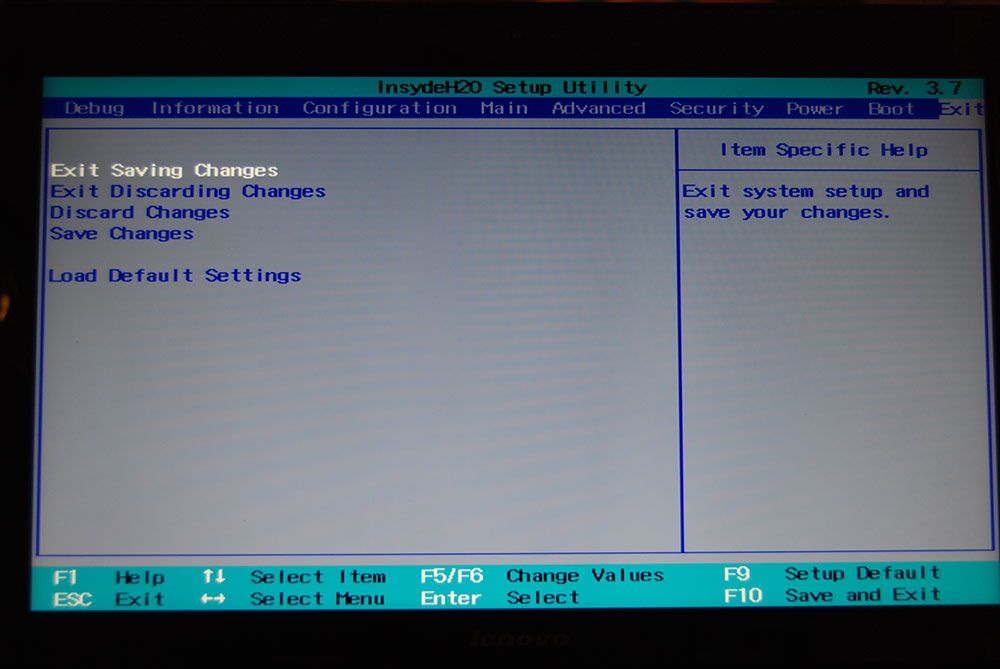
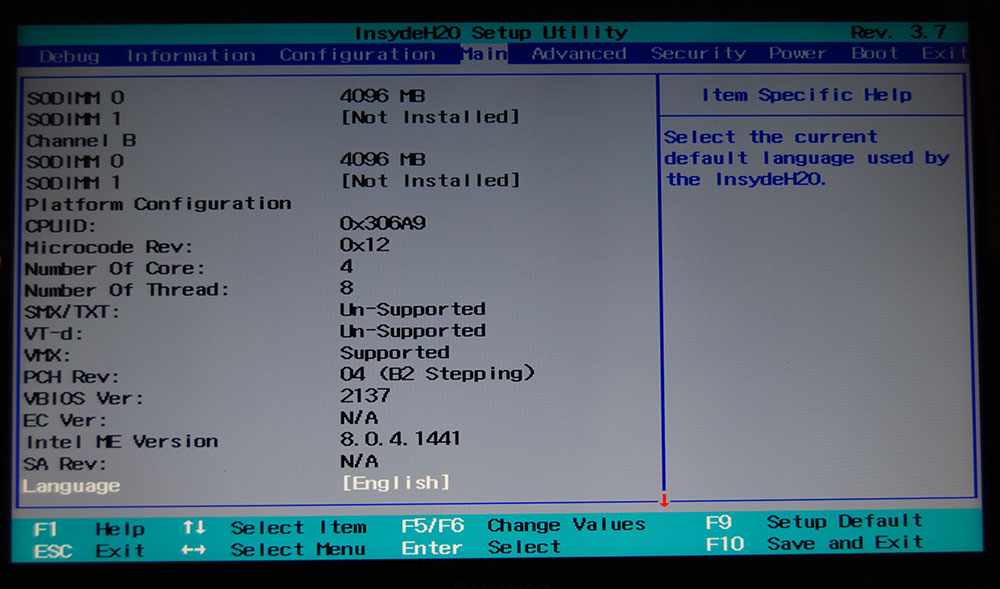
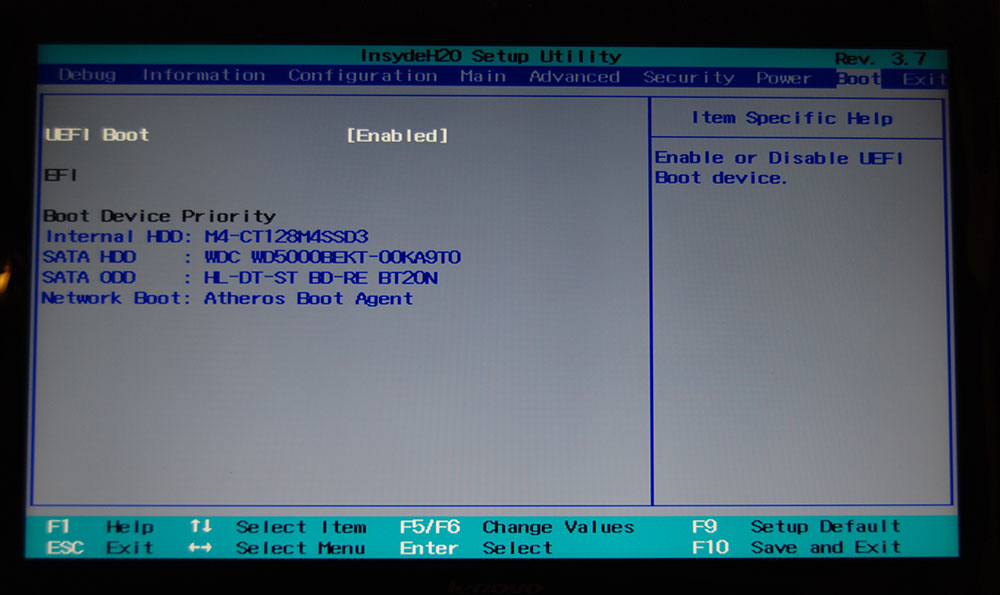
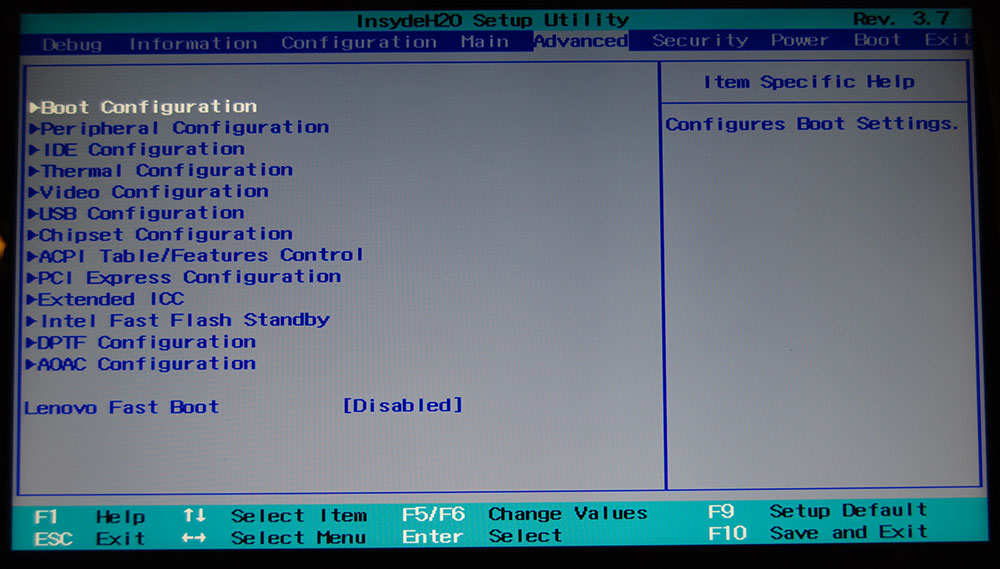
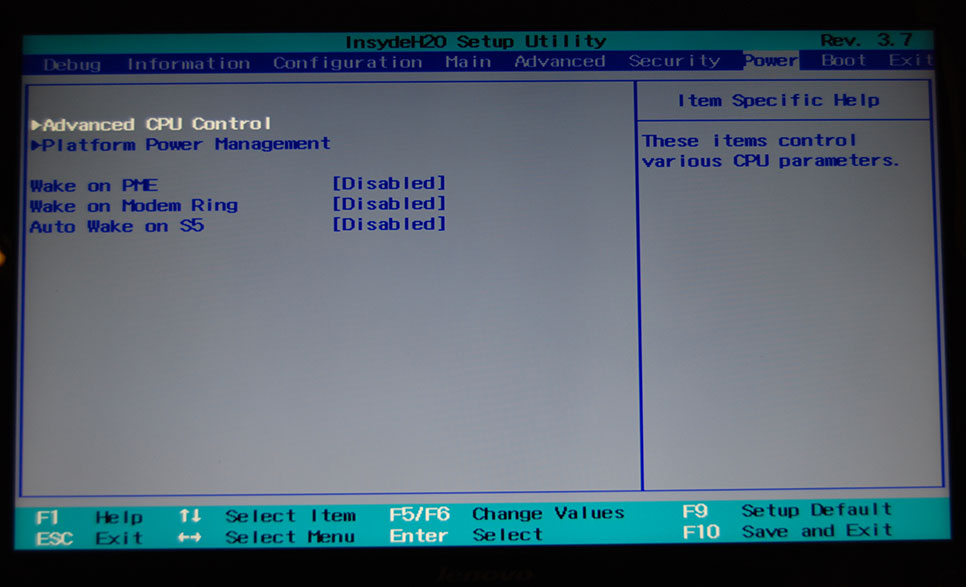
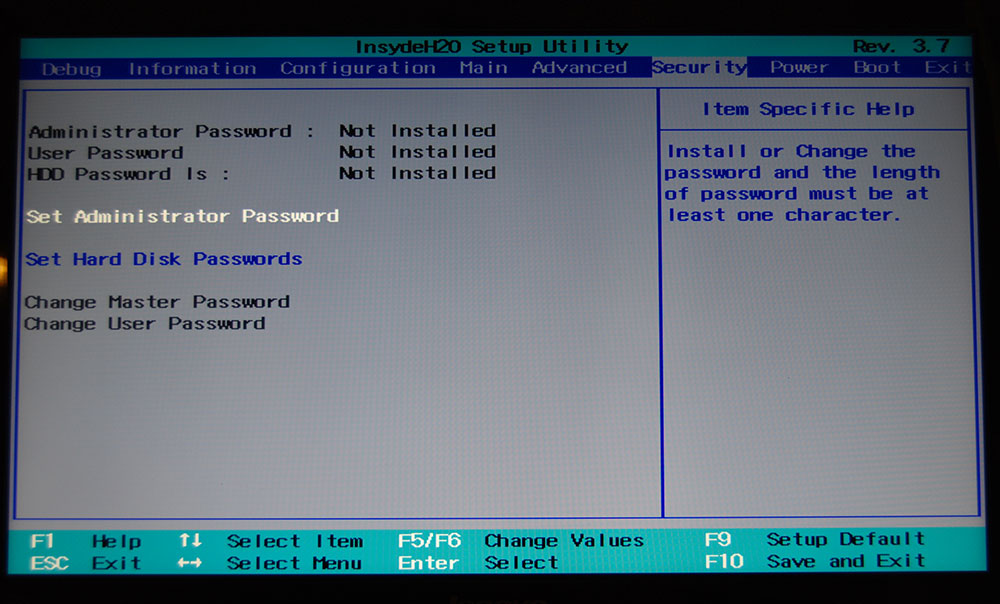
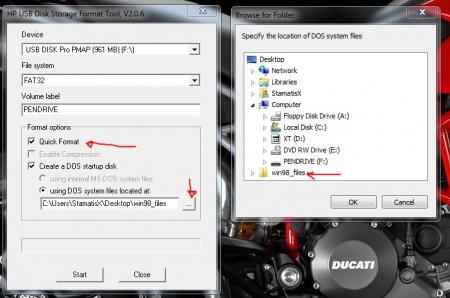
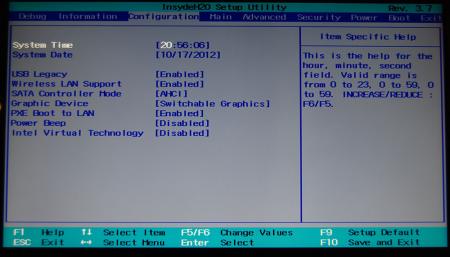
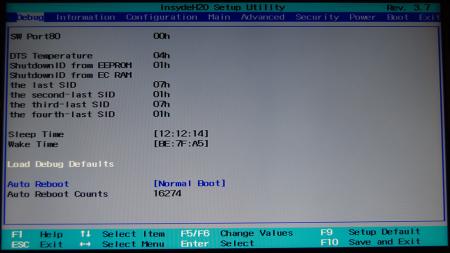
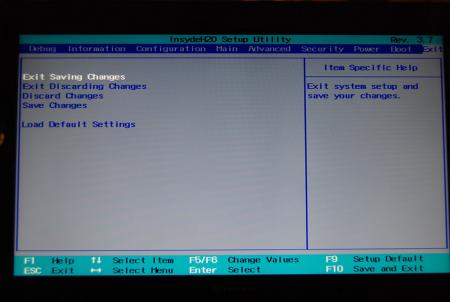
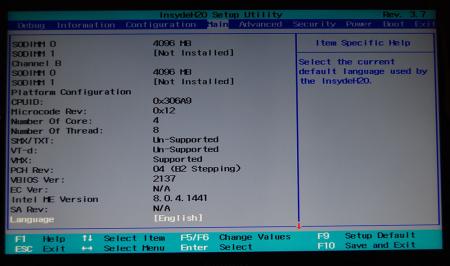
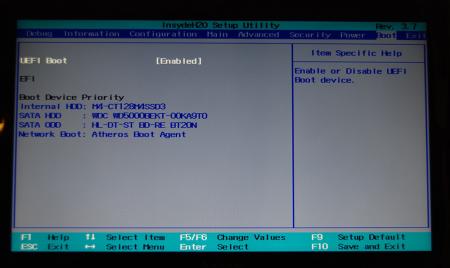
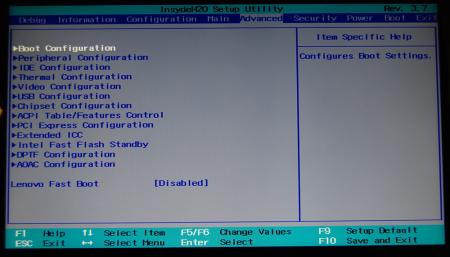
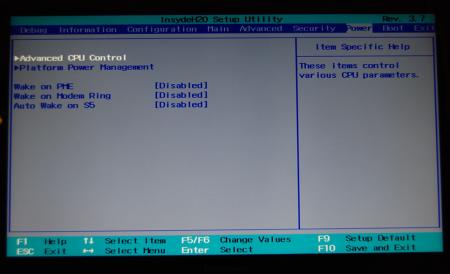
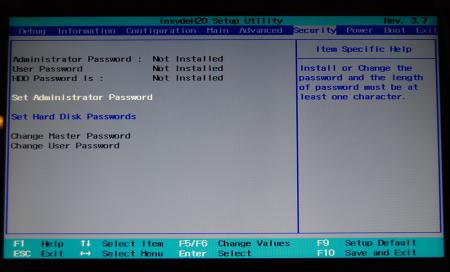
Lenovo Y500 - 'unlocked' BIOS / wwan-wlan whitelist removal The Lenovo Y580 / Y480 comes with a pretty locked down BIOS, and in addition to this with a whitelist which prevents the user from getting 3rd-party wwan/wlan cards to work properly. The modified BIOS versions here will take care of this. Keep in mind that not necessarily all options available in the modified bios will work. Some might not do anything at all, others could possibly leave your system in a state which will prevent it from booting. Use care when changing stuff in the modified bios, don't touch things you're not familiar with. Use all the mods and software posted here on your own risk. NOTE: This will only flash the bios region. It won't reset the nvars set in the bios. While it is technically possible to update from v2.0x to v8.01 by using the method described below, I can't really recommend it since the EC of your system won't get updated. While it might work (possibly even without any issues) I can't recommend it. Therefore if you're on v2.0x and want to update, the better option is to wait until Lenovo provides an official 8.xx firmware update with EC and BIOS. You can then still flash the modified version as described below, once you're on a proper v8.xx firmware. Attached you'll find a modified version of the Y580 / Y480 BIOS v8.01 (5DCN90WW). ----------------------------------------- >> For users with a v2.0x BIOS: << Download links Old version: Current 2.0x version: Lenovo Y580 / Y480 BIOS v2.07 (5DCN40WW) -> unlocked, whitelist removed, Nvidia 660m @ 1GHz default 3d clocks Flash with the included InsydeFlash utility. ----------------------------------------- >> Instructions for v8.0x BIOS users: << The attached BIOS ("Lenovo Y580 - Y480 BIOS v8.01 (5DCN90WW) - Mod") is unlocked, whitelist stuff removed and the 660m is tweaked to 1GHz default 3d core clock. The only way I know of which allows you to flash the modified BIOS for v8.01 users does unfortunately also describe certain information which you don't want to loose (serials, Windows licencse etc.). Don't worry, I got it all sorted out, but due to this the flashing procedure is a bit more complicated than usual. Make sure you follow the instructions carefully. Download the flash tool, for flashing you'll need the DOS version, but for creating the backup of your current BIOS the Win64 version will do as well, and it is faster. Get the prr tool as well. Grab the modified BIOS you want to flash and the Y580-Y480_BiosFix tool. Create a backup of your current BIOS using the flash tool you downloaded (first step) by runing the included backup.bat, or by using the Win or Dos version flash tool with this command: -d BackupBiosY500.bin -bios If you get and 'Error 104', grab 'Error 104' fix and replace the original fparts file with it. . Make sure you have the modified bios which you want to flash, the bios backup you just created and the "Y580-Y480_BiosFix" tool in the same folder. Run the Y580-Y480_BiosFix tool, follow the instructions on the screen. Enter the name of the files correctly, else you'll get an error. It will create a new file for you and will be named after the modified bios file you specified, with 'Fix' appended to it. Here's a screenshot of the tool in use (Y580 version looks the same). In the case shown here it will create a file called "modifiedBiosFix.bin" which you can find in the folder where you run the tool. Use that one for flashing. Put the fixed BIOS, the prr.exe tool and the fpt.exe (along with the fparts.txt file) on the root of your prepared DOS bootable USB drive, restart your system and boot from that drive. Execut the prr.exe, if you don't get an error message continue by pressing enter. Then flash the bios by using this command (filename.bin obviously needs to be replaced with the name of the file you want to flash). If you can't remember the name of your file, use the command dir to display all the files on your drive. Flash with this: fpt.exe -f filename.bin -bios NOTE: The name of the BIOS file mustn't exceed eight characters (not counting the extension)! That's a DOS limit, so make sure the name of your file isn't too long. Wait until the process is done. After flashing it will verify the data, in case there's something wrong with the flashed data it will tell you. In that case don't reboot, just flash again. It might look a bit complicated at first, but that's the easiest way I could think of. Let me know if anything is unclear. The attached v8.0x modified versions include: - unlocked menus - whitelist removed (wwan / wlan) - Nvidia 660m 'GHz edition' - 1000MHz default 3d clocks >> Here's the 'buy me a beer' link in case you like this. Modding makes me thirsty << Use at your own risk, you are responsible for your system and the changes you make on it. My programs come with absolutely no warranty to the extend permitted by applicable law. Thanks @X0pas1 for testing, and for some pics - see below: I'd appreciate it if someone could also post some pictures of the more interesting sub-menus, e.g. advanced CPU control, video settings and similar. UPDATE 1/17/16 DOWNLOAD LINK FOR FILES REFERENCED IN THIS POST:
 1 point
 -
Hi all, Check down this article. SilverStone Joins the 'Steam Machine' Compact Case Race See a familiar looking box under the name of the ASUS XG2?? That's right - it looks to me exactly like the T004. Now that ASUS is behind it as well maybe we can see an imminent release?1 point
-
Windows 7 64 bit? Let us see your .inf file.1 point
-
Well my SB 2560P 4.6W vs IVB 2570P 5.4W idle test was with SSD vs HDD. A SSD can consume virtually no power in HIPM+DIPM slumber mode as discussed at AnandTech | SanDisk Extreme II Review (480GB, 240GB, 120GB) , whereas my HDD consumes 0.8W MKxx61GSYN Series in low power idle. That's exactly the 0.8W difference I noted. I had already been using an extensive set of 2570P tweaks as documented at http://forum.techinferno.com/hp-business-class-notebooks/2537-12-5-hp-elitebook-2570p-owners-lounge.html#post38399 . Without the ASPMs L0s/L1 tweak, the 2570P's SD/MMC upgraded controller was consuming an addition ~1.8W idle power making it significantly worse than a 2560P. Upon viewing your comments I wondered if I could possible squeeze out some more battery savings? Yes, a further up to 0.3W gain was possible by (1) Disable USB 3.0 - function disable bit 27 (2) Use Throttlestop to decrease multiplier from x12 to x8. Function disable is at 0xFED1F418 on my HP. That may be different on yours. Find it by doing a PCI read of 0:1f.0 f0 (32-bit) but set the rightmost digit to zero, then add 0x3418 it. Use the RWEverything utility to do the pci read then the memory read/write for disabling USB 3.0. Doing a device manager rescan afterwards to see it disappear. Now if I had a SSD I'd love to show a ~4.6W idling 2570P. That would be at least 2W better than as supplied by HP. The Haswell "power efficient" ULT (ULV) platform idles just under 4W. There might not be much in it at idle.1 point
-
More details here: SilverStone / ASUS SG Station 2 External Thunderbolt Video Card Hands-On | Gamers Nexus - Gaming PC Builds & Hardware Benchmarks1 point
-
I chose that particular extension cable because it had 8 wires and the male end plugs into the female end. Its original purpose as a CPU extension cable is a coincidence, the cable met my need for the number of wires I needed, wire length, wire gauge, and the ability for the ends to plug into each other and lock. I cut the wires so that the male end had about 2" and the female end had the remainder, and soldered the ends to where I wanted them to go. I cut off the XBOX end and soldered the male side to it, and soldered the female side to the appropriate connectors on the eGPU side. I made the 5V switchable by running the 5V red wire from the floppy molex to the same side of the switch as the blue XBOX PSU wire (5V to the blue wire signals for the 12V to activate). I made my observations with the 5V disconnected by trying to troubleshoot my 203W PSU that I fried. I reconnected 5V in my final setup for a number of reasons, but to mainly reduce the load on the 3.3V from the motherboard (3.3V gets converted to 5V on the PE4L, and I was having some issues with my other PCIE devices during testing with the GPU on 3.3V power) and to run/charge USB devices. In the end, you can just pull the 5V connector from the molex floppy power connector to your PE4L. If you're running an ATX power supply like pretty much everyone is doing, you probably only have one. If I do that on mine, I risk damaging the only connector I have and it's a pain in the butt to replace. Did I answer your question?1 point
-
No it isn't thermal I ran my PC over a AC unit and the ~10 seconds benchmark (32M) started, stayed, and ended with my CPU running at 27x multi while temp were under 62. And I'm not alone, another forum user reported the same with the same laptop and cpu. Here's my ThrottleStop bench log: nopaste.info - free nopaste script and service Send @Tech Inferno Fan a PM and see what can be done. I'm sure he will help.1 point