Leaderboard


Popular Content
Showing content with the highest reputation on 07/11/11 in all areas
-
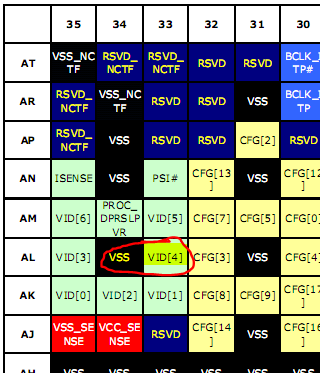
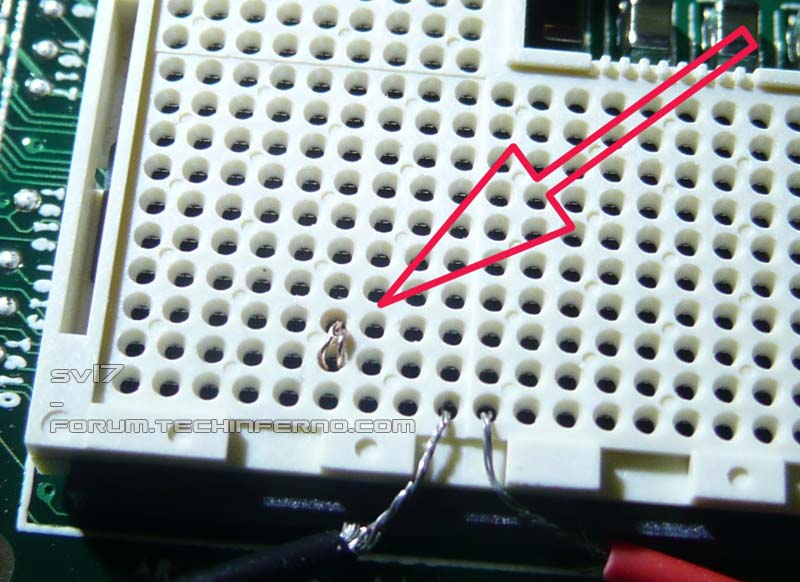
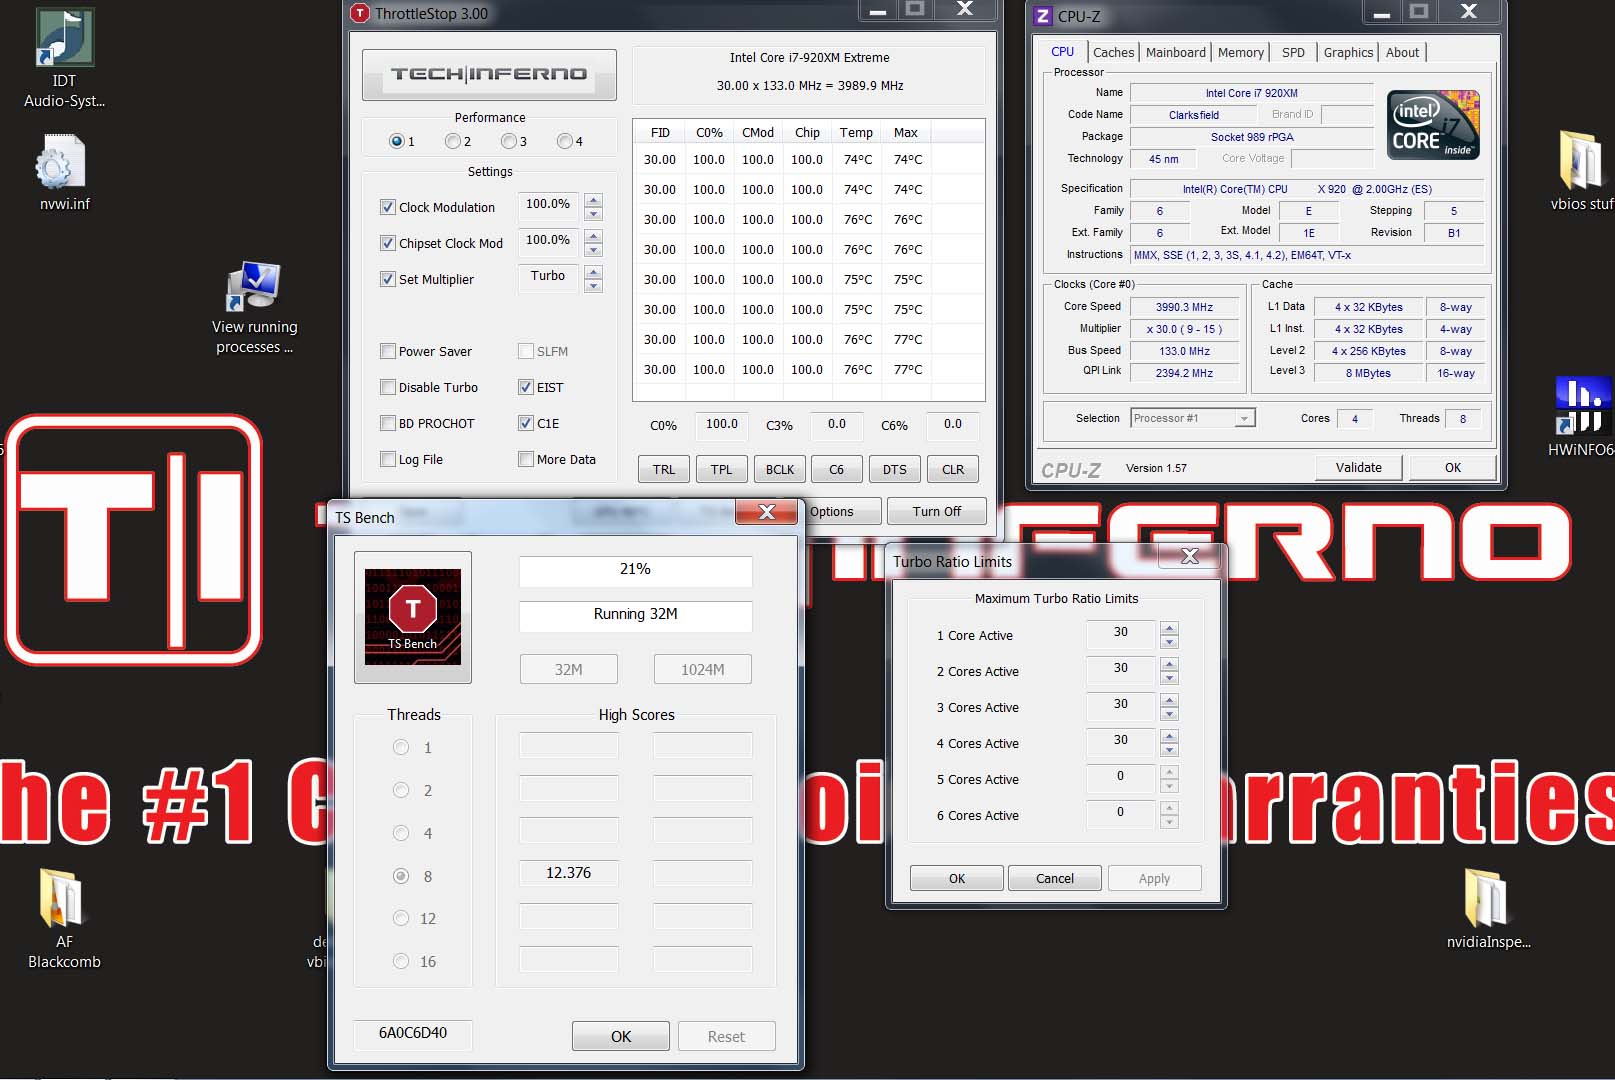
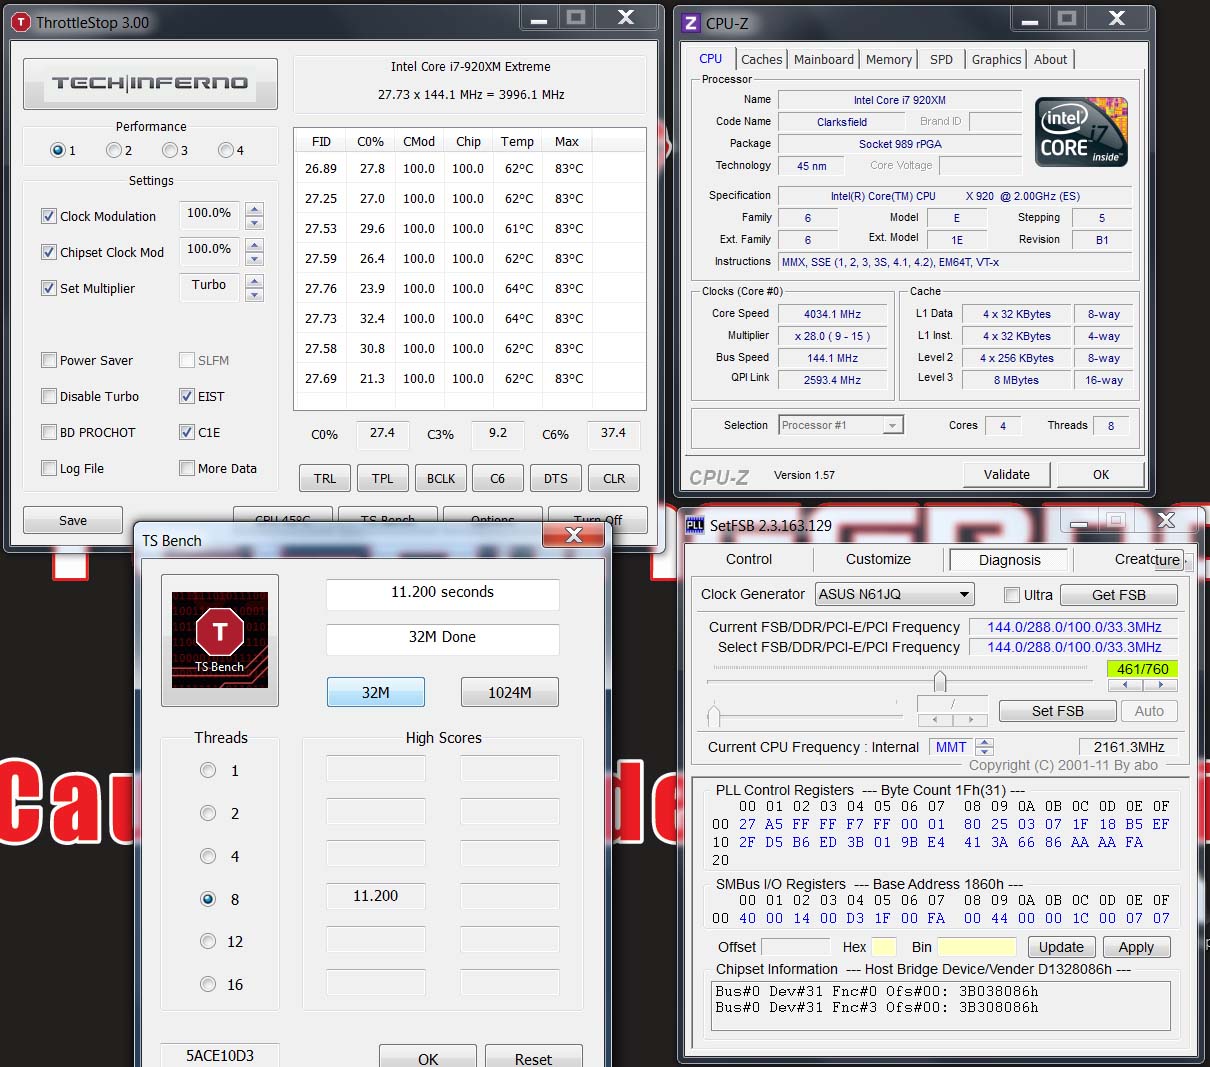
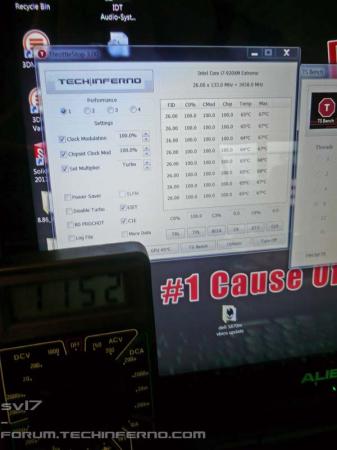
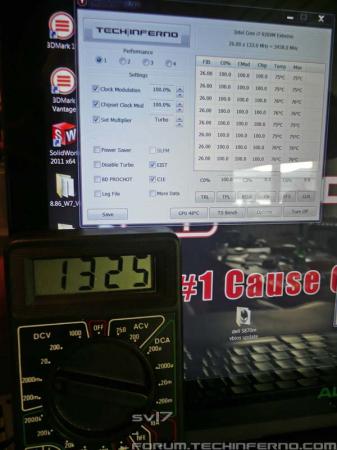
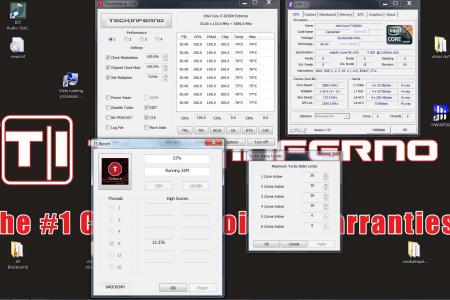
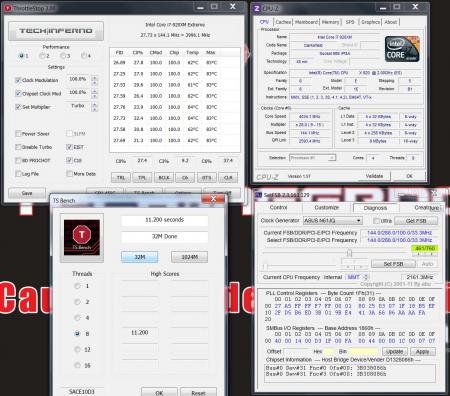
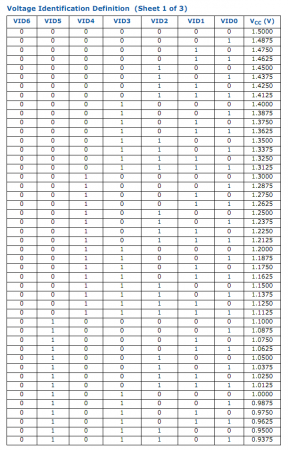
This post will quickly describe a way to increase (and decrease) the core voltage of the CPU, I have to advise anyone against doing this unless you're aware of all the risk that is involved. First of all a quick summary of how the voltage regulation works in the recent Intel CPUs, if you want to see my results skip to the end of the post. The method described below is mainly interesting for unlocked extreme processors, it will allow you to push the multiplier a bit more without crashing the systems. If you happen to have an adjustable BCLK it may be helpful as well and should allow you to push it further than with the standard voltage (provided the RAM can keep up with the speed) A quick explanation: The core voltage (Vcc) gets regulated by combining 7 different voltage identificators pins (VIDs), VID0, VID1, ... VID6. Each VID has a different voltage value. VID0 = -0.0125V VID1 = -0.0250V VID2 = -0.0500V VID3 = -0.1000V VID4 = -0.2000V ... you get the idea. Simplified you can say the Vcc is at 1.5V when no VID is active, every active VID pin will subtract it's value from the Vcc and in this way create the needed Vcc. Looking at the VID table should help to understand the concept. A 1 represents an active VID, a 0 an inactive VID pin. The seven VID pins allow a wide variation of different voltages which allow smooth transitions and can get easily controlled with a simple binary code. E.g. the string for 0.9250V would be 0101111 Now if you permanently deactivate a VID pin by connecting it to Vss (CPU ground), you increase the voltage of each possible VID combination which uses this pin actively (set to 1). This means with this method you always change a whole range of different voltages. For example if you connect VID3 to ground, you will increase each voltage which contains VID3 = "1" in the table by 0.1V. The problem is that this will result in voltage jumps when the CPU adjust its voltage. As an example lets assume VID3 is connected to Vss (this means VID3 is always = "0" in the table) Now if you look at the VID table, 1.1000V is a VID combination of 0100000. If the CPU increases the voltage by 0.0125V it will set the VIDs to 0011111 which normally results in 1.1125V, but since the VID3 is always set to "0", the voltage will directly jump to 1.2125V. Intel actually requires a smoother voltage transition, only 12.5mV steps are allowed according to the datasheet. This voltage mod will result in a "jumping" Vcc each time the modded VID pin should get set to "1". So this mod won't give you a voltage increase in a percentage basis, but only increase it at certain VID combinations. Therefore it's (in my opinion) only suited for increasing the max voltage, or (with some adjustments) also for decreasing the idle voltage. Anyway, this will result in voltage changes that aren't conform with the Intel standards. Also if you plan to do such a mod, I highly recommend to measure the voltage of your CPU before doing this. Intel says that "Individual processor VID values may be set during manufacturing so that two devices at the same core frequency may have different default VID settings", this means that the max voltage of your processor may be different from my value. After measuring the max voltage which my 920xm uses when pushed to it's stable limits (multiplier at 26x at all cores, baseclock at standard 133Mhz), I took a look at the VID table in the datasheet of the processor. My max voltage was at about 1152mV. This means by setting the VID4 to "0" (by connecting it to Vss) it gives me a boost of 200mV when my CPU gets to its limits. The datasheet provides all the necessary information about the pin locations. Below you see how it looks, encircled in red is what must get connected to permanently set VID4 to "0". For doing this you simply connected the Vss and VID4 pin in the CPU socket with a very thin wire. Make sure the CPU pin has still enough room. If it's done it'll look like this: I measured the voltage to make sure it worked as intended. The left picture shows the voltage a multi of 26x on all cores before the mod, the right pic the voltage after the mod. I didn't do a lot of testing yet, but the results are very impressive so far. I've been able to raise the multi to 30x on all cores an run a quick TS bench. And with a multi of 28x and a BCLK of 144 MHz I was able to run the 32M TS bench at more than 4GHz on 8 threads. The previous limit was 26 on all cores. Left: Check out the multi shown in Throttlestop Right: 32M TS bench at 4GHz on 8 threads I'll see what I can do with proper cooling... this is gonna be fun _______________________________ A voltage increase will result in an extreme increase of the power draw, resulting in a lot of heat. I have to advise everybody against doint this unless you're really aware of the risks involved in this. This is nothing that you should do to your machine permanently, but it's great to see how far it can be pushed. It's an extreme kind of overclock which will stress the system very hard. The Intel "absoulte maximum rating" for the voltage of the 920xm is 1.45V, so this is really close... _______________________________ As already mentioned, this method can also be used to decrease the idle voltage. You'll need to find out your idle voltage and then check the VID table for the suitable mod. You'll have to connect the VID pin(s) to Vcc instead of Vss if you want to decrease the voltage (set the VID permanently to "1") There are other possibilities to increase the voltage, also to get a certain percental voltage increase which won't have the problem of jumping voltage values. I might investigating in this sometimes. The advantage of this mod is, that it's very simple. No soldering iron is needed and it can be quickly removed. ______ Let me know if something is unclear, this is quite complex to understand and I wanted only to quickly explain the idea behind this. I'll be glad to help you in case you want to under- or overvolt your CPU with this method and have some questions. PS: I'll try to put this in a frontpage article when I find time.


 3 points
 -
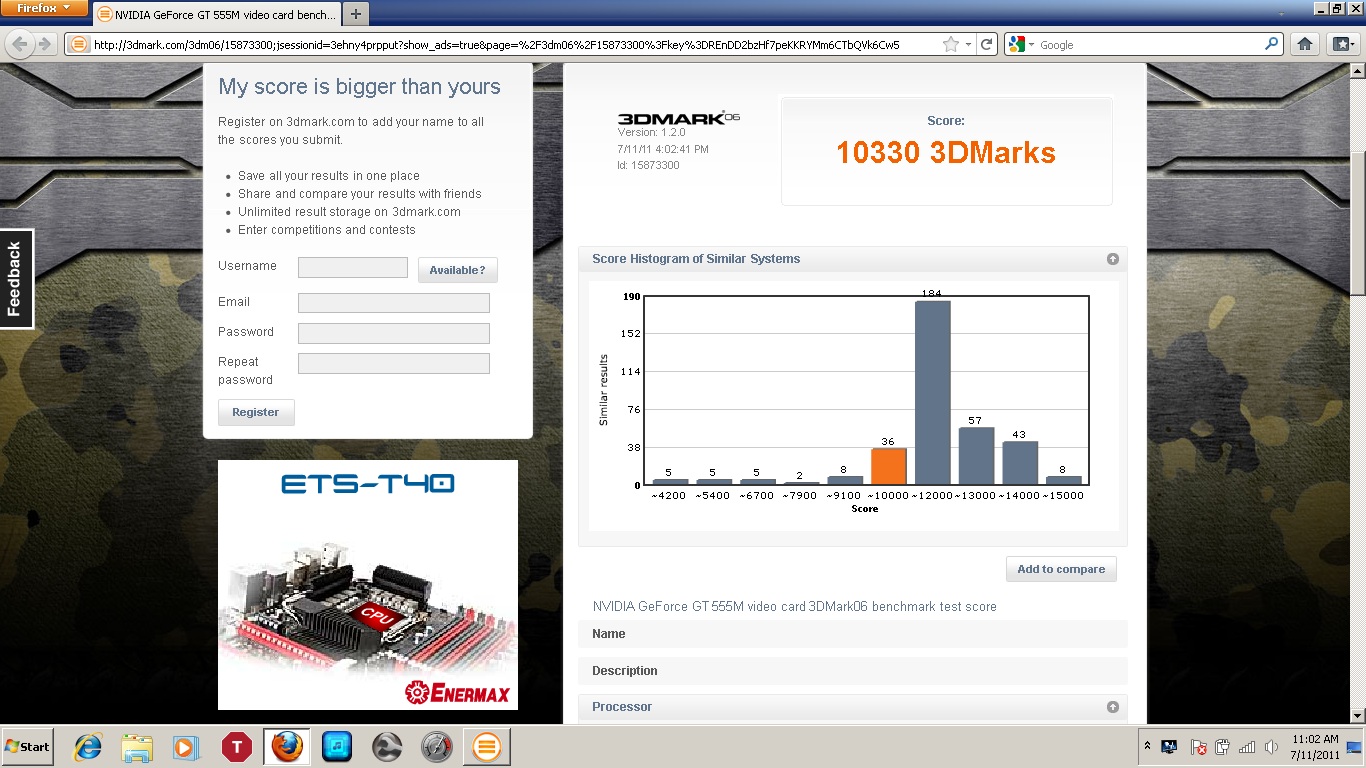
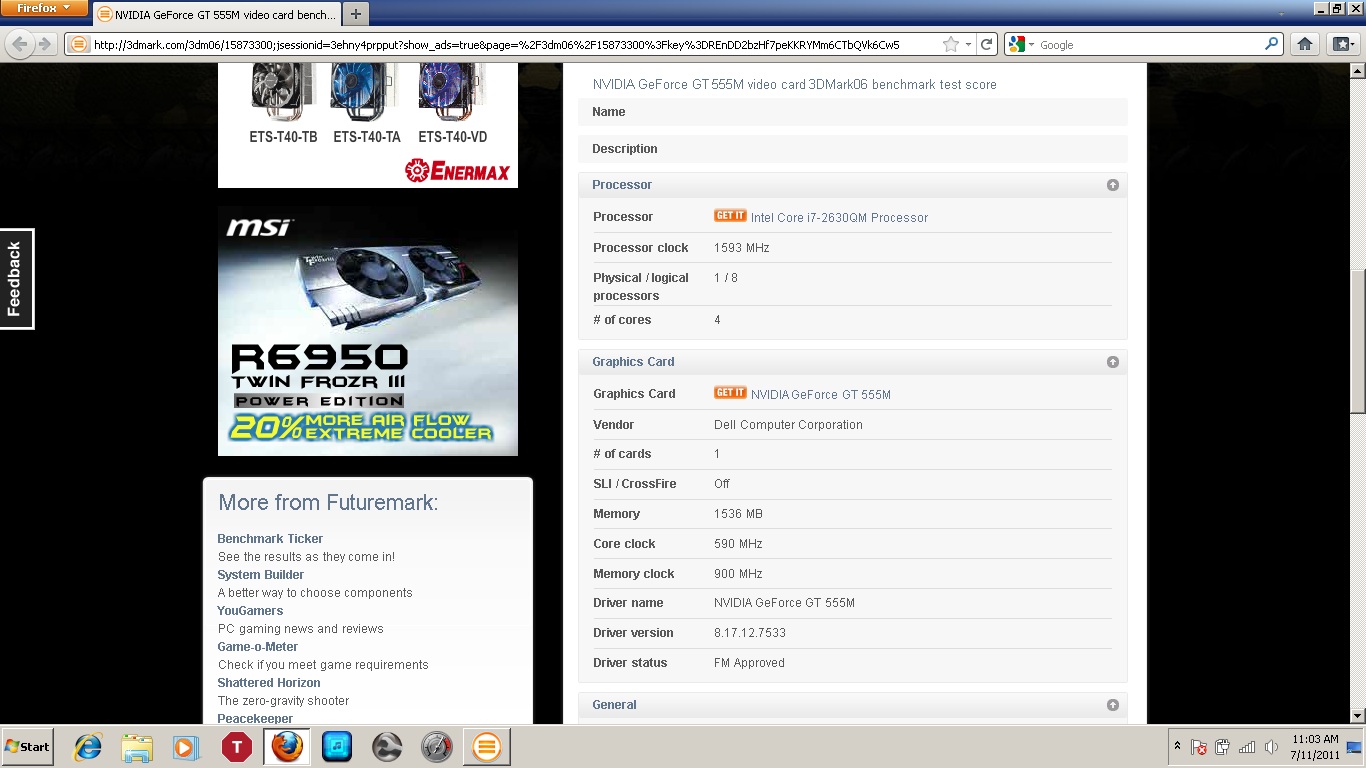
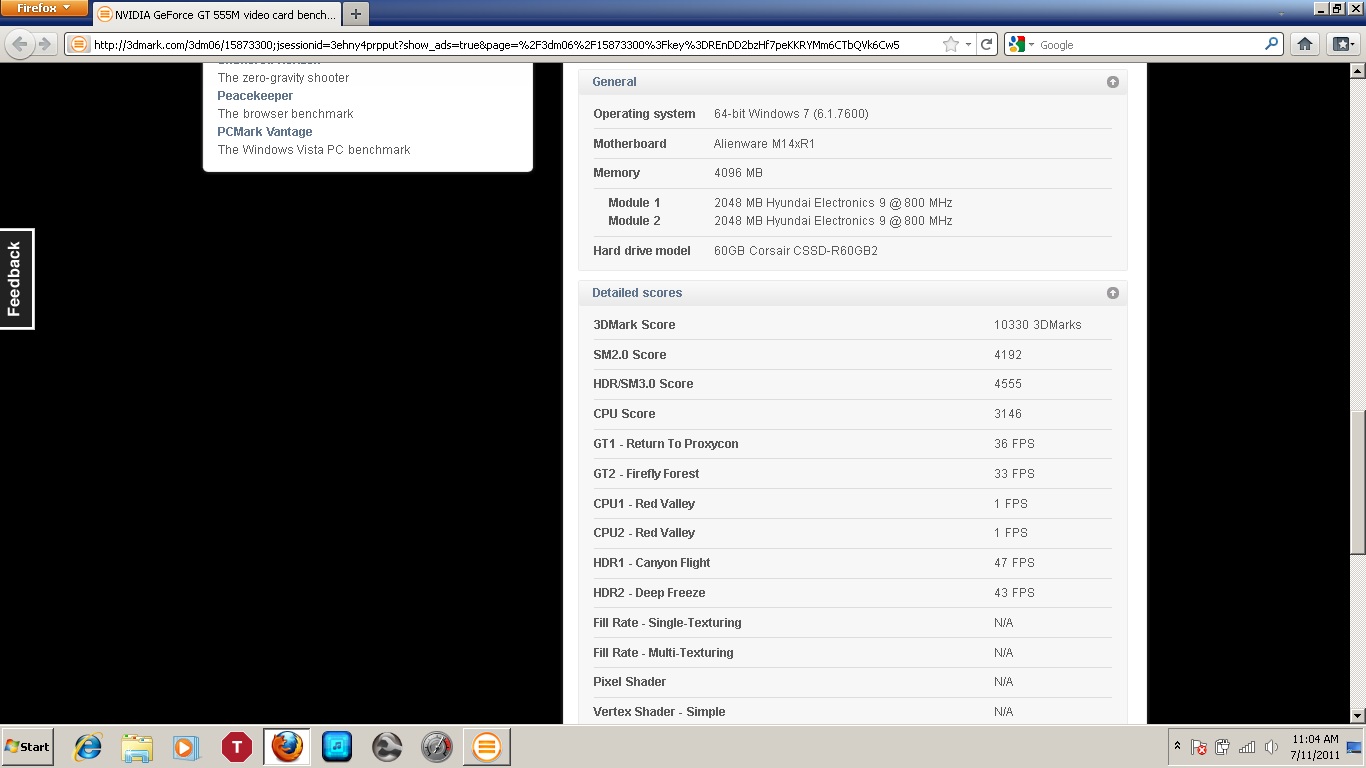
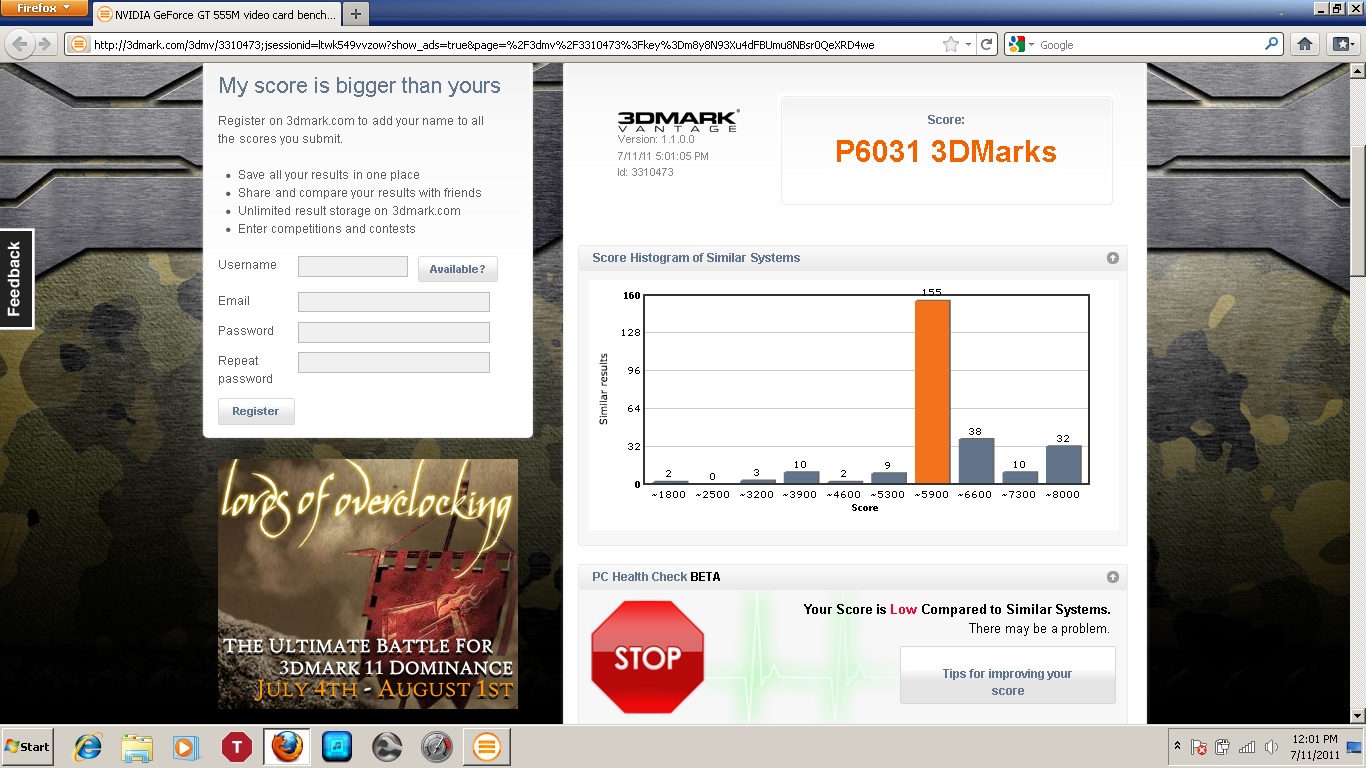
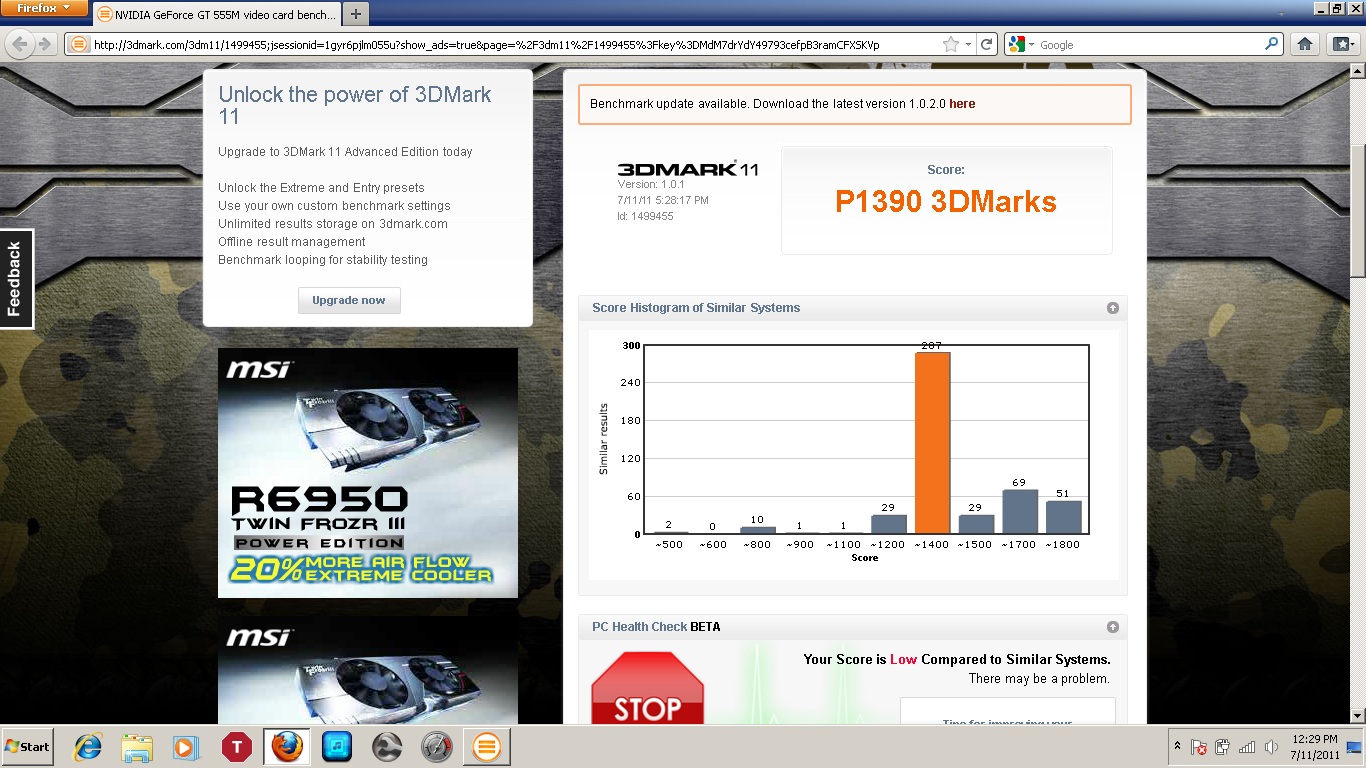
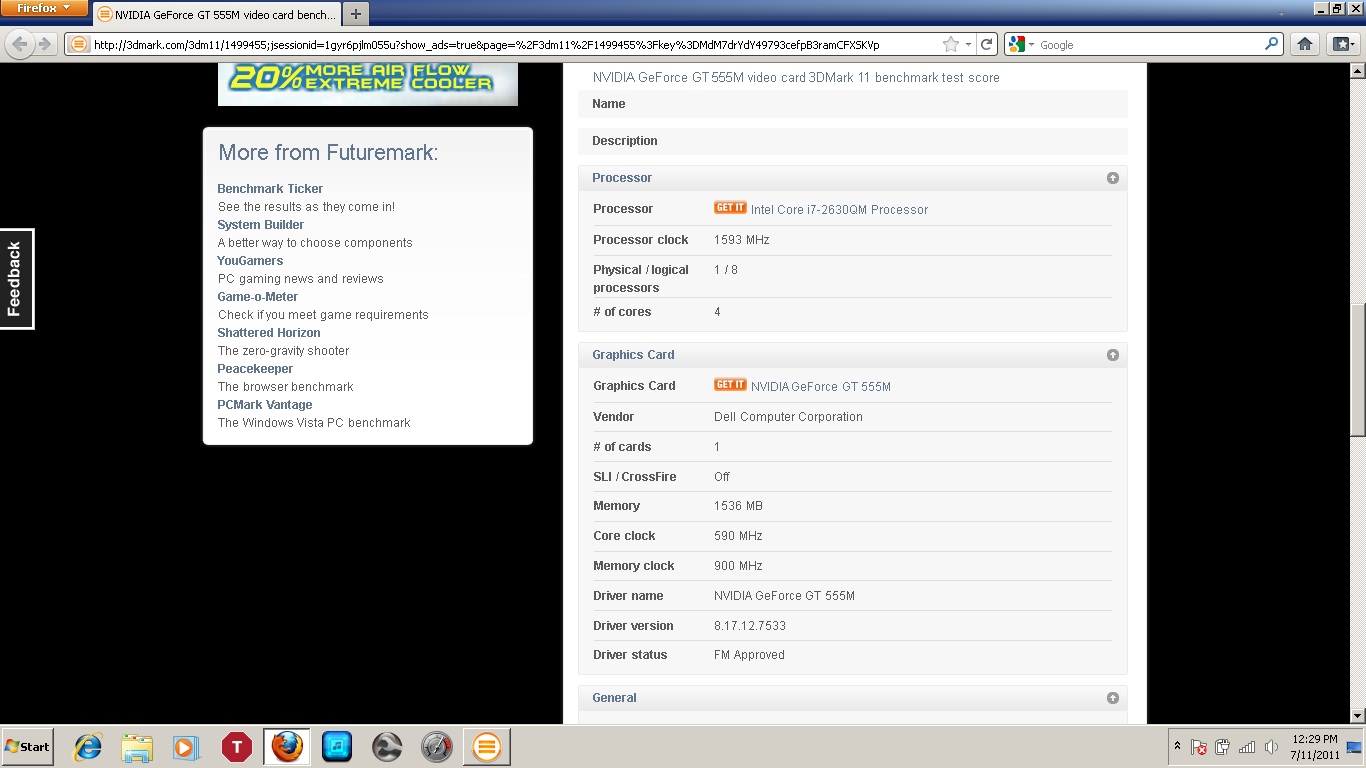
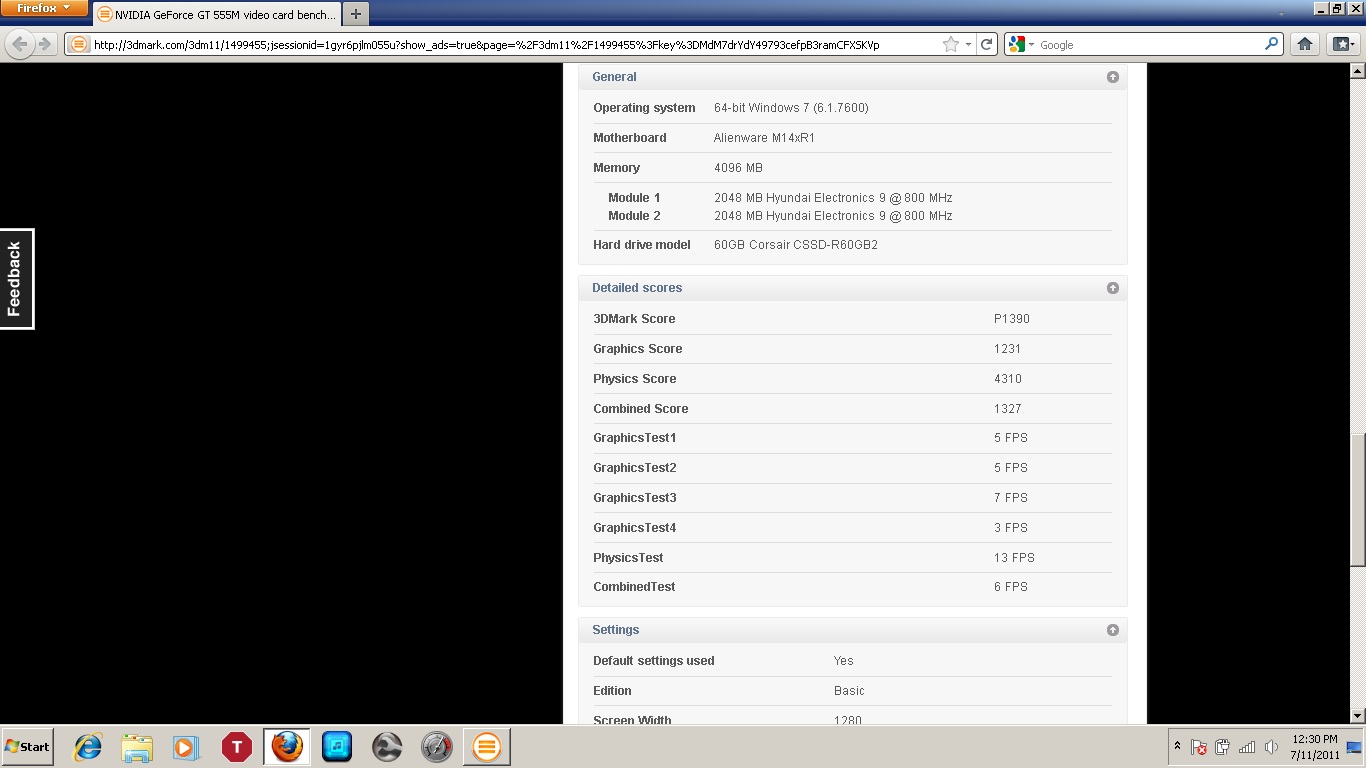
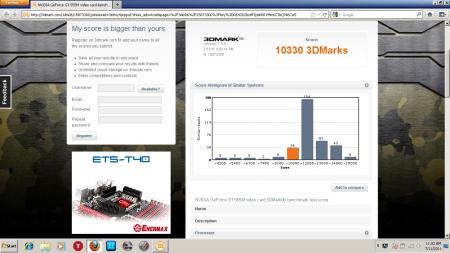
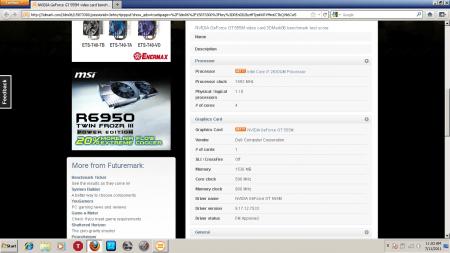
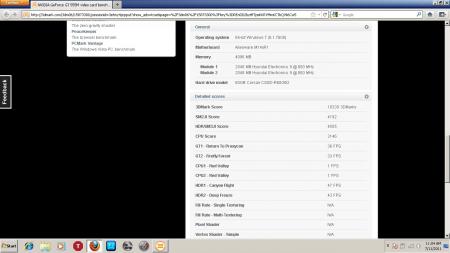
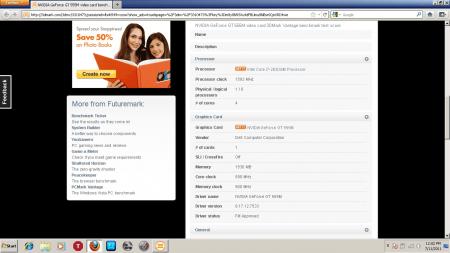
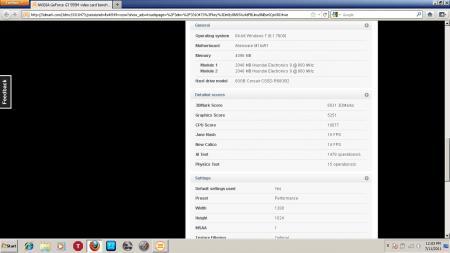
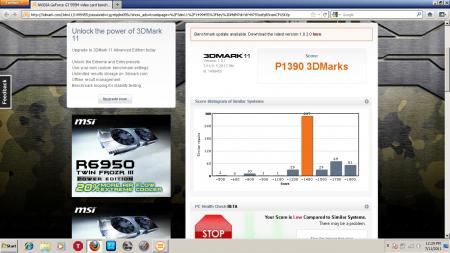
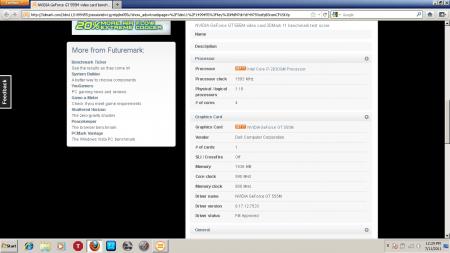
Benchmark On Battery Methodology: The purpose is to provide real benchmarks on battery. To certify accurate results I selected the power profile, performed a complete shutdown, removed power cord and booted completely up on battery. System: I7-2630QM, Nvidia 555mGT 1.5, 4GB Ram @1600, 60 + 64 GB SSD, LCD 1366x768 Native 1. Drivers: 275.33 WHQL Nvidia, Intel 10.2361 2. Nvidia Settings: Performance setting with AA/AF set to application controlled. Render ahead set to 0. Physx Set to Auto. 3. System Setting: a. Bios A01 b. Power profile - Gaming on Battery. Intel and GPU set to balanced. CPU set min and max to 80 percent (1.6ghz). c. Core parking enabled. d. LCD set to lowest setting. e. AlienFX off. First Up... 3DMark06 (you can see the cpu and gpu speed in the report) Free Version, Performance Default Settings Next Up... 3DMarkVantage (3dmarkVantage Free Version, Performance Settings) Last 3Dmark11 Freeware (performance settings) Afterthoughts... Make sure that you create a custom profile for gaming on battery as I have mentioned before. You don't have to disable turbo in bios but if you want to be 100 percent certain you are using your profile you can select the power profile, shut down and boot up on the battery power profile. To test you can use Throttlestop just to be safe. Graphics should be set to balanced for both Intel and Nvidia (dedicated GPU).


 3 points
 -
Thought you guys might like it:2 points
-
Jimbo hehehe1 point
-
About the insulating thing with phase change cooling... check out this.1 point
-
Yeah the Crysis 2 graph is missing the R2 results because I don't have a copy of the game. 1)A maxed out R2 (2x5870Ms and 940XM even overclocked) is not as powerful as the M18x (OCing the 2720QM can come really close to the 940XM OCed) The only reason not to upgrade is due to the lack of RGB LED and 1200p that the R2 has. 2)We have no information about the M18x-R2 so we couldn't speculate. 3)The 2920XM will benefit the synthetic benchmarks and applications that are heavily CPU depended. If someone uses the M18x just for gaming, an upgrade will have minimum impact on FPS. We wish we could have the review published earlier, but since there were 3 laptops in 3 different locations it was very hard to coordinate things mostly because of the 3 different time zones (plus this is not our main occupation and all these tasks were performed during our free time). Thank you though for the feedback. It is greatly appreciated and crucial for our future reviews1 point
-
I did a bit of Vantage benching lately mw86, mainly just been gaming and learning some new networking/server stuff. Here it is, finally hit over 15k GPU! 3DMarks: P16,548 GPU: 15,215 CPU: 22,4451 point
-
What? You paid for 2.2GHz and only got 1.9GHz? Unbelievable... Go and ask for those 300MHz, now! They should send a technician who does a pinmod on your PLL1 point
-
Man, i am not close with my dad as well, and i know i'll regret it one day.. I had to cancel my M18x order, because it's been too long in production and since i am moving to brazil in two weeks i was afraid i won't get it on time. Instead i opted to buy a second hand M18x from a user at the "other forum", he's shipping it to me today. Hope it's all good with it and that i'll get it on time.1 point
-
They must be running short on the 6970 supply, the 580M is much stronger so it's a win for you!1 point
-
I have two pieces of software. I have a fully licensed version of powerdvd 9 with updates and a have fully licensed Total Media Theater 3 (version is a year old). It's slower than powerdvd9 but more compatible with titles. So I load up both and use powerdvd9 first and if it fails then I use TMH. Even the 720p screen looks amazing with blu ray so it would scorch with 1080p on a 14 or 15 inch platform.1 point
-
Oh yea, I forgot to mention that they were also able to change the case coloring from Space Black to Nebula Red.1 point
-
I just got off the phone with a AW rep and they were able to change the GPU's for me. Instead of getting the 460m's, they were able to give me the 6970m CrossFire's. I am quite please and very thankful. It does pay off to get that extended warranty when available. :D1 point
-
Most of the dust is drawn towards the center. I took 3 pictures of the net. Its about 10 days + since I cleaned it. The net looks totally nasty with particles all over with extra much in the center of the fanpositions. This is taken with my phone camera, but on the 2nd picture the particles are rather visable.1 point