Search the Community
Showing results for tags 'thermal paste'.
-
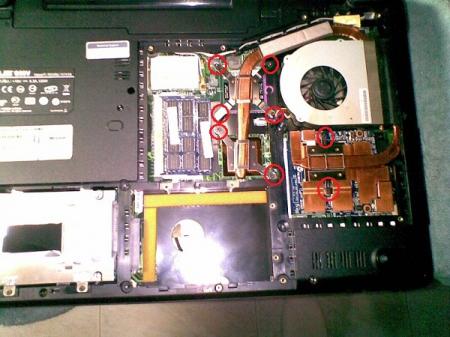
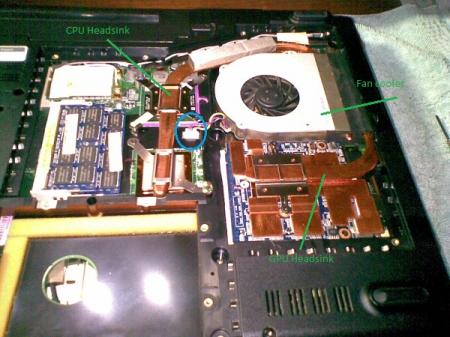
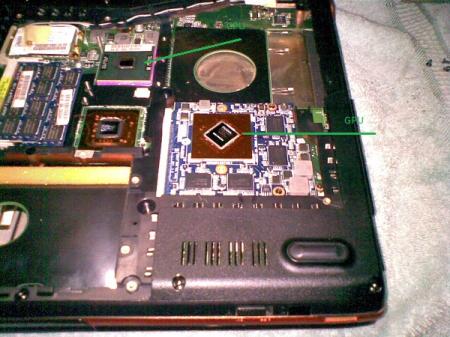
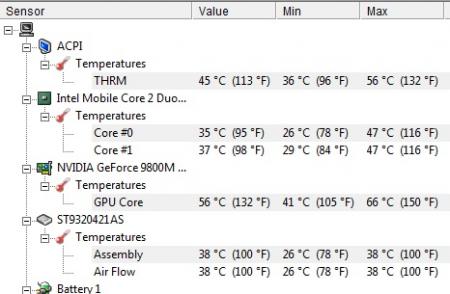
I wrote an article on my website and wanted to share here (you can read in spanish) EDIT: A complete guide to disassembly the Asus G50 can be found here: http://forum.techinferno.com/asus-gaming-notebook-forum/560-official-asus-g50-disassembly-guide.html#post6282 At this time we will see how clean and apply new thermal paste to an ASUS G Series (Republic of Gamers) more specifically the G50VT X1 model, however, this process may be the same that applies to all G50 and G60 series. This laptop began to raise their temps, mainly GPU. Before making the process of cleaning the fan / heatsink and applying new thermal paste, the temperatures were in: Normal use: CPU: Between 30 ° and 40 ° GPU: Between 60 ° and 75 ° Doing a "stress test" with FurMark 1.9 (only 3 minutes) CPU: Between 50 ° and 60 ° GPU: Between 90 ° and 97 ° reaching 106 °!! Note: Furmark stress tests performed in order to know the answer to take your 3D graphics card generation and whether it will be able to run the most demanding programs and games. As you can see, the temp of CPU (both cores) are not unusual, tem are quite acceptable, but the GPU is too FU***** high. After performing the cleaning process and application of new thermal paste temps are: Normal use: CPU: Between 26 ° and 38 ° GPU: Between 41 ° and 58 Doing a "stress test" with FurMark 1.9 per 15 minutes CPU: Between 40 ° and 47 ° max 57 ° GPU: Between 80 ° and 90 ° with a maximum of 92 ° Playing for a while Hydrophobia Prophecy the GPU max temp was 88° I started with the cleaning and application of new thermal paste. What we need is a tube / syringe of thermal paste, I used Artic Silver 5, a Phillips screwdriver. Antistatic cleaning cloth, a pair of coffee filters (yes coffe filters!) A lot of patience! so lets started! You must remove the top / main deck of the machine, so you'll see the following parts that you need to remove: As you can see in the image, the red circles are the screws that you need to remove in order to release the heatsink and fan. Also be sure to remove "gently" fan connector marked with the blue circle. After releasing the screws and the fan connector cable, "gently" pull up the CPU headsink, may be a little stuck but do it slowly and gently. Later will do the same with the fan cooler, the fan "box" is attached to the GPU headsink through a "duct tape" so you must be gentle to avoid any damage. Once released the Fan cooler you can put aside while you go to releasing the Headsink of the GPU. In my case, this Headsink was quite stuck, but after a few attempts you finally pull up once you've removed the headsink you now should start cleaning...the fan box has 3 screws that need to remove to be able to clean easily. Likewise, you should clean the sink grids that are filled with a lot of dust, preventing a good flow of air. This process can be slow, because in order to clean the grates you need something small to get inside and clean the stuck dusting. In my case I used a set of Screwdrivers that can also serve for other tasks. After cleaning the headsink you should proceed to clean the processor and GPU. Both have thermal paste residue that should be removed. You can find many online methods, but the one I used is quite practical. What you need is isopropyl alcohol, Widely used in cleaning of photographic lenses and electronic contacts, as it leaves no marks and is fast evaporating. It can be 99% pure or 70%. You can use 'Q tips "for this process, wet (very little) the Q tips on alcohol and rub it gently on the surface of the CPU / GPU to completely remove the thermal paste. Must be completely clean, you can use the "technique of the credit card" which as its name suggests you use an old piece of plastic card or similar to clean the remains of thermal paste. DO NOT use anything that could scratch the surface Once you've completed this process, the CPU / GPU will be like in the picture below (Note that I used a cloth underneath the laptop to prevent scratching) The next step will be to apply new thermal paste. In my case, as I said before I used Artic Silver 5 with very good results. For more information about this product you can see the official manual here. There are different methods for applying the thermal paste, you can find videos on youtube like this I applied the Artic Silver 5 method. Do not apply too much or little thermal. The recommendation is to cover the entire surface of the CPU / GPU evenly to avoid the so-called "air bubbles" Do NOT use your finger to apply the thermal paste, because the human skin contain grease and this will contaminate the electronics surface. For that we will use coffee filters in our finger, and gently apply it the thermal paste. The purpose is: the thermal paste is a driver which sends the heat from the CPU / GPU to the heatsink and through the fan, this hot air is taken out of the laptop. If exist "air bubbles" well...no good thermal conductivity, so: high temps, that's my explanation, let's see the Wikipedia: The thermal paste, also called thermal silicone, or thermal grease is a substance that increases the conduction of heat between the surfaces of two or more objects that may be irregular and do direct contact. In electronics and computing, is often used to help heat dissipation of components through a heat sink. A hair, piece of lint, and even dead skin cells can significantly affect the thermal interface's performance An important point to note is that any thermal paste need a break-in period can be a couple of days or a week depending on computer use. By this, temps will decrease gradually, so if you dont see a big difference in degrees after apply new thermal paste take it easy, you must give some time to adjust. Remember to monitor temps to confirm that you did a good job. To do this you can use programs such as HWMonitor Here is my temps on HWMonitor NOTE: I know, my english sucks...but I try ..take care and be safe!
- 38 replies
-
- 3
-

-
Hi all, I'm debating whether or not to replace the thermal paste in my Lenovo y510p. I've started overclocking a bit, and I have an external fan, but I would like to not have to run the fan as fast because it is a little loud. I have been reading a bit about different thermal pastes, and I'm wondering if there is even a big difference between stock thermal paste, and something like the liquid metal from thermal grizzly. It sounds like it'd work better, but I don't want to fall for a good marketing scheme. If anyone has experience with this and has or hasn't seen big differences, your input would be greatly appreciated. Thanks in advance! -Web
- 6 replies
-
- thermal paste
- laptop
-
(and 4 more)
Tagged with:
-
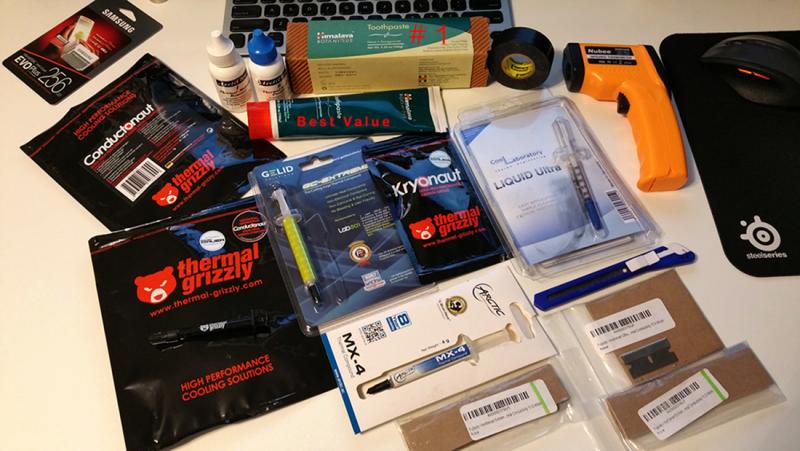
Thermal Paste Complete: Mandatory. Not an Option. * Don't mind the MX4 LOL that was just left over from something... How about that toothpaste that is rated at 401w/mk...which happens to be the thermal conductivity of copper. Greetings, I will be repasting the P775DM3 very soon and will be posting up the results w/ a lot of pictures for your entertainment. My liquid metal paste of choice will be Grizzly Conductonaut, however, I'll be experimenting with other pastes as well to satisfy any curiosity as to if one can get by with just traditional paste. (Highly doubtful, but I am curious about GC.) Traditional paste wise, I have a feeling that GELid will hold up pretty well. While I'm at it, I'll also be replacing the thermal pads. Depending on how warped the heat sink is, I have pressure paper handy to be able to test the contacts of the die and IHS against the Heat Sink. If needed, I have copper shims standing by of varies sizes from 0.1mm to 0.3mm+ ... Below are the conductivity numbers for the top Liquid Metals and Traditional Paste: (As we know the numbers don't mean everything, however, from all my tests done so far, Grizzly Conductonaut has always topped CLLU by an average of ~3C. Results may vary and it can be the case where it's the other way around. However, the thing here is that with these beasts, every drop in C's count. It could make all the difference.) Liquid Metals: Thermal Grizzly Conductonaut - 73 W/mk Coollaboratory Liquid Ultra - 38.4 W/mk Coollaboratory Liquid Pro - 32.6 W/mk Traditional Paste: Gelid GC Extreme: 8.5 W/mk Grizzly Kyronaut: 12.5 W/mk ICD: 4.5 W/mk ------------------------------------------------------------------------------------------------------------------ Project 775 Journal: Straight out of the Box: The temps when running OCCT on the CPU reached 99C on all four cores. Even on F1, the CPU temps all maxed out. Yikes right? As for the GPU, when running Unigine Heaven and Fire Strike the Temps were also in the high 80's and 90's. Repasting is a must IMO. 90C's is not okay and there's no justifying that. I know it's such a shame on Clevo's part for poor QC and lack of engineering (as demonstrated by the crap ADDA fans that are used), but it is what it is. If you want something to just work out of the box without any modding, then a DTR is not for you. Simple as that. Yes, it should work within normal operating temps right out of the box, of course, we would all agree. A DTR is for enthusiasts and those who have the willingness to get under the hood. Some of us thrive on this fact, while others don't, but at the same time this doesn't give Clevo an excuse to go cheap on us. Project Delid + Liquid Metal Magic: (9/22/16) The Repaste and Delid are now complete. I've been gathering temp data non stop, along with fine tuning the machine to find where it is the happiest. The temps have been amazing and I'll be posting up a full review shortly. - Stay tuned... Fine Tuning: (9/25/16) It's been a blast fine tuning the beast and I think I've got it to near optimal range. The CPU is a winner in the silicon lottery, thank goodness. I'm holding 4.6GHz @ -200mv Core / -200mv Cache and it's very stable with gaming, running benches, video encoding etc...As for the GPU, it's a working progress. After about 100+ runs...yes really of fine tuning and recording data on a spreadsheet, I think I've found the GPU's sweet spot. It's not a massive overclocker chip, but it's good enough to get a great boost out of it. Then again, my expectations are very high so anything sub par is not good enough. I'll be running more benches tonight and hopefully the tuning will pay off to take the #1 spot int he P775DM3 Class for Fire Strike, Unigine Heaven, Cinebench R15, Time Spy, wPrime (already recorded and sitting at #1 in this class) etc... I'll keep you all posted! ------------------------------------------------------------------------------------------------------------------ Please post your results using the format below in order to keep things uniform and organized: >>> Before repasting, please run the benches and record your temps for a base. <<< >>> Please BOLD the answers as show below. <<< Application List: (Click below to Download.) 1. HWiNFO64 2. OCCT 3. wPrime 2.10 ==========================copy/paste======================== Machine Specs: FROM: Hansung Computer Notebooks [한성컴퓨터 노트북] EX76S BOSSMONSTER [775DM3] CPU: 6700K GPU: GTX 1080 Display: 4K w/ GSYNC Thermal Paste: Grizzly Conductonaut Delidded: Yes. TGC on IHS->die and IHS->HS Run OCCT for 30 Minutes on Stock Clocks. (Before Repaste) CPU Max Temp (Stock Fan Profile): 99C CPU Max Temp (F1 Fan Profile): 99C CPU Under Volt: -225mv Core / -225mv Cache Run OCCT for 30 Minutes on Stock Clocks. (After Repaste) CPU Max Temp (Stock Fan Profile): 67C CPU Max Temp (F1 Fan Profile): 57C CPU Under Volt: -225mv Core / -225mv Cache Run Unigine Heaven -> Fully Maxed @ 1920x1080, Back to Back to Back. (Before Repaste) First Run GPU Temp: 91C Second Run GPU Temp: DNF Third Run GPU Temp: DNF Run Unigine Heaven -> Fully Maxed @ 1920x1080, Back to Back to Back. (After Repaste) First Run GPU Temp: 69C Second Run GPU Temp: 72C Third Run GPU Temp: 75C =========================bottom============================ OCCT for 30 Minutes: Clevo P775DM2/3(-G)/P75xDM2(-G) (Sager NP9152/NP9172) Temperature Record to Date: . . . . . . .
- 4 replies
-
- 2
-

-
- thermal paste
- thermal
- (and 11 more)
-
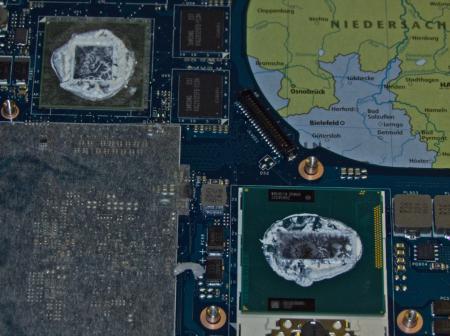
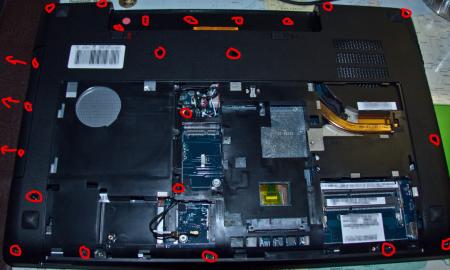
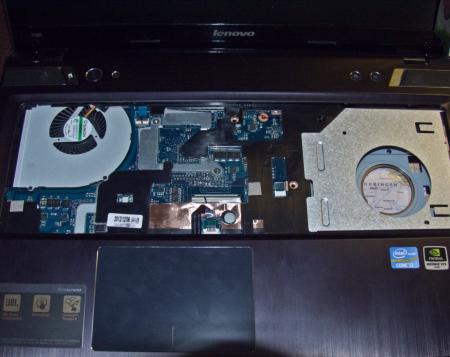
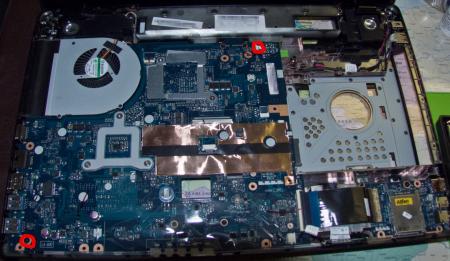
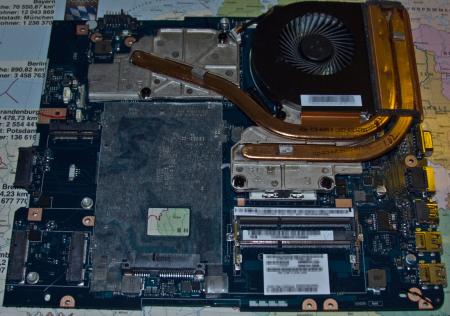
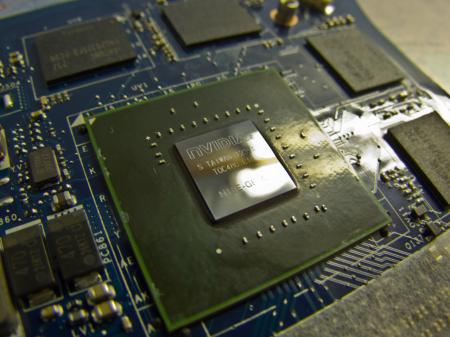
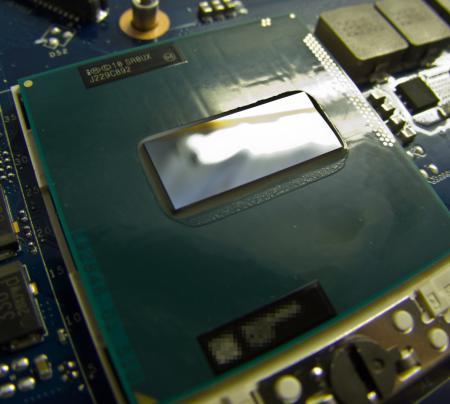
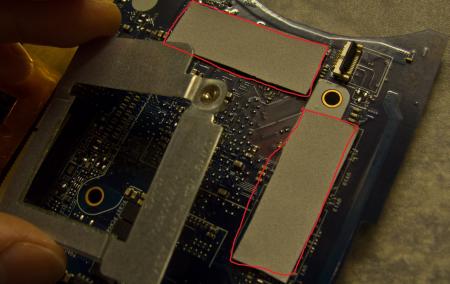
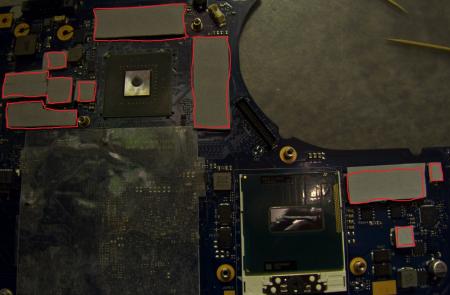
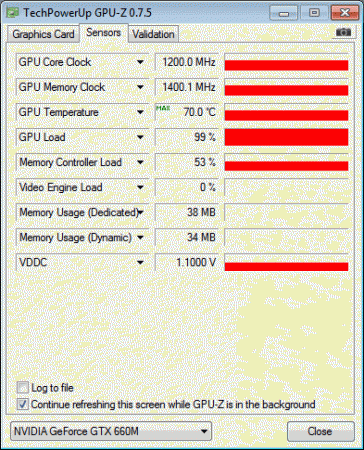
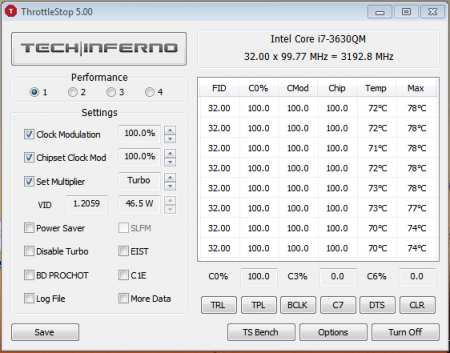
• Why should I repaste my Notebook? I think that picture says more than any words can say. There is to much thermal paste on the thermal surfaces. To get the best temperatures as possible, you need a good-pasted system. • What do I need? - time - a bit ''sleight of hand'' - screwdriver - something to remove the thermal paste (I used ''ArctiClean 1 & 2'', for thermal material removing and thermal surface purifing, alcohol should also work) - a lint-free cloth - a good thermal paste (IC Diamond or Arctic MX-4, i used the one from Arctic) - good thermal pads (with at least 6 W/mK thermal conductivity is nice) • How to do You have to remove the following hardware of the Y580 for repasting: • Battery pack • Hard disk drive(HDD) • Optical drive • Keyboard • Keyboard bezel • System board ... You have to remove these screws: Be really careful with removing the keyboard. Do it very slowly and smooth and nothing will broke This is how the Y580 looks like without the keyboard: The same applies to the keyboard bezel. Remove it slowly and smooth, be careful The Y580 after removing the keyboard bezel: Remove the two screws and you can take out the motherboard This is the motherboard with the fan and the two heatsinks for the CPU and the GPU • The repasting - remove all thermal pads - remove the thermal paste - clean all components until they ''shine'' like that: - after the cleaning replace at first the thermal pads at the back of the GPU (backside of the motherboard) like me: - take the new thermal paste and reapply the paste to the core of the 660m and to the CPU - place the thermal pads to the parts that I marked, there were the pads placed from factory: • The result For the testing i modified the vBIOS of the 660m. I rised the core-clock to 1,2 GHz and the memory-clock to 2800 MHz. I also modified the voltage. No overvolt, but i modified it that the voltage stays always at 1,1 V. The GTX 660m stays steady at the 1,1 V and it's maximum clocks of about 1200/2800 MHz. And for the CPU (i7-3630QM) i always use ''ThrottleStop 5.00'' to get the maximum performance and steady 3,2 GHz on all cores. -> My system is throttle-free thats why it can become really hot • The temperature of the 660m goes now to a maximum of 70 degrees celcius. Before the repasting the absolute maximum temperature for the gpu was 87°C high. (with my overclock) • The temperature of the processor, the i7-3630QM, maxes out at 78°C. Before the repasting the 3630QM maxed out at 98°C with throttlestop set at 32 multiplier, 100% clock modulation, 100% chipset clock mod and BD PROCHOT turned off. All in all, the time you have to spend on reapplying the thermal paste is definitely worth it. Lower temperatures means more stable overclocks for technique-enthusiast's or higher life-time of the laptop for the ''normal'' PC-user.
-
hi all thats my first post here and iam very happy cause this site has hold out so much good information about my dell laptop that i didnt know... i have a dell inspiron 7720 with a gt 650m and i try to do the best i can to keep my gpu cool cause some times it reaches 93 c ... so i was wondering if it worth the time and the work to put thermal paste at the gpu ? has any1 from you do this work befor ? it has considerable effect at the temperatures or there is no need to try it ? also i must say that i have an arctic cooling mx-4 paste but i had buy it 10 years ago is there any problem with this ?
-
I've decided that it's time to open my beast after i've noticed that one of my 4870's memory climbed above 93 degrees while playing Mass Effect. The idea behind photographing the process is to allow a better perspective than what the service manual gives. What was done? Cleaning the fins on both video cards heatsinks with compressed air Replacing thermal paste on both GPUs and the CPU to Shin Etsu G751 Replacing memory thermal pads on both GPUs from crappy stock ones to those Modding the retention clip as described here. All Credit goes to Ashtefere please rep him for that, he deserves it! Tools used small Phillips screwdriver - it matches all the screws inside your Alienware can of compressed air a small plastic prying tool that Dell once sent me, i used it to pry open the center control cover. Materials used Shin Etsu G751 thermal paste - i bought mine on eBay, but there are a lot of places that sell it. The reason i used it is because according to a lot of reviews this is one of the best performing pastes, only problem is that it's a pain to apply (there are guides for that too ) Thermal pads Step by step (More or less) Ok, here we go. Try to remember the sizes of the screws you are pulling out, and store them somewhere so they don't get lost (i use a vodka shot glass ) Removing the Center control cover i started with placing a towel on my working area to make sure i do not scratch the laptop while i work on it and removed the charger and battery. Unscrew two screws as shown to remove the compartment door. Unscrew the two screws located on both sides of CPU Fan, they are marked as M2.5XL17. Now turn the laptop around and open the screen as far as possible. using the pry tool, or a flat screwdriver, gently pry the control cover up. I found that in my case it's best to start from the right side. Be careful as there's a cable you need to disconnect before you pull it out. EDIT: For those of you who struggle a lot with taking the cover out, make sure you read this mod by Aikimox. Keyboard Unscrew the 5 little screws holding the keyboard and then gently pull it up. lift the keyboard up,disconnect those two cables and remove the it. Video cards. Since both video cards are going to get the same treatment, i'll describe just the master. We are going to pull it out, remove the heatsink, clean it and perform Ashtefere's retention clip mod Keep in mind that it will void your warranty! Remove the bracket. unscrew both screws that hold the video card. Disconnect the CF cable from the card, i used my nails to do it. Note that the location of the CF connector on the second card is under the heatsink and you'll need to remove the heatsink before disconnecting the CF cable there. Now pull the card up from it's outer side to remove it and expose the fan. blow compressed air to clean the heatsink and the fan. Unscrew the 4 screws that hold the heatsink down, following the numeration next to those screws. Now, after unscrewing those screws, the heatsink will probably be still attached to the video card pretty hard. Pry it up gently using the pry tool but make sure to do so where there's no electronic stuff under the tool. This is what you'll see. Next, clean the old thermal paste using alcohol pads, and remove the old thermal pads from the memory. Reapply thermal paste on the video card. I replaced the old thermal pads with with new ones, Ashtefere suggests applying a thick thermal paste on the memory (Shin Etsu would work since it's very thick).. Next, Ash's retention clip mod. I will not repeat him, he explained it beautifully in his guide. This is just to demonstrate how the screw looks like with the washer on it. Follow his guide to reassemble the heatsink on top of the card and return the card to it's place. (Don't forget the crossfire cable). Repeat with the slave card. CPU To access the heatsink of the CPU we will be removing the palmrest and the magnesium cover. With both video cards back in place and screwed in, turn the laptop, and unscrew three screws inside the battery compartment that are marked M2.5XL5 to release the palmrest. With the pry tool pry the palmrest down and then lift it up to remove the little cable that connects the touchpad. Ok, here i forgot to take a number of pictures so I will explain everything on this one. Basically what we're going to do is remove the magnesium cover. before we do that we will need to: disconnect LCD/Wifi/BT cables. They are marked with yellow. Next we will need to open the 10 screws that hold the cover down, those screws are marked with red and with a P letter on the cover itself. Disconnect the Crossfire cable from the master video card so you can pull it out. Finally, after the cover is removed, we'll unscrew those four screws that hold the heatsink down. They are marked with blue Clean the CPU and the heatsink from the old thermal paste with alcohol pads. Next i reapplied Shin Etsu G751 thermal paste on the CPU and replaced the thermal pad on the heatsink with a new one. That's it. Next, reversing the steps i reassembled the whole thing. I had a hard time putting the LCD cable back in place, took me maybe 3 tries before i got it right. Results Those are readings before and after, both after about 30 minutes of playing mass effect 2 so to me this comparison looks valid. Thanks to Ashtefere's mod,replacement of thermal paste and pads to better ones and cleaning the dust I can see about 5-7 degrees temperature drop on the CPU, and i have reason to believe that it'll keep dropping as Shin Etsu has about 3 days settle in time 11-19 degrees GPU temperature drop (!!!) 11-18 degrees GPU DISP/IO temps drop 19-24 degrees GPU /IO temps drop 15-20 degrees Shader temps drop 5 Minutes Furmark run No game warms the GPUs as furmark does, so after running it for 5 minutes and seeing the temperatures stabilize where they did i am very happy overall. EDIT: Additional Resources M17x Service Manual
- 68 replies
-
- 5
-

-
- alienware m17x r2
- m17x cooling
- (and 8 more)
-
I did not know exactly where to put this thread but i think is a good idea to discuss and share something about the thermal paste. I have read enough of this topic, and the best known brands are: IC Diamond Arctic Cooling MX-2 / MX-4 Arctic Silver 5 Tuniq TX 2 / TX 4 Extreme COOLER MASTER IceFusion I found a new one (at least i did not know) that promises to be better than the others, called GC-Extreme Solutions GELID, here are the link to a review: GELID Solutions GC-Extreme Thermal Compound Review - Page 1/5 | techPowerUp. $13 on Newegg Also found several videos on YouTube explaining the methods of applying thermal paste, and i want to share with you a couple of them: Also found some pictures here that show (basically) how to apply the thermal paste on the AW M11x, i think internally is quite similar to M14x so, if any of you know a method or have any pictures/videos/reviews that you can share i'll be more than interested in seeing them and if they are of the M14x that would be better! greetings!
- 33 replies
-
- 6
-

-
- cpu cooling
- gpu cooling
-
(and 5 more)
Tagged with:
-
HP HDX 18/ Intel Core 2 Duo Q9000 @2ghz/ Nvidia GT130M /Blu-ray Rom CD/DVD-RW/ 500gb 7.2K RPM *Feel free to make fun of my second paste job, first re-pasting job ever. (I Know that was a horrible smear of paste) There was definitely 20-30 degree F drop in temperature under heavy usage and greater during idle. This is my brothers system I cleaned out. Imageshack Album Part 1 http://imageshack.us/g/163/201106230237.jpg/ Imageshack Album Part 2 http://imageshack.us/g/88/201106230243.jpg/
- 3 replies
-
- 1
-

-
- cleaning
- core 2 quad
-
(and 8 more)
Tagged with:


