Leaderboard


Popular Content
Showing content with the highest reputation on 07/01/15 in all areas
-
Well, if he only needs it on OSX then it's pretty much plug and play. Just use goalque's script to install the drivers after booting with the eGPU connected to the right port, and that's it. By "right port" I mean port 1 or 2; if he uses one of the other ports the computer won't boot. And by "1 or 2" I mean the lowermost two ports, using this labeling as you're looking at the back of the Mac Pro as it's standing the way it's meant to: 5 6 3 4 1 2 I would also not connect anything else to the port next to the one he chooses, as the side-by-side ports share a TB controller inside, and you'll want to maximize the bandwidth available to the eGPU. In order to get the card to turn on properly, the first boot and driver installation should occur with no monitor being connected to the eGPU. After the drivers are installed, reboot, wait until the desktop loads on the iGPU, and then plug in a monitor into the eGPU. It should flick on with Titan goodness. Note that you won't get EFI display on the eGPU, so you probably want to keep a monitor hooked up to one of the internal TB ports if you ever want to use boot menus. I can't really advise him on an enclosure. I'm using the xMac Pro which allows me to rackmount the computer and a bunch of peripherals, and this comes with a mechanically modified version of the Sonnet Echo Express III. I assume this is very similar to the III-D - and it's almost perfect. I was able to graft GPU power connectors onto the built-in PSU's terminals and it's stable with a Titan. The Titan is rated at 250W TDP and it might be a bit hairy to hang that off a 300W PSU, but it does work. If he wants to use a 980Ti or some power-hungry AMD card the PSU might not be enough, and it's a pretty involved task to replace the built-in unit with a desktop one due to the nonstandard connectors on the main board (and the fact that the case has no room for a desktop PSU so it'd have to be external). The only thing I have against my setup (aside from the fact that I can't get it to work in Windows) is that the way the xMac Pro is constructed, sliding the Echo Express III into it's place will cause the GPU's power connectors to catch onto some fan connectors. This might be circumvented with low-profile power connectors (I have some on order) - but chances are your friend isn't planning on rackmounting the thing. I don't know if the desktop Echo Express III has enough room for a full-size GPU. I know that the Highpoint NA211TB does, but I can't say anything else that's first-hand about that enclosure.2 points
-
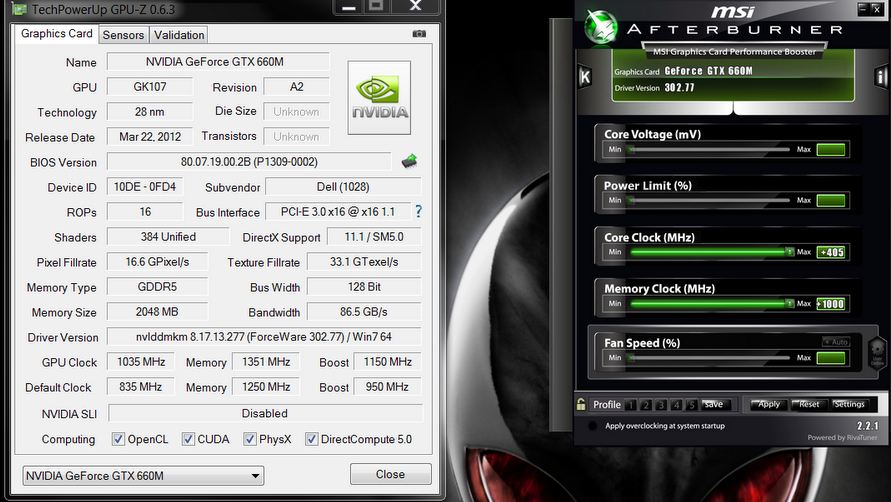
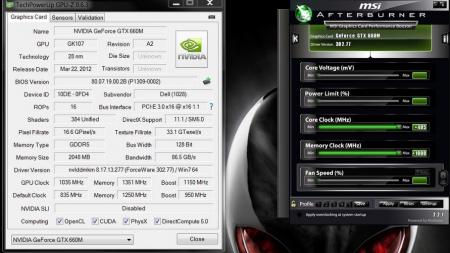
UPDATE: ALL DOWNLOADS LISTED IN THIS POST FOUND HERE. Nvidia 'Kepler' GPUs - modified VBIOS files >>> NOTE: More versions (including voltage mods) exclusive for T|I users can be found in the second post. <<< The 'Kepler' GPUs from Nvidia perform really well, even at increased clocks speeds they stay quite cool - a perfect behavior when it comes to overclocking and improving the performance. Unfortunately the mobile GPUs suffer from an artificial +135MHz core overclocking limit, so you can't go higher by using tools like Nvidia Inspector and similar. The modified VBIOS files listed here have this limit unlocked, some have increased stock clocks or tweaked voltages. Just refer to the description. All files have been modified by myself, if you like them feel free to buy me a drink, donation link can be found below GTX 660m: 660m_OC_edition__VBIOS_[DELL].zip- comes with unlocked software overclocking limits 660m_GHz-Edition_overvolted_VBIOS_[DELL].zip - default 3d clock 1000MHz, base boost 1200MHz,, memory (3d) 1350MHz, increased 3d voltage undervolted editions possible, depends on interest, tba Some screenshots: GTX 680m: Clevo_680m_-_80.04.33.00.10_'OCedition'_revised_01.zip Dell_680m_-_80.04.33.00.32_'OCedition'_revised_00.zip Increased software overclocking limits & optimized for no throttling. Read the included 'Read me' file before flashing. Instructions: I recommend flashing under DOS using nvflash . Donation link in case you want to buy me a beer Thanks and cheers! More to come. Testers: Thanks @eliteone (Dell 660m), @littleone562 (Dell 680m) For all mods: Use at your own risk.
 1 point
 -
Your MBP (11,3) board-id Mac-2BD1B31983FE1663 is also located at /System/Library/Extensions/AppleGraphicsPowerManagement.kext/Contents/Info.plist /System/Library/Extensions/IOPlatformPluginFamily.kext/Contents/PlugIns/X86PlatformPlugin.kext/Contents/Resources/Mac-2BD1B31983FE1663.plist You may try different configs, but value "none" is originally proposed by Pike: https://pikeralpha.wordpress.com/2014/05/01/os-x-mavericks-10-9-3-build-13d55-seeded/ to pass the black screen issue. You can send me PM, preferably two ioreg outputs without personal data as described here, when you have 4K@60Hz and when 4K@30Hz, and I can take a look at those Mac hardware specific parts.1 point
-
Thanks @goalque for the heads up, I have installed 10.10.4 and I have the latest driver, and I'm still getting 4k30. I have also switched off "Automatic graphics switching" in the energy saver settings but it's still no luck. EDIT: Okay, I have done the following since the original post: I tracked down the AppleGraphicsDevicePolicy kext, in which I suspect may be the culprit of the 4k30 problem, and removed my board ID. On next reboot, I managed to get 4k60 back! However, on restart, my computer crashed during boot (i.e. partway through the Apple logo when it usually will detect the eGPU at this point) I have also noticed that when I switched off the computer on the successful boot, the computer will take longer to shut down. I managed to get an error report from the crash. I can send it to you if you want.1 point
-
It's for notebooks prior to the 2015 models. The 2015 models don't count. Sent from my HTC One using Tapatalk1 point
-
The chips you are referring to are high-side and low-side power FET combo chips. Usually one chip is just a low side-FET or a high-side FET, but Nvidia uses chips with a high-side and low-side combined on one chip. These are involved with voltage regulation, but they are not the VRM. The VRM is located on the back side of the card. Power FETs are responsible for powering the core, while the VRM controls the power FETs. All current to the core travels through the power FETs, which in the case of the 980m are 3 combo chips. Now that that's cleared up... The 980m has 3 power phases while the 680m, 780m, 880m, and 970m all have 2. On the 980m each phase has just one chip, while older cards and the 970m have 2 on each phase. This does mean that each chip must pass more current, but overall there is less strain on the voltage regulation. There are 2 reasons for this. One is there is a 3rd inductor. Inductors dump a lot of heat out onto the card because they are fairly resistive, and having a 3rd to split the current load reduces heat output significantly. Other reason why the 980m is better is because having 2 chips in parallel is not a purely positive thing. The 2nd chip on the phase means that the VRM must push and pull twice as much charge to turn the FETs in the chip on and off. You want to switch back and forth between high-side being on, and low-side being on, and vice-verse as fast as possible. The longer it takes means lower efficiency and more heat put out. The 2nd chip per phase slows down the switching speed. So combining the positives of the 3rd inductor and faster switching speeds, the 980m seems to me to have better power delivery than the 970m or earlier cards.1 point