Leaderboard


Popular Content
Showing content with the highest reputation on 01/28/13 in all areas
-
[Desktop & Mobile] NVIDIA Geforce 313.96 BETA Changelog: Download: Geforce.com 310.90 WHQL vs 313.96 BETA: Game: Call of Duty: Black Ops 2 GPU: GTX670 (Up to 4% in Call of Duty: Black Ops II) Settings: Extra, no Vsync, no AA, 6040x1200 Average FPS: 310.90 WHQL: 67.2 (100%) 313.95 BETA: 70.6 (105%) I'll benchmark Assassin's Creed III at a later time, want to see the 28% performance improvment myself:Banane38: Game: Assassin's Creed III GPU: GTX 670 (Up to 28% in Assassin’s Creed III) Settings: Very High, no Vsync, high AA, 6040x1200 Average FPS: Map: Frontier 310.90 WHQL: 31.1 (100%) 313.96 BETA: 31.5 (101.3%) Map: New York 310.90 WHQL: 36.0 (100%) 313.96 BETA: 37.2 (103.3%) source: Geforce.com Hmm...only a small difference (1 to 3%) between the 310.90 WHQL and the 313.96 BETA driver in Assassin's Creed III...no idea how Nvidia gets 28% more performance...souped numbers?!?...too bad:chargrined:2 points
-
Well, credits for this go to Orbmu2k, the creator of Nvidia inspector and not to anybody else. Just list the help for all supported Nvidia Inspector commands and read them, and you know how to do it. I don't see why anyone should claim 'credit' for reading the manual... just my 0.02. Anyway, you're totally free to use this instead of a bios mod, however I have issues with this method and don't recommend it to anyone. First of all it's complicated, you need to manually switch back every time you want to go back to idle clocks. Furthermore the voltage is still not adjustable, and depending on the card and vbios you have the voltage of the forced P-state is lower than the P0 voltage. In addition to this I can imagine that there are other issues, e.g. there are other clocks like ROP etc.which might not get adjusted, depending on how the OC is applied and depending also on how the chip is designed. I don't know whether there's only one clock source for Kepler or not. If there is more than one, then certain clocks will lag behind since they won't get increased as well, possibly resulting in weird behavior or performance issues. GE60 bios mods will come eventually, lol I think I promised them to dozens of other users... just a bit busy at the momen.2 points
-
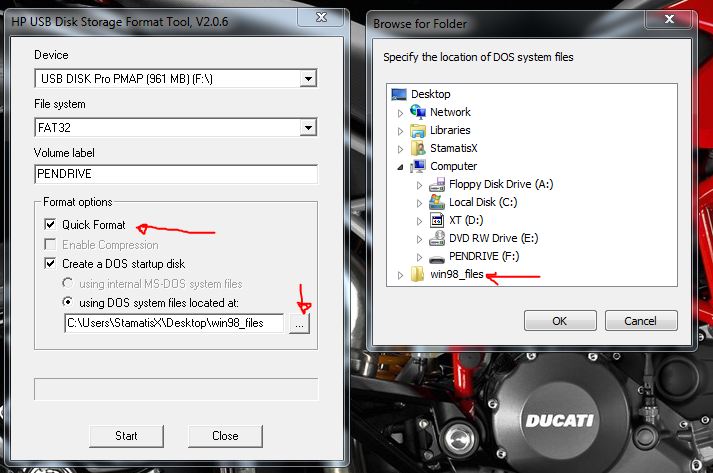
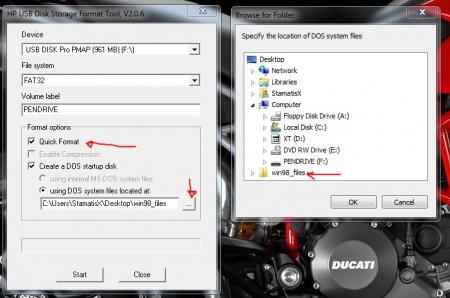
Hello people. I concur that CRISDISK will not work on win7 or win8. Windows xp or Zo mode are the only ways that seems to format and place the blind flash bios on to stick. I have spent many hours on this subject (author on NBR first BIOS MOD m17xR2). the hp tool didn't work for me either. I even tried to image the usb stick to no avail. Note. you can blind flash from any usb port including esata.2 points
-
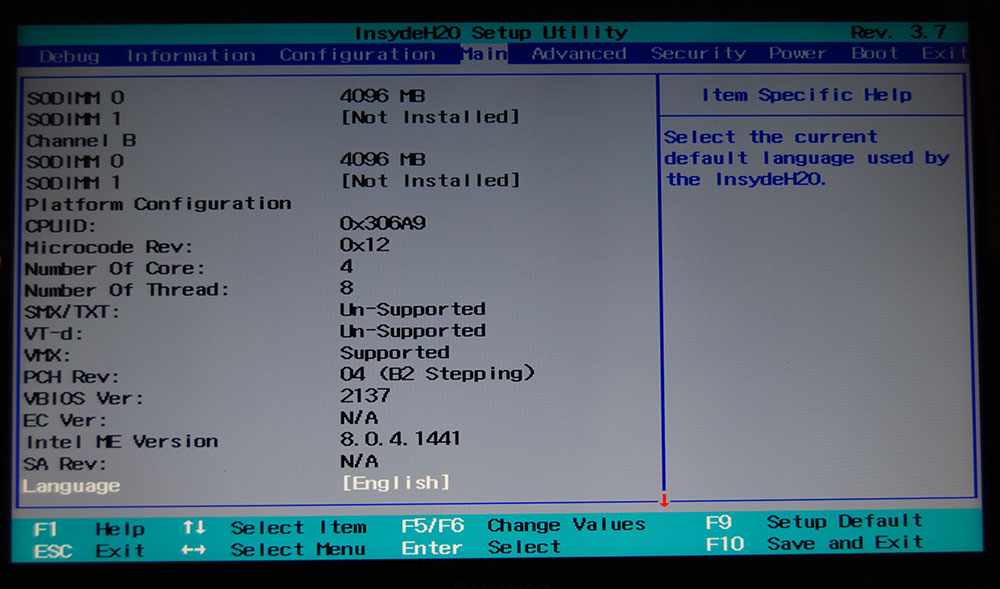
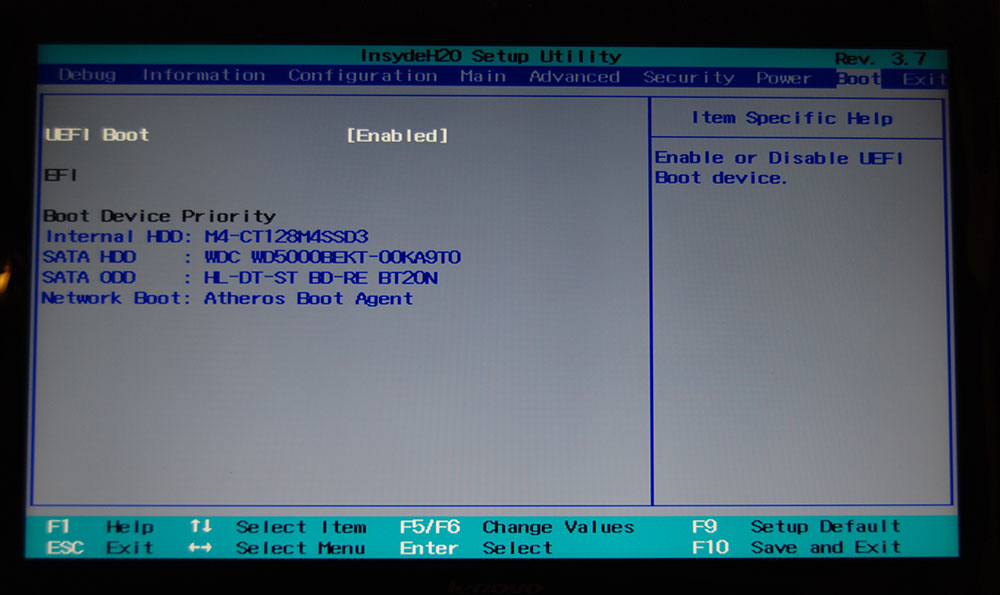
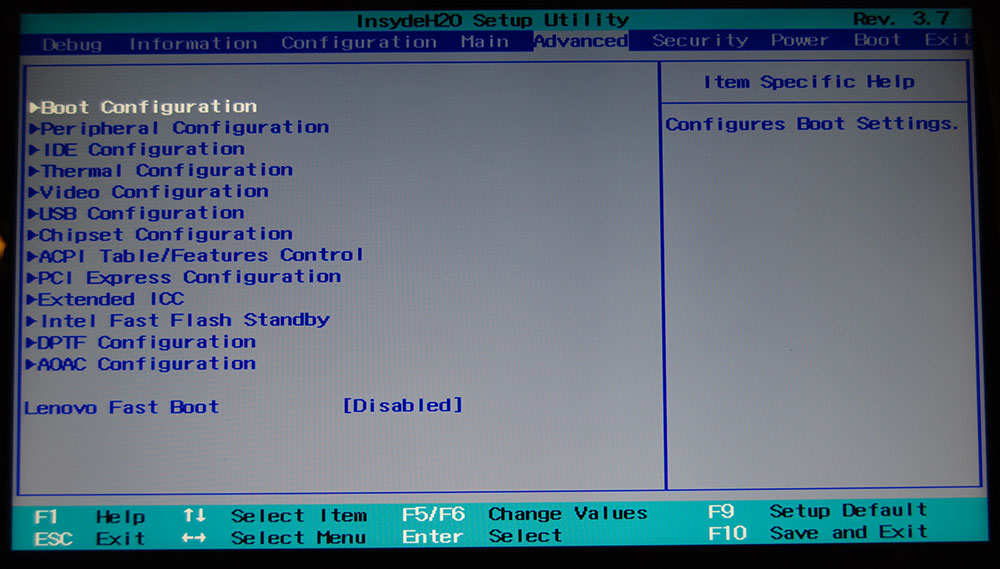
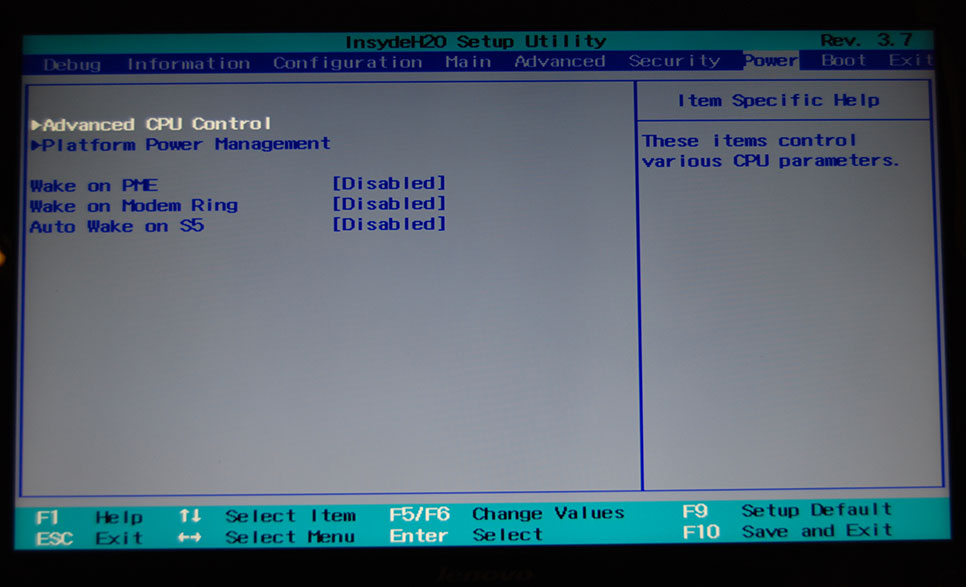
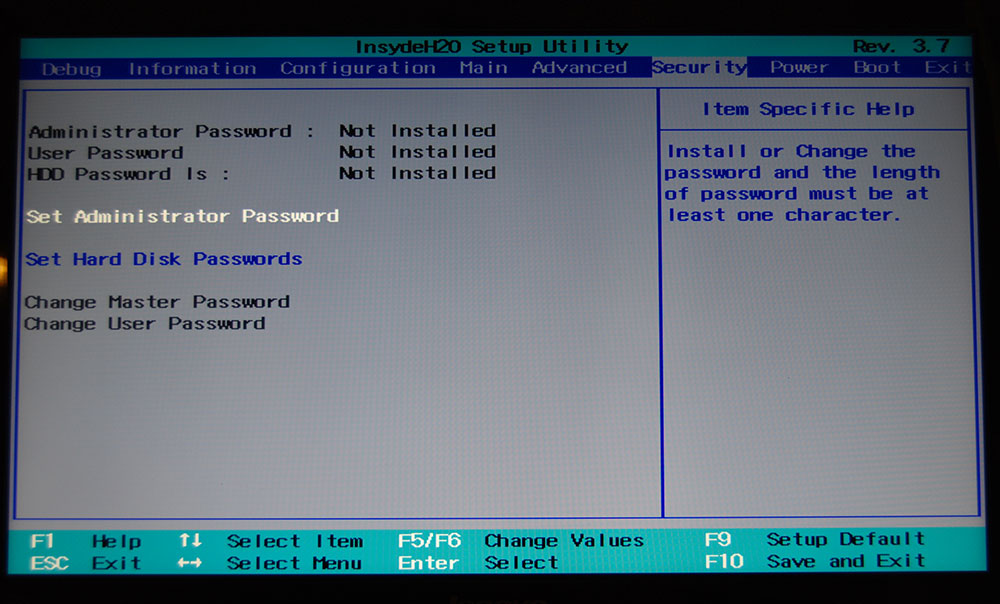
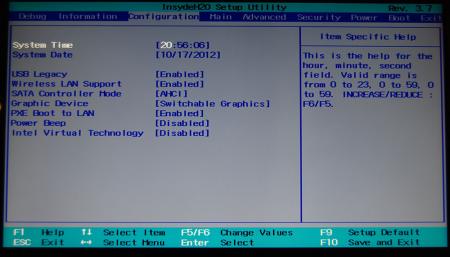
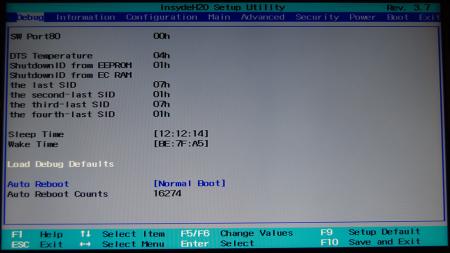
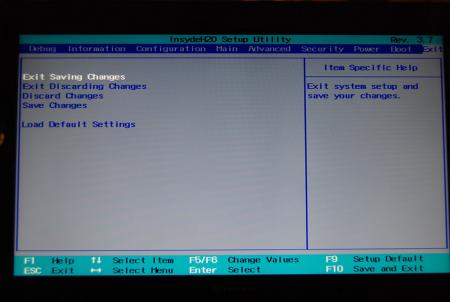
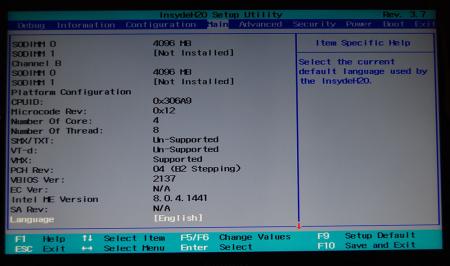
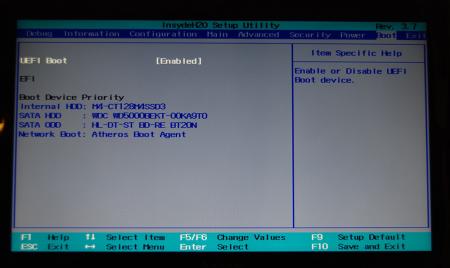
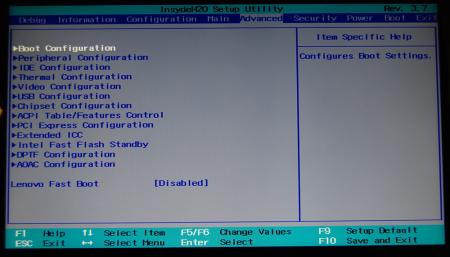
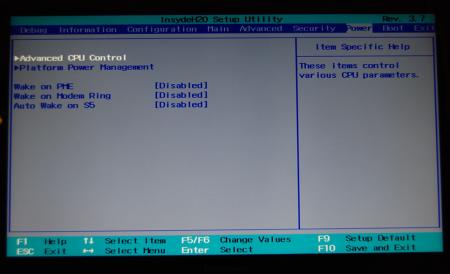
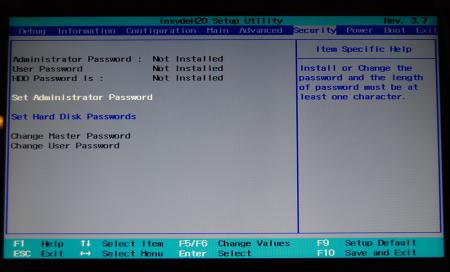
Lenovo Y500 - 'unlocked' BIOS / wwan-wlan whitelist removal The Lenovo Y580 / Y480 comes with a pretty locked down BIOS, and in addition to this with a whitelist which prevents the user from getting 3rd-party wwan/wlan cards to work properly. The modified BIOS versions here will take care of this. Keep in mind that not necessarily all options available in the modified bios will work. Some might not do anything at all, others could possibly leave your system in a state which will prevent it from booting. Use care when changing stuff in the modified bios, don't touch things you're not familiar with. Use all the mods and software posted here on your own risk. NOTE: This will only flash the bios region. It won't reset the nvars set in the bios. While it is technically possible to update from v2.0x to v8.01 by using the method described below, I can't really recommend it since the EC of your system won't get updated. While it might work (possibly even without any issues) I can't recommend it. Therefore if you're on v2.0x and want to update, the better option is to wait until Lenovo provides an official 8.xx firmware update with EC and BIOS. You can then still flash the modified version as described below, once you're on a proper v8.xx firmware. Attached you'll find a modified version of the Y580 / Y480 BIOS v8.01 (5DCN90WW). ----------------------------------------- >> For users with a v2.0x BIOS: << Download links Old version: Current 2.0x version: Lenovo Y580 / Y480 BIOS v2.07 (5DCN40WW) -> unlocked, whitelist removed, Nvidia 660m @ 1GHz default 3d clocks Flash with the included InsydeFlash utility. ----------------------------------------- >> Instructions for v8.0x BIOS users: << The attached BIOS ("Lenovo Y580 - Y480 BIOS v8.01 (5DCN90WW) - Mod") is unlocked, whitelist stuff removed and the 660m is tweaked to 1GHz default 3d core clock. The only way I know of which allows you to flash the modified BIOS for v8.01 users does unfortunately also describe certain information which you don't want to loose (serials, Windows licencse etc.). Don't worry, I got it all sorted out, but due to this the flashing procedure is a bit more complicated than usual. Make sure you follow the instructions carefully. Download the flash tool, for flashing you'll need the DOS version, but for creating the backup of your current BIOS the Win64 version will do as well, and it is faster. Get the prr tool as well. Grab the modified BIOS you want to flash and the Y580-Y480_BiosFix tool. Create a backup of your current BIOS using the flash tool you downloaded (first step) by runing the included backup.bat, or by using the Win or Dos version flash tool with this command: -d BackupBiosY500.bin -bios If you get and 'Error 104', grab 'Error 104' fix and replace the original fparts file with it. . Make sure you have the modified bios which you want to flash, the bios backup you just created and the "Y580-Y480_BiosFix" tool in the same folder. Run the Y580-Y480_BiosFix tool, follow the instructions on the screen. Enter the name of the files correctly, else you'll get an error. It will create a new file for you and will be named after the modified bios file you specified, with 'Fix' appended to it. Here's a screenshot of the tool in use (Y580 version looks the same). In the case shown here it will create a file called "modifiedBiosFix.bin" which you can find in the folder where you run the tool. Use that one for flashing. Put the fixed BIOS, the prr.exe tool and the fpt.exe (along with the fparts.txt file) on the root of your prepared DOS bootable USB drive, restart your system and boot from that drive. Execut the prr.exe, if you don't get an error message continue by pressing enter. Then flash the bios by using this command (filename.bin obviously needs to be replaced with the name of the file you want to flash). If you can't remember the name of your file, use the command dir to display all the files on your drive. Flash with this: fpt.exe -f filename.bin -bios NOTE: The name of the BIOS file mustn't exceed eight characters (not counting the extension)! That's a DOS limit, so make sure the name of your file isn't too long. Wait until the process is done. After flashing it will verify the data, in case there's something wrong with the flashed data it will tell you. In that case don't reboot, just flash again. It might look a bit complicated at first, but that's the easiest way I could think of. Let me know if anything is unclear. The attached v8.0x modified versions include: - unlocked menus - whitelist removed (wwan / wlan) - Nvidia 660m 'GHz edition' - 1000MHz default 3d clocks >> Here's the 'buy me a beer' link in case you like this. Modding makes me thirsty << Use at your own risk, you are responsible for your system and the changes you make on it. My programs come with absolutely no warranty to the extend permitted by applicable law. Thanks @X0pas1 for testing, and for some pics - see below: I'd appreciate it if someone could also post some pictures of the more interesting sub-menus, e.g. advanced CPU control, video settings and similar. UPDATE 1/17/16 DOWNLOAD LINK FOR FILES REFERENCED IN THIS POST:
 1 point
 -
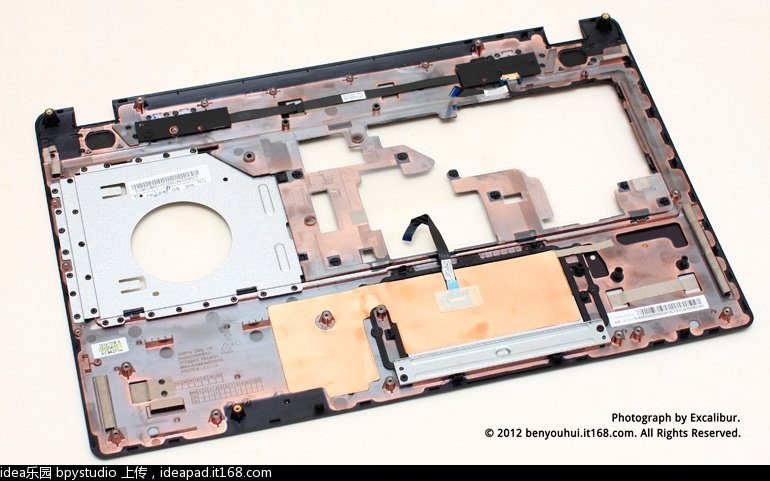
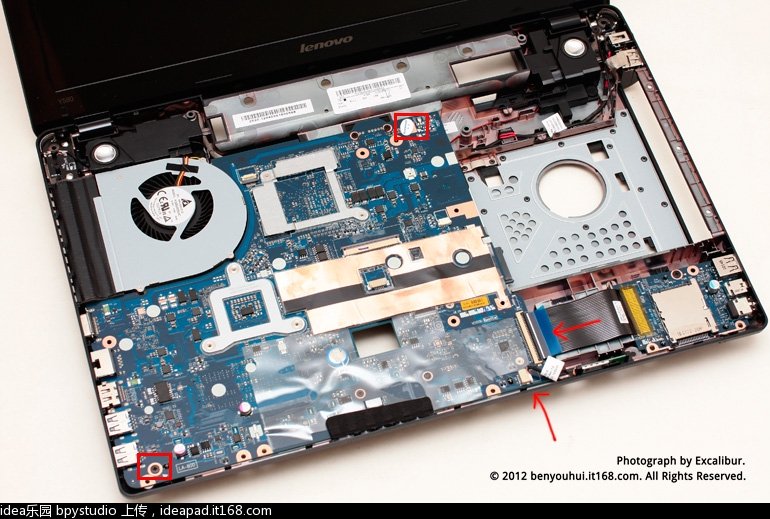
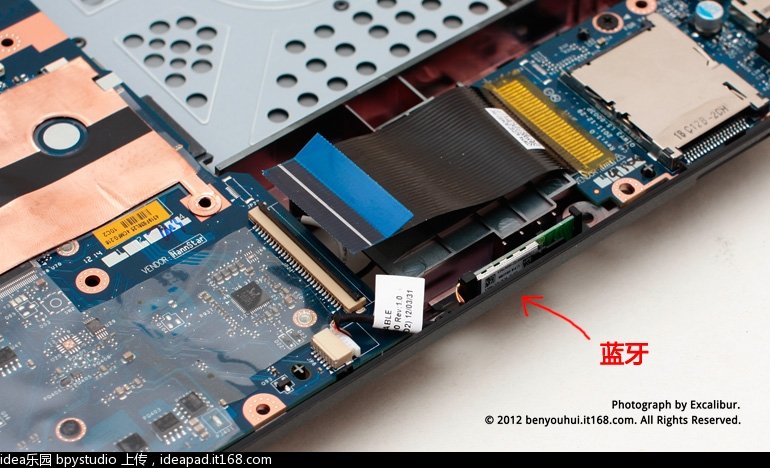
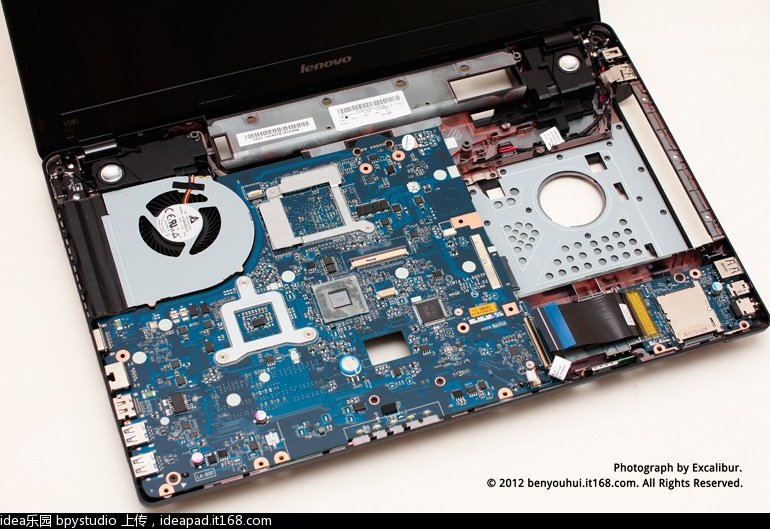
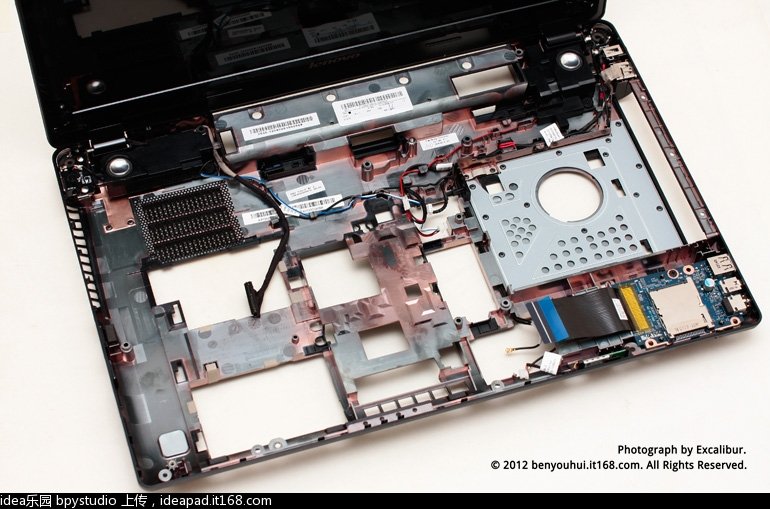
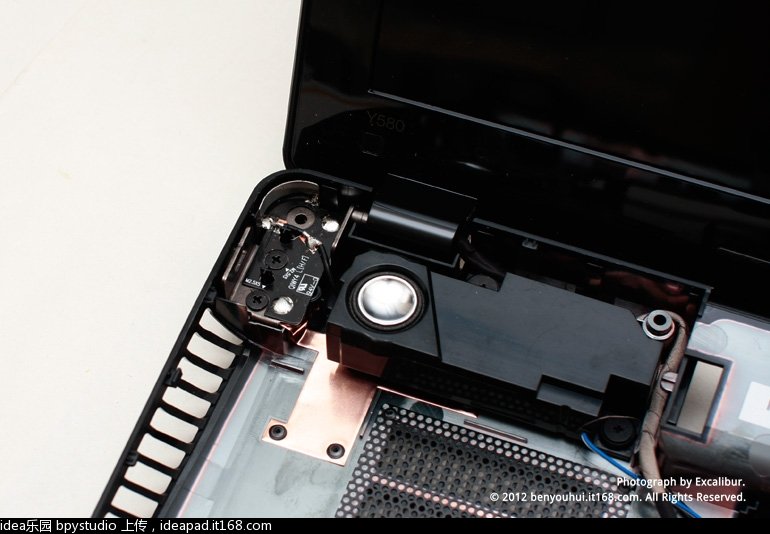
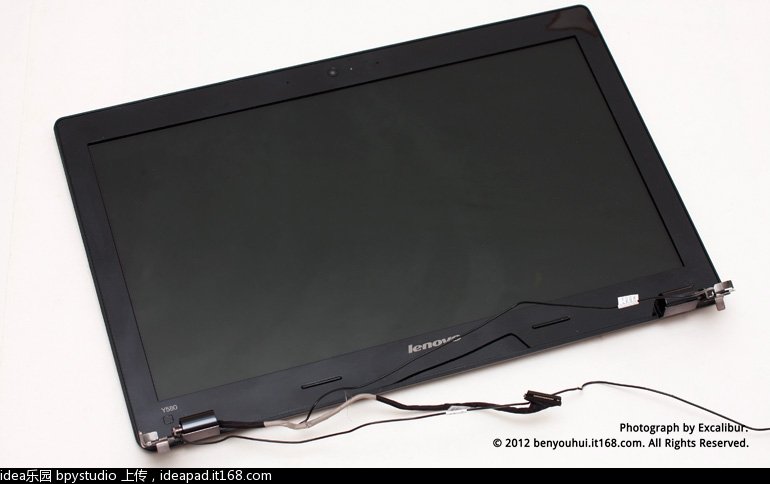
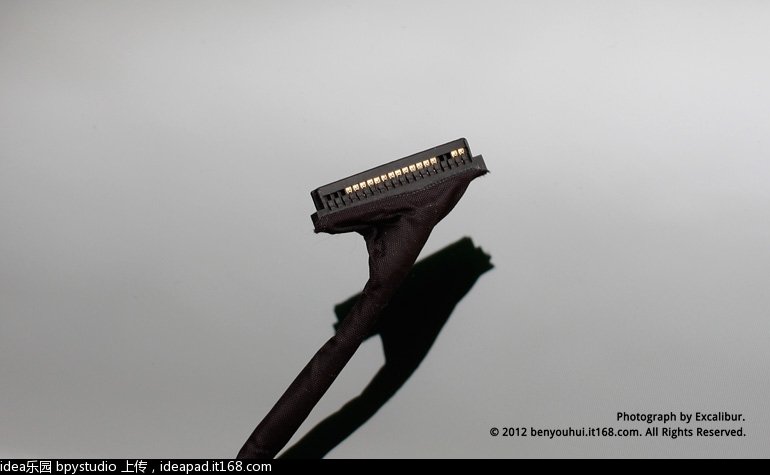
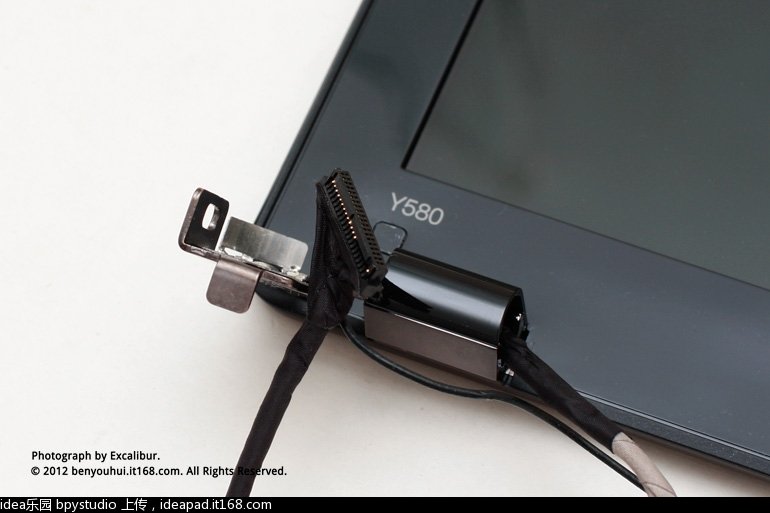
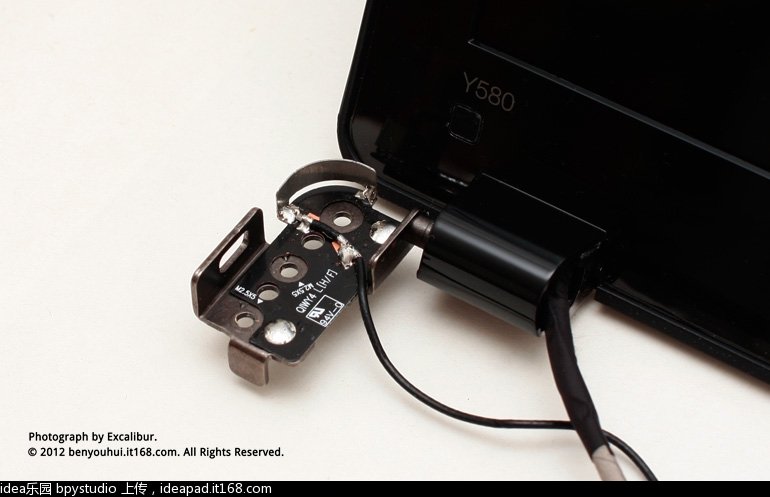
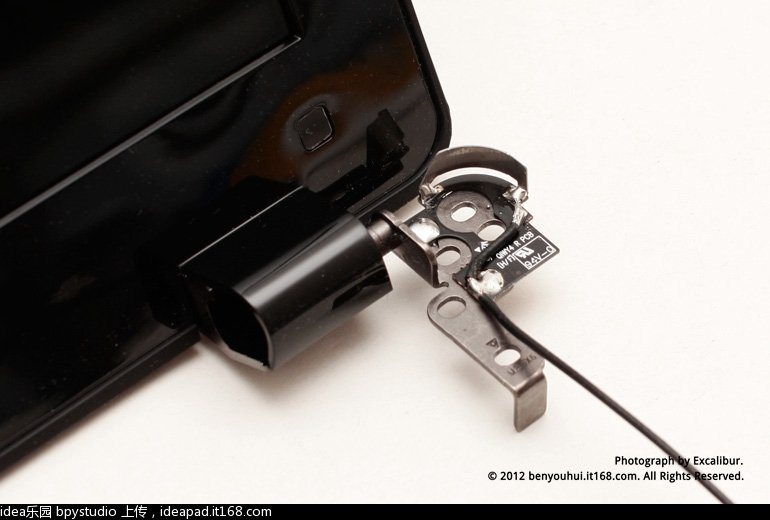
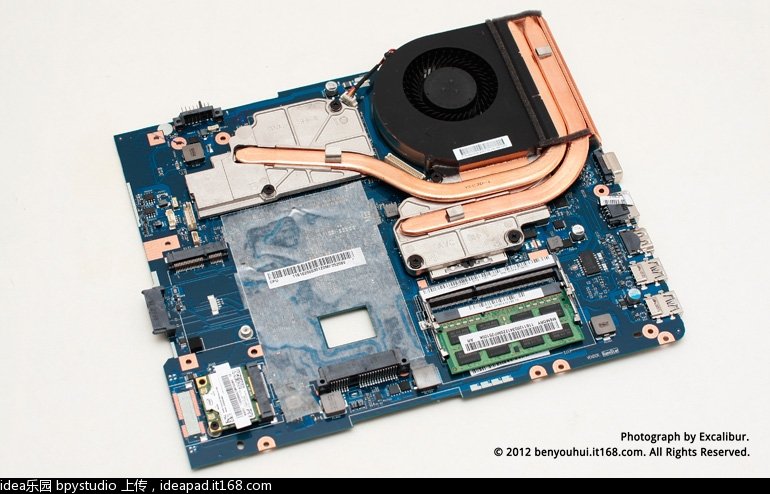
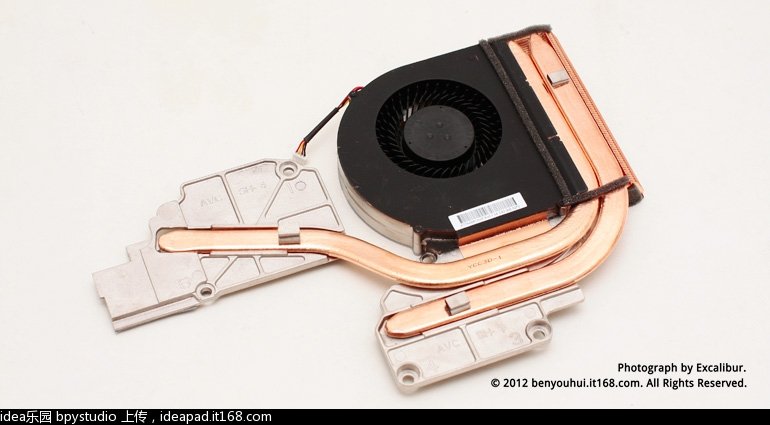
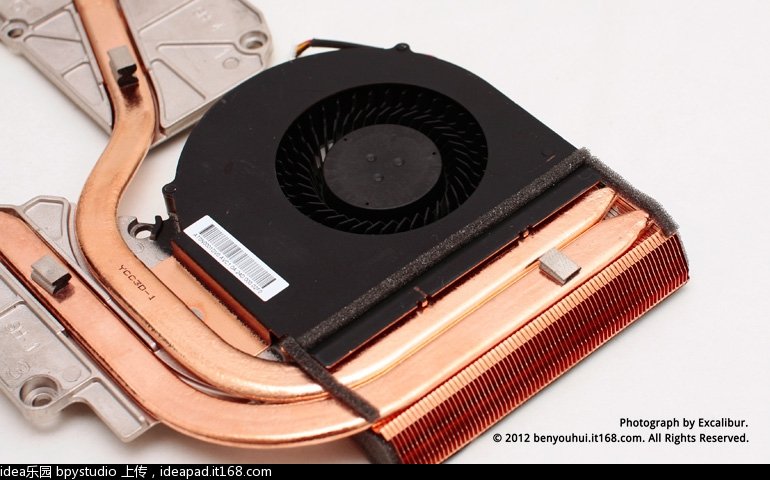
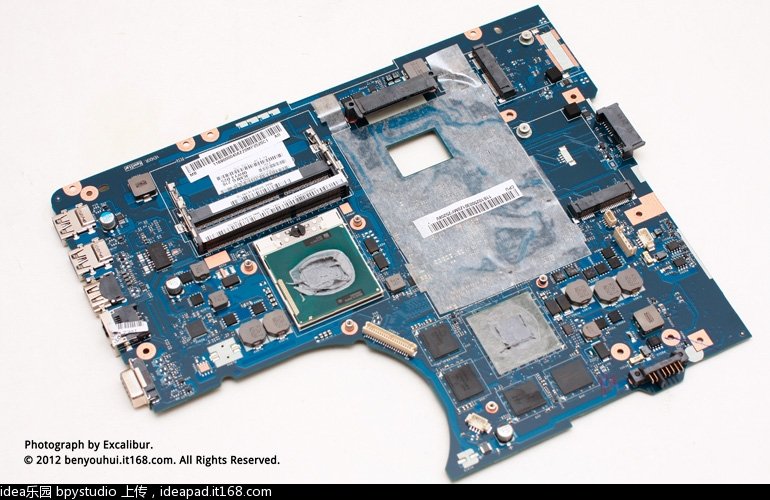
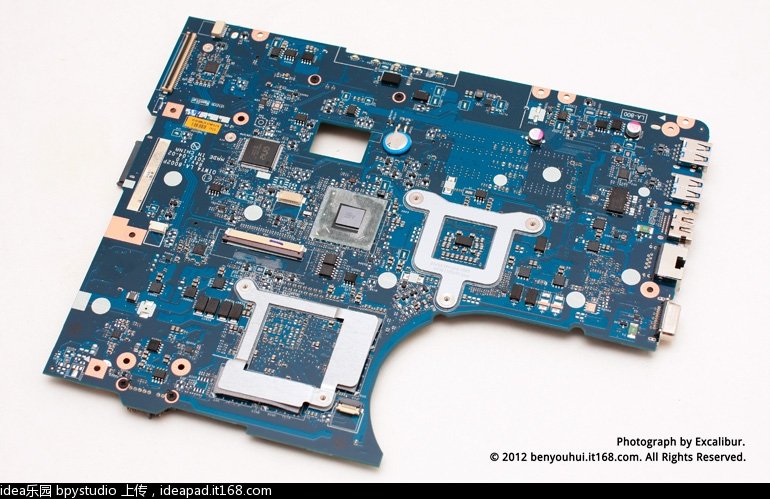
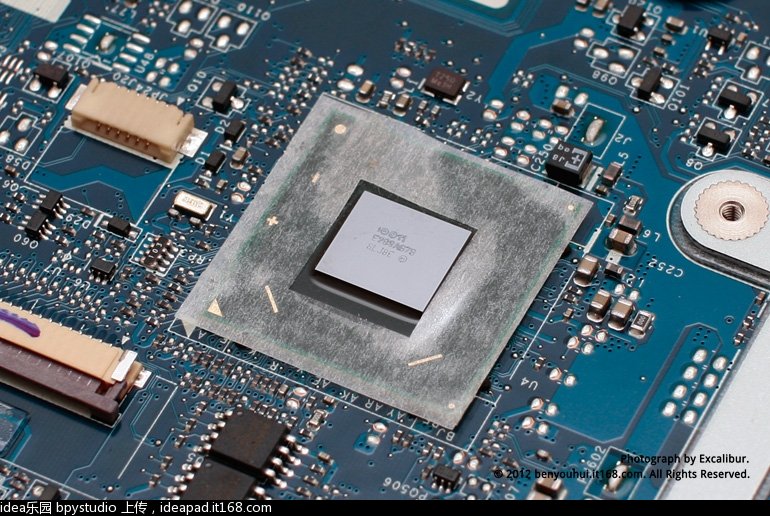
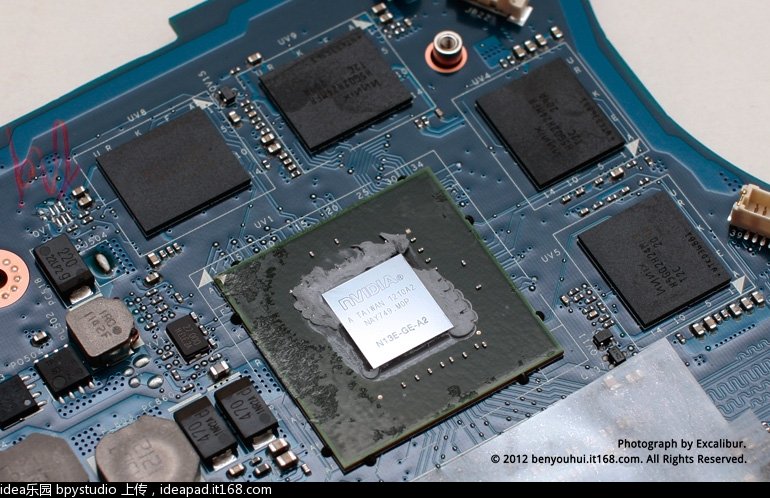
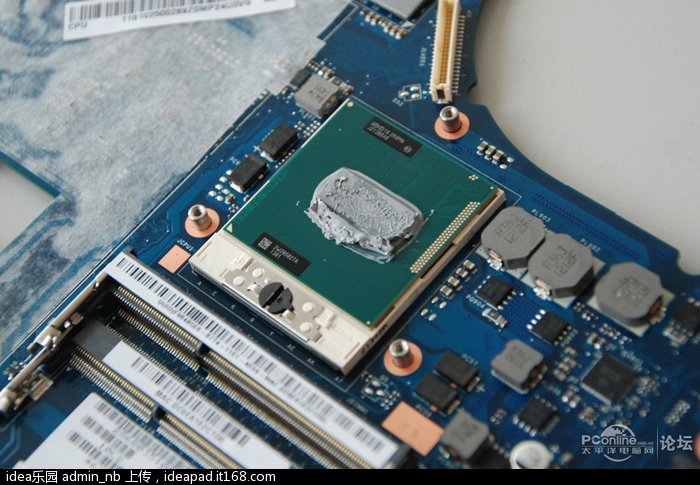
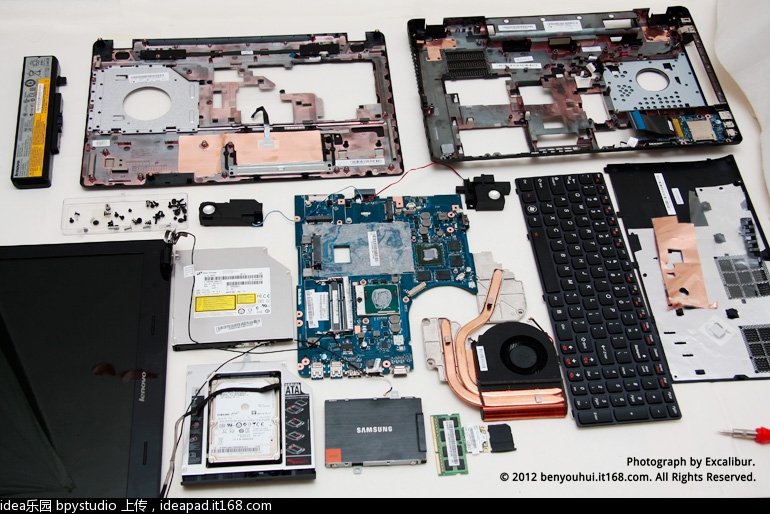
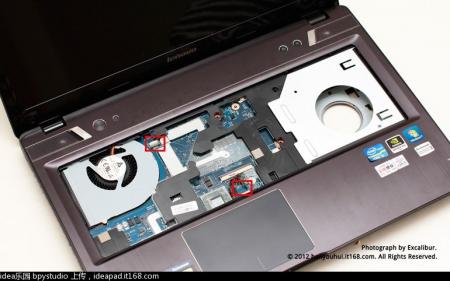
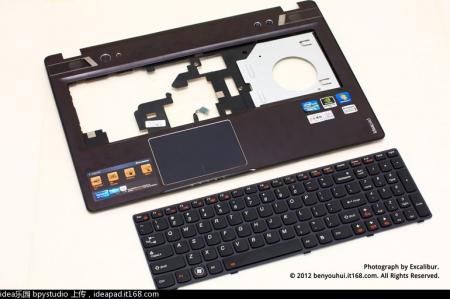
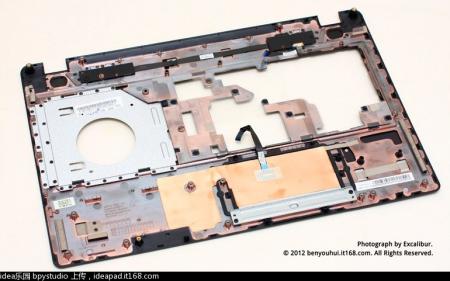
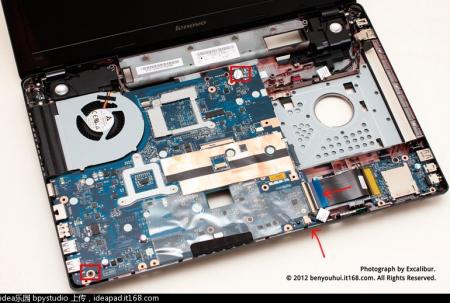
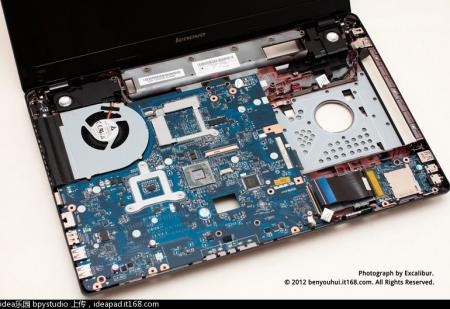
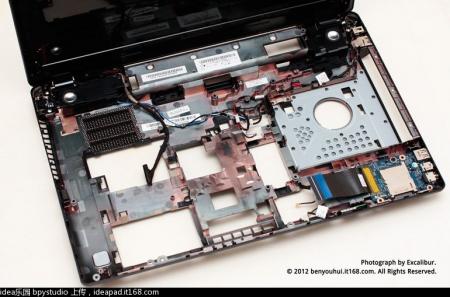
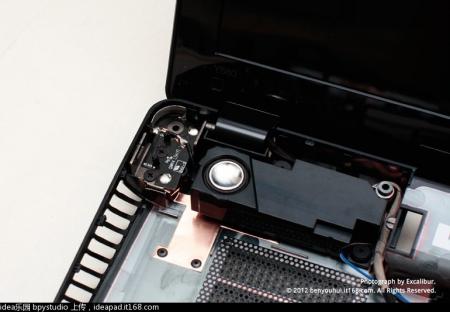
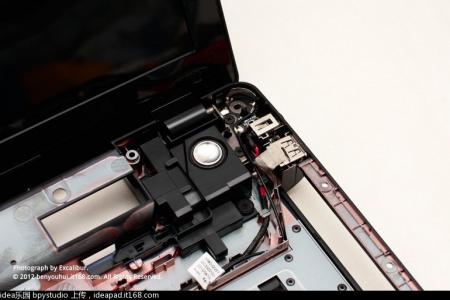
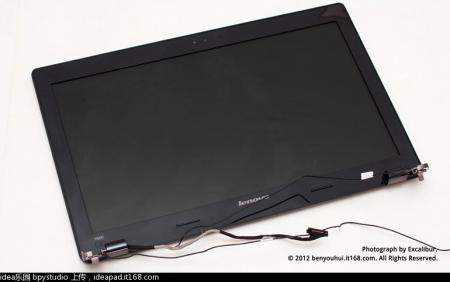
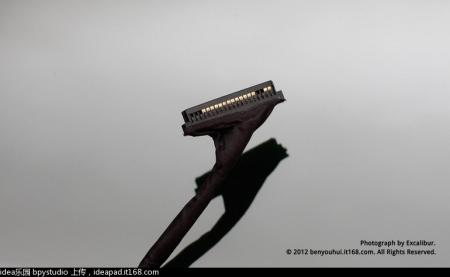
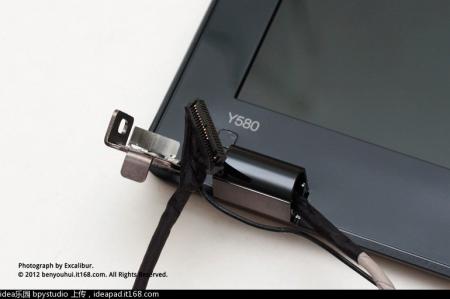
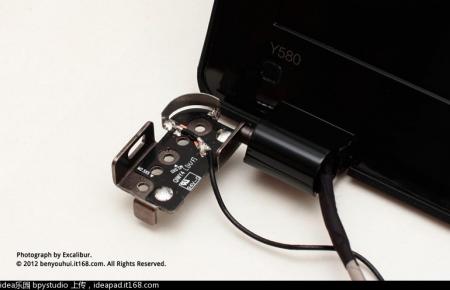
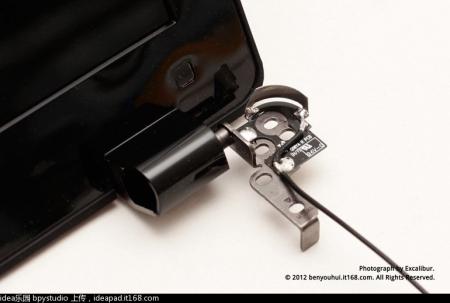
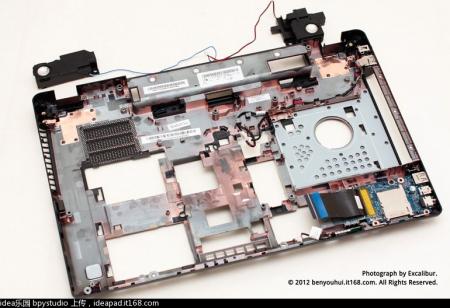
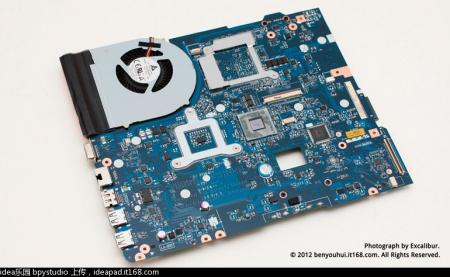
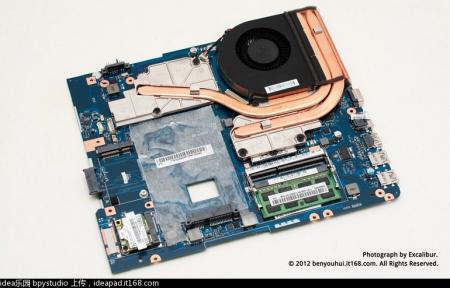
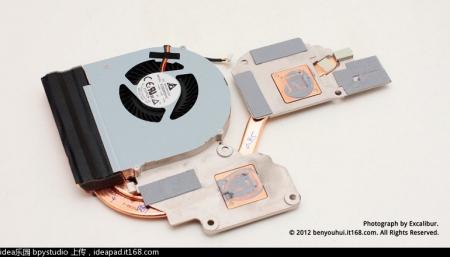
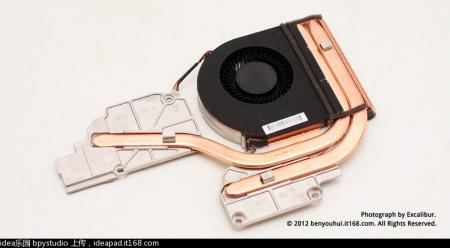
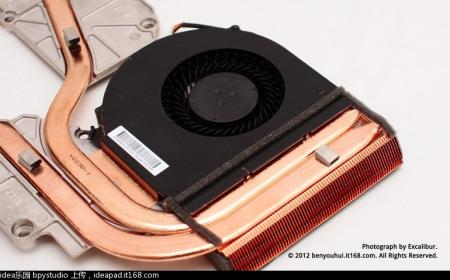
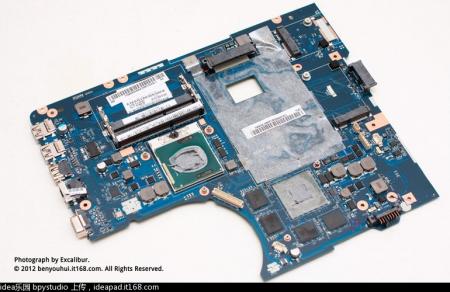
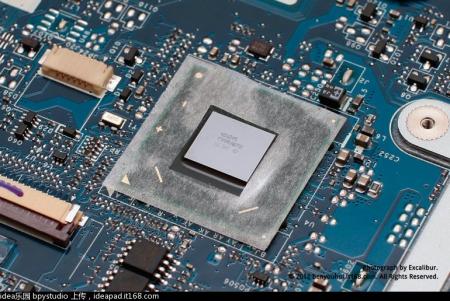
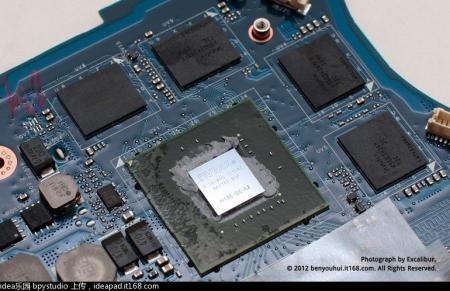
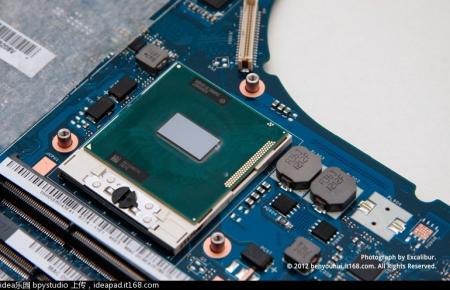
Hi all, http://download.lenovo.com/consumer/mobiles_pub/ideapad_y480_y580_hmm_1st_edition_mar_2012_english.pdf 1. It's not my photos, originally posted at: DIY 2. Last link is to PDF manual created by Lenovo 3. ENJOY


 1 point
 -
The USB FAT32 flash drive default upgrade is faster and smoother, update System Bios to unlocked A12 (Sata III fix) http://forum.techinferno.com/alienware-m17x/2279-%5Bm17x-r3%5D-bios-a12-unlocked-sata-tweak.html WIndows 8 is not officially supported "....a new BIOS came out just a few days ago but I believe it was meant to enhance windows 8 and provide working switchable graphics with Fn+F7." Alienware Staff member referring to A12 release. Windows 8 upgrade. After downloading Win 8 Upgrade with "Keep Nothing" option search for folder options>show hidden folders> browse C:\ESD>open it>copy all the contents to a formatted FAT32 USB flash drive and back it up somewhere else, use this tool to format Rufus - Create bootable USB drives the easy way + very useful for firmware/bios updates. Windows 8 already installed("Keep Settings/Files" want to perform a clean install). Microsoft confirmation email download link with product key, when finished it formats the USB flash drive to default FAT32. SSD AHCI MODE (middle bay 1 aka drive 1 SATA III 6GB/s) 1- Enter the Bios, set AHCI mode. 2- Install windows> select custom Install (Advanced)>Drive Options (advanced)>>Delete all partitions SSD Drive 1 (including system reserved 350MB) until it is only unallocated space>Select Drive 1 unallocated space (SSD)>Next. 3- Follow these instructions "System Setup after Installation" Sean's Windows 8 Install & Optimization Guide for SSDs & HDDs Shrink System Protection 1% 1.19GB and don't Turn Off page file. 4- Shrink Page file>Windows Key + Pause|Break Key>Advanced system settings>under Performance click Settings>Advanced>Virtual memory click Change>uncheck "Automatically manage paging file size for all drives">Select the C: drive>check custom size> initial / Maximum size set both to 2048MB>click set>apply>reboot when prompted. Latest Windows 8 drivers. Chipset. Native driver. Intel Management Engine. http://www.dell.com/support/drivers/us/en/19/DriverDetails/Product/alienware-m18x?driverId=H0P3V&osCode=W764&fileId=2731100829&languageCode=en&categoryId=CS Intel Rapid Storage Technology (Raid) http://www.dell.com/support/drivers/us/en/19/DriverDetails/Product/alienware-m17x-r3?driverId=R302553&osCode=W764&fileId=2731118169&languageCode=en&categoryId=SA Standard SATA AHCI Controller (SSD) https://downloadcenter.intel.com/Detail_Desc.aspx?agr=Y&DwnldID=22271&lang=eng Intel® Rapid Storage Technology Release 12.5.0.1066 is designed to provide functionality for the following Storage Controllers: • Intel® 8 Series/C220 Series Chipset Family SATA AHCI/RAID Controller • Intel® 7 Series/C210 Series Chipset Family SATA AHCI/RAID Controller • Intel® 6 Series/C200 Series Chipset Family SATA AHCI/RAID Controller • Intel® 5 Series/3400 Series SATA AHCI/RAID Controller • Intel® X79 Express Chipset TRIM check tool TRIMcheck: A FREEWARE TRIM TESTER Realtek card reader RTS5209 Realtek Qualcomm Atheros AR8151 PCI-E Gigabit Ethernet Controller http://www.qca.qualcomm.com/download.php?type=driver&id=73 Wi-fi Intel 64-bit https://downloadcenter.intel.com/Detail_Desc.aspx?agr=Y&DwnldID=22741&lang=eng BigFoot Networks Killer Wireless 1103 Killer Gaming :: Support :: Driver Downloads Dell Bluetooth 375 (driver only) Windows Update Catalog (AMD64) Microsoft Update Catalog Bluetooth on - 7Zip extract to desktop>right click .inf(bcbtums-win8x64-brcm.inf)>install Dell Bluetooth 375 Software http://downloads.dell.com/FOLDER01052616M/1/Network_Application_C71DK_WN_12.0_A02.EXE Touchpad Drivers | Synaptics USB 3 Microsoft Renesas driver device manager>universal serial bus controllers>USB Root Hub (xHCI)>uncheck power management. IDT 92HD73 Audio updated Windows 8 Driver http://forum.techinferno.com/alienware-m17x/3549-m17xr3-m18xr1-idt-windows-8-driver-v-6-10-0-6421-maxx-audio-3-quality.html OSD R3 version is the only one with no compatibility issues, even for R4 and M18XR2 users Driver Details | Dell United States Command Center grab R4 A02 (Win8) it works both M17XR3 / M18XR1(installation issues fixed)Driver Details | Dell United States Title: Application: Alienware Command Center Application Version: A02-00 OEM Name: OEM Version: 2.8.10.0 Computers: Alienware Notebook: M14x, M17xR4, M14xR2, M18xR2, M11xR3, M18X, M17xR3 OS: Windows 8 64-bit - Pro, Windows 8 64-bit - ALL Languages: Chinese Simplified,Japanese,Spanish,Danish,French,Portuguese (Portugal),Finnish,English,Br Portuguese,Norwegian,Turkish,Korean,Arabic,Russian,Greek,Polish,Italian,Chinese Traditional,German,Swedish Created: 11/28/2012 Edit: Dell fixed command center installation issues. Different packaging, previous oneDriver Details | Dell United States(both are 2.8.10.0 A2) 1 -Obs.before installing IDT/OSD/Command Center enable .Net framework 3.5. Program and Features>turn windows features on and off>check .net framework 3.5>ok>download/install>reboot>install IDT/OSD/Command Center same order. 2 -Important extract all downloaded DELL files with 7Zip, install from the extracted folders. This will prevent install errors and windows compatibility settings due to packaging. 3 -Windows 8 System image backup. To enable custom backup instead of all or nothing, Control Panel>Windows 7 File Recovery>Set up backup>select media>Next>let me choose. 4 -Nvidia GTX 680M modded .inf http://forum.techinferno.com/nvidia/3201-%5Bmobile%5D-modded-nvdmn-inf-v314-22-alienware-m17xr3-r2-m18x-nvidia-gtx-680m.html 5 -Optimizing GPU FPS rendering http://forum.techinferno.com/pc-gaming/3066-gpu-rendering-optimazation-fps.html#post42540 6 -CPU OC. http://forum.techinferno.com/alienware-m17x/2285-unlocked-throttlestop-alienware-m17x-r3-r4-m18x-r1-r2.html 7 -Start menu. Try StartisBack fully native StartIsBack - real start menu in Windows 8 8 -Windows 8 Dark themes fix AeroByDesign For Windows 8 by ~LiveOrDieTM on deviantART uxstyle X64 beta for Win8 UxStyle - no more patching. (Reduced black color w/ intensity slider) Obs.Install uxstyle core beta only after there are no windows updates left, future updates>task manager>processes>end task "UnsignedThemesSvc" ( theme binaries updates icon fix KB2751352/IE KB2761465 ) personalize>change to windows 8 default themes. This is to prevent black screen with flickering backlight after reboot and sfc /scannow is useless, create restore points/backups:mad:win 8 dec updates failed [Archive] - My Digital Life Forums Thanks Ballmer for Windows 8 design flaws. 9 -Windows 8 Dark themes fix 2 (Aero)Dark theme for Windows8 RTM by ~Nighthawk-F22 on deviantART (Themes only, don't use Aero Glass fixes) AeroByDesignSignature Windows 8 dark themes fix 21 point
-
Thanks, I'LL do that.1 point
-
I highly doubt it. They likely were originally for SMD capacitors, but the caps got removed to save on costs.1 point
-
No, no damage at all. It is better than nothing, it's just that the cooling on the m18x is very good so you can get great results just by lifting the back with those laptop lifts that Brian suggested1 point
-
But Jimbo, my foolish friend... you're just lazy Going from a M18x to a P370em wouldn't make a lot sense if you ask me... rather go 15 inch then. Did you ever consider a Dell Precision series notebook? Very nice design if you ask me, and powerful hardware.1 point