Search the Community
Showing results for tags 'hardware'.
-
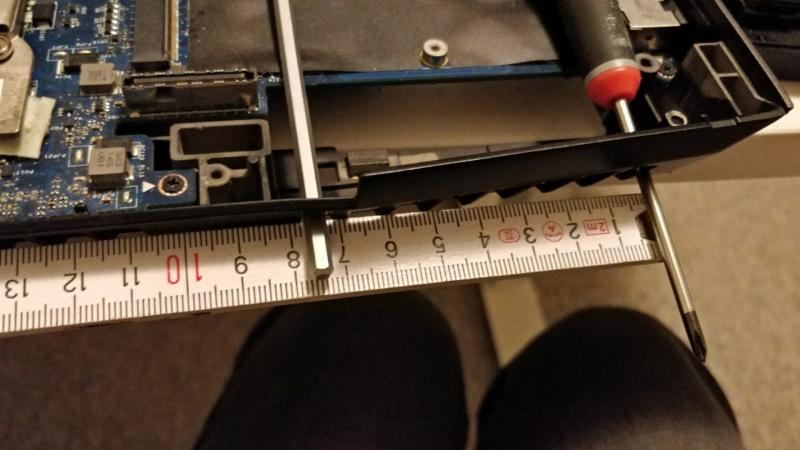
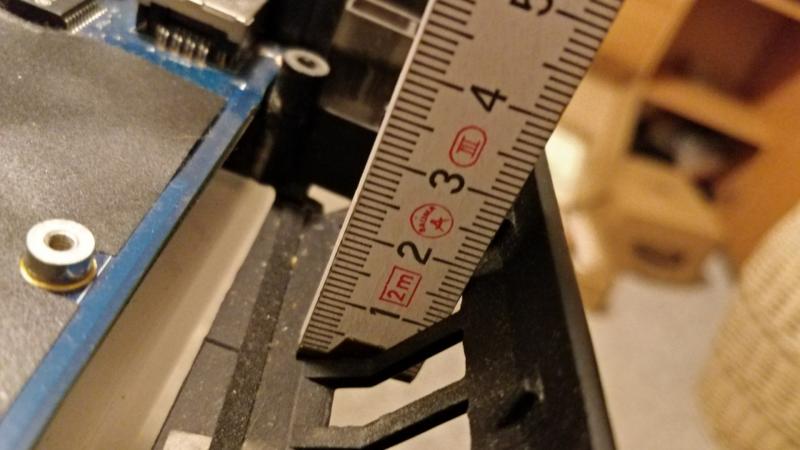
First I want to thank the community, who have inspired me to do this project. I will give you guys the chance to follow me on this journey. I hope you will all help me come up with ideas, techniques and parts that could become handy. This modding may be possible to convert to allot of laptops. Let's begin! Here is the measurement of the went hole. 77mm X 16mm I have 2 ideas for what can be done.
- 35 replies
-
- water cooling
- alienware m18x
- (and 11 more)
-
Hey everyone! After lots of searching it looks like this is the go-to place for laptop mods online, so I figured this would be the best place to ask something like this. I picked up a Dell E6530 for basically scrap value, and I love the thing. Runs Xubuntu great, battery is halfway decent, and I can play 99% of the games I own on it. My friend on the other hand picked up an E6440 with its silver-ish finish along the back. As much as I love my 6530 I've gotta say, that thing looks great. To get to the point now, I was wondering if it's possible for me to polish the top of the lid on my 6530 to have a more silver finish like that (or maybe even a mirror finish if I sand it down with a fine enough grit). Really what I want to know is if the dark grey part of the lid is actually metal. I can't seem to get a definitive answer online, and I tried the magnet test on it and it wasn't magnetic at all. This doesn't necessarily mean it's not metal though, as aluminum isn't magnetic but is obviously a sandable/polishable metal. One source said the laptop has anodized aluminum parts on it, but they didn't specify whether it was something internal or external. Can anyone here provide me some insight? If the grey part is definitely a metal and not a plastic, I think I'm gonna give it a try. As stated before I got this thing for scrap value, so if in the end it doesn't work out I'm not gonna cry over it or anything. Still though, I'd rather not run into this blind. If this is indeed possible though and I can accomplish what I want with a decent looking result, I'll post up some pictures with the method I used for others to do as well. Thanks in advance!
-
Hi everyone, I hope I'm not going to write off-topic; I own an Acer Predator 15 (G951) notebook, and it never gave me problems before; I've never used the integrated audio jack port because I usually listen to music and other stuff through Bluetooth headphones, but few weeks ago I noticed that putting a jack connector in the jack port only deactivates the sound from the pc speakers, but the headphones don't appear in the "devices" section, and the sound coming out from the headphones is really faint and distorted (only if the system slider of sound is at the maximum level and the sound should be very noisy, when the level is lower I don't hear anything at all). Also, when I put a jack in the microphone jack port of the pc I hear the classic sounds of the jack which touches the pin connectors inside the port, but it doesn't happen with the headphones port. I tried almost everything: I changed a lot of headphones, both phone headphones with a single jack and pc headsets with two jacks (for the headphones and for the microphone) but every time it's the same. I installed and reinstalled a lot of different versions of the audio drivers, both from Acer and the productor (Realtek), and nothing changes, I also tried with Ubuntu and it's the same. What could be the cause, and can the problem be solved without any technic intervention? Anyway the warranty for my pc is still valid, but the assistance should be the very last resource (I should do a backup of everything and format and so on). And, the last question, I flashed a custom VBIOS some time ago, does this compromise the warranty? Should I really reflash the original VBIOS or it's not so likely they're going to check on this? Thank you all for your attention!
-
I've recently purchased Sager's new P9872-S laptop with Intel i7-6700K unlocked CPU and a single nVidia 1070 XMX GPU. Let me say that overall I absolutely LOVE this new machine, but I've discovered some strange hardware/BIOS type quirks that I'd like to discuss here. Note: I don't see a version displayed in my BIOS, but HWINFO lists a BIOS date of 10/19/16. The CPU is unlocked and supports overclocking. The stock BIOS also has a section for CPU overclocking. My CPU is quite happy running a moderate 4.5GHz OC across all cores with a 70mV undervolt (offset mode.) Yes it'll do the same clock at stock voltage but I've found that many Skylake CPU's do not need such high voltage as Intel has programmed them for - and my temps run much lower with the undervolt. So I set the undervolt with Intel XTU (I've also tried doing the same with Sager's own utility) and it runs beautifully until I reboot the system. At POST, BIOS then seems to reject the undervolt, forces a power-cycle, and sets CPU PL1 and PL2 power specs to very low "safe" levels. It also changes the negative voltage offset to a positive 70mV, indicating that it's trying to "error correct" the negative value. BIOS itself specifies a valid range of -500 to +500mV for the voltage offset here, and I can change it directly within the BIOS (and then it DOES actually stick through future reboots) but the BIOS does not allow me to enter a negative value here! Instead of -500 to +500, the actual values it allows for entry are 0 to +1000! And no, +500 does not actually equal zero, tried that and it really is +500. Also of note, I can change any multipliers in XTU or Sager's utility without the BIOS objecting but *any change* to the voltage offset gets rejected at reboot - even +1mV. Even applying +1mV and then immediately applying 0mV in either utility gets rejected on the next reboot so it's as if some checksums or something are not calculated the same way by XTU as they are by BIOS, causing a rejection of *any* voltage offset modification made by a utility rather than BIOS itself. Initially I set all my CPU core multipliers to 45x and all was good. Soon I noticed that any time I put the computer to sleep or hibernate, it would limit core speed to a maximum 42x after recovering, despite still reporting 45x as the CPU maximum. I tinkered with it for a while and eventually tried different values. Now I have ONE CORE multi set to 46x and TWO, THREE, and FOUR CORE multi set to the original 45x. That shouldn’t make a lick of difference versus 45x across the board but it does! 46, 45, 45, 45 sticks properly through sleep and hibernate; Weird right? I’m fine with the current settings as an effective workaround but I feel it’s still worth noting here. The VSYNC seems "lazy." I know this may be a driver or settings issue, rather than true hardware quirk, but it really bothers me - and the same behavior exists with nVidia drivers 368.xx to 373.06. Take Dirt Rally for example; I want it to run with VSYNC ON at 1080p, 90Hz. If I turn VSYNC OFF, my average framerate is about 200Hz, and never falls below about 110Hz, but with VSYNC ON it keeps dipping momentarily below 90Hz and skips frames! In a fast-motion racing game this is very distracting! I've observed this same behavior with the internal LCD and with my AOC 144Hz gaming monitor connected via DisplayPort. With VSYNC OFF, even with framerate limiter set at or just above my refresh rate, the game looks terrible so this is not an acceptable workaround either. Yes, the reported refresh rate is on target without VSYNC but there's terrible tearing and stutter. I've never experienced this kind of VSYNC dysfunction before; any thoughts? I have the 1920x1080 120Hz LCD screen. I wanted to set a couple custom refresh rates in nVidia Control Panel for racing games that really stress the system at 120Hz but I still want more than 60Hz. If the LCD starts out set at 60Hz and I test a custom resolution of 1920x1080 at, say, 90Hz, the screen goes kaput until it reverts back to 60Hz. However, if the screen starts out set at 120Hz I can then create any custom refresh rate in between 60 and 120Hz that I want. I wouldn't bother trying to fix this one as there's a perfectly functional workaround - it's just weird to me that starting frequency matters. Any thoughts on these quirks are welcome, and I’d be happy to try/test any good suggestion or curiosity you might have. Especially getting a negative CPU voltage offset to stick permanently, as well as any thoughts on the VSYNC laziness would be greatly appreciated. Thanks everyone!
-
Hey Everyone. Sometimes I use my laptop's SPDIF because I'm an audiophile weirdo . But enabling it is annoying. My previous laptop, a Toshiba, would automatically recognize when a mini-toslink adapter was inserted. On this unit I have to manually make digital out the default and switch it back when I'm done. Does anyone know a workaround? Thanks


