Search the Community
Showing results for tags 'gtx 980'.
-
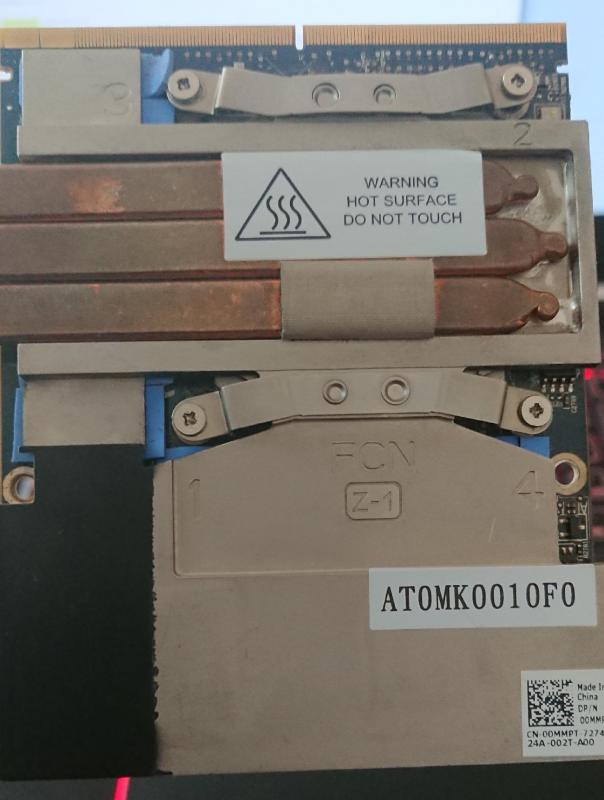
As per @coolane's request, I figured I'd make a separate thread for this modification. In the original thread (https://www.techinferno.com/index.php?/forums/topic/265-benchmarks-the-official-thread/&page=34) coolane shows their heatsink modifications and results which I think were ingenious. Initially I didn't think it was possible to use the 980DT heatsink with the MSI 1070 without modification, though with coolane's post showed potential and I figured I may as well give it a try since there's no chance in hell or any other place that I would be able to do a 1070 SLI configuration. Thanks to coolane, they provided further detail into their mod and it was very straightforward enough for me to warrant an attempt. So, I ordered: 10pcs of 8.8mm x 8.8mm heatsinks 1 sheet of thermal transfer tape 400 - 3000 grit sandpaper and I am waiting for those parts to arrive to my location before I begin and I post when they do. EDIT: I may do some minor changes to their attempt like not adding additional heatsink pipes since i have no idea on how to even attach them so this will be a basic modification. EDIT2: Original content EDIT 3: I learned from @J95 and @Prema that the vbios mod used by coolane was stolen from Prema by some crappy Chinese hacker so this thread is specifically for the modding of the heatsink itself. EDIT 4: I ended up getting the following to complete the mod so far. 1. Stanley hacksaw - $10AUD 2. Sandpaper 80 grit and 180 grit emery (for soft metals like copper), 400 grit W&D, 800 grit W&D, and 1200 grit W&D - $10AUD approx (though i spent more ordering more from Amazon which won't be used now but good to have :p) 3. Protective gloves - $12AUD EDIT 5: Ordered some thermal adhesive to glue a bit of copper plate to cover the power phase chip. Sure, a mini-heatsink might do the job though it might be better if it was going through the heatpipes.
-
Hi there, I'm planning to upgrade my gpu to the gtx 980 from my now knackered cooked 9 times hd7970, but looking at pictures and videos on the web I have a different 3 pipe heatsink to most it seems... Others appear to have more copper present on the memory cooler section than mine. My question is for anyone who has the same heatsink or knows of this one, have they been able to cool another gpu successfully?
-
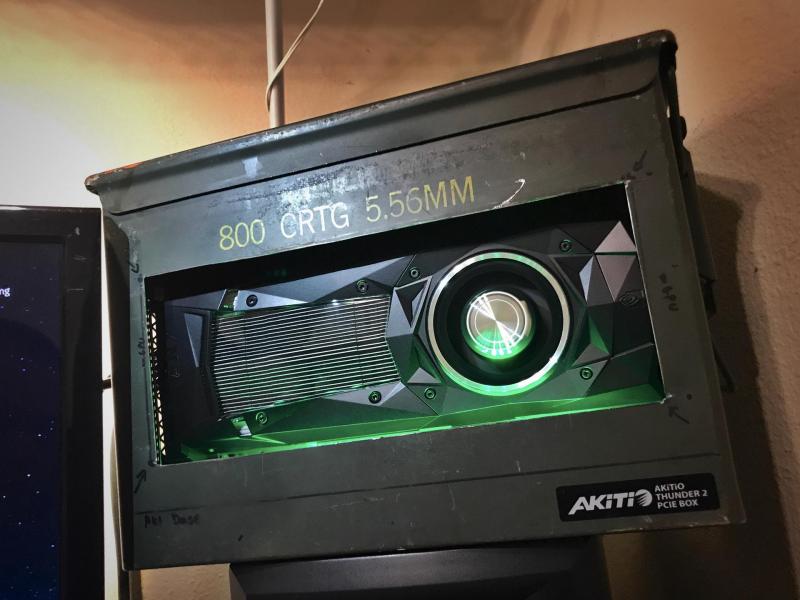
This isn't even my final form! "DotPusher III" Hardware: Mid-2014 MacBook Pro (15-inch) Core i7-4980HQ (2.8 GHz) NVIDIA GT 750m NVIDIA TITAN Xp 12GB (GP102-450) (previously 980, 980 Ti) Also tested with: EVGA GTX 1080 SC (see bottom of post) Akitio Thunder2 Corsair 550w ATX PSU "Fat .50" Ammo Can (800 rd 5.56mm) Software: Windows 10 Latest macOS version automate-eGPU.sh rEFInd Boot Manager apple_set_os EFI application Tools: Screwdrivers Channel-lock Pliers (or vise grips) Jigsaw / Dremel / Angle Grinder / Metal File / Sandpaper The Build Honestly, the build was surprisingly simple! Popped open the Akitio, used channel-lock pliers to pry the front side of the Akitio open to allow for the length of the GPU. Added gaff tape over all of the metal parts, just in case the card came into contact with the bare metal of the bent Akitio enclosure. Got the card handy, a gorgeous little reference model GeForce GTX 980. On a side note, I actually had an MSI GTX 980 GAMING 4G but ended up trading it for this reference unit, as it was one of the ugliest pieces of hardware I've ever seen, and the reference models are just beautiful. (Form over function, but isn't that the Apple way? :P) The card slotted right in, no problems here. Next up was the power supply. I used a Corsair 550w unit, but cut everything besides the two PCIe power connectors and the CPU 12v rail (to power the Akitio). Terminated all the ends with shrink wrap and gaff tape on top of that, and taped all the unused lines down to the side of the PSU. It was also during this step where I hotwired the PSU to always be "on" via the paperclip trick...except I just traced those wires back to where I was going to make my cut, and soldered them together. For the Akitio's power, I used the molex-to-barrel-adapter guide, but instead of being patient and getting a proper barrel connector with two leads, I cut the barrel connector off of the Akitio's power supply that came in the box. I like to live life in the moment, I guess...but the fruits of my labor were revealed when I stripped the wire and it turned out to be coaxial instead of side-by-side! No matter, I said to myself, as I twisted the outer fibers into a solderable piece of wire, and stripped the inner wire as well. Verified polarity via a multimeter, and soldered the Akitio barrel connector to the CPU12v line from the PSU. A bit of shrink-wrap and gaff tape later, and I had a nice little feed for the Akitio coming off of the PSU. No powered riser bs, no extra Akitio power supply. Clean and simple. PCIe plugs went straight into the GPU, I gave em a little bend so they'd hug the edge of the magazine holder. I also re-routed the front LED from the Akitio's box around the back of the PCB to where the Akitio power plug is, so that that area of the magazine holder lights up blue when the card is active. At this point, I took the magazine holder and made cutouts for the GPU ports, ventilation, and PSU ventilation. Covered the rough edges with gaff tape so they wouldn't fray and get sucked into a fan (plus it looks a bit less janky). The Akitio with GPU slid perfectly into one side of the magazine holder (make your measurements first before going shopping!), but was sitting too low for my cutout to be centered on the GPU's cooler...nothing a little packing foam (from the Akitio box!) couldn't fix. The PSU slid in with...some effort. From my measurements, I knew the PSU wasn't necessarily going to fit, but it was close enough that with a bunch of gaff tape to keep the bottom and sides secure, it doesn't move anywhere and there are no signs of any danger of it falling out after a good 2 weeks with the setup. I just try to keep this side hidden, it's pretty garish. EDIT 070416 (MURICA DAY) Added green underlighting because #AMDsux #teamNVIDIA (lol). Here she is at work (literally, at my work), powering 2x 120 Hz displays & a bunch of OpenCL compute. The Experience It was time to start her up. Plugged in PSU, switched it on, plugged my 4K 60Hz monitor into the eGPU, plugged the TB cable into the Mac and hit the power button. Fired right up, booted into Windows and re-installed the NVIDIA drivers. After a reboot, the card was recognized, and I was playing Doom (2016) at ultra quality 1440p inside of 10 minutes. Not too shabby! I spent some time in MSI Afterburner, customizing a fan curve to keep it pretty quiet during moderately high gaming workloads, but ramp the fans up quickly if the temperature went north of 70º C. Boy, this thing is loud when the fans are at full tilt, but I'm glad they; the reference cooler is no slouch, and with fans cranked to max it's actually able to pull down the temperature from 80 down to 70 while furmarking! With a bit of tinkering, I settled on a final, furmark-for-8-hours-stable overclock of +225 MHz core, and 7400 MHz on the memory. Using ThrottleStop, I also undervolted the i7 in the laptop, and downclocked it to ~2.4 GHz. Windows runs a bit hotter than OS X, figured I'd help out as much as I could. I gotta say, it feels good to put down an 80th-percentile score in 3Dmark Fire Strike with a MacBook Pro. On the OS X side of things, automate-eGPU.sh took care of everything without a hitch. I did notice some weird stuttering every second (and exactly on every second), but with some tinkering I found out that the "Displays have separate spaces" option was the cause of the issue. Disabling it made OS X run perfectly smoothly afterwards. Final Cut Pro X immediately took advantage of the new GPU, and I was able to play back Sony FS5/A7s 4K footage with a few layers of colorgrading on it much smoother than with the 750m. It can almost handle playing it back at full-res, which was just astonishing to me. Analyzation of footage for stabilization just rips, along with optical flow retiming. Adobe CC was able to take advantage of the card as well, Mercury Playback Engine (CUDA) felt much smoother than on the 750m, though I haven't been using Premiere in a while so I didn't do much testing in CC. Unfortunately, After Effects is not really accelerated by the card, but oh well. To get Optimus to work with a 750m-equipped MacBook Pro, I turned to this reddit thread detailing the installation of rEFInd and using an EFI utility called apple_set_os to get the Mac to expose the Iris Pro when booted into Windows. I also customized the rEFInd interface because the default skin looked like something out of Mac OS 7.5.3 (I half expected little puzzle piece extension icons to start loading across the bottom). The reasoning for using apple_set_os instead of the built-in spoofing feature in rEFInd is because I'd like to normally run Windows without the iGPU enabled, but retain the ability to switch into "Optimus mode" when I'm mobile. My full boot/setup process for mobile gaming via Optimus, coming from normal eGPU usage with external monitor is as follows: Leave eGPU unplugged Boot into Windows Disable the 750m in Device Manager (I usually leave it enabled when booting Windows normally) Run the switch-GPU script to set the iGPU as primary Shut down Windows Plug in eGPU and start the computer Select apple_set_os (I've renamed this to "iGPU Enabler", the far right icon in rEFInd) Boot Windows If all goes well, I'm in Windows with the GTX 980 as the Optimus "high-performance NVIDIA processor". Game performance takes a bit of a hit, but not anything significant...I can still play most titles at 1080p ultra quality, and they look great on the MacBook Pro's retina IPS display. Lingering Issues Thankfully, all of the lingering issues I have only involve the boot process. Sometimes the entire system refuses to POST (sits at a black screen without ever chiming), and I have to hold the power button for a few seconds and try again. When it does POST though, the next hurdle is whether the driver (in OS X or Windows) will initialize properly. Sometimes it doesn't want to play nice, and I'll get a BSOD on booting Windows with DRIVER_IRQL_LESS_OR_NOT_EQUAL, but a restart or two will do the trick. FIX FOR BSOD ON BOOT: I figured it out, a trip to Device Manager and I noticed there was a "show hidden items" menu option. Clicking that revealed that I had two GTX 980 devices that weren't connected for some reason, and the driver was fighting itself upon initialization during boot. Rebooted into Safe Mode and ran DDU to clean out the NVIDIA driver, reinstalled it in normal mode with the eGPU connected, and all is well. One GT 750m, and one GTX 980 in Device Manager when viewing hidden devices. If you're having driver issues like I did, you might want to check this. (NEW) FIX FOR macOS NOT BOOTING: Run Goalque's script in "-a mode". This alters something regarding the thunderbolt chipset on every shutdown, so when rebooting back into macOS, the eGPU will initialize properly every time. For OS X, I just get a black screen with my monitor showing no signal input. Again, a restart or two fixes this. (Honestly, I've had the NVIDIA Web Driver do this with the internal 750m, so it's just a normal driver-crashing-on-init issue, not specific to the eGPU.) But once the system is booted, it is rock solid, and I've never had anything crash or fail (besides overclock-induced crashing in Windows, but that's my own fault). It all seems to be based on luck of the draw, as I'll have some days where it'll work flawlessly and I'll be bouncing between the two OS's with no problem, other days I'll get 8 failed starts in a row. If anyone has any idea how to help mitigate these failed starts, I'm all ears. The only other issue I can think of is lack of display brightness control when running in Optimus mode (anyone got any clues?), but it just means I have to set the brightness from within OS X first before going through the boot process. Final Thoughts It was totally worth it. I'm in love with this setup, it truly feels like the best of both worlds. The i7-4980HQ in the MBP is no slouch of a CPU, the only thing my setup was missing was some graphics horsepower, and the GTX 980 more than comfortably steps up to the plate. My work experience has had amazing fluidity, and gaming has gone from sub-720p resolutions on the latest titles to gorgeous looking, maxed quality 1080p and higher. Less demanding titles (CSGO, Borderlands Pre-Sequel) even run at 4K 60fps, which is a sight to behold. The Oculus Rift that I got my hands on runs perfectly smooth, with no VR-sickness to speak of. And all this, in a "portable" setup. I now have 3 levels of portability (with associated levels of performance): full desktop mode, Optimus (so I don't have to lug a monitor around to LAN parties or remote editing / rendering of CGI), and of course the laptop by itself (which, with its Core i7, is still no slouch, at least when it comes to CPU compute power). It's also extended the longevity of my machine a lot, since I was looking at the 2015 and purported 2016 models for their GPU upgrades...but not anymore! The only thing I'm looking at is the moment NVIDIA releases Pascal drivers for OS X...and my poor wallet might have to take the brunt of a GTX 1080. The Future I'm still on the hunt for a better case, but all of the computer cases I've found are...well, computer cases, and far larger than this magazine file setup. So I'm looking at...different solutions. An old army surplus ammo box looks like my next case, and it has a handle at the top, which I can't live without after having this magazine file for a couple weeks. I'd love to pick up a modular SFX PSU so that the PSU actually fits into the magazine holder without any modification necessary, and if it's modular, it'll help keep the cables clean and tidy, with no drive and fan power cables to cut. Hope you guys enjoyed the adventure, and that some of the solutions to the little quirks I found help out someone! Happy eGPU-ing! --- EDIT 070416 (MURICA DAY) Just for kicks, slapped a buddy's GTX 1080 into the chassis to test with Windows. It required a driver reinstall as the system didn't detect the 1080, even after rebooting...it seems that the NVIDIA driver enumerates the cards in your system at install time and will only install the drivers it needs to, not all of them (different from the way OS X does it). The driver install worked fine without having to run DDU and cleanly install. YMMV though. The added compute power of the GTX 1080 was more than welcome to help mitigate the performance hit you take when using Optimus. Crysis 3 ran at the laptop's native resolution (2880x1800) at around 45-60fps with all settings cranked. Beautiful. I was really looking forward to testing out Rise of the Tomb Raider on it, but ironically there's a bug with Pascal cards and NVIDIA VXAO, so I couldn't get a fair comparison. Wish I could keep it, but the lack of Pascal drivers for OS X keeps me on the 980. For now. EDIT 071816 Acquired a "Fat .50" (actually an 800x 5.56mm) ammo box and made the primary cuts using a pneumatic angle grinder + cutoff wheel. Test fitted the Akitio and PSU. Currently need to drill the PSU & AKT mounting holes, but also trying to figure out what thread pitch the Akitio's mount holes are (anyone got a clue?). Specifically, the ones that the Akitio's own case's captive thumbscrews screw into. EDIT 072016 Finally finished the ammo can case after much measuring, cutting, and drilling. As the barrel plug was going to be flush against the side of the case, and I didn't want to have to loopback the cable like I did in the magazine file, I ended up soldering the CPU12v rail to the back of the Akitio's PCB. Pre-tinned the wires and plopped them onto the PCB, then secured it with gaffer's. Verified the correct solder points thanks to /u/Dippyskoodlez, who found the info from these very forums. Singed the PCB a bit, but oh well, close enough. EDIT 050517 NVIDIA released Pascal drivers for macOS. Upgraded eGPU to a TITAN Xp. Benchmarks available upon request. Yes, it's completely a ridiculous setup now—I was only able to upgrade due to external circumstances. Diminishing returns starts to creep in (even for the much-more-fairly priced 1080 Ti) due to the TB2 bottleneck.
-
Hi all, thanks to your posts and knowledge, I was able to get an eGPU rig with a GTX 980 up and running with very few issues! It's been great so far. One of the lingering issues I've had is having to play the lottery whenever I start up the Mac...it seems like only one time out of 5 will the machine actually POST and play the startup chime and continue booting. Most other times, the GPU will initialize (I see the LEDs turn on and the fans spin up and return to idle), but the Mac just sits there at a black screen and never plays the startup chime. No amount of shuffling between thunderbolt ports (on both the Thunder2 and the laptop), or praying to the PC Master Race gods has seemed to have any effect on whether the machine will successfully boot or not. Sometimes it'll boot right on the first try, and do so 10 times in a row, other times I'll have to sit there and hold power to force-shutdown the machine and retry 6 or 7 times before it'll boot. Any ideas? Specs are as follows: 2014 MacBook Pro 15", i7-4980HQ, GT 750m Akitio Thunder2, MSI GTX 980 Gaming 4G, Corsair 650w PSU
-
I have hooked up my graphics card via akitio thunderbolt chassis . I have installed all the drivers necessary and still do not any image from HDMI out on card. The computer read my graphics card in that sections of system report before but now does not say it. I have downloaded CUDA and installed script for drivers and no image. Can anyone please help ?
-
Ok so I do I lot of work on Rhino 3D, Sketchup and too Revit. I also use Maxwell and sometimes VRay for rendering. My current 15" Macbook pro with Iris pro graphics really sucks for this. When I move models around they get laggy and often freeze and crash. I do expect rendering to always take a while. Should I go with the Thunder2 and a GTX 970 with a PSU or would I be fine with the built in AMD R9 m370X of the higher priced macbook. The GTX kills it on benchmarks however the GTX requires a PSU and its hard to take around.... Thanks!
-
These days a lot of the rage is in thin and light notebooks and while that is fine for a lot of people, there is a substantial number of performance enthusiasts (especially found on this website) that want the exact opposite. This group of enthusiast demands the pinnacle of performance built right into the notebook and not a thin and light compromise saddled with an Intel BGA processor and soldered GPU. Well Clevo and Eurocom are listening and Eurocom let us know that they have launched the new Sky DLX7 notebook that is aimed squarely at those aforementioned enthusiasts. But you don't have to be a gamer to want this DTR (desktop replacement) because it will offer the same amount of productivity as any formidable desktop, especially with it's 17.3" display with 4k resolution and 64 GB of DDR4 RAM. It can also support up to 4 active displays thanks to its two mini Display Ports, USB 3.1 and HDMI 2. The Sky DLX7 uses Intel's latest Z170 chipset with socket LGA 1151 which allows it to support the latest 14nm Skylake desktop processors up to the Core i7-6700K that operates at 4 GHz and has a turbo boost of 4.2 GHz. In addition, the CPU can be further overclocked for true high end desktop level performance. For those that like to keep upgrading their notebooks, the Sky DLX7 supports MXM 3.0b graphics cards such as the NVIDIA GTX 980 desktop (full desktop level card in an MXM package) and professional Quadro mobile cards. Unlike many competing notebooks, this DTR won't have trouble keeping itself cool as it features high capacity copper heatsinks and fans to keep things chilled. There doesn't appear to be a shortage of space either as it can support two 9.5 mm HDD or SSD bays and two M.2 SSD PCIe x 4 SATA drives with RAID 0/1/5/10 availability. There's no word on final pricing but given all the power this thing packs, it probably can get pricey very quickly. EUROCOM Sky DLX7 Specifications: Special Feature(s): Intel Z170 Chipset; Skylake-S; supports both mobile and a desktop based GTX 980 GPU Main Chipset: Intel Z170 (Skylake) Processor: Socket LGA 1151 Skylake-S; up to i7-6700K, unlocked Video / GPU: - MXM 3.0 slot; up to 180W GPU - NVDIA GeForce GTX 980 (desktop) N16E-GXX MXM 3.0 (83x 115mm)or GTX 980M, 970M, 965M; MXM 3.0b (83x105mm) Built-in PC Camera: Built-in 2M FHD Display: 17.3" UHD IPD eDP 3840x2160 Supports 4 active displays Memory: Four 260-pin, 1.2V, SODIMM sockets DDR4-2133/2400; up to 64GB Total Storage: up to 4 physical drives: - 2x M.2 2280 SSD PCIe Gen3 2x/4x or SATA - 2x 2.5" 9.5mm/7mm HDD/SSD/SHDD - RAID 0/1/5/10 Optical Drive: External USB based DVD-RW or Blu Ray Burner Card Reader: 6-in-1 Push-Push Card Reader MMC/RSMMC SD/mini SD/SDHC/SDXC UHS-II (SD 4.0) Audio Architecture: High Definition Audio S/PDIF Digital Output Built in array microphone Built in two 2W speakers and subwoofer Sound Blaster X-FI MB5 External 7.1CH output (headphone, mic, line-in and S/PDIF) ANSP 3D Sound Technology (headphone output) LAN/WLAN/Bluetooth: - WLAN / Bluetooth; M.2 2230 slot - 1Gigabit Ethernet RJ-45 LAN on-board; Killer E2400 Data and Physical: Kensington Lock Fingerprint TPM 2.0 on-board (Infineon SLB9665-TCG) Internal cards / # of slots/Type: Three M.2 slots -1st: WLAN M.2 2230 Card with PCIe x2 and USB (A Key) -2nd for SSD M.2 2280 Card with SATA / PCIe x2/x4 (M key) -3rd for SSD M.2 2280 Card with SATA / PCie x2/x4 (M key) I/O Ports: 1 x USB 3.1 type C / Thunderbolt 3 / DP 1.2 / HDMI 2.0 3 x USB 3.0 1 x eSATA / USB 3.0 (1x Powered USB AC/DC) 2 x miniDisplay Port 1.2 1 x HDMI 2.0 output 1 x Headphone 1 x Microphone-in 1 x S/PDIF (digital) 1 x Line in 1 x RJ-45 LAN 1 x DC-in Internal Keyboard: Backlit full size keyboard with numeric pad TouchPad with multi-gesture and scrolling W/A/S/D Gaming key AC Adapter: 330W 100-240V 50-60Hz Auto-switching (worldwide) optional 660W (2x 330W) for Extreme Performance Battery: 8cells Smart Li-Ion; 89W FexiCharger (via BIOS) Weight: 3.9kg / 8.58lb with battery Dimensions WxDxH: 418x295x39.9mm / 16.72x11.81x1.6-inch View full article
-
Hey I have a Problem with my Egpu Setup. I have a MacBookPro mid 2012 with Intel hd graphics 4000 + a gtx 980 as a Egpu + Windows 8.1 pro. I builded the hole thing and installed the newest drivers. My Problem is that the pc finds the egpu but doesnt use it. All Games etc. are running on Intel hd graphics. I doesnt know what to do. How can I switch between the 2 GPUs? Would be very nice if someone could help me! Thanks
-
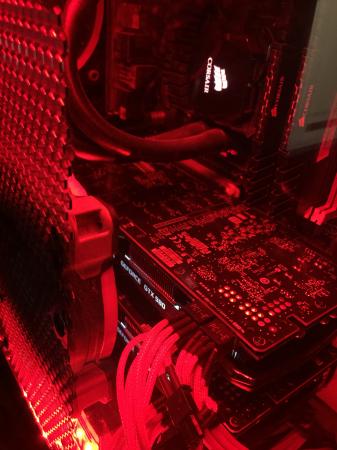
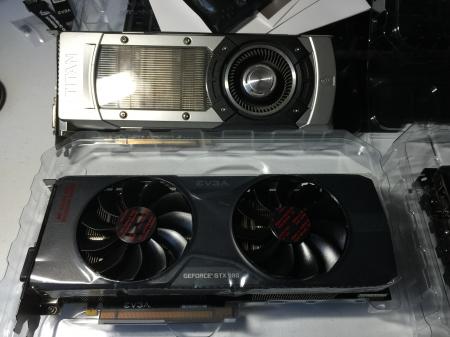
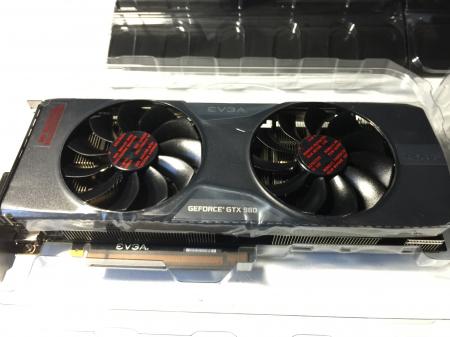
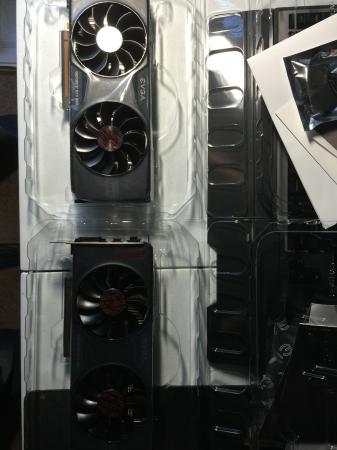
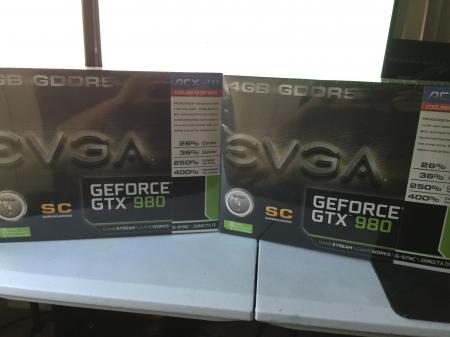
Picked up a couple EVGA GTX 980 SC's with ACX 2.0 coolers and compared to the Titans that they are replacing, the temperatures are WAY better (Maxwell ftw) as is the operating frequency. It's pretty awesome how far NVIDIA has taken 28nm and they aren't done yet as the big Maxwell (GM200) will probably arrive in 2 months in the form of Titan 2 and then probably GTX 1080i in June or so (I'll probably grab that). Anyhow, I added a side fan to the computer door to help exhaust heat since these are open air coolers and therefore dump heat into the case. Temps and OC are fantastic as I mentioned, with my OC so far hitting 1520 MHz on stock voltage and max temps being 75C and 63C respectively. These cards idle at 40C and 34C each so I'm really happy about that. I'll probably do a run of 3DMark in a few minutes just to see how they do but I'm not a hardcore benchmarker, I prefer to test the results of my overclock in games I actually play and then crank their settings up and see how much an OC benefits me. Here's my setup: Benchmarks: 3DMark GTX Titan SC SLI vs 980 SC SLI (980s are on STOCK voltage):Result Stock vbios. +130 core (1571 MHz core/1853 MHz memory), +12mv voltage, 120% Temps never got above 69C on GPU 1, second card barley hit 60C. My 3DMark run: 19155


