Leaderboard


Popular Content
Showing content with the highest reputation on 03/22/13 in all areas
-
Update: I received my first set of parts (everything else except 2x2TB drives). The parts I ended up are following: MB & CPU: SAPPHIRE TECHNOLOGY PURE White E350 RAM: 2x4GB DDR3 (1600MHz but MB can utilize it as 1066, oh well it was the cheapest set of 8GB) HDD: 2x Toshiba DT01ACA (2TB) CASE: Cooler Master Elite 120 (As Timohour suggested) PSU: One noisy leftover from dead computer - will be replaced soon After receiving the parts It became quite clear that its too shiny to put in some closet so I tried to figure out how to utilize it completely so I went with custom OpenMediaVault setup (with Ubuntu 12.04 because Debian Squeeze dont seem to support VA-api with AMD). Currently I have it up and running pretty nicely, just waiting for the actual HDD's. If this doesnt work well in 'real life scenarion' I might just go back and install FreeNAS to it. All the feedback is appreciated!2 points
-
hey everybody sup, i recently tried to update and flash my bios on my p370em with a moded one and i bricked it totally,i was in need of help and saw that there was no easy guide available to help me recover it. so i decided to put this up in case anybody gets in the same situation. 1)you need a usb stick formatted to fat32. 2)download the stock bios rom from the net(google it) 3)rename the file to P370EM.rom or for the 3D model P37EM3.rom (caps sensitive) and then place in usb port 4)plug in the ac and battery 5)power and press and keep holding fn+B( you should see lights blinking on usb a few times to know its working ) after a bit it will boot up and u r sweet as and ready to boot into windows again all fixed:Banane05::Banane05:1 point
-
I can confirm this, but not totally accurate: there is a little bit of bandwidth limitation. I'm running a GTX 650 Ti in my eGPU at 1.1Opt, and I'm getting about 90% of the GPU's full power. However, when I pull it out and drop it into my desktop, I'm seeing a definite framerate increase in the same games (e.g. Metro 2033, L4D2), despite my desktop only being C2D E8400 and my laptop being i7 2760QM. As well, my GPU monitors (MSI Afterburner) show that in my eGPU my 650 Ti never goes above 80-90% load, whereas on my desktop I've seen it spike to 100%. So while my desktop gets better performance out of the GPU, we're really only talking about something like 5-10 frames more than my laptop, and when you're already running a game at 60-80fps, that's not really that much in the end. I just wanted to toss that out there. FWIW, I have my eGPU housed in a Shuttle XPC case. It's not as small and elegant as a mini-ITX, but I found that it's more convenient due to the size: I can stack my secondary monitor (19") monitor on top of it, and it's now top-aligned with my primary monitor. In my thread here, I have some pictures of my enclosure. As you can see, it's larger than a mini ITX case, but not by too much. And because of the larger case, I have lots of empty room inside that allows me to stow away the cables (PSU power, DVI), making it really easy to just pack up and go.1 point
-
Great great job. I saw a lot of forum for find if Sandy Bridge can work with Kepler ! I have an GT780dxr Msi and I want to make your mod. And I'm a little Afraid, because I just bought an gtx675mx (she cost an eyes :-( ) and now, I'm not sure that it will fit, but I want to try. Congratulations Again for your Job, you're the first (and alone) Kepler/sandybridge man !1 point
-
Sorry I dont have a decent camera (the one on my phone is just awful). [offtopic] Just a quick update: Don't ever go with ATI/AMD if you want to use linux & hw acceleration in flash. Spent whole day trying to make it work without success... popped in old Nvidia G210 and it all works pretty much out of the box. Even the multi channel PCM works great on Nvidia [/offtopic]1 point
-
Yeah, try this, I can't think of much more. Clevo seems to have a very weird implementation of the SPI bus.1 point
-
oh Hi everyone.. I think I found a gem while surfing along internet space! nice content minus the flaming. and where biased opinions are welcome.hehe I was just looking for a hardware "mod" to remove and place a the primary hdd to the ODD "cavity" of my lappy, and I found myself reading stuff here unrelated to my first intent, take that as a compliment.1 point
-
I had this issue when I flashed a custom vbios to my 460m on an Asus. Try -nvflash -4 -5 -6 newrom.rom1 point
-
dota 2 runs at 60-100fps with the original lenovo 307.64 drivers but with terrible flickering chat and other graphical bugs. I have tried the newers drivers 314.14 and the fps drops to 30-50fps on the same exact settings. Sli is enabled and the gpu usage is about half for each gpu on msi afterburner. The graphical bugs are gone, although sometimes autoattacks and some spell homing animations do not render at all and are completely not visible. I also tried 314.21 (tomb raider) drivers and it's the same as 314.14.1 point
-
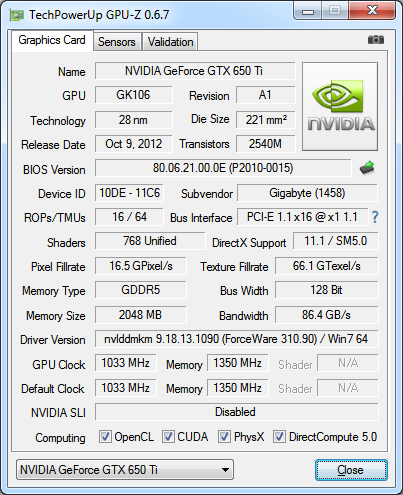
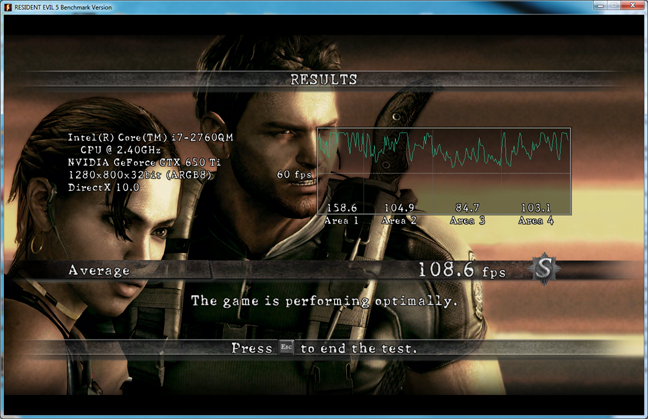
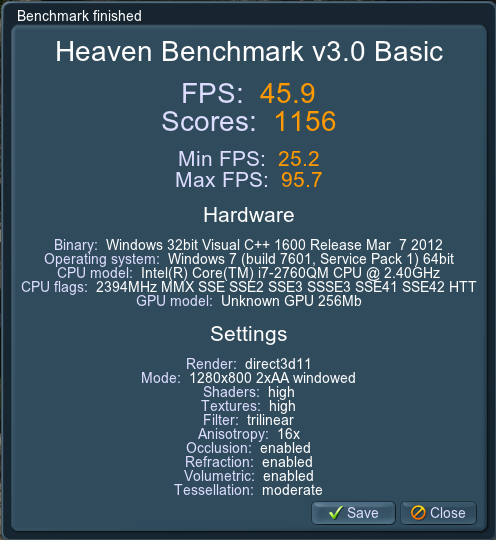
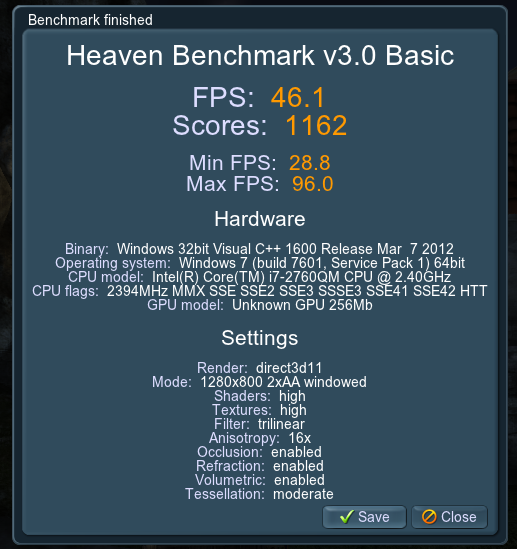
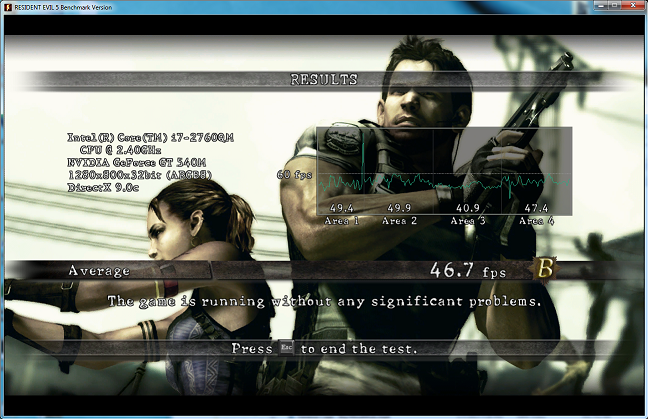
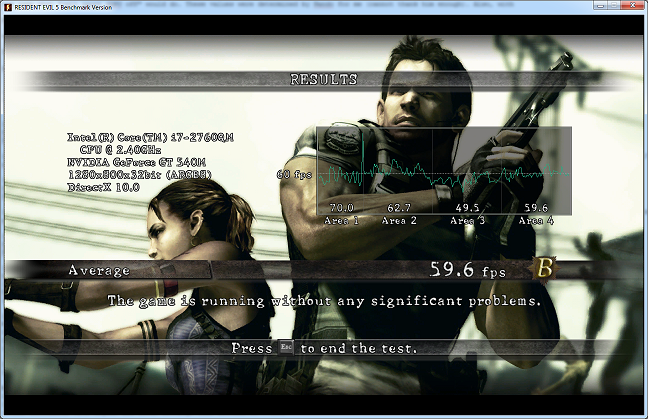
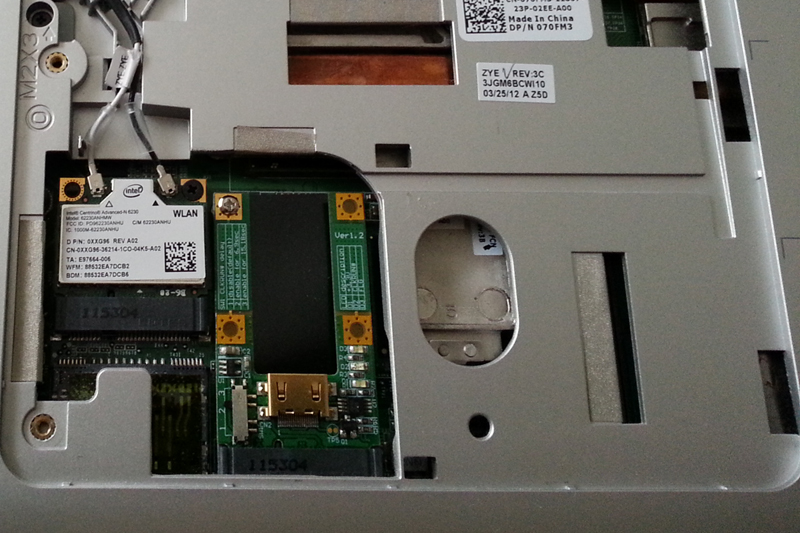
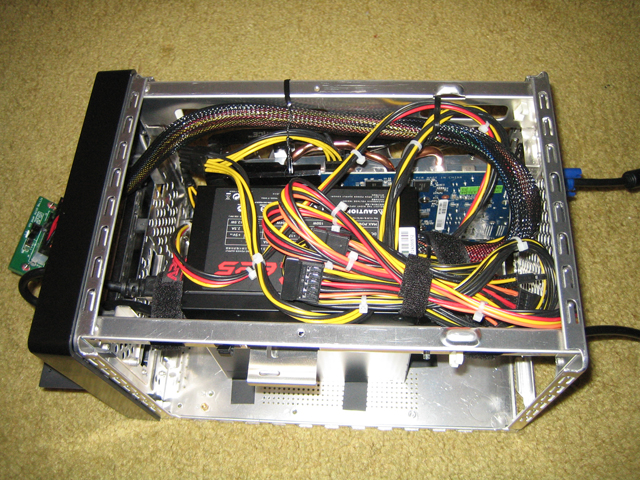
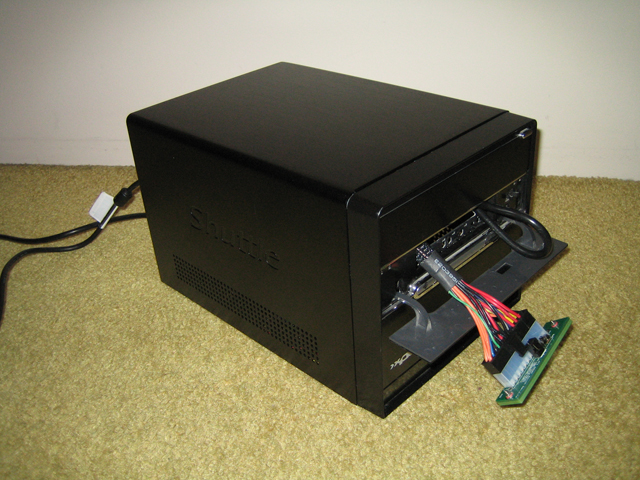
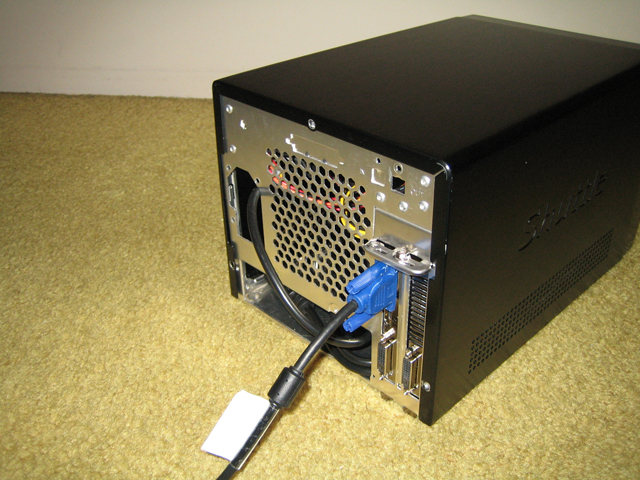
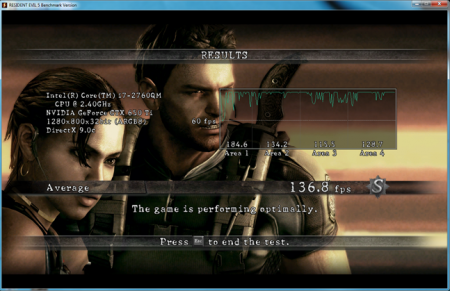
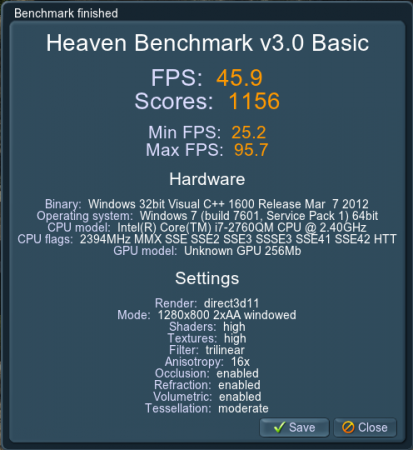
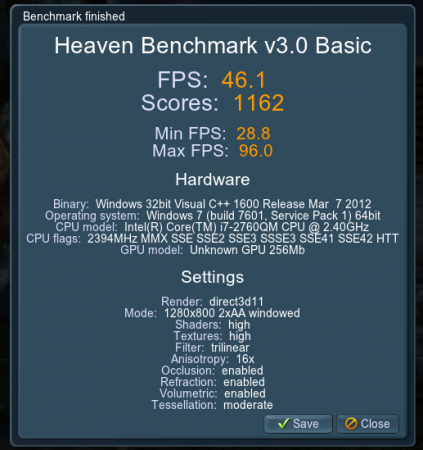
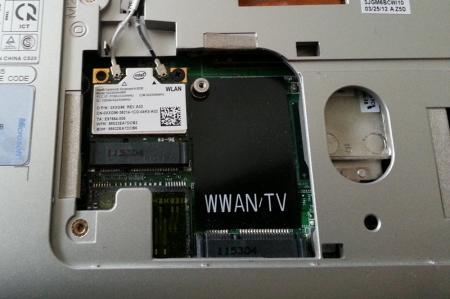
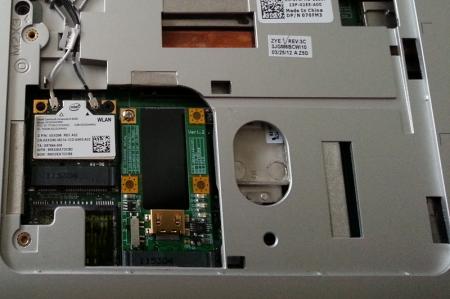
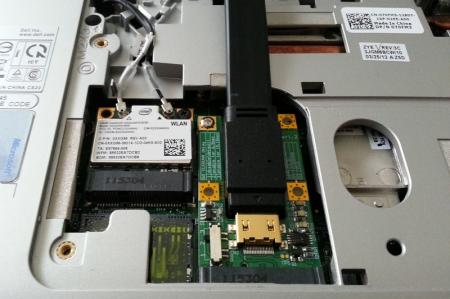
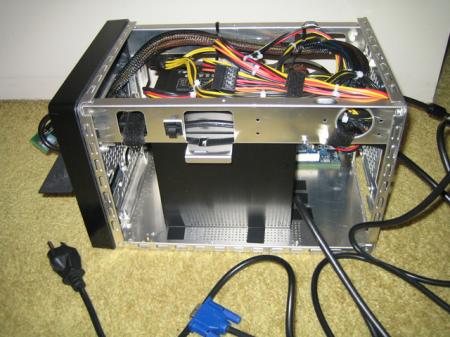
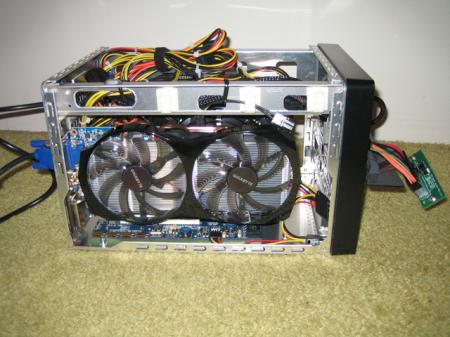
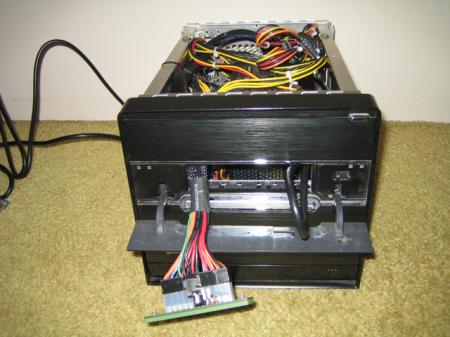
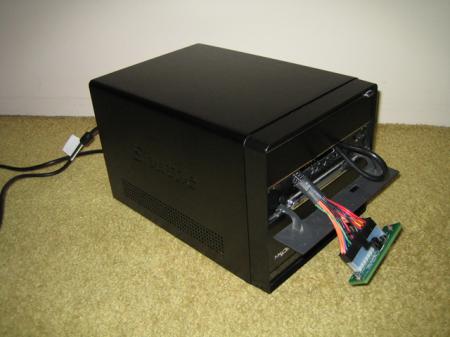
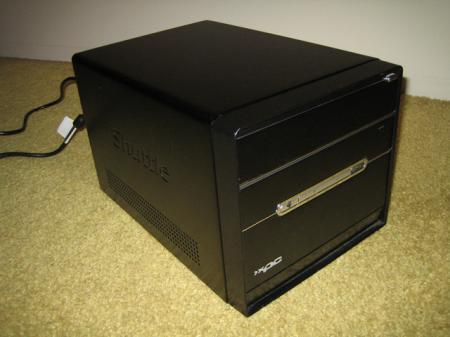
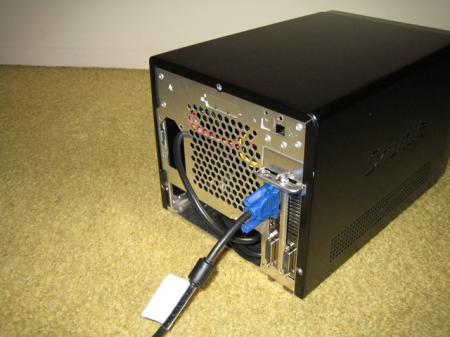
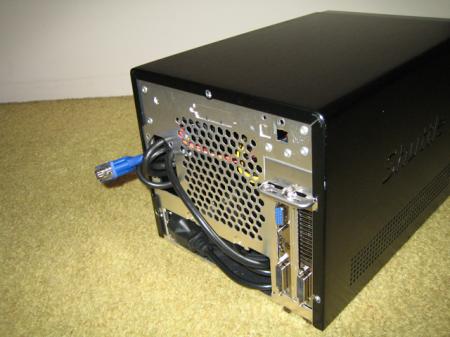
In this post: Troubleshooting my Setup 1.x problems Benchmarks Pictures Troubleshooting My Setup 1.x startup.bat I had a *lot* of trouble with Setup 1.x. The first problem to arise was the "dGPU[off]" command stopped working. While the script would run, it would immediately freeze when Setup 1.x attempted to return to the main menu. This happened consistently. In order to resolve this, Nando helped me cherry pick certain troubleshooting steps. Normally a startup.bat script would look something similar to call iport dGPU off call iport g1 1 call vidwait 60 10de:11c6 call vidinit -d 10de:11c6 call pci call chainload mbr However, as disabling my dGPU was causing trouble, we needed to work around it. So with Nando's help, here is my new startup.bat: Note that "call iport dGPU off" has been replaced by the "setpci -s ..." and "call iportbus force". These two lines effectively do the same what "call iport dGPU off" would do. These values were determined by Nando for me (cannot thank him enough). Also, with Nando's assistance, I used another version of Setup 1.x to help troubleshooting my problems. I am still uncertain if the different versions of Setup 1.x have helped my situation, but both versions I've used seem to work now. There were some other changes made to my DIYEGPUIMG:\core\pci.bat script as well, to test and try alternatives to the "call iport dGPU off" problem, but the updated startup.bat is essentially what fixed my issue. Benchmarks (Below are all results running on 1.1Opt) GPU-Z 3DMark06 3DMark06 DX9 (Highest of 5): 19935 (click link for 3DMark06 score) 3DMark06 DX9 (Lowest of 5): 19600 (click link for 3DMark06 score) versus 3DMark06 DX9 on the dGPU Nvidia GT 540M: 8430 (avg of 1st run and 2nd run). 3DMark11 3DMark11 DX9 (Highest of 3): P4204 (click link for 3DMark11 score) 3DMark11 DX9 (Lowest of 3): P4175 (click link for 3DMark11 score) versus 3DMark11 DX9 on the dGPU Nvidia GT 540M: P1149 (avg of 1st run and 2nd run) 3DMark Vantage 3DMark Vantage DX10 (Highest of 3): P13925 (click link for 3DMark Vantage score) 3DMark Vantage DX10 (Lowest of 3): P13895 (click link for 3DMark Vantage score) Unigine Heaven Unigine Heaven DX11 (Highest of 3): 1162 Unigine Heaven DX11 (Lowest of 3): 1156 Resident Evil 5 Benchmark Resident Evil 5 DX 9.0, Variable (1280x800, Shadow = High, Texture = High, Overall quality = High, AA x2, Motion blur On): 136.8 (other benchmarks with higher and lower settings fell between 90 - 150) versus only 46.7 on the dGPU Nvidia GT 540M: Resident Evil 5 DX 10, Variable (1280x800, Shadow = High, Texture = High, Overall quality = High, AA x2, Motion blur On): 108.6 (other benchmarks with higher and lower settings fell between 80 - 110) versus only 59.6 on the dGPU Nvidia GT 540M: Pictures PM3N mini PCI-e card installed, and with mHDMI cable eGPU enclosure - Shuttle XPC case - used VGA cable for demonstration purposes only Internal PSU side view: Notice the empty space around the PSU. Lots of room for arranging cables, etc (but I'm too lazy to get into that) Internal GPU side view: just the GPU and the 4-pin floppy connector powering the PE4H board. Note the placement of the mHDMI power in the far bottom left corner: this poses a problem with the XPC's enclosure sleeve. I will have to cut out part of the sleeve to make a hole large enough to safely allow the mHDMI cable to be plugged in at all times. Assuming I get a PE4L, this hole should accommodate the board as well Internal top view: bit of a mess, but it's mostly just extra cable sitting on top of the PSU. The PSU power cable has been fed through a couple of cable cable cinches along the inside of the top frame (closest to camera, out of view) Front view: the SWEX board, and a bit of the power cable poking out (to reduce stress on the PSU's input port) Front panel: that's the slot where the 3.5-inch floppy drive would normally go. It's perfectly sized to allow easy movement of the SWEX board and PSU 24-pin cable, and just large enough that I can tuck in/pull out the SWEX board for quick packing. For storage, I can unplug the power cable, and place it as well as the SWEX board inside the case. Makes it extremely easy to pack up and move around, or just pack away altogether Rear view. Note that I can very easily tuck away the power cable into the larger horizontal hole at the bottom. Makes it extremely easy to pack up. (Power cable exits the enclosure through the 1.5x3 inch hole on the left of the back panel) When cinched up, the video cable (DVI or VGA, but not both) can be tucked away into the enclosure, through the hole that the power cable comes out of. Plenty of room inside, beside the PSU.


 1 point