Search the Community
Showing results for tags 'p370sm'.
-
Hi, Recently came into the possession of a P370SM and was wondering if anyone can confirm whether the eurocom 780w adapter works with this model/has anyone tried it? I haven't read anything to the contrary and i believe the connector is the same as current models. Thanks in advance.
-
hey there, first of all, sorry for my bad english i have a problem with one of my gpu´s in my p370sm. i had installed the relive drivers from amd, things went fine, after some gaming i had windows updates installed. suddenly i ve got a blackscreen on boot and no POST. i bought a new vbios with the stock bios programmed, the card did a post, but i have 2 problems: in the bios the gpu is shown as 4x pcie link, ive tried both slots, and both of them shows the same pcie 4x link speed. on windows its the same issue, pcie 4x link speed. i have artifacts in 3dmark, and doom. guild wars 2 runs normally. ive found some pictures on internet showing those artifacts like i ve got and explain them as "bus artifacts". how do i fix it? or must i replace the hole mxm card?
-
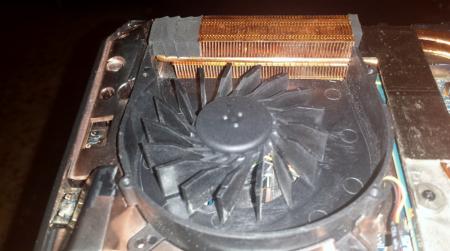
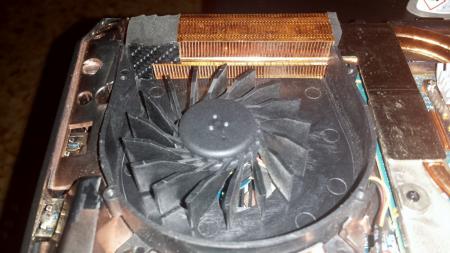
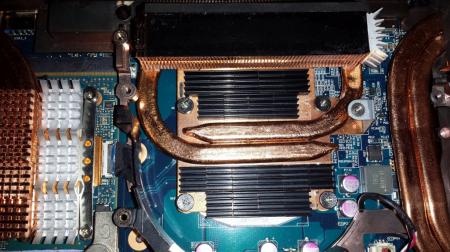
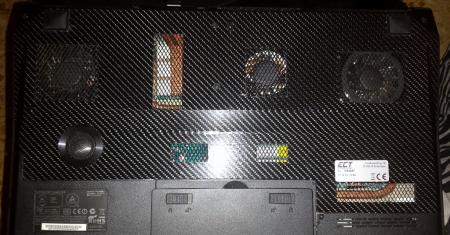
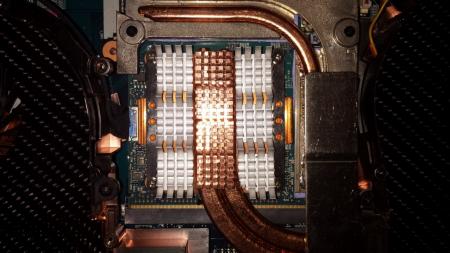
I was removing the cooling system for cleaning and noticed a hole between the fan and the radiator on the GPU # 1 that disperses the air flow. It can solve easily by applying a trimming in PVC, or any other material, closing the hole, avoiding the dispersion of air. (Gain -4 ° C) Before After I also applied the heat sink directly on the block of the GPU and CPU. CPU (gain -2°C) GPU (gain -3°C) I also modified the backcover, by increasing the air flow (Gain -2 ° C) Have Fun!! :not_ripe:
-
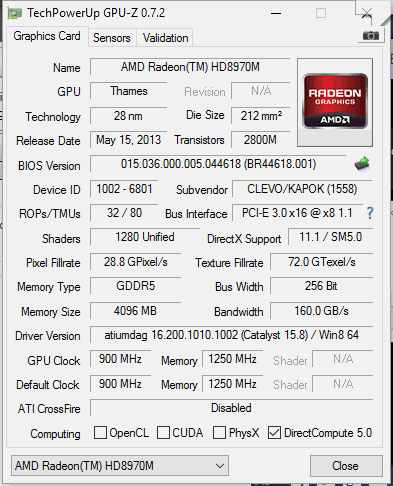
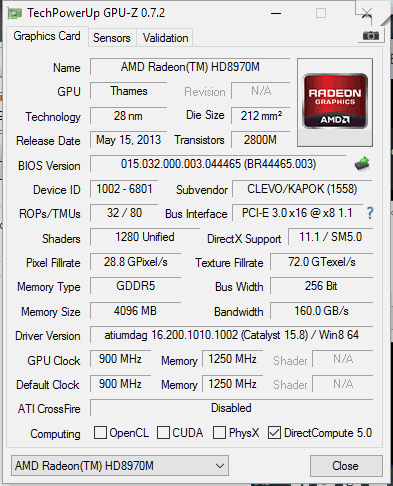
Hello, I come to you because it is very rare to find topic concerning crossfire notebook. I have bought 2 years ago a p370sm with 2 8970m 4GB paired in crossfire. 1 year ago , one of the two graphic card stopped to work. I've tried to swap the graphic card from their slot and I concluded that one of the two gpu was dead. I stayed for a long time with only one GPU on the primary slot, and 2 weeks ago , i ordered a copy of my card on Aliexpress: http://www.aliexpress.com/item/HD8970M-HD-8970M-R9-290X-4GB-GDDR5-MXM-for-CLEVO-P570WM-P370EM-P37xSM-P37xSMA-P150EM-P150SM/1978000913.html The card was recognized by my laptop and It showed two cards 8970m in the Device Manager. On CCC , the two cards were recognized but the second was "(desactivated"). I tried to reinstall catalyst but the problem is still here , i can't enable crossfire on the Radeon menu. i've made a gpu-z test and i've seen that the version of the two GPU were not the same. Moreover the bus version is different between the two cards. The responsible can possibly be the wire between the gpus ,it stayed in a drawer for 1 year. I've heard that @Prema is very qualified in Clevo gpus. Thank you for your future response. Have a good day, (All apologies for my english , I'm french)
-
Greetings from Germany. My name is Thomas and at first I want to thank Prema for his great work. Using your BIOS' is so simple that I wonder how I (working in IT btw) managed to brick my P370SM. Once upon a time it all began by using Prema BIOS v1 @P370SM. A GTX 980M was incoming so I updated to V2. There were two problems since using V1: The EC2 update progress did not start AND the notebook did not went of after shutdown (i had to press the power button every time). At this point I did not yet know that I have a so called development board without EC2. In the comment section I read about similar problems and Prema posted an alternative version. I updated BIOS again and after EC2 update still not working I turned the device off (like always) and also left the device at least a minute without power cord. I guess that at this point i killed my lovely machine. So i pressed the power button but nothing great happended. The power LED and the keyboard backlight is on. The BD drive seems to look for a disk. The screen stays black and the CPU and GPU1 fan start after a minute (GPU2 fan is disconnected). By pressing FN+1 the fans move at full speed. Pressing num lock or caps lock do not activate the corresponding LEDs. The following steps I tried to bring the machine back to live. #1) Downgrading to GTX 680M (yes, I used GTX 680M SLI in P370SM, not 780M an not P370EM). #2) Disconnecting power cord, battery and CMOS battery for 5 minutes, connecting CMOS battery, battery and power cord and then starting again #3) Doing #2 but waiting for one night instead of only 5 minutes #4) Doing #2 and #3 but starting with disconnected CMOS battery #5) Doing #2, #3 and #4 with a) mSATA SSD, two HDDs and 4 RAM stick no mSATA SSD, no HDD an only one RAM stick c) no mSATA SSD, no HDD an no RAM stick #6) Trying to recovery BIOS first with stock BIOS from premamod.com and later with Prema BIOS V2 - both renamed to P370SM.rom a) on 16GB USB 2.0 flash drive and 64GB USB 3.0 flash drive connected to USB 2.0 eSATA combo port and all the USB 3.0 ports, first formatted with FAT32 an only ROM-file, then as bootable FreeDOS FAT32 and ROM-file added. Each time after doint steps #3 and #5 burned at a DVD and inserted into the BD drive. Each time after doing steps #3, #5 I pressed FN+B and holding it down while pressing the power button and still holding down FN+B for additional 20 seconds. I also tried FN+R, Win+B and Win+R. The USB 2.0 flash drive has a red LED as read/write indicator but the LED does not flash at any recovery attempt So I do not know what additional things I can do. I finally have one question: Did I brick my BIOS and/or EC? If yes: I guess I need a new mainboard because i saw that the BIOS chip is soldered in literally dozends of junctions so that installing a new BIOS chip will be a quite difficult task. Thanks in advance for your suggestions.
- 10 replies
-
- bricked bios
- p370sm
-
(and 1 more)
Tagged with:
-
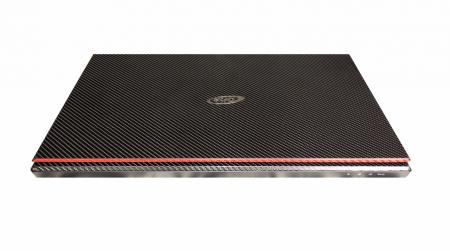
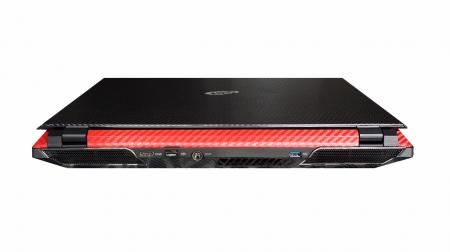
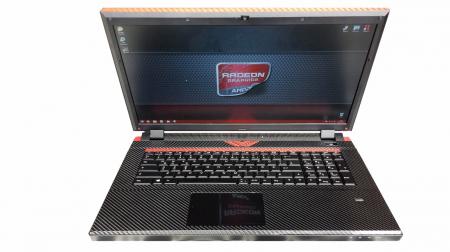
Hi guys! I just wanted to share my personal experience with the adhesive film. The equipment required is very simple: - Adhesive film (bought on ebay) - Hair dryer - Cutter - Felt wrapping squeege (bought on ebay) - So much patience (this unfortunately can not be bought anywhere ) The procedure is really simple and intuitive, the only difficulty is it does not create bubbles under the film, and be careful to trim the edges and corners. The end result is... Byee


