Search the Community
Showing results for tags 'gtx 1060'.
-
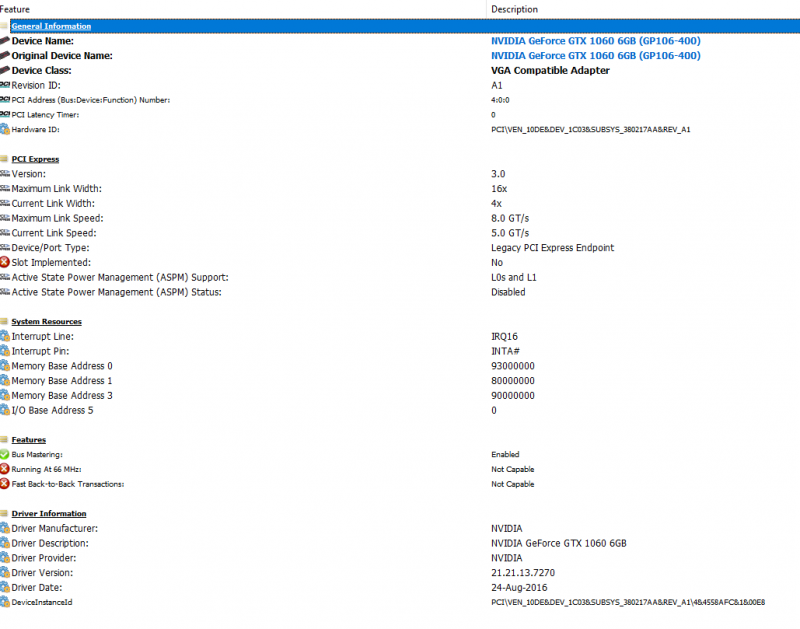
Hello, Have a Lenovo Y700. Just installed the PE4C-M4060A v4.1 for M.2 "M" style key (which replaced my NVMe SSD) with Gigabyte GTX 1060 6GB card. While it is working somewhat, I keep running into BSOD issues when trying the SteamVR test. Here's what I've done so far: - In BIOS, switch to "Integrated Graphics" only to bypass internal NVIDIA dGPU - Clean install of 372.70 drivers (latest drivers always caused Error 43 in Device Manager; read another thread suggesting to try the older version) - The above works fine, and I have HDMI output from the card - About two seconds into the SteamVR Test, the card makes an audible clicking sound and then I receive BSOD The PE4C has two delay switches (what they actually govern, I have no clue and can't find any good info on this). Out of the nine possible combinations, only three combinations actually allow the card to be recognized and used in Windows. Two of the combinations cause the system to completely freeze and become unresponsive during SteamVR, and the eGPU fans turn on full blast. The third combination, which I'm using, causes the BSOD with "VIDEO_SCHEDULER_INTERNAL_ERROR." The eGPU fans don't turn on for this one. Attached is the HWiNFO readout for the PCIe bus that's in use with the PE4C. Not sure what my next steps should be! Any ideas? I tried the DSDT lane increase route, but couldn't get my DSDT.dsl file to compile (even without edit), as there were 13 unresolved errors. Thanks for any suggestions!
-
NVIDIA announced it's newest Pascal based GTX 1060 today that is expected to go on sale July 19th for $250 and $300 for the Founder's Edition. The GTX 1060 will feature 1280 CUDA cores, 6 GB DDR5 memory with a boost clock of 1.7 GHz which NVIDIA claims can easily overclock to 2 GHz. In addition, NVIDIA claims the 1060 is on average 15% faster and over 75% more power efficient than the closest competitive product at stock speeds which would be the AMD RX 480. The following is their PR release: Media: View full article
-
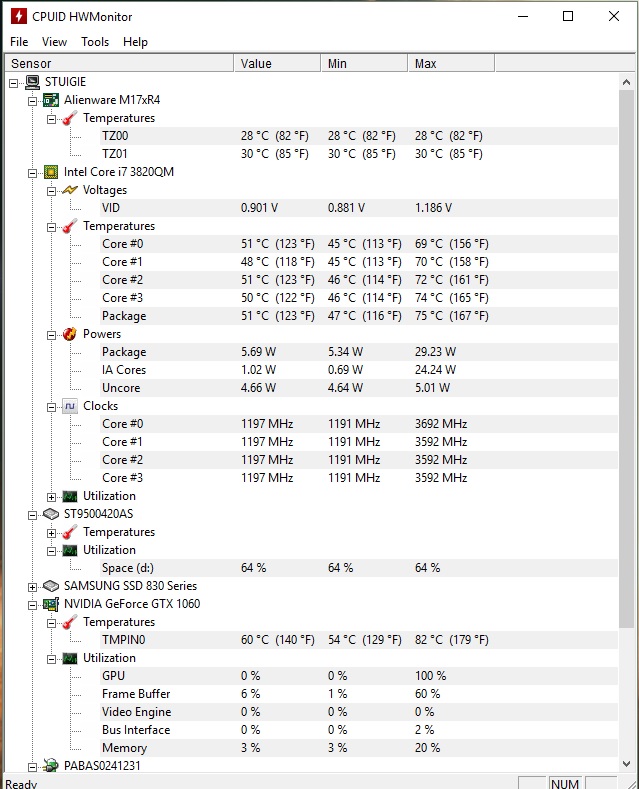
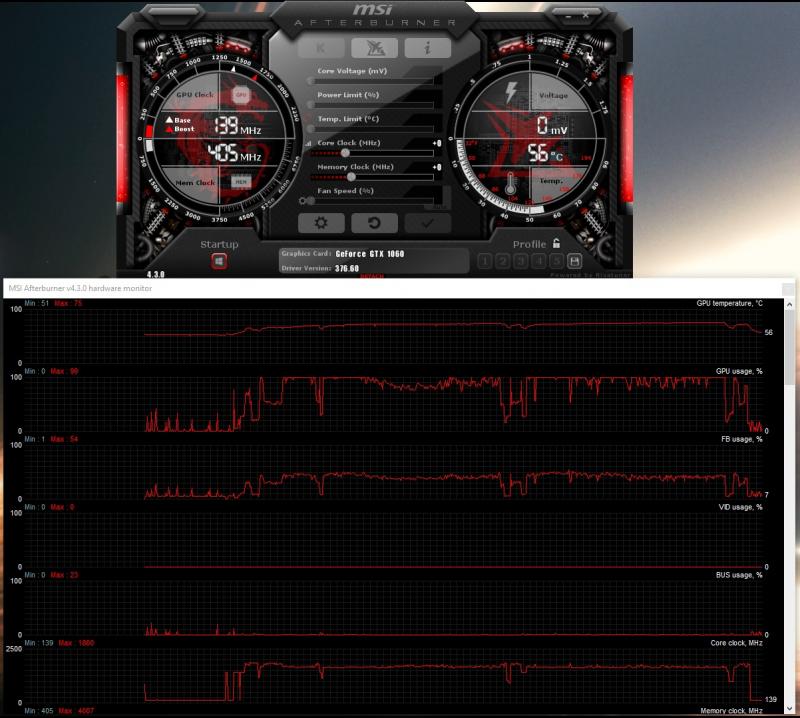
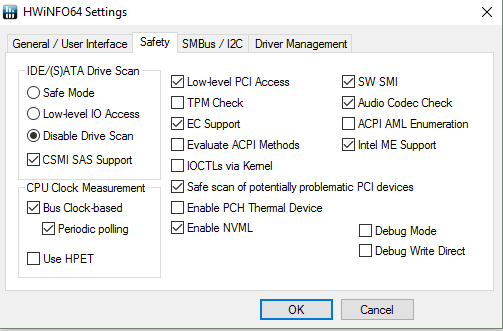
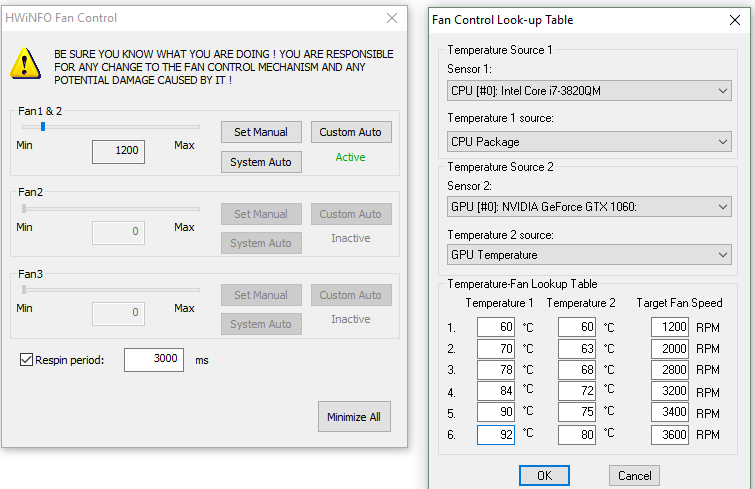
Hi all, This is just to report the success of installing a gtx 1060 on my M17X R4. Mine is the 3D version and as far as I'm aware, you need a screen in eDP mode (120Hz 3D model) for it to work (confirmed) on top of UEFI support to boot up. See here for the gtx 980m install which is the same for this card, but the 980m works on 2D models too: https://www.techinferno.com/index.php?/forums/topic/8103-installed-980m-in-m17x-r4120hz-3d/ HDMI in and out works but it does raise the question if the gtx 1060 will work on the 2D model via HDMI out. It should do as it's the eDP connector for the laptop screen is the issue here. Also 3D mode will no longer work (like anyone cares about 3D anymore ). The cards above the 8xxm series have no 3D support. Prerequisites A 120Hz screen is needed to pascal GPUS as only the 120hz connector in the laptop supports eDP mode. Keep your current card, in case you try modding your Bios or something like that, if settings become reset, UEFI is usually off by default. That means in this situation the GTX 1060 won't work without changing the Bios settings. Install your old card as it supports non-UEFI and UEFI modes. UEFI mode: This is must for the reason above. Windows needs to be installed on a GPT partition to use this feature. As this laptop origianlly came with windows 7, GPT and UEFI originally was not used. However Bios updates and windows 8+ could use it so UEFI was enabled. Install a fresh copy of windows on a GPT partition. The windows installation menu can help you with that. https://technet.microsoft.com/en-gb/library/dn336946.aspx Bios settings: In the boot options, set to UEFI mode, disable fastboot and legacy options. This ensures that your old card and the Pascal card both work when you swap them out. Installation It seems the laptop just about supports it. One Major thing to be aware of is the installation. For at least the MSI model of the GTX 1060, you need to use very thin heat pads as the core only just makes contact with the heat sink otherwise. I have found that on the core side are some new resistor blocks (Labelled R.22) that weren't in my old GTX 680m and thankfully they are the exact height of the core, so it isn't impossible to mount the heat sink. It's a very fine mark but provided you use thin pads (stock GTX 6xxm cards have nice thin ones) and a tightly screwed X bracket, you can get good cooling performance. The top R.22 blocks also do not need thermal pads (may benefit from thermal paste though) as you need as little height as possible. I'm aware of two types of heatsink used in the m17x r4. Both will work but there is a protrusion (in red) that can prevent proper contact with the core. If on a copper cornered heatsink (second image), you may not have to file this bit down. If you seriously have no tools to do this, you can very carefully bend this section VERY slightly to provide a little more clearance. To ensure good contact with other components in this case, use thicker pads or more paste on this section. (Top) Taken by Zoldago (Bottom) Taken by Decool Drivers Drivers are fine, just go to laptopvideo2go and get the latest drivers with the modded .inf files. Remember to use DDU before installing . Simple guide for drivers:) - uninstall any graphics drivers, including ones automatically downloaded by windows (disable windows update if need be). Using DDU ensure every trace is wiped clean to avoid any problems - Disable driver signature enforcement (Shift + restart button in the start menu -> troubleshoot -> Advanced options -> Startup settings) OR f8 at boot screen (windows 7) - Run official installer, quit once the driver files are extracted. - Place the modded .inf file into "display.driver" of the extracted files - run "setup.exe" from extracted folder. Done! Bios + screen Generally, a modded bios is not needed as all necessary options are already available. Some scenarios may need a display type change or the iGPU cannot be disabled the usual way. To convert from a 60hz to a 120hz screen, you need to ensure that when booting up on the 60hz screen to disable the iGPU (FN+ F7) (Check BIOS settings to ensure it stays off). Once in dGpu only mode, you can go ahead and install the 120hz screen. 120hz screens do not support optimus as the iGPU is incompatible. Performance wise it's pretty close to a desktop 1060, hitting a score of ~3600 in time spy and ~12,000 graphics score in Firestrike (desktop scored ~14,000). Temps settle at 75C as the card is limited to ~80W (so very limited OC for now ). First Screenshot below used the stock paste that came with the card. Highly recommend a different paste such as mx-4 paste which I used (second screenshot). I doubt it will work on a M17X r3 due to the lack of UEFI support. Fan control and monitoring I use MSI afterburner for monitoring temps. You can also use HWinfo to control the fans, seeing as the 1060 is an 80W GPU compared to the 100W that the laptop is capable of cooling. If you're interested in lowering the fan speed for the sake of noise, use HWinfo. I'm aware that a system lock up can occur when using the fan control feature. However, so far I may have a solution. - Remove the main battery. A fix for many users and easy to implement - Alternatively use the settings provided in my screenshot. I know that the ACPI features are likely to be the main cause of lockups, but to be sure copy my settings and only monitor the sensors needed for fan control (e.g. CPU package temp and GPU temp). the author of this program is aware that the battery monitoring is the cause for lock ups (which uses the ACPI in windows) Remember that you can only control both fans at the same time! Be sure to stress your CPU with a program prime95 to ensure your CPU does not overheat with your new fan settings. Also use both fan tables, one for the CPU and the other for the GPU so the fans spin up under loads from either. A final note. I would set a re-spin period on the fan control menu to reduce fan pulse. I found 2-3 seconds ideal. In my machine at least, the BIOS sets the fan speeds higher than needed before settling down to their target speed. E.g. at 4000 rpm, the fans spin up to 4600 rpm and in around 10 seconds slow down to 4000. Below is my preferences, although you may not want to run components quite as hot. Under max load, the CPU hits 90c and GPU 78c. Good luck and enjoy!
-
I am using an EGPU on my Lenovo Y510p (http://imgur.com/HN51mJj). I have hooked up the GPU and booted up windows and I got the error 43 message (http://imgur.com/QfhThfh). I a using a Corsair CX600PSU and the V8.0 EXP GDC Beast EGPU enclosure (http://www.banggood.com/Mini-PCI-E-Version-V8_0-EXP-GDC-Beast-Laptop-External-Independent-Video-Card-Dock-p-1011222.html).
-
I have a problem with my egpu. When I am playing a game during 40 minutes i get a black screen during 1 or 2 seconds and after that I see my desktop and the game that I was playing has been closed. laptop details: i5 3230M 2,6 Ghz gigabyte gtx 1060 3gb exp gdc 8.4d 4gb ram My power suply is Enermax NAXN 500 W, ATX, 220 V.
-
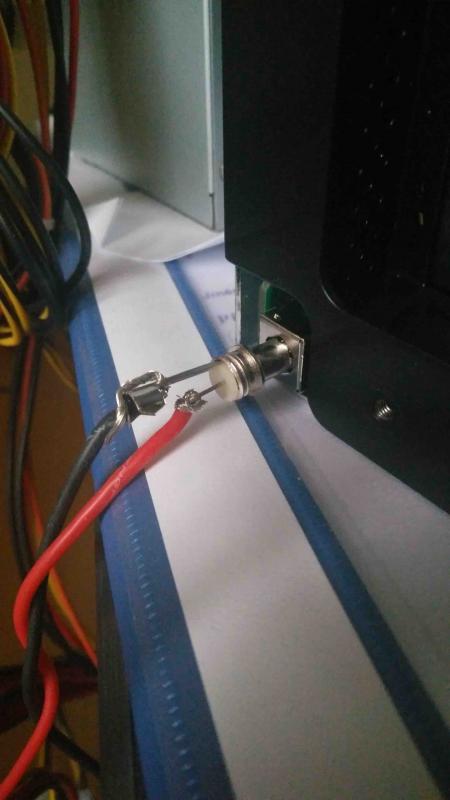
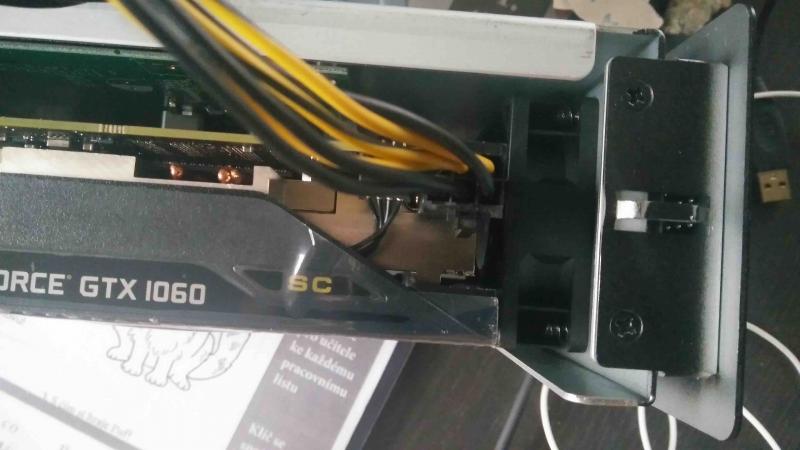
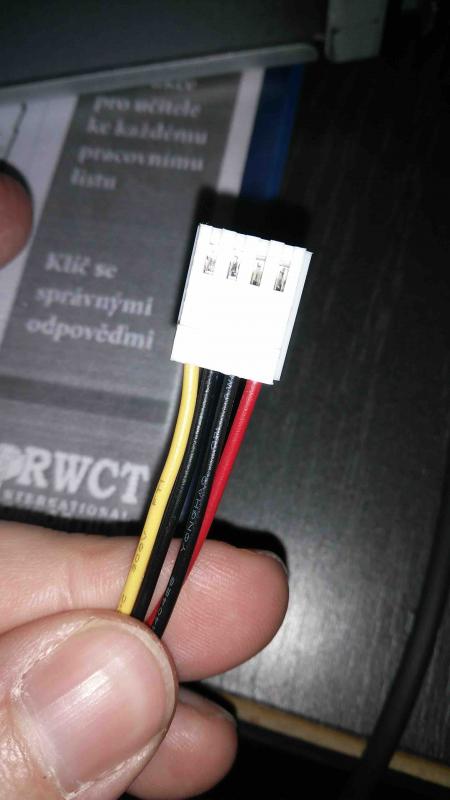
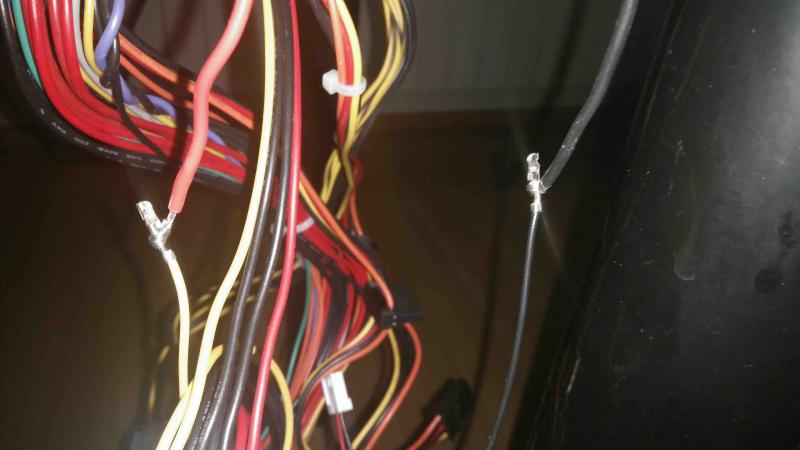
Hi, as of Christmas time i tried my setup 550W PC PSU but will switch for this one once finish testing (220W Switching PSU) Barrel plug EVGA GTX 1060 6GB SC card (fits without bending the box), using 3GB OC version as well with no problems 2015 13" Macbook Pro (model MacBookPro12,1) Akitio Thunder 2 box So far using the internal screen (projector Epson EH-TW5100 for testing purposes) Ext. monitor Dell 27" S2716DG Samsung T1 500GB Win10 (v.1511) Installed WIN 10 to USB drive first using https://bleeptobleep.blogspot.cz/2013/02/mac-install-windows-7-or-8-on-external.html Had a problem to update to newest version of WIN10 over the windows update(some uEFI hw issues), but it went smoothly once i run this WIN 10 disk as a virtual over VirtualBoxVM http://www.sysprobs.com/mac-os-x-host-boot-virtual-machine-from-usb-in-virtualbox For powering the box i just removed one connector from PSU(pics bellow) and used RED-yellow/Black cable without soldering to connect the barrel plug For the GPU i used the 6pin connector from PSU To install: - Power on the Box - Boot to WIN 10 - Hot plug the Thundebolt cable and check the Device manager for new card something like "Basic Display Adapter" - Then install the Geforce driver (in my case the version 376.33) as administrator. Even 378.49 works fine - Then follow the instruction and reboot (don't unplug the cables). Rebooting without ext.monitor plugged in. - It should boot again in WIN10 (select win 10 during the boot). It requires a bit patience here during spinning wheel. I made a ham&eggs meanwhile (approx. 10-15minutes). I don't have to select the system after chime because my system starts automaticly when USB with Win10 is plugged in EGPU is working until the next reboot of Win10 in that case i need to reinstall the drivers (but it's worth those 8 minutes ) - Remove the old drivers by DDU tool (Display driver uninstaller) http://www.guru3d.com/files-details/display-driver-uninstaller-download.html - Install the driver again as described above and it should work again Remarks: I was running fine even on build 1607 of Win10 but after some microsoft update it stopped working. So i reverted back to build 1511 again (see below what i have installed from Microsoft) I found out that i don't really need to reinstall the drivers again. Just doing this: - turn off the Mac, - plug in the th2 - then turn the Mac on and just after chime turn on the egpu (It will not boot with the win for first time, but the win it self boots) - Then i just restart the win and not touching the th2 cable. And that's it. eGPU is up and running. (there is spinning wheel but all it takes is 2-3minutes) PPS: Don't let the windows to go to screensaver or powersaver mode. It will disconnect the eGPU Work in progress Its a snug fit This cable i used to power box (yellow and black wire) Work in progress
-
Hardware: Late 2012 13" Retina Macbook Pro (i7, 8GB RAM) Akitio Thunder2 enclosure ZOTAC GTX 1060 6GB mini Rocksoul Xbox One power supply MyDigitalSSD 512GB USB 3.0 USAP SSD I recently acquired a Akitio along with the GTX 1060. I am currently running this from a Xbox One power supply that I hacked together to be compatible with a barrel plug and 6 pin for the GPU. The adapter is only like $30 unlike the DA-2's which to be older and may not be as reliable. It powers it up and is working as expected! I will be posting a general guide on using the Xbox One PSU as a viable replacement instead of the DA-2 since this is lighter and more compact. I cannot comment on how this setup working in OSX as I am only currently running Windows and have no desire to for OSX. I have a blog article here on installing Windows to an SSD for OSX. I will be posting a better write up of the eGPU on there as well. And pictures to follow: http://assets.davidjameshowell.com/davidjameshowell.com/mac-egpu/setup-and-verify.jpg https://assets.davidjameshowell.com/davidjameshowell.com/mac-egpu/egpu-unit-setup-new-power-supply.jpg https://assets.davidjameshowell.com/davidjameshowell.com/mac-egpu/egpu-unit-setup-new-power-supply-uplcose.jpg
- 7 replies
-
- 1
-

-
- macbook pro
- gtx 1060
-
(and 4 more)
Tagged with:
-
Hi there, So I'm having a little issue with my egpu setup and if anyone could give me some hinters that would be great. Basically I've done this before with this same laptop on a 980ti which worked perfectly and now I have a 1060. Only problem is, I've installed everything correctly, theres no error messages in device manager, says this device is working correctly BUT when I go to play games, it decides to run the dgpu instead. Now I've run some benchmarks and the 1060 is being used, getting 150fps. I do have to disable the AMD though. So, my question to the pros is, what happens next? I've tried using the latest drivers from nvidia, tried uninstalling everything with Display Drive Uninstaller and trying again, tried using a safe driver version (372.70) because I read the latest one was buggy.. Tried uninstalling and disabling microsoft basica display adapter only to get the same results.. I also get an error when trying to access nvidia control panel "nvidia display settings are not available, you are not currently using a display attached to an nvidia gpu" but it shows in device manager as "working properly" It also doesn't show in dxdiag as well. only shows the AMD. I'm not using an external display if that helps.. any help would be appreciated!! EDIT: I have been getting code 12 errors with my current driver 372.70 Does this mean I need to do a DSDT override? I'd like to not have to deal with coding etc but if necessary then I can try. I have tried to update to the latest driver version but that hasn't really been helping either. Anyway thanks
-
Hello guys! So my setup works finally, but with on major flaw: whenever I want to get into "gaming mode" - meaning using the eGPU, my only working solution and method is 100% working, however takes ages - Without egpu, boot to windows, uninstall all nVidia drivers Reboot to macOS, turn on egpu, wait around 10 sec, plug it in, run the automate-egpu.sh script, then again in -a mode turn off mac, shutdown egpu, wait until there's no green light, unplug. plug the thunderbolt cable back in, boot to windows without egpu connected, open device manager, turn on egpu, after 10 sec hotplug, see it gets recognized, re-install drivers. turn off mac, shutdown egpu, wait until there's no green light, unplug. plug in the egpu, boot to boot selection, after the cursor is move-able, power on the egpu, boot to windows (if it would freeze w/ black screen or infinite spinning wheel, force shutdown and do step 6. again) after getting to Windows, voila, it's alive. Additional 8th step - whenever I turn off my laptop, I have to re-do everything. +1 : I always use the closest thunderbolt port to the magsafe port. So the question is, did anyone found out a way of booting 100% succesfully without having to reinstall the geforce driver all the time? I mean since my macbook is the most problematic one, even I have a gtx 10x0 series, I should be happy of this method working at least, I'd still love to fasten up the process. ps.: I'm thinking about a solution, what would somehow reset all the caches/temp files of the driver itself when shutting down everything, if there would be a way for doing that, I would try it right away, and post an update. Would it help at all, or should I just keep reinstalling everytime? Thanks, Samu
- 1 reply
-
- egpu
- macbook pro
-
(and 8 more)
Tagged with:
-
The goal here was to keep my workhorse laptop functional for school, and in the off chance I get free time, require only 5 minutes of setup for high end gaming and virtual reality. Though there were many hurdles to overcome due to issues caused by the manufacturer, I finally have a VR-Ready working solution. Thanks to Nando for DIY eGPU Setup 1.30 and his timely response to my ichip error. Hardware & Software Tools Lenovo Thinkpad Edge E550 (i7) Processor: Intel i7 5500U iGPU: Intel HD Graphics 5500 dGPU: AMD Radeon R7 M265 eGPU: ZOTAC GeForce GTX 1060 AMP! Edition Adapter: EXP GDC Beast V8.0 (NGFF M.2) PSU: EVGA 400w DIY eGPU Setup 1.30 Initial Setup: Begin by downloading the drivers for the GTX 1060, as you'll have to remove the WiFi card later and won't have access to internet. Then attach the GTX 1060 to the PCI port of the GDC Beast. Then attach the power supply connectors (6 pin connector to the top of the 1060, 20 pin and 4 pin connectors to the included connectors from the GDC Beast). Once this is completed, plug in the power supply and shut down the PC. Remove the WiFi card and attach the NGFF M.2 connector in its place. Plug the HDMI end of the connector into the GDC Beast and power on the PC. The graphics card should be recognized in the device manager as a basic display adapter and you should be able to install the drivers. After the drivers install you may have a working setup (as I did), however after rebooting you'll be confronted with a black screen and a code 12 error in device manager. This means that there are not enough resources to accommodate the device. A DSDT Override is needed to compensate. DSDT Override: Nando has a great guide for this process here, but it is important to note that you'll want the Windows 10 Drivers Kit instead of the link provided on that page. Using the Windows 8 Drivers Kit will result in compilation errors when compiling the asl file. Aside from that, follow the instructions and set TESTSIGNING on. Once you reboot, you should notice a large memory address in your device manager in resources-by-type. You now have a 36 bit PCI space that will accommodate the GTX 1060. After rebooting, you'll notice that you still get code 12 error. This is because of improper PCI allocation. Therefore, you'll need to hard allocate the eGPU into the 36 bit PCI space which can be done with Nando's DIY eGPU Setup 1.30. Issues Before PCI Compaction: However, before compaction there are several issues that need to be addressed. One well known issue is that Lenovo BIOS whitelists their WiFi cards, causing the BIOS to not acknowledge other devices attached in their place. This is usually overcome by hotswapping the WiFi card and the eGPU after booting into Setup 1.30, but there are issue to tackle before this. After mounting Setup 1.30, you may have this error when attempting to boot into menu-based setup. [ichip] Unknown intel chipset found. Update R:\core\intel.txt including version with your chipset info, run ichip clear to clear variables then run ichip to confirm your chipset is found. If this is the case you'll need to contact Nando for an updated intel.txt. You'll then replace your intel.txt found in R:\core\ with the new intel.txt. You then will be able to properly boot into the menu-based setup. Theoretically from here you should be able to hotswap the WiFi card and the eGPU and have Setup 1.30 recognize it, but after performing that process the eGPU is remains unrecognized. This means that the adapter is not correctly interfacing with the PC. Specifically the GDC Beast is set to only receive power from the PSU when signal is detected, which makes it unready when the CLKRUN signal should be received. We can overcome this issue by removing the top plate from the GDC Beast. You'll notice 2 small switches on the bottom left. One of them is used to set the PSU to be permanently on, while the other delays the receive of the CLKRUN and PERST# signals in order to avoid ACPI_BIOS_ERROR. Set the PSU switch to on and the CTD/PTD switch to 15. You should now be ready for hotswapping. Reboot into Setup 1.30 (menu-based setup) with the WiFi card attached. Hotswap the WiFi card and the eGPU and your eGPU should now be recognized. PCI Compaction: Since we now have the eGPU recognized by Setup 1.30, we can begin PCI compaction which will eliminate the code 12 error. First, disable the PCI port of the dGPU and any other PCI ports you don't need using iport>disable ports. We also want to set our eGPU's PCI port to Gen2 with iport>Gen2>(whatever port your eGPU is on). Then select PCI compaction and set the endpoint to 36 bit. Run PCI compaction with the scope being iGPU + eGPU and force the iGPU to 32 bit PCI space. Finally, chainload to Windows 10 and you should no longer have any errors. We now have a VR-Ready working solution. Results: Setup and benchmark images coming soon []
-
Hi all, I have my egpu working consistently in the last couple days. I want to share my experience to you guys. I hope my experience would help you to solve your problem. First of all, I find out Windows 8.1 perform more consistently than Windows 10. I think Windows 8.1 could solve many issues such as black screen and infinity wheel spin. This thread inspired me to set up my hardware. According to my experience, Windows 8.1 would be work either Win to Go(Exteral Hard Drive) or Bootcamp (Internal SSD). Hardware: AKiTiO Thunder2 PCIe Box EVGA GTX 1060 OC single fan ITX Power Supply 600w Process: Step 1 : Run Windows 8.1 and install Bootcamp Step 2 : Power up Egpu and hot plug thunderbolt cable to Macbook Step 3 : Let windows detect the egpu plug in (check device manager) (for more detail check the thread above) Step 4 : Install the Nvidia graph card drive, but do not click "Restart". I prefer to "Shut down" manually. Step 5 : Keep TB caple plug in and power up macbook. Also plug in external display to the Egpu Step 6 : It should be work! Notice: After you install the graphic card drive, you need to shut down the Macbook correctly at least 1 times before you plug in the Egpu. For example, Your got black screen/wheel spin. Then you need to unplug the TB cable, and then let macbook loggin to MacOs/Win 8.1 and press the shutdown button. After Macbookturn off, plug in and load to windows 8.1. Hopefully those process would work for your Macbook. Good Luck.
-
Hi i have an msi ge 60 2pc and i am trying to install egpu exp v8 the gtx 1060 zotac 3gb, but i have the error 43 . haw i can resolve this ? , with the 650ti no problem , plz need help
-
First, I wanna thank everyone in this awesome forum that made this project possible! Current Setup: My parts: Akitio Thunder2 ZOTAC GTX 1060 Mini EVGA 400w PSU Insignia DC travel adapters (for Molex to Barrel Plug-n-Play) from BestBuy 15' MacBook Pro with Retina Display (GT 750m) ASUS MG248Q 144Hz refresh rate Gaming Monitor Keyboard and mouse w/ USB hub My problems: 1. [SOLVED] Code 12 on the eGPU in Device Manager According to @Nando's suggestion, reinstalling Windows helps. (in EFI boot mode) 2. [SOLVED] Code 43 on the eGPU in Device Manager Do NOT update the drivers to the newest from Nvidia, version 320.70 works as far as I tested. 3. [UNSOLVED] Booting problems Just like everyone, booting successfully with eGPU with kind of a luck thing... I'll put on more photos when I have the time! THANKS


