hoani
-
Posts
53 -
Joined
-
Last visited
-
Days Won
1
Content Type
Profiles
Forums
Downloads
Everything posted by hoani
-
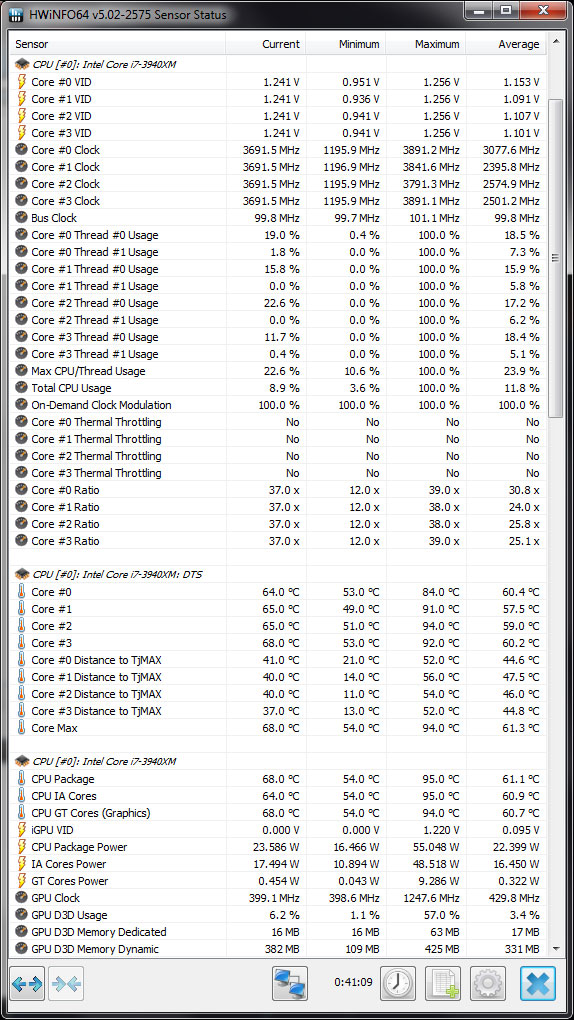
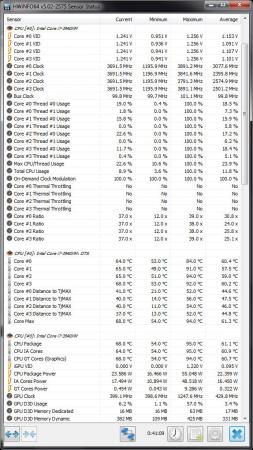
Thanks for the tip. It does not appear to me as a bend when observing it more precisely by I'll do as you mentioned. I've also received 1000/1200/1500/2000/3000/4000/5000/7000 grit sandpaper for final polishing. I think I will apply them to my heatsink and my CPU die. I've just received my Collaboratory Liquid Ultra so I hope I'll see a difference after polishing + liquid ultra. Thanks for your help ! - - - Updated - - - Thanks for the lego trick, I'll try it tonight. - - - Updated - - - Hi, I'm monitoring the power drawn by the CPU using HWInfo64 and it nevers go further 58W. Anyway, thank you for the advice, I'll take caution on this variable when trying to OC (if I ever be able to).
-
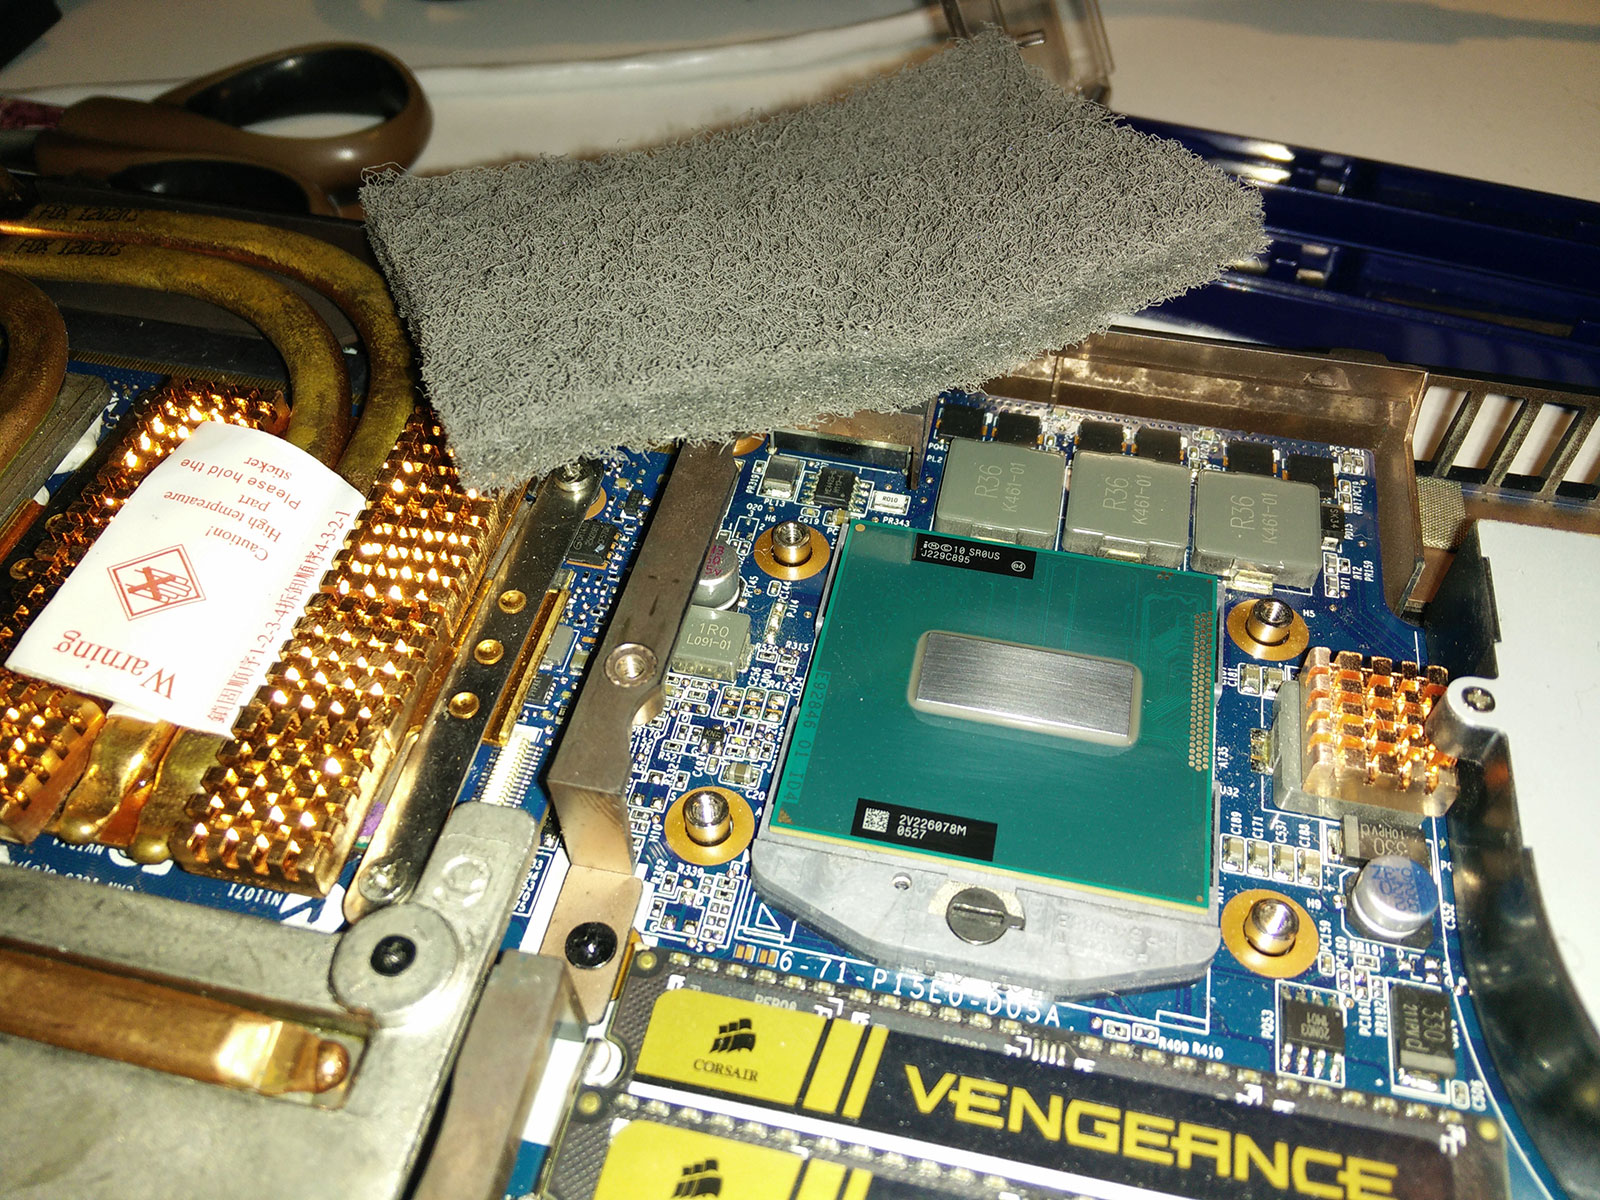
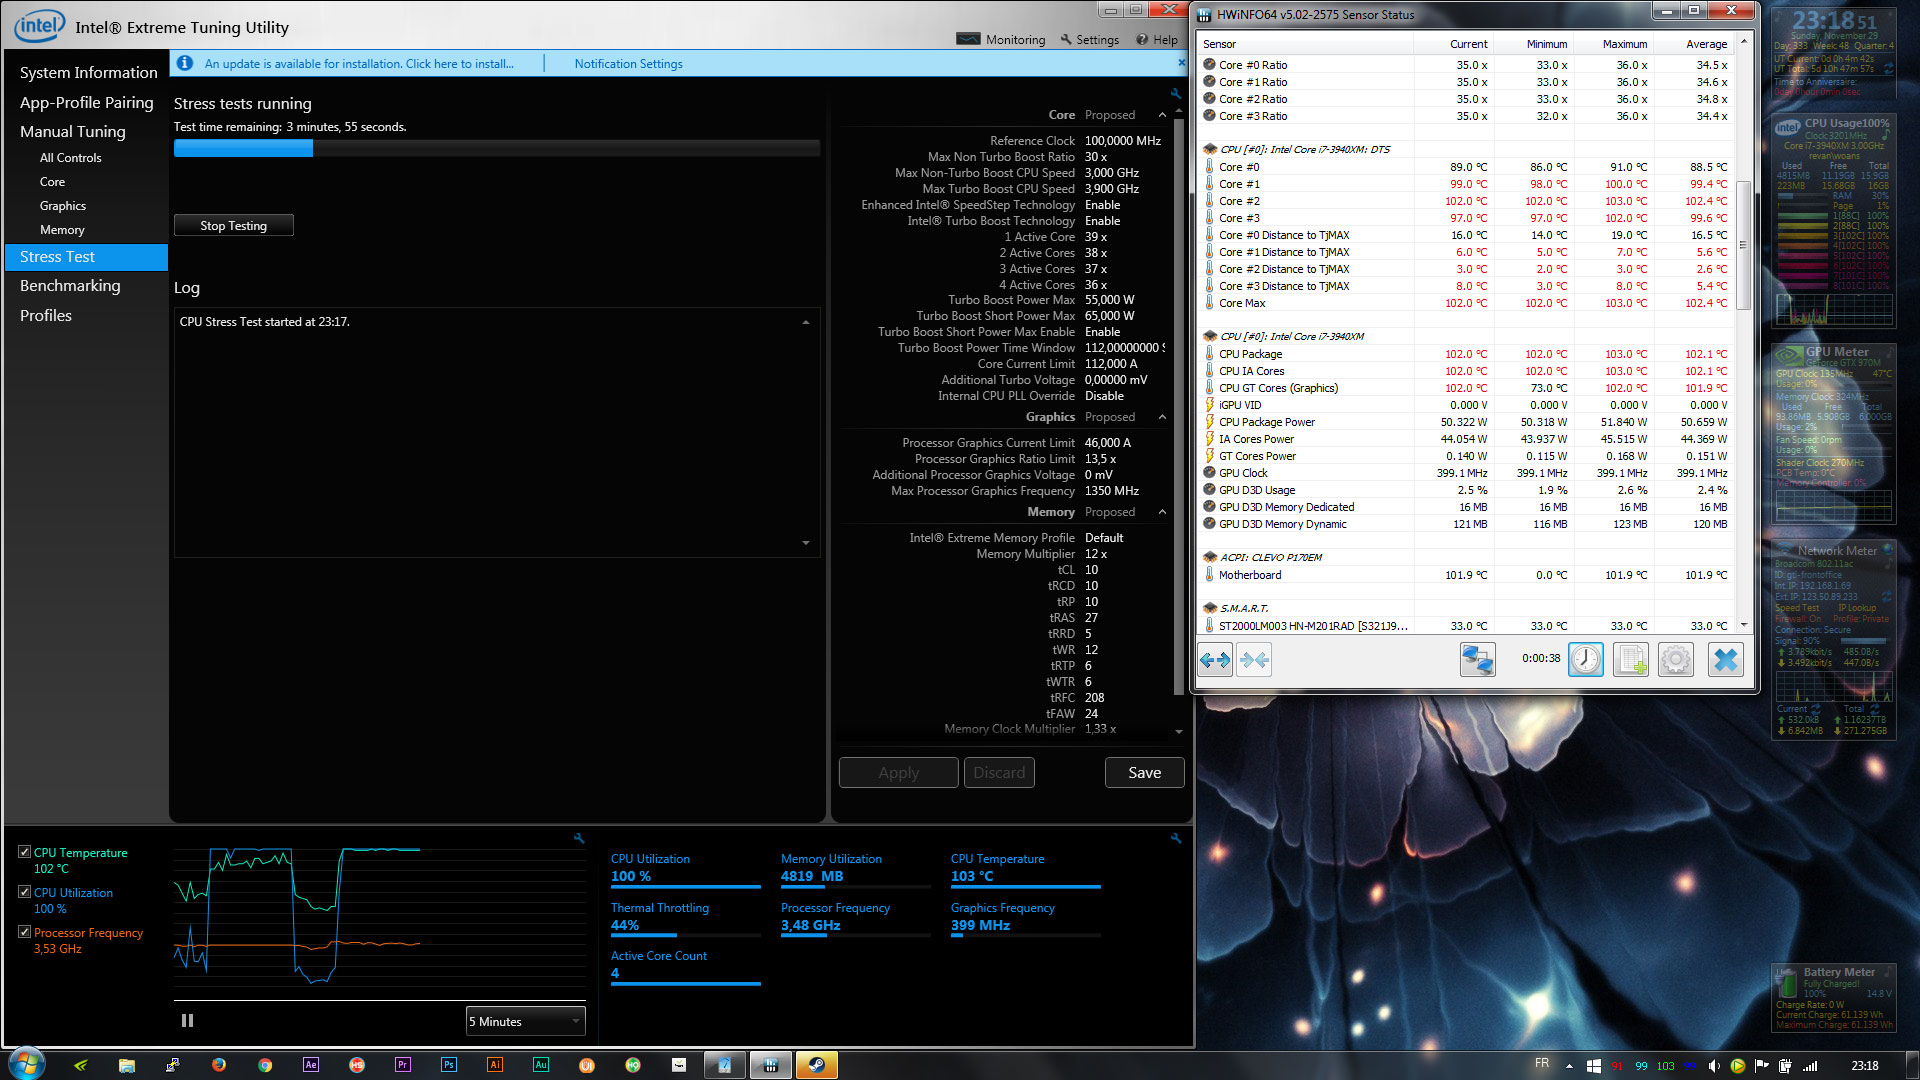
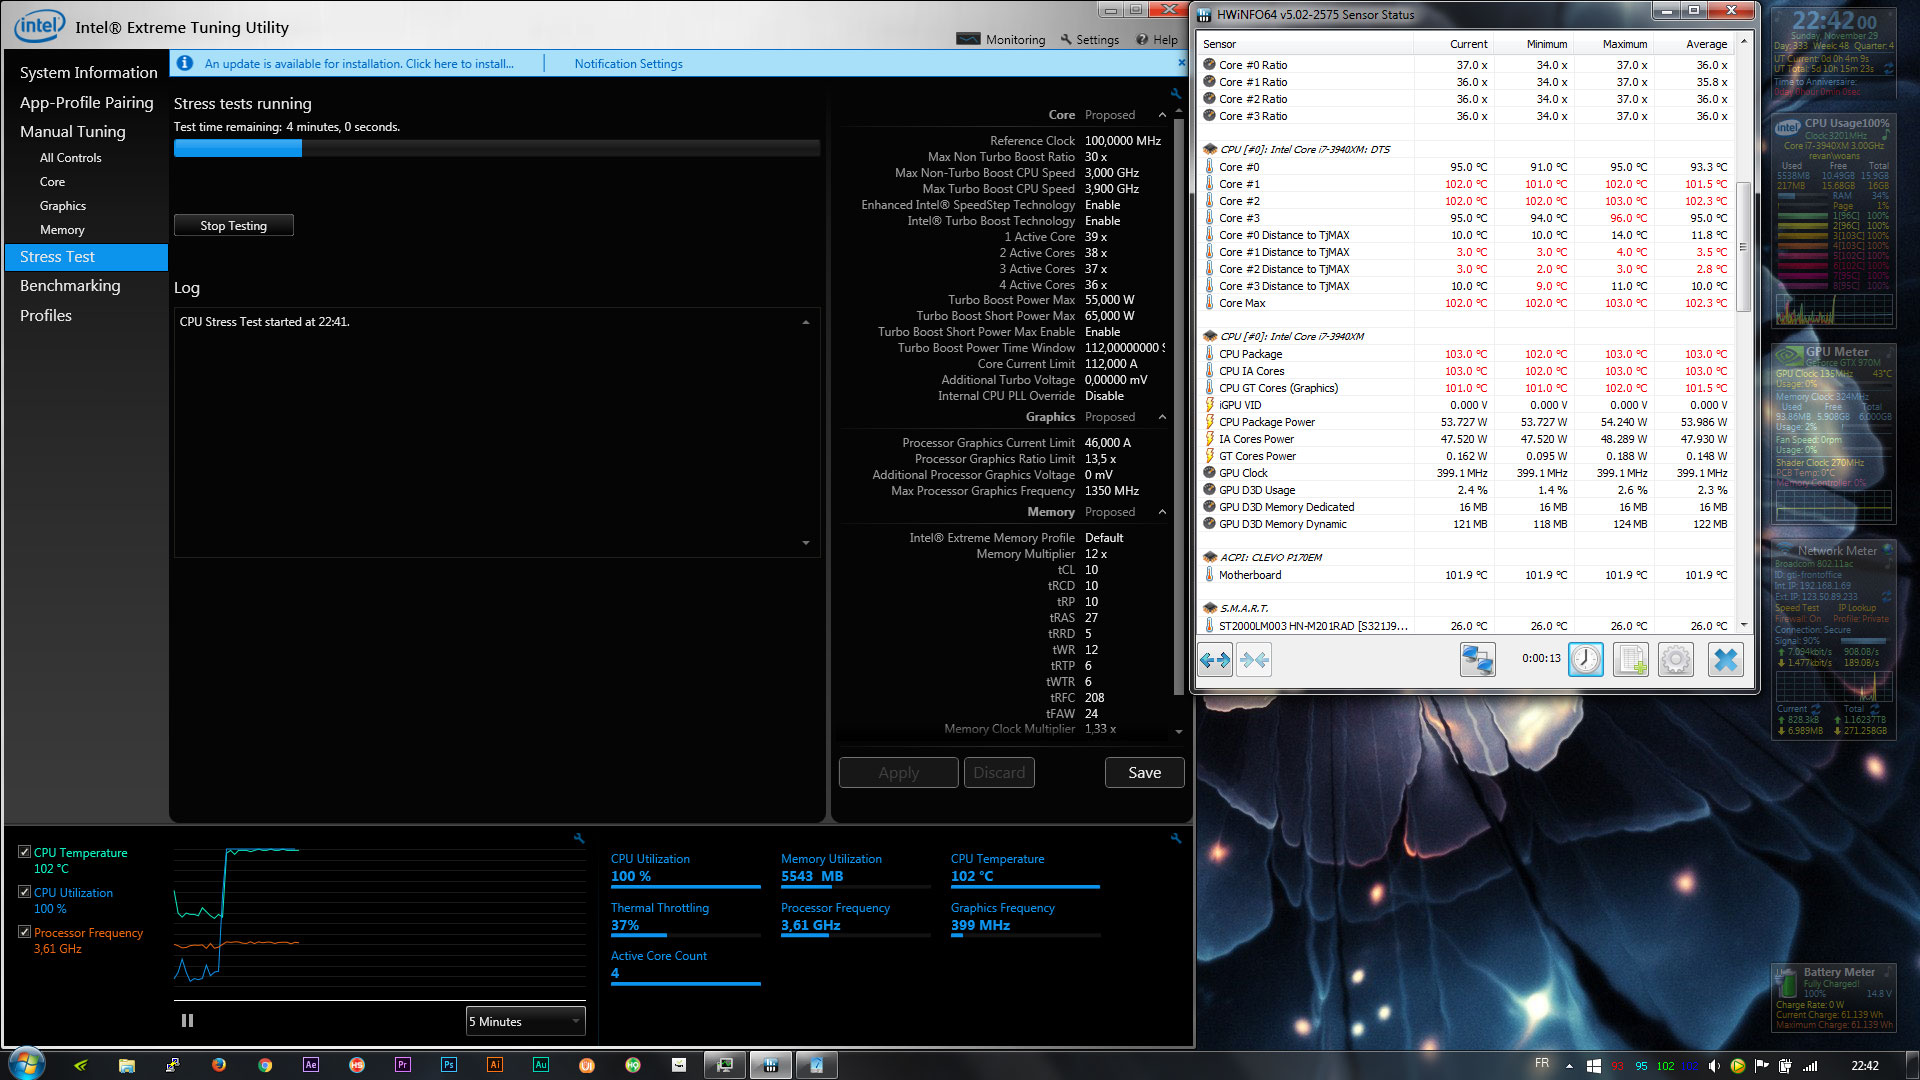
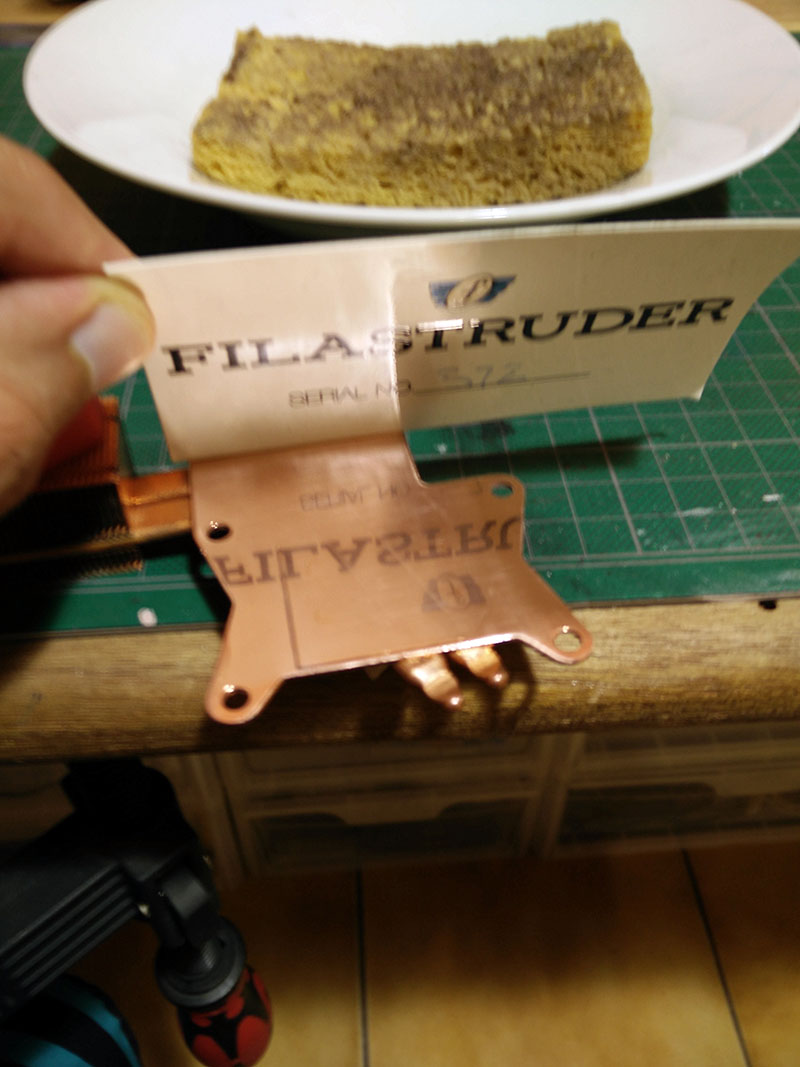
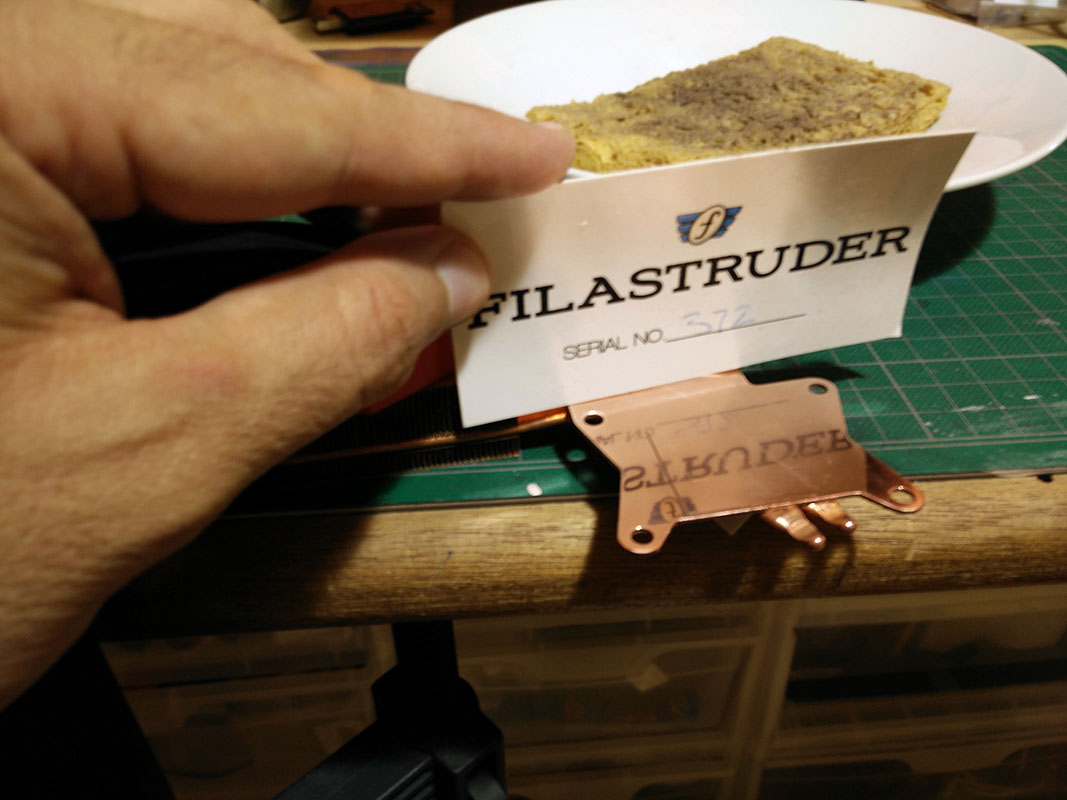
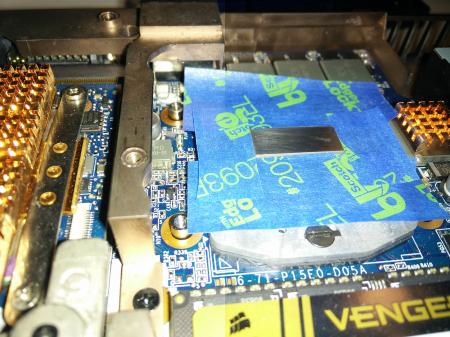
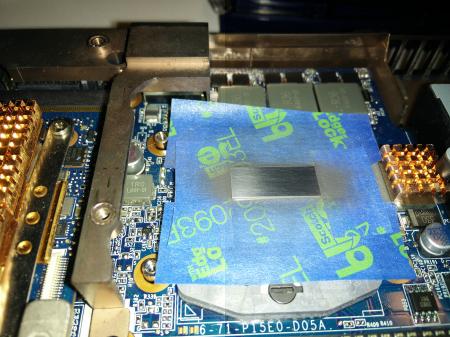
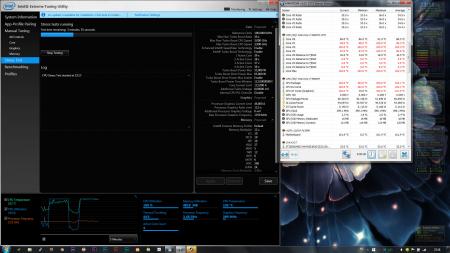
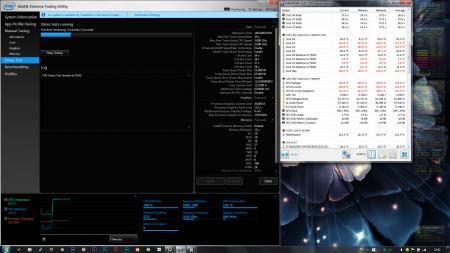
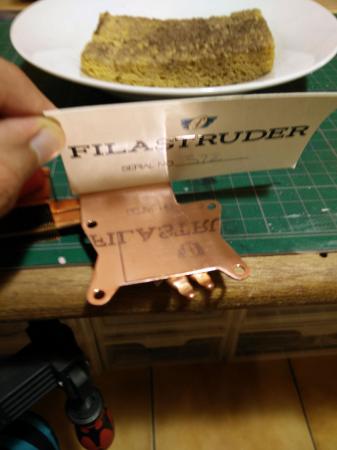
Finaly I decided to go to the no return point and start lapping my CPU die to remove this awfully stuck old thermal paste : after the furious lapping session, I got this (you can see the tool I used - from an used Coolaboratory Liquid Ultra kit - to lap my CPU die) : ready to screw the heatsink (you can notice that I kept the original pads for the powerFETs) : And the result was... disapointing The same, awful temps, reaching 103°C on some cores with more than 45% of throttling.... I decided to tune the tighteness of my screen LIVE, using a Viltrox LCD screen I have for my camera and HDMI output as mirror of the screen. After many tries, it appears that the upper right screw needs to be particulary more tighten than the other screws to keep on "normal" temps (below 95°C). Here are my measures of the temperature with the optimal tightening configuration I've found : I can't wait getting my liquid ultra !!!

-
I never removed ALL the pads, just the ones I added in addition to the original ones just to test if there is a difference. There was a difference but it was a hotter one.
-
The vcore jumps up to 1.261V. I'm testing with full fan mode on prema mod. Don't forget I inserted spacers between the heatsink and the screws so I potentially can break the CPU if I screw has hard as I can.
-
With those additional pads removed, if I tighten my screws one more turn or half more turn, I get worse results... Seems I found the coolest area.
-
Thanks for the tip, as I mentioned, I'm waiting for two seringue of Collaboratory Liquid Ultra to come to my POBOX. Already used one on my 970M GPU with impressive results. I still have the sponge and will try to use it to remove the old paste as mentioned. I effectively removed the additional pad and get better results (the last screenshot has been dont WITHOUT the additional thermal pad). I tried this to follow an advice from Khenglish. I'll try to tight more and more my screws and see the difference between... I don't want to break anything :/
-
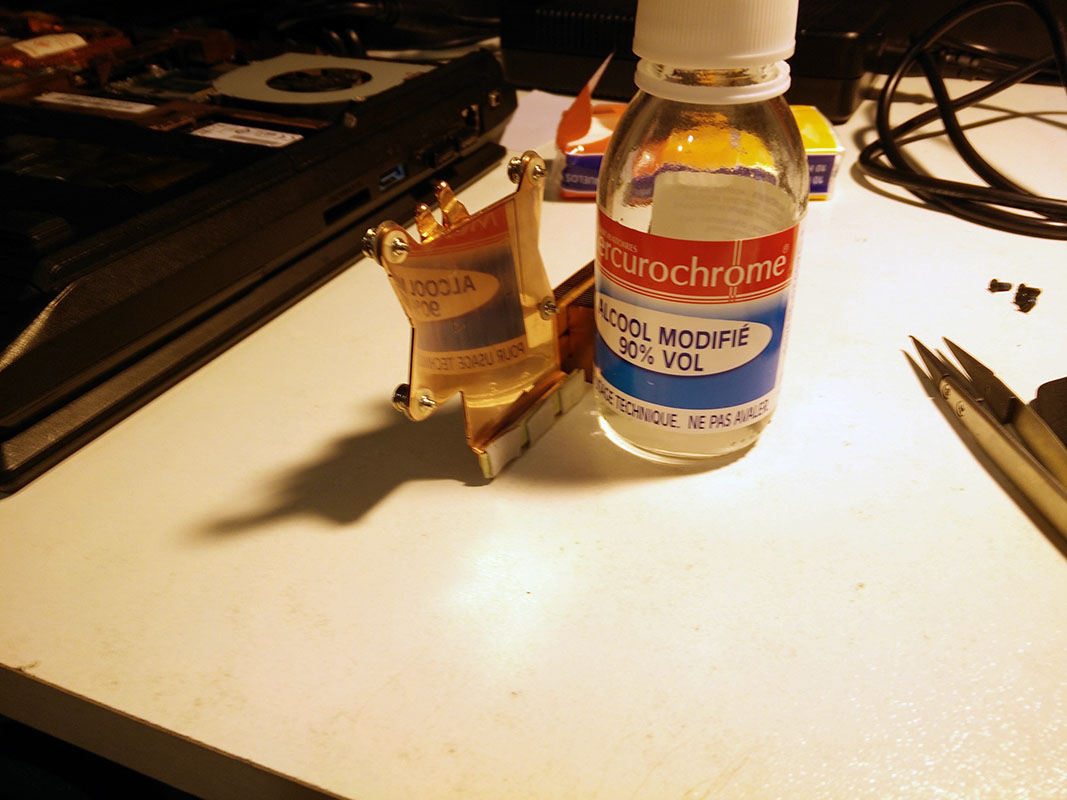
I used alcohol and acétone with no luck. Envoyé de mon A0001 en utilisant Tapatalk
-
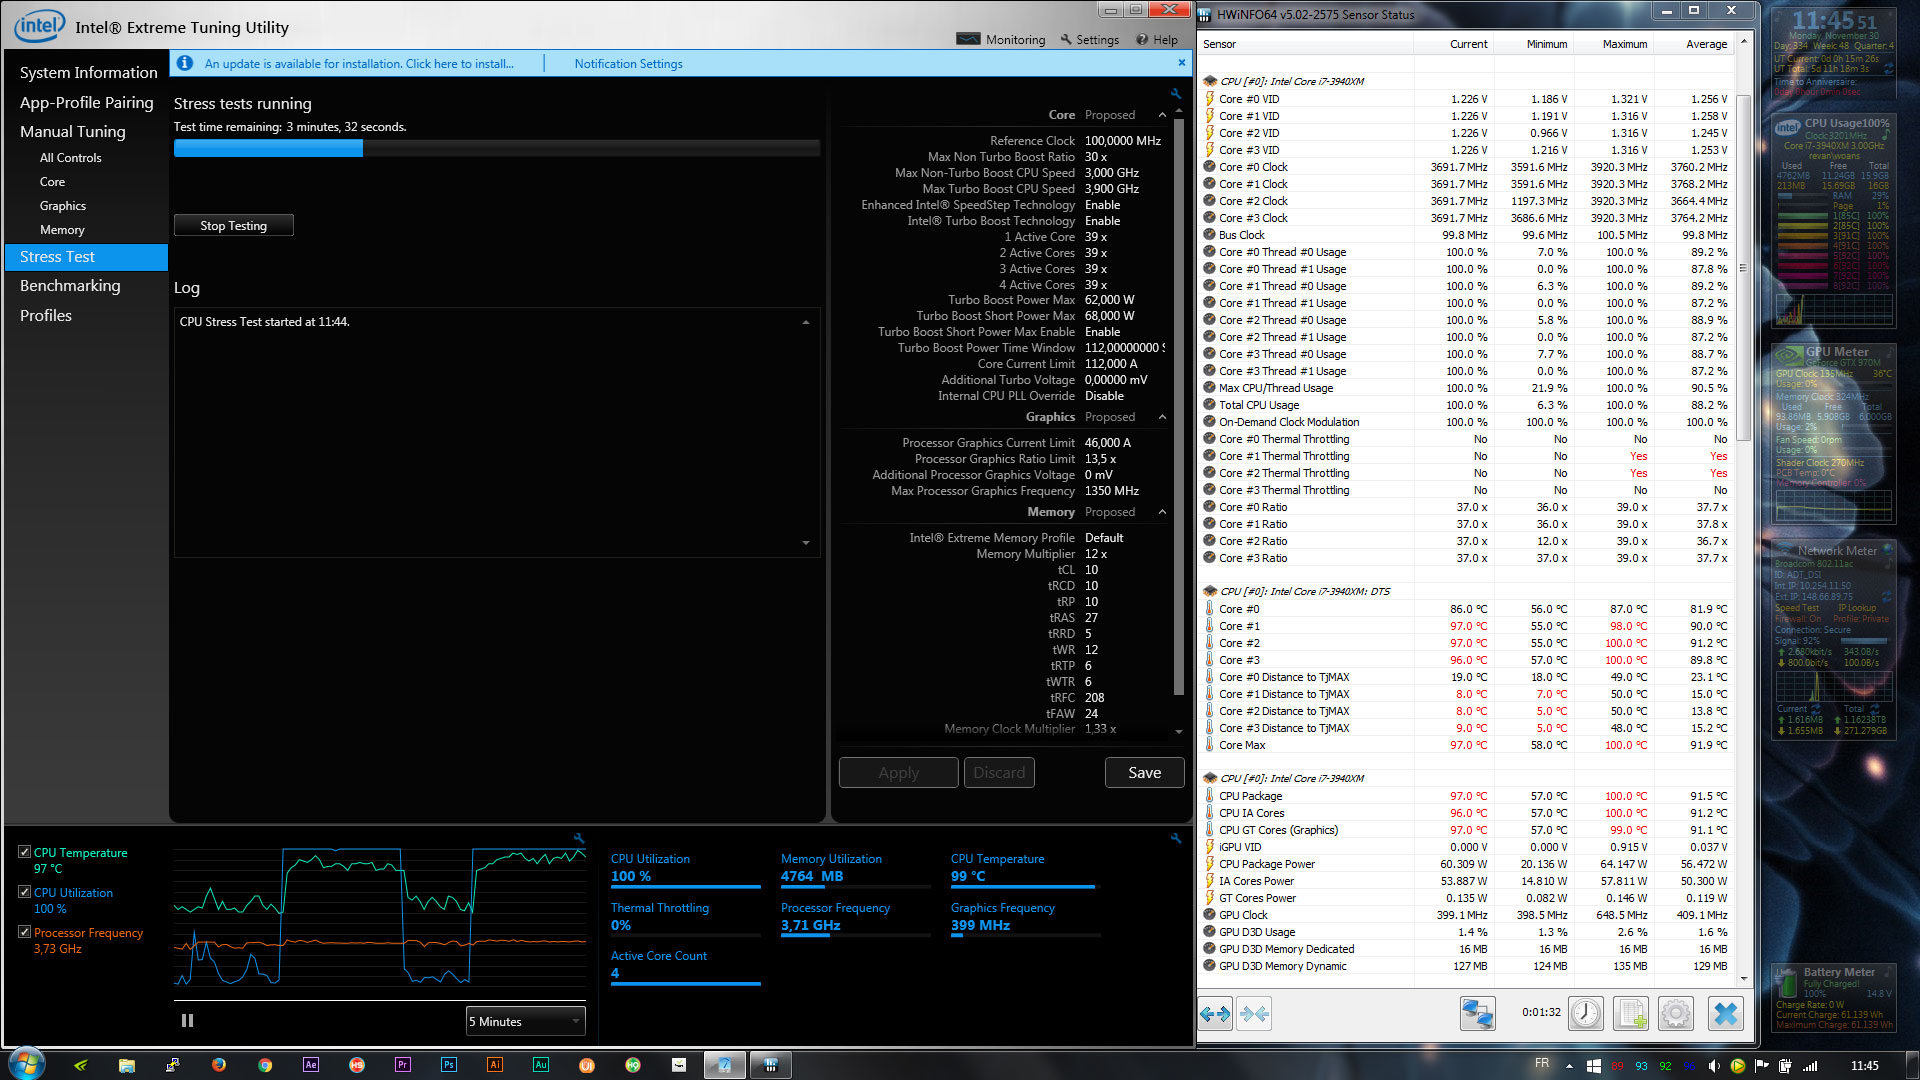
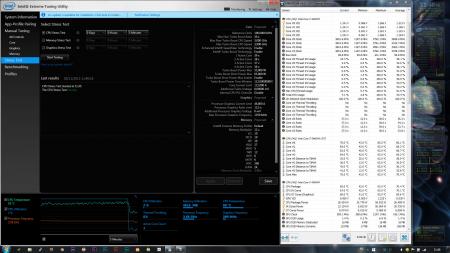
I put my laptop on a small room with air conditioner set to 22°C, I tried to screw evenly all the four screws (3 turns) and I managed to stabilized the temps : I don't know if regarding the conditions (room temp and my paste quality) my temps seems correct... I'll try at home in a less optimal situation (27°C room temp) if I'm still reaching the red zone. I tried to push to x39 on all core : some cores still bump over 100°C and I can't make further x37 due to throttling. I hope that with coolaboratory liquid ultra (should be -10°c) I'll get suitable conditions to have some slight OC possible !

-
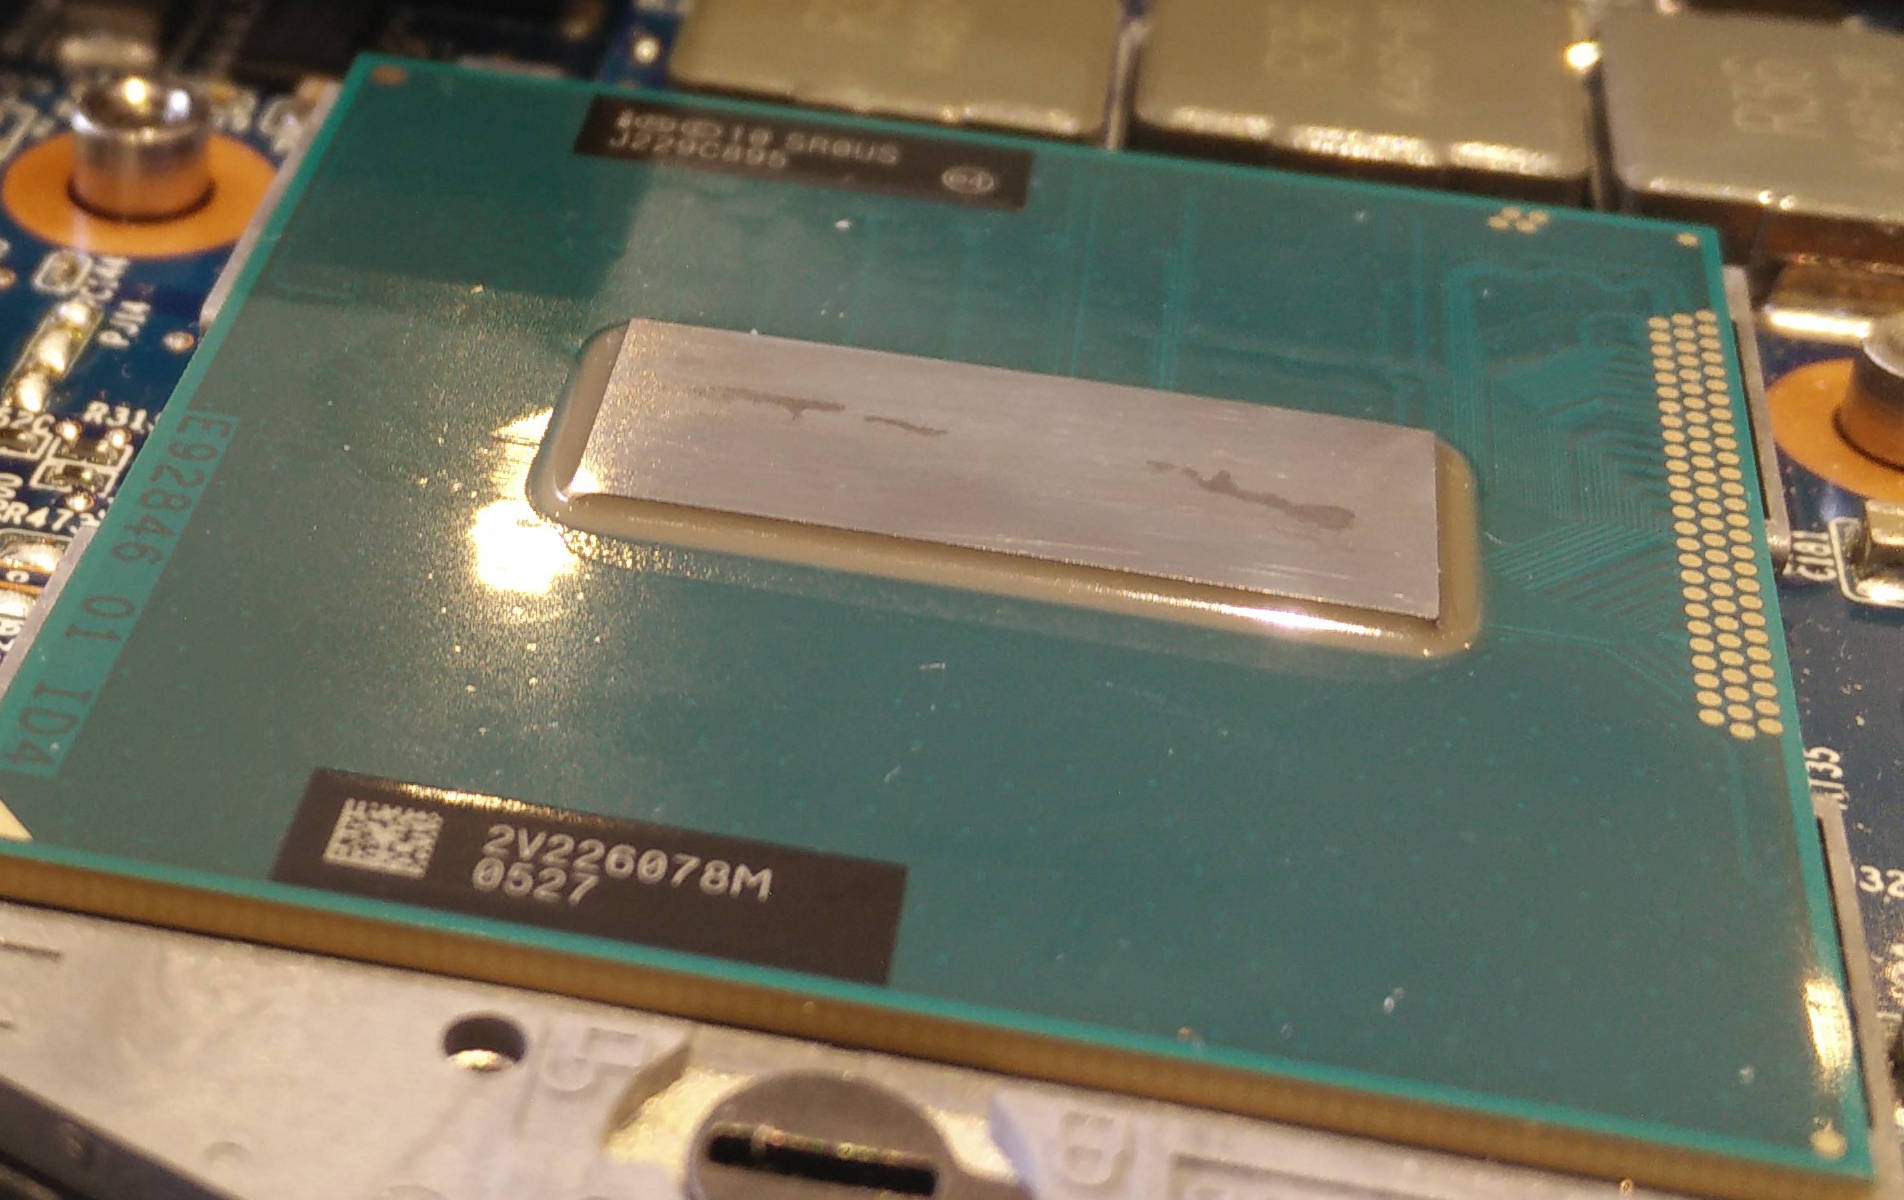
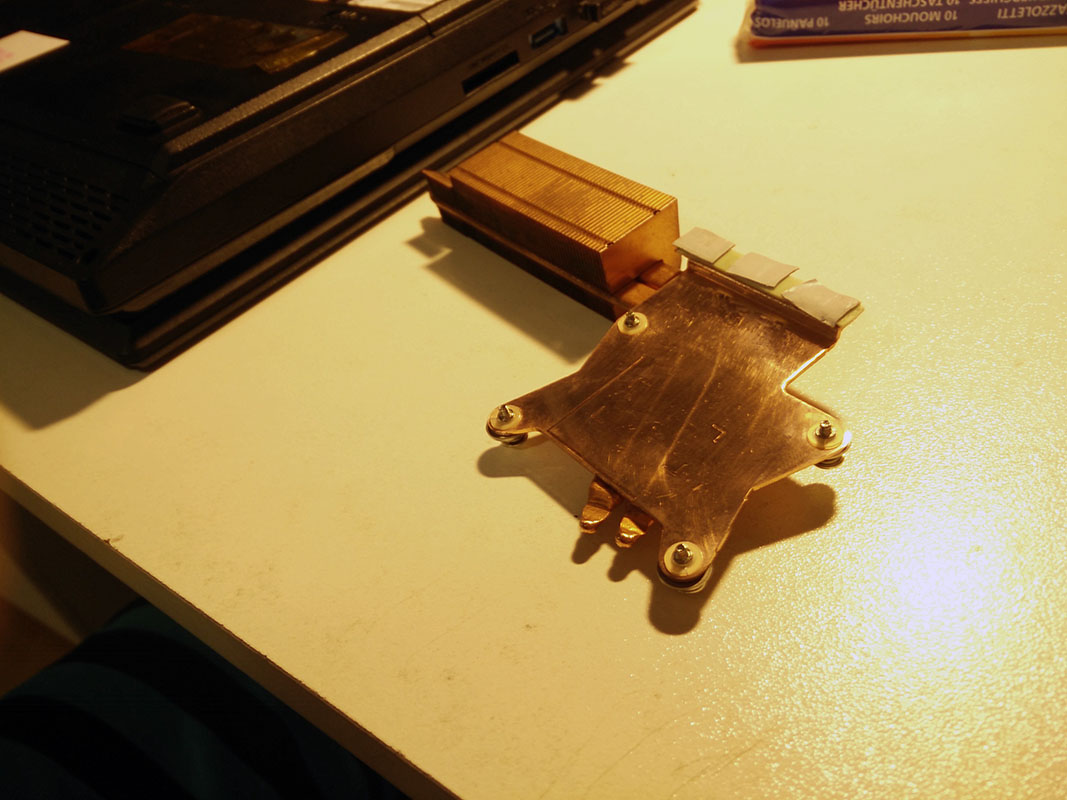
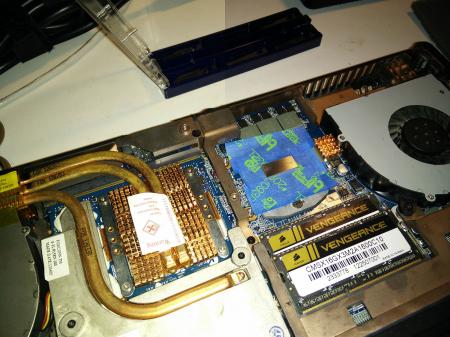
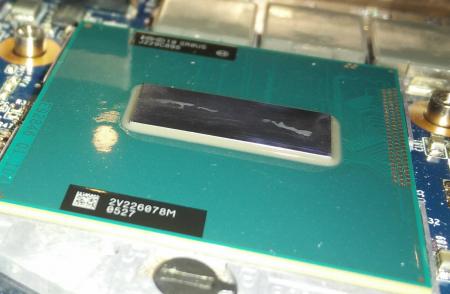
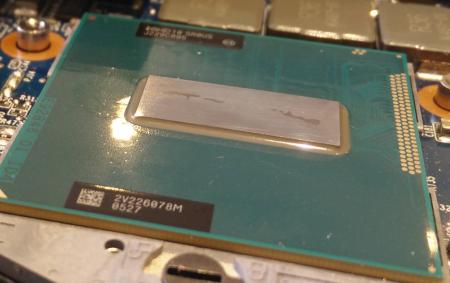
I have also to mention the fact that the 3940XM I received has "fossilized" thermal grease on top of die that I wasn't able to remove. I can feel with my nail that there is an difference between mirror parts (that slides very well) to the old paste (that makes my nail grip on it). Maybe this is why I'm facing such difficulties making this CPU working properly at stock and I'm observing core0 lower temp... Here are some pictures of the guilty CPU :
-
Not the best one, but not the worst : Coolermaster E2 IC Essential. 5.5°C difference with IC Diamond 7, nearly 10°C with liquid pro I have two seringe of Collaboratory Liquid Ultra coming to my PO BOX... Ordered them one month ago, should received them this week (I hope).
-
Tried to tigh the screw to get much more pressure (I saw the arms of the heatsink starting to bend) but no luck, my temps still horrible : It seems to be a very precise science to just tighten those screw at the right level evenly... Do you have a special technique to get into it ?
-
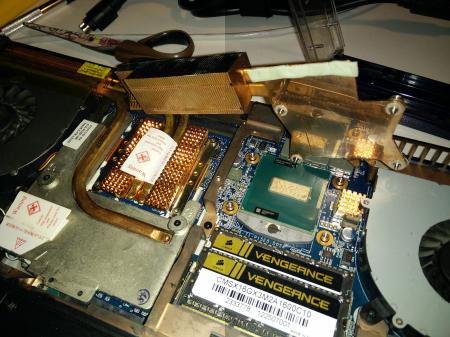
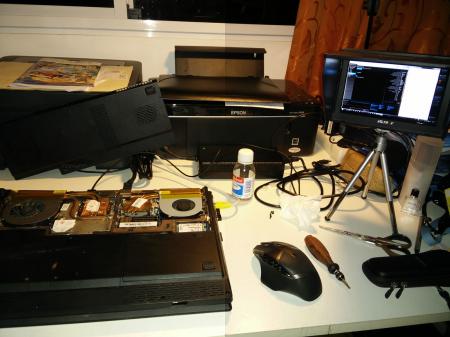
Hi, I did lapped my CPU heatsink and used washers to enhance pressure on my CPU and I'm still getting crazy temperatures : Here are some photos of the lapping process : 1. After using 600 grit for 15 mins : 2. After using 1000 grit for 15 mins : 3. After using 1500 grit for 15 mins : 4. Here is the re-assembled heasink with washers inserted to enhance pressure : 5. I was quite afraid to crack my CPU so the screws are to fully tighten... So maybe the results are so bad because of uneven "tighteness" of my screws ? Do you think it is safe to screw to the max with those washers ? I'm still wondering if my CPU is OK or not


-
It seems to be the issue I'm facing, agreed with that. Do you thing the original heatsink is enought to dissipate 55W or more of power ? I'm also wondering if popping the CPU heatsink screws off it is hard or not. How to you proceed ? I have some more K5 Pro available and I can try with it. I still have many few thermal pad left from previous installs. Which one would you advice me to use. FYI, I saw that XTU set the Turbo Boost Powermax to 68W and the Turbo Boost Short Power Max to 98W. I lower them to 55W/63W and can stabilize at 3.4GHz with temps below 99°C, not ideal but suitable situation until I find I better solution. Anyway, thank you for your directions Khenglish !
-
I switched back my 3940XM in my laptop, properly tighten screws... and still getting awful temps... However I can get similar temperatures to my 3610QM at 3.1GHz when I set the multiplier to x31. core0 is OK and never go more than 94°C while core1 to core3 can bump to 103°C in a second. Is it normal to have one core with such difference on other cores ? There are some cosmetic wears on the CPU die and I wonder if I have a damage one... It is a SR0US anyway. I still have today to decide whether my CPU is defective or if my capacity to dissipate temperature is too bad... and if I chose the first option, I'll have to request a refund.
-
Thank you for you reply ! I already look at every hardware mod for inspiration but I want to understand the boost of my original 3610QM temperature. Finally I tight evenly to the max every screw of the CPU heatsink and I got stabilized temp under 90°C. I was just missing 1/8 turn on one screw ! I will try again with my 3940XM !
-
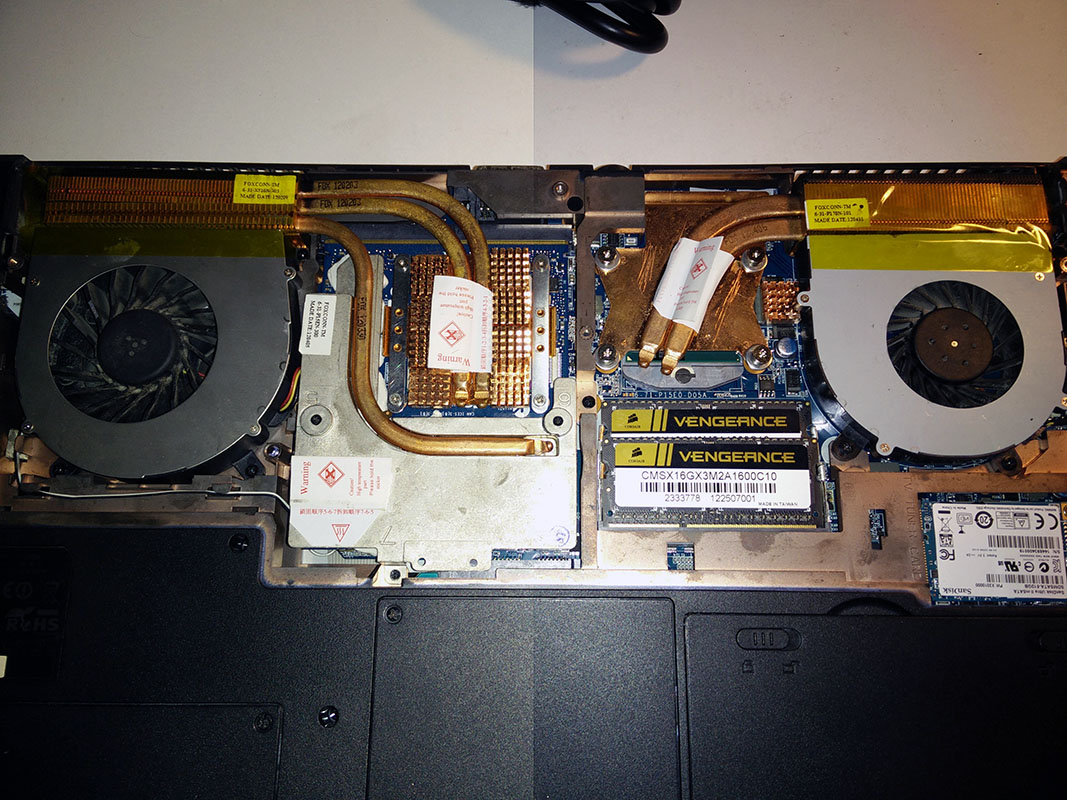
Hi ! I ordered a 3940XM for my P170EM. At stock, I get more than 50% throttle with prime95 with 3 cores reaching +102°C in seconds, note even approaching 3.5GHz... Please note that I'm living in Tahiti and room temperature here is at 28°C min... when using the air conditionner. Even if I switch back to my original 3610QM I get not so cool temps : I can get up to 100°C while stressing the CPU in 5 mins I (re)pasted my CPUs with Coolermaster E2 Essential thermal paste. What do you think I should do to improve those temps ? I remember that before repasting the 3610QM, I maxed at 90°C max. Do I put too much pressure (tight the screws to MAX) ? I also plan to lap my CPU heatsink and to apply Collaboratory Liquid Ultra. Already done that on my 970M with great results (-10/12°C). Please help !
-
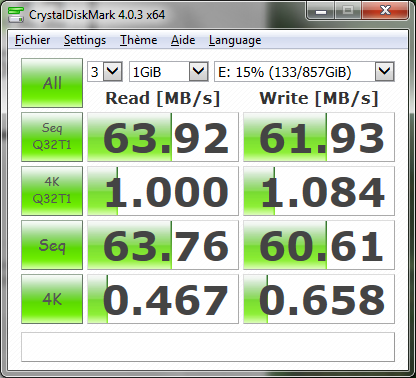
Strange... my 1TB HDD in the SATA2 slot (using a ODD-HDD caddy) has slightly more efficient performances :
-
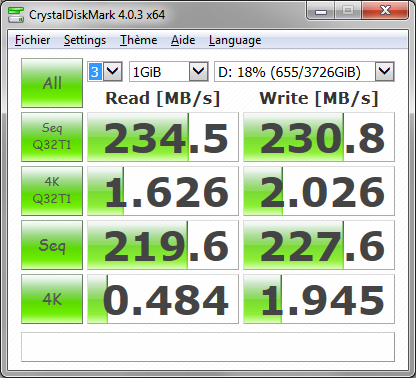
Hi, I finally ordered and received my two M9 Spinpoint 2TB 2.5" HDD and installed them into the two available SATA3 slots in my P170EM. Now my laptop has 5.5TB of space available ! cooool. Moreover, I can do 230MB+ sequential read/write performance !
-
Prema, do u plan to release v3 for US ?
-
It will be available when you become an unrestricted user, after 5 useful post for the community !
-
I finally found the solution ! For an unknow reason, probably upon the launch of ComboFix, I had a registry key activated that made compulsory the fact that apps must be signed to be able to use Optimus... I had to set those entry to 0 in my registry : HKEY_LOCAL_MACHINE\SOFTWARE\Microsoft\Windows NT\CurrentVersion\Windows\RequireSignedAppInit HKEY_LOCAL_MACHINE\SOFTWARE\Wow6432Node\Microsoft\Windows NT\CurrentVersion\Windows\RequireSignedAppInit Sometimes the second one is not present so it should be created as a DWORD. After your mod, you must reboot. I got those informations from this page.
-
I finally managed to go back to a pseudo-normal situation by using DDU, removing nVidia and INTEL drivers, reinstalling them from scratch. However, I cannot have 970M activated in 3D Mark 2013 and Metro 2033 Redux... it's running on HD4000 only Even when I forced the nvidia gpu to be activated. In Metro 2033, when I switch to windows, the Optimus notification widget says that Metro 2033 is using my dGPU BUT when in game, the GPU usage is 0.0% and FPS average is 1.5... 970M successfully working on Unigine Valley, Skyrim, L.A. Noire, Far Cry 3, R.U.S.E., Tony Hawk Pro Skater HD though. Seems optimus is coing crazy ??? Any clue to resolve this situation ?
-
I had 350.12 installed with my bios modded 970M and overvolting and memory clock sliders working properly with nvidia inspector. Launched ComboFix to search for any malware on my computer... after restart, I lost my 970M, seems that it is no present anymore. Had to reinstall the nvidia driver. Now nvidia inspector overvolting and memory clock sliders does not work anymore Moreover even after reinstalling the 970M is never used - checked on 3d mark 2013... please help !
-
4k 17.3" screen at 120Hz and 4-Way SLI with four 980M and Titan XM
-
After validating properly my GTX970M overclock, I finally made FS 7515 (NVIDIA GeForce GTX 970M video card benchmark result - Intel Core i7-3610QM Processor,CLEVO P170EM)... I'm waiting K5-PRO thermal paste, Coolaboratory Liquid Ultra and copper heatsink to push it further.