


Henrik9979
-
Posts
185 -
Joined
-
Last visited
-
Days Won
7
Content Type
Profiles
Forums
Downloads
Posts posted by Henrik9979
-
-
Go to some of the latest post to find newer versions. But the complete instruction for installing the drivers are on this site.
-
41 minutes ago, dogs said:
Hi henrik,
Thanks for replying
")
The low fps only seems to occur when i try to install the latest nvidia driver (368.69). I modded the nvdmi.inf as shown in previous post but couldn't get any higher fps than 24fps. When I installed the modded driver from eurocom website (347.88) then the fps goes back up to 100fps. So it looks like my modded file is incorrect.
I will play around and see if I can get it to work but any help modding driver 368.69 would be greatly appreciated.
Yes I understand that, but I want to know what is causing the fps. It sounds like the coreclock stays at idle. MSI afterburner can tell you that. Also I am not 100% family with the m17x r4, I think it maybe has nvidia optimus technology, so the problem could be it keeps using the Intel graphicscard and not the nvidia. Said in another way, it stays in powersafe mode.
But in general, nvidia has fucked up their drivers very bad, making many cards useless. Your modding seems to be correct. I assume you did disabled the forced driver signature, otherwise modded drivers will not install probably.
I will give you a link for a thread where the newest drivers are modded so the performance issues are gone.
-
5 hours ago, dogs said:
Hi guys,
i took the plunge and bought a GTX780M upgrade kit.
The installation was almost flawless. I say almost because when screwing down the heatsink to the graphics card, i must have over-screwed and sheared off one of the screw heads.
But that being said I now have a working GTX780M in my M17XR4 and I want to thank henrik9979 for his help in me coming to my decision.
I seem to have been bitten by the upgrade bug because so far I have changed my 1600x900 screen to 1920x1080 screen and also changed the keyboard as well as the graphics card.
I notice in one of the posts that there is an unlocked A12 BIOS but this is specifically for the M17XR3. Will this also work for the M17XR4?
i currently have A13 BIOS installed on my M17XR4, will there be an unlocked version of this BIOS anytime soon?
Hoping to learn much more in these forums which is why I had to subscribe to one of the plans because there was no way i was ever going to get promoted
Best Regards
Edit:
Seems like it's not working properly

My fps is 24 and no matter what i change in wow or swtor it still stays at 24fps.
is there anything else I need to do to make the GTX780M work at its full potential?
I have modded my nvdmi,inf file to use the latest nvidia drivers from the hardware ids of the gtx780m below:
PCI\VEN_10DE&DEV_119F&SUBSYS_05511028&REV_A1
PCI\VEN_10DE&DEV_119F&SUBSYS_05511028
PCI\VEN_10DE&DEV_119F&CC_030000
PCI\VEN_10DE&DEV_119F&CC_0300below are the added entries in nvdmi.inf
[NVIDIA_Devices]
%NVIDIA_DEV.119F.0551.1028% = Section240, PCI\VEN_10DE&DEV_119F&SUBSYS_05511028[Strings]
NVIDIA_DEV.119F.0551.1028 = "NVIDIA GeForce GTX 780M"Most of the tutorial was fairly straight forward although i wasn't sure of what to use for the Section part. Does anyone know what i should be using for this?
I re-installed the drivers that came with the card (347.88) which of course are not the latest one (368.69) and my fps has shot back up to over 100fps so it is definately something I have done wrong in the modded file.
Any help would be greatly appreciated in helping me mod this driver file
Glad to hear you could use my advice.
About the low frames, try to use msi afterburner and monitor your temps, usage, and core clock and see if there is a pattern between those. Run a game a couple of minutes and watch the graph afterwards. Then it is easier to troubleshoot.
-
I have just bought an gtx 980m sli upgraded kit for my alienware m18x r2.
I'm currently waiting for it to arrive, but they assured me it will work flawlessly.
I see they also have upgrade kits for your alienware m17x r4. Just not the 780m.
I have just bought an gtx 980m sli upgraded kit for my alienware m18x r2.
I'm currently waiting for it to arrive, but they assured me it will work flawlessly.
I see they also have upgraded kits for your alienware m17x r4. Just not the 780m.
-
I don't know how big your budget is, but If you don't mind pay for quality, then buy a complete upgraded kit frome these guys.
It comes with thermal pads, thermal paste, xbracket and 1 year warranty.
http://www.ceg-hardcorecustom.com/category/gpu-mobile-mxm
You can find them on eBay too, and ask them question.
-
About thermal pads. You can use the one you have but I tell you one thing they brake very very very easy so be really careful. Again be patient and look very carefully when you take off you heatsink.
The biggest challenge you can face is the need of modifing your heatsink.
I don't know how well you gtx 660 heatsink will fit. Also you will see on you heatsink if it say NV75w or GTX75w
Because for the 780m it is recommended to be a 100w. Also for the gtx 680m.
You may get it to work anyway.
The heatsink for a 680 should fit a 780 no problem. So try search about the 660 heatsink will fit 680 or 780.
-
Yeah and the two things that are a real pain in the a*** is xbrackets and thermal pads.
First of, yes the xbracket will fit. All xbrackets "fits" the difference between them is the square in the middle of the xbracket. On amd cards it is big and at nvidia it is small.
But where the screws go in, it is the same.
I know some one on these forums will beat me for telling you this. I upgraded from an nvidia gtx 675m to an amd 8970m. The and didn't came with any xbracket so I took the nvidia xbracket and blended it till it would fit.
Because the amd required a xbracket with a big square, the square is actually on some of the chips because it is too small.
But the screws fits and I'm still running my laptop with this card for third year.
Long story short, if it do not fit, you can make it fit.
You may use a little work getting the xbracket off you 660, because it is glued on. It was on my 675.
-
Just now, dogs said:
thanks pal,
i hopefully will be able to repay the favour some day
best Regards
No problem
If you not so experience with changing graphics card, remember one thing. BE PATIENT!!!
The most errors happens because you start rushing. Take a whole day free so nothing can distract you, and make a perfect result instead of a decent. Many tutorials explain exactly how to do it, but when you get inpatient you forget critical details.
Oh! And take pictures of everything now you have it open. Just so you remember how to put it together, and then you can always see how it looked like inside without taking it apart.
Good luck with the upgrade. Be patient and be happy.Two people who also can help you is Prema and Mr.Fox.
-
I found these websites that might coming handy.
It can indeed seem a bit complicated, but it is not impossible.
https://www.techinferno.com/index.php?/forums/topic/3245-need-help-installing-gtx-780m-driver-in-m17xr4/
http://www.laptopvideo2go.com/drivers?dev=0CAF&sub=04431028&whql=0&lang=0&orderby=version&dir=desc&os=
http://null-bin.blogspot.dk/2015/08/how-to-modify-nvidia-notebook-driver.html -
18 minutes ago, dogs said:
-
3 minutes ago, dogs said:
thank you so much
I did read on other forums that for each driver upgrade on the 780m you have to mod the driver but if this isn't the case then the 780M is looking more favorable to me.
Hmm... Maybe that is true, but I have not experienced it my self.
The only time I need to do it again, is if I uninstall the driver completely.But anyway, when you first know how to do it it is no hassle.
What it basically is about, is - your graphics card will have a wrong hardware ID (This you find under device management).
The Nvidia driver has a tekst file called nvdmi.inf, which has the list of hardware ID's for all the different nvidia graphics cards.
The problem is that the nvidia card you buy, has a hardware ID there is not on the list.What you have to do is enter the nvdmi.inf file, find where it says "GTX 780m" and replace the hardware ID, with YOUR graphics card hardware
-
4 minutes ago, dogs said:
Thank you henrik9979,
that is very useful information. I will most certainly look into the 780m.
Are there any tutorials on this site on how to edit the drivers?
Best Regards
You can be lucky that the seller give you a PDF file with detailed instruction how to do it, but I will try find a good tutorial for you.
-
Go for The gtx 780m, Yes you might need to mod the driver to get it installed, but it is only the first time you need that. You can find a lot of tutorials for doing so and it WILL work! It is just a matter of how long time you need to figure it out. I've been there many times.
When updating drivers you don't need to it again, only first time.
If you can find the 680 and 780 for the same price go for the 780.
The 680 might be plug'n'play, but it depends on the carrier who sells it. If it says for Alienware m17x then there's a big change it will work immediately.
But if it says for clevo then it can still work straight away, but the chances a smaller and you need to modify the driver.
You can also go for the 880 BUT that card overheats like crazy! If you order this card, make sure to order the correct heatsink, it is crap if the heatsink is slightly wrong, because if it hits 90 degrees it throttles like crazy!
Hope you could use the information.
-
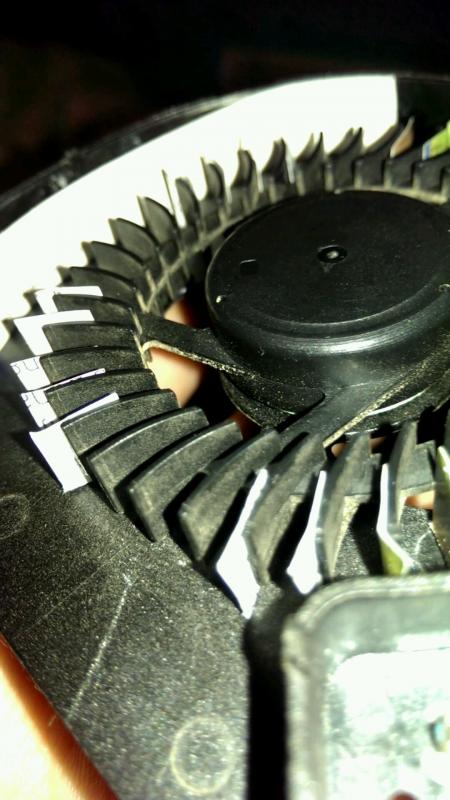
10 hours ago, Mr. Fox said:
This information is very interesting. Thank you for sharing it. Extending the length of the fan blades seems to have improved things and was a great idea to test. How is the fan balance with this mod? Are you able to detect any vibration after the mod? As the blades are closer to the housing on one side, I suspect this helps to compress the air and having the blades closer to the housing in those areas probably assists in the increase of air pressure.
I haven't tested the balance. I may try take one fan out and hold it in the hand while it spinning to feel if it's unbalanced. I can't feel any on the computer.
I can still compare because my right gpu fan hasn't been modified.
Also I don't know if it will improve even more to extend all the wings. May it will fix the sound and if it's unbalanced it might fix this too.
-
I honestly don't know.
You have checked in site bios to make sure it boots from the right hard disk first?
You can set the priority in bios.
If you only have the GPT hard drive in the computer will the problem be gone?
-
Doing it through command prompt:
-
Turn off the PC, and put in the Windows installation DVD or USB key.
-
Boot the PC to the DVD or USB key in UEFI mode.
-
From inside Windows Setup, pressShift+F10 to open a command prompt window.
-
Open the diskpart tool:
diskpart
-
Identify the drive to reformat:
list disk
-
Select the drive, and reformat it:
select disk <disk number>
clean
convert gpt
exit
-
Close the command prompt window.
-
Continue the Windows Setup installation.
When choosing an installation type, select Custom. The drive will appear as a single area of unallocated space.
Select the unallocated space and click Next. Windows begins the installation.
Btw maybe you only need to format the ssd to UEFI.
-
-
I think I understand your problem.
The problem is you version of Windows isn't for UEFI.
If bios has not been set to UEFI and installed Windows, then it will not boot if set to UEFI. It sounds like you have more than one Windows installed, and that you have set bios to try boot from the ssd first. The reason because it flashes 3 times is that it try to flash from the ssd but it fails and it tries again before trying to boot from the normal harddrive.
The only way I know to fix this is reinstalling Windows. When coming to the screen where you have to choose boot partition. Format the boot drive (maybe the other drives needed formatting too). Make sure to set bios to UEFI first.
If you can't get to format it to UEFI.
Then I know you to can do it trough command prompt. There you also can see what disk is UEFI ready.
But enter command prompt when booting from a installation disk or floppy drive.
-
Turn off the PC, and put in the Windows installation DVD or USB key.
-
Boot the PC to the DVD or USB key in UEFI mode. For more info, seeBoot to UEFI Mode or Legacy BIOS mode.
-
When choosing an installation type, select Custom.
-
On the Where do you want to install Windows? screen, select each of the partitions on the drive, and select Delete. The drive will show a single area of unallocated space.
-
Select the unallocated space and click Next. Windows detects that the PC was booted into UEFI mode, and reformats the drive using the GPT drive format, and begins the installation.
-
-
On 26/7/2015 at 3:56 PM, pixma21 said:
goodday sir.. according to my friend .. without 8970m graphics card will sure boot to bios.. according to him "the m18x r1 mobo doesnt support 8970, it is hard coded to mobo..." .. which he said the reason while i cant boot to bios.. he said, the only solution we got is to reflash the 8970m to 7970m which kinda a big trouble cant the 8970m wont let to be reflash back to 7970m ..( a huge pain.) we will try another alternative and let him do it.. great.>
 gtx 970m sli and 3940xm @ 4.5ghz would be so a great partner and deliver about 50% more than gtx 980m . .... but will 330watts will work nicely with gtx 970m sli (150watts) and i7 3940xm oc to 4.5hz..?
I sit on my alienware m18x r1 now with my 8970m working flawlessly!
I took it from my clevo laptop.
Benchmark on alienware m18x r1 with amd 8970m from clevo p170em and prema vbios mod.
The benchmark is Unigine Valley on 1080p and Ultra settings
-
Try the vbios first, it is easier changing vbios than a normal bios. Also screw up the vbios only srews up the gpu.
Do you still having trouble downloading the vbios?
Do you have another laptop so you can try switch graphics card?
-
3 things:
1. If the heatsink is full of dust and the thermal paste on the gpu is hard, then you might have fried the gpu.
2. If not, try get a new vbios for your card. (vbios is a bios only for the graphics card, so if it screws up you only screw up the gpu, not your motherboard)
3. If it's fried, try search on how to bake your graphics card. Yes bake! Put it in the oven a bake it. Sometimes if something has been burned over, it can solder it back again.
-
Just to make sure, have you tried to remove the small bios battery?
Steps you can try.
Remove any power source from the computer, also the battery.
Remove the bios battery.
Hold the powerbutton for 30 sec to drain remaining power from the system.
Put the bios battery back.
Plug you power cable into the computer.
Do not insert normal battery yet.
Try boot the laptop.
It should give a 5 beeps beepcode.
Turn off the computer again by holding the power button.
Now hold the "FN" key on the keyboard down and turn on the computer.
It should turn on for 5 seconds and restart. Keep holding the "FN" key, can't remember when to let go.
Now it should boot normally.
-
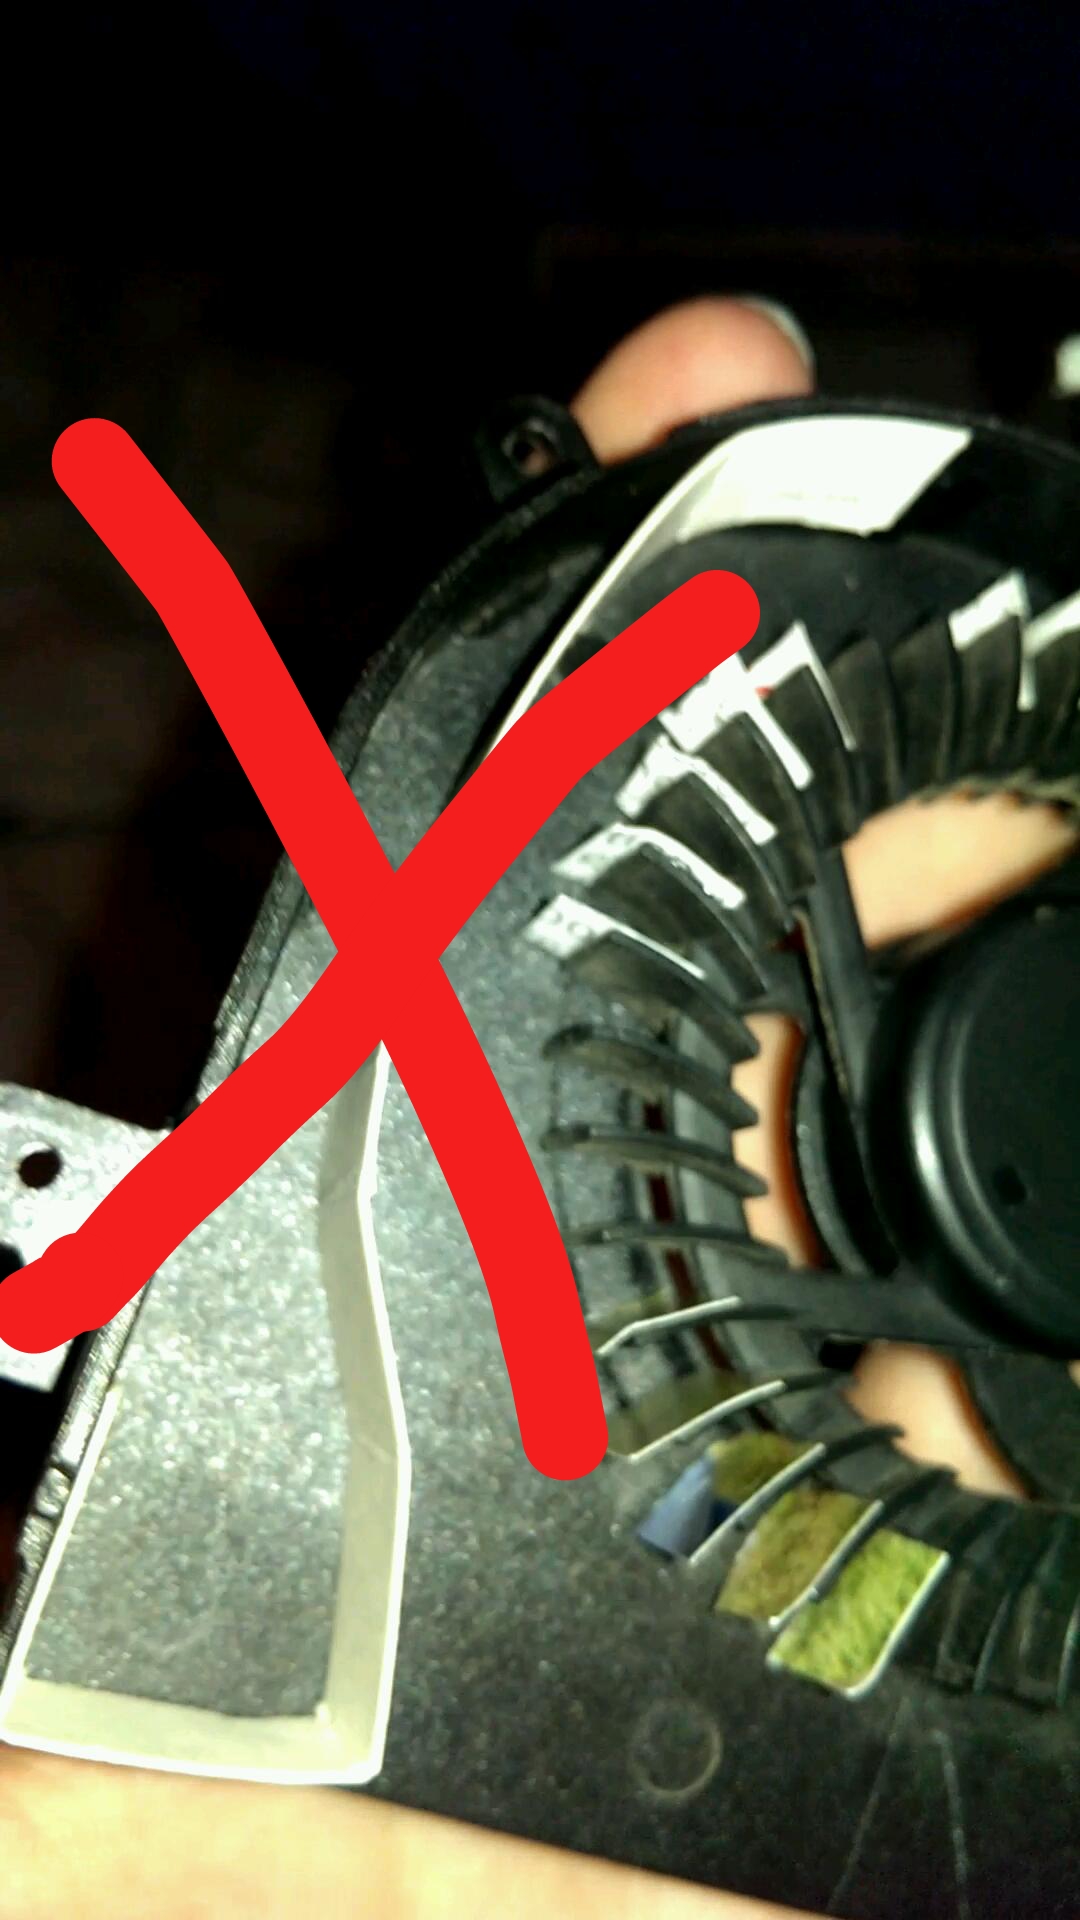
By the way, it is a m18x r1 gpu fan with 4,8 CFM (it means how much it can blow)
One this you need to know when doing this mod. The noise get different.
I don't know if it's a littlebit louder or not. It doesn't have this typical hissing sound anymore, it's more like a buzzing.
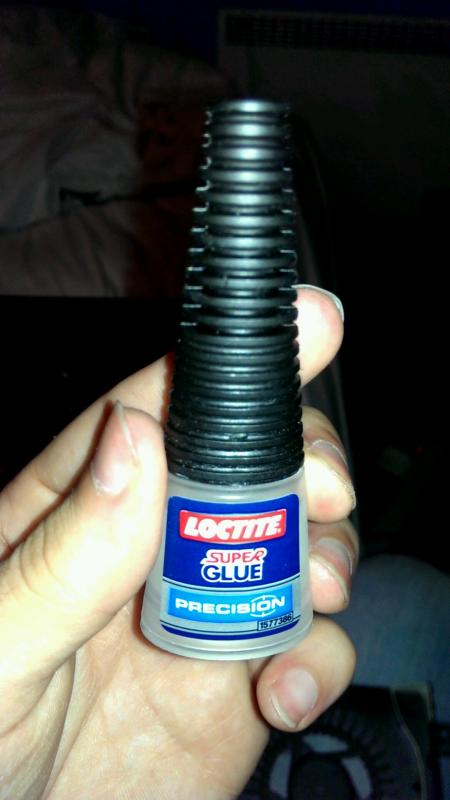
I used some fast drying superglue to get it stick. I recommend using some very watery glue, because it's easier to work with and you don't need so much.
If you found my explanations confused or not understandable just say it and I will try again. Hope you found it usefull.
-
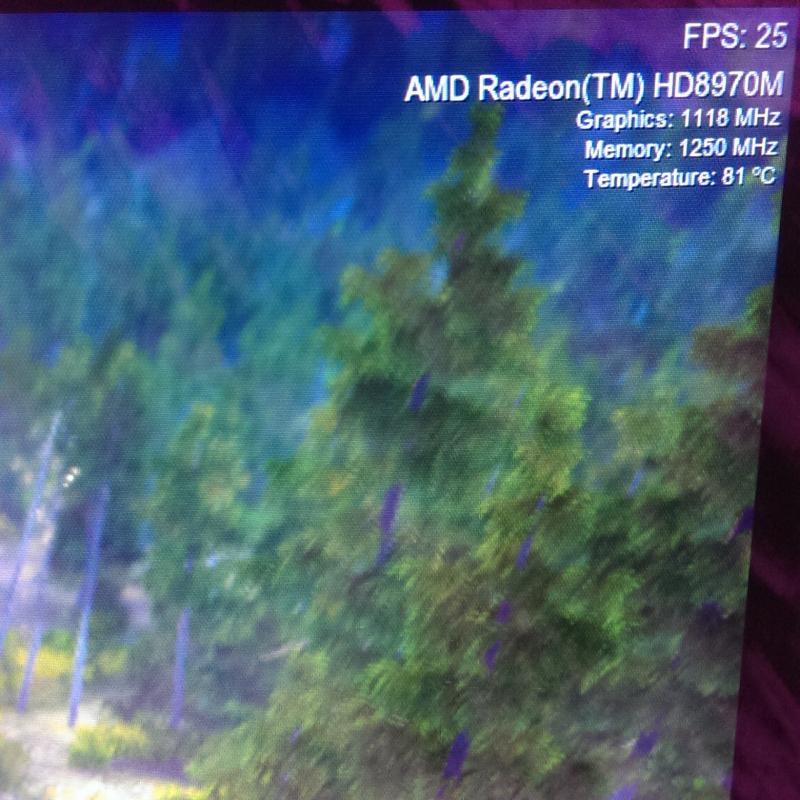
I did another modification.
Now I had the air power I needed, now I just needed to get the most out of it.
I made a small reconstruction of the fan making, the air spread more.
When I tested it, yes indeed the air came trough the entire heatsink, but when starting the benchmark, the temps hit 90 degrees in 4 minutes and kept claiming.
So DO NOT MODIFY THE CONSTRUCTION! It makes it worse. Only make the wings wider.


Nvidia GTX680M 4G VRAM for Alienware M17XR4
in NVIDIA Video Cards
Posted
Not at all, I am very patient.")
To disable driver signature in Windows 10.
First you click on the Windows 10 logo in the bottom left corner and choose settings.
Then just follow the pictures.
When getting to the last picture press 7 or F7, it doesn't matter.
Remember, this way you only disable driver signature until you restart the computer again.
If you want to disable it permanently let me know.
If you already have it disable permanently then you will see your Windows build version in the right bottom corner when you are at the desktop.