Search the Community
Showing results for tags '1060'.
-
Hi, i have some questions about my laptop compatibilty for a egpu laptp specs: Intel Core i7-6500U CPU @ 2.50GHz Intel HD Graphics 520 8 GB RAM DDR3 1600 MHz so the first question i have, is possible adapt a desktop graphic card to this laptop? i see in this forum about similar models can do it, but what you do think about? ---------- the wifi adapter is a Intel AC 3165 wich is connected to a NGFF port of the laptop, so i will need the NGFF version of the EXP GDC adapter... i am correct in this??? -------- im think get a GTX 1070 or a 1060, the bandwhich of the NGFF port, and the cpu of my laptop have power enougth to use the 1070 or i'll be better a samller graphic card? --------- other question is what i need to change in the bios to enable correctly the eGPU? your help be useful to me thanks pd: sorry for my bad english :/
-
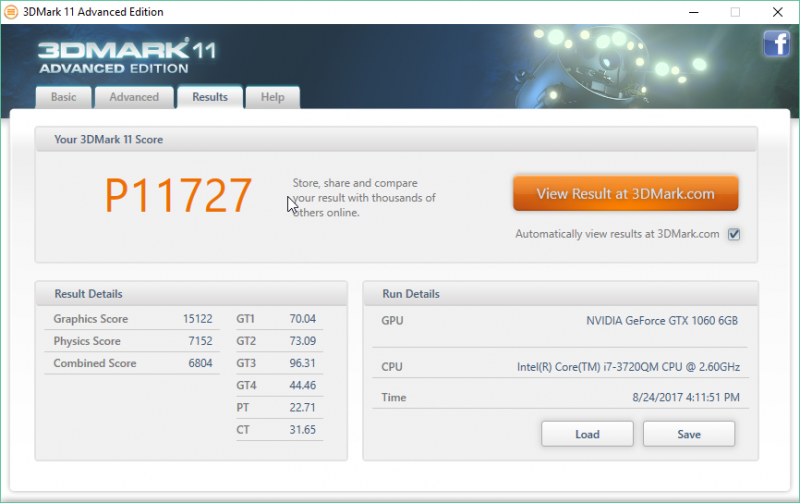
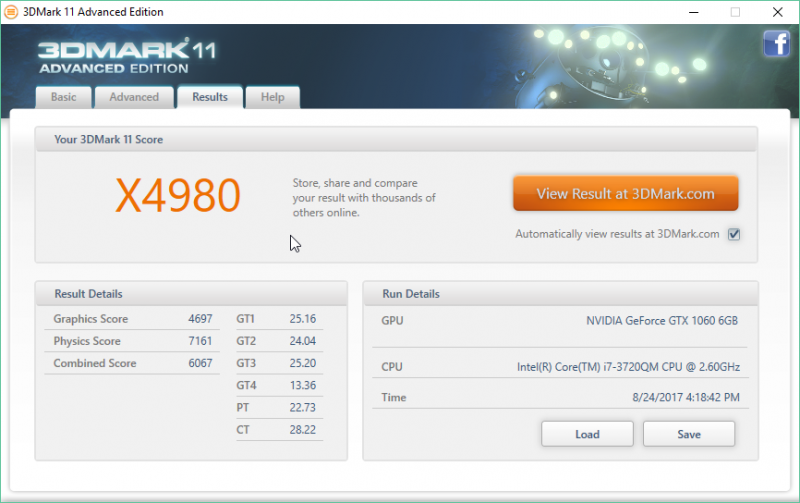
M17xR4 upgrade 680m to 1060I kindly apologise for my atrocious formatting, I have never written such a long thread before. Hey everyone, this is my experience regarding upgrading my m17xR4(2012) with a 680m and a 3D 120hz display to a GTX 1060. Please bear with me as it will be a long story.A little bit of background, on May 11, 2017, my laptop suddenly shut itself down when playing some Witcher 3. No response, no power, no lights, certainly dead.http://forum.notebookreview.com/thr...t-motherboard-replaced-but-still-dead.805508/Called Dell India, they recommended motherboard replacement (not quite as much as a recommendation but as an only option.) 15000INR for that. (~235USD)Still not resolved, no light, no post, no power. But if I remove the 680m, the laptop boots but gives 8 beeps, indicating a GPU or LCD failure. Putting the gpu back in causes a short circuit and no power to system.Dell technician recommended GPU and LCD replacement. Will cost about 15000INR(235USSD) for GPU and 8000INR(125USD) for the LCD.Sure, why not.New GPU time. And boy oh boy, I was in for a headache.Initial plan was for GTX 980m, easy and simple upgrade, tried and tested.I contacted @woodzstack, he suggested me the 1060, approx. 30% more performance for the same price. I went ahead with that.He is a well-known and an excellent seller here on NBR and other forums.So I got myself a 1060 with a heatsink. The heatsink on my 680m had worn out screws and I couldn’t remove it to reuse it (tried a Dremel to make grooves). The 1060 was available and ready to ship, the heatsink was on back order which caused some delay. Thankfully, woodzstack provided me with a free upgrade to faster shipping. Thanks! Then came the headaches. As I didn’t have a backup or fall back gpu (680m died), I wasn’t able to change the settings in bios required for 1060 and the system won’t boot with a 1060 ass the settings were incorrect. Also, I had the motherboard replaced which had stock bios. Got 8 beeps with 1060 installed, indicating gpu or LCD failure, which it wasn’t. Also, being a 120hz 3d display, I couldn’t use the intel gpu, as it won’t be able to run the display.Stuck in catch22 situation there. I contemplated returning the gpu as I hadn’t gotten it to work, and it had gotten quite expensive(motherboard+gpu+heatsink). I posted on various forums for 2nd hand 680Ms or even lower gpu. Woodzstack offered a 680M but shipping was quite expensive.Then @maxslo came to my rescue, he offered a used Quadro K1000M. Just pay for shipping and its mine. Notebookcheck states that its equivalent to a GT 630M, so it was from my series of gpu. I didn’t know if it would work or not, I took a gamble, if it didn’t work I would return all the stuff and get a new laptop (or a desktop maybe?)It took its own sweet time to come as it was via national post (can’t complain, got the card only for shipping cost)And when it came, I installed it, hit the power. I TURNED ON. It was alive!I quickly got into bios, changed the settings and installed the 1060.But alas, it didn’t start. 8 beeps again. Woodzstack helped here again.The issue was default display setting in bios and the uefi settings. Uefi needs a compatible gpu to save that setting and boot with that gpu. As k1000m wasn’t a uefi compliant gpu, I was stuck again. But changing the graphics settings to auto and then it let me disable the legacy settings. After applying these settings and installing the 1060, it let me boot.Somewhat.No bootable media detected. Press any key to restart.Turns out that the gtx 1060 is fussy even about bot drive partitions. Had to reinstall windows on a GPT partition. MBR to GPT conversion did not work. Needed a fresh install.Finally, after 3 months of patience, I could revive my laptop.II would like to thank these threads and their authorshttps://www.techinferno.com/index.php?/forums/topic/10982-m17x-r4-gtx-1060-upgrade/https://www.techinferno.com/index.p...x-r4-another-socket-victory-against-bga-crap/Note: for 680m, the benchmark was done on max overclock +300 core and +500 memory. Stock score would be nearer to 3DM11 P=6300-6500, Ex=2200-2400Unfortunately, I don’t have 3dmark scores for 680m Note: This is same as my thread on NBR. Posting here as well for people not on NBR. http://forum.notebookreview.com/threads/m17xr4-upgrade-680m-to-1060.808327 Some benchmarks
-
I tried to extract the .bin from the .exe (on Dell's website) using PhoenixTool v.273, and in a way it worked... I want to change the TDP values on my 1060mq but when I tried to open the .bin in Mobile Pascal TDP Tweaker, this is what happened. Can somebody help me? Here's the original .exe and the .bin. Thanks! (note: I wasn't able to extract the bios using AFUWINGUI64 or any other similar tool as I think Dell has some type of guard or protection against that, suspecting that's also the cause of my current issues...)
-
So, i have a GT72VR with a 1060 , and after some testing i saw that it is beeing underused. Even using MSI Afterburner the core only reaches ~1800Mhz (in 100% usage , and 9000Mhz on the memories ). This happens because it reaches the Power limit ( 100% , and its blocked) ; is there a custom BIOS (or any other way) to unlock it ? In terms of temperatures it has more than room for it, it only reaches ~75ºC at ~60% fan speed, and it has a 230W PSU (more than enough to push the 1060 further) Thanks
-
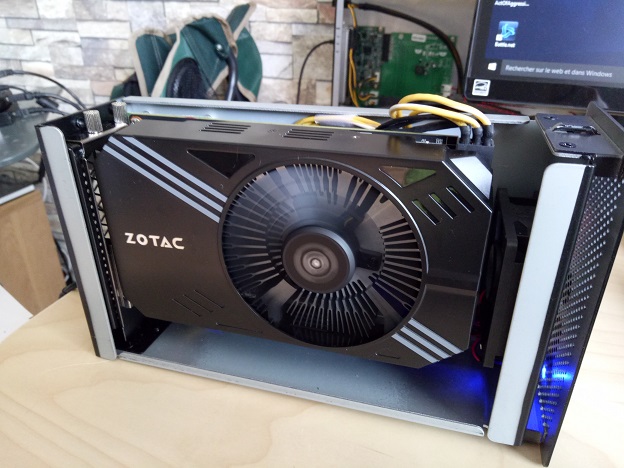
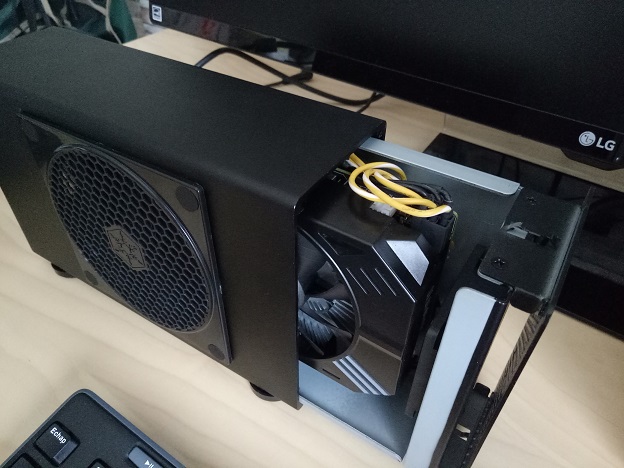
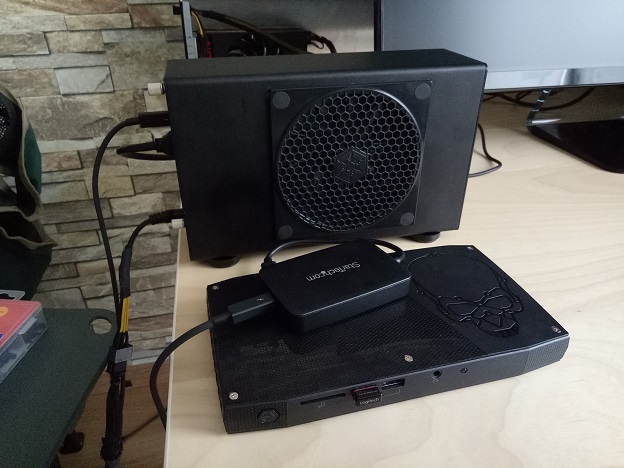
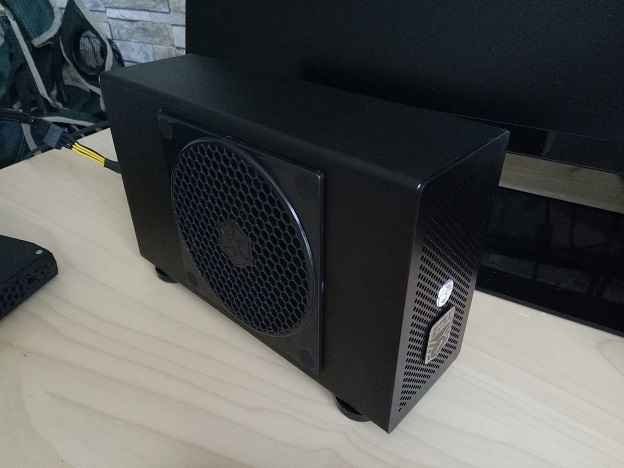
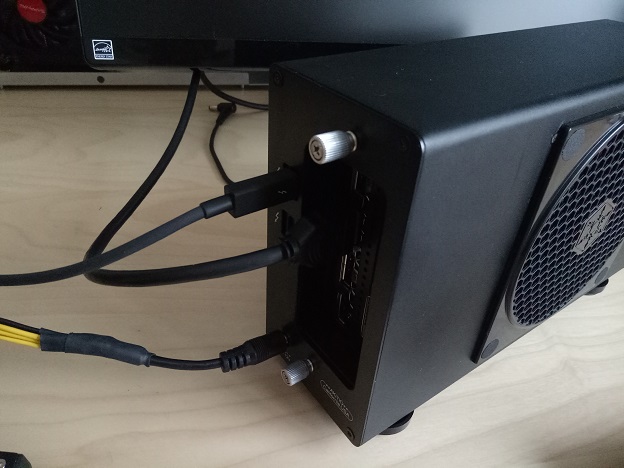
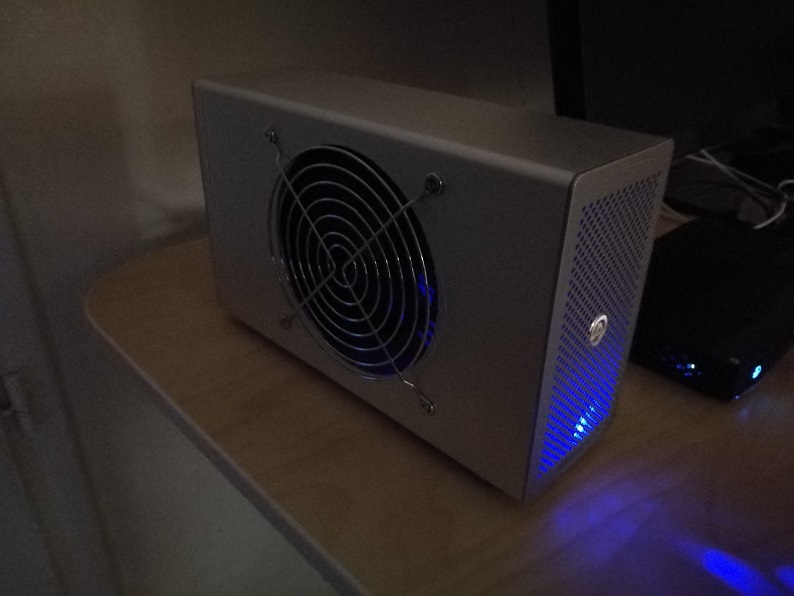
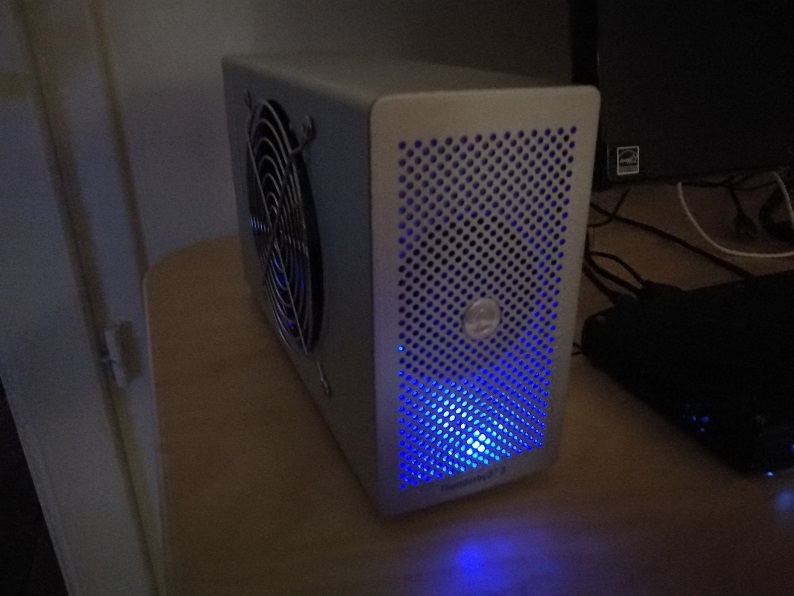
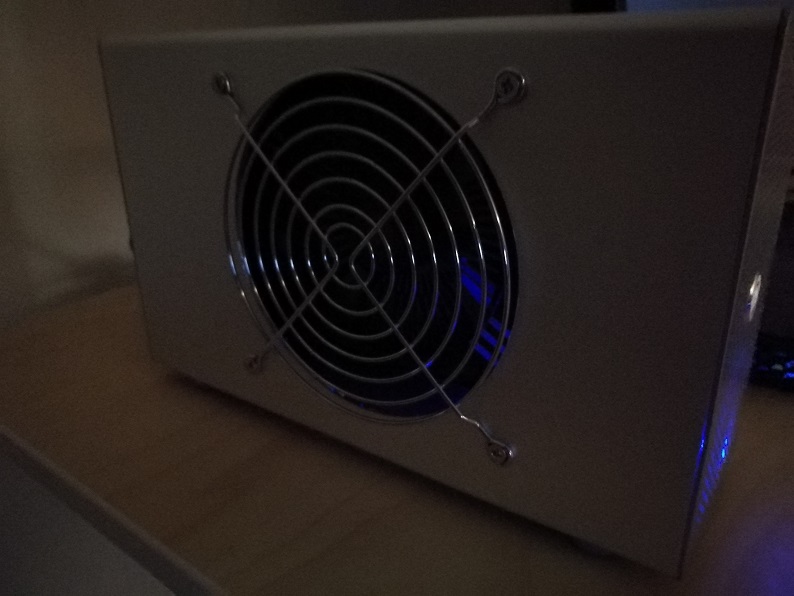
Here is my first attempt of doing building an e-GPU. What I wanted to do : Due to the fact that having a Razer Core is a pain in the *** and because it's a 7Kg not so portable solution, I decided to build myself my own e-GPU using an Akitio Thunder2 casing for the latest Intel NUC6i7KYK “Skull Canyon”. I also wanted not to change the power connector of the casing. Costs : Akitio Thunder2 : 211.45€ Thunderbolt3 to Thunderbolt2/1 adapter : 95.19€ Dell DA-2 Power Supply : 27€ ZOTAC GTX 1060 6GB : 320€ (174mm x 111.15mm) The Plan : The steps : 1\ Cut the DELL DA-2 cable properly to expose the 8 wires. 2\ Solder all GROUND together as well as all 12V together. 3\ Solder the 2 obtained wires to a 5.5x2.1mm barrel. 4\ Solder two thick wire from the barrel to the top back of the casing (15cm). 5\ Split the two wires into a 6 PIN MOLEX connector. 6\ Cut a 110mm hole inside the casing. 7\ Fix a fan/dust protection. How it works : Great ! Not so much test so far but pretty stable playing the latest DOOM. 2560x1080, HIGH settings with V-SYNC ON :60fps 2560x1080, HIGH settings with V-SYNC OFF : 90fps Next steps : Figure out if there is a difference in performance using the Akitio TB3 prototype. Photos (new model: Akitio Thunder3): Photos (old model: Akitio Thunder2):
-
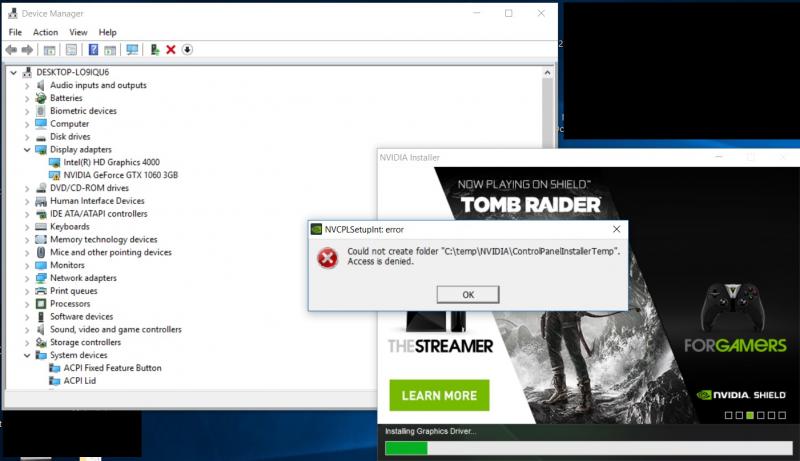
Hello guys, I wanted to give my older laptop a bit of kick. It's a W150ER (XMG A502) laptop with GT 650M. I got the GDC for mPCIe wifi slot, EVGA GTX 1060 and 450W Corsair PSU. But I need some help. 1. With everything wired up, having green LED on GDC device the eGPU wasn't recognized in device manager. eGPU fan was just wiggling in roughly 2s intervals. 2. I tried to hotswap from wifi to GDC as described in troubleshoot post, that made the system load the GTX 1060. Fan got spinning few seconds after swap and then turned off. Now what I got is the code 43 error and fans not spinning at all. Tried several ways that I found to overcome that, including installing older driver. During one of the installation attempts I actually got the external monitor loaded for few second before installation ended with error (still no fan spinning, even though the GTX 1060 got a bit warm). After failing to install the driver, GTX 1060 disappears from Display adapters and is available after restart again with error. Can anyone help me to get it working? What's with the fan? I'm kinda worried about it. Thank you very much!
-
Hello all, I am new to this forum so I apologize in advance if this question is in the wrong place or has already answered elsewhere. I am thinking about setting up my 13 inch mid 2012 non-retina MacBook Pro with an eGPU. I considering an EVGA GeForce GTX 1060, similar to this one: http://www.newegg.com/Product/Product.aspx?Item=N82E16814487267 I am also considering an AKiTiO Thunder2 PCIe box since it is not too expensive: http://a.co/7TsdwNH I know I will need an power supply of some sort as well but am not sure what I want to get yet since I am new to all of this (any suggestions are welcome). So, my main question is, with the GTX 1060 fit in the Thunder2 box without modification? I also request that if anyone knows of a cheaper thunderbolt 2 box out there please let me know. I would like to set up this GPU as cost effectively as possible. Thank you in advance for your help!
-
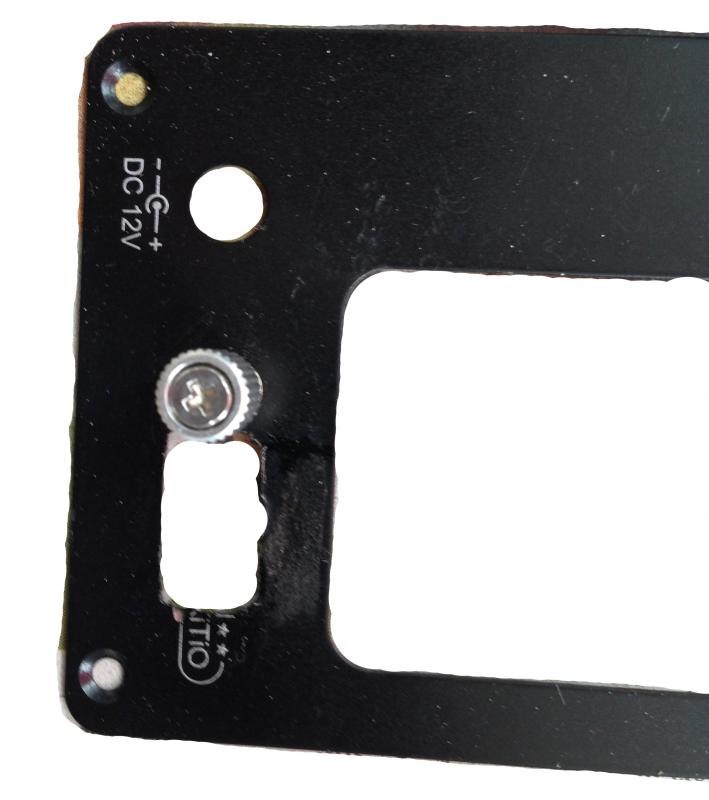
Currently I have two different akitio thunder 2 setups and one runs with 970 (will be referred as setup 1) and other with 1060 (will be referred as setup 2). 970 uses a more basic cabling setup and it has wire mesh paper tray cut attached. The other one has 8pin male connector replacement for the adapter socket and drilled surface. In this post I would like to do a quick comparison in between those two for cooling and performance. BTW, I am just an amateur who enjoys playing rc toys, completely have an unrelated profession and wanted to build egpu setups as a hobby. Also, I have many macbooks around me and wanted to expand their lifespans increasing their graphical design, gaming and cuda computation capabilities. I could not have gone this far without @Dschijn @Nando @goalque and @seefew s setups and descriptive posts. To start with for sure you will need Akitio thunder 2 or preferably Thunder 3 and also a graphic card. I decided to fit graphics cards in to the boxes in order to carry them around with a camera bag (cheap canon or nikon camera bags are perfect to carry akitio setups and their adapters). My must have tool kit list: 1. Dremel rotary tool (even the cheapest will do the job), dremel work station with. Proxxon and bosch also have similar tools but the key is head should be capable of holding small cutting wheels for hobby crafting. 2. Soldering station capable of at least 350 degrees Celsius (if you are going to replace akitio thunder 2's adaptor socket you would need at least 350 for sure). 3. Heat gun to wrap cable tubes 4. A multimeter to mesure 5. Glue gun 6. Welding kit (if you will cut/expand the front but still make it use the front grill) Consumables: 1. Zip ties 2. Solder wire 3. Glue gun sticks 4. 2.5mm Drill bits (at least 20 for case drilling required) 5. Dremel metal cutting wheels (at least 5) and couple grinding and polishing heads. 6. PSU cables (18 AWG or something like that) Used parts and pieces in my Akitio setups (I have no endorsements or something like that from the brands but I will just write them so you guys can found them easily): 1. Frozencpu connectright 8pin male eps 12v p8 connector ( setup 1) $2.98 2. 4pin male and female connector (to attach capacitors with fashion) $0.55 each 3. Gold plated female and male pins - 4 pack and $0.99 for male and $0.99 for female 4. Mod/smart full pin removal kit (to remove back pin connectors if you will mess the cabling) 5. Full automated ksd9700 series thermal switch to attach to front fans (I preferred 70 degrees) 6. Noctua nf9x14pwm 92 x 14mm pwm fans $21.95 x 2 (you can fit 2 of those beasts and yes they are a game changer) 7. Moddiy.com 8-Pin CPU/EPS Male Header Connector - 90% Angled - Black 1.99 USD (setup 2) you need at least two in order to get couple extra long pin legs 8. Moddiy.com Mini 4-Pin GPU to 2 x 4-Pin PWM Fan Adapter (to connect noctua fans to graphic card's pwm socket to have digital spin controls) $5.99 9. Dell 220w DA-2 Ac Power supply adater $23.99 or Corsair sf450 mini psu $89 (Dell da2 are what I prefer for my setups but for larger graphics cards sf450 is the ideal) 10. 4700mf capacitors (I used 4) $0.8 each 11. 12v swich (I used round led switch for my setup 1 and stick switch for setup 2) $0.4 12. PCI-E 8 PIN Y SPLIT TO 90 DEGREE RIGHT LOW PROFILE PCI-E 6 AND 8 PIN (you can make one by yourself or buy one from ebay) 13. Cheap 60 x15mm fans (I used two of those) $4 Cabling for setup 1, takes around 4 hours to complete (I am going to describe only the difference between other setups posted in the forum): 1. Easiest way around is expanding low profile 8pin connector's cable to somewhere around 15-20 cms in order to make an L shape starting at the top where gpu's power socket rests and take it down to the akitio's power adapter sockets. At this point you can reduce the cables to one yellow and and one black and solder those two to the back of the power socket. Image below is from my setup 2 but it represents where you should solder the yellow and the black. 2. Bend left leg of the graphics card and place a 8 pin male connector and solder each yellow and black cables to get only one of each and solder those two cables to back of the akitio 2's power socket. So in total you would solder 2 sets of cables to the back to power the graphics card and to power the akitio's card using the power coming from the 8 pin connector. If you are using a psu such as corsair sf450 you can use all 4 black and 4 yellow cables to power the board but if you will use dell da2 you should use one for the power switch and other should be blank so only 6 cables will power the card. (this step is extensively described in other posts) 3. Cut back of the two plates in a rectangular 8pin shape using dremel rotary tool and steel cutting wheel. This step just requires attention but it is very easy to do in 3 minutes. Just use a pencil to draw the shape and slowly cut the plate. (image was on top of a document so I did a quick edit) . 4.I used a round led switch for my first setup and attached it to the front of the case. To fit the switch I first created a small hole with a 2.5mm drill bit and expanded that using a round dremel rotary head. Then attached one cable to one of the 8pin connector's line's to power dell da2's switch line and grounded it to one of the 3.4v sockets as the yellow cable at the right hand side of the card. 5. Cover all cables and sockets with tubes, or hot glue gun. Cabling for setup 2 takes around 4 hours to complete: 1. Using the soldering iron remove the existing power socket of the akitio from the board. Heat it from the back legs and it will drop. 2. Organize legs of Moddiy.com 8-Pin CPU/EPS Male Header Connector in order to match the holes. I soldered and grouped legs of 2s to fit only one positive and one neutral leg. 3. Soldered two separate cable lines to the legs to power gpu and attached a Y SPLIT TO 90 DEGREE RIGHT LOW PROFILE PCI-E 6 AND 8 PIN 4. Soldered 4 capacitors to 4pin connectors via cable then attached them to other soldered pair. 5. Soldered one yellow one black cable to the board in order to power front fans and soldered ksd9700 thermal switch to the black cable. 6. Paired two front fans cables with matching cables and soldered to the yellow cable (step6) and empty black cable coming from thermal switch. 7. Cover all cables and sockets with tubes, or hot glue gun. Ventilation for setup 1 takes around 2 hours to complete: 1. Cut the exterior of the box using steel cutting wheels following rectangular shape among yellow and blue sections of the diagram 2. Cut a rectangular mesh grill from the paper holder and slide it in to the box. 3. Stick mesh grill with a epoxy or weld it in. 4. Apply black spray paint (I took it to a auto paint shop for proper painting) Ventilation for setup 2: 1. Cut the front inner side in a rectangular shape to fit to 60mm fans on top of each other. To be able to do so you should weld sides of the front sides so it does not come apart. Place two fans. 2. First hit with a sharp steel to create small holes (punches) following the diagram. Then drill thousands of 2.5mm holes using dremel work station and rotary tool. (This step took my 22 hours) 3. Clean holes with sandpaper and paint. (In the attached image I was using it with the setup 1) Post will be edited soon...
-
- 2
-

-
- akitio
- thunderbolt
-
(and 7 more)
Tagged with:
-
Well guys...so now we know... What are your thoughts and first initial impressions? Do you foresee the new cooling design being able to cool the 1080 better than DTR's/Clevo's? Are you going to be ditching your current AW to get the new one? Will you be buying a different brand all together? Reason for the switch? Are you willing to pay DTR prices for the new AW if it turns out that way? (AW 1070 pricing is now available) Which screen option will you be opting for? FHD, QHD, or 4K? Do you care for Tobii? How long do you normally keep your laptop? -> Do you normally upgrade every year with the latest refresh? --> If so, is having LGA/MXM really practical for you? Things that I like: "...magnesium alloy for rigidity, copper for better performance and steel...." ".....overclockable DDR4 system memory capable of up to 2667 MHz overclockable DDR4 system memory capable of up to 2667 MHz....." ".... 17" QHD 120Hz display is designed to deliver the smoothest gaming experience with 4ms response time, wide viewing angles, 400 nits of brightness, and NVIDIA G-Sync technology...." "....a thinner design, better ventilation, higher quality sound and external ports organization...." ".... larger and more effective speaker box has been installed, improving audio output for a clearer and more dramatic gaming experience....." "....Avoid excess cables and embrace the “desktop mode” design, where most of your critical connections and ports are in the back and out of the way....." "....We offer the maximum amount of battery power legally allowed with the 99 Whr battery– storing and delivering the most amount of power found in any notebook battery for longer uninterrupted game play....." Don't forget the LED lighting that unlocks the BIOS and makes the AW hover for better ventilation. On another note, this is one step in the right direction...it can breathe I take it... What we know so far (stuff that we actually care about): * New AW17 1080 will be 180W and GDDR5X https://www.twitch.tv/alienware/v/87746534 (Thanks @DeeX for the heads up. Also confirmed from the horses mouth himself, Azor.) @ 4:46:26 …mentions 180W @ 4:49:33 ...worth watching it from here, lol... @ 4:50:10 ...takes a crack at Clevo...I love DTR's, but what he says is true. No heart behind Clevo's design, just a bunch of rebranded, rebrands. * Full on Copper heat sinks and heat pipes. * Back of display is metal. * Bottom of laptop is metal, anodized aluminum. * Laptop is very rigid. Watch them try bending it...it's solid as a rock. Lots of metal. * Keys on the keyboard are guaranteed and rated at 10 Million strokes. * Keys have a longer 2.2mm travel length. * N Key roll over technology. Able to register multiple keystrokes. * 19 Total Macro Keys. More added near the Num pad side on the 17". * The back plate of keyboard is steel enforced, all metal. * Bottom and Side air intakes. * Designed to keep the heat toward the rear and away from the front areas, keyboard / palm rest. ____________________________UPDATE (9/14/16)____________________________ Well guys: Click here Here are some early pricing (out) comparisons. I've been playing around with different configurations to get an idea of what we can expect for the overall pricing. I've noticed that it is a bit more ala carte in a way...well kinda... Note: It's possible that my numbers are off and if it is then I'll update it, but please do go price it yourself if you have a moment... Couple things I've noticed: * There is an option to get a display unit without Tobii. Thank goodness. I wonder if this is true for the up coming QHD panel? * The price for the 4K UHD w/ Frobii is outrageous. +$400?! Sheesh... Hope they offer 4K without Frobii. ____________________________UPDATE (9/23/16)____________________________ www.Alienware.com is now LIVE with pricing of the new machines, but only up to GTX 1070 configurations. --- Early Comparisons of an Alienware 17R4 (GTX 1070) vs Clevo P775DM3 (GTX1070): (Blue = Better / Red = Falls Short / Grey = Equal) ------------------------------------------- Clevo P775DM3 / Fager NP9172-S * i7-6700K * 1080 FHD w/ GSYNC * GTX 1070 * 16GB RAM DDR4 2400MHz * 256GB M.2 SSD * Killer 1535 * 2 Year Warranty …$2,114…NO TAX w/ GTX 1080: $2,502 Options: * 4K UHD w/ GSYNC is +$275 ________________________________ Alienware 17R4: * i7-6820HK * 1080 FHD w/o GSYNC * GTX 1070 * 16GB DDR4 2400MHz * 256GB M.2 SSD + 1TB Paper Weight * Killer 1525 * 2 Year Warranty $2,474 + PLUS TAX $198 (Avg. 8%) = ...$2,672... Options: * 4K UHD w/ Fobii Eye Tracking is +$400 ________________________________ Reality in terms of value to cost ratio: * 6700K (socketed lga) > 6820HK (mobile bga) * GTX 1080 for only $275 more on the DTR. How much more will GTX1080 be on the AW? * 1080FHD has GSYNC on DTR * Can paying $558 More for AW17R4 be justified? ________________________________ Current thoughts at this time and moment: Well to be honest, as for the pricing it doesn't look good if the numbers on the pricing page is anywhere near accurate. There's no way that I can justify paying ~$558 more at this point, however, that can change depending on the GTX 1080 and QHD variant. It's too early to tell. I'd like to also add that the 2 Year Warranty for Dell is "Blue," because it is far superior than Clevo's 2 Year Warranty. This is a fact (at least if you're in the US), so please let's not argue about this. As I've said before, "Do not pay DTR prices for a bga machine." This is just my opinion and everyone is entitled to their own, but please do the math and make a wise decision that best fits you and your needs. Notice that the comparison is between the AW17R4 vs the Clevo P775DM3, which is not the bulky DTR, but the more slimmer and (IMO) cleaner looking one. What are your thoughts?


