

badbadbad
-
Posts
141 -
Joined
-
Last visited
-
Days Won
3
Content Type
Profiles
Forums
Downloads
Posts posted by badbadbad
-
-
This one is currently the cheapest (no shipping fee to US). Only problem is non-US keyboard.
This ad is for an HD screen only but the seller says that the 1080p screen will fit the 900p E6430. Does this mean he is selling 1080p compatible LED screens?
UPDATE: The seller claims that he does have a 1080p LED screen for the E6430. I'm asking him right now if it is a 2-channel LVDS 14" 1080p LED variant as discussed in the first page.
-
That's not really a big issue for me.
..you are basically using a single pipe to cool the CPU while on the E6430 you take advantage of both pipes...
Can't a couple of Copper shims bridge the two heat pipes?
This deal went by real fast but is essentially an E6430 for $120.
-
Seeing all that has been accomplished here makes me wonder if the E6530 shares the same upgrading capability. Would it be too greedy to ask for x2.2 and 1080p? LOL
-
I successfully flashed the Unlocked Descriptor, OC ME Firmware, and the x2.2 link.
My only problem is finding the right XTU version with the Core Clock Slider.
EDIT: Thanks @timohour, reflashing that MEOC FW you sent me did the trick!
-
I have a recovery partition left over from my HP 2570p installation. I think it's formatted to FAT32, and thus it's selectable in BIOS when setting to UEFI mode, and allows us to define an EFI boot device on it if we copy the EFI folder to the partition. Once it's added, even though the system is booted in Legacy mode, when pushing F12, we'll have the option to boot it.
I did use Clover in my 2570P to dual boot OSX. Looks like we can try to explore dual booting OSX for the E6430 too.
-
Yes, the vars in the link. I set them as you suggested, var 0x1D4 set to 0x0 and var 0x1D8 set to 0x1. Oh, I noticed I can also boot to the efi setting utility by copying the EFI folder to my recovery partition. No more USB stick required.
Setting: Primary Display, Variable: 0x1D4
Option: Auto, Value: 0x3
Option: IGFX, Value: 0x0
Option: PEG, Value: 0x1
Option: PCI Bus, Value: 0x2
Setting: Internal Graphics, Variable: 0x1D8
Option: Auto, Value: 0x2
Option: Disabled, Value: 0x0
Option: Enabled, Value: 0x1
These EFI variables can be very useful, and I'm thinking of adding this to the guide. Care to explain in a little more detail how to boot to EFI Setting Utility without a USB?
When setting Internal Graphics to Enabled without setting them as default, the system boots but gives Code43 on the Intel HD Graphics driver. Once set to IGFX default, everything is peaches.
Noted.
-
@uyuzettin, Are you using HxD? If so, make sure you change the Data Type to Hex-Values.
I also want to note that I have successfully Unlocked my Flash Descriptor and Flashed the OC ME Firmware (thank you @Khenglish). Documented the steps, as usual.
@timohour, I'm currently encountering some problems with the steps for x2.2 and FITC.
After unlocking the Flash Descriptor and flashing the hex edited bios, I opened the same editedbios.bin in FITC.
In FITC, only the Flash Image\PDR Region Folder has an red X mark.(Is this expected?)
Navigated to Flash Image\PCH Strap and edited PCIe Port Configuration 1 to 01. Then I clicked Build Image.
What I noticed after clicking Build Image F5 is that it created:
- Int Folder (Contains Four Files: BIOS Region, Descriptor Region, GbE Region, ME Region)
- outimage.bin (12Mb File Size)
- outimage(1).bin (8Mb File Size)
- outimage(2).bin (4Mb File Size)
- outimage.map
Is there something that I did wrong, or should there really be 3 copies of outimage.bin?
Which among the files listed is needed for the next step in x2.2?
-
 1
1
- Int Folder (Contains Four Files: BIOS Region, Descriptor Region, GbE Region, ME Region)
-
Oh, I didn't know you could do that. That opens up other cheaper deals! Thanks Tech Inferno Fan!
-
Hey Dewos, welcome to the E6430 community! I too loved my 2570p, but the larger 1600x900 resolution is more suited to my needs. One thing to prepare for though is that this thing weighs a lot more than the 12.5" laptop we were used to.
If you don't mind a barebones system, Ebay occasionally sells a used No CPU/RAM/HDD/Battery unit for under $100. Pretty decent deal especially if the CoA sticker is still there.
-
Added this on the first post.. Thanks for your efforts
port 1 variable is 0xb2 port 4 0xb5
Also some variables need cold boot to take effect so you better shutdown and start up
Alright, I changed the last step in UEFI Variable Modification to Cold Boot.
-
1
-
-
Thank you for the feedback @timohour ! I've corrected the original post to allow the mods to do their cleanup magic. I haven't done the major tweaks yet, so most of it came from my understanding and imagination.
-
Here is a simple consolidated guide for those who, like me, have limited knowledge in hardware and software tweaking.
Be very careful in flashing your bios. A failed/faulty bios flash comes with a risk of potentially bricking your unit! You have been warned.
Special thanks to all the experts who have helped me up to this point, especially @Tech Inferno Fan, @Khenglish, and @timohour.
NEWBIE GUIDE TO TWEAKING THE DELL E6430
Permanently Unlocking Flash Descriptor
Requirements: Paper clip, USB Flash drive with FreeDOS (c/o Rufus) and fpt.exe; FITC.exe or any Hex Editor (ex. HxD)
Purpose: Allow Flashing of Modified ME Firmware; Unlocks the ability to set Port 1 or Port 3 @ x2.2 (for use with the PE4C v2.1 eGPU adapter)
Steps:
- Locate the IDT chip on your unit (Use the Disassembly Guide for help)
- Using a paper clip, bridge Pin 5 to either Pin 9 or the resistor and boot the laptop
- Boot to FreeDOS on startup using the USB (Press F12 then select Legacy>USB Storage)
- Create a backup of the original bios by using the command: fpt -d origbios.bin
- Open origbios.bin in a Hex Editor
- Locate HEX string: 00 00 0B 0A 00 00 0D 0C 18 01 08
- Replace string with: 00 00 FF FF 00 00 FF FF 18 01 08
- Save the file (editedbios.bin) and reboot laptop
- Boot to FreeDOS on startup using the USB (Press F12)
- Flash your new descriptor with fpt.exe using the command: fpt -desc -f editedbios.bin
Notes:
- If you did not bridge the pins correctly, you will get Error 26. Just shut down the unit and start over.
- If you bridged the pins correctly, you can restart the computer in FreeDOS (ctrl+alt+del) without losing the unlocked state (good for flashing the modified bios).
- If you bridged the pins correctly but did not flash the editedimage.bin descriptor yet, cold booting (Shut down, then Power on) will require the pin mod again.
- Keep the original image.bin in a safe place in case you need to revert back to original settings (for warranty/selling)
Flash Modified ME Firmware and BLCK Overclocking
Flashing someone else's E6430 overclocked ME firmware may encounter errors, and prevents the XTU Reference Clock slider from working. It is highly advised to follow Kenglish's guide to modifying your own ME Firmware.
Requirements: FITC; editedbios.bin; USB Flash drive loaded with FreeDOS (c/o Rufus) and fpt.exe; Unlocked Flash Descriptor; Intel XTU
Purpose: Overclocking using BCLK via XTU
Steps:
- Open your Bios Dump (preferrably editedbios.bin) using FITC
- Navigate to Flash Image>ME Region>Configuration>ICC Data>ICC Profile 0>FCIM/BTM Specific ICC Registers
- Check if the value of Clock Source Select is set to 0x00011A33 (If yes, then you can proceed)
-
Modify the Following Parameters to the values listed on this table
Address Parameter Value ..ICC Profile 0>FCIM/BTM Specific ICC Registers Clock Source Select 0x00011A34 ..ICC Profile 0>FCIM/BTM Specific ICC Registers SRC Source Select 0x00133744 ..ICC Profile 0>FCIM/BTM Specific ICC Registers PLL Reference Clock Select 0x000A8CBE ..ICC Profile 0>FCIM/BTM Specific ICC Registers Divider Enable 0x000005FF ..ICC Profile 0>FCIM/BTM Specific ICC Registers SSC Control 0x00000000 ..ICC Profile 0>ICC Registers Pl12BiasParms 0x00000888 - On the menu bar, select Build -> Build Image (or alternatively, press F5)
- After the build completes, go to the FITC folder where an outimage.bin has been created (same size as your editedbios.bin)
- Transfer the file to your FreeDOS USB
- Boot to FreeDOS on startup using the USB (Press F12 then select Legacy>USB Storage)
- Flash Modified ME Firmware using the command: fpt -me -f Outbin.bin
- Cold Boot (Shut Down, and Power On)
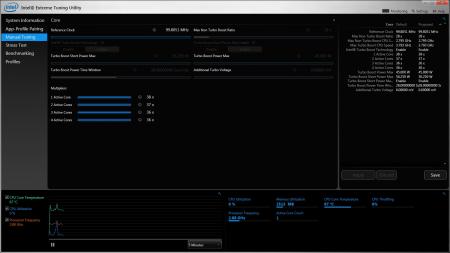
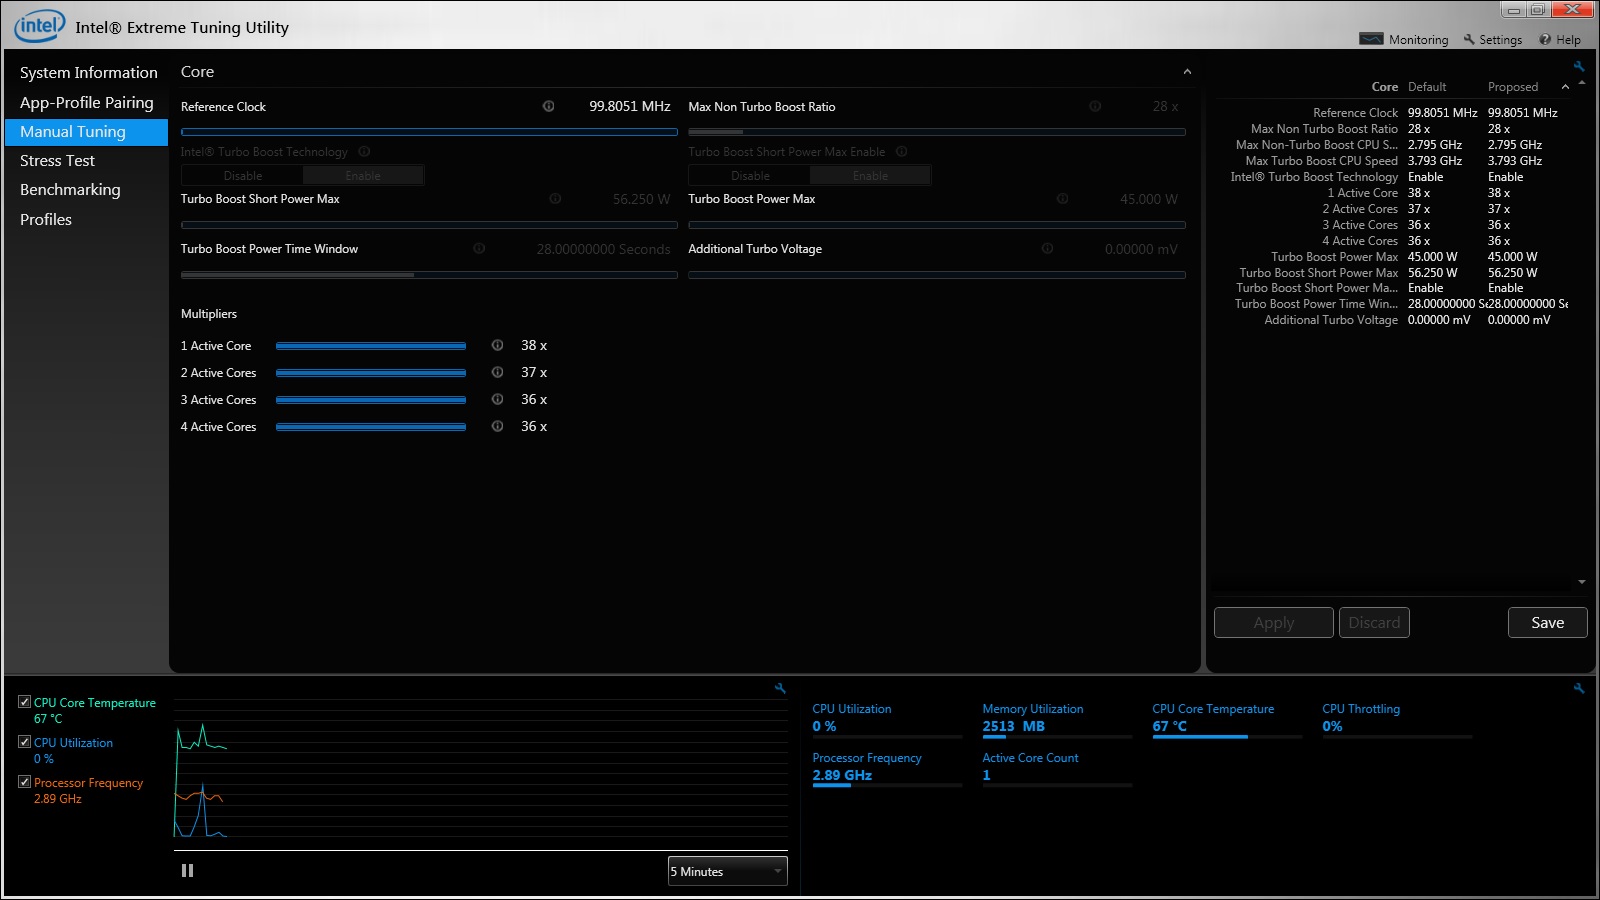
- Install and Open Intel Extreme Tuning Utility (XTU) - version may depend on your current Bios Version
- Select Manual Tuning and adjust slider to desired overclock
Note/s:
- When balancing BCLK Overclocking (core clock speed), and UEFI TDP/Multiplier (core multiplier), it is better to set the highest BCLK possible first, then adjust multipliers accordingly.
- Updating your integrated graphics driver will kill BCLK overclocking. Reinstall XTU to enable it again.
- When doing BCLK overclocking you can see some stuttering in games. Enable HPET in command line to fix this (Run CMD as admin, bcdedit /set useplatformclock true).
- You can't overclock in Windows 8/8.1 because there is no way for Windows to track time properly when BCLK is changed after startup. Windows 10 is still untested.
- XTU Versions
Setting Port1 @ x2.2 (Do this only if you own the PE4C 2.1 eGPU adapter!)
Requirements: USB Flash drive with FreeDOS (c/o Rufus), fpt.exe, and FITC.exe; Unlocked Flash Descriptor
Purpose: Combining two PCIe 2.0 ports to allow eGPU at x2.2 configuration (8GT/s)
Steps:
- Open FITC.exe and load your editedbios.bin dump or descriptor region
- Navigate to: Flash Image\Descriptor Region\PCH Straps\PCH Strap 9
- Double click on PCIe Port Configuration 1
- Replace 00: 4x1 Ports 1-4 (x1) with 01: 1x2, 2x1 Port 1 (x2), Port 2 (disabled), Ports 3,4 (x1)
- On the menu bar, select Build -> Build Image (or alternatively, press F5)
- After the build completes, go to the FITC folder where an outimage.bin has been created
- Transfer the file to your FreeDOS USB
- Boot to FreeDOS on startup using the USB (Press F12)
- Flash with fpt.exe using the command: fpt -desc -f outimage.bin
Note/s:
- Port 2 will no longer function as long as Port 1 is set at x2.2 (transfer your Wireless card to Port 5)
- If the outimage.bin file is too big for your USB, you can isolate the descriptor region by reopening outimage.bin with FITC. Inside the FITC folder, you will find a new folder with the name of your bios image. Inside the Decomp folder you will find a 4K Flash Descriptor.bin which you can flash using the command: fpt -desc -f Descriptor.bin )
UEFI Variable Modifications
Requirements: FAT32 formatted USB with Grub Bootloader (FILE)
Purpose: PCIe Generation 1/2 toggle, TOLUD/Power/CPU/RAM/Battery tweaks, and many more yet to be discovered!
Steps:
- Boot to GRUB on startup using the USB (Press F12)
- Test out GRUB by looking up RAID0 value (use the command: setup_var 0x12D )
- Depending on the desired modification, change the variables using the command: setup_var variable value
- Cold Boot (Shut Down, and Power On)
List of Modifiable Dell E6430 UEFI Variables (based on the IFR File) (Dell E6430)
-
Option Variable Values Notes Port 1 PCIe Speed (Gen1/2)
[mPCIe Slot]0xB2 0x0 (Auto), 0x1 (Gen1), 0x2 (Gen 2) [PCIe] Gen1 works if plugged prior to boot, Reverts back to Gen2 if hot plugged Port 2 PCIe Speed (Gen1/2)
[mPCIe Slot]0xB3 0x0 (Auto), 0x1 (Gen1), 0x2 (Gen 2) [PCIe] Gen1 works if plugged prior to boot, Reverts back to Gen2 if hot plugged Port 3 PCIe Speed (Gen1/2)
[Expresscard Slot]0xB4 0x0 (Auto), 0x1 (Gen1), 0x2 (Gen 2) [PCIe] Gen1 works if plugged prior to boot, Reverts back to Gen2 if hot plugged Port 4 PCIe Speed (Gen1/2)
[ODD Slot]0xB5 0x0 (Auto), 0x1 (Gen1), 0x2 (Gen 2) [PCIe] Gen1 works if plugged prior to boot, Reverts back to Gen2 if hot plugged Set Max TOLUD 0x1E5 0x0 (Dynamic), 0x3 (1GB),
0x4 (1.25Gb), 0x5 ( 1.5GB),
0x6 ( 1.75GB), 0x7 ( 2GB),
0x8 ( 2.25GB), 0x9 ( 2.5GB),
0xA ( 2.75GB), 0xB ( 3GB),
0xC ( 3.25GB)[PCIe] Adjust TOLUD to enable more space for PCIe compaction Long Duration Power Limit 0xB40 0x00-0xFF (8-bit value from 0-255) [Power] To get the Optimal setting (no TDP Throttling), check with Throttlestop, (Example: 0x50 = 80W) Short Duration Power Limit 0xB41 0x00-0xFF (8-bit value from 0-255) [Power] Sets short duration TDP limit of CPU. Default value is +12,5% of the original (0x64 = 100W) 1-Core Ratio Limit 0x25 0x00-0xFF (8-bit value from 0-255) [CPU] Assigned value is CPU Dependent. A good overclock rule is to gauge the stock's max multiplier with Throttlestop then increase that multiplier value by 4-bins.
You can also refer to this post for more information on figuring out the Multiplier limit2-Core Ratio Limit 0x26 0x00-0xFF (8-bit value from 0-255) [CPU] Assign one value less than 1-Core Ratio Limit 3-Core Ratio Limit 0x27 0x00-0xFF (8-bit value from 0-255) [CPU] Assign one value less than 2-Core Ratio Limit 4-Core Ratio Limit 0x28 0x00-0xFF (8-bit value from 0-255) [CPU] Assign the same value as 3-Core Ratio Limit DIMM Profile 0x1EE 0x0 (Default), 0x1 (Custom),
0x2 (XMP Profile 1),
0x3 (XMP Profile 2)[RAM] Not needed if RAM has existing JEDEC OC'd profile,
Locked RAM requires pre-flashing of XMP Profile (then select 0x2 or 0x3)ASPM Support 0xC 0x0 (Disabled), 0x37 (Auto),
0x1 (Force L0s)[Battery] Set to Auto Native ASPM 0xB04 0x0 (Disable), 0x1 (Enable) [Battery] Set to Enable GT OverClocking Support 0x16F 0x0 (Disable), 0x1 (Enable) [iGPU] Enable to allow iGPU Overclocking GT OverClocking Frequency 0x170 0x00-0xFF (8-bit value from 0-255) [iGPU] [the decimal value] x 50MHz (Example: 34 x 50mhz = 1700mhz) GT Overclocking Voltage 0x170 0x00-0xFF (8-bit value from 0-255) [iGPU] 0.01 increment for every value from 0x00 to 0xFF (Ex: 0x05 = +0.05V) Primary Display 0x1D4 0x0 (IGFX), 0x1 (PEG), 0x2 (PCI Bus), 0x3 (Auto) [iGPU] Set to 0x0 to force your laptop screen (Primary Display) to use iGPU. Allows eGPU plugged in during cold boot. Internal Graphics 0x1D8 0x0 (Disable), 0x1 (Enable), 0x2 (Auto) [iGPU] Set to 0x1 to enable the laptop screen to run off the iGPU. Allows eGPU to work on an external screen without disabling the iGPU. RAID0 0x12D 0x0 (Disable), 0x1 (Enable) [HDD] Toggle RAID0 array RAID1 0x12E 0x0 (Disable), 0x1 (Enable) [HDD] Toggle RAID1 array RAID10 0x12F 0x0 (Disable), 0x1 (Enable) [HDD] Toggle RAID10 array RAID5 0x130 0x0 (Disable), 0x1 (Enable) [HDD] Toggle RAID5 array Intel Rapid Recovery Technology 0x131 0x0 (Disable), 0x1 (Enable) [HDD] Toggle Intel Rapid Recovery Technology
Note/s: Make sure that the bootloader is located in: EFI\Boot\bootx64.efi
OTHER Mods- Disable Bidirectional PROCHOT (Throttlestop) to prevent CPU throttling.
-
Overclocking the dGPU
- Use a program like Nvidia Inspector or MSI Afterburner
- GPU clock would go up to 891 MHz and maximum memory would be 2100 MHz (requires a 130W PSU)
-
6
-
I'm currently in the process of unlocking the Flash Descriptor. Documenting the process so we can make the guide even easier to follow.
To make the unlock permanent all you have to do is mod your Flash Descriptor bios part using FITC or
get a hex editor, look for this HEX string: 00 00 0B 0A 00 00 0D 0C 18 01 08
and change it to: 00 00 FF FF 00 00 FF FF 18 01 08
then save the file. this will unlock the descriptor.
Flash it back and you are a free man. Now you can use FITC and set your port 1 (WWAN) to x2 2.0 mode.
Thanks to everyone who contributed so far. Feel free to correct or contribute.
I've downloaded FITC already. But I don't know what to do from there. I see the Flash Image\Bios Region
-
I've decided to play it safe and order an RF Mini Keyboard instead. It's arriving within the week and can be used for other projects too.
-
That's great news!!! Waiting for your implementation.
Regarding the descryptor flash, I have done it both ways. The first time I removed the palmrest but let the keyboard connected on the side (used a plastic bag under the keyboard to avoid any kind of shortcircuit). The second time I completely removed the palmrest and keyboard, and used a USB keyboard to boot/flash. If you have a second computer you can edit there your bios to unlock your descryptor. After you successfully apply the paperclip mod your descryptor will be unlocked as long as you don't shutdown your laptop (rebooting won't matter). Flashing the descryptor region with an modified dump will make the unlock permanent
Keep us posted.
Surely will. I was planning to document my implementation anyway to help other beginners like me. Guide seems easy enough to understand though.
Reverted back to Windows 7 Pro x64 so I can't really answer the DX12 question yet.
-
Hey guys! I've got all my parts setup for overclocking now and was hoping to ask for some advice as well.
My setup is the following:
LAPTOP: E6430 NVS5200, 900p
CPU: i7 3840 QM (QCF1)
RAM: Crucial 16Gb PC12800 1600MT/s
EGPU: PE4C v2.1 + GTX970 (Hoping to get at least x2.2)
For those who already did the paperclip mod, do you power on the laptop with the keyboard removed or can you just lift it from its position? Not sure if there is enough space for my hands to bridge the paperclip underneath an attached keyboard.
Also, once the system has properly booted after bridging, do I have to permanently Unlock the Flash descriptor before resetting the Laptop? Because that might mean I would have to use an external keyboard, or hotplug the keyboard I disconnected.
Thanks in advance!
-
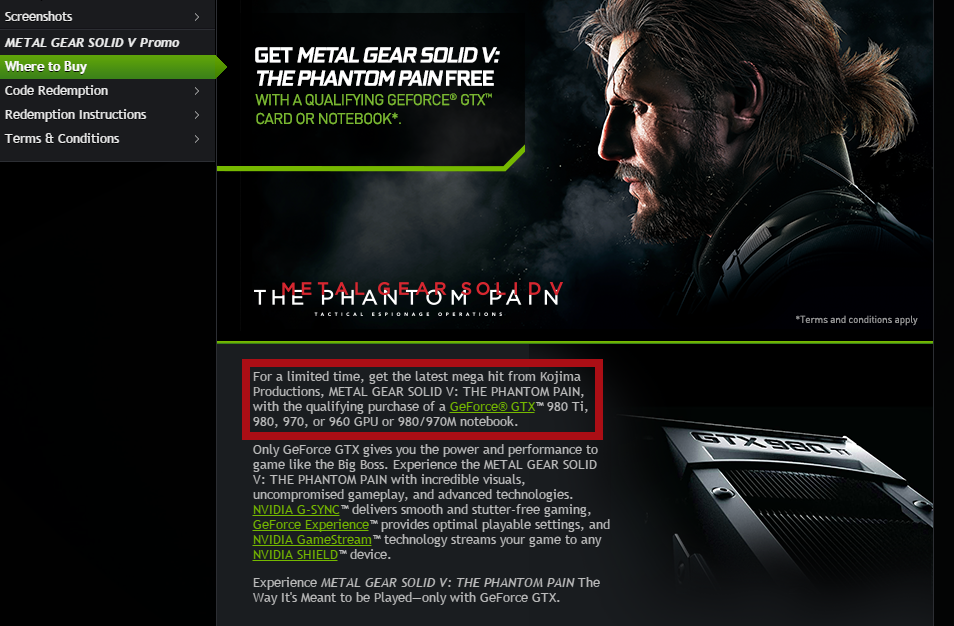
Those come as a Steam Bundle after activating the code. You can use it as added advertisement.
-
Yeah, They just didn't have the time to update it because their Code-Generating system was malfunctioning these past few weeks.
EDIT: @herman285, looks like the MGS V:TPP Codes are being distributed already! Did you get yours?
Also good to note are the extra included content:

-
Uh why do best buy have the code? I thought they don't have anything to do with the promotion?
It's part of the Nvidia deal, you bought an Nvidia/EVGA card so it's technically a bundled item with your purchase. You just have to claim it.
People have been receiving their codes from Newegg, and that is not even listed as one of their sponsors. It really wouldn't hurt to ask.
-
Maybe it's because of Windows 10.
-
I see. Thanks for the info. I ordered the cards from bestbuy on 7/17 but...
One card is PNY GTX 980 and the other is plain reference Nivida GTX 980. They are still unopen box right now.
1) Do you think I can still get the code?
2) Do I need to open the box to provide some serial number to Nivida customer support?
1. Maybe.
2. No. You contact Best Buy and ask for a code, while referring them to the Nvidia promo page.
-
EVGA is an authorized board partner. It's technically possible to receive a code if your purchase is still within the return period.
-
For those who scored a great deal in these past two weeks, you might want to push your luck a little bit more.

Just call customer service. They're more than willing to send a code through email. *fingers crossed*
-
There is hope after all.

-
1
-

14" Dell Latitude E6430 - Performance Upgrades and System Mods
in Dell Latitude, Vostro, and Precision
Posted
Seller retracted his statement. They do not have any 14" 1080p LED 2-channel LVDS screens for the E6430.