


kloper
-
Posts
24 -
Joined
-
Last visited
Content Type
Profiles
Forums
Downloads
Posts posted by kloper
-
-
How can i check Optimus whether its enable or not?
-
I wonder how much it would cost to clone the thing...
-
thanks

the SW1=1 i believe will only work on an EFI install (which means no Optimus internal lcd stuff)
-
NOTE: The US$180 BPlus TH05 (inc Thunderbolt cable) native Thunderbolt adapter used in this implementation was recalled in Jan 2013 due to (presumably) threats by Intel/Apple per TH05 recall notice. As a result refer to either of these solution that can be implemented today: http://forum.techinferno.com/diy-e-gpu-projects/4570-%5Bguide%5D-2012-13-rmbp-gtx660-sonnet-echo-express-se-%40-10gbps.html#post63754 or 2013 11" Macbook Air + Win7 + Sonnet Echo ExpressCard + PE4L + Internal LCD [uS$250].
Hi!
Well, with Apple having just released the new 2013 Macbook Airs and me being bored of my old heavy 13" Retina Macbook Pro, I figured, sure, lets try it out. As you might remember, I got my old laptop working perfectly with my eGPU (w/ Optimus) here: http://forum.techinferno.com/diy-e-gpu-projects/2728-%5Bguide%5D-2012-13-retina-mbp-bios-win7-gtx570%40x2-2-th05.html. Thing is, I'm not upgrading unless everything works again. Well, I'm happy to say that my newly purchased 11" Macbook Air (w/ i7 Haswell) is fully compatible -- and I've written instructions for how you could do it too!
We're going to be using Windows 7 BIOS (not windows 8, and not EFI). Getting Windows 8 EFI working with the eGPU is effortless, but Internal LCD rendering (via Optimus) doesn't seem to work. Windows 8 BIOS didnt work for the same reasons as the retina mbp (internal lcd remains off when the eGPU is plugged in). Also, I didn't get to try Windows 7 EFI because I couldn't get the damn installer to start.
Ok!
Benchmarks are coming [for reals this time!], and I'll update this thread once they're done. Spoiler: It's still insanely fast
 It's fast because this monitor is 1366x768, plus a crazy video card. Woo!
System specs
- Mid-2013 11" Macbook Air
- 1.7 GHz Intel Core i7-4650U (basically the most maxed out 11" mba)
- 8GB 1600 MHz DDR3
- Intel HD Graphics 5000 1024 MB
- Windows 7 Professional 64-bit (BIOS)
- 512GB Apple SSD
Requirements
-
TH05 Thunderbolt -> PCI-Express adapter. Unfortunately this adapter is still discontinued. Intel requires all Thunderbolt devices to be licensed and BPlus Technologies (the makers of the TH05) have been unable to get this license. Intel first complained about there not being a case, but when that was fixed, Intel came up with other excuses, forcibly preventing eGPUs from existing. See the Facebook discussion, and http://forum.techinferno.com/diy-e-gpu-projects/2680-th05-recall-notice.html, for more details. Although these instruction are specific to the TH05, they could also be relevant to other adapters.
-
NVidia GTX 570 videocard. Note you can probably use any video card including ATI cards and these instructions should be identical. See note at end about Internal LCD rendering on ATI cards.
-
300W power supply capable of running the video card. Look at your video card's spec sheet to see the peak wattage only it uses (not the suggested value that often includes motherboard + hard drives, etc).
-
2013 11" Macbook Air. Instructions should be identical for the 2013 13" Air though.
-
DIY eGPU Setup 1.X, developed by nando, available for purchase here: http://forum.techinferno.com/diy-e-gpu-projects/2123-diy-egpu-setup-1-x.html. This allows you to do the PCI bus remapping to allow windows to see both your internal Intel HD 4000 and the GTX 570. It also gets rid of the Error 12 that you'll usually get in a Windows BIOS install.
- A USB memory key that's at least 4GB for Boot Camp
- Other software: Windows 7 ISO (from MSDN / MSDNAA / etc).
PART A: Generic prep of Windows 7 64-bit
- On your mac use Boot Camp Assistant to prep a USB key with Windows 7 64-bit
- Still with Boot Camp Assistant, partition your main drive and start the Windows 7 installation process. I recommend around at least a 60GB partition. Games are big these days. If you just don't have the space, you can do what I do and turn off Hibernation Mode and the Virtual Memory Page File to save hard drive space (about 17GB together).
- Once partitioning is done, your computer will auto reboot and the Windows 7 installer will start. Install Windows 7.
- The Windows 7 installer will install the Boot Camp drivers at the end of it.
- Go to Intel's site and download the latest Intel HD 5000 drivers for Windows 7 64-bit.
- Launch Windows Update and apply all required/optional patches. Reboot as required. Repeat this step until nothing’s left.
- There's some clock weirdness when switching between Windows and OSX, so add the key HKEY_LOCAL_MACHINE\SYSTEM\CurrentControlSet\Control\TimeZoneInformation\RealTimeIsUniversal with DWORD value 1
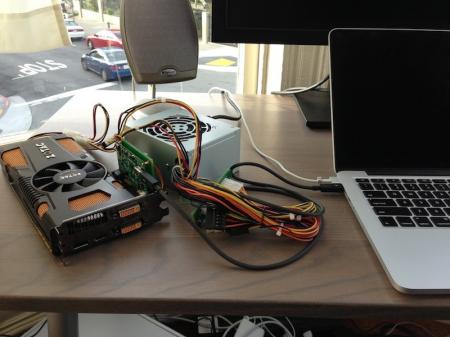
PART B: Putting together the eGPU and understanding the problem
- On the TH05, set SW1 to position 3 (6.9s, though note it's more like 30s). Set SW2 to 2-3 for 2X.
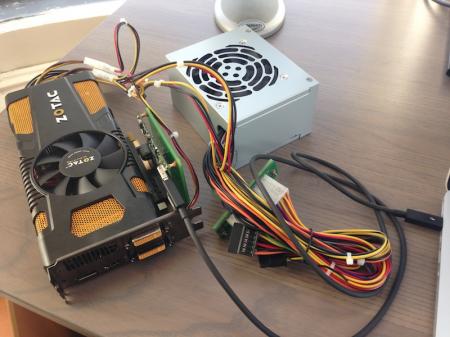
- Plug in the power (the white connector) on the TH05 to your power supply. There is no need to plug in the Black and Red cable (this is for automatic powersupply control, which doesnt work on the Macbook). Keep the pins disconnected on the TH05. Plug in the TH05 to your video card.
- Plug in the motherboard connector to the included SWEX adapter. Make sure it is in the ON position (1-2). Also plug in any required 6-pin/8-pin connectors to your GPU. Mine required 2 6-pin plugs.
- Make sure your laptop is shut down.
- Plug in the thunderbolt cable to the TH05 and then the laptop. Also, make sure no monitors are plugged into the video card.
- Turn on the power to the power supply, the GPUs fans should start, then start your laptop. Hold the Option key. Now wait for the red light to turn off on the TH05. Once it’s off, select Windows.
- Go to NVIDIA’s site, download and install the latest drivers for your video card. When prompted to reboot, shut down the computer instead.
- Turn off the eGPU’s power supply.
- Start the eGPU's power supply and boot your laptop, waiting for that red light to go off again before selecting your Windows partition. You will always need to do a power cycle of the eGPU when rebooting your computer because of the way the TH05 works.
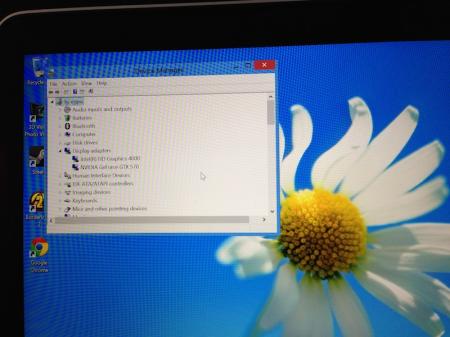
- Once Windows has started, open the Device Manager. Select Scan For New Hardware.
- Notice the GTX 570 is listed with the yellow exclamation mark. If you double click on it you’ll see the dreaded Error 12. This Error 12 means that Windows wasn’t able to allocate a contiguous block of memory for the video card. Yes you probably have 8GB in your laptop, but the PCI Bus doesn’t work that way. We’re going to get rid of that error by reallocating devices in the PCI Bus.
PART C: Getting rid of Error 12 on this Windows 7 (BIOS) install
- Go purchase DIY eGPU Setup 1.x here: http://forum.techinferno.com/diy-e-gpu-projects/2123-diy-egpu-setup-1-x.html and run the self-extracting exe on Windows to install to c:\eGPU.
- Open an administrator command line and run c:\eGPU\setup-disk-image.bat. This will install everything and add a boot item so you can load the video card. Next we'll configure DIY eGPU Setup to work with the 2013 Macbook Air and Haswell chipset.
- Mount the virtual disk image by running e:\eGPU\eGPU-Setup-mount.bat. This will mount a V: drive.
- In notepad, open the file V:\core\intel.txt. Add the following above the Series-7 entries:
0x9c43 QS87 2 8 62; Series-8 (5GT/s)
- In notepad, create the file V:\config\pci.bat and paste the following into it:
@echo -s 0:1c.4 COMMAND=0 1d.b=50 22.w=BEB0 26.w=D3F1 > setpci.arg
@echo -s 5:00.0 COMMAND=0 1d.b=41 20.w=B0B0 22.w=BB00 24.w=C001 26.w=D1F1 >> setpci.arg
@echo -s 6:03.0 COMMAND=0 1d.b=31 20.w=B200 22.w=b700 24.w=c001 26.w=CDF1 >> setpci.arg
@echo -s 6:04.0 COMMAND=0 1c.b=41 1d.b=41 20.w=BAC0 22.w=BAF0 24.w=D1C1 26.w=D1F1 >> setpci.arg
@echo -s 7:00.0 COMMAND=0 3C.b=0 >> setpci.arg
@echo -s 8:00.0 COMMAND=0 1c.w=2121 20.l=B300B200 24.l=C9F1C001 28.l=0 30.w=0 3c.b=10 >> setpci.arg
@echo -s 9:00.0 COMMAND=0 1c.w=2121 20.l=B300B200 24.l=C9F1C001 28.l=0 30.w=0 3c.b=10 >> setpci.arg
:: NVidia eGPU
@echo -s a:00.0 COMMAND=0 10.l=b2000000 14.l=c0000000 1c.l=c8000000 24.l=00002F81 3c.b=10 3C.b=10 50.b=1 88.w=140 >> setpci.arg
@echo -s a:00.1 COMMAND=0 10.l=B30FC000 3c.b=10 >> setpci.arg
:: Re-enable CMD
@echo -s 0:1c.4 COMMAND=7 -s 5:0.0 COMMAND=7 -s 6:3.0 COMMAND=7 -s 6:4.0 COMMAND=7 >> setpci.arg
@echo -s 7:00.0 COMMAND=6 -s 8:0.0 COMMAND=7 -s 9:0.0 COMMAND=7 >> setpci.arg
@echo -s a:00.0 COMMAND=6 -s a:0.1 COMMAND=6 >> setpci.arg
setpci @setpci.arg:: Disable CMD, set PCIe config space
- In notepad, edit the file V:\config\startup.bat and paste the following into it:
call vidwait 60
call vidinit -d %eGPU%
call pci.bat
call chainload mbr
call speedup lbacache
- Turn off your MacBook, power cycle the eGPU from the power supply and make sure the thunderbolt cable is still plugged into the MacBook. Make sure no display is plugged into the card.
- Turn your MacBook on while holding Option. There's no need to wait for the red light to turn off now before proceeding. Select the windows partition.
- Windows will boot into a menu allowing you to select between Windows and eGPU setup. Select eGPU setup.
- Once you get to the Blue first menu, press enter for Option 1. This will prep the PCI Bus. Note it might take a few seconds for the eGPU to be detected (basically until the red light goes off)
- Once that exits, you'll be back at that same menu from step 9. This time select Windows 7 and wait for it to boot.
- Open up the Device Manager and you should see the GTX 570 again, except ... without the yellow exclamation mark! Horray! You fixed Error 12!
- Double click on the NVidia icon in the system tray. On the left side click on “Adjust image settings with preview”.
- I know it’s shocking, but if you see a spinning NVidia logo, your internal LCD screen is being rendered by your external GPU! If you don’t believe me, launch your favorite game and notice how there’s no way the Intel HD 5000 could render it so well. I recommend you now install your fav benchmarking software, GPU-Z, FRAPS, Steam, etc to take advantage of your laptop’s new abilities.
- You win!
Notes
- For ATI cards to render on the Internal LCD, you’ll need to use Virtu. See http://forum.techinferno.com/diy-e-gpu-projects/2109-diy-egpu-experiences-%5Bversion-2-0%5D-35.html#post33187 for instructions on how to get this to work.
- When doing Internal LCD mode (which you’re doing when you have no monitor plugged into the video card), PhysX might not be on. Open the NVidia control panel and switch it from CPU to Auto. When doing benchmarks, keep it on CPU though.
-
Dont forget that every time you reboot, you must power cycle the eGPU
- If someone knows how to get the eGPU to restart with a reboot of the computer, please let me know. Simply connecting the black and red cable isn't enough on the MBP from my observations. I tried the switch in both positions and both polarities.
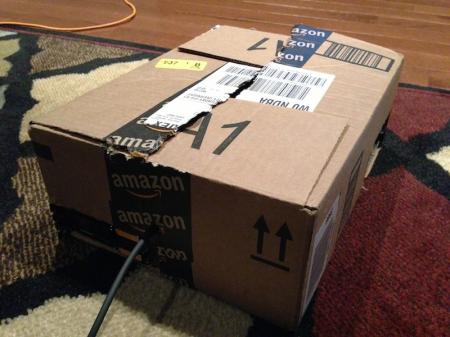
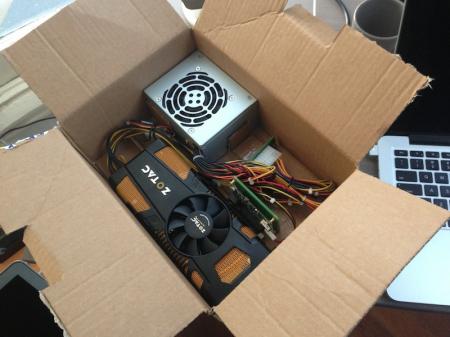
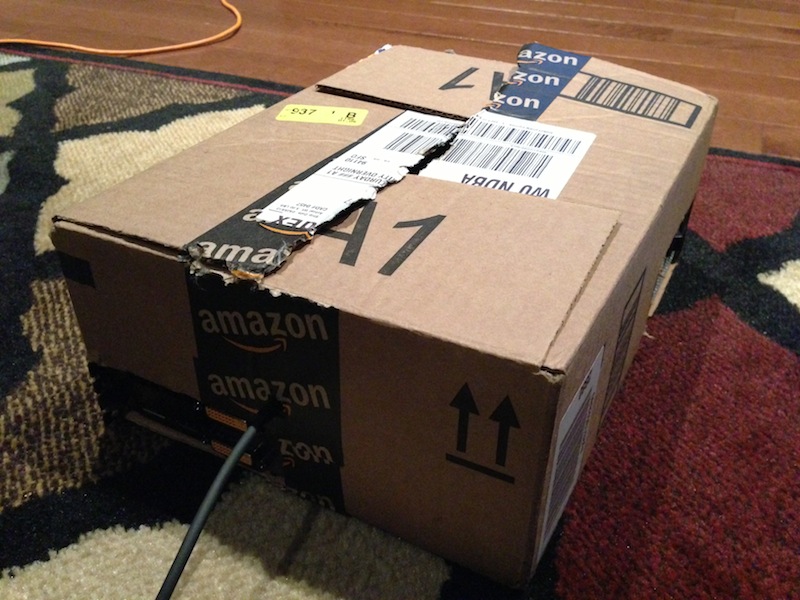
Here's my latest "case":

(the clear strip is the tape "handle"!)
Enjoy, and I hope these instructions were helpful for you! If you're on Twitter, i'd appreciate a follow: @lg Also thanks to Tech Inferno Fan for helping out!
-
 3
3
- Mid-2013 11" Macbook Air
-
I will give you $400 for you TH05.
Message me
well done
-
just received the following from them via email:
*** Promotion by Jan 25th *** USD150 Coupon for TH05 Recall, Hurry up!Now, we have promotion for TH05 recall;
- Get USD150 Bplus Coupon!
- Free shipping fee!
- By Jan 25th! (4 day only!)
- TH05 & shipping fee fully Refund, of course!
If you ship your TH05 back to us in this week by Jan 25th,
we will provide USD150 coupon of Bplus products.
It's free shipping! you can get Bplus products
worth exact amount of USD150.
Here is example of TH05-100B (USD180) refund;
- TH05-100B : USD180
- Shipping fee at TH05-100B shipping : USD28
- Bplus USD150 Coupon : Free
- Shipping free USD28 for goods by coupon : Free
= Total USD386 (USD208 Refund and worth USD178 promotion).
Hurry up to ship TH05 and inform FedEx number to us!
If you have questions about this promotion, please give us reply.
like with everyone else... they'll get their TH05 when they pry it from my cold, dead hands.
seriously though, i dont really understand why they're so excited to get these back... tried just asking them what their motivation is, waiting for reply...
-
Recently another forum member has suggested a simpler setup for e-gpu with his MBA. Since the MBPR-13 and MBA have very similar setup and configurations (iGPU only, 8gb ram Max...) I am wondering if the same setup will work for you.
i just tried what he did and i didn't have any luck. the gtx570 refused to come out of error 12 even with basically everything disabled.
-
TH05 Bios Mode Win 7: SW1=3 -> Windows Booting properly. eGPU not recognized at all in device manager any more. Not even with Error 12. (So, this is worse)
did you wait for the red light to go off before selecting your OS? also try forcing the device manager to detect new hardware.
-
NOTE: The US$180 BPlus TH05 (inc Thunderbolt cable) native Thunderbolt adapter used in this implementation was recalled in Jan 2013 due to (presumably) threats by Intel/Apple per TH05 recall notice. As a result refer to either of these solution that can be implemented today: http://forum.techinferno.com/diy-e-gpu-projects/4570-%5Bguide%5D-2012-13-rmbp-gtx660-sonnet-echo-express-se-%40-10gbps.html#post63754 or 2013 11" Macbook Air + Win7 + Sonnet Echo ExpressCard + PE4L + Internal LCD [uS$250].
First off, before anything, I really want to thank Tech Inferno Fan for all his help. There is no way I could have gotten anywhere nearly as far without his prompt replies and help debugging stuff. Thanks!
Ok, so, I have managed to just get this configuration working! As it was quite an effort, I felt like a tutorial was in order to help others in the future. Note that although this is mostly designed for 13" Retina Macbook Pros, different parts of this tutorial can be used for different computers. Also, realize that the Retina has different config in pci.bat from the non-Retina (see the Note at the bottom).
This tutorial is for Windows 7 BIOS (not windows 8, and not EFI). Although I was able to get Windows 8 EFI working with little to no effort, Internal LCD mode wasn't working likely because of immature drivers. Windows 8 BIOS also had a host of problems (see Notes section below for more details).
Although this tutorial might be useful for you, I'd really like your help! If you were somehow able to get Win 8 BIOS (or EFI) working with Internal LCD on this laptop model, please PM me so I can try it and update these instructions. See note at end about what happened when I tried Win 8 BIOS. It sucks because I'd like this tutorial to be designed for the bleeding-edge, but oh well, compatibility...
Anyways, here we go!
Benchmarks are coming, and I'll update this thread once they're done. Spoiler: It's fast
System specs
- 2.9 GHz Intel Core i7-3520M (basically the most maxed out retina 13" mbp)
- 8GB 1600 MHz DDR3
- Intel HD Graphics 4000 768 MB
- Windows 7 Professional 64-bit (BIOS)
- 256GB Apple SSD
Requirements
-
TH05 Thunderbolt -> PCI-Express adapter. Note that this device is currently discontinued because Intel wants cases for all thunderbolt products. See the Facebook discussion and http://forum.techinferno.com/diy-e-gpu-projects/2680-th05-recall-notice.html for more details. The company is working for a summer 2013 release of the TH04 which should operate identically. Finally, although these instruction are specific to the TH05, they could also be relevant to other adapters.<br><br>
-
NVidia GTX 570 videocard. Note you can probably use any video card including ATI cards and these instructions should be identical. See note at end about Internal LCD rendering on ATI cards.<br><br>
-
300W power supply capable of running the video card. Look at your video card's spec sheet to see the peak wattage only it uses (not the suggested value that often includes motherboard + hard drives, etc).<br><br>
-
2013 13" Retina Macbook Pro. Instructions will differ for different macbooks. for example the non-retina macbook requires different config (see Note at end), and a 15" Retina/Non-Retina also requires different config (described here)<br><br>
-
DIY eGPU Setup 1.X, developed by nando, available for purchase here. This allows you to do the PCI bus remapping to allow windows to see both your internal Intel HD 4000 and the GTX 570<br><br>
- A USB memory key that's at least 4GB for bootcamp and initial Setup 1.X configuration<br><br>
- Other software: Windows 7 ISO (from MSDN / MSDNAA / etc). See Note at end of article about Windows 8
PART A: Generic prep of Windows 7 64-bit
- On your mac use Boot Camp Assistant to prep a USB key with Windows 7 64-bit<br><br>
- Still with Boot Camp Assistant, partition your main drive and start the Windows 7 installation process. I recommend around at least a 60GB partition. Games are big these days. If you just don't have the space, you can do what I do and turn off Hibernation Mode and the Virtual Memory Page File to save hard drive space (about 17GB together)<br><br>
- Once partitioning is done, your computer will auto reboot and the Windows 7 installer will start. Install Windows 7.<br><br>
- Once the install is done, go back to your mac partition (hold the Option button while booting). Go back to Boot Camp Assistant and download the Boot Camp Windows Support software. You can put it in a folder on the USB memory key.<br><br>
- Reboot to Windows 7, go to the File Explorer, onto your USB memory key, and run the Boot Camp installer. This will install a bunch of drivers to make Windows more usable (including your Wifi drivers).<br><br>
- Go to Intel's site and download the latest Intel HD 4000 drivers for Windows 7 64-bit.<br><br>
- Launch Windows Update and apply all required/optional patches. Reboot as required. Repeat this step until nothing’s left.<br><br>
- There's some clock weirdness when switching between Windows and OSX, so add the key HKEY_LOCAL_MACHINE\SYSTEM\CurrentControlSet\Control\TimeZoneInformation\RealTimeIsUniversal with DWORD value 1
PART B: Putting together the eGPU and understanding the problem
- On the TH05, set SW1 to position 3 (6.9s, though note it's more like 30s). Set SW2 to 2-3 for 2X.<br><br>
- Plug in the power (the white connector) on the TH05 to your power supply. There is no need to plug in the Black and Red cable (this is for automatic powersupply control, which doesnt work on the MBP). Keep the pins disconnected on the TH05. Plug in the TH05 to your video card.<br><br>
- Plug in the motherboard connector to the included SWEX adapter. Make sure it is in the ON position (1-2). Also plug in any required 6-pin/8-pin connectors to your GPU. Mine required 2 6-pin plugs.<br><br>
- Make sure your laptop is shut down.<br><br>
- Plug in the thunderbolt cable to the TH05 and then the laptop. Also, make sure no monitors are plugged into the video card.<br><br>
- Turn on the power to the power supply, the GPUs fans should start, then start your laptop. Hold the Option key. Now wait for the red light to turn off on the TH05. Once it’s off, select Windows.<br><br>
- Go to NVIDIA’s site, download and install the latest drivers for your video card. When prompted to reboot, shut down the computer instead.<br><br>
- Turn off the eGPU’s power supply.<br><br>
- Start the eGPU's power supply and boot your laptop, waiting for that red light to go off again before selecting your Windows partition. You will always need to do a power cycle of the eGPU when rebooting your computer because of the way the TH05 works.<br><br>
- Once Windows has started, open the Device Manager. Select Scan For New Hardware.<br><br>
- Notice the GTX 570 is listed with the yellow exclamation mark. If you double click on it you’ll see the dreaded Error 12. This Error 12 means that Windows wasn’t able to allocate a contiguous block of memory for the video card. Yes you probably have 8GB in your laptop, but the PCI Bus doesn’t work that way. We’re going to get rid of that error by reallocating devices in the PCI Bus.
PART C: Getting rid of Error 12 on this Windows 7 (BIOS) install
- Go purchase DIY eGPU Setup 1.x here and run the self-extracting exe on Windows to install to c:\eGPU.<br><br>
- Shut down your computer and unplug the thunderbolt cable. Keep it unplugged until mentioned later. Restart the computer to OSX.<br><br>
- You’re now going to write the Setup 1.X raw disk image (ending in .img) to your USB memory key. Open a Terminal and type the following:
diskutil unmount /dev/diskXs1
sudo dd if=/Volumes/BOOTCAMP/eGPU/eGPU-Setup-YYYYY.img of=/dev/diskXdiskutil list (look for the /dev/diskX where X is the USB memory key)
Make sure you replace the X and Ys with your disk number and Setup 1.X version.<br><br> - Reboot to Windows 7.<br><br>
- If the version of Setup 1.X you received was 1.10b5, go to this thread: http://forum.techinferno.com/diy-e-gpu-projects/2123-diy-egpu-setup-1-x.html download the Patch named: Setup-110b5-updates.exe. Run it to extract. Instead of extracting to the suggested V:\ extract to the USB drive, which for me was E:\ (i'll be referring to this drive as E drive from now on). Select Yes when prompted to overwrite files.<br><br>
- Open up the command prompt in Administrator mode. Type the following to prep the boot image with your computer’s configuration:
cd \devcon
mkdevcone:
<br><br>
- In notepad create the file E:\config\pci.bat and paste the following into it:
echo Performing PCI allocation for 2012 13" MBPr based off Tech Inferno Fan's MBP BIOS mode findings . . .
:: The X16 root port
@echo -s 0:1.1 1c.w=6030 20.l=AE90A090 24.l=CDF1AEA1 > setpci.arg
:: Underlying Bridges in order from high to low
@echo -s 4:0.0 1c.w=5131 20.l=AB00A090 24.l=C9F1B801 >> setpci.arg
@echo -s 5:3.0 1c.w=4131 20.l=A700A200 24.l=C5F1B801 >> setpci.arg
@echo -s 7:0.0 04.w=7 1c.w=3131 20.l=A300A200 24.l=C1F1B801 28.l=0 30.w=0 3c.b=10 >> setpci.arg
@echo -s 8:0.0 04.w=7 1c.w=3131 20.l=A300A200 24.l=C1F1B801 28.l=0 30.w=0 3c.b=10 >> setpci.arg
:: The NVidia GTX570
@echo -s 9:0.0 04.w=400 0C.b=20 24.w=3F81 10.l=A2000000 14.l=B8000000 1C.l=C0000000 3C.b=10 50.b=1 88.w=140 >> setpci.arg
setpci @setpci.arg
set pci_written=yes@echo off
<br><br>
- Again in notepad, open the file E:\config\startup.bat and replace the contents with the following. Note the vidwait and vidinit lines. They need to have the correct PCI ID for your video card. 10de:1086 is my GTX 570. If you have a different card (including an ATI card) it will be different.
call speedup lbacache
:: wait for GTX570 eGPU to be on the PCI BUS
call vidwait 60 10de:1086
:: initialize NVidia eGPU
call vidinit -d 10de:1086
:: Perform the pci-e fixups
call pci
:: Chainload to the MBR
call grub4dos mbr:: Speed up end-to-end runtime of startup.bat using caching
<br><br>
- Turn off your MacBook, turn the eGPU on from the power supply and plug the thunderbolt cable into the MacBook. The fan on the GPU should be spinning right now. Make sure no display is plugged into the card.<br><br>
- Turn your MacBook on while holding Option. There's no need to wait for the red light to turn off now before proceeding. This time select to boot from the USB drive.<br><br>
- Once you get to the Blue first menu, press enter for Option 1. This will prep the PCI Bus. Note it might take a few seconds for the eGPU to be detected (basically until the red light goes off)<br><br>
- Windows 7 should start. If you open up the Device Manager you should see the GTX 570 without the yellow exclamation mark! Horray! You fixed Error 12!<br><br>
- Double click on the NVidia icon in the system tray. On the left side click on “Adjust image settings with preview”.<br><br>
- I know it’s shocking, but if you see a spinning NVidia logo, your internal LCD screen is being rendered by your external GPU! If you don’t believe me, launch your favorite game and notice how there’s no way the Intel HD 4000 could render it so well. I recommend you now install your fav benchmarking software, GPU-Z, FRAPS, Steam, etc to take advantage of your laptop’s new abilities.<br><br>
- You win!
Bonus: Running Setup 1.X from your hard drive (not USB)
The initial USB install is necessary as the disk image writes don't quite work right on a Macbook. So once the USB stick works we copy it to the disk image for a faster bootup time with more convenience. Here's how to do it:
- Open an Administrator command prompt and run the Setup 1.X installer:
setup-disk-image.bat answer Y when asked about mounting the image
del “c:\ProgramData\Microsoft\Windows\Start Menu\Programs\Startup\eGPU-Setup-mount.bat.lnk”
xcopy /e e:\*.* v:\*.* assuming e:\ is your USB drive. overwrite all.cd c:\eGPU
<br><br>
- Shut down the macbook and remove the USB memory key. Power cycle the eGPU (as usual) and start the macbook again. Select Windows from the hard drive this time.<br><br>
- Once the Windows boot manager shows up, select “DIY eGPU Setup 1.1xxxx”<br><br>
- Press Enter on the first option which will do exactly what your USB memory key used to do. Convenient!<br><br>
- Once the Windows boot manager shows up again, select Windows<br><br>
- Windows should properly boot and everything should be back to normal!
NOTE: if you ever get a black screen when booting, it means you probably forgot to power cycle the eGPU.
NOTE: you won't be able to access the menu system from this hard drive boot mode. To change config do it using the USB drive and rerun these instructions.
Notes
- For ATI cards to render on the Internal LCD, you’ll need to use Virtu. See http://forum.techinferno.com/diy-e-gpu-projects/2109-diy-egpu-experiences-%5Bversion-2-0%5D-35.html#post33187 for instructions on how to get this to work.<br><br>
- If you have a non-Retina 13" Macbook Pro your pci.bat will be different, see http://forum.techinferno.com/diy-e-gpu-projects/2367-macbook-pro-retina-15-gtx-560-ti-%40-th05-3.html#post32194 for what yours will look like.<br><br>
- Although the eGPU steps are identical and work on Windows 8 BIOS too, there are problems in Win 8. With NVidia cards, having a monitor hooked up to the eGPU will make the Internal LCD flash and with no monitor, the LCD just renders the Intel HD 4000 output (making the eGPU useless). With ATI cards, although it does work to render games on an external monitor, Internal LCD rendering does not work (when using Virtu, supposedly need Virtu MVP which doesn't install on notebooks!). Because of compromises on both these and the relative immaturity of Windows 8’s drivers, I decided to make this tutorial for Windows 7.<br><br>
- If you ever change the video card you use, you'll need to update the startup.bat with the correct PCI ID.<br><br>
- When doing Internal LCD mode (which you’re doing when you have no monitor plugged into the video card), PhysX might not be on. Open the NVidia control panel and switch it from CPU to Auto. When doing benchmarks, keep it on CPU though.<br><br>
-
Dont forget that every time you reboot, you must power cycle the eGPU.<br><br>
- If someone knows how to get the eGPU to restart with a reboot of the computer, please let me know. Simply connecting the black and red cable isn't enough on the MBP from my observations. I tried the switch in both positions and both polarities.<br><br>
Oh and here's my "case":
Enjoy, and I hope these instructions were helpful for you! If you're on Twitter, i'd appreciate a follow: @lg

-
5
- 2.9 GHz Intel Core i7-3520M (basically the most maxed out retina 13" mbp)
-
So, is sound also working now when the eGPU is not attatched?
oh right i should have probably mentioned this. i dont know about you guys, but my sound works just fine. bootcamp drivers are all that's needed to get it enabled. maybe it's the configuration in my 13" Retina MBP, but works great.
-
Device manager now tells me it's not a valid driver as its unsigned which didn't happen with previous versions.
oh i had that error too for some reason. i uninstalled the driver (and deleted files) and reinstalled it from intel's .zip file on their site. it worked the second time...
-
It was a little confusing to read about the Intel HD 4000. Does the driver work under EFI mode? Or was it just in combination with EFI + eGPU + internal LCD that it didn't work?
The Intel HD 4000 will work on its own in EFI, just not with the eGPU also hooked up. The new intel driver seems to have fixed the need to delete the driver file to make it display something.
Intel Drivers are bugged in EFI mode. I'll probably give BIOS install a try again to see if graphics switching works for 15" models! Great news.yeah with the whole dGPU thing you have going on in the 15", i'm not sure how it'll turn out. report back!
-
thanks to nando i'm now fully egu compatible w/ Optimus+Internal LCD (intel hd 4000 igpu) on my 13" Retina Apple Macbook Pro. I got it working in Windows 7 Bootcamp BIOS + Setup 1.X (with patched pci.bat and startup.bat files as per http://forum.techinferno.com/diy-e-gpu-projects/2367-macbook-pro-retina-15-gtx-560-ti-%40-th05-11.html#post36670), though i think Windows 8 is possible too. I have a GTX570 running at x2.2 (TH05, SW1=6.9s). Will do a writeup and get some pix soon! wooohooooo!
-
with nando's amazing help, i was able to get it working w/ Optimus + internal LCD! no DSDT changes were needed, but i did need to follow the instructions for proper BIOS setup as specified on this page: http://forum.techinferno.com/diy-e-gpu-projects/2367-macbook-pro-retina-15-gtx-560-ti-%40-th05-3.html#post32194 this is important as macbooks appear to need to be done that way.
i did this in win7 bootcamp bios, but i suspect i can reproduce this using win 8 as well. going to try that next.
i had to use a different /config/pci.bat (below) in Setup 1.X:
@echo off
echo Performing PCI allocation for 2012 13" MBPr based off Tech Inferno Fan's MBP BIOS mode findings . . .

:: The X16 root port
@echo -s 0:1.1         1c.w=6030 20.l=AE90A090 24.l=CDF1AEA1 >  setpci.arg

:: Underlying Bridges in order from high to low
@echo -s 4:0.0         1c.w=5131 20.l=AB00A090 24.l=C9F1B801 >> setpci.arg
@echo -s 5:3.0         1c.w=4131 20.l=A700A200 24.l=C5F1B801 >> setpci.arg
@echo -s 7:0.0 04.w=7  1c.w=3131 20.l=A300A200 24.l=C1F1B801 28.l=0 30.w=0 3c.b=10 >> setpci.arg
@echo -s 8:0.0 04.w=7  1c.w=3131 20.l=A300A200 24.l=C1F1B801 28.l=0 30.w=0 3c.b=10 >> setpci.arg

:: The NVidia GTX570
@echo -s 9:0.0 04.w=400 0C.b=20 24.w=3F81 10.l=A2000000 14.l=B8000000 1C.l=C0000000 3C.b=10 50.b=1 88.w=140 >> setpci.arg

setpci @setpci.arg
set pci_written=yes
/config/startup.bat
:: Speed up end-to-end runtime of startup.bat using caching
call speedup lbacache

:: wait for GTX570 eGPU to be on the PCI BUS
call vidwait 60 10de:1086

:: initialize NVidia eGPU
call vidinit -d 10de:1086

:: Perform the pci-e fixups
call pci

:: Chainload to the MBR
call grub4dos mbr
go back a couple threads if you need to see the specs of my setup
-
just got a follow up from them on Facebook after probing them about what the deal was with Intel:
Thank you for your inquiry.From present Thunderbolt policy, it is difficult to release certified TH05, because enclosure is required for PCIe adapter.
So, we will plan to release another product TH04, which is almost same as PE4H v3.2b but has Thunderbolt port instead of ExpressCard.
We hope you will like it!
Thanks!
that sounds great! no eta given though
-
so everyone with a functional TH05 should feel happy and shouldn't care about the recall notice.
i feel horrible that i can't keep recommending this to friends anymore :\
-
When you say the LCD turns off, does this also see the HD4000 missing from your device manager listing as you showed before?
yeah, i was just describing in more detail what happened before (booting efi with egpu plugged in). after windows spinner thing, internal lcd turns off, egpu takes over.
If you're going to try to modify the DSDT table then be warned, Win8 no longer allows registry overrides. You'd need to use a mechanism such as I describe in the DSDT override procedure to do a pre-boot in-memory DSDT substitution. Maybe rEFId has a mechanism to do that? Win7 does allow registry DSDT overrides.alright, windows 7 bios time. seems like that would be the easier way to test this theory. any tips while i read that page and try to do this change on my macbook? i've never really looked into DSDT changes before
-
I've also been harassing them on their surprisingly-active Facebook Page. When asked about why they stopped, here's their response:
Thank you for inquiry!As TH05 and TH03 are not Thunderbolt certified products, so the quality does not satisfy requirement, even though works fine in some environment.
We know it is very inconvenient for you, however, we would like you to understand this case to enhance whole quality of Thunderbolt market.
We will send another e-mail for detail about return and refund soon.
Thank you again for your understanding.
Thanks!
All signs point to Intel got angry and forced em to stop producing Thunderbolt products. I've asked them if they're going to try to become compliant or if they're just going to give up altogether. Waiting for a response to that...
-
Did rEFIt/rEFInd show the HD4000 as active when you boot in EFI mode? If it's all black screen then no go.. the HD4000 is dead in the water. If the HD4000 does show, then my assertions may be incorrect and it could be the Apple DSDT (ACPI) disabling the iGPU when Win8 boots up with the eGPU active.
when i boot my mac, the internal lcd displays the grey screen. i see the rEFId menu on the internal screen and select the windows partition. rEFId then goes away and changes to a semi-black screen which just says it's starting the partition. after a second or so, still on the internal LCD, i see the windows loading screen for about a second. then the screen goes fully black for 2-3 seconds, and finally the lcd turn off. about 2 seconds after, the egpu's monitor gets a signal and i get the windows 8 welcome screen. prior to the welcome screen, the egpu doesnt output anything.
so, it appears something is turning off the LCD once the eGPU starts.
So do a USB install of Setup 1.1x, then go ahead and boot it by holding the Option key and select it. That will use BIOS mode.IMPORTANT!! Ensure you follow the instructions for BIOS mode here to get the eGPU detected prior to booting Setup 1.1x. It's trickier than EFI mode.
Fingers crossed, the HD4000 will appear. I'd expect it to since how else could you see the Setup 1.1x screens? If the HD4000 does appear then you would look at doing a BIOS install of Win7 or Win8 along with Setup 1.1x to get it all running. A benefit there is you could go back to Win7 if are not so keen on Win8.
- if i boot with the eGPU plugged in and SW1 at PortRidge or 500ms, both screens are black after selecting to boot from the USB drive
- if, however, i boot with the eGPU plugged in and SW1 at 6.9s, eGPU setup starts on the internal LCD and lists the following data on the right side:
STATUS:
QS77: gen=2 p=8 tolud@N/A
using_devcon_txt: yes
pci_written: no
pci_alloc_valid: yes* [512MB]
iGPU=8086:0166 (Intel)
eGPU=10de:1086 (NVidia)
[email protected] 14e4:[email protected] (BroadC)
[email protected] 14e4:[email protected] (BroadC)
looks like both are detected.
i guess this means i should try win8 bootcamp bios? i also heard that win7 can be easier (and not need egpu setup) by modifying the dsdt, need to still figure out how to do that for that for my macbook...
-
ok, i want to quickly check. do you want me to reinstall windows in the bootcamp BIOS mode and follow the BIOS Mode instructions on your link? or are you suggesting some way to BIOS boot my existing EFI install?
-
hi. i tried replying earlier, but for some reason my reply required moderator approval so i'm going to rewrite it here.
basically i tried the latest Intel driver (2012-12-18) and although now i dont need to delete any driver files, it still doesnt show anything on the internal lcd when booting with the egpu. i also tried bringing the resolution all the way down on the intel hd 4000 (with the egpu unplugged), then rebooting with the egpu plugged in, but no difference.
here are some notes for when i have the egpu plugged in:
- if i go into the device manager, only one display device is listed, my GTX 570. if however i select "show hidden devices", it's there, but error 45, "device not connected".
- if i right click on the desktop and go to the resolution changing screen, it actually shows two monitors (one the external monitor thats plugged into the video card and the internal lcd) and both can be enabled. interestingly enough it has the proper resolution capabilities for the internal retina lcd (2560x1600). even though the monitor is enabled though, the lcd stays off. it doesnt matter if i Extended to it, or forced to only display on that screen, the lcd never turns on
- also with this other monitor, in Device Manager, it shows the Generic NonPnP Monitor as being connected to the root (no video cards). in the resolution dialog, if i click Properties, it says "Microsoft Basic Display Driver" is running it
- looking at the device manager, it appears the Intel HD has IO allocated 0x2000 - 0x203F, no presence in IRQ, two memory locations: 0x90000000-0x9FFFFFFF and 0xA0000000-0xA03FFFFF. note that these might just be remnants of when i booted without the egpu?
- the intel utility does not show up in the system tray when booting with the egpu plugged in, but it DOES when booting with the egpu not plugged in
- booting with the egpu not plugged in, but then plugging it in after boot will have the GTX appear, though as Error 12
i dont know... it just feels like windows (or efi or something) disables the intel video card when it sees a egpu is present
DIY eGPU Setup 1.10b5  : Windows_fails dump Sat 01/05/2013
05:53 PM
--------------------------
Driver's PCI resource list
--------------------------
PCI\VEN_8086&DEV_1E22&SUBSYS_72708086&REV_04\3&11583659&0&FB
    Name: Intel(R) 7 Series/C216 Chipset Family SMBus Host Controller - 1E22
    Device has the following resources reserved:
        MEM : a0617000-a06170ff
        IO  : efa0-efbf
PCI\VEN_8086&DEV_1549&SUBSYS_00000000&REV_00\7&234FBAB3&0&0000180009
    Name: PCI standard PCI-to-PCI bridge
    Device is currently using the following resources:
        MEM : a2000000-a30fffff
        MEM : b0000000-b9ffffff
        IO  : 3000-3fff
        IRQ : 16
PCI\VEN_8086&DEV_1E12&SUBSYS_72708086&REV_C4\3&11583659&0&E1
    Name: Intel(R) 7 Series/C216 Chipset Family PCI Express Root Port 2 - 1E12
    Device is currently using the following resources:
        MEM : a0500000-a05fffff
        IRQ : 17
PCI\VEN_8086&DEV_1547&SUBSYS_11112222&REV_03\6&2ECBABAD&0&00000009
    Name: Thunderbolt
    Device has the following resources reserved:
        MEM : a0700000-a073ffff
        MEM : a0740000-a0740fff
PCI\VEN_14E4&DEV_16BC&SUBSYS_96BC14E4&REV_21\4&1A0B740B&0&01E0
    Name: Broadcom SD Host Controller
    Device is currently using the following resources:
        MEM : a0420000-a042ffff
        IRQ : 17
PCI\VEN_8086&DEV_0155&SUBSYS_0102106B&REV_09\3&11583659&0&09
    Name: Xeon(R) processor E3-1200 v2/3rd Gen Core processor PCI Express Root Port - 0155
    Device is currently using the following resources:
        MEM : a0700000-ae7fffff
        MEM : ac800000-c3ffffff
        IO  : 3000-6fff
        IRQ : 16
PCI\VEN_8086&DEV_1547&SUBSYS_11112222&REV_03\5&21AAE2CC&0&000009
    Name: PCI standard PCI-to-PCI bridge
    Device is currently using the following resources:
        MEM : a0700000-a07fffff
        IRQ : 17
PCI\VEN_8086&DEV_1E2D&SUBSYS_72708086&REV_04\3&11583659&0&D0
    Name: Intel(R) 7 Series/C216 Chipset Family USB Enhanced Host Controller - 1E2D
    Device is currently using the following resources:
        MEM : a0616c00-a0616fff
        IRQ : 23
PCI\VEN_8086&DEV_1547&SUBSYS_11112222&REV_03\5&21AAE2CC&0&200009
    Name: PCI standard PCI-to-PCI bridge
    Device is currently using the following resources:
        MEM : aac00000-aaffffff
        MEM : c1c00000-c1ffffff
        IO  : 5000-5fff
        IRQ : 17
PCI\VEN_8086&DEV_1E26&SUBSYS_72708086&REV_04\3&11583659&0&E8
    Name: Intel(R) 7 Series/C216 Chipset Family USB Enhanced Host Controller - 1E26
    Device is currently using the following resources:
        MEM : a0616800-a0616bff
        IRQ : 22
PCI\VEN_8086&DEV_1547&SUBSYS_11112222&REV_03\5&21AAE2CC&0&180009
    Name: PCI standard PCI-to-PCI bridge
    Device is currently using the following resources:
        MEM : a2000000-a70fffff
        MEM : b0000000-bdffffff
        IO  : 3000-4fff
        IRQ : 16
PCI\VEN_10DE&DEV_1086&SUBSYS_120719DA&REV_A1\8&814E909&0&000000180009
    Name: NVIDIA GeForce GTX 570
    Device is currently using the following resources:
        MEM : a2000000-a2ffffff
        MEM : b0000000-b7ffffff
        MEM : b8000000-b9ffffff
        IO  : 3f80-3fff
        IRQ : 16
PCI\VEN_8086&DEV_1547&SUBSYS_11112222&REV_03\5&21AAE2CC&0&300009
    Name: PCI standard PCI-to-PCI bridge
    Device is currently using the following resources:
        IRQ : 19
PCI\VEN_8086&DEV_1547&SUBSYS_11112222&REV_03\5&21AAE2CC&0&280009
    Name: PCI standard PCI-to-PCI bridge
    Device is currently using the following resources:
        IRQ : 18
PCI\VEN_8086&DEV_0154&SUBSYS_0102106B&REV_09\3&11583659&0&00
    Name: 3rd Gen Core processor DRAM Controller - 0154
    Device is not using any resources.
PCI\VEN_8086&DEV_1547&SUBSYS_11112222&REV_03\4&34CE352F&0&0009
    Name: PCI standard PCI-to-PCI bridge
    Device is currently using the following resources:
        MEM : a0700000-ab0fffff
        MEM : b0000000-c1ffffff
        IO  : 3000-5fff
        IRQ : 17
PCI\VEN_8086&DEV_1E20&SUBSYS_72708086&REV_04\3&11583659&0&D8
    Name: High Definition Audio Controller
    Device is currently using the following resources:
        MEM : a0610000-a0613fff
        IRQ : 22
PCI\VEN_14E4&DEV_16A3&SUBSYS_16A314E4&REV_21\4&1A0B740B&0&00E0
    Name: Broadcom Simple Communications Device #2
    Device is currently using the following resources:
        MEM : a04f0000-a04fffff
        MEM : a04e0000-a04effff
        IRQ : 16
PCI\VEN_8086&DEV_1E56&SUBSYS_72708086&REV_04\3&11583659&0&F8
    Name: Intel(R) QS77 Express Chipset LPC Controller - 1E56
    Device is not using any resources.
PCI\VEN_8086&DEV_1E31&SUBSYS_72708086&REV_04\3&11583659&0&A0
    Name: Intel(R) USB 3.0 eXtensible Host Controller - 0100 (Microsoft)
    Device is currently using the following resources:
        MEM : feaf0000-feafffff
        IRQ : 4294967294
PCI\VEN_8086&DEV_0151&SUBSYS_0102106B&REV_09\3&11583659&0&08
    Name: Xeon(R) processor E3-1200 v2/3rd Gen Core processor PCI Express Root Port - 0151
    Device is currently using the following resources:
        IRQ : 16
PCI\VEN_10DE&DEV_0E09&SUBSYS_120719DA&REV_A1\8&814E909&0&010000180009
    Name: High Definition Audio Controller
    Device is currently using the following resources:
        MEM : a30fc000-a30fffff
        IRQ : 17
PCI\VEN_8086&DEV_1E03&SUBSYS_72708086&REV_04\3&11583659&0&FA
    Name: Intel(R) 7 Series/C216 Chipset Family SATA AHCI Controller - 1E03
    Device is currently using the following resources:
        MEM : a0616000-a06167ff
        IO  : 2088-208f
        IO  : 209c-209f
        IO  : 2080-2087
        IO  : 2098-209b
        IO  : 2060-207f
        IRQ : 19
PCI\VEN_8086&DEV_1549&SUBSYS_00000000&REV_00\6&61F204D&0&00180009
    Name: PCI standard PCI-to-PCI bridge
    Device is currently using the following resources:
        MEM : a2000000-a30fffff
        MEM : b0000000-b9ffffff
        IO  : 3000-3fff
        IRQ : 16
PCI\VEN_8086&DEV_1E3A&SUBSYS_72708086&REV_04\3&11583659&0&B0
    Name: Intel(R) Management Engine Interface
    Device is currently using the following resources:
        MEM : a0617100-a061710f
        IRQ : 16
PCI\VEN_14E4&DEV_4331&SUBSYS_010F106B&REV_02\4&A7413AB&0&00E1
    Name: Broadcom 802.11n Network Adapter #2
    Device is currently using the following resources:
        MEM : a0500000-a0503fff
        IRQ : 17
PCI\VEN_8086&DEV_1E10&SUBSYS_72708086&REV_C4\3&11583659&0&E0
    Name: Intel(R) 7 Series/C216 Chipset Family PCI Express Root Port 1 - 1E10
    Device is currently using the following resources:
        MEM : a0400000-a04fffff
        IRQ : 16
27 matching device(s) found.
=======================================================================
------------------
ACPI PNP resources
------------------
ACPI\PNP0C01\2
    Name: System board
    Device has the following resources reserved:
        MEM : 20000000-201fffff
        MEM : 40000000-401fffff
ACPI\PNP0C02\1
    Name: Motherboard resources
    Device has the following resources reserved:
        MEM : fed1c000-fed1ffff
        MEM : fed10000-fed17fff
        MEM : fed18000-fed18fff
        MEM : fed19000-fed19fff
        MEM : e0000000-efffffff
        MEM : fed20000-fed3ffff
        MEM : fed90000-fed93fff
        MEM : fed45000-fed8ffff
        MEM : ff000000-ffffffff
        MEM : fee00000-feefffff
ACPI\PNP0C02\2
    Name: Motherboard resources
    Device has the following resources reserved:
        IO  : 002e-002f
        IO  : 004e-004f
        IO  : 0061-0061
        IO  : 0063-0063
        IO  : 0065-0065
        IO  : 0067-0067
        IO  : 0080-0080
        IO  : 0092-0092
        IO  : 00b2-00b3
        IO  : 1000-100f
        IO  : 0400-047f
        IO  : 0500-057f
ACPI\PNP0C09\0
    Name: Microsoft ACPI-Compliant Embedded Controller
    Device is currently using the following resources:
        IO  : 0062-0062
        IO  : 0066-0066
ACPI\PNP0C0A\0
    Name: Microsoft ACPI-Compliant Control Method Battery
    Device is not using any resources.
ACPI\PNP0C0E\2&DABA3FF&1
    Name: ACPI Sleep Button
    Device is not using any resources.
ACPI\PNP0103\4&178F8E12&0
    Name: High precision event timer
    Device has the following resources reserved:
        MEM : fed00000-fed003ff
        IRQ : 0
        IRQ : 8
ACPI\PNP0C0D\2&DABA3FF&1
    Name: ACPI Lid
    Device is not using any resources.
ACPI\PNP0B00\4&178F8E12&0
    Name: System CMOS/real time clock
    Device is currently using the following resources:
        IO  : 0070-0077
ACPI\PNP0000\4&178F8E12&0
    Name: Programmable interrupt controller
    Device has the following resources reserved:
        IO  : 0020-0021
        IO  : 0024-0025
        IO  : 0028-0029
        IO  : 002c-002d
        IO  : 0030-0031
        IO  : 0034-0035
        IO  : 0038-0039
        IO  : 003c-003d
        IO  : 00a0-00a1
        IO  : 00a4-00a5
        IO  : 00a8-00a9
        IO  : 00ac-00ad
        IO  : 00b0-00b1
        IO  : 00b4-00b5
        IO  : 00b8-00b9
        IO  : 00bc-00bd
        IO  : 04d0-04d1
ACPI\PNP0A08\0
    Name: PCI Express Root Complex
    Device is currently using the following resources:
        MEM : 000a0000-000bffff
        MEM : 000c0000-000c3fff
        MEM : 000c4000-000c7fff
        MEM : 000c8000-000cbfff
        MEM : 000cc000-000cffff
        MEM : 000d0000-000d3fff
        MEM : 000d4000-000d7fff
        MEM : 000d8000-000dbfff
        MEM : 000dc000-000dffff
        MEM : 000e0000-000e3fff
        MEM : 000e4000-000e7fff
        MEM : 000e8000-000ebfff
        MEM : 000ec000-000effff
        MEM : 000f0000-000fffff
        MEM : 8fa00000-feafffff
        MEM : fed40000-fed44fff
        IO  : 0000-0cf7
        IO  : 0d00-ffff
ACPI\PNP0200\4&178F8E12&0
    Name: Direct memory access controller
    Device has the following resources reserved:
        IO  : 0000-001f
        IO  : 0081-0091
        IO  : 0093-009f
        IO  : 00c0-00df
        DMA : 4
ACPI\PNP0C0C\2&DABA3FF&1
    Name: ACPI Power Button
    Device is not using any resources.
ACPI\PNP0C04\4&178F8E12&0
    Name: Numeric data processor
    Device has the following resources reserved:
        IO  : 00f0-00f0
        IRQ : 13
ACPI\PNP0100\4&178F8E12&0
    Name: System timer
    Device has the following resources reserved:
        IO  : 0040-0043
        IO  : 0050-0053
15 matching device(s) found. -
tried upgrading to the latest intel hd 4000 drivers (12/18/2012) and although i now don't need to delete any driver files, the internal lcd still won't turn on when the computer boots with the egpu plugged in. also tried setting the intelhd to a tiny res (when the egpu wasnt plugged in), then rebooting with the egpu plugged in and same thing.
here are some more details for when booting with the egpu plugged in:
- if i right click on the desktop and select resolution, it shows two monitors. one is my external Dell (2560x1600), the other is a "Generic Non-PnP Monitor" (2560x1400). the resolutions make sense, it just never shows anything on the internal lcd.
- going into device manager under display adapters shows only the "NVIDIA GeForce GTX 570". if i select "Show Hidden Devices", the "Intel HD Graphics 4000" is there, but greyed out with Error 45 "This hardware device is not connected to the computer". Intel driver version is 9.17.10.2932.
- intel hd appears to be connected like so: Computer -> ACPI x64-based PC -> Microsoft ACPI-Compliant System -> PCI Express Root Complex -> Intel® HD Graphics 4000
- gtx appears to be connected like so: Computer -> ACPI x64-based PC -> Microsoft ACPI-Compliant System -> PCI Express Root Complex -> Xeon® processor E3-1200 v2/4rd Gen Core processor PCI Express Root Port 0155 -> PCI standard PCI-to-PCI bridge -> (then 3 more idencally named nested) -> NVIDIA GeForce GTX 570
- my monitor Dell U2711 (DP) is listed as being connected to the GTX
- the intel hd is listed in the memory, io, and irq lists, but just isnt found when on the properties page of the adapter
so basically, it looks like it's hooked up, but just won't be enabled...
screenshots here: intelhd not working - Imgur
-
hello. i have a 2012 13" retina MBP. win8 uefi (w/ deleted intel driver), gtx 570 via th05 (SW1=1, SW2=1-2). rEFIt. i haven't modified startup.nsh.
i'm trying to get optimus internal lcd working.
without the egpu, the internal lcd works great, but the intel hd 4000 displays to it. with the egpu plugged in at boot, after the spinner thing the DVI out on the gtx570 outputs to my external monitor, but the internal lcd goes black. i can't seem to get them both working at once, and more importantly, i'm wondering if i missed a step somewhere on how to get the egpu to render to the internal lcd. any ideas?
thank you!


2013 11" MBA + GTX570@4Gbps+c-TBEC2 (PE4L 2.1b) + Win7 [kloper]
in Implementation Guides - Apple
Posted
CLICK >> [url=http://forum.techinferno.com/diy-e-gpu-projects/6578-implementations-hub-tb-ec-mpcie.html#Thunderbolt]Implementations Hub: TB[/url]
The above links indexes all the DIY eGPU Thunderbolt implementations which have progressed significantly by using an inexpensive native Thunderbolt2 enclosure (AKiTiO Thunder2), and reduced both the hardware and software installation compexity compared to kloper's solution posted in 2013 below.
Forum -> Notebooks -> DIY e-GPU Projects -> Sticky: Implementations Hub: TB
[FONT=verdana]TLDR: By buying around $250 in commonly available parts, plus a video card, you can make the graphics of your 11" Macbook Air from 5X to 7X faster. Demo video at end of post. Step-by-step, here's how to exactly do it. Warning: not for the faint of heart!
NOTE: after this guide was written another was produced showing how for less than $100 more than this solution you can create a faster native 10Gbps Thunderbolt solution instead. See it at [url]http://forum.techinferno.com/diy-e-gpu-projects/4570-%5Bguide%5D-2012-13-rmbp-gtx660-sonnet-echo-express-se-%40-10gbps.html#post63754[/url].
[URL=http://imgur.com/DktfNr7]
(click to see larger versions, video at end of article)
Hey everyone!
This is my third article here on this forum, though it's the first that the process can be done by anyone with off-the-shelf parts. No more discontinued exotic parts like the $180 BPlus TH05 are required. All you need is a macbook air, a graphics card, a power supply, Windows 7, and ~$250 to buy some adapters and software online. All these parts are readily available for anyone.
Like usual, I really want to thank Tech Inferno Fan for his help in doing all this. He's the mastermind behind the technicals, I just like writing articles and making stuff easier for everyone. He's super dedicated and eGPUs wouldn't be anywhere near where they are today if it wasn't for him! Thanks!
So what are we doing? We're going to make a Macbook Air accept an external video card via Thunderbolt! Yes, you might have read in the news that real commercial solutions are just around the corner. We've been promised by these companies over-and-over again, with youtube videos, hands-on reviews, press releases, etc, but nobody is releasing anything. It's been like this for over a year. Intel even openly admits its bias against GPU usage where it's listed as unsupported in their Thunderbolt Certification Application. Talking to one of their thunderbolt guys, here's what that "Not Supported" means:
So with the bad news out of the way, the good news is that you can still do it yourself -- just a bit less elegantly. We'll be using the Sonnet Thunderbolt to ExpressCard adapter, together with the BPlus PE4L ExpressCard to PCI-Express adapter. This PE4L adapter also includes a Delayed PCI-Reset jumper, making Windows 7 + Internal LCD rendering possible on the Macbook. Also, it's not that bad. As you'll see by the benchmarks later in the article, yes you're only running at expresscard 5Gbps x1 2.0 PCI bus speed (as opposed to 16X 2.0 on a proper PC and only half of Thunderbolt's 10Gbps), but its WAY WAY better than the internal integrated graphics of the laptop, plus you can still max out tons of games. The full PC bus speed is super rarely used anyways, so it's not like you'll get 1/16th the performance.
As part of this tutorial, we'll be using Windows 7 BIOS (installed the regular Bootcamp way). Things are possible in Windows 8 as well, but the instructions differ, and I've also had troubles getting Internal LCD rendering working on Windows 8. Yeah I'm not a fan of using legacy Windows versions either, but whatever, every game works on both OSes for now anyways. Oh and we're using Windows because games only exist for it, and I can't get the setup to work on OSX (haven't tried too much though).
Alright, lets get started!
My laptop specs
Stuff to buy
PART A: Generic prep of Windows 7 64-bit
PART B: Putting together the eGPU and understanding the problem
PART C: Getting rid of Error 12 on this Windows 7 (BIOS) install
Install Notes
Benchmarking
Cutting to the chase, benchmarks are below. It's insanely fast because the MBA LCD is 1366x768, it's a 15W i7-UM Haswell CPU that is on par performance wise to a high end 35W Sandy Bridge i5 CPU, plus a crazy video card. Woo! :D
external monitor
3dmark06: 19921 vantage: P15876 (gpu=19574) 3dmark11: P4900 (gpu=5210) 3dmark: Ice Storm: 87663, Cloud Gate: 10128, Fire Strike: 3413
internal monitor
3dmark06: 17645 vantage: P15030 (gpu=18270) 3dmark11: P4732 (gpu=5110) 3dmark: Ice Storm: 23839, Cloud Gate: 8943, Fire Strike: 3264
Internal LCD Rendering vs External
A decision you'll need to make is if you want to plug a monitor into your video card or just use your laptop's monitor. Each has it's own pros and cons. You'll get faster performance with an external monitor, but you'll lose the convenience of not needing a giant monitor. This becomes relevant as people make better eGPU cases where your eGPU will be portable. Why bring a monitor to your friend's place when your laptop already has one?
It's actually kind of cool that you even get this choice. The way it works is by the NVidia Optimus drivers taking the video frame memory from the video card, piping it back over the Thunderbolt bridge to the Intel HD 5000 memory and overwriting Intel's memory so that you see the eGPU's output on the Intel LCD. Cool! If you're curious, this is the exact tech that's used when laptops have an NVidia internal discreet graphics chip.
Conclusion
It has become very clear that gaming is not only high-performance, but super practical on an 11" Macbook Air. There's so much going against it: this hodgepodge of adapters, it has a low voltage CPU, disaster of wiring and exposed sensitive parts, crazy boot-time chainloading software, Intel killing companies producing adapters and products left right and center via legal threats, etc. but somehow, with the right parts and some patience, it works spectacularly. And is quite cheap too!
Again I want to thank Tech Inferno Fan for all his help in working with me tirelessly over the last few months to get this working. Also, thanks goes out to TechInferno and the community thats been built here for allowing people to help eachother so efficiently. If you have any questions/comments, please feel free to reply to this thread.
I'm also available on twitter, @lg.
Thanks everyone -- have a great day! And enjoy gaming, I hear PayDay 2 is awesome too :D
kloper [/FONT]
Additional References
* [url]http://forum.techinferno.com/diy-e-gpu-projects/4570-%5Bguide%5D-2012-13-rmbp-gtx660-sonnet-echo-express-se-%40-10gbps.html#post63754[/url] - an alternative guide put together after this one showing a native 10Gbps Thunderbolt solution for
* [GUIDE] 2012 13" MBP + GTX660Ti/[email protected] (TH05): nando's extensive performance comparison of x1 2.0 (TB-to-EC) versus x2 2.0 (native TB) bandwidth, AMD vs NVidia, and NVidia Optimus vs LucidLogix Virtu drivers for internal LCD mode.
* [GUIDE] 2013 11" Macbook Air + [email protected] Win7-BIOS (TH05): my writeup using a native Thunderbolt TH05 eGPU adapter
* [GUIDE] 2012 13" Retina MBP + BIOS-WIN7 + [email protected] (TH05): my writeup using a native TH05 Thunderbolt eGPU adapter
* Thunderbolt, expresscard and mPCIe eGPU implementations: documented DIY TB/expresscard/mPCIe eGPU implementations.
[video=youtube;kZZdwkICE3M]http://www.youtube.com/watch?v=kZZdwkICE3M[/video]