Lake
-
Posts
2 -
Joined
-
Last visited
Content Type
Profiles
Forums
Downloads
Everything posted by Lake
-
[GUIDE] DSDT override to fix error 12
Lake replied to Tech Inferno Fan's topic in DIY e-GPU Projects


-
[GUIDE] DSDT override to fix error 12
Lake replied to Tech Inferno Fan's topic in DIY e-GPU Projects
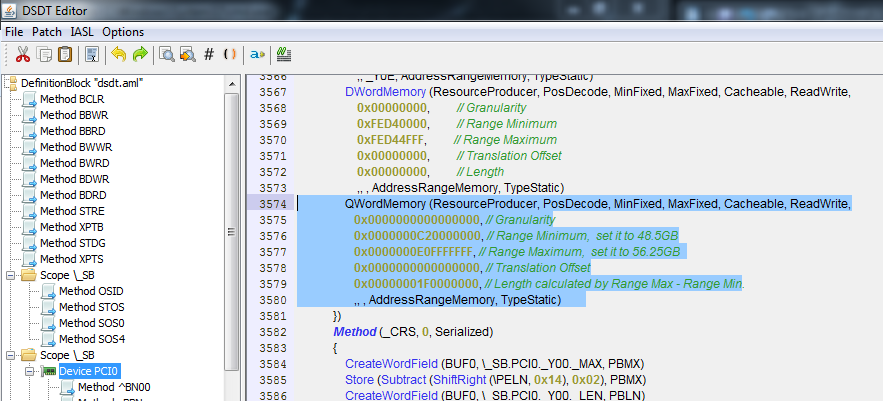
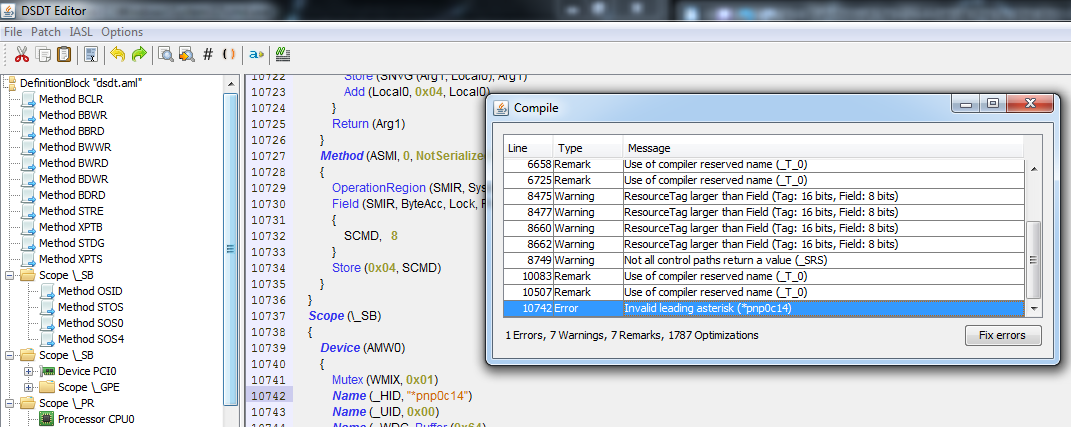
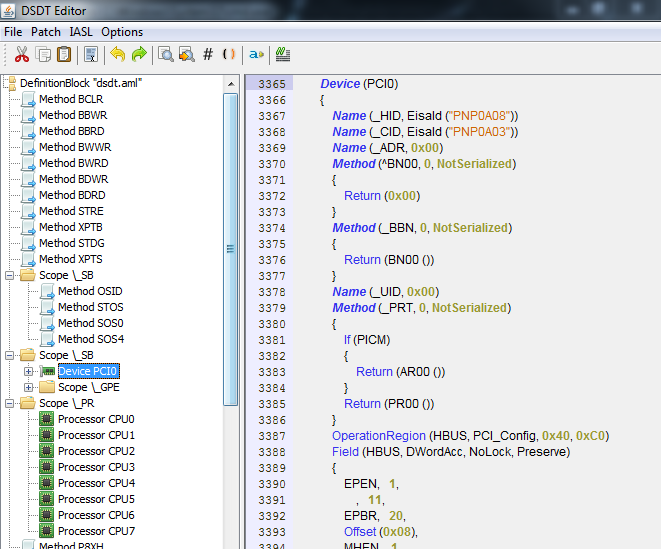
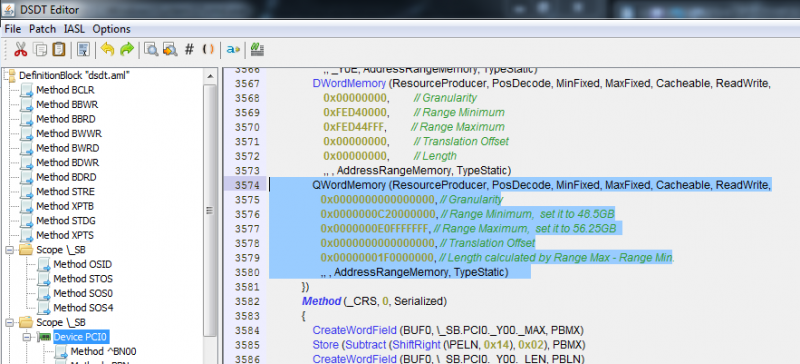
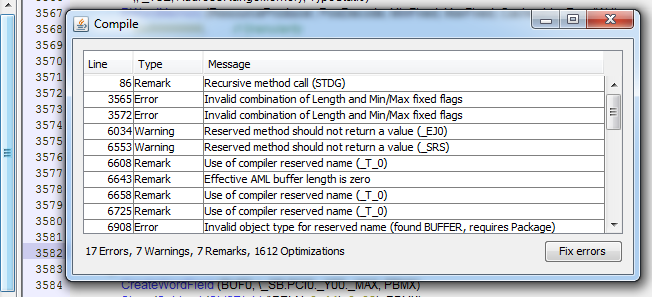
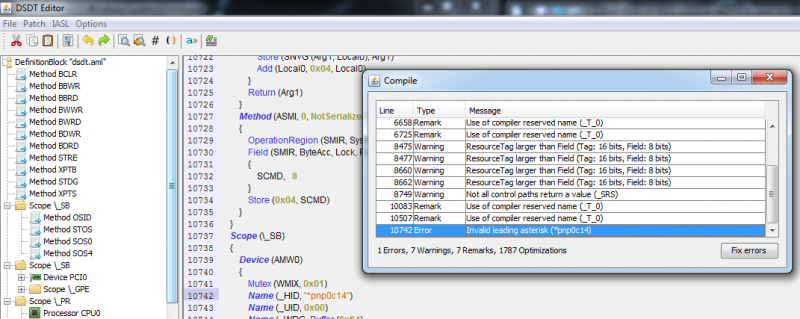
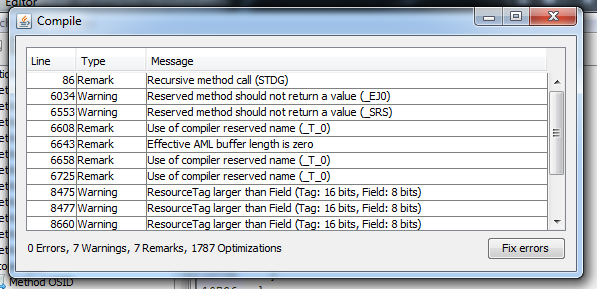
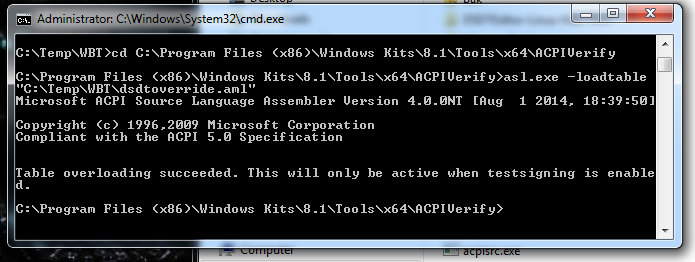
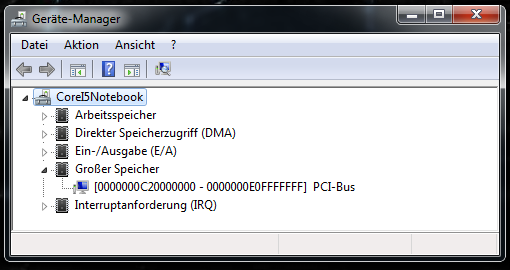
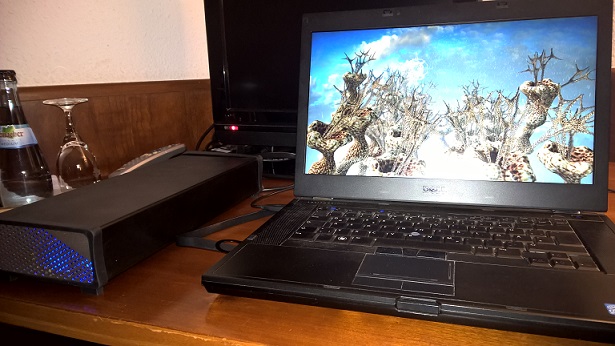
[Working Solution: End-to-End Guide for DSDT Override AND PCI Compaction to get eGPU running on Dell Latitude E6510 with 8GB of RAM installed] Hi everybody, first of all, I want to endlessly thank Nando for his support that helped me get running my eGPU system setup - that is now used on a regular base The Villagetronic support (the vendor for my hardware and enclosure) failed to help me. I want hereby share my success story to you. I took me over a year to get my eGPU hardware running. Maybe there is someone out there who can overcame "error 12" with this guide too. My system parameters:Dell Latitude E6510 BIOS Version: A016 8 GB RAM (2x 4GB) Intel Core i5 CPUWindows 7 x64 SP1 (still in test signing mode after DSDT override) Villagetronic ViDock Nano (320W) Gainward GTX 750 TI OC Golden Sample 2GB (a very quite and very cost efficient card, power consumption is about 50 watt) 0. Prerequisites - download and install the Windows Driver Kit (WDK), which contains the Windows ASL Compiler - Install Java by running "jxpiinstall.exe" - extract "DSDTEditor_Linux_Windows.zip" - start with a fresh Windows 7 installtion (no driver installed for the eGPU graphics chip) or uninstall ALL existing NVidia (eGPU) and Intel drivers (iGPU), then use "ddu" software (Display Driver Uninstaller) to clear registry entries of both and Reinstall both drivers 1. Create an .aml-File by running "DSDT Editor.bat" within directory "DSDTEditor-Linux-Mac-Win" - run DSDT Editor.bat - run menu item "File\ Extract DSDT" - Wait a bit, then click 'Device PCI0' - it should be just after your Processor - Scroll down until you see your DWordMemory stuff, go to the bottom of this list - Under the last DWordMemory entry in that area, add a 'QWordMemory' (64-bit) entry shown as the second paragraph below. I ensure that I stay in the 36-bit range (< 64GB) so the location is compatible with the PAE-capable Win7 32-bit. I also chose a location above 48GB so we won't have issues with maxxed out memory. The range chosen was 48.5GB to 56.25GB. - At the bottom add: QWordMemory (ResourceProducer, PosDecode, MinFixed, MaxFixed, Cacheable, ReadWrite, 0x0000000000000000, // Granularity 0x0000000C20000000, // Range Minimum, set it to 48.5GB 0x0000000E0FFFFFFF, // Range Maximum, set it to 56.25GB 0x0000000000000000, // Translation Offset 0x00000001F0000000, // Length calculated by Range Max - Range Min. ,, , AddressRangeMemory, TypeStatic) - the result looks like this: - run menu item "IASL\ Compile" (or hit F5) - click button "Fix errors" if you have any - locate remaining found error(s) and manually correct the syntax errors e.g.: Error "10742 Error Invalid leading asterisk (*pnp0c14)" Reason (found in a german forum): "Einerseits haben wir hier den Asterisk (*) der das Problem verusacht, aber wir müssen den String eben auch gross schreiben. Also aus Name (_HID, "*pnp0c14") wird Name (_HID, "PNP0C14")" Solution is to replace the following line: Name (_HID, "*pnp0c14") with line: Name (_HID, "PNP0C14") If all errors are fixed re-compile the DSDT.dsl file again: - run menu item "File\ Save DSL as..." which is now enabled - named file "dsdtoverride.aml" - put this file in the DSDT program directory with asl.exe and iasl.exe - close the editor - the following files were created while the editing process: 2. Loading the dsdt.aml file into into the registry as a DSDT override - you must be an admin user for this to be successful so open up command prompt as admin - change directory to where WDK was installed, much likely "C:\Program Files (x86)\Windows Kits\8.1\Tools\x64\ACPIVerify\asl.exe" (or set a corresponding environment variable for that path) saved your "dsdtoverride.aml" file in command prompt - run command: asl -loadtable "C:\Temp\WBT\dsdtoverride.aml" 3. Restart the system and check the device manager for the successfully create new large memory 4. Enable test signing mode for the registry override to apply (otherwise I got an error message everytime I shut down windows) - you must be an admin user for this to be successful - run following command: bcdedit -set TESTSIGNING ON 5. Perform PCI compaction with the new bounds: endpoint = 56.25GB-64bit scope = eGPU or iGPU+eGPU closeunusedbridges = off or on Try each of the above (will give you 4 different permutations). After each, Chainload to Windows using "Chainloader -> Test Run". Confirm Windows stability and that error 12 is eradicated against the eGPU. 6. Start Windows, install eGPU graphics chip drivers and enjoy your second graphics card on your notebook Best regards, Lake- 178 replies
-
- 1
-

-
- dsdt override
- error 12
- (and 1 more)