


Akaraah
-
Posts
7 -
Joined
-
Last visited
Content Type
Profiles
Forums
Downloads
Posts posted by Akaraah
-
-
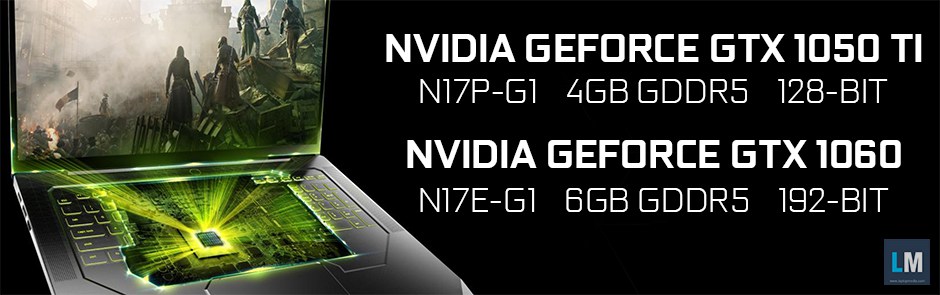
GTX 1050 TI (desktop) and 1060 for notebook?
Link to full article here. So some of the previous rumors regarding desktop cards in mobile chassis might actually be coming to fruition? Anyone else's thoughts? I guess it would make sense with the 1060 and 1050 TI since they'd still be less presumably less powerful than a 1080m.
")
-
I also noticed that there's no "P870DM2" included among those upcoming pascal photos... Perhaps @EVOC just hasn't provided photos yet or none were on ground? In any-case, should I take it as a good sign that given the upgrade-ability of the P870DM that there's no revamp in the works at the moment? Given it just launched in like December 2015 through February depending on the OEM, it'd make sense that no updated models would be show-cased since it is the current top-end model and already has thunderbolt type C support. Given how much I like the machine I'd love to just be able to upgrade to mobile/desktop pascal, and swap in a high res, higher refresh-rate panel and remain having the best laptop money can currently buy.

@Prema is there anyway you can confirm if there's a "P870DM2" (which I hope is not quite a thing yet, lol)?
1070/1080 mobile Pascal?
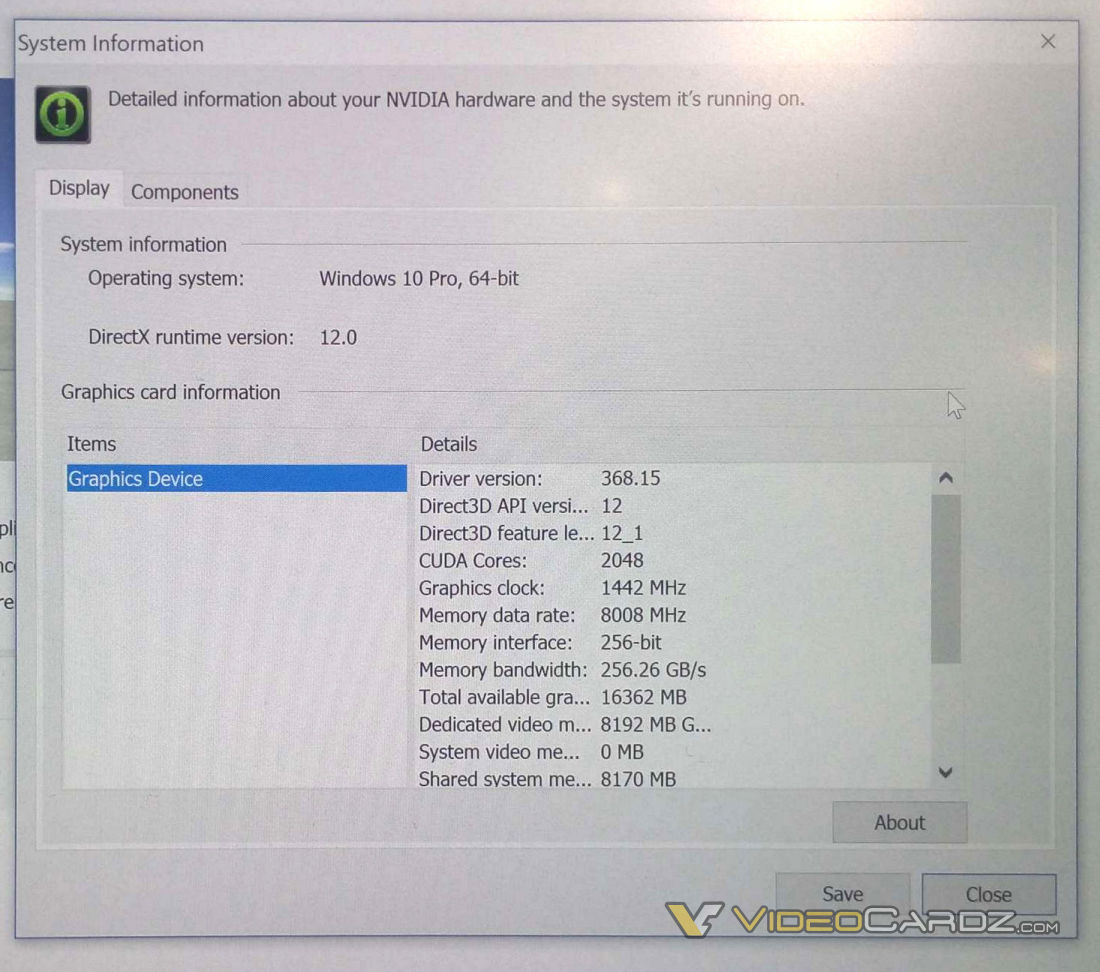
Full URL here: http://videocardz.com/60935/geforce-gtx-1070-in-notebooks-nvidia-pg611-board-spotted-gp102-400-gpu-confirmed
Neat stuff coming out of Computex.
I just wish under "Dedicated video memory" we could see whether it's GDDR5 or GDDR5X. 
-
On 6/1/2016 at 8:53 AM, Brian said:
Would love to get my hands on a pascal equipped one for testing. I'm not sold on vr yet.
Agreed on pascal. Perhaps we'll get an awesome SLI option!
Also, I'll personally be picking up my HTC Vive Monday or Tuesday so if you want I could always provide first-impressions. What I really want to test is how well 3D blu-rays function especially with 1st gen VR headsets. I bought VR desktop off of steam so I'll finally be able to test it this week.
23 hours ago, Mr. Fox said:I hope so, too. I love the 200W 980 beast GPU, but it sucks that it doesn't support SLI. After so many years of having dual-GPU laptops, it feels like something is missing only having one GPU. It's very powerful and an amazing product, but there is no such thing as too much horsepower. I'm finally getting used to the idea, but it has been hard to warm up to the concept to playing with only half of a deck of cards (1 versus 2 GPUs) when I know there is twice as much fun to be had with SLI. I was really sad that I had to send the 180W 980 SLI setup back to Eurocom. That was absolutely wicked.
Pascal 1080 should require less power, so that's even more of a reason that it would be stupid if it doesn't support SLI.
Definitely agreed here. I initially wanted to go for the 980 Desktop edition but like the benefits of SLI (one of which being super-sampling SLI x16 based anti-aliasing for games that aren't over-the-top demanding but still visually impressive). I felt only a 20% to 30% advantage over a single 980m wasn't quite worth it especially looking into the likelihood of selling the desktop card versus dual 980ms given only certain premium laptops can actually house it. AND...I knew the next gen would likely be only a year off at max from my purchasing of the P870DM. If the desktop-laptop edition 1080 gets overall lower TDP/wattage (say, 120w as opposed to the actual desktop card 180w) then I'd say a strong possibility for SLI. We'll just have to follow the money until then.
-
On 6/4/2016 at 10:52 AM, Prema said:
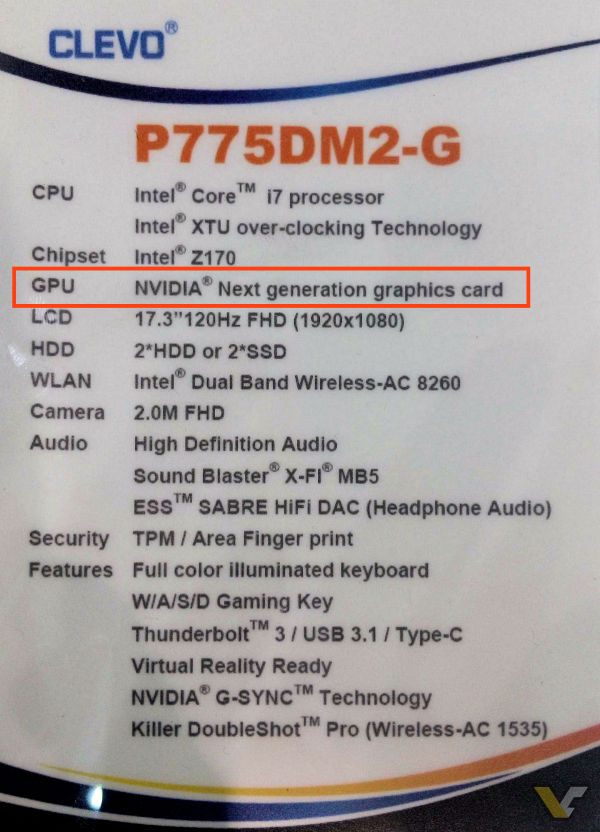
The 120Hz FHD should work just fine (given the DM2 cable can fit) in current DM models (minus g-sync)...the higher res will exceed the current DM model eDP bandwidth...
They would like to see people Better Get Another one each year than upgrade their current model...
Good to know higher refresh rate panels are on the way. If the higher-res panels (3K, 4K) exceed DM bandwidth that sucks unfortunately. I'd love to be able to upgrade the display on my P870DM from 4K @ 60Hz to 120Hz (using it with SVP among other high FPS video playback software would be incredulous)!
Perhaps there's a wy to clock it down to jut 100Hz or 90Hz so that it could function? I'd be perfectly fine with just those refresh rates. I really love my P870DM and don't want to exchange it anytime soon since it seems pascal will indeed be compatible at this point.
I also wonder when these new machines and mobile pascal will be available. My guess would be August-September (pushing into October as well if the pattern is anything like yesteryear) time-frame.
According to this article :http://www.pcgamer.com/nvidia-geforce-gtx-1070-and-1080-coming-to-gaming-notebooks/ we could very-well be receiving the full desktop edtiion 1080 rather than just 1080m initially sooner than initially speculated. Hopefully the 1080 desktop edition takes a cue from current standard MXM cards and can be done in SLI as opposed to the current 980 desktop edition.
-
Hi all! Figured since there aren't many avenues out there as of yet that properly show how to dissect your phoenix, I'd try to take up the mantle with my own experience in upgrading the LCD panel from FHD 1080 to the 4K panel. Before we get started, I'd like to present a list a useful tools to have beforehand if you intend to pursue this endeavor. I'll be providing pictures of my own tools as well as links to various components you need for purchase if you intend to follow-suit:
MOD EDIT: ATTENTION HUGE PICTURE LOAD AHEAD!

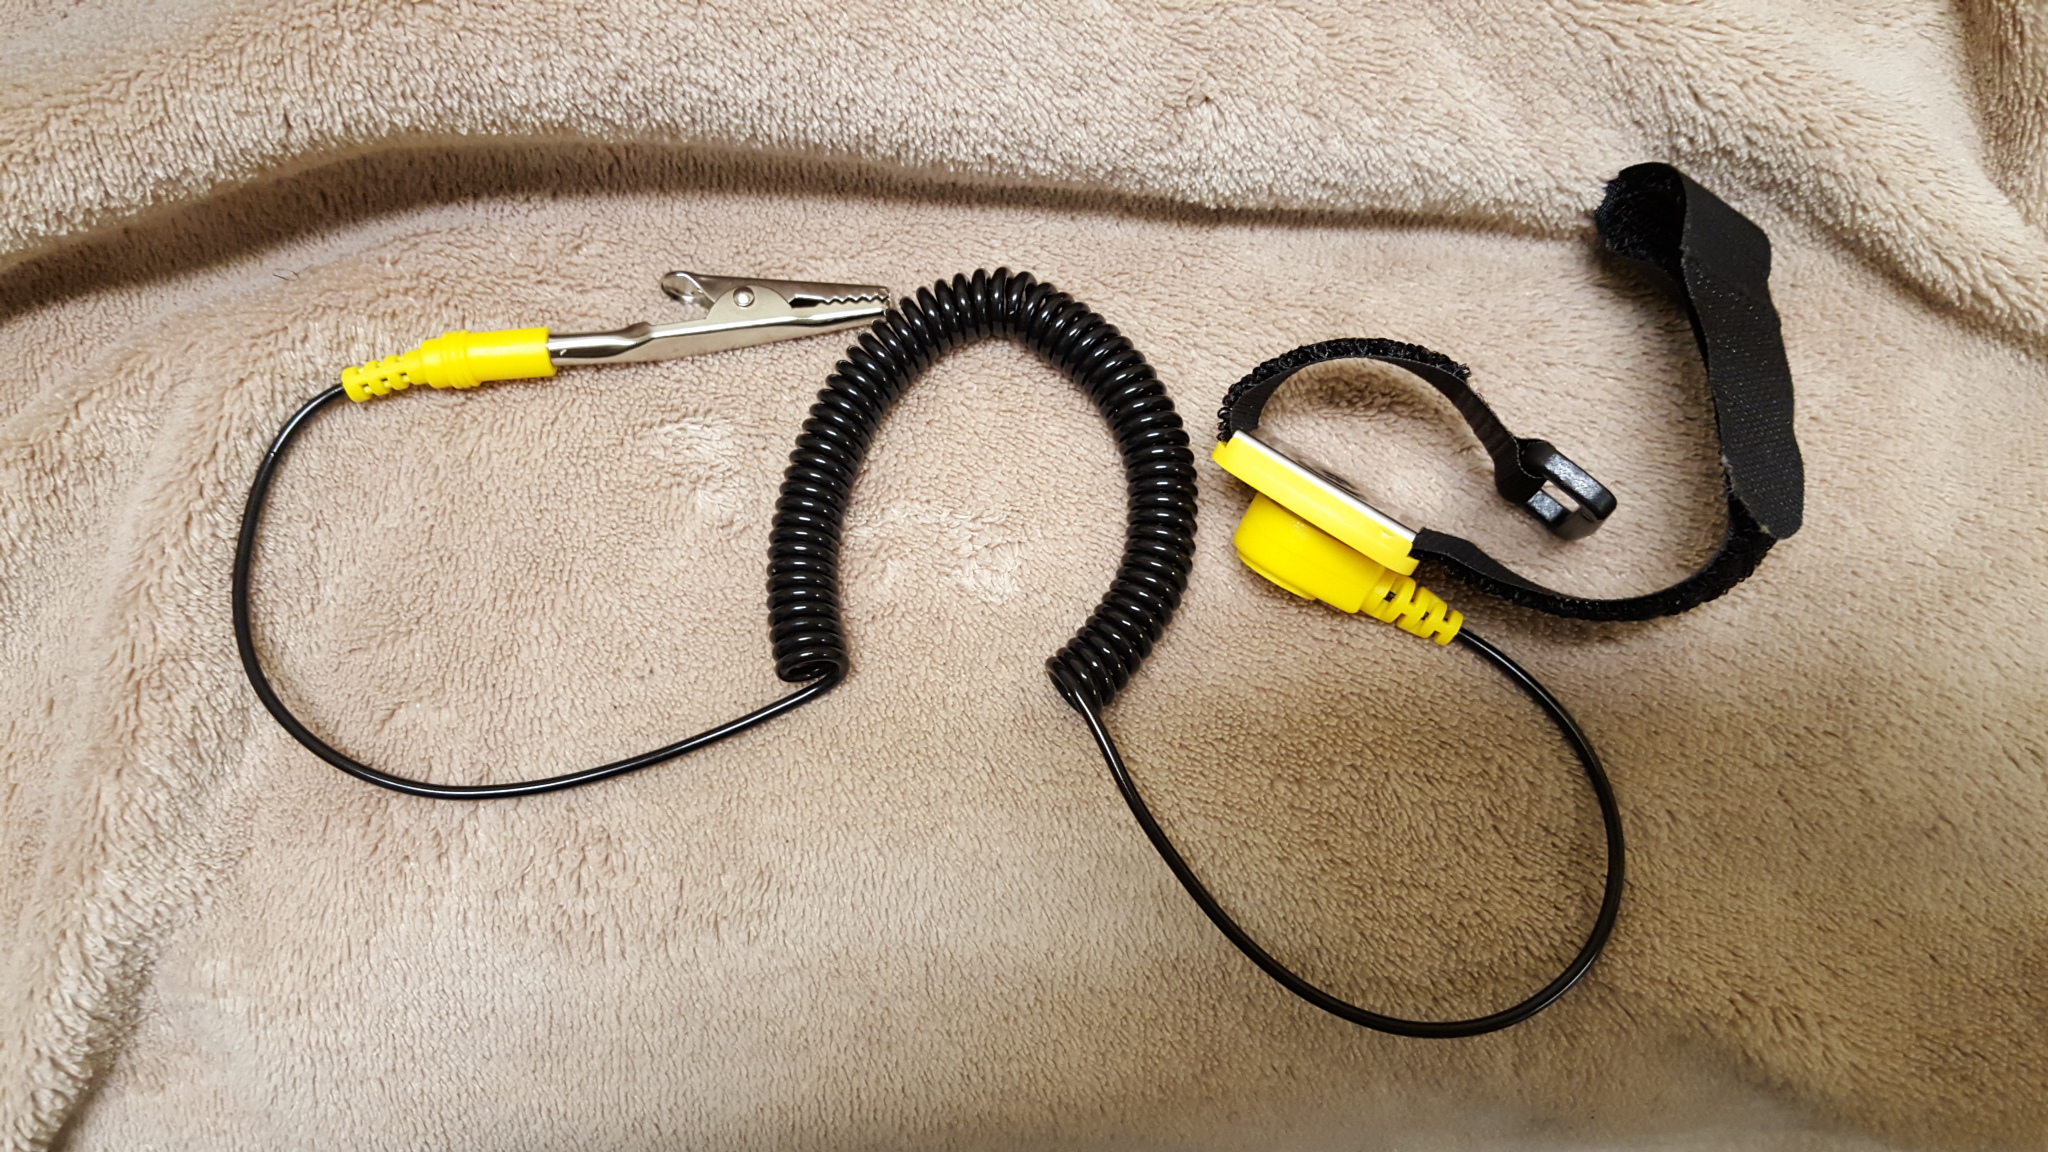
1.) Anti-static wrist band:
You should always have something prepared to control static whether it be the wristband here or an anti-static matte. All it takes is a single static discharge on the MOBO of your machine to scramble it. Also, the surface you choose to work on plays a role. For me, I prefer soft surfaces that are distinctly colored from the components I have to remove so I don't lose track of them.
2.) Prying tool(s):
During the tear-down I waited to the very end to remove the screen frame and then eventually the screen, in retrospect, I should have done that first because I had to be extra careful when I finally got to that point with the top-base plate completely removed. So on, I recommend having multiple, smooth-edged prying tools to minimize potential scuffs or indention to the screen frame. I only used the IFIXIT tool for that but for the sake of freedom, choose whatever you're most comfortable using to get the job done. Once I get to that part in the tutorial I'll show the ideal spot to start opening with your tool of choice.
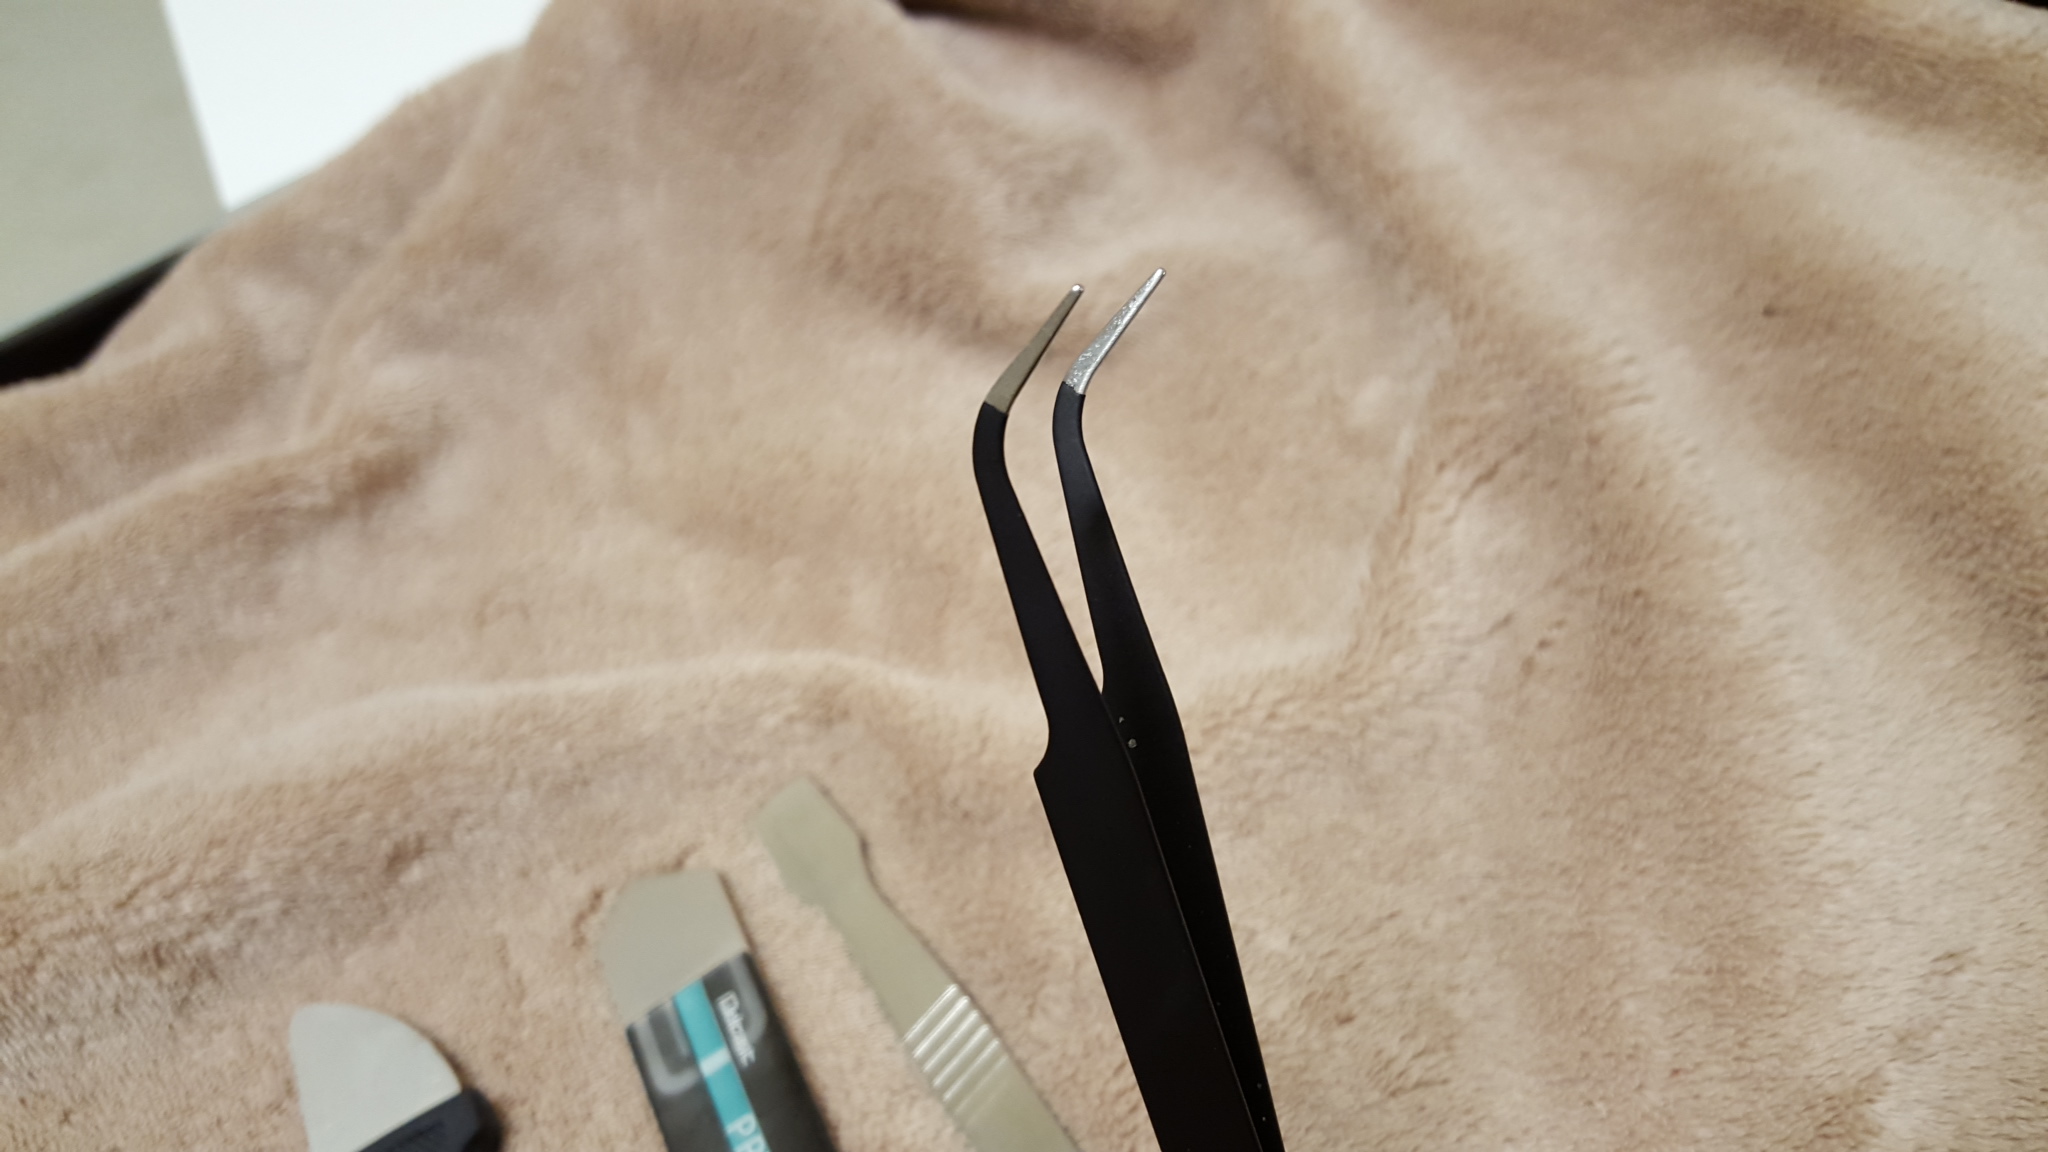
3: Forceps:
Not the best image, I know, but these also happen to be anti-static and help with removing ribbon cables, opening/lifting tabs, and so on and so forth. A godsend for people with sausage fingers.
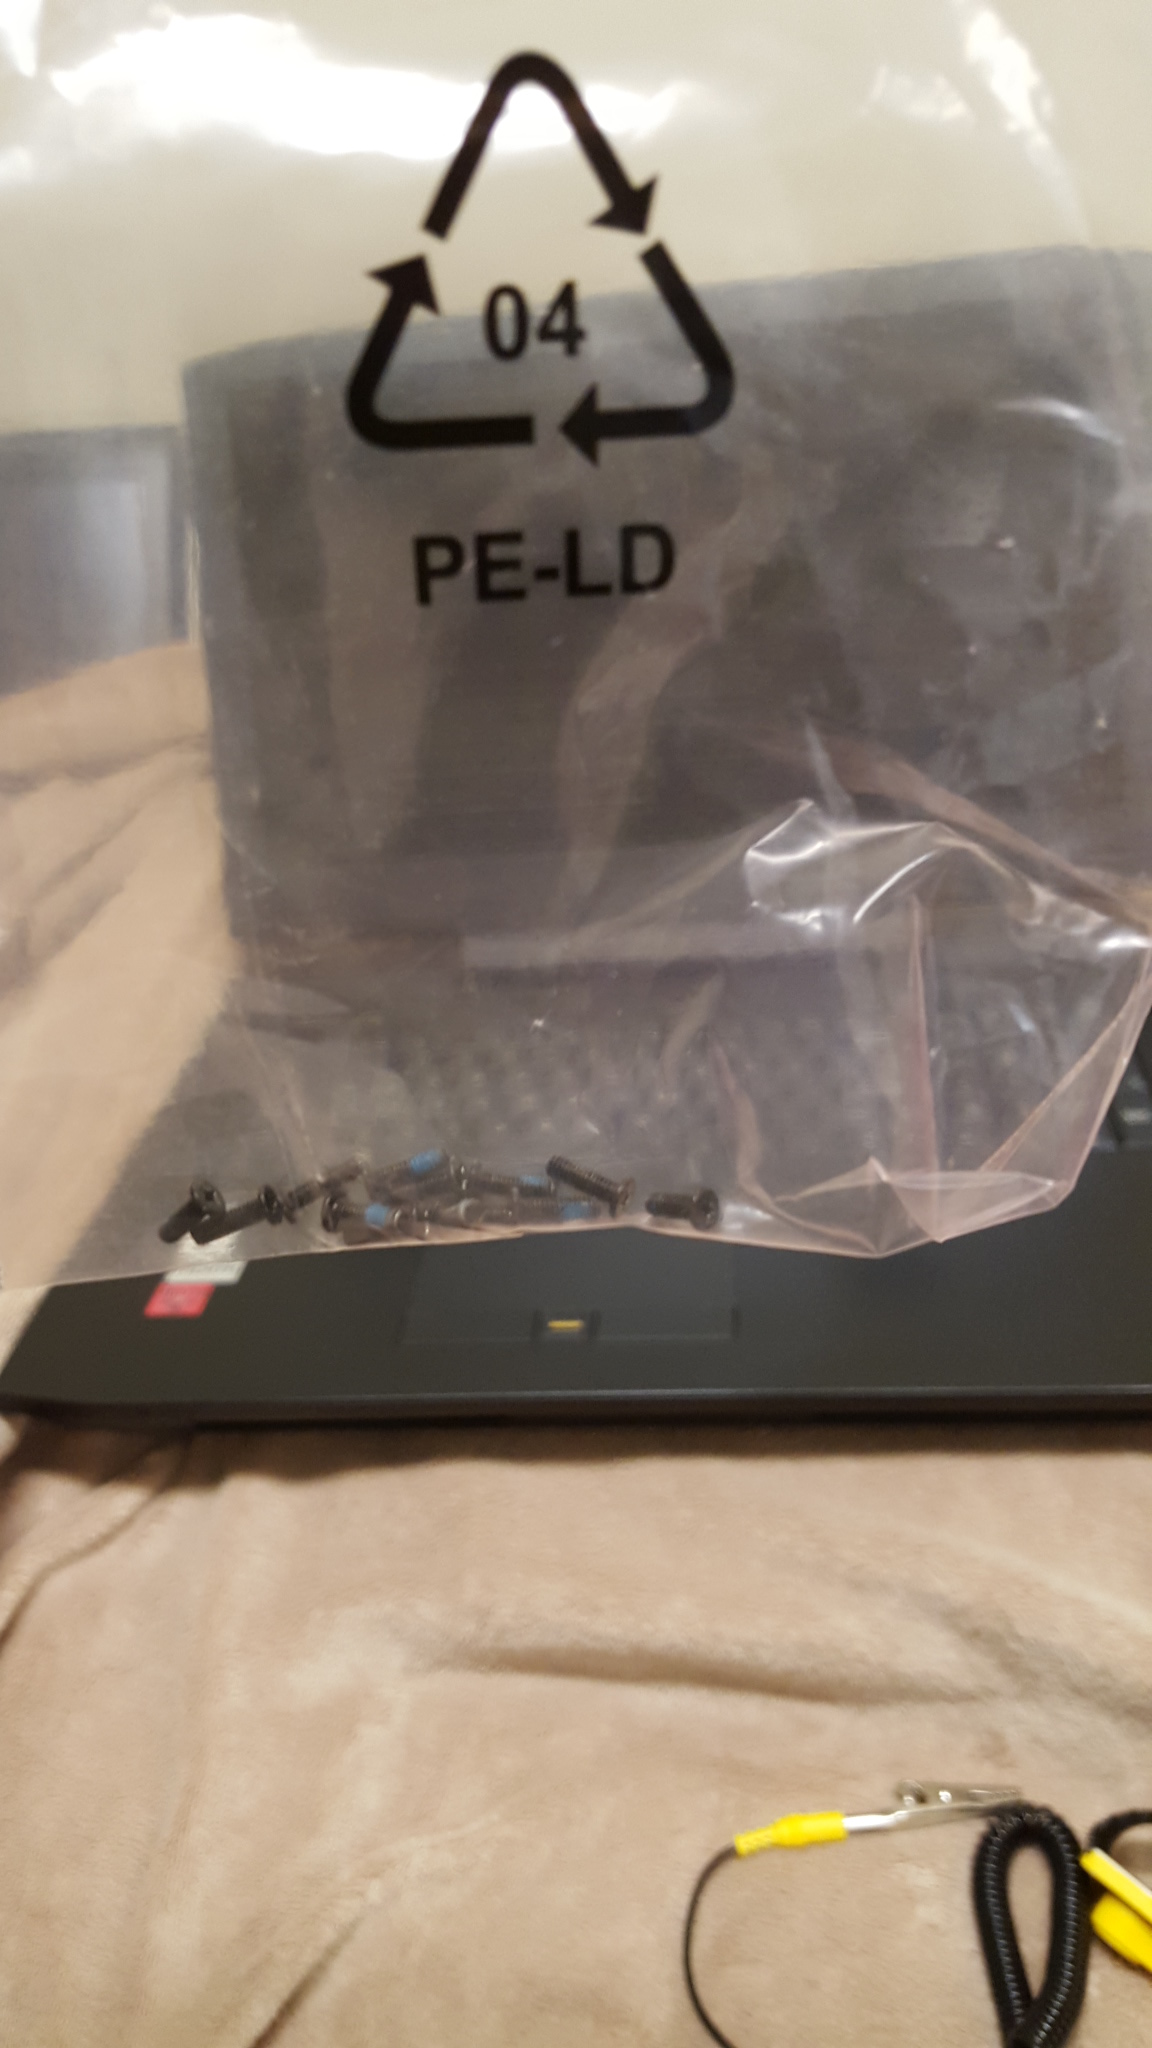
4.) Storage for screws and other small bits:
Really, this is redundant but with that said, keep special screws separate from generic ones. A good majority of the screws on the phoenix are the same specifications in dimension/length, but for the ones that aren't which may be shown throughout the teardown, do yourself a favor and put them somewhere distinct but obvious. Also be sure to remove ALL screws that frame the laptop at the bottom once open (the other edges, around the heatsink, etc). And to remove the darn dummy SD card. There are quite a few times I tried to remove the frame and forgot it was there. XD With that said...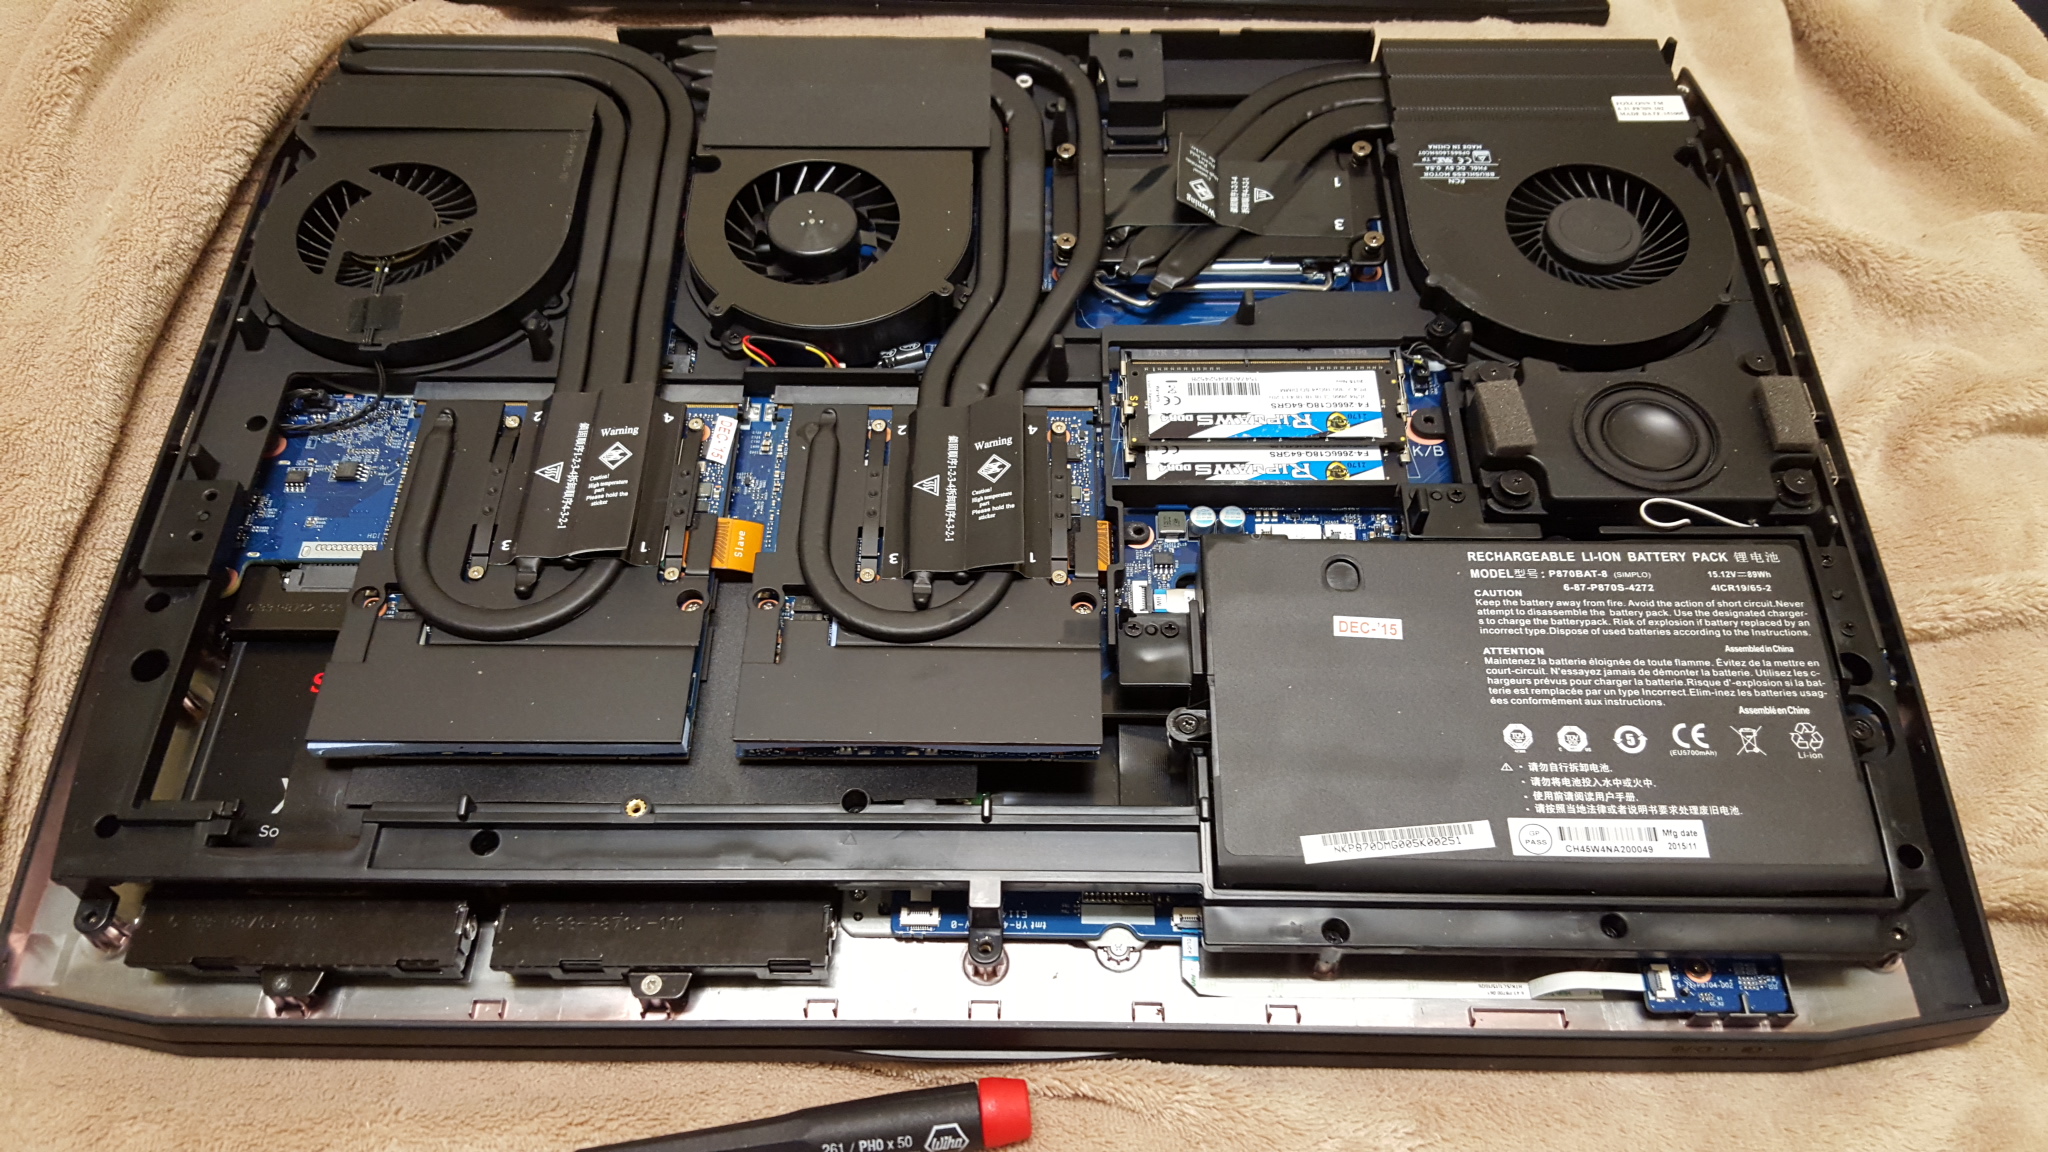
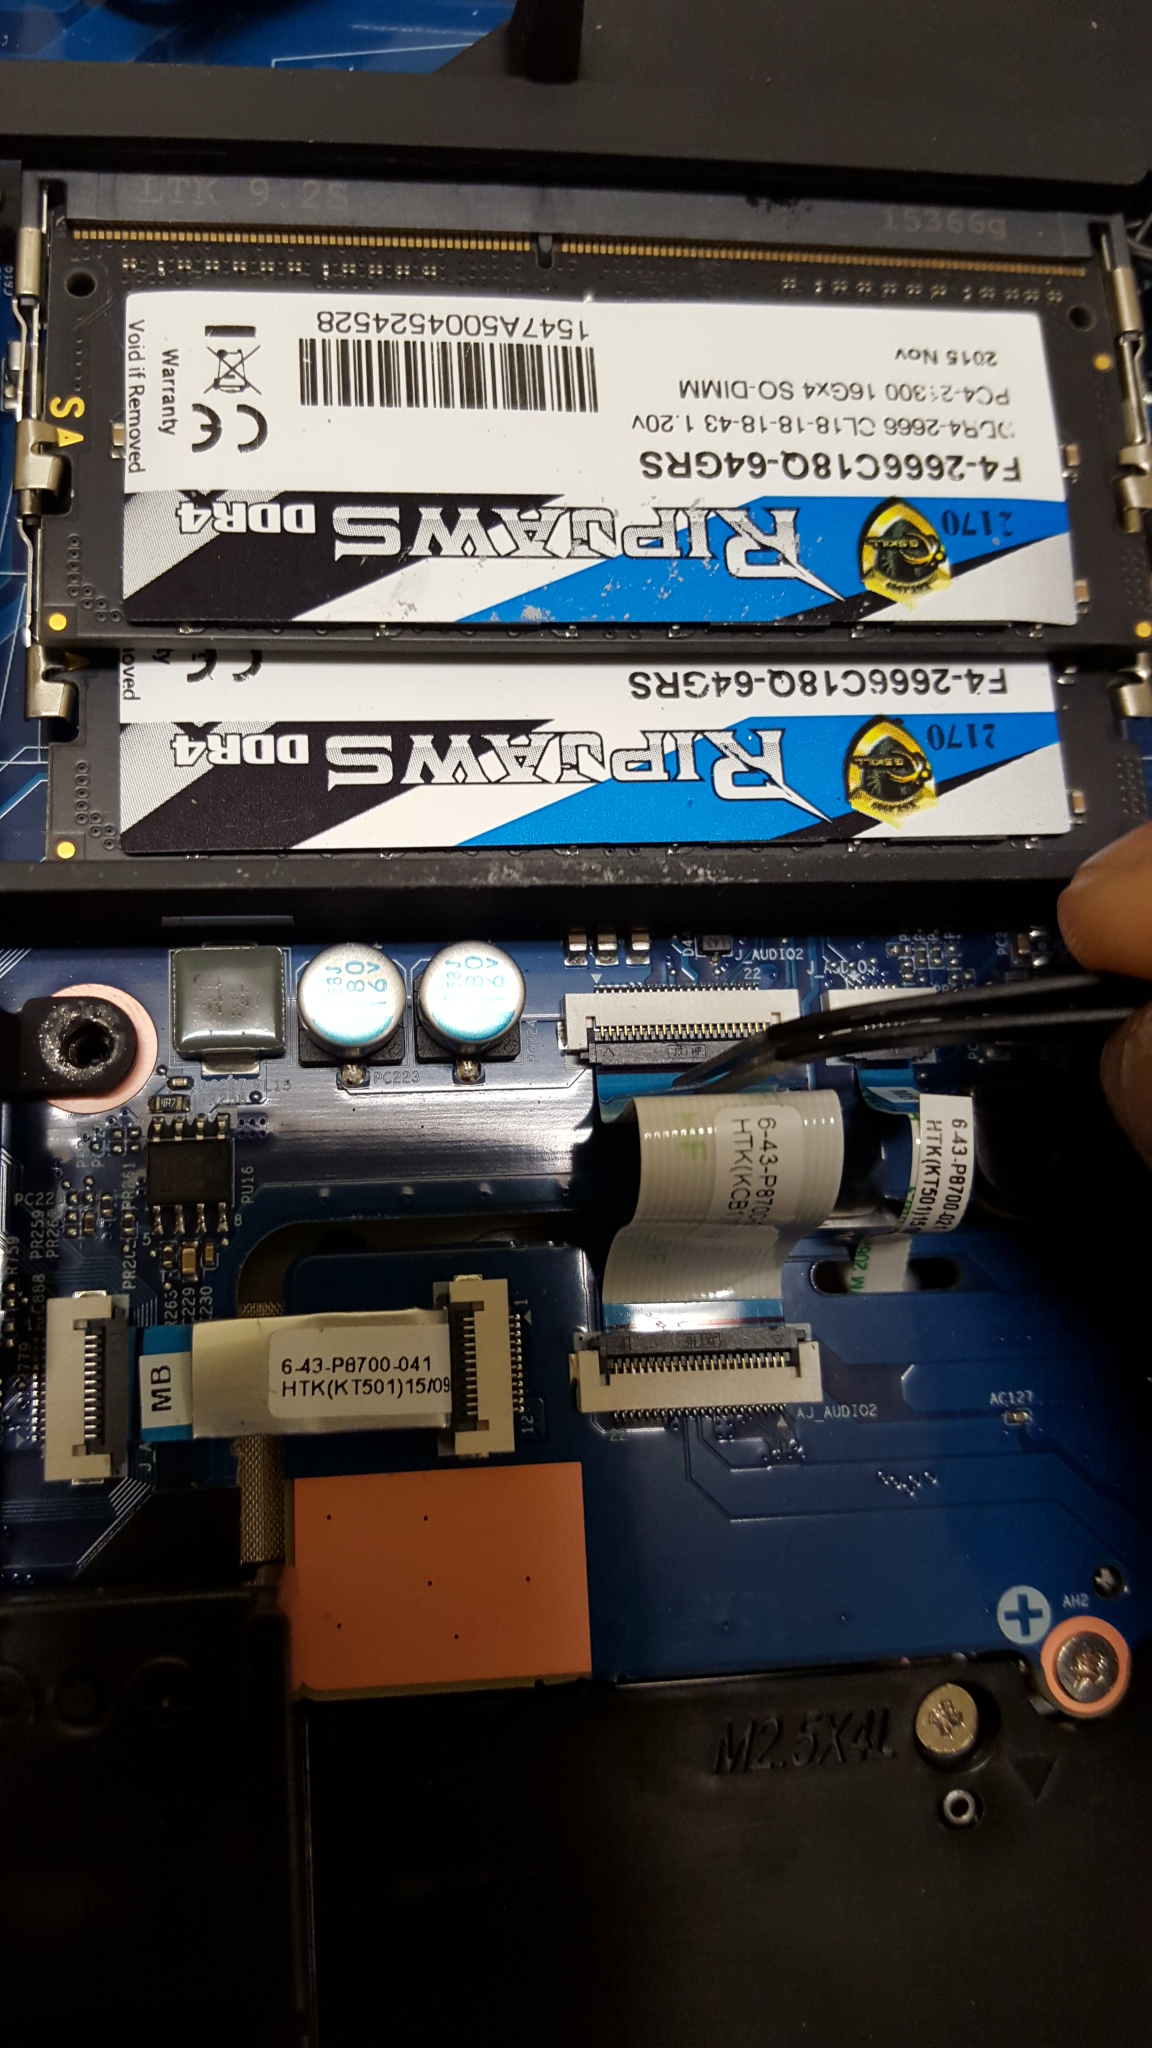
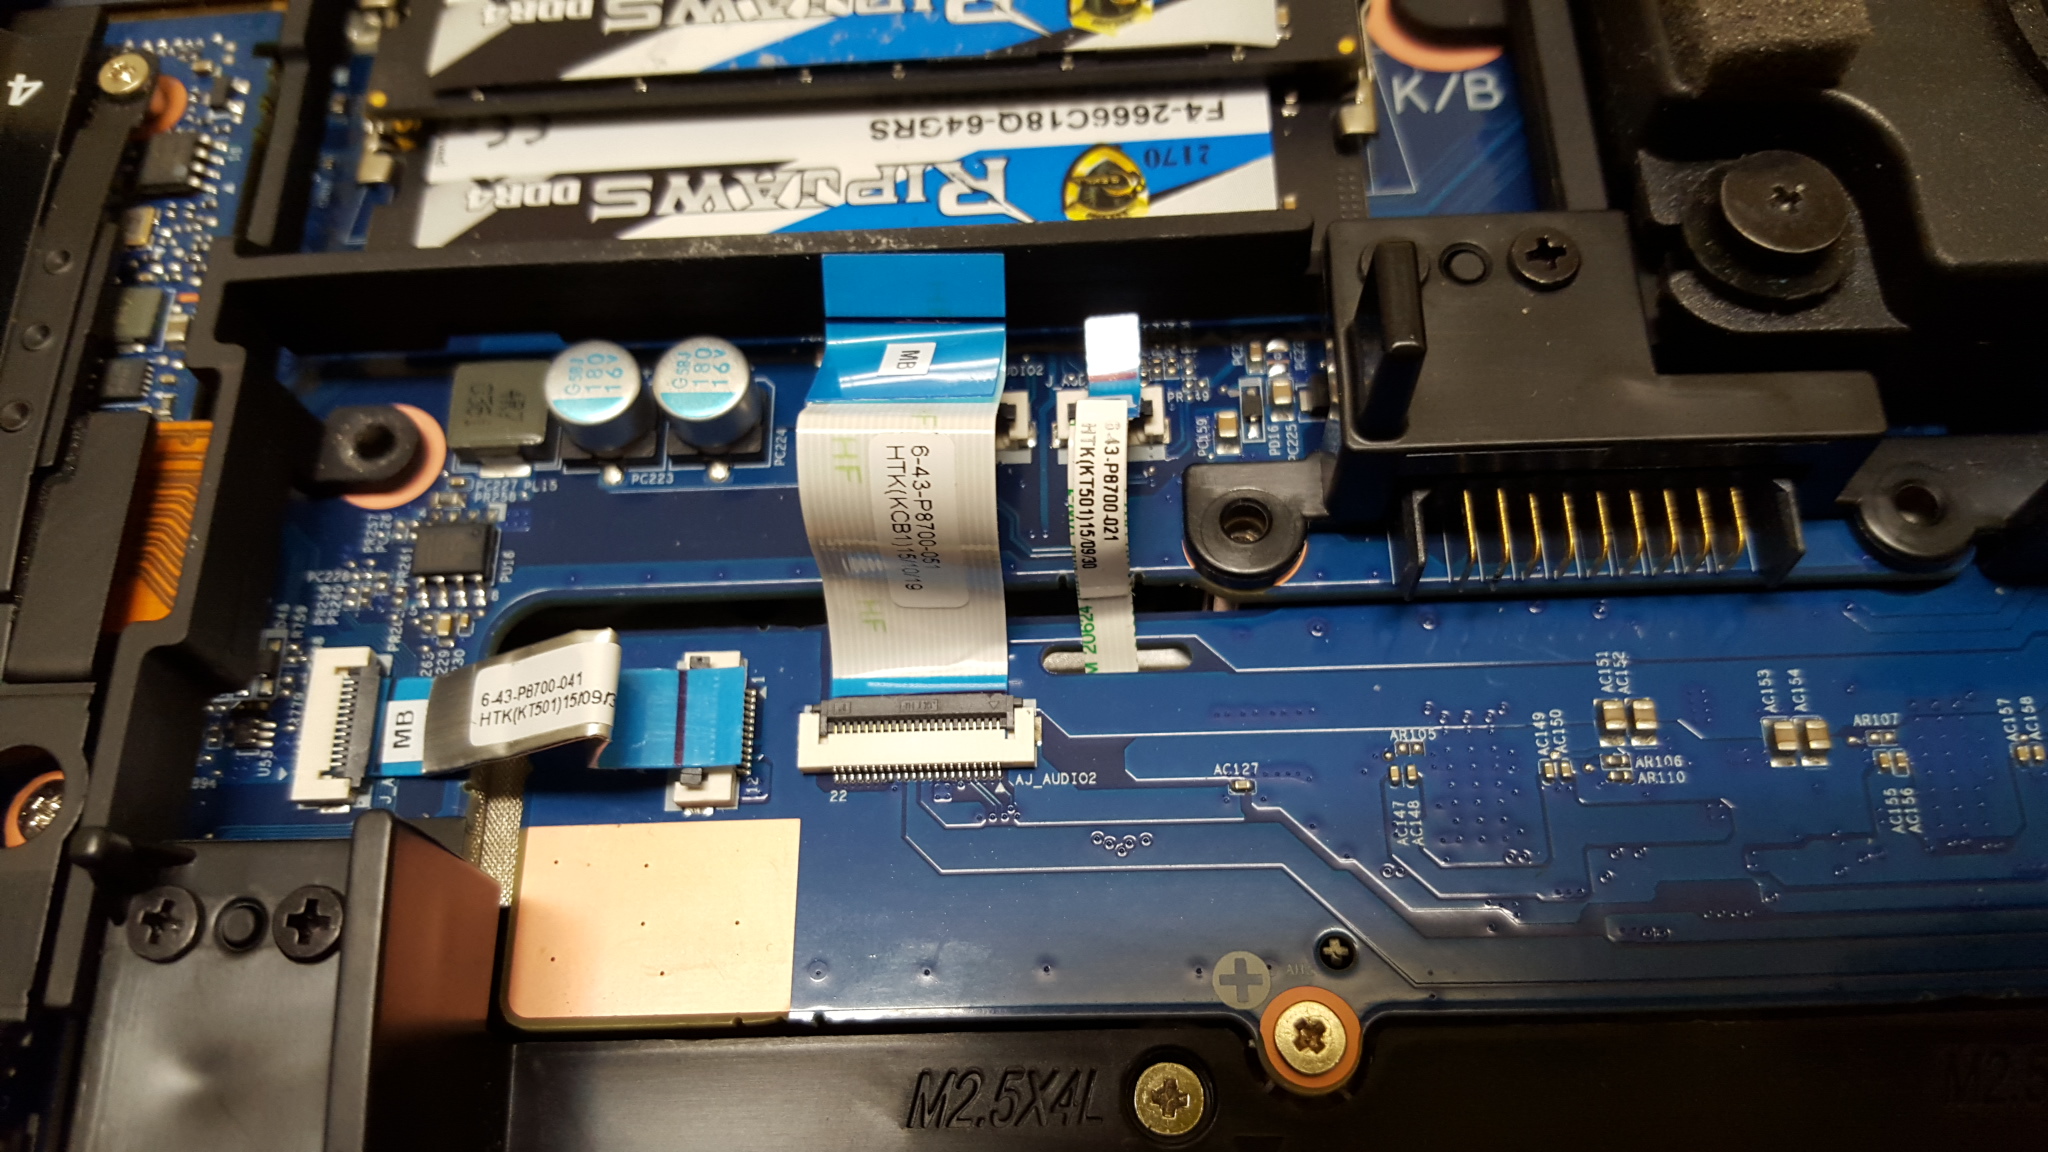
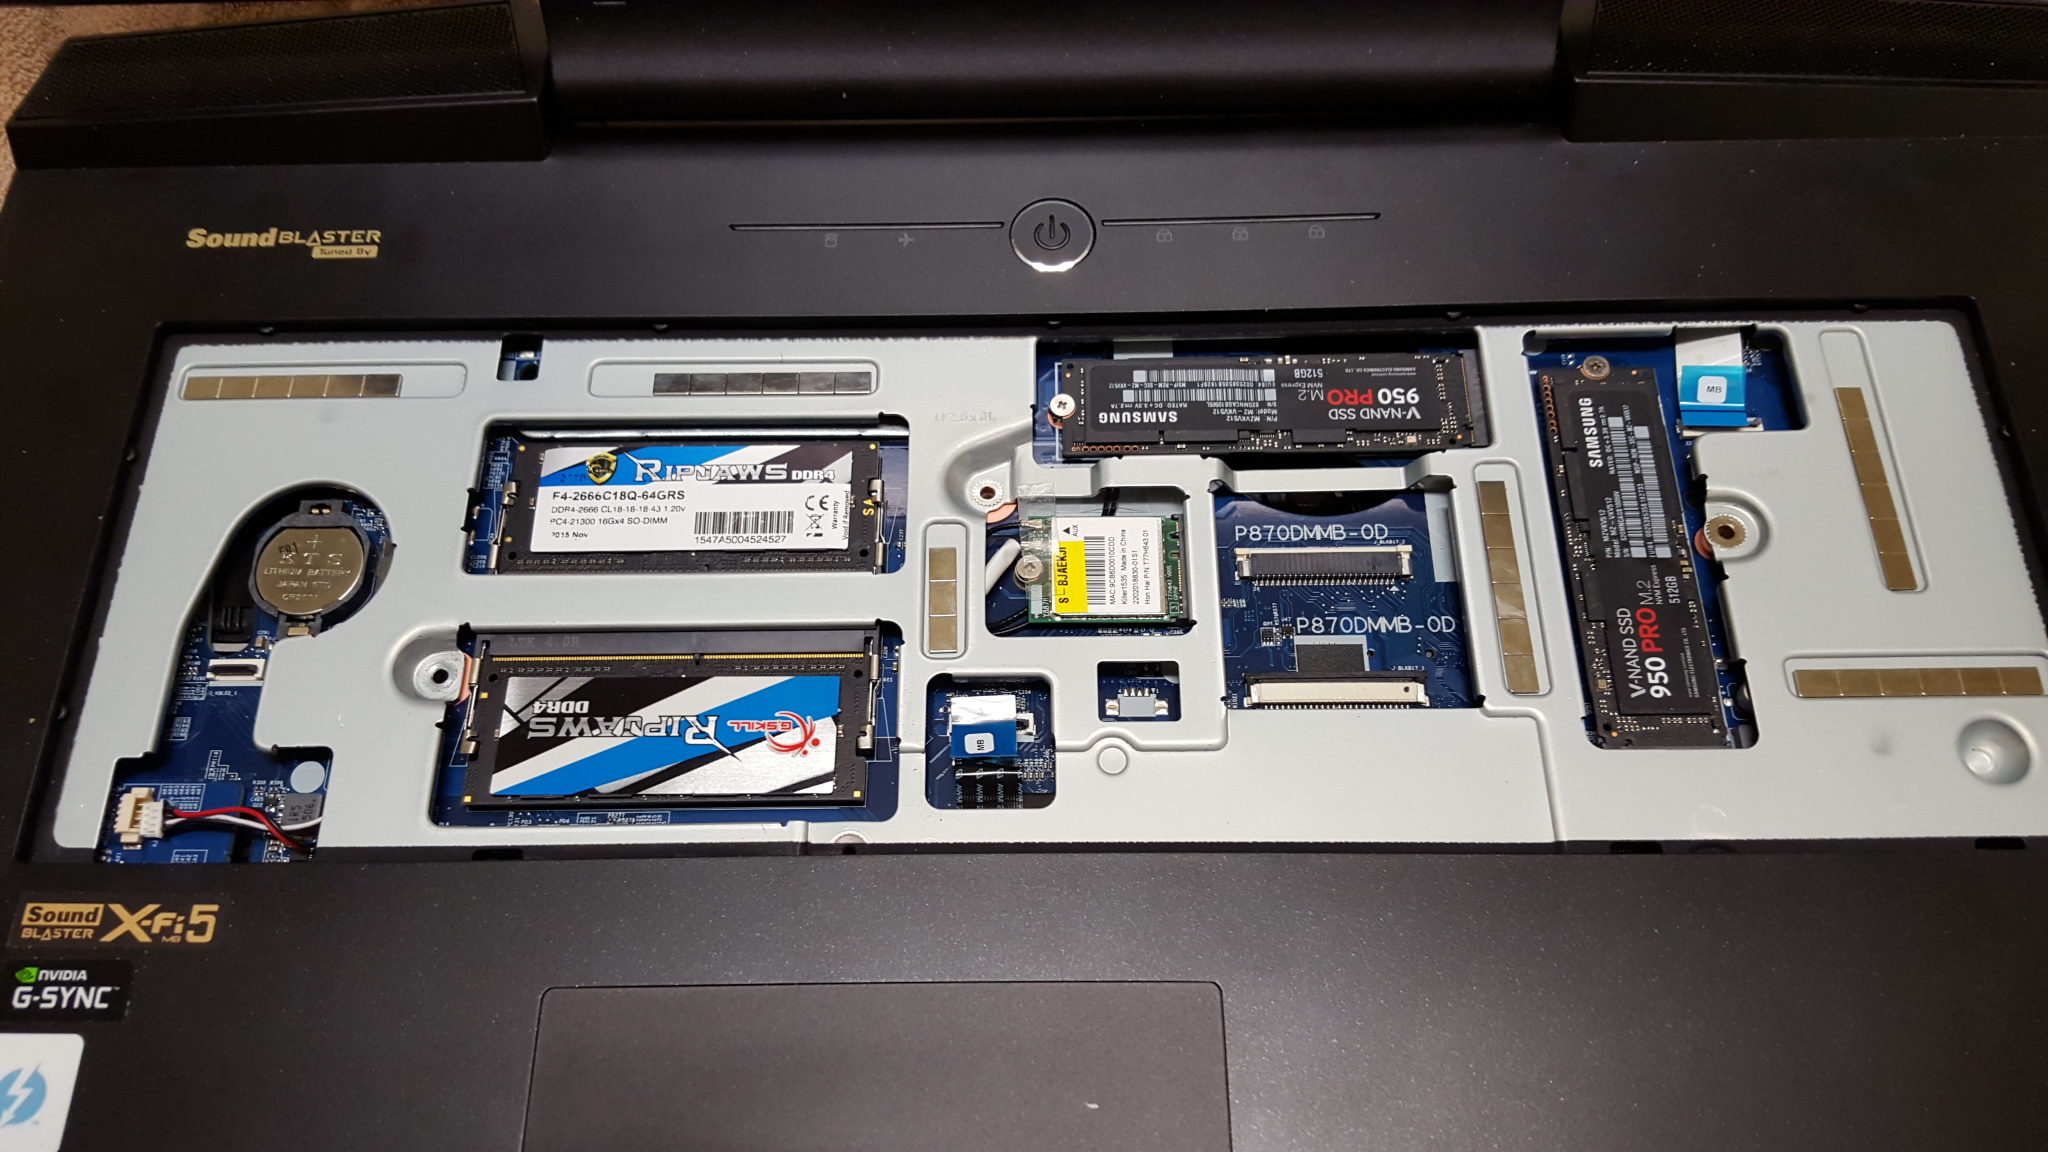
Remove the back of the laptop (I won't be showing that process since there are plenty of other guides for that and to get to the important bits quicker).Next: The battery. Remove it. and then you'll be confronted with these three ribbon cables:
Notice the "MB" printed on each? Lift the black tabs using the forceps or another small, precise tool. Heck, your fingers if they're small enough.
This isn't really a difficult maneuver. The hardest for me being the cable that rests to the far left and is bent (the one with the metal-ish sleeve). With that done, move on to disconnecting the subwoofer.
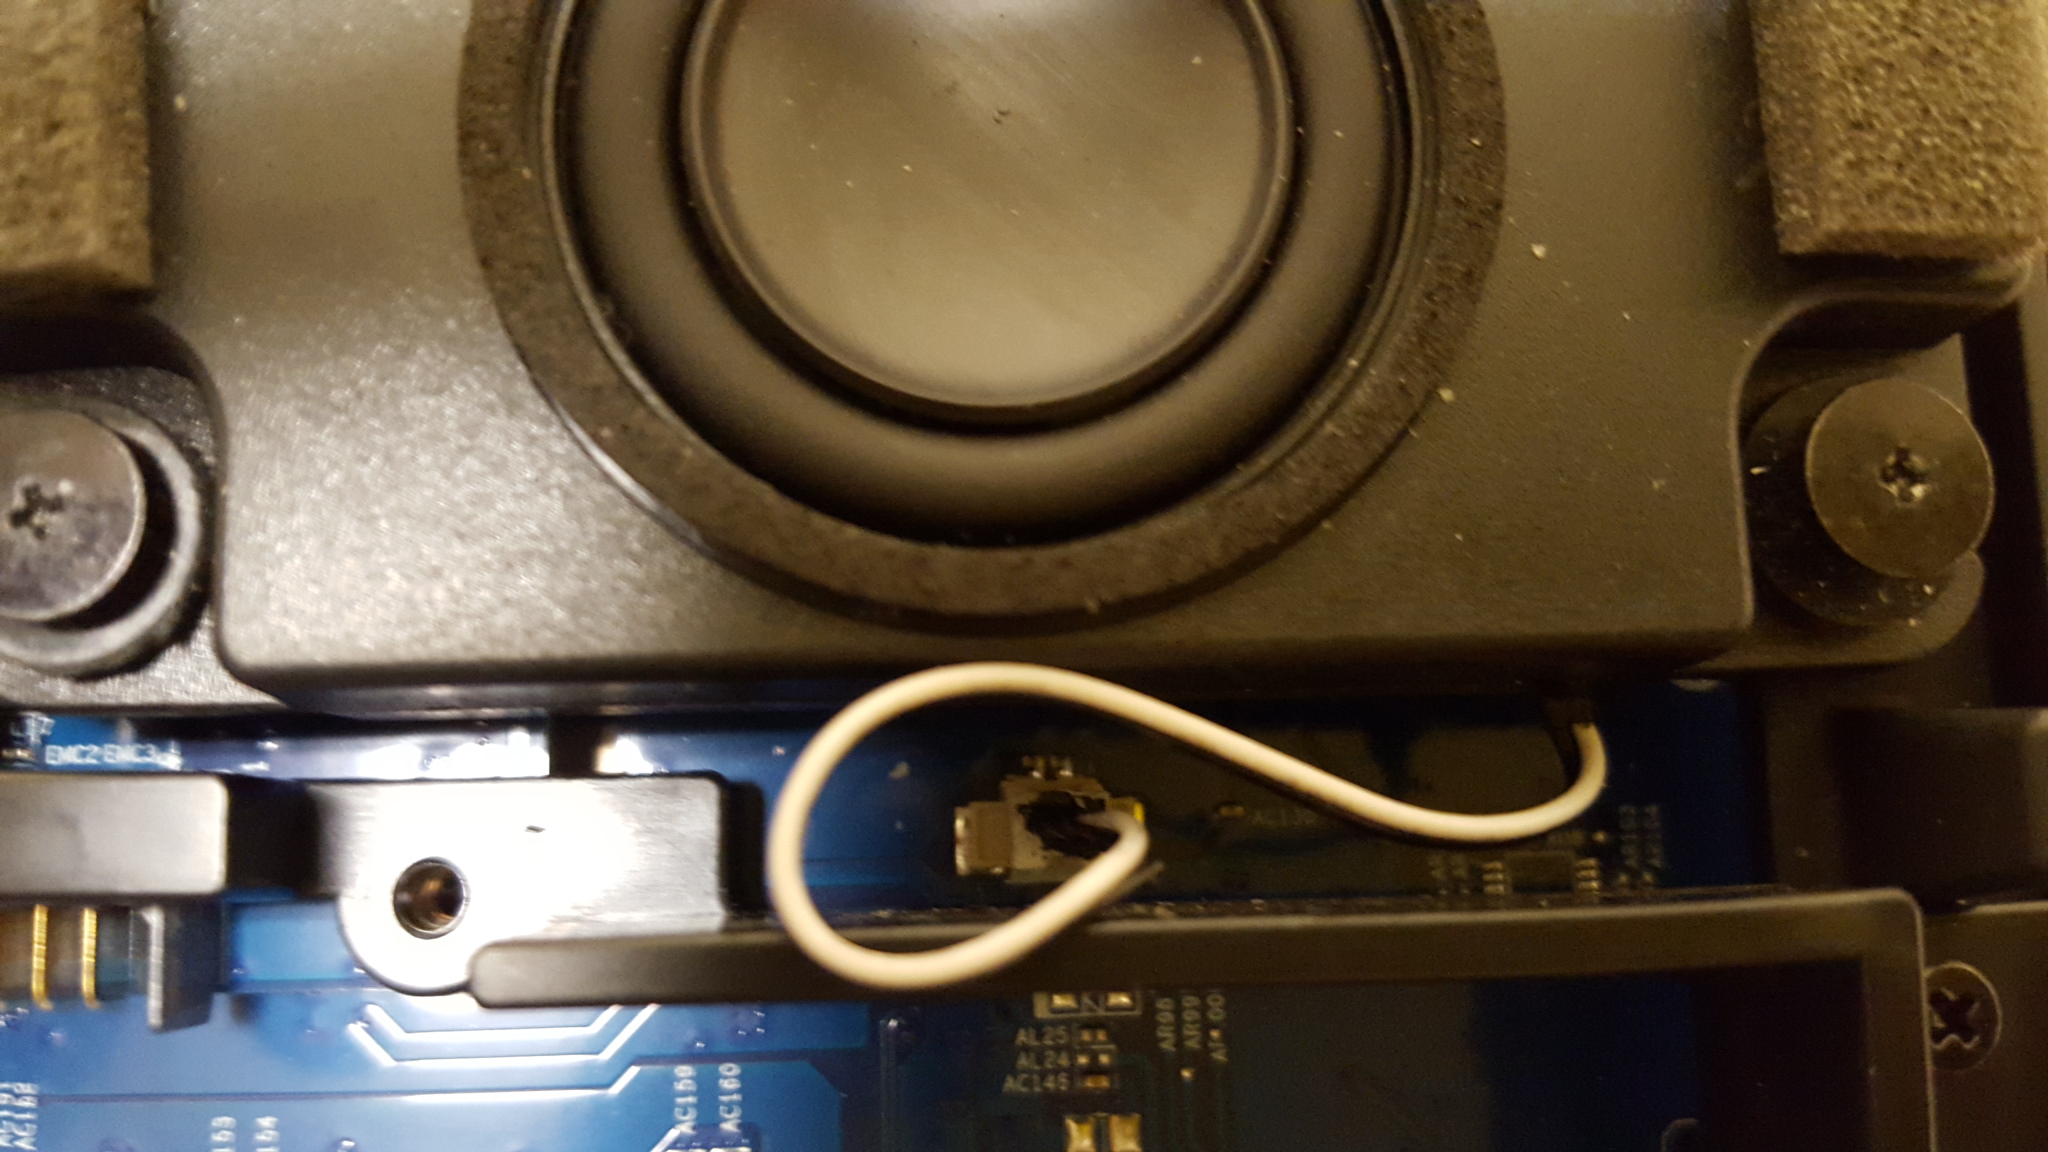
At the bottom you'll see where it connects with a tab at the very top. From my experience it's easy to take at with only your fingers since they are durable enough. Just be sure to bring your finger tips as close as you can on the wire and to pull both cords at the same time.
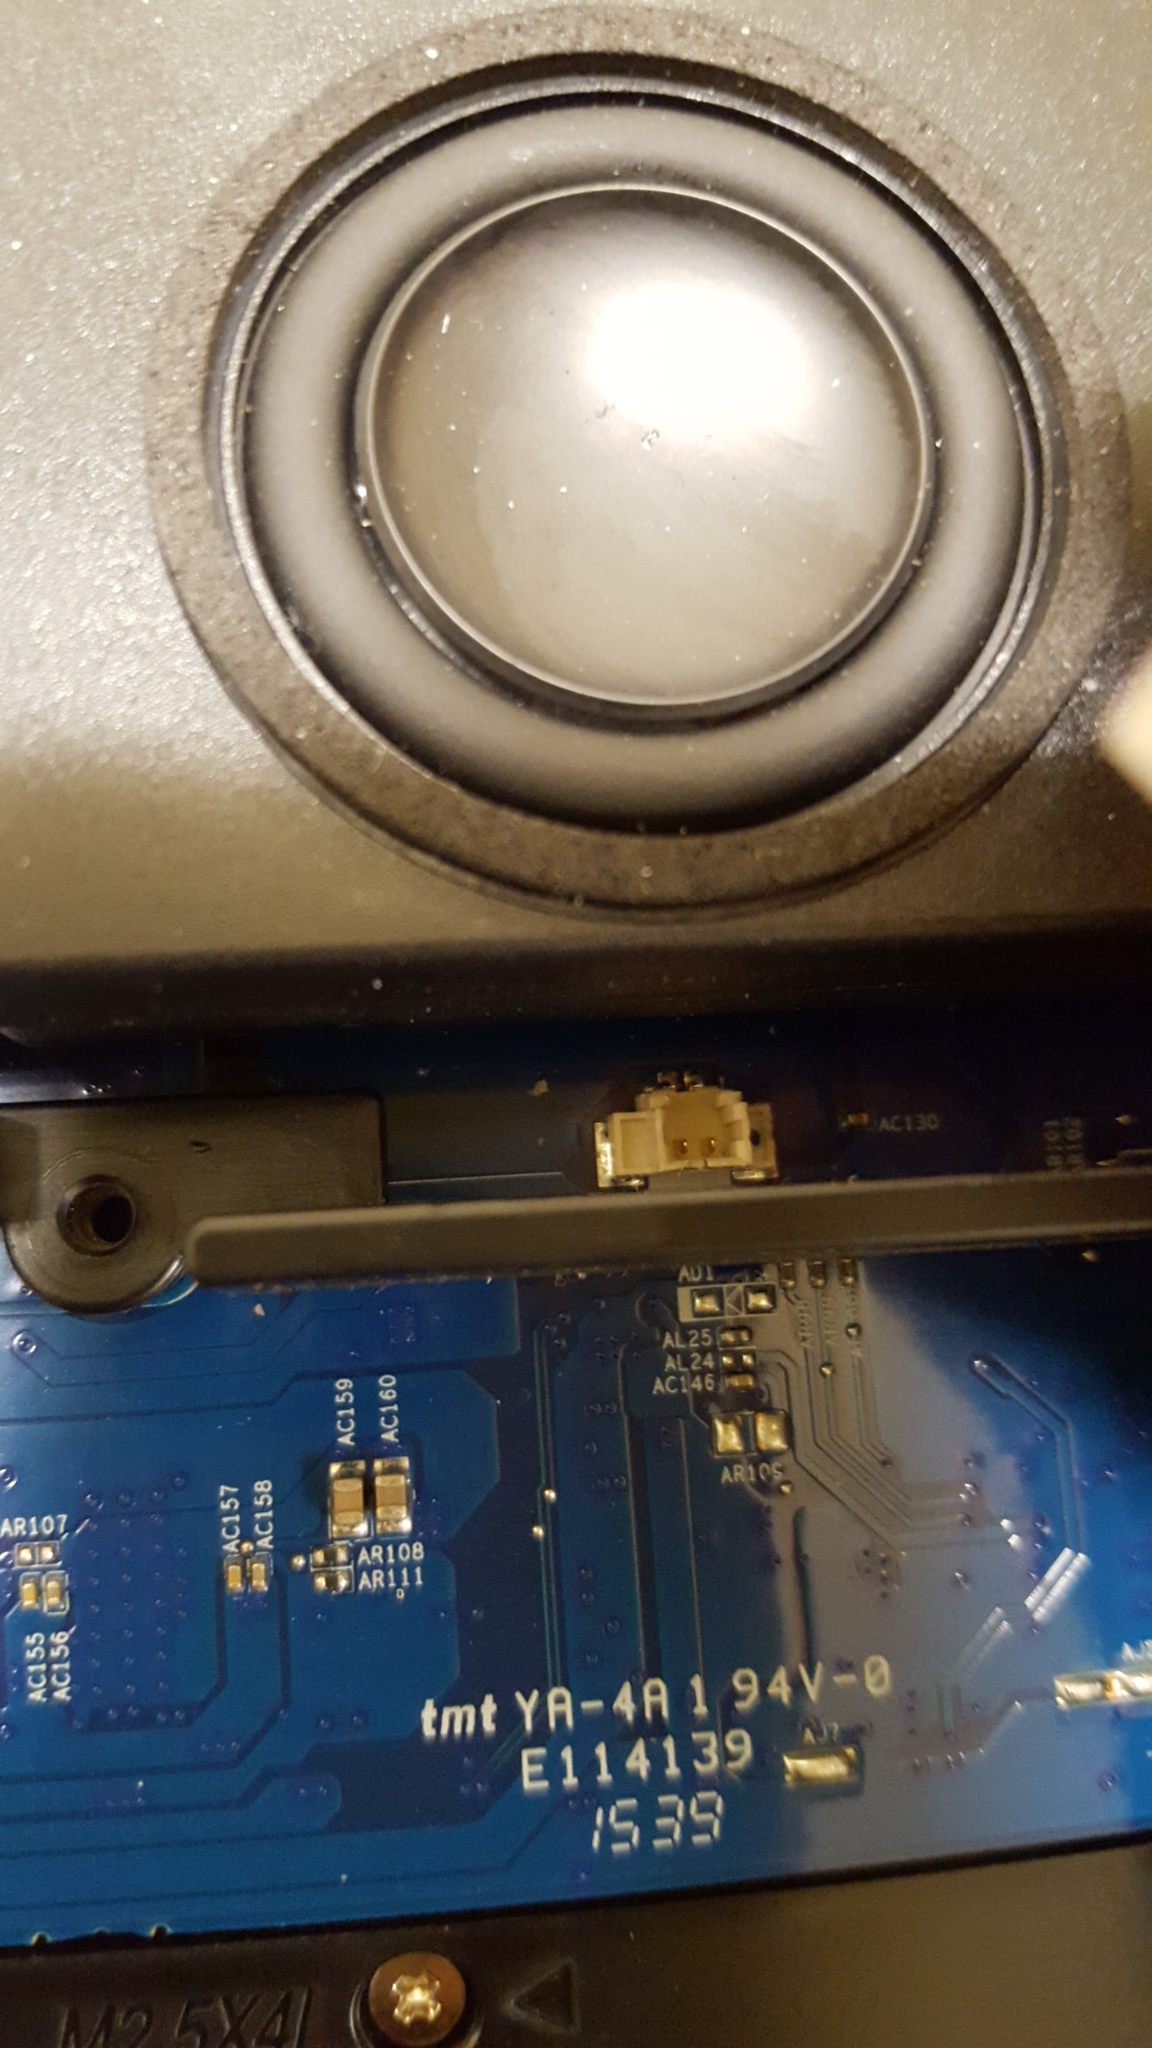
Here is what it looks like once removed so when you reconnect you'll have an idea how to re-plant it. Future-speak, I used the forceps to re-align the cord and used my screw-driver to push it back in correctly. Aim for the other edges so you don't end-up damaging the connections.
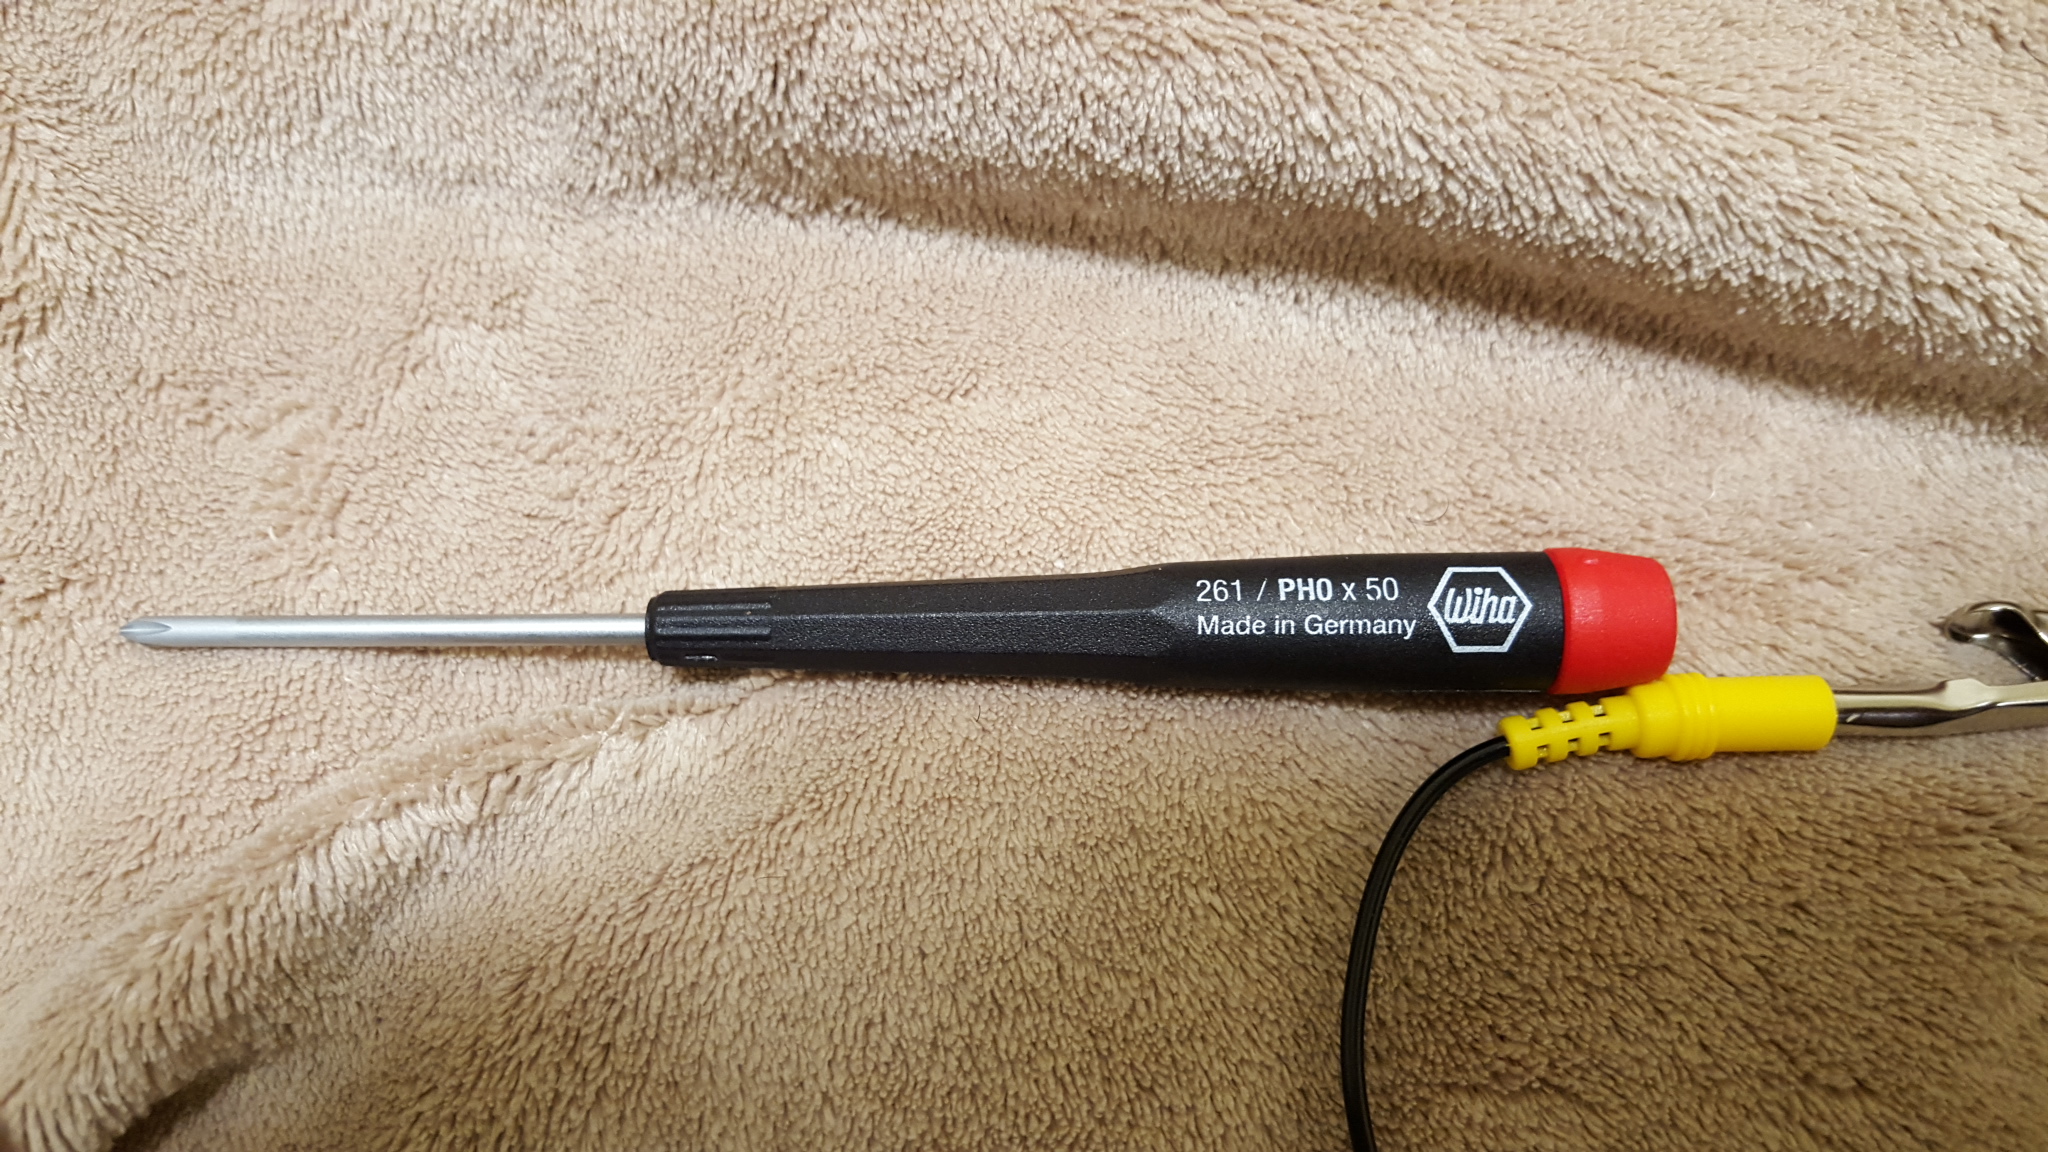
As a bonus, here's a picture of the screw-driver I used the entire time. From GPU heatsink to screen panel. It's pretty reliable. Not to mention magnet-tipped so that it's easy to lift screws in some of the deeper spots with a steady-hand. Philips brand. Specifics are printed on the holster.Next:
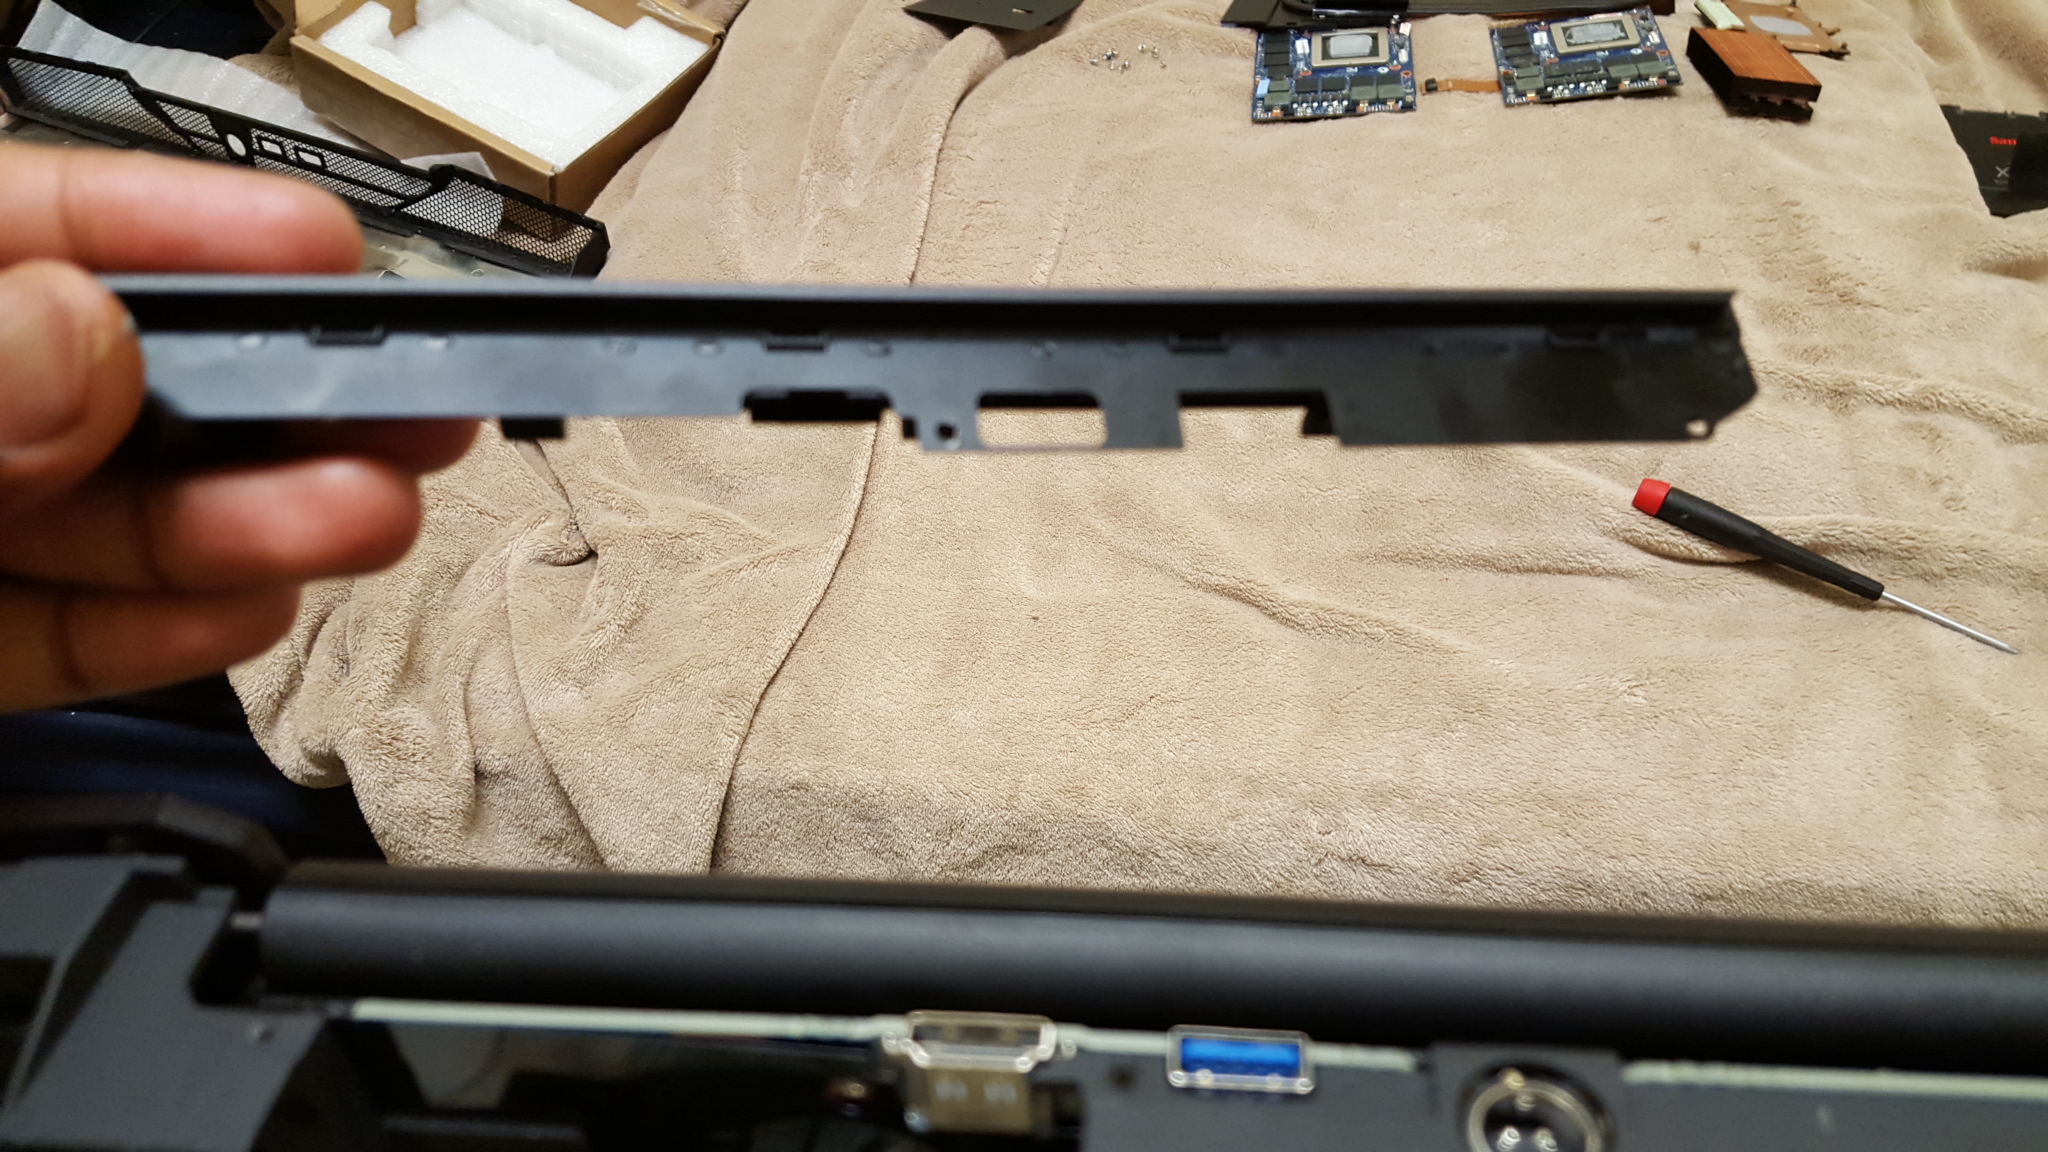
And:Remove this back-plate with the various ports on the back. the screws have unique dimensions but are black like the majority of generic screws so keep them separate .
Just to keep this in perspective, here's an image of the plate removed. While it doesn't feel cheap, it is very thin so keep it somewhere safe where you won't accidentally lean on and bend it. Now with all that done. We'll move on to the keyboard and which connections and sever so-to-speak...
Incase you don't already know, to remove the keyboard you must find the hole on the bottom of the laptop labeled "KB" and stick an narrow, firm object through. Beforehand I usually turn the laptop on its side and push. In my case, I usually use a thin screwdriver or two unraveled paper clips and bend them ever so slightly around eachother. For an example, refer to this @HTWingNut video: around the 7:00 to 7:25 mark. It's slightly older model but pretty much the same principle. Now let's identify where the connections need to be undone. Firstly:
The two primary keyboard ribbon cable.s. To remove, I recommend forceps. For the bottom, place the tips of the forceps on an indention on the place tab and pull towards the screen. The bottom ribbon should then be easy to remove. For the top cable, the same idea. When you decide to re-insert the keyboard connections. remember for the black tab (bottom connection) ribbon goes BENEATH the black tab and not sandwiched between the black and white. For the top connector the ribbon cable must go BETWEEN. Both strange and simple enough.
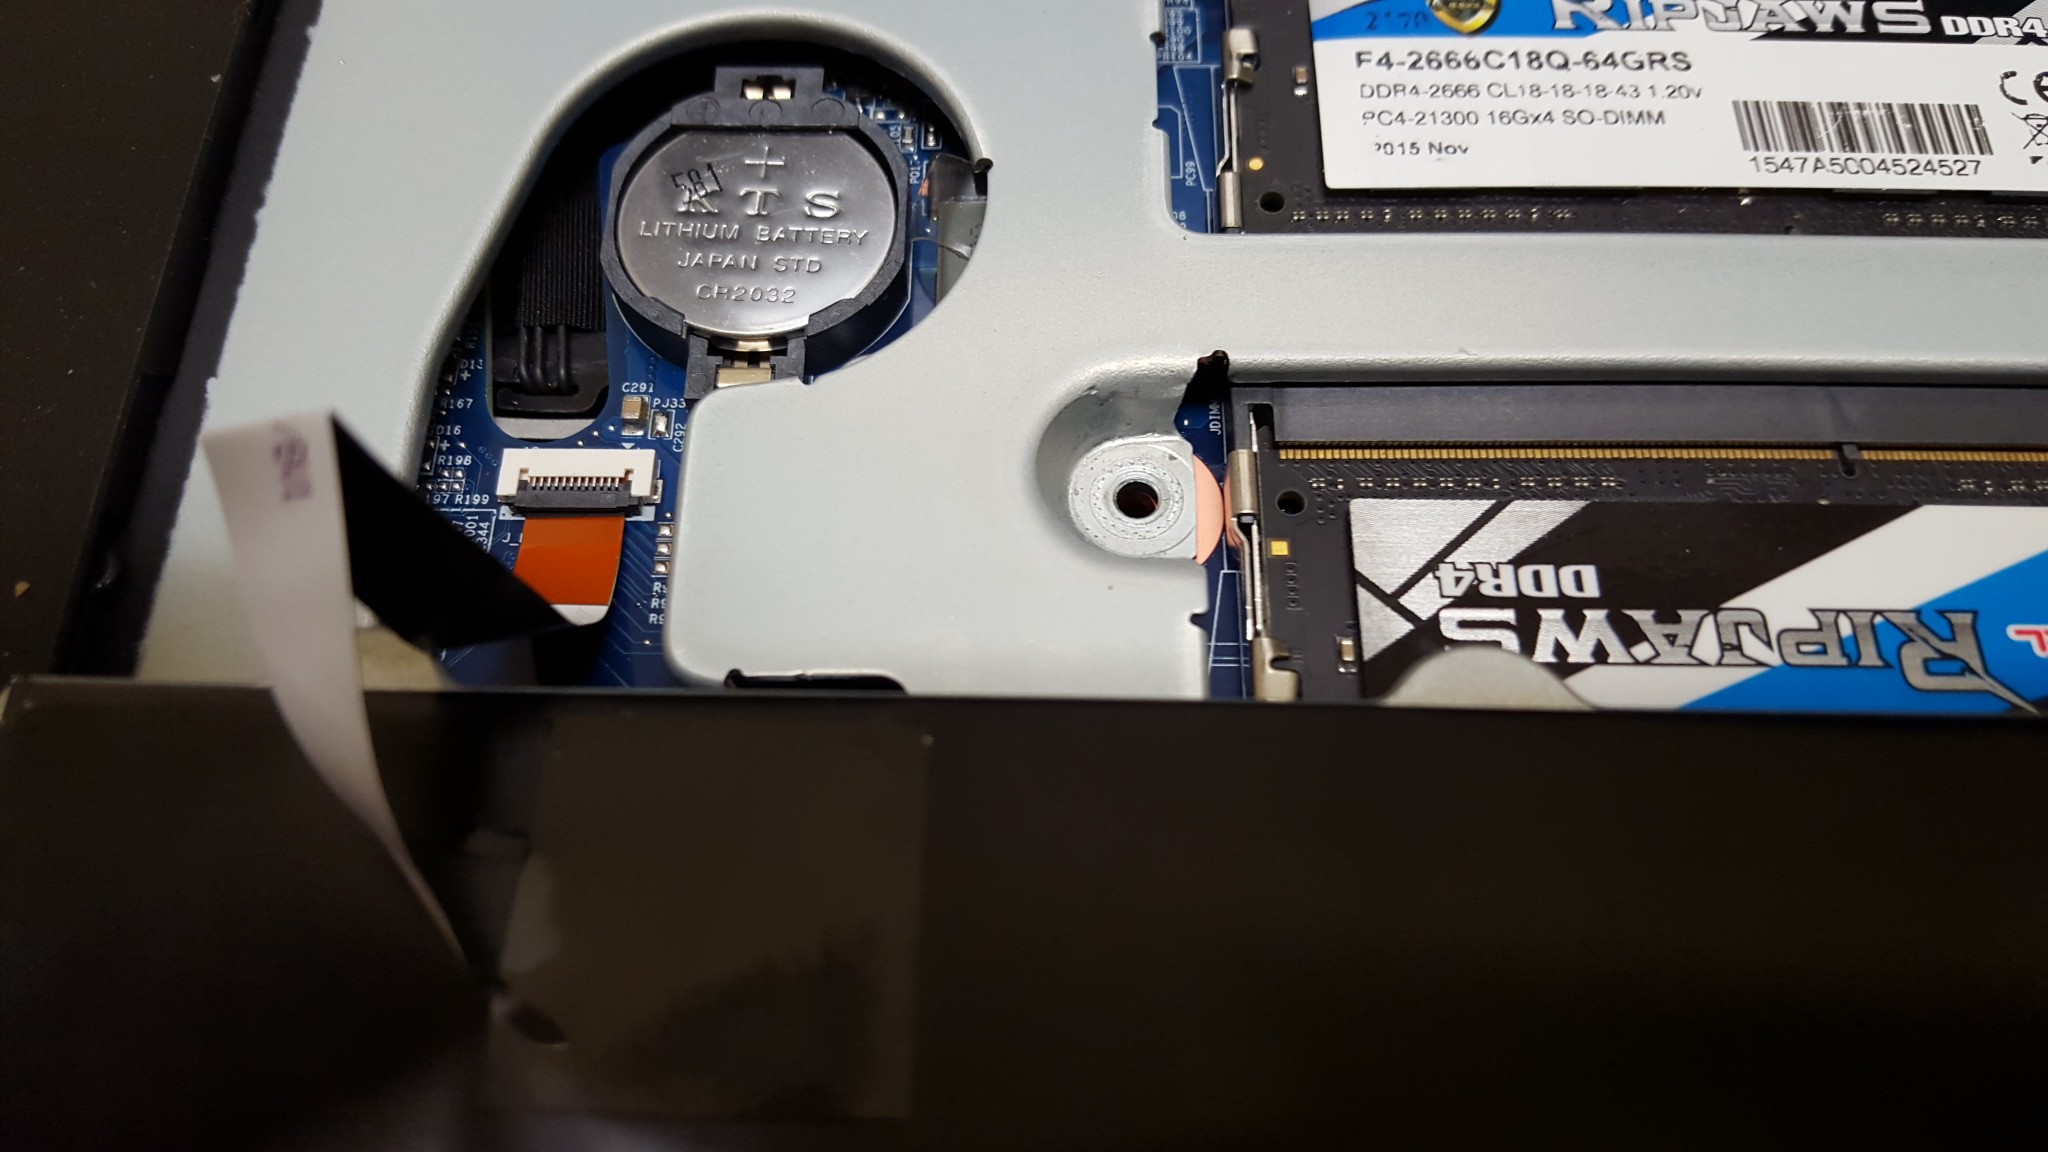
The ribbon cable to the leftside of the image and just under the CMOS battery controls the lighting on your keyboard. push the black tab up and pull the cable out. CMOS, RAM, and M.2 SSDs can stay put the entire time during your venture. We just want to get all the screws securing the faceplate down and the ribbon cables removed.
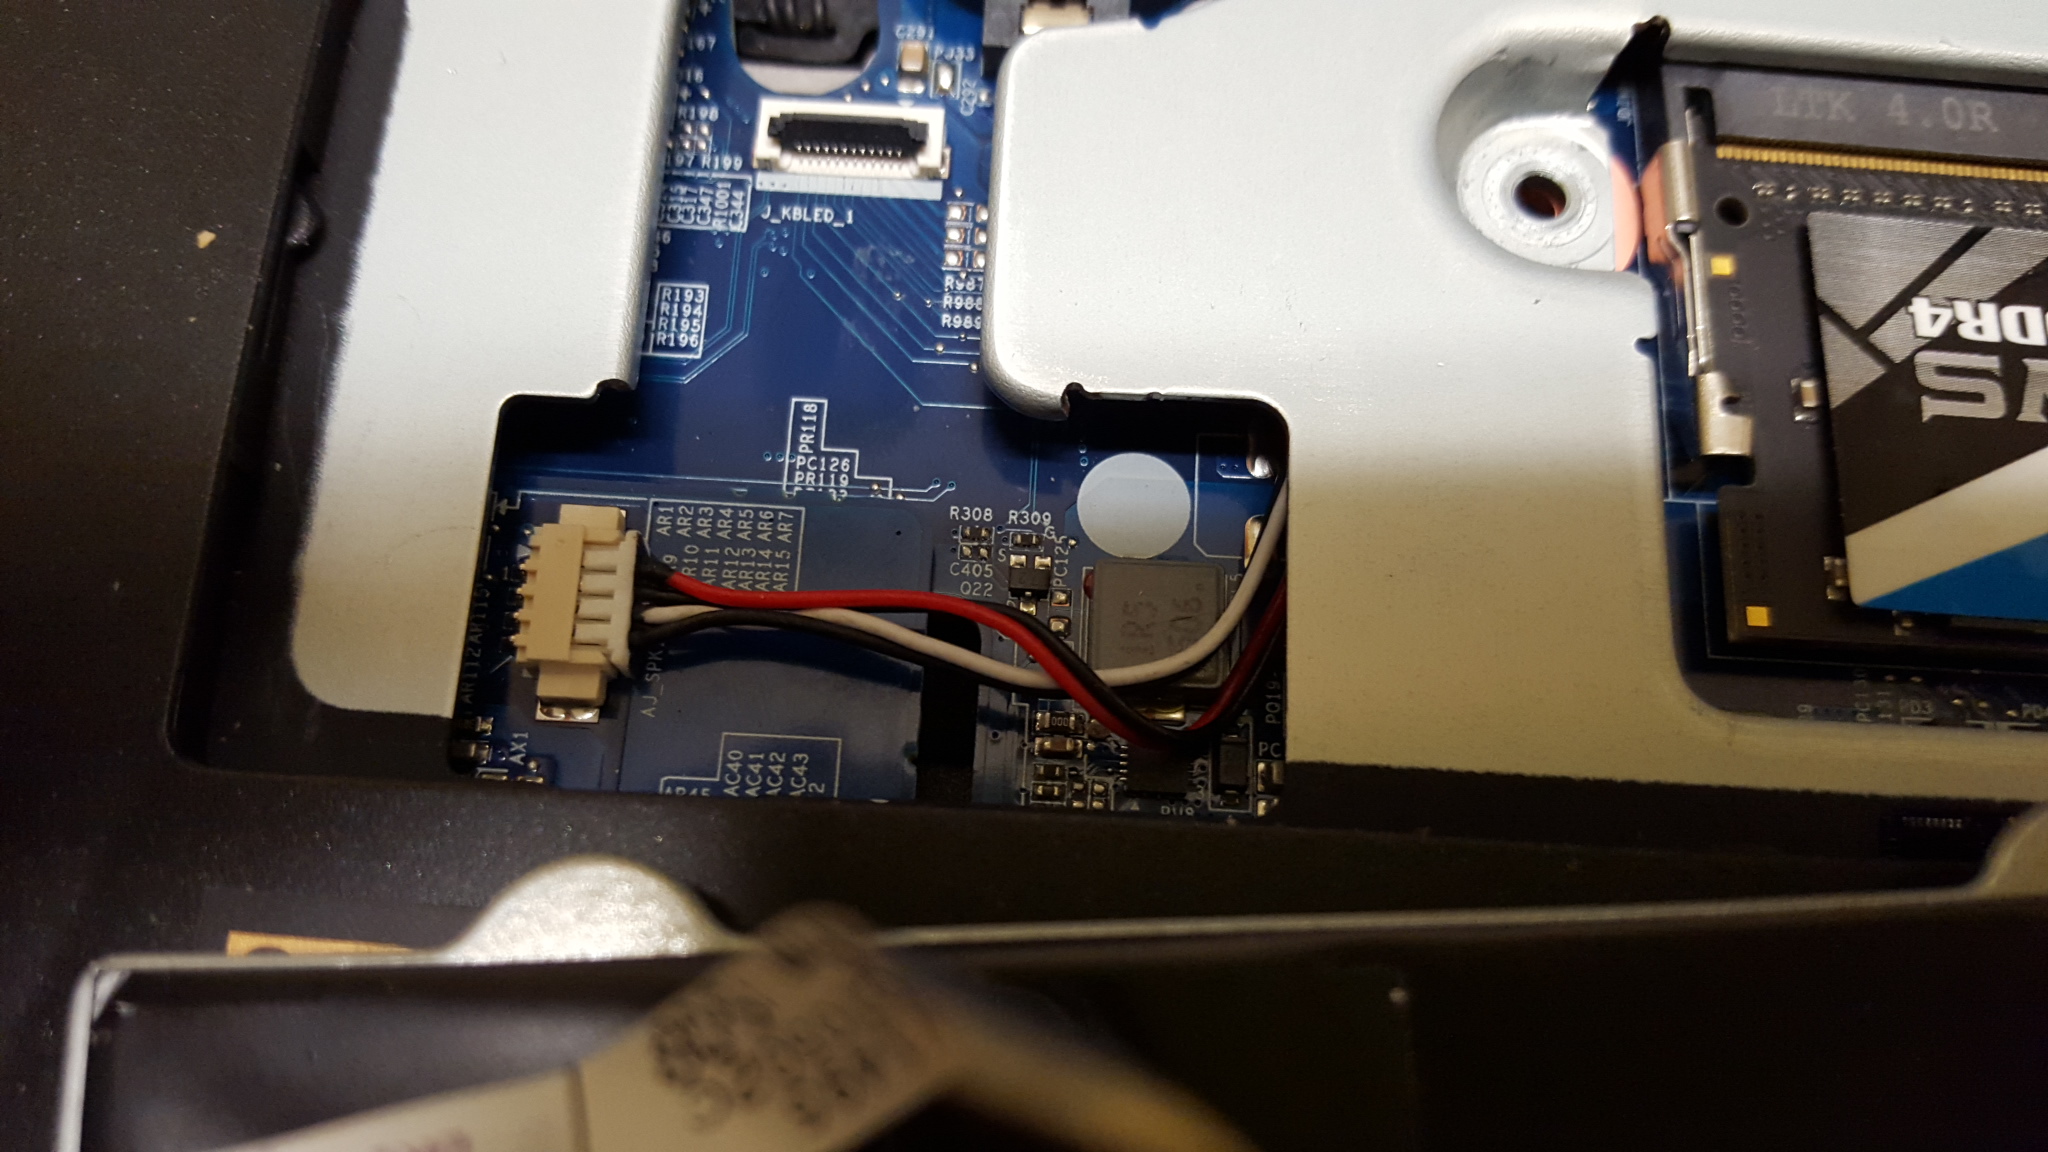
Now that we've removed the ribbon cable that dictates keyboard lighting we're going to take out the Speaker cable. It's pretty much the same as the subwoofer. Two or more firm fingers (or forceps if you have sausage fingers or Shrek hands) nearest the connector on the cables seen here; tug and remove. When re-applying, this one isn't nearly as cumbersome as re-connecting the subwoofer.
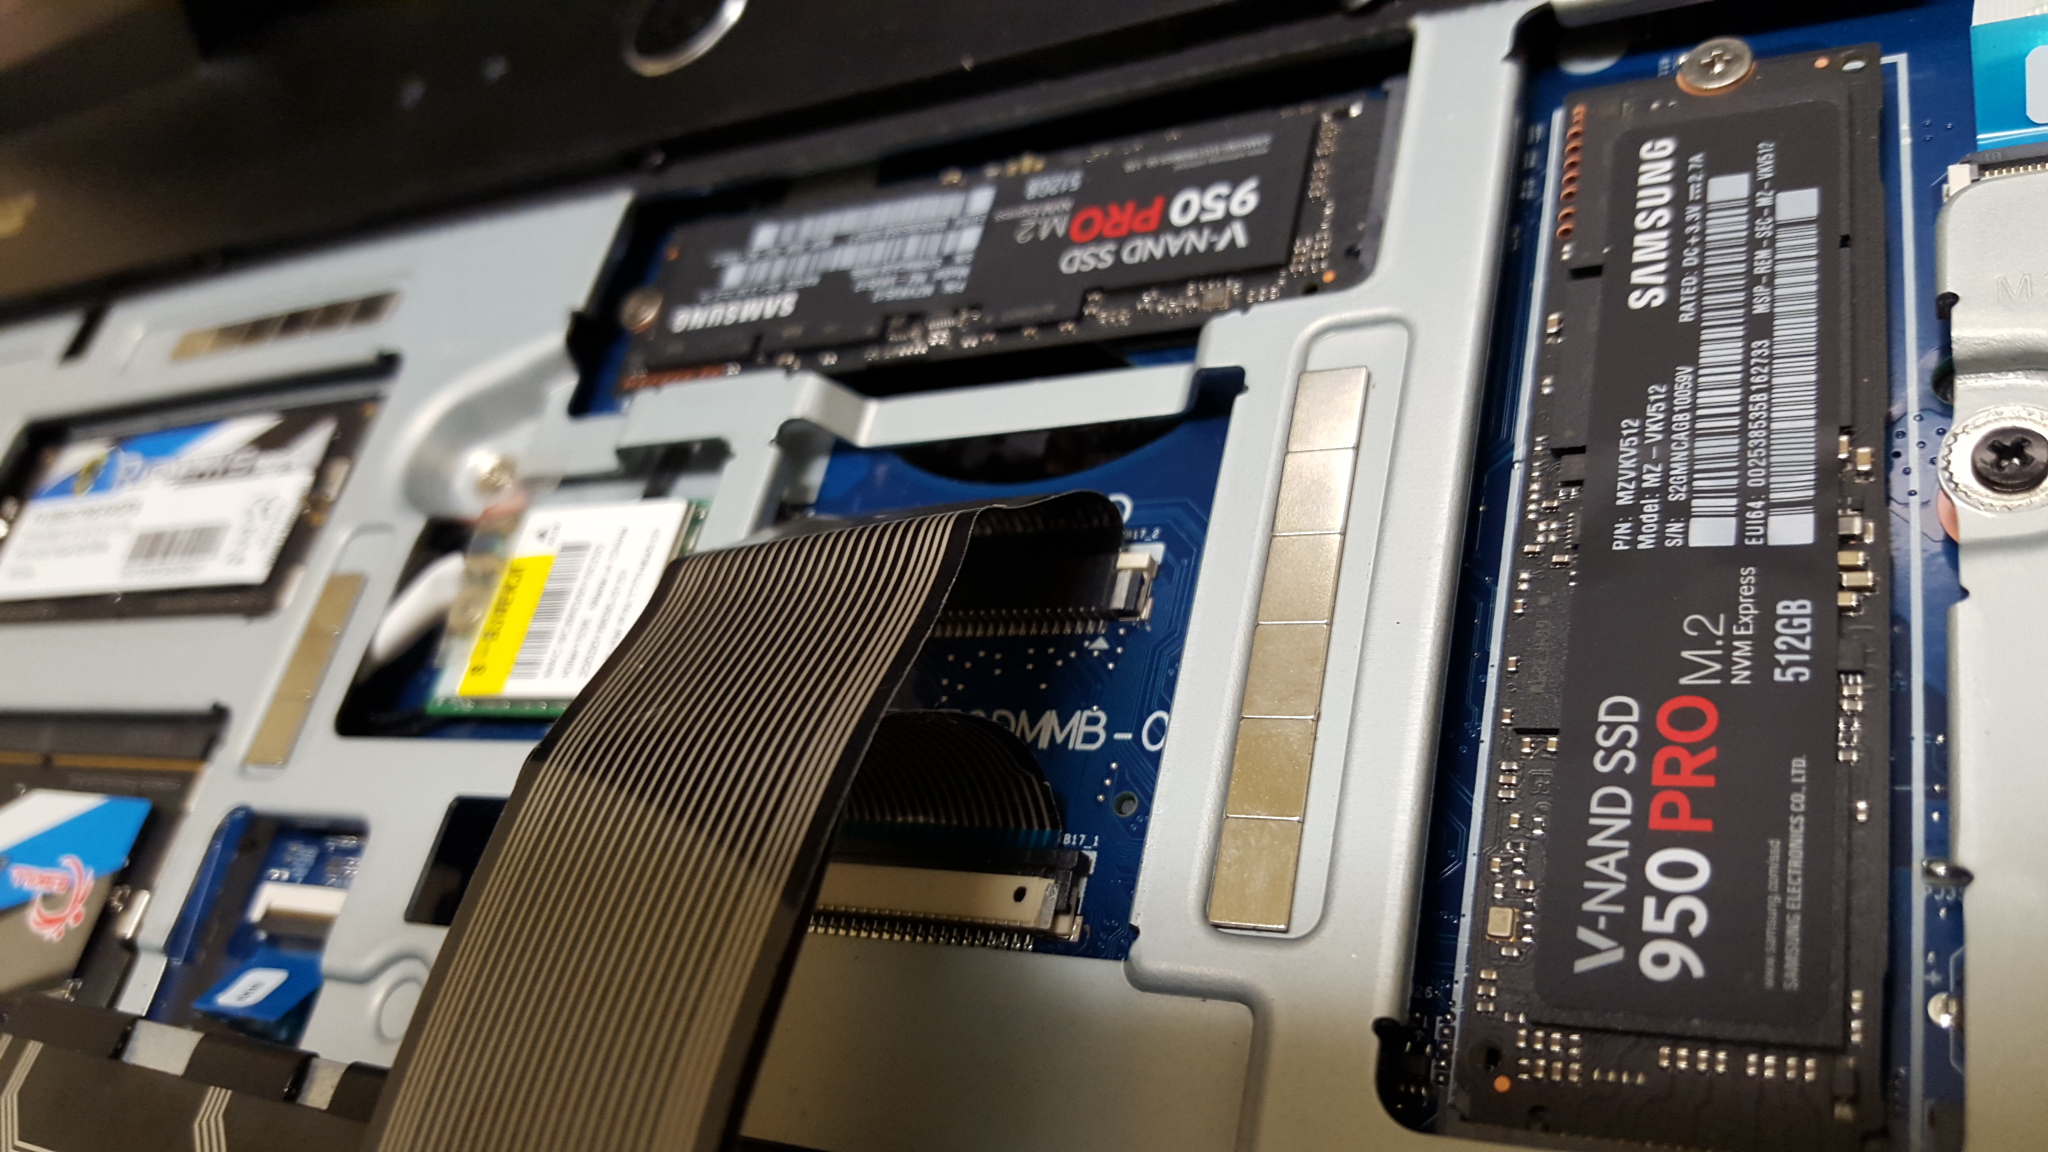
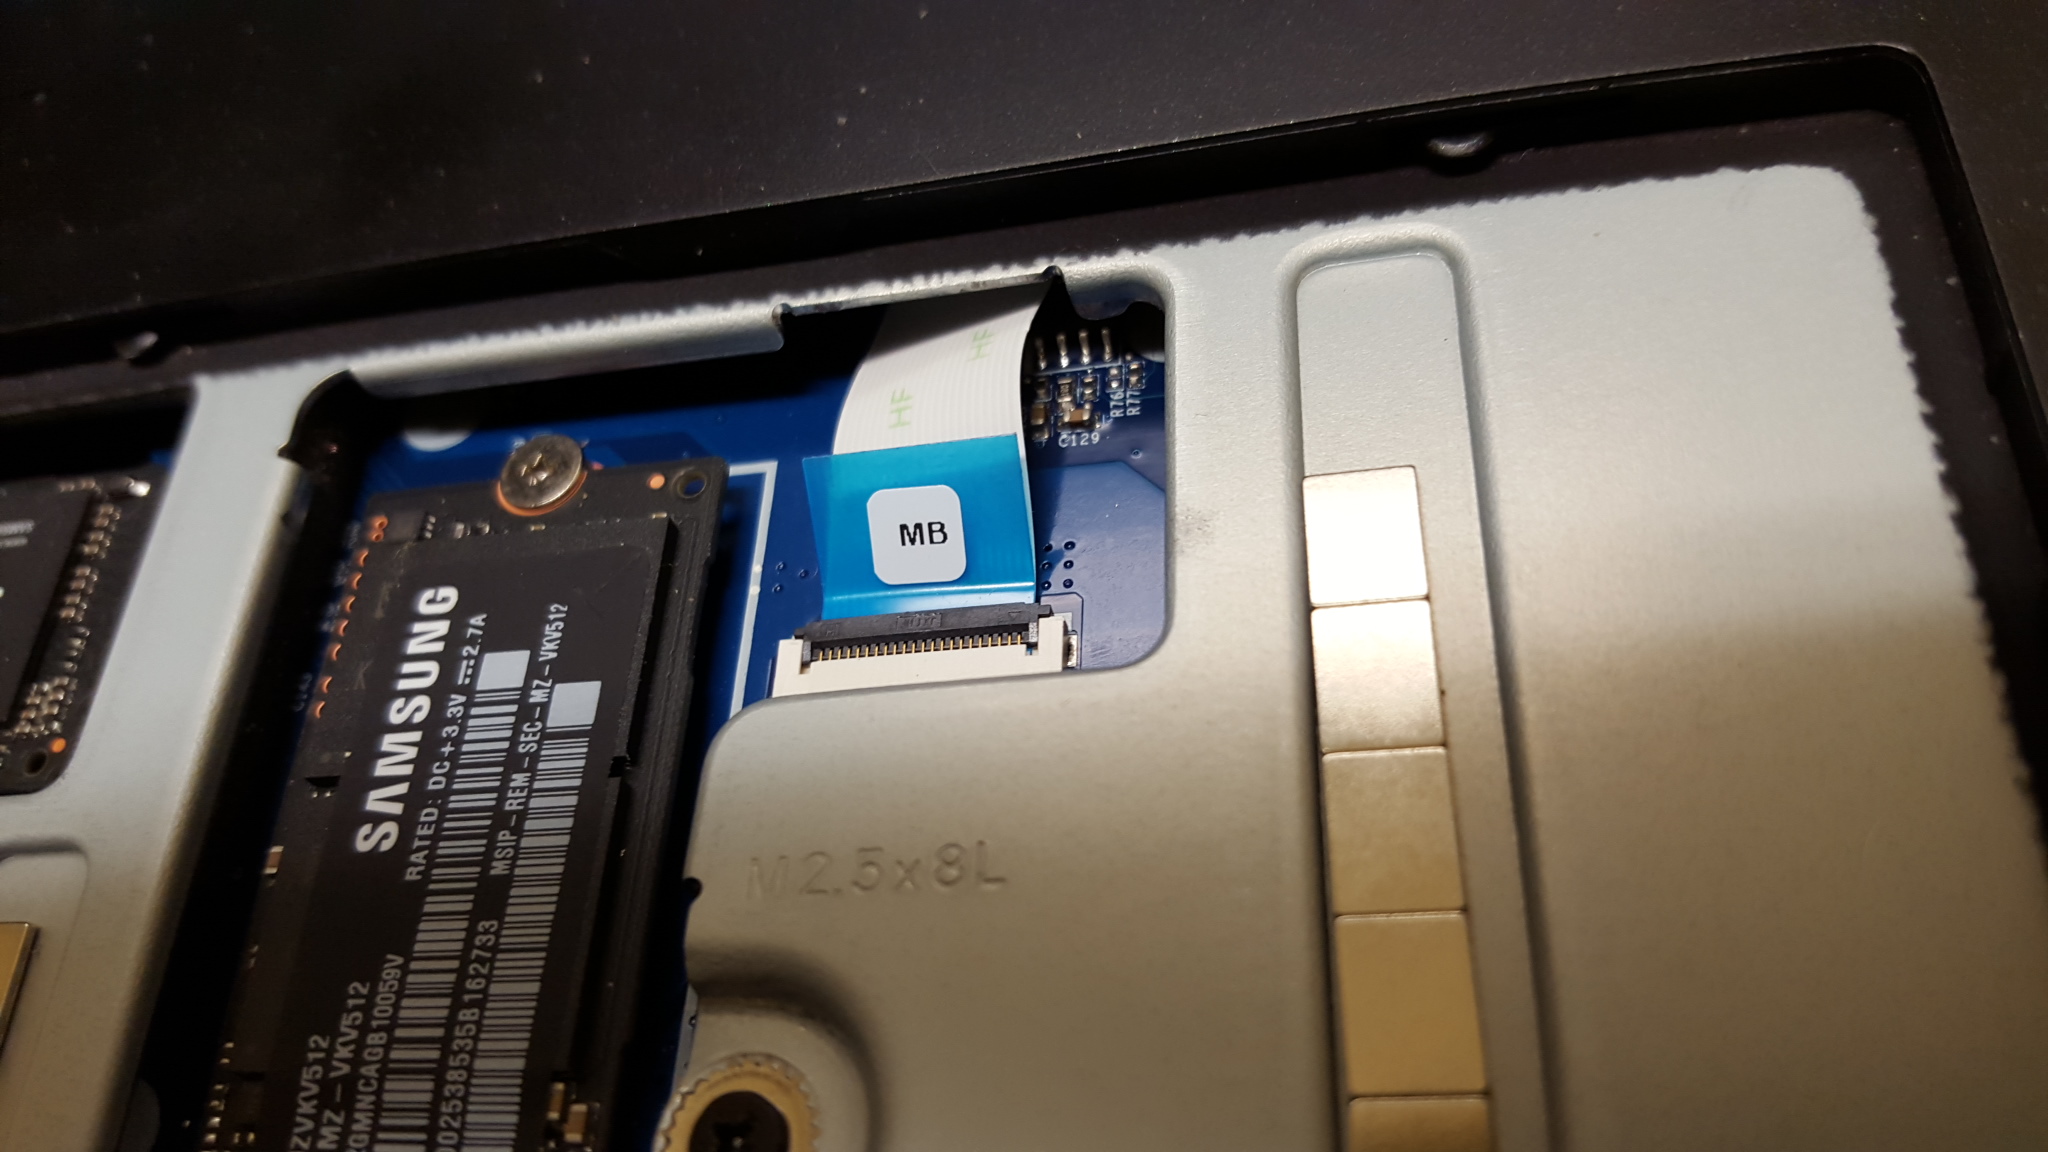
This guy right here coming from the very top near a would-be M.2. Very simple. Flip the tab up, and gently pull the blue tab outward then upward.
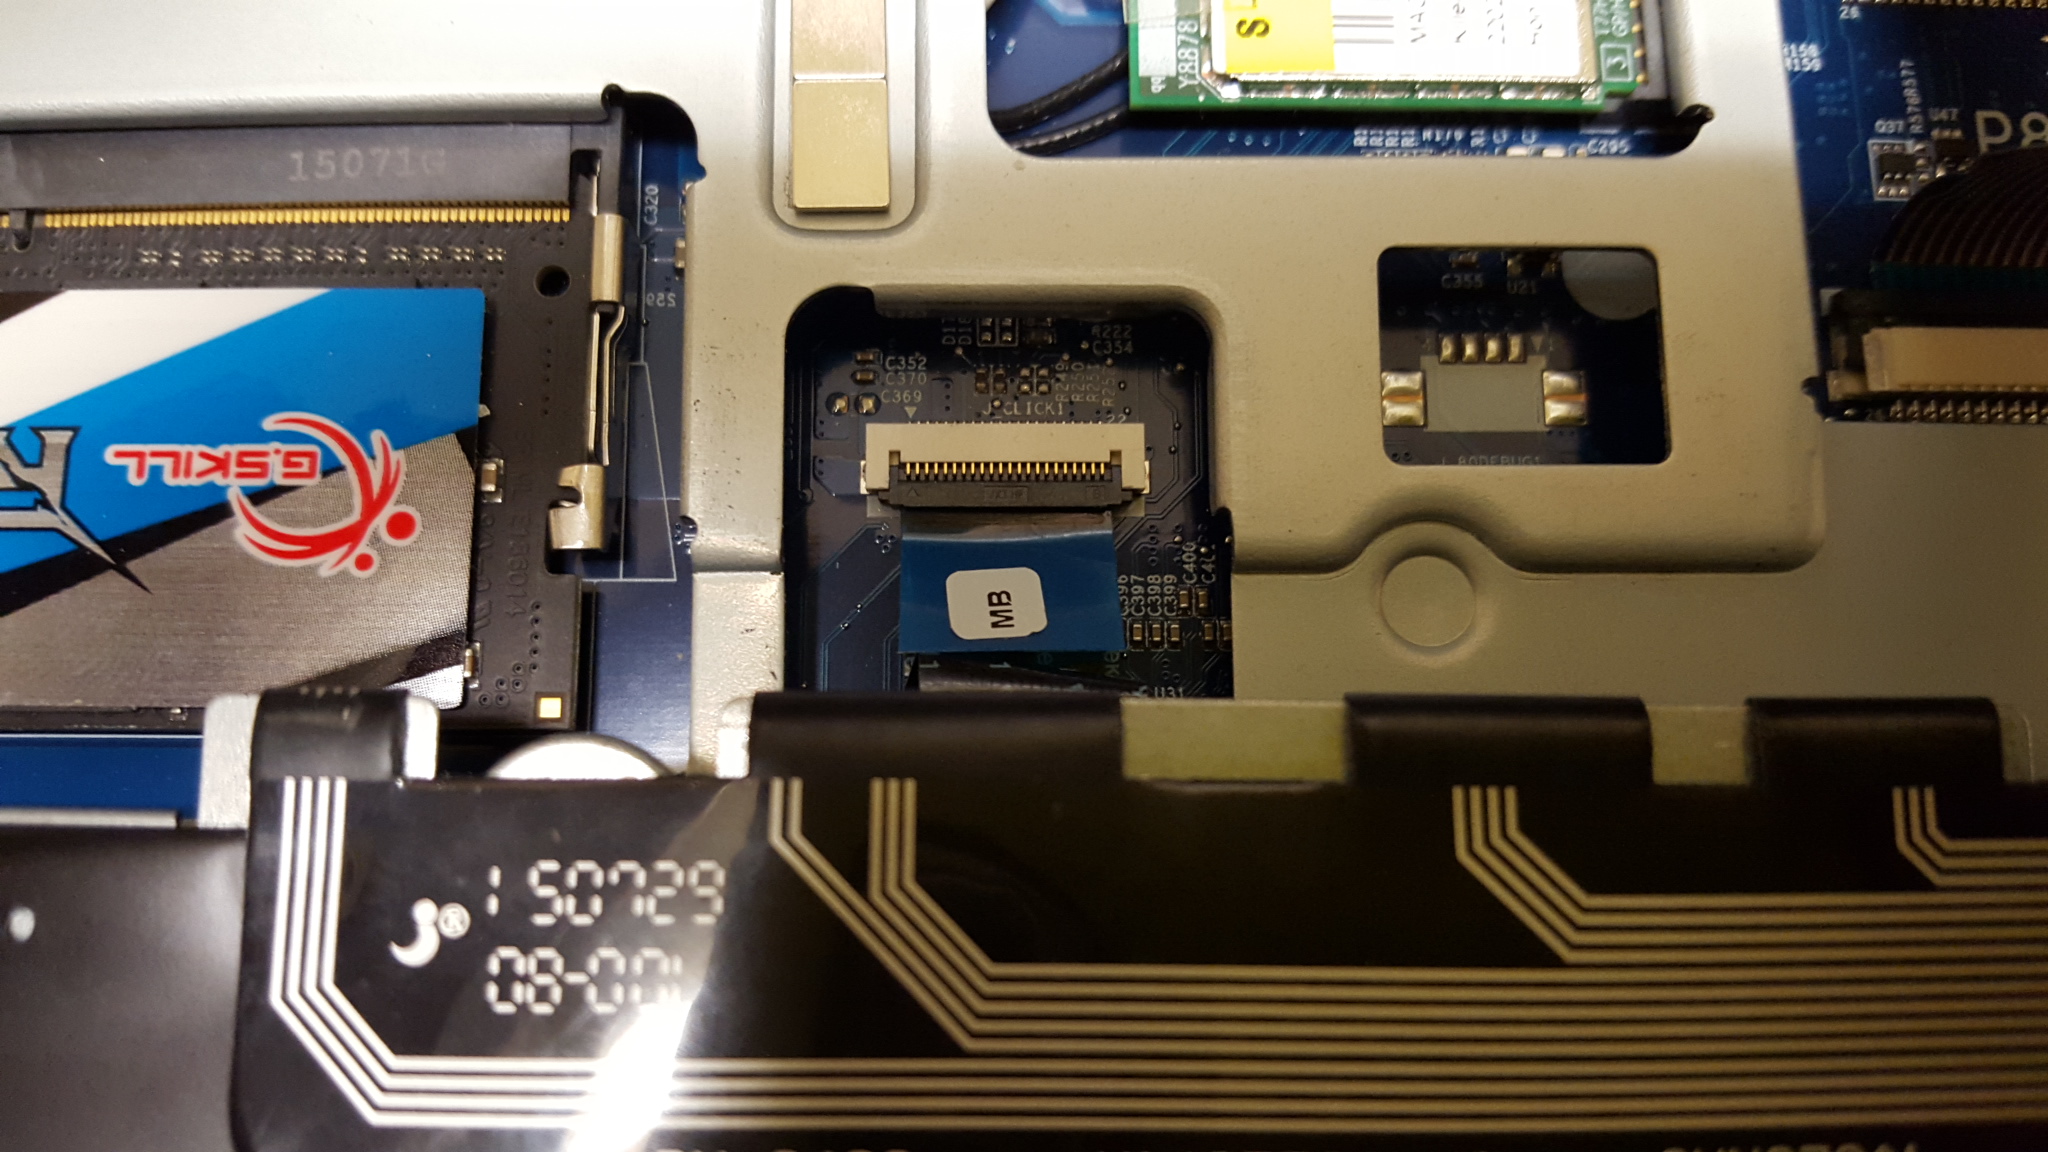
And then this last ribbon cable marked "MB". It comes from the underside of the faceplate and connects it the the part of the MOBO that will be disconnected once the faceplate is removed. Be sure it is not stuck when you re-apply the faceplate. Always be sure when you put your machine back together that all cords are not trapped and are fully re-affirmed in the right tabs. The keyboard was a drag for me to get right because if it wasn't all the way secured certain keys won't work. I recommend putting a soft, cleaning-cloth inbetween the keyboard to keep the magnets from sucking it all the way down just in case you need to make minute adjustments.
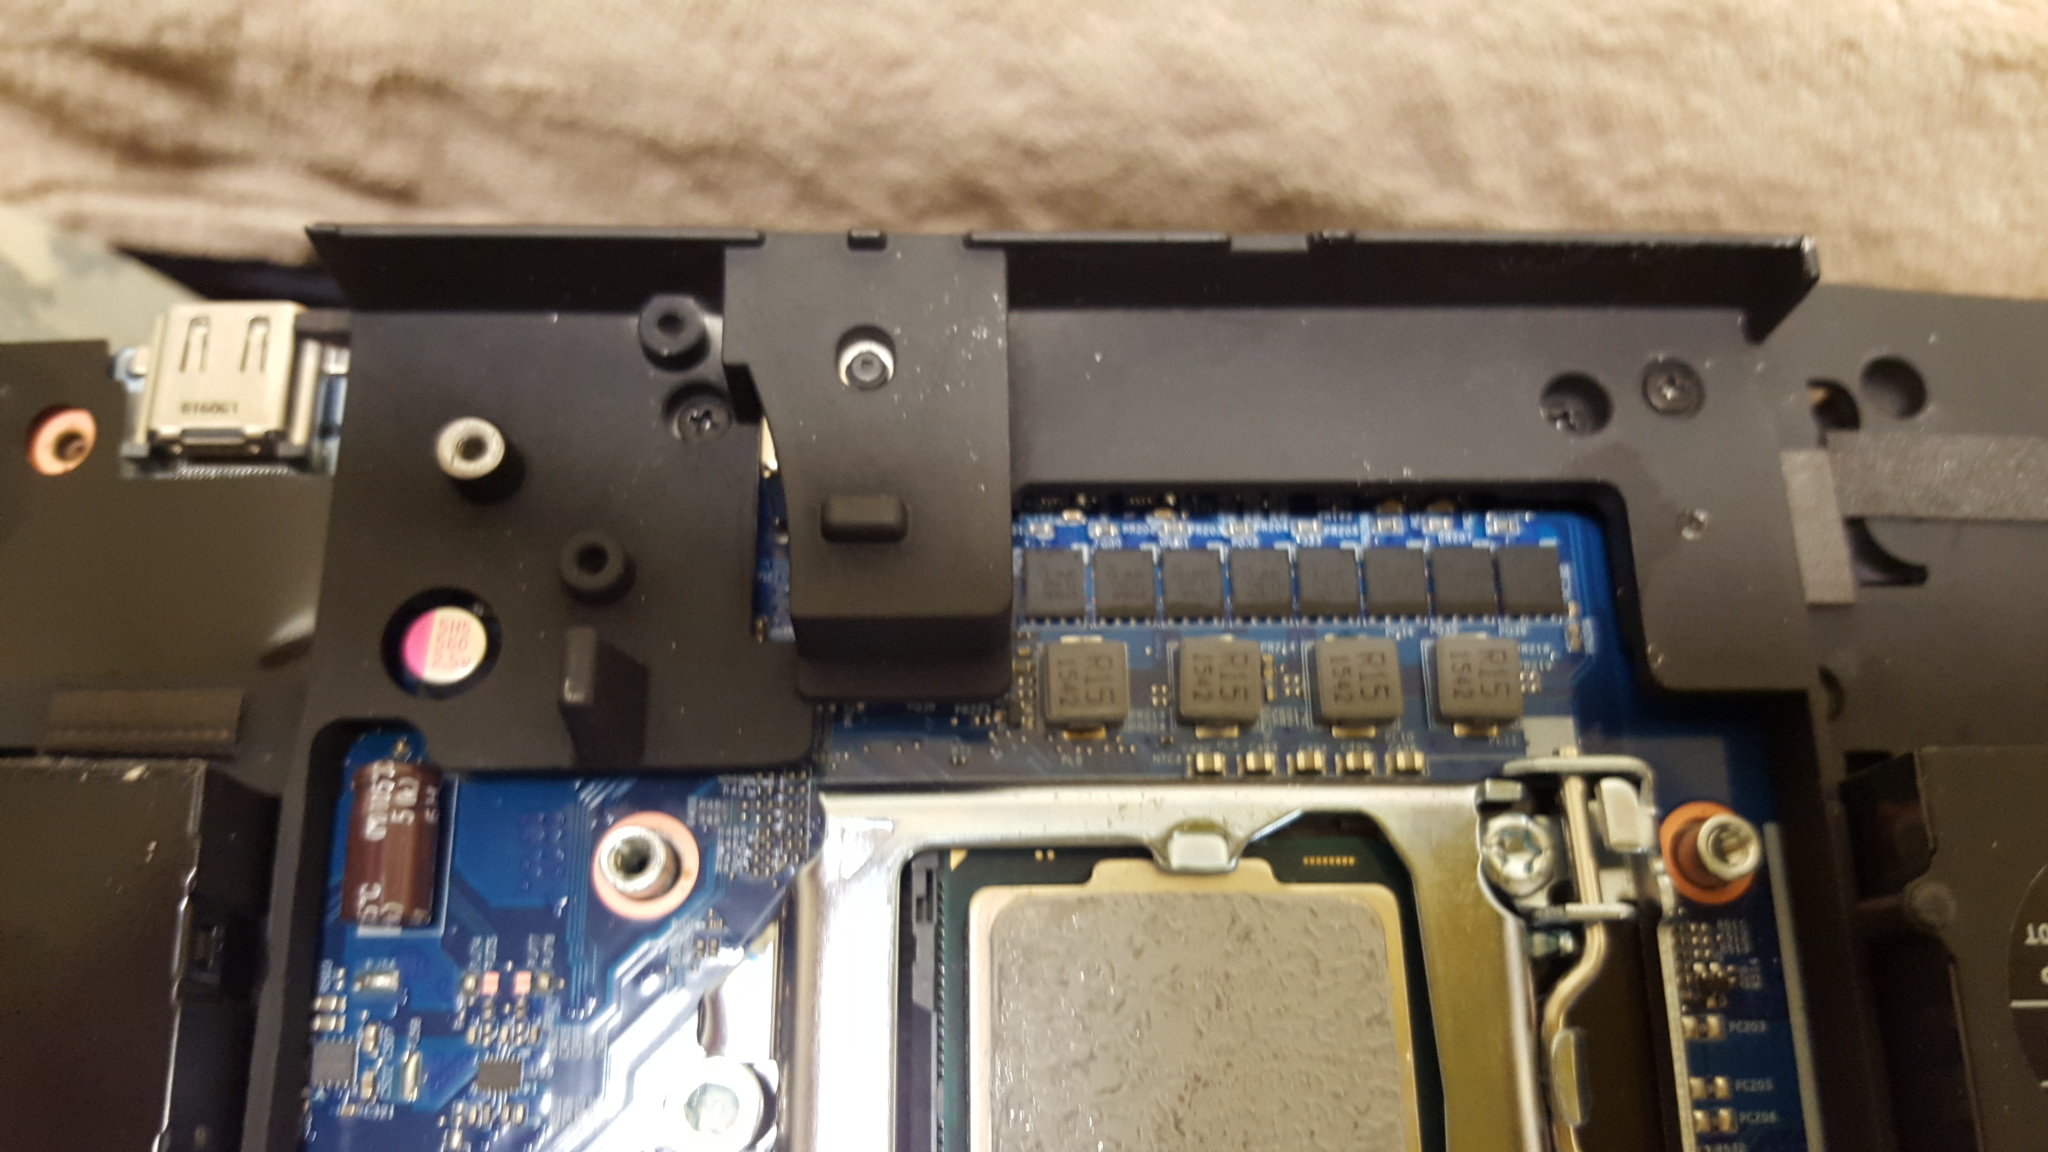
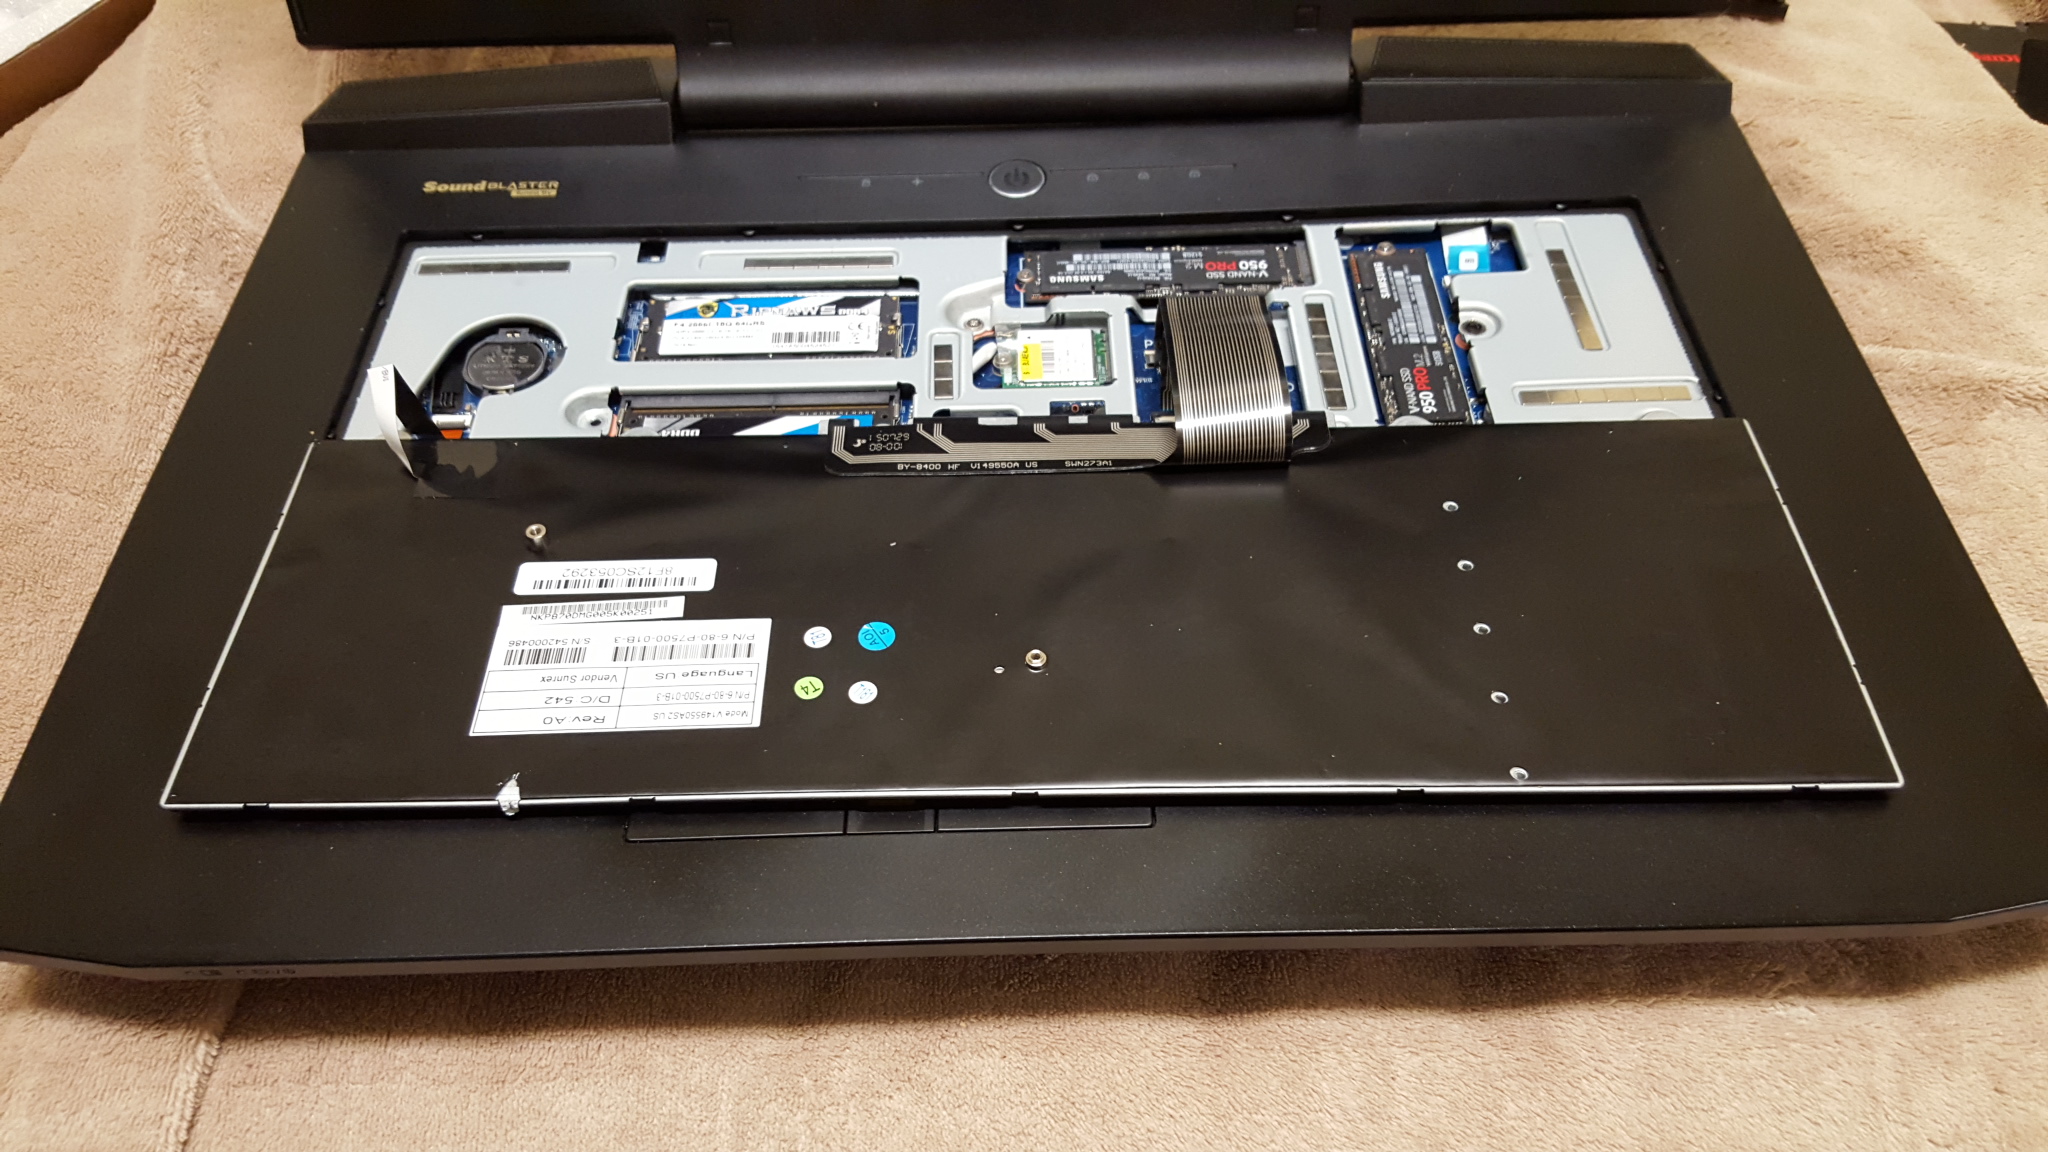
Be sure to take out any screws on the sectors you may see above. Those are often missed. Once again, all the components you see here can be left in during the entire process. But keep in mind that the wi-fi card often has a piece of tape on it on it connected to the faceplate. Nothing drastic, just remove it or temporarily stick it entirely to the wif card. Okay, lets move on to the stuff everyone has been REALLY wanting to see...
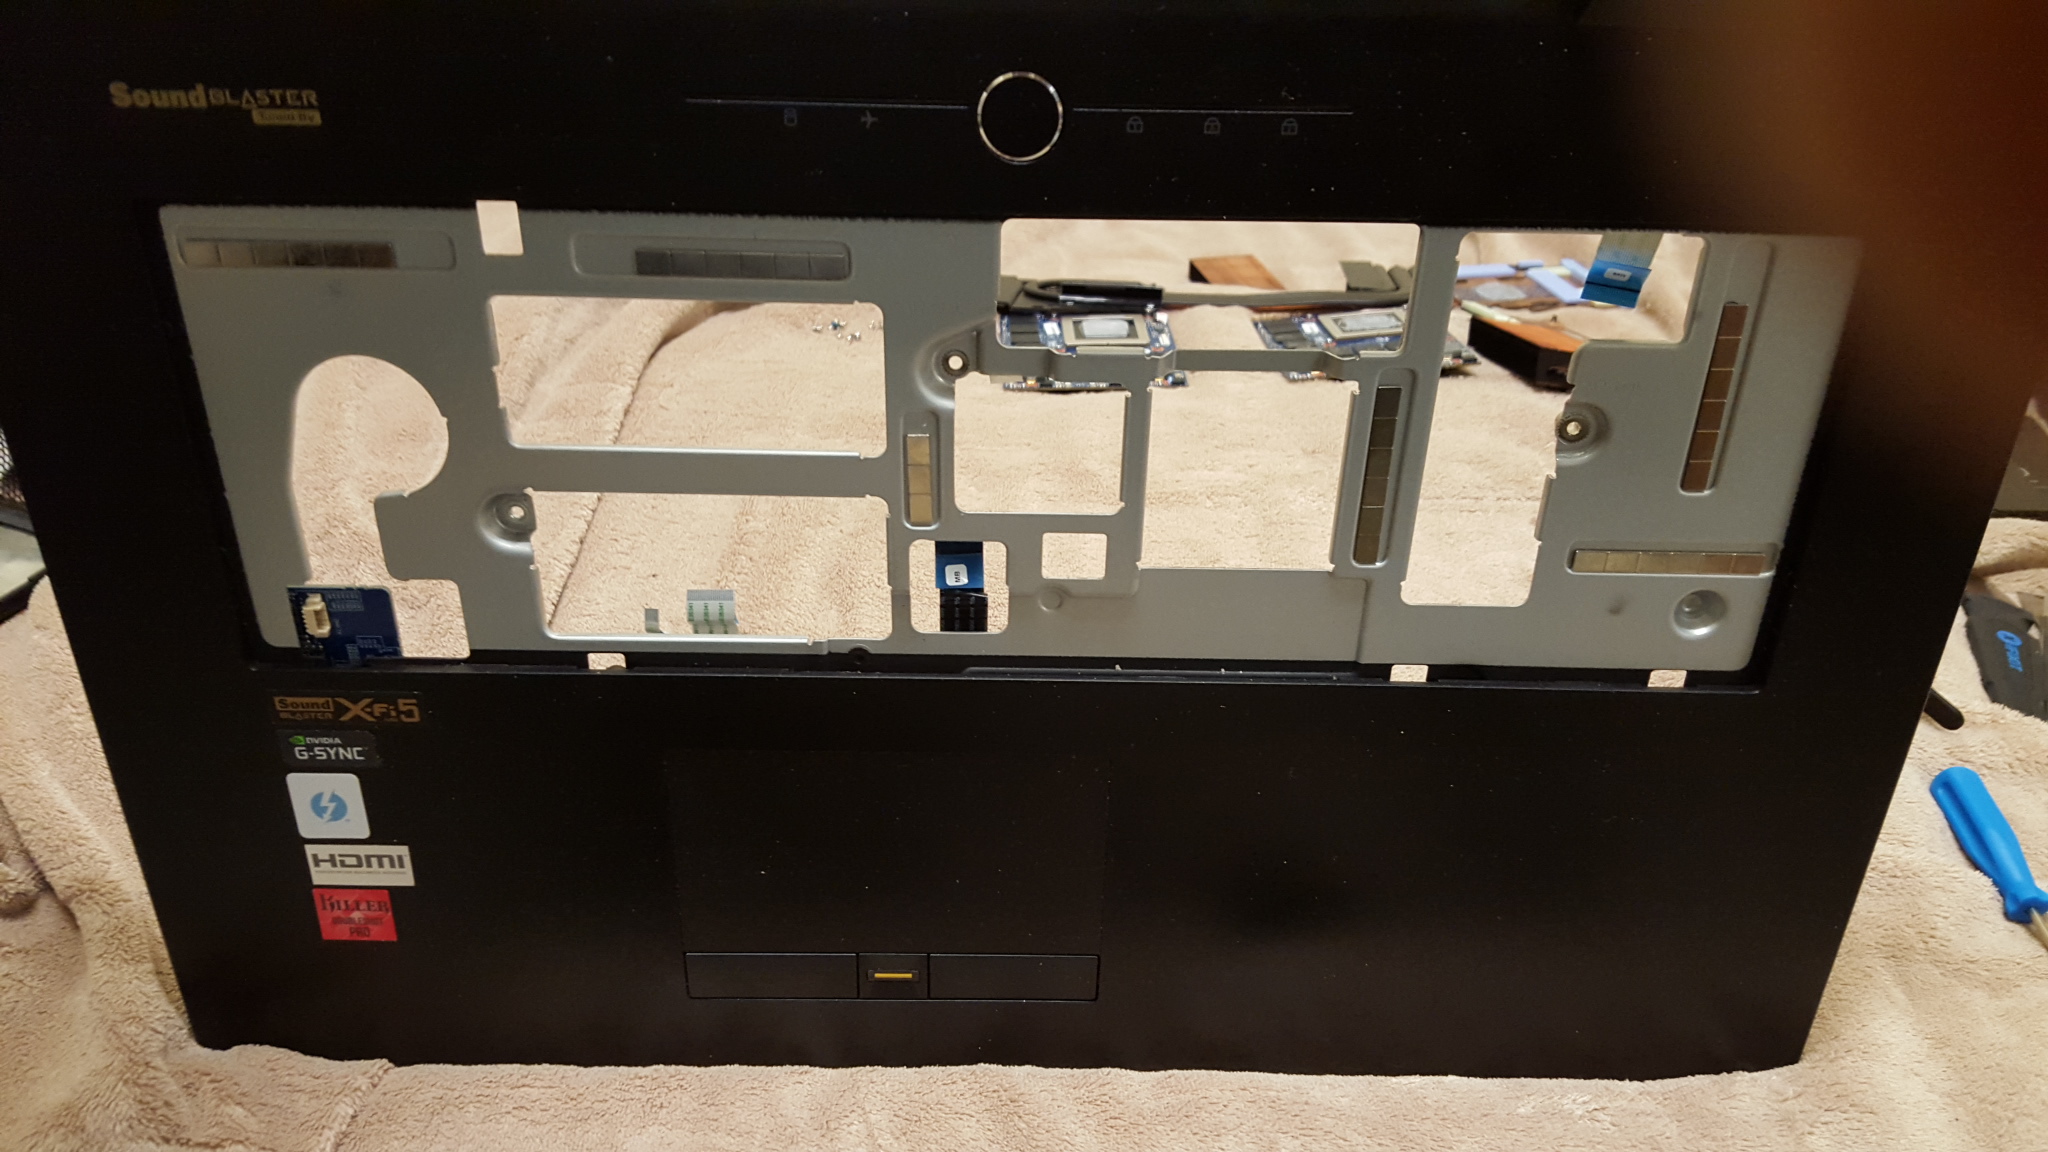
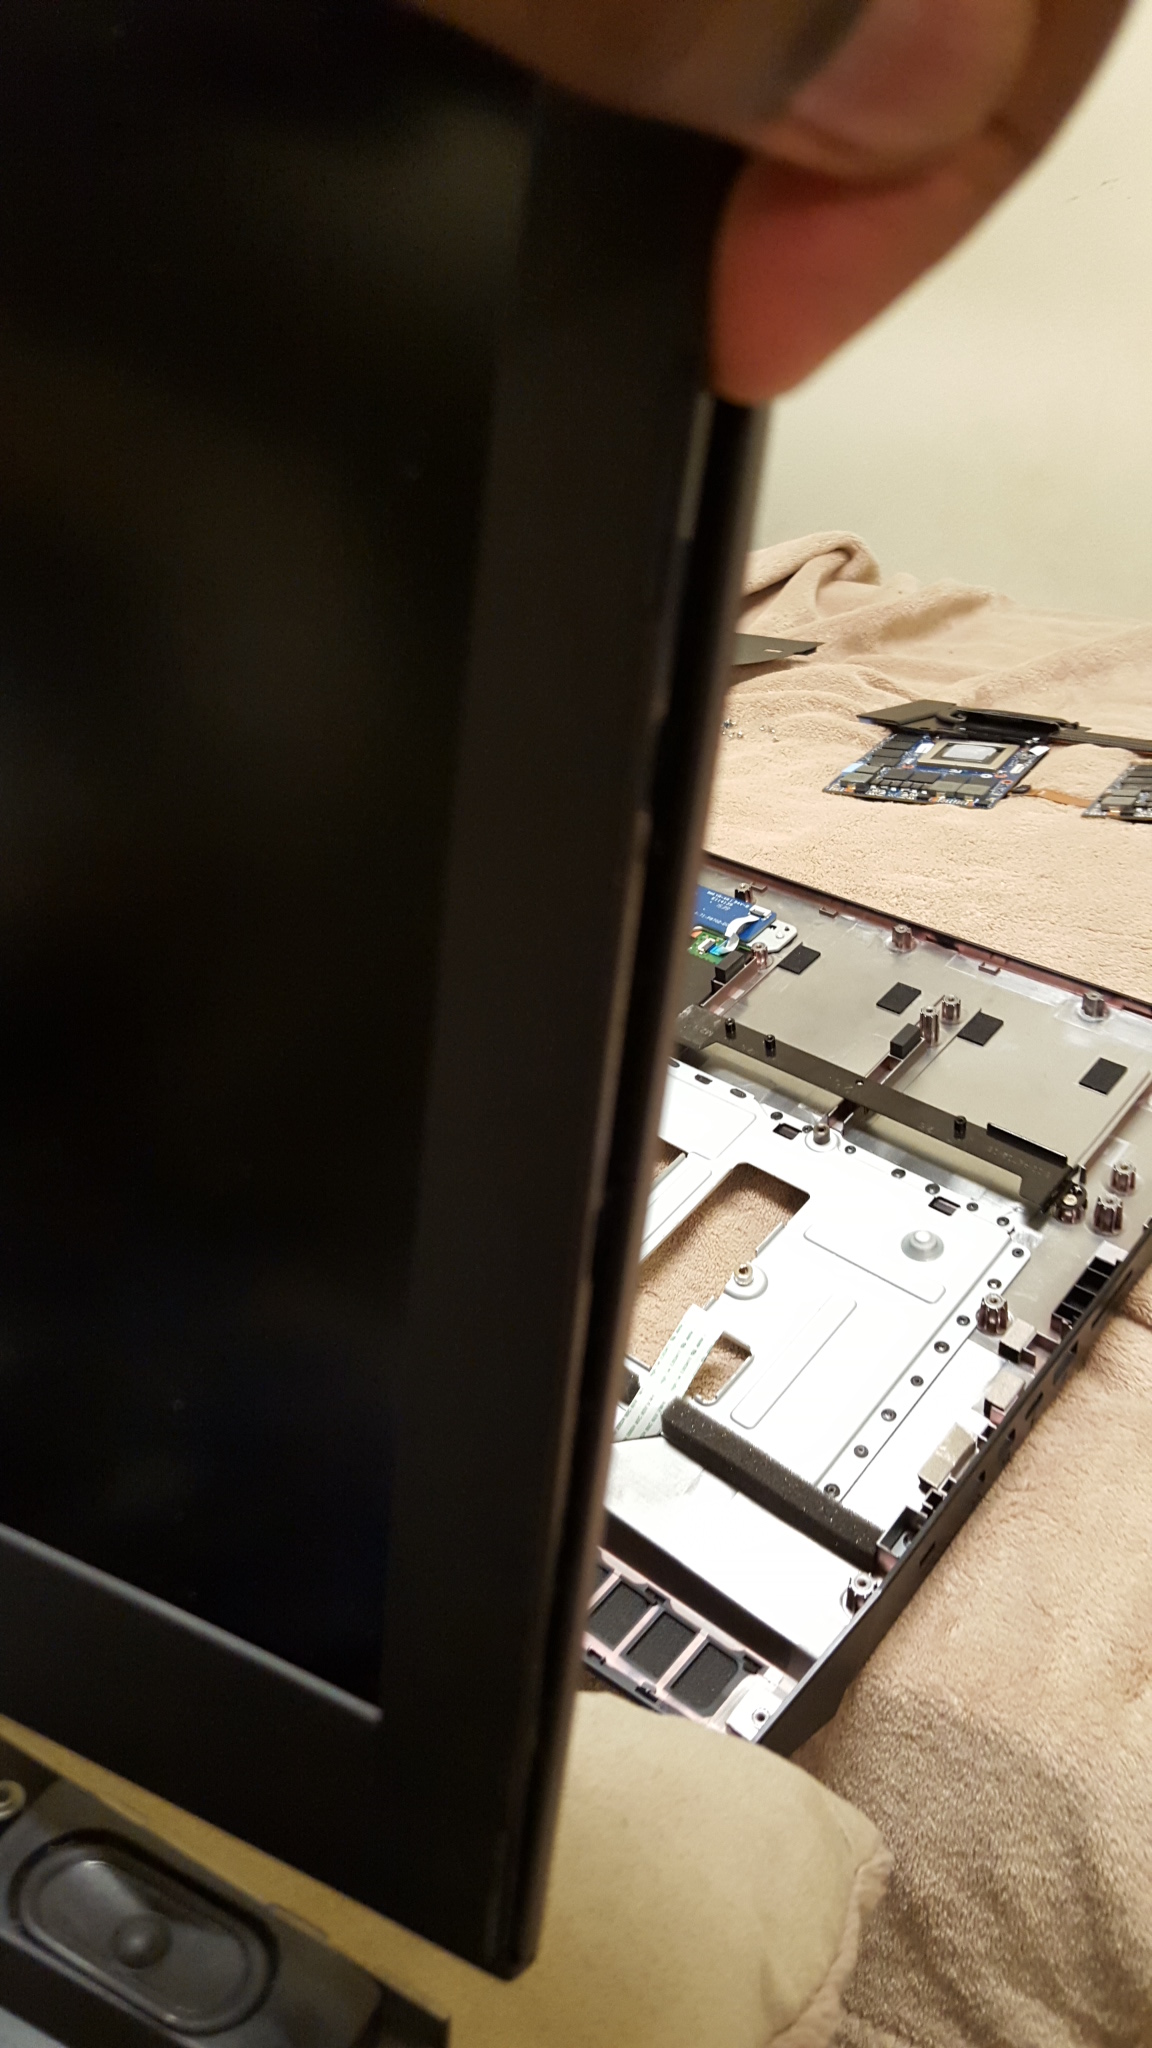
FACEPLATE REMOVAL!!! To start, bring the laptop screen towards you (as in a bent hinge but not so bent that it begins to fall because of gravity). Start prying with your fingers at the back (where the speakers are) while keeping the detachable half secure to whatever surface you're utilizing. My own personal method: I also try pushing my thumb against the MOBO (be sure hands are clean, dry, and you're wearing an anti-static strap if you opt this method). Visualize yourself holding the laptop at a slight 30 or less incline and using your left thumb to push the faceplate away. The area where the CMOS battery tends to be is the easiest. Will provide more images of the plate to show any loose parts you might want to lookout for.
Flipped faceplate. You can now see where all the connections are made. Keep in mind their positions when putting the phoenix back together. Notice the ribbon cables that were formerly under where the battery would sit.
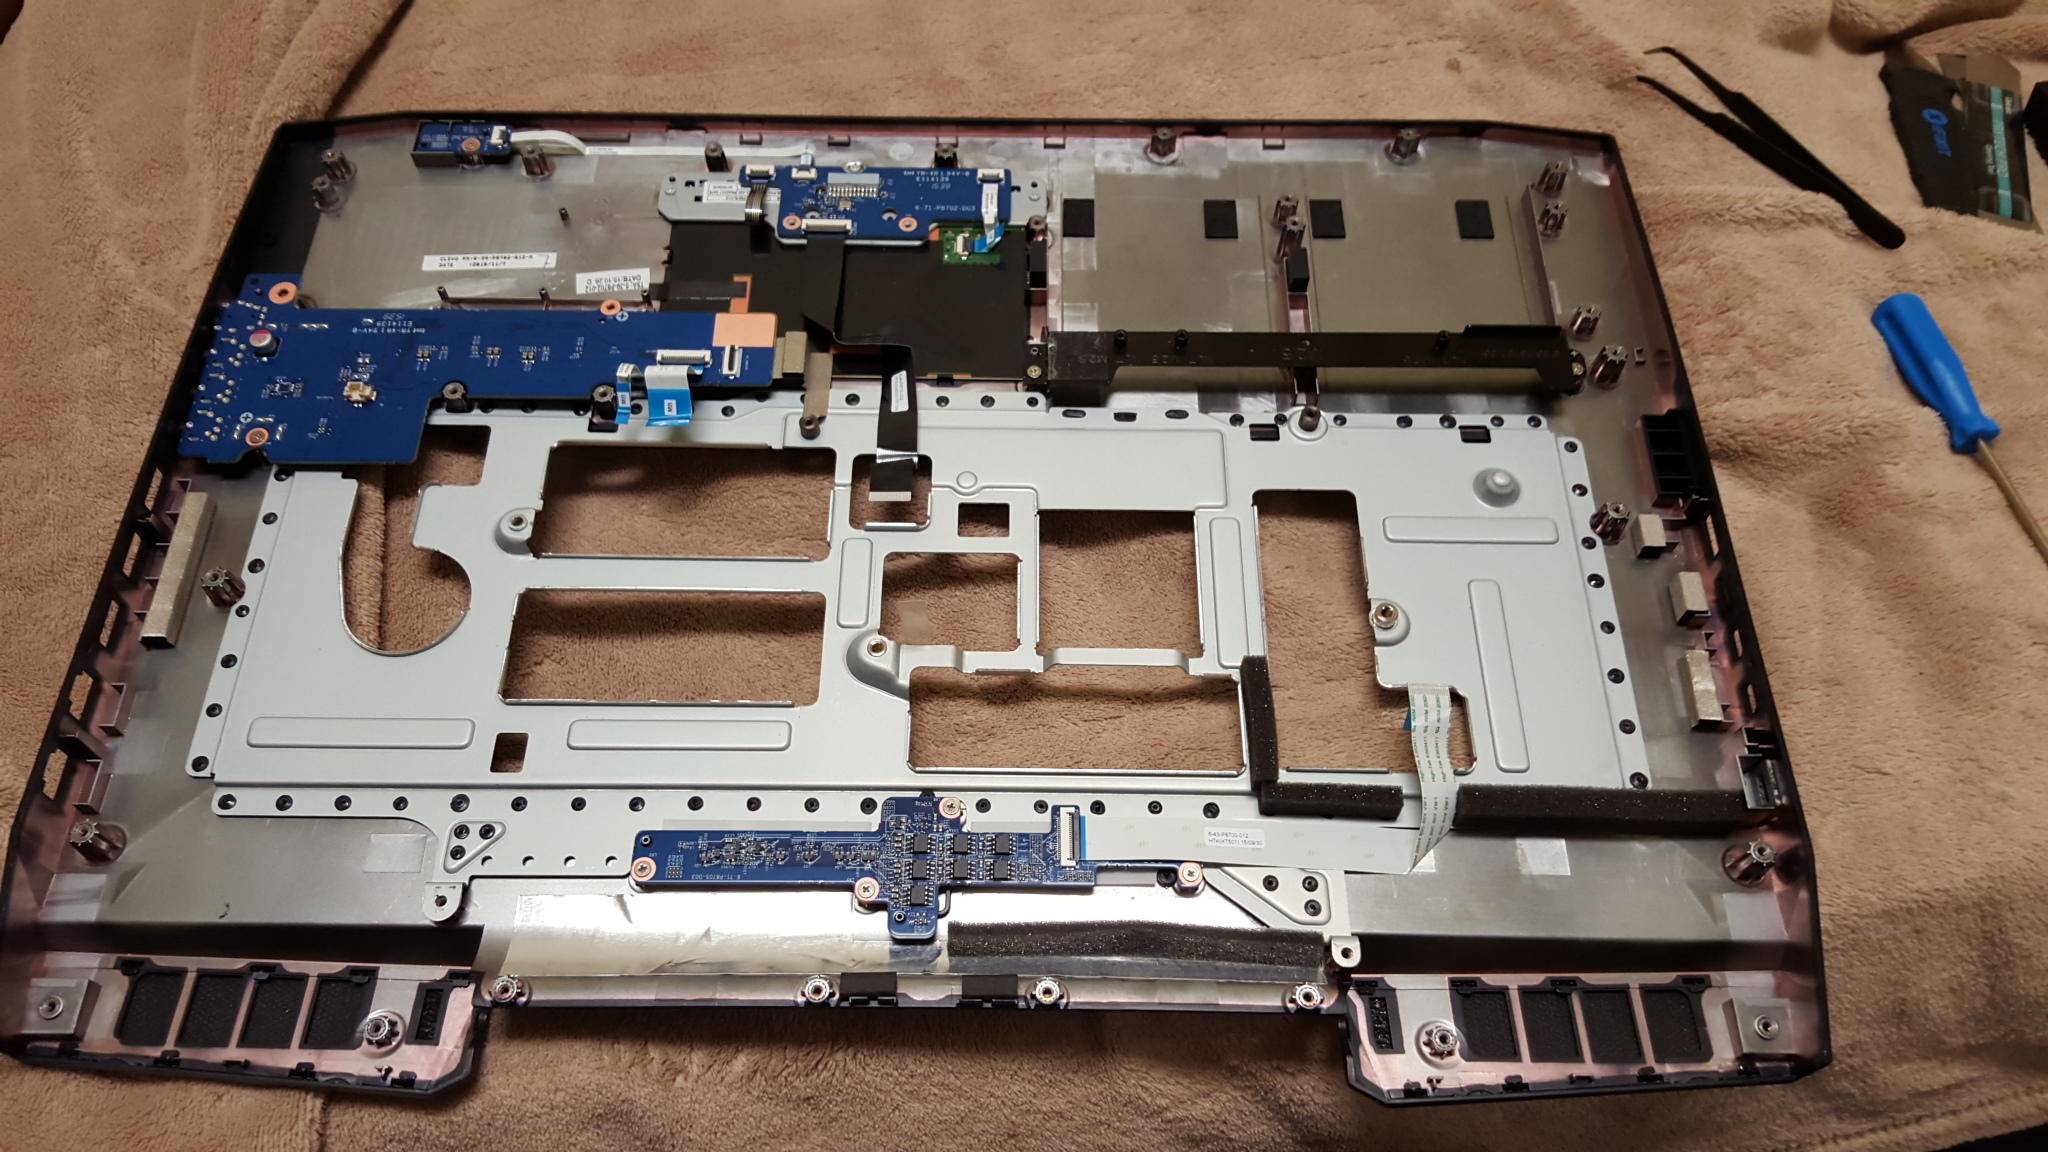
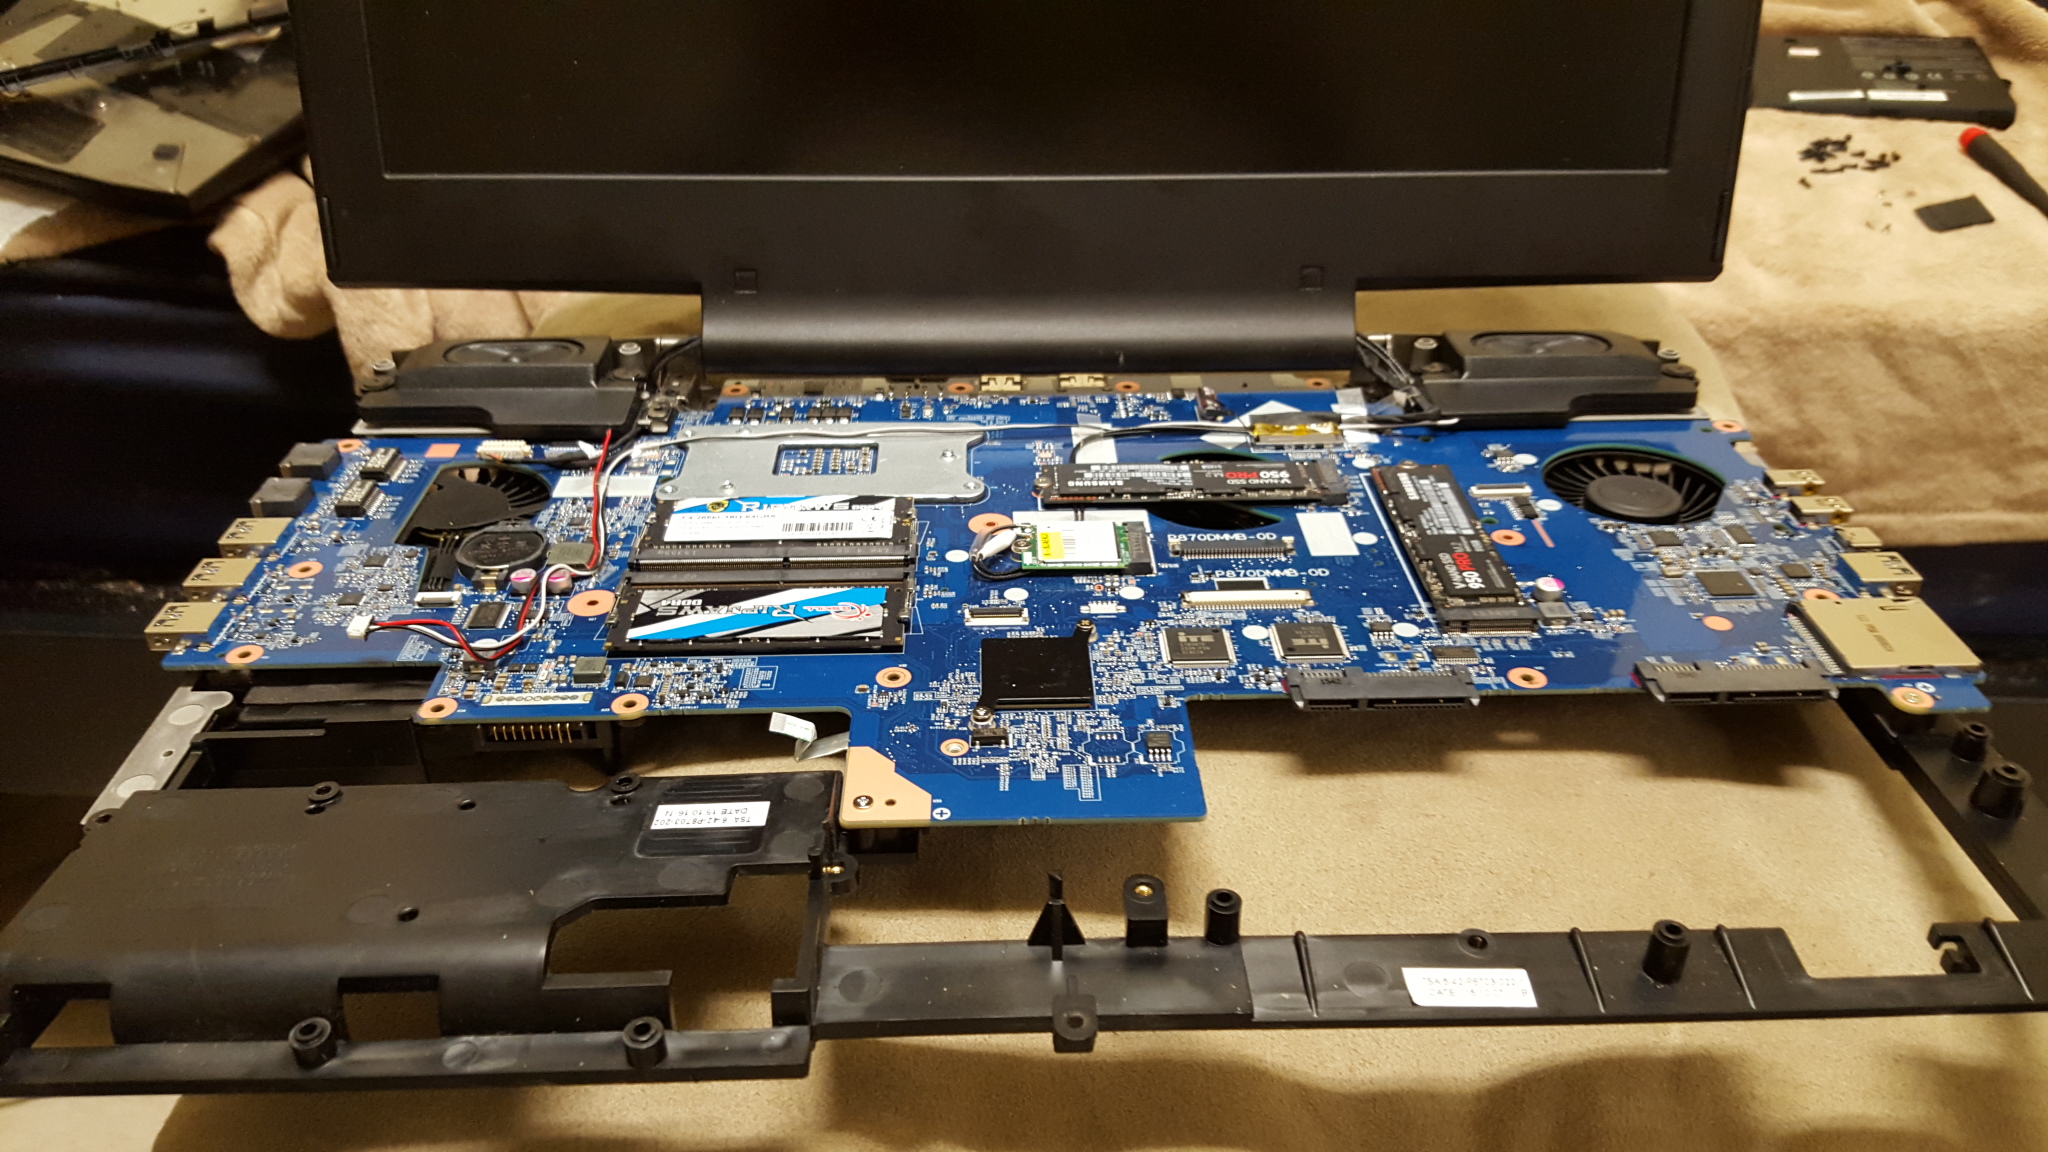
A full-shot of the laptop without the cover plate. In all its beauty. At this point this is why I mentioned earlier that I should have removed the screen first. With the core components largely removed, the screen tends to make the laptop not so securely planted so you may find yourself applying minimal pressure/handling to keep it from rocking.
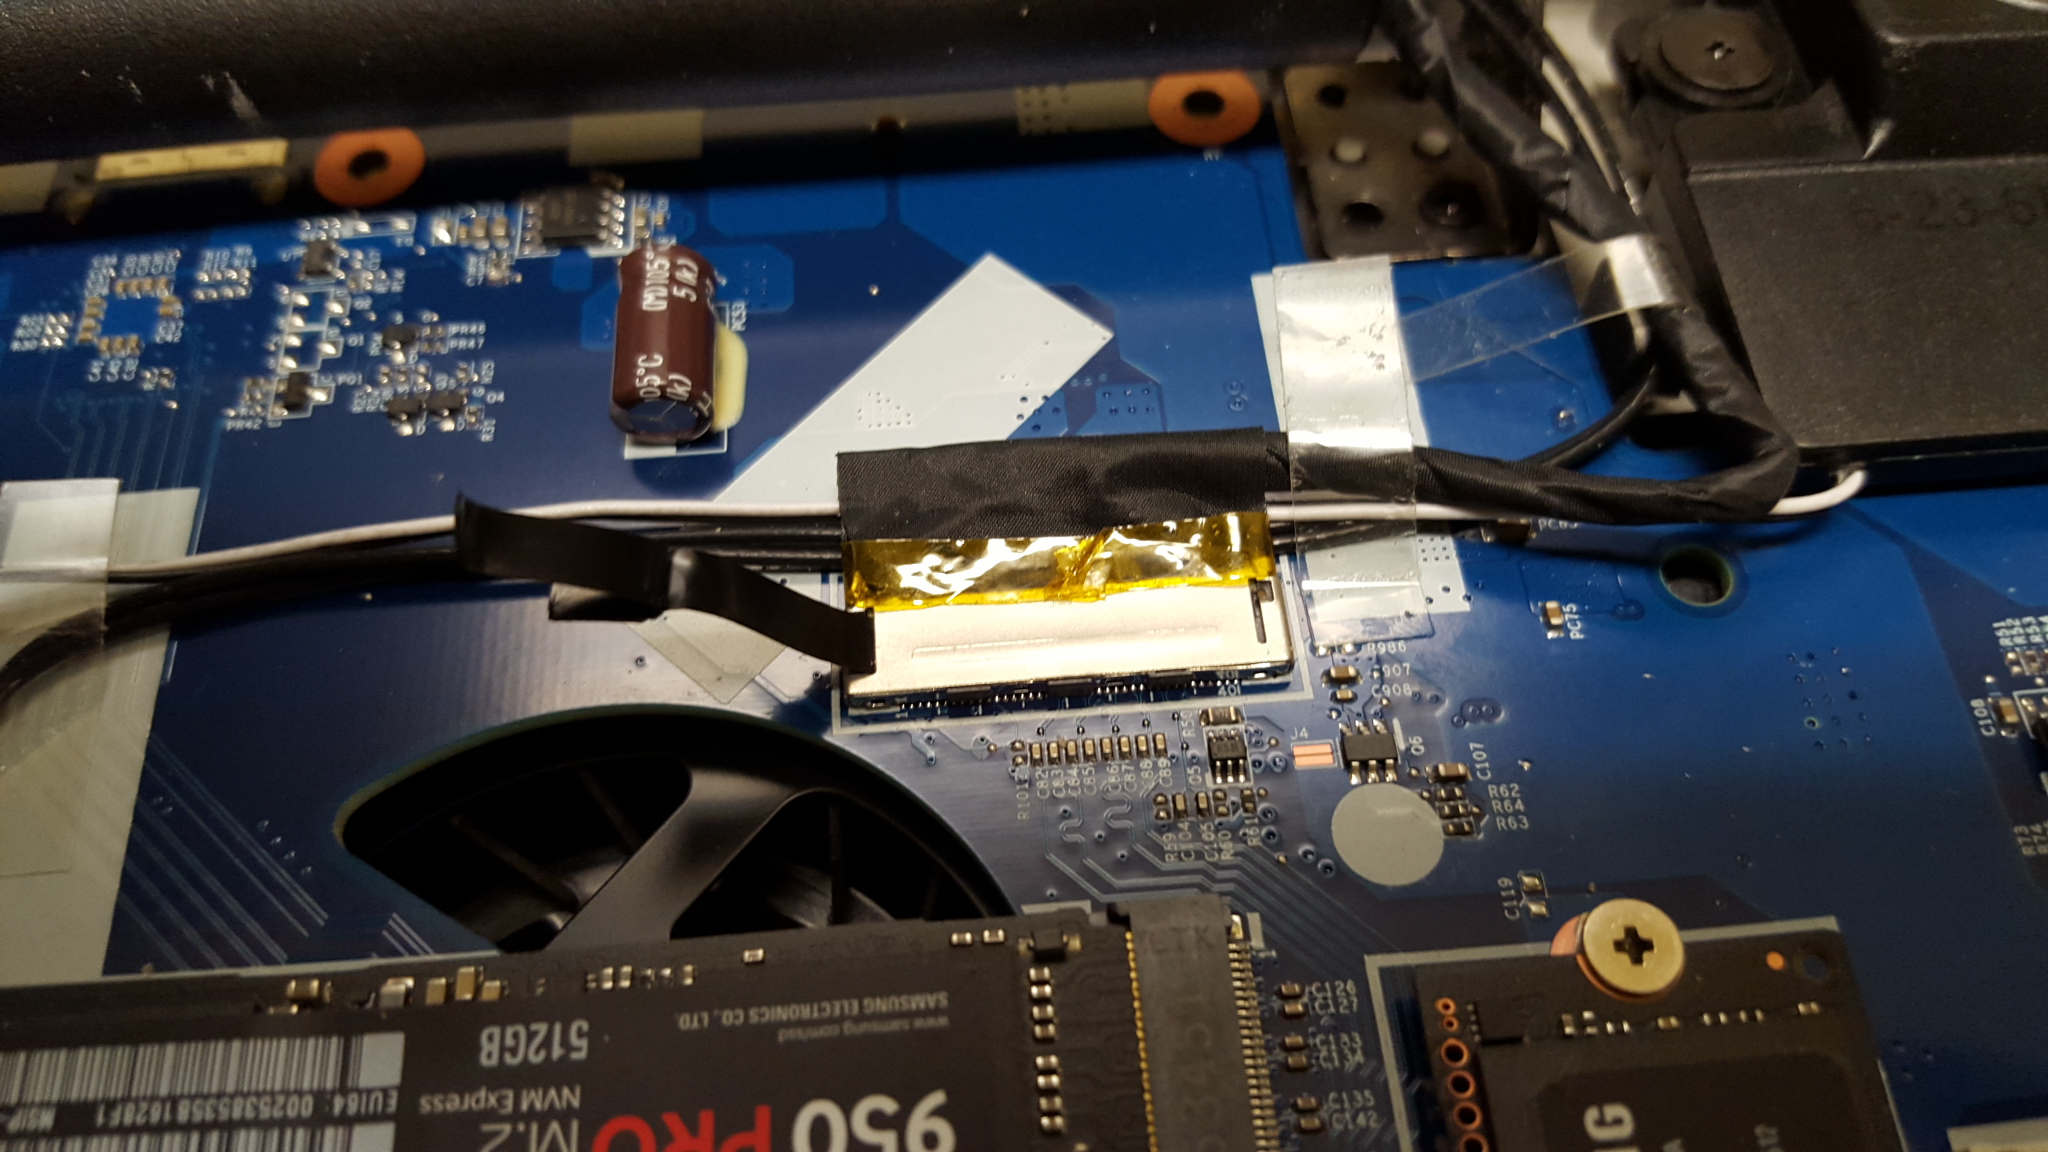
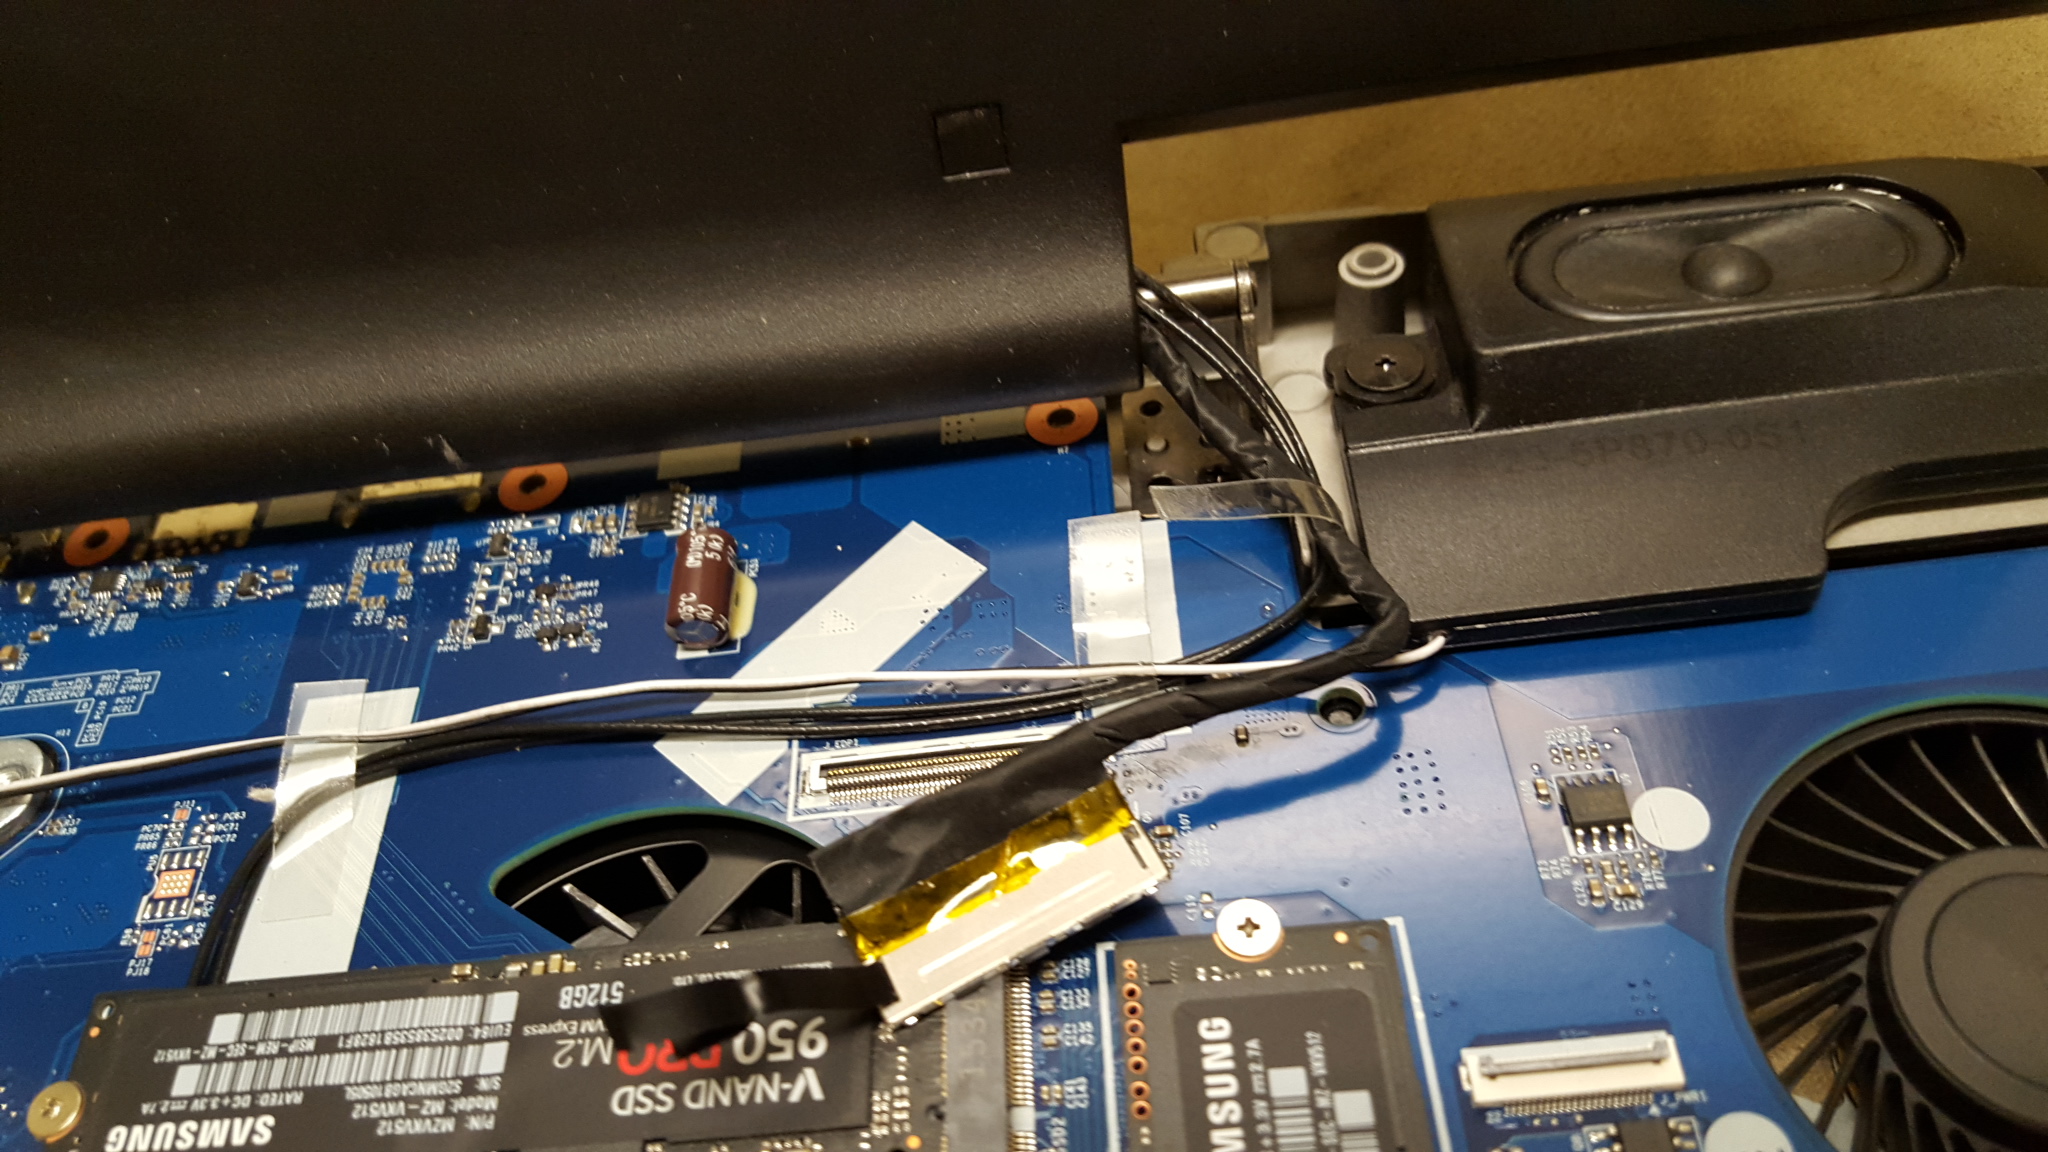
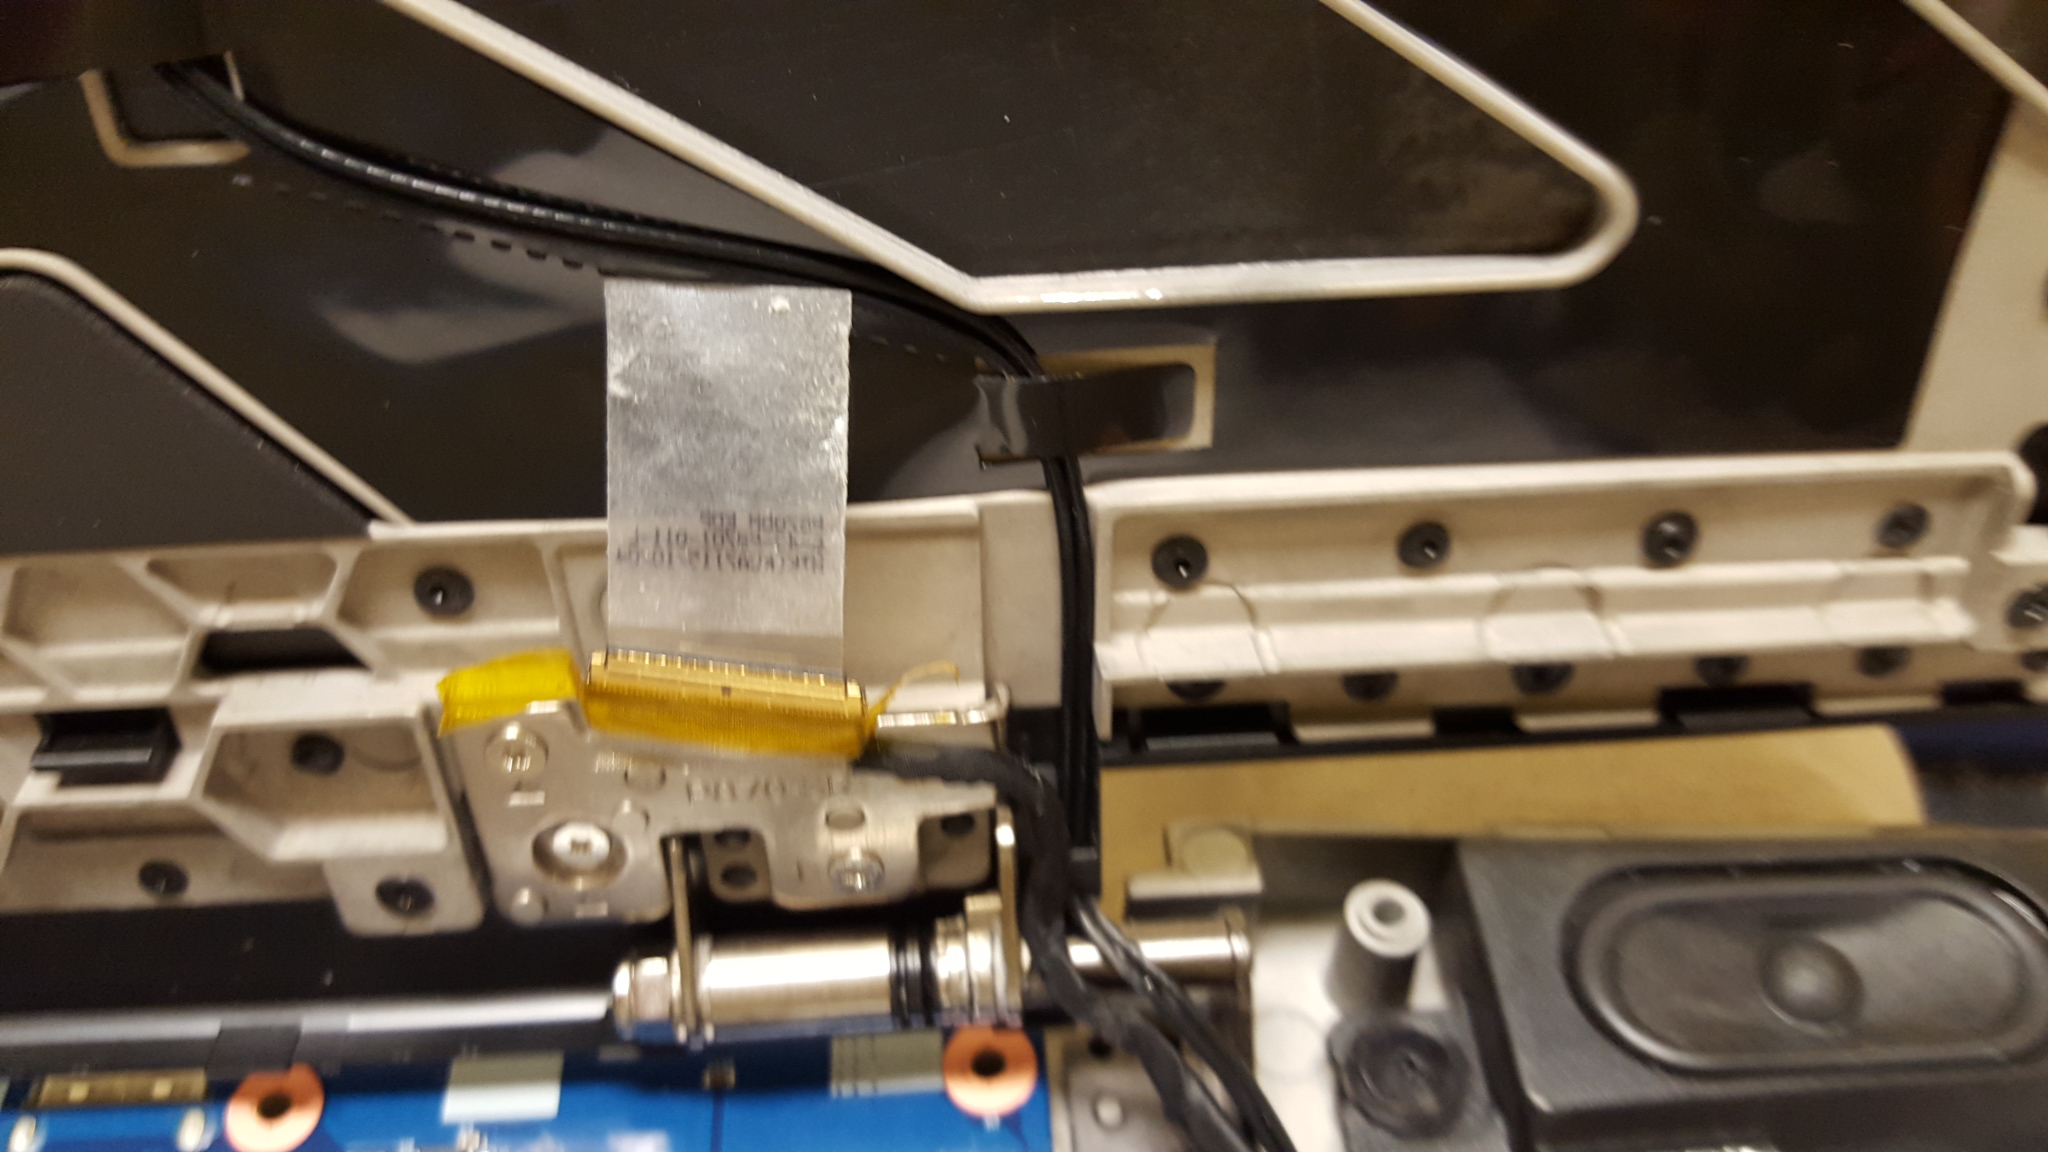
Bringing our attention to the EDP cable here. Remove the tape to the left. For removal I'd recommend pulling on the outer-edge of the black sleeve. As you can see there's a black handle bar which I tore by mistake when trying to use it to lift the EDP connector from the board.
Now that it's disconnected, notice where the rest of the EDP cable runs through. You know what's coming next...
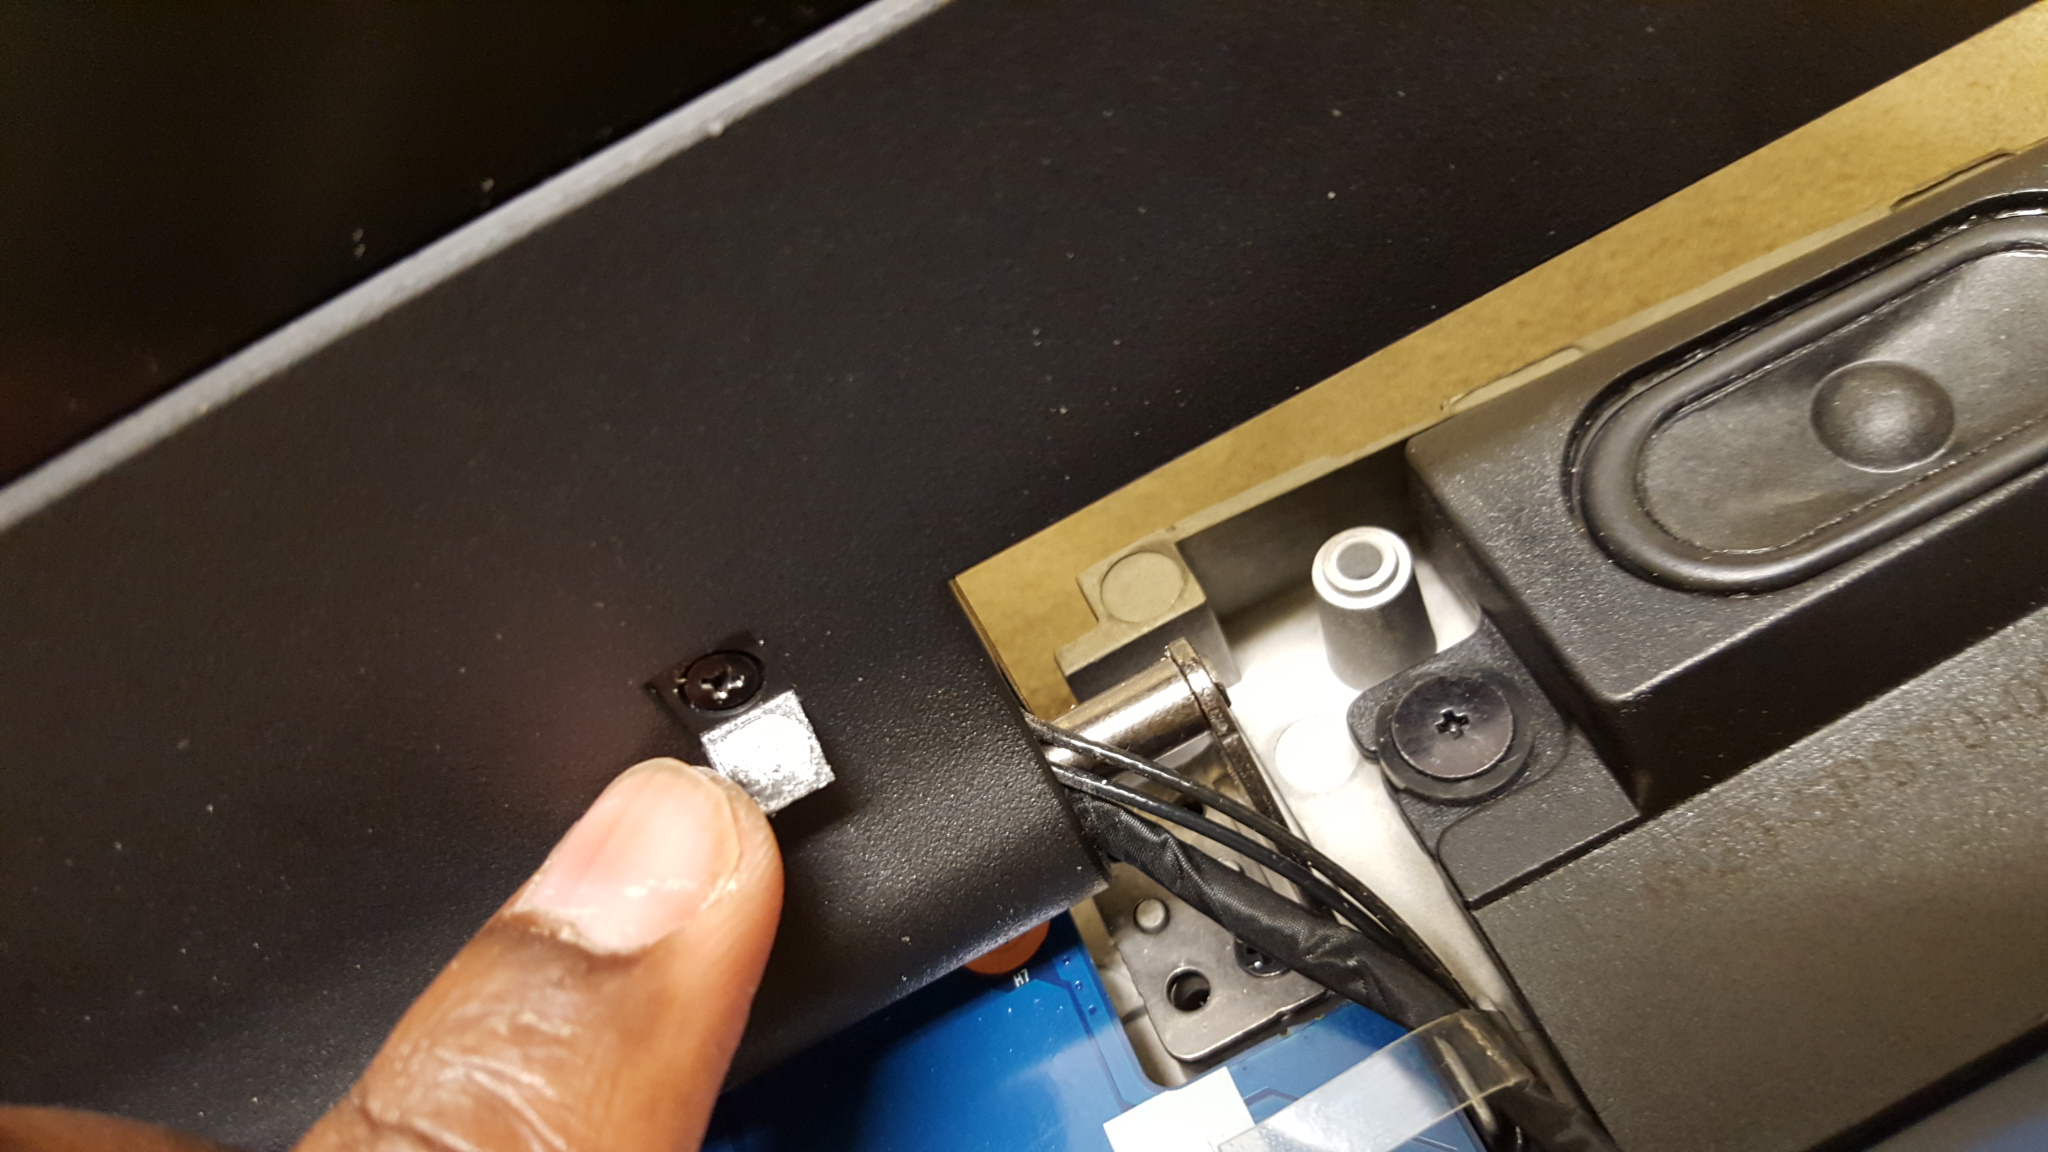
Notice the little screw covers along the hinge? Simple to remove. All it takes is a finger-tip. No knife or
poking utensil. It's secured with a very light adhesive. Just put your finger at the very top of the square and "scrape" the edge in a downwards motion, so-to-speak. It may cause the square to curve a bit but it's perfectly replant-able. It may stick to you once removed so put it somewhere that's dust or lint free for re-application. I personally placed these squares on the dummy SD card. The screws underneath are unique so place them somewhere safe in the meantime.Get out that oh-so-important prying utensil! While not in complete focus, notice the out edge near the tab, use your tool there. Note, not IN the same space but to slot bordering the frame. It's also best to start at the bottom when applying pressure. Don't be afraid to go a little deeper to begin frame removal, the screen is more centered then the image here will allow you to see. Another shot to follow.
Have a better idea where to start prying now? When you starting opening, go natural. It will come loose in a series of "pops" as the connectors are little circulars between the face plate and the body. When working your way around the camera don't be afraid if it's a little stubborn. The plastic frame in this area is a little more flexible. Use reasonable force. Especially when finally making your way back towards the hinge and noticing the light stubbornness.
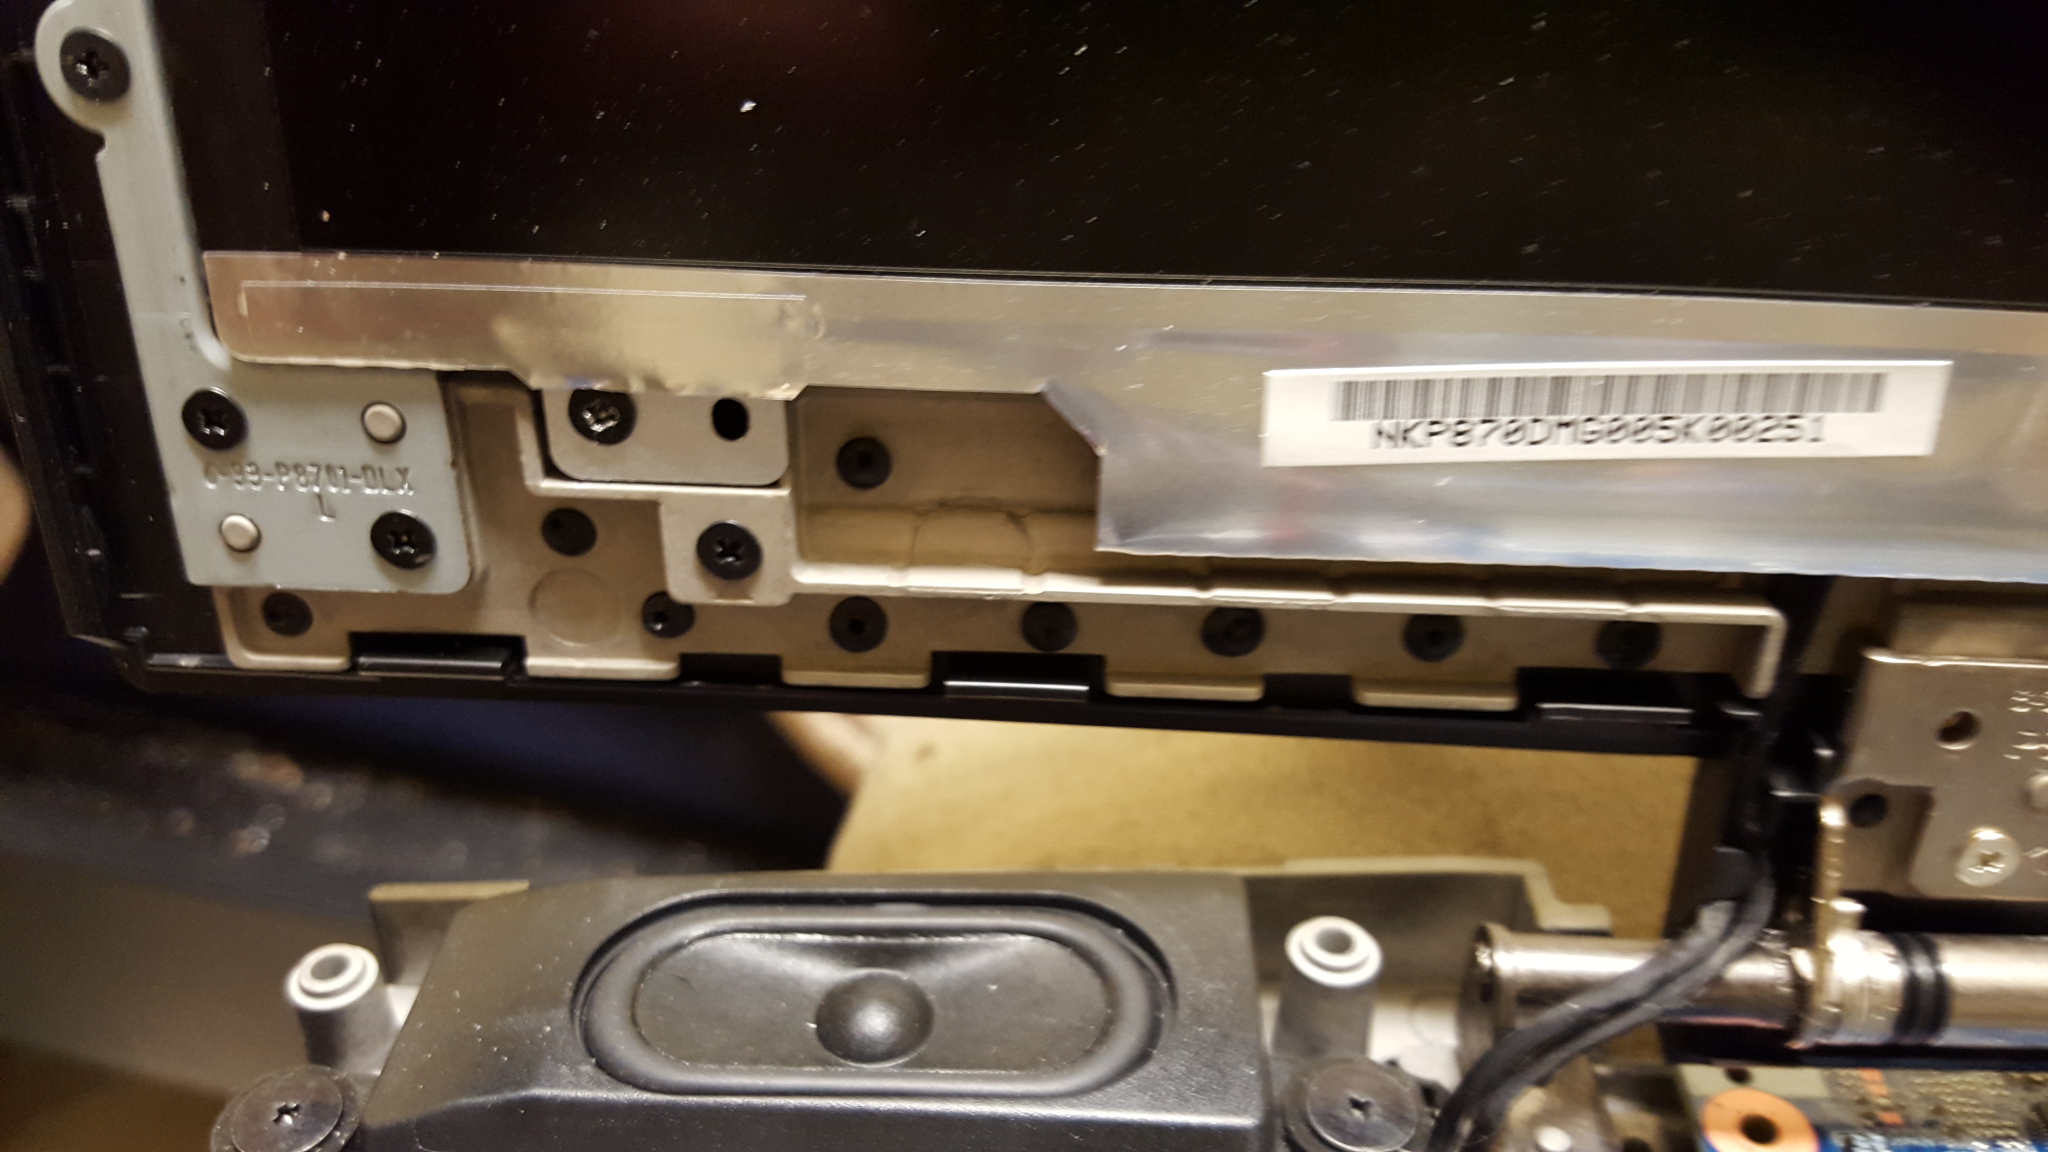
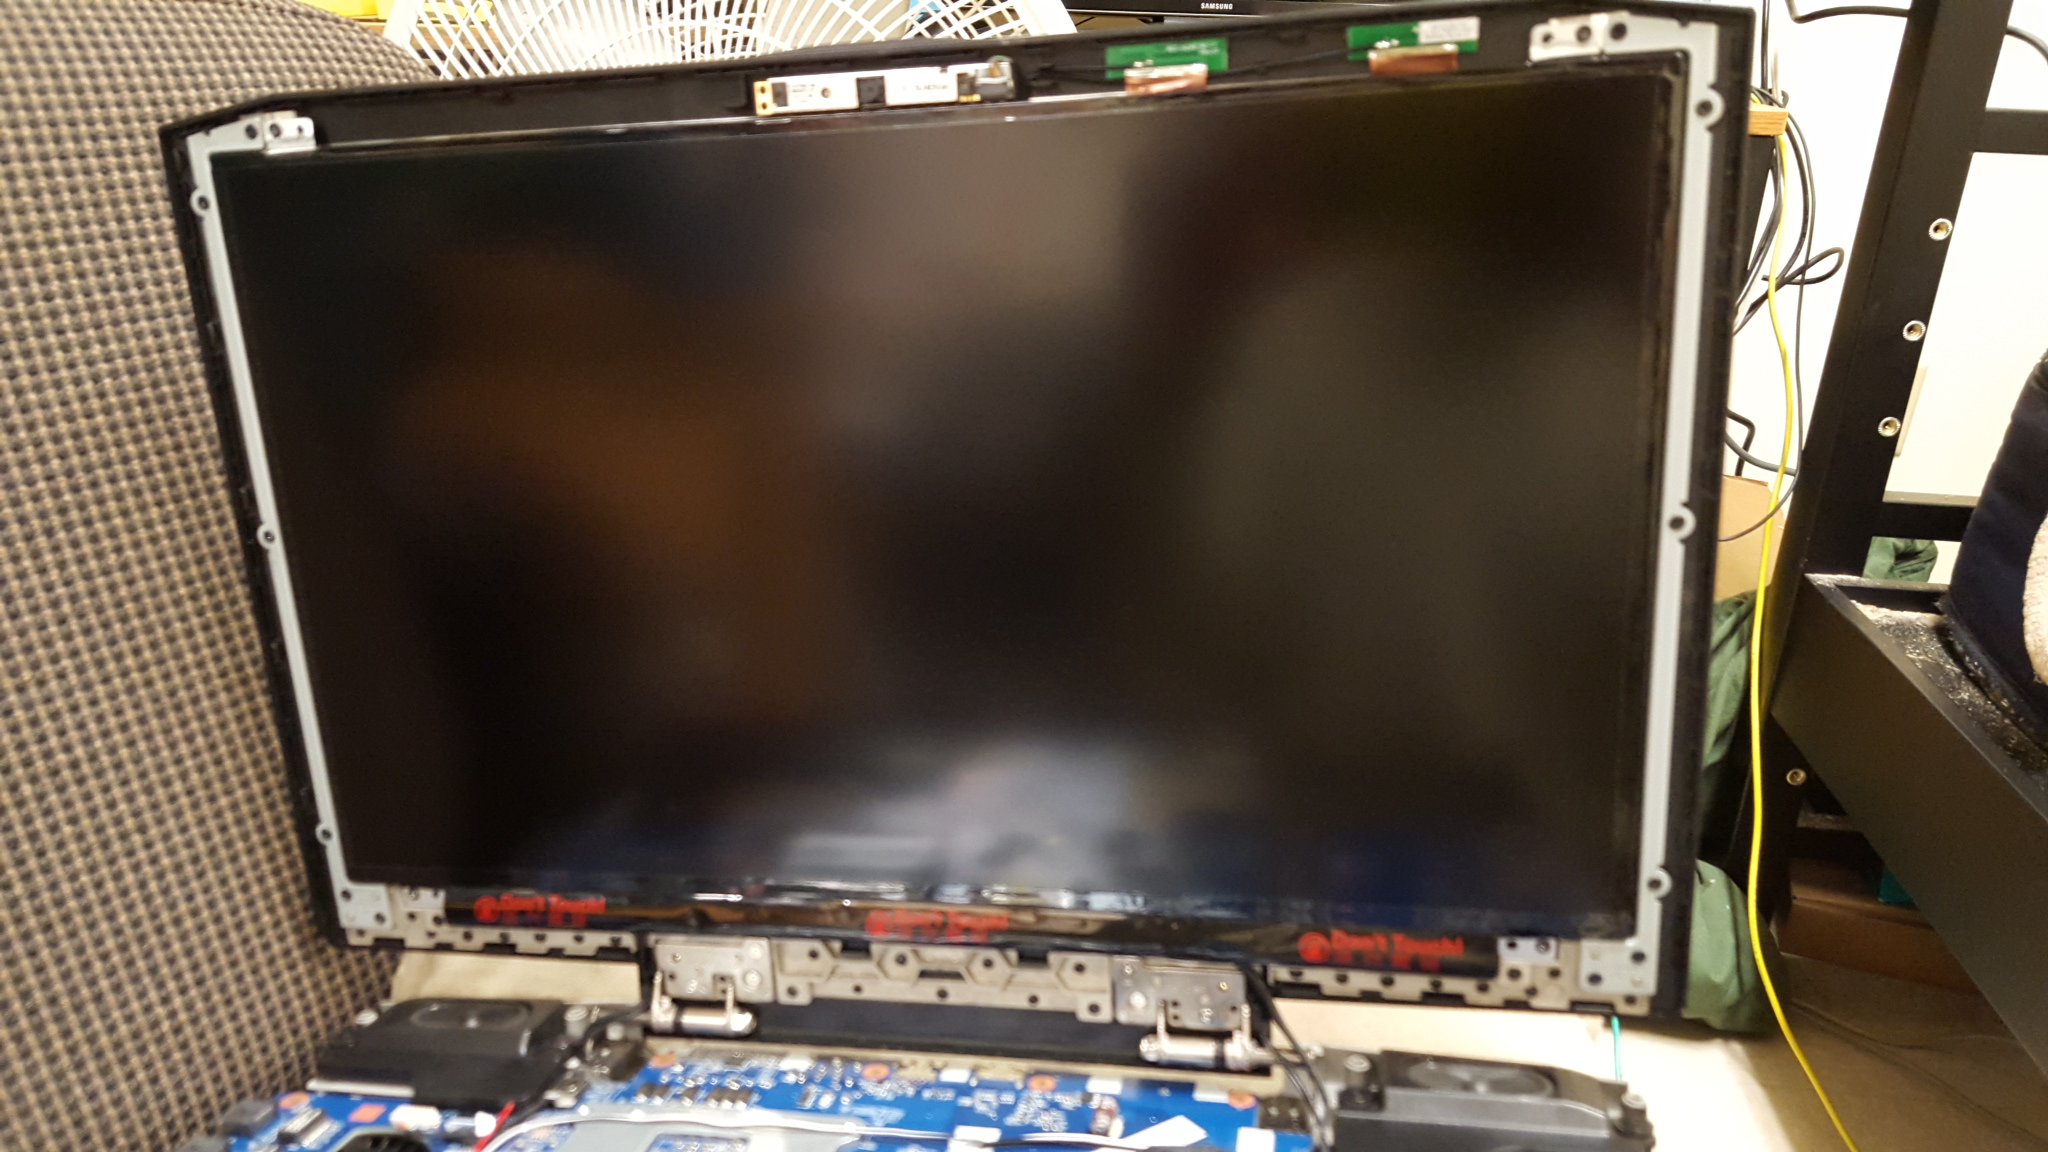
This should be what you're affronted with next if all went well. Notice the four screws and holsters around each edge. We'll take a closer look.
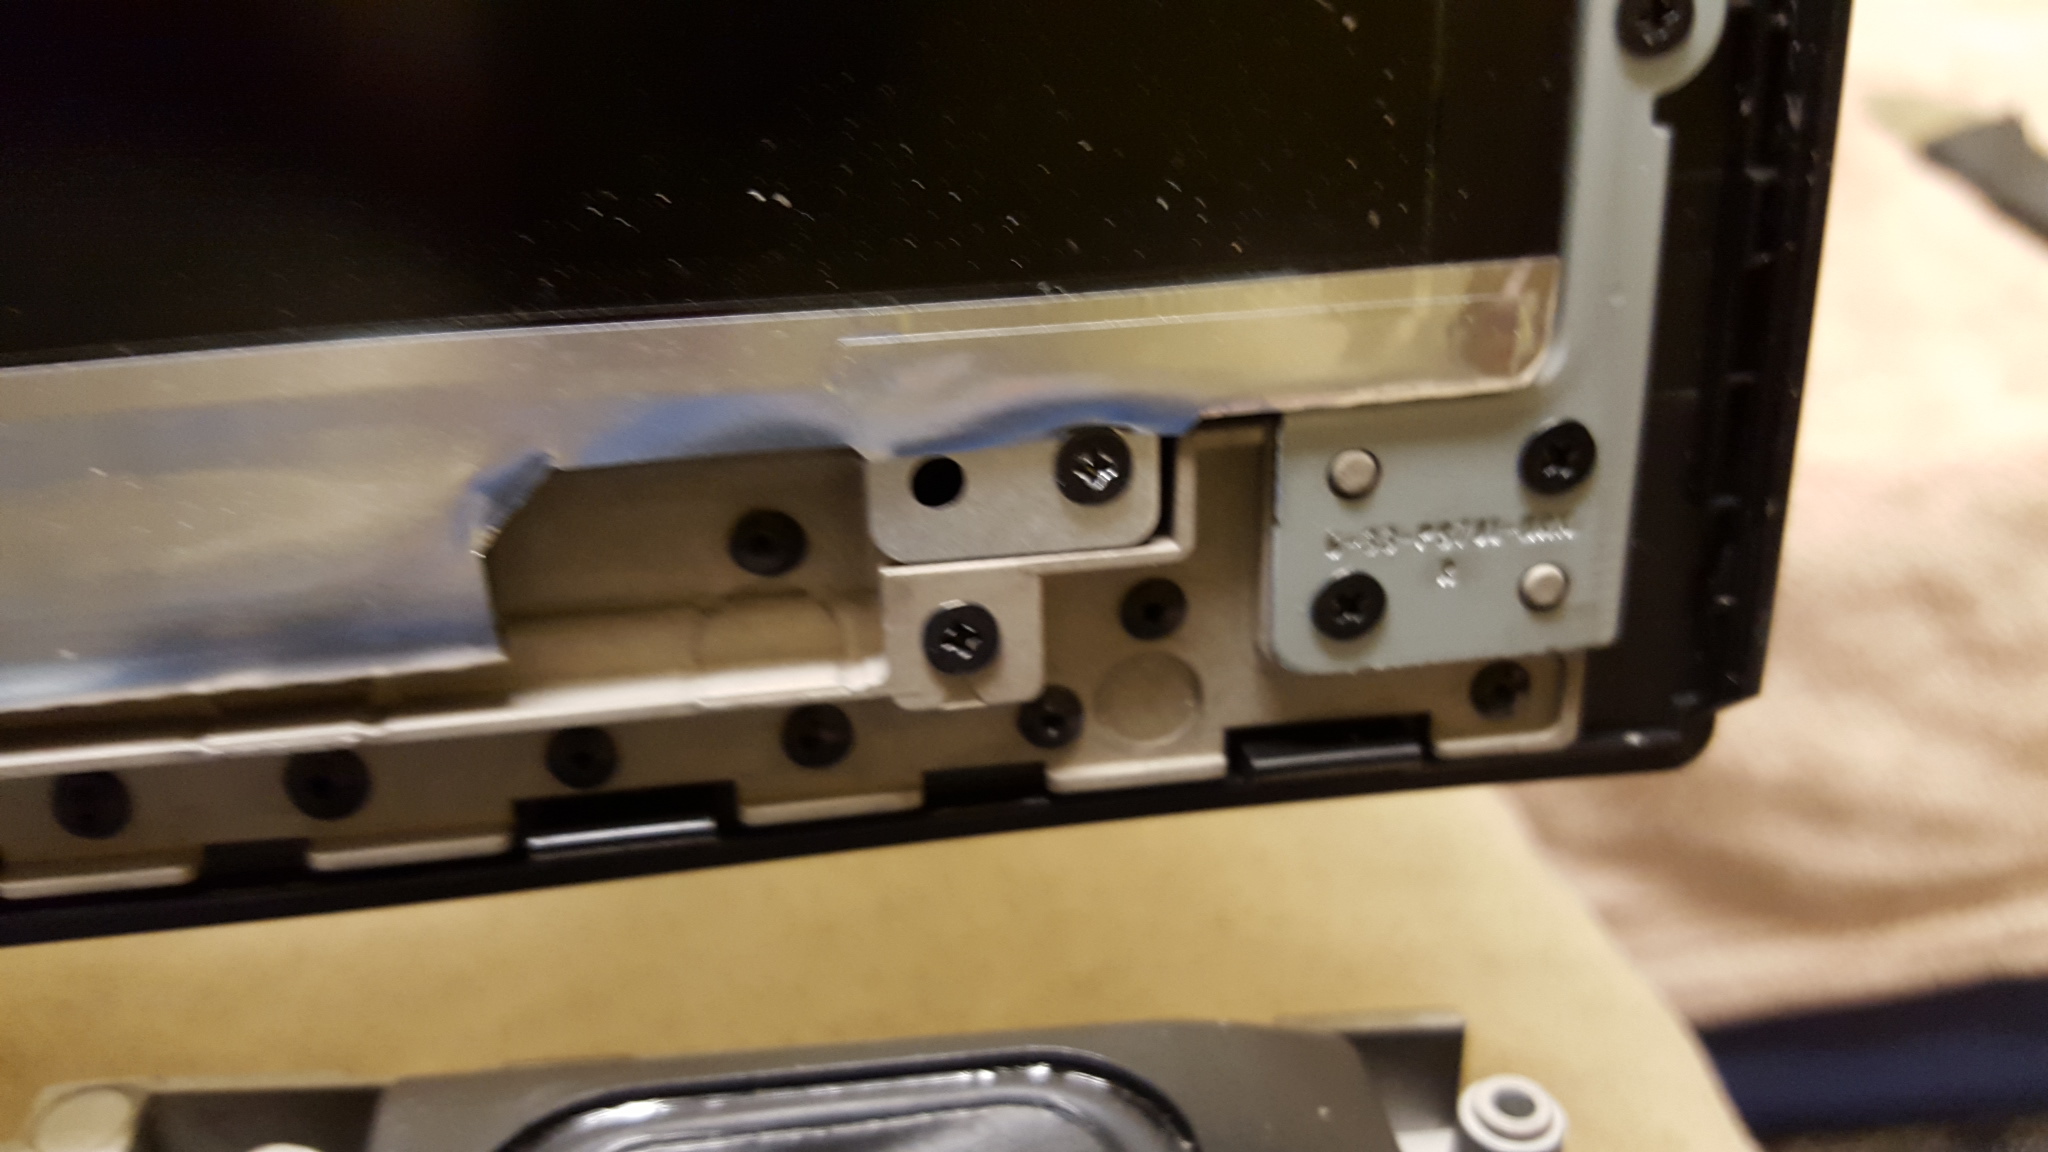
Here's the screw and holster on the upper-left side. See the little stick poking through? When securing your 4K AUO screen be sure the stick goes through it. I won't show the right-side because that'd be a little too redundant so lets look at the bottom screws for the panel.
Bottom-left
Bottom-right
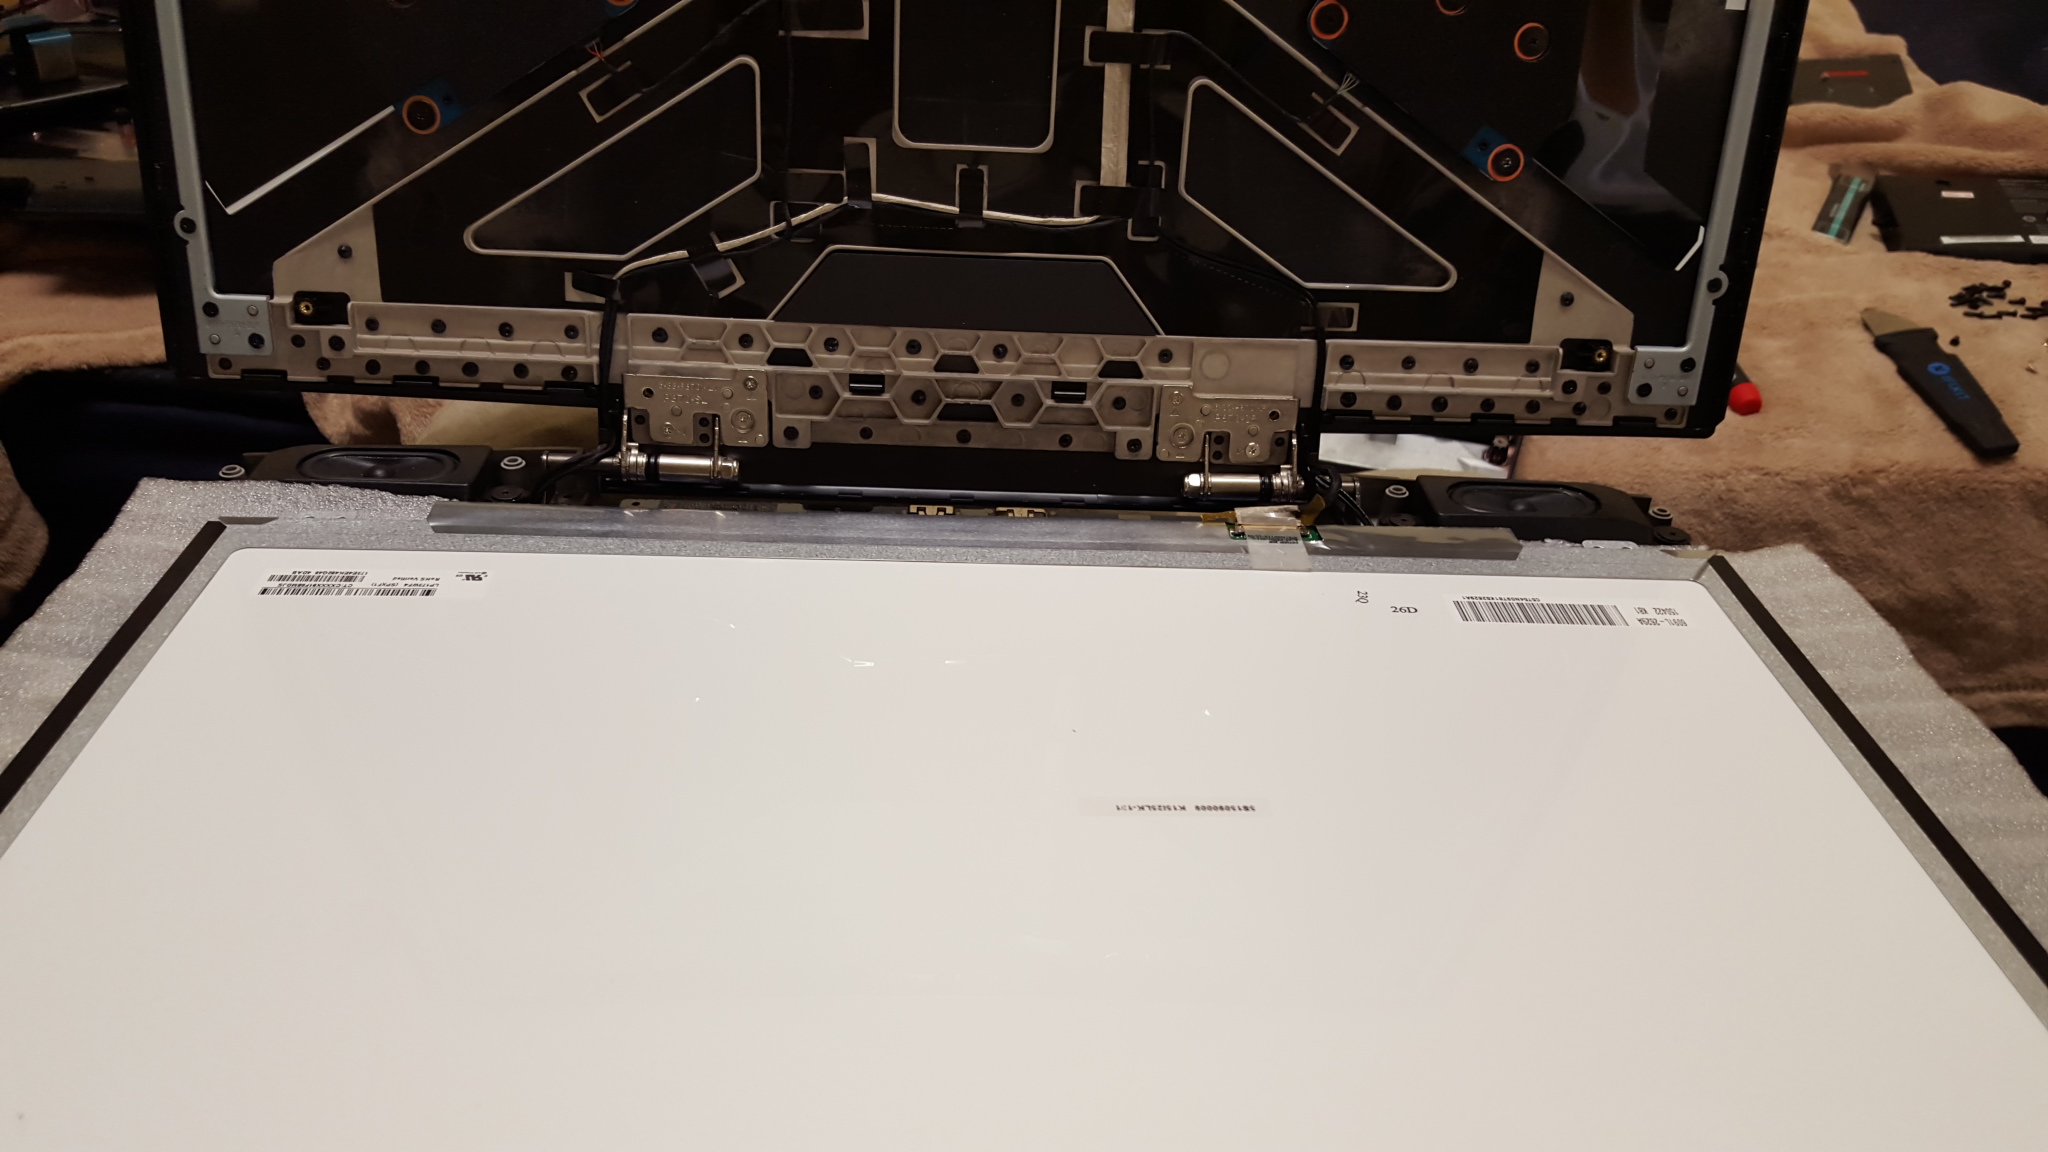
Now that we've identified, place a soft preferably foam material down between the screen and the base of the machine. Lean the screen back to reduce the chance of it unintentionally flopping forwards once unscrewed. Follow-suit and then gently lean the screen forwards and then lie it down. I wouldn't use only a single hand especially if your panel is still perfectly-fine. Be careful from herein if you weren't already.
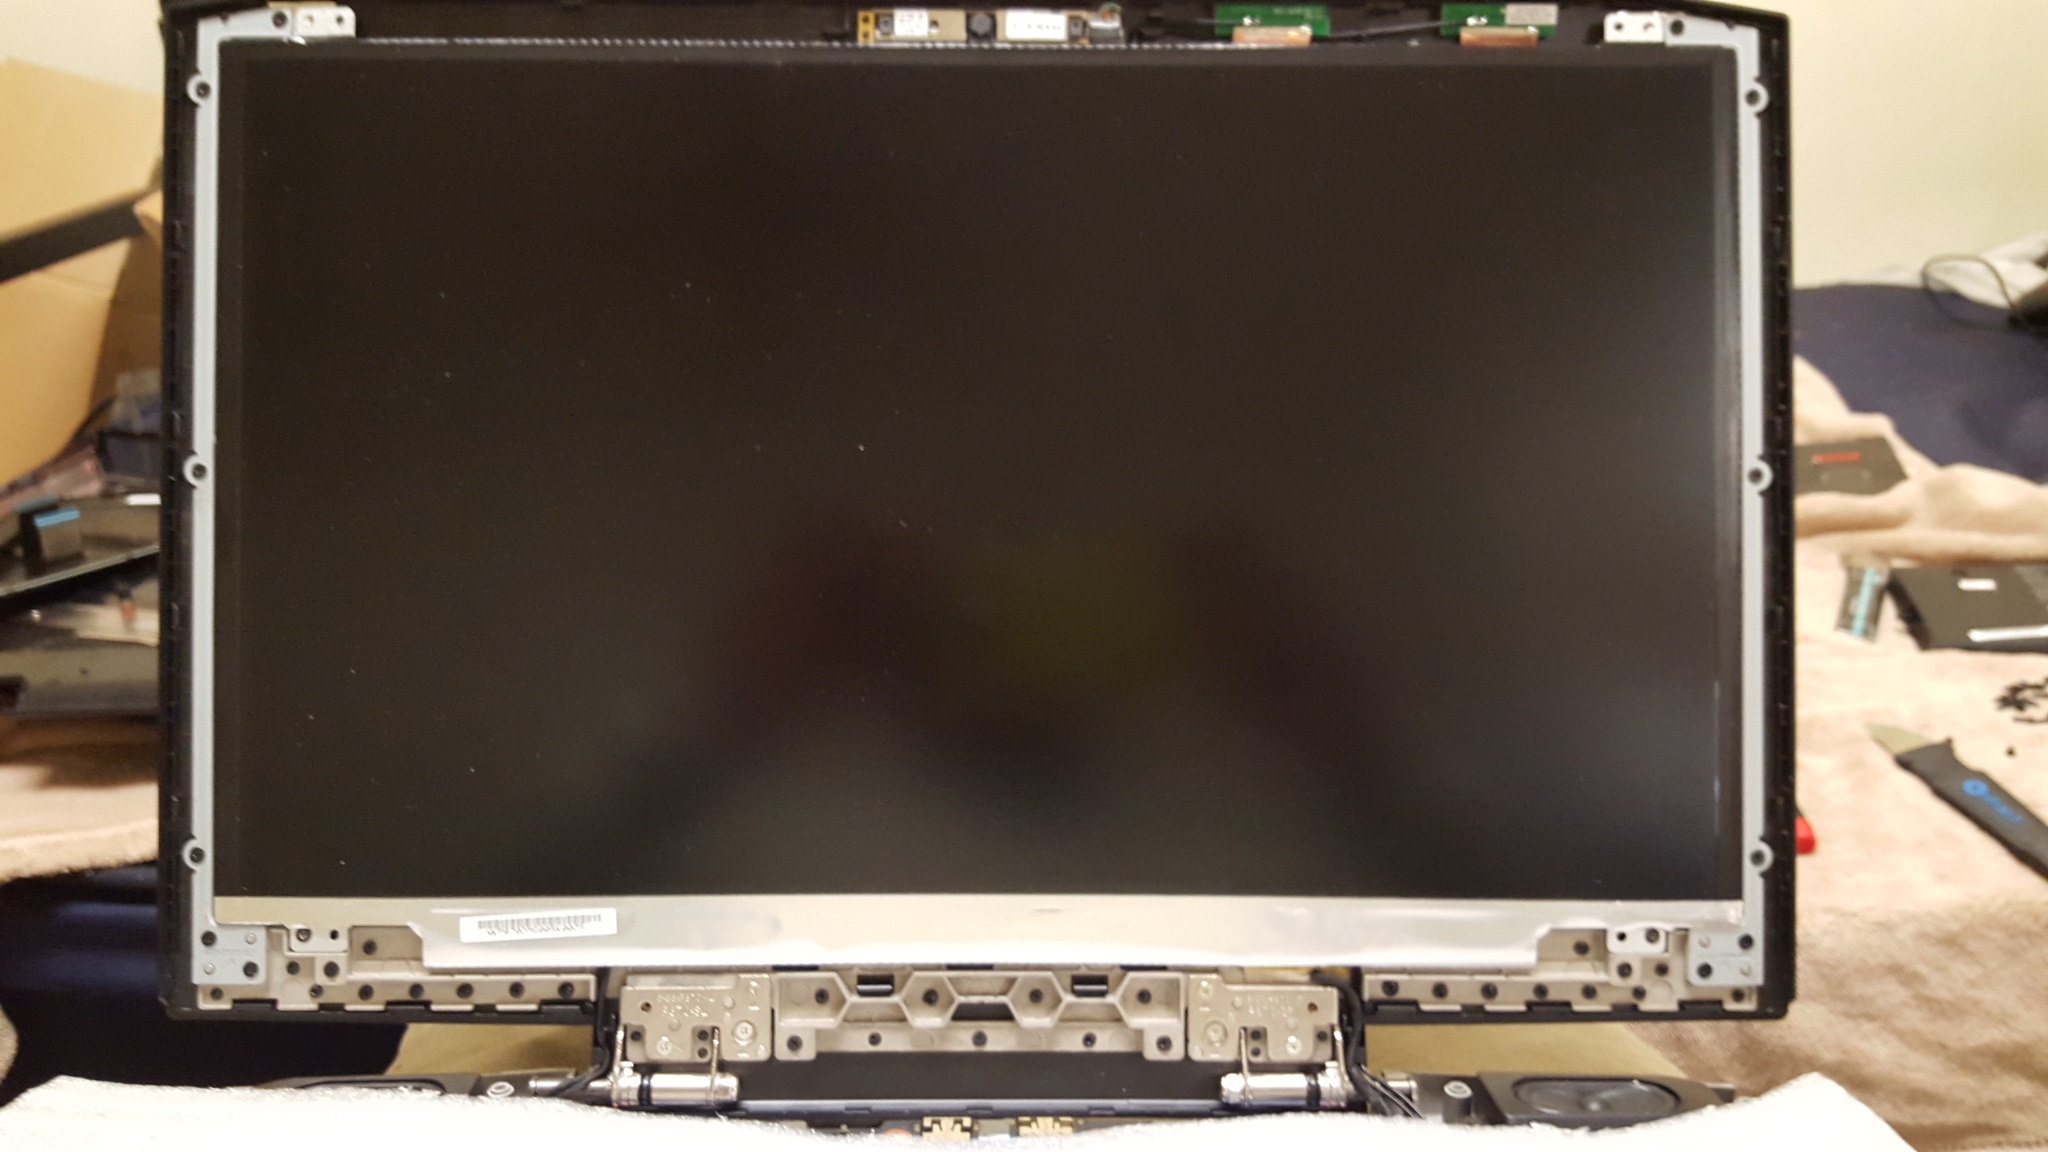
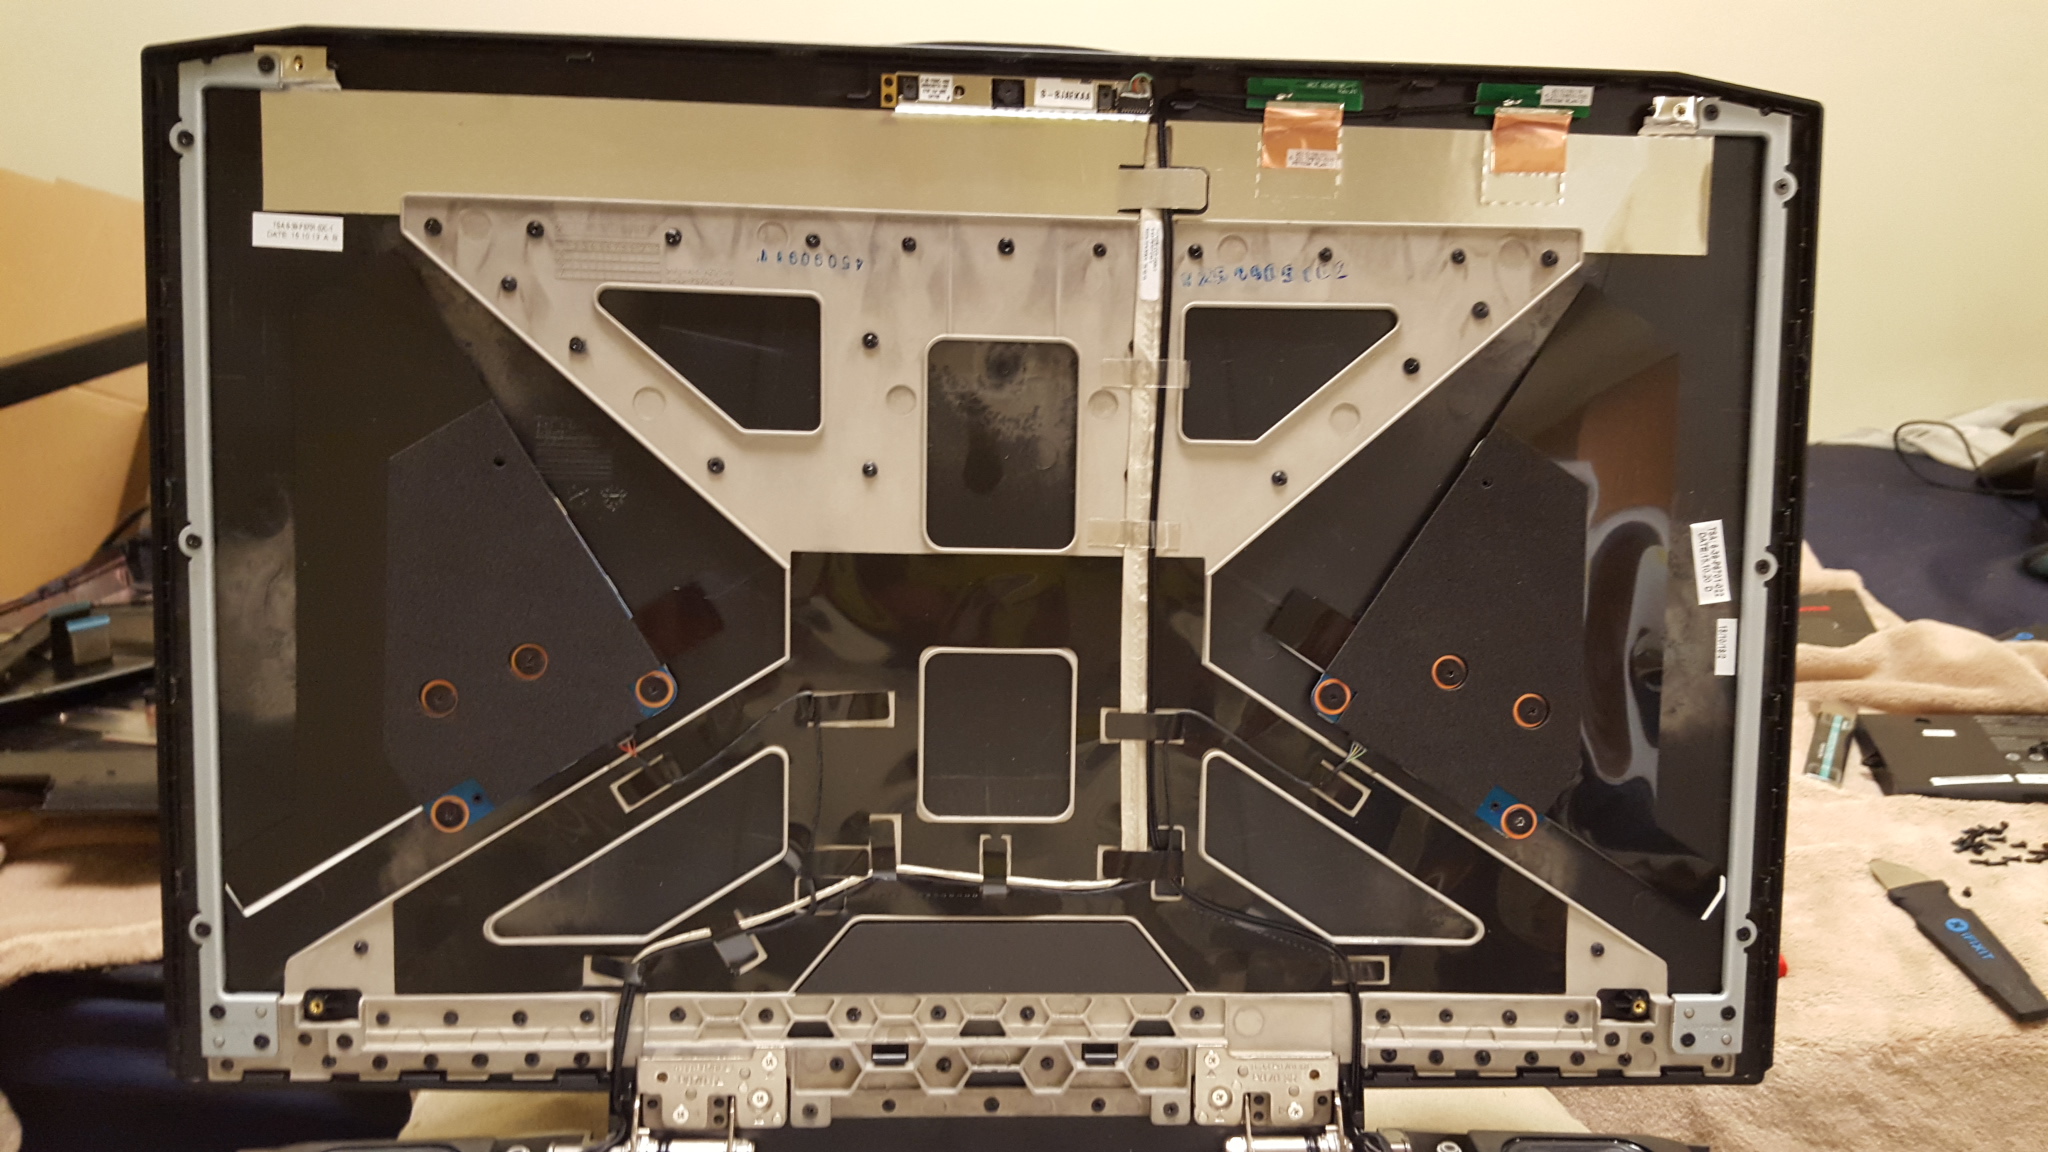
The back frame w/o the screen. You can see all the connections here from the camera to the lighting assortment.
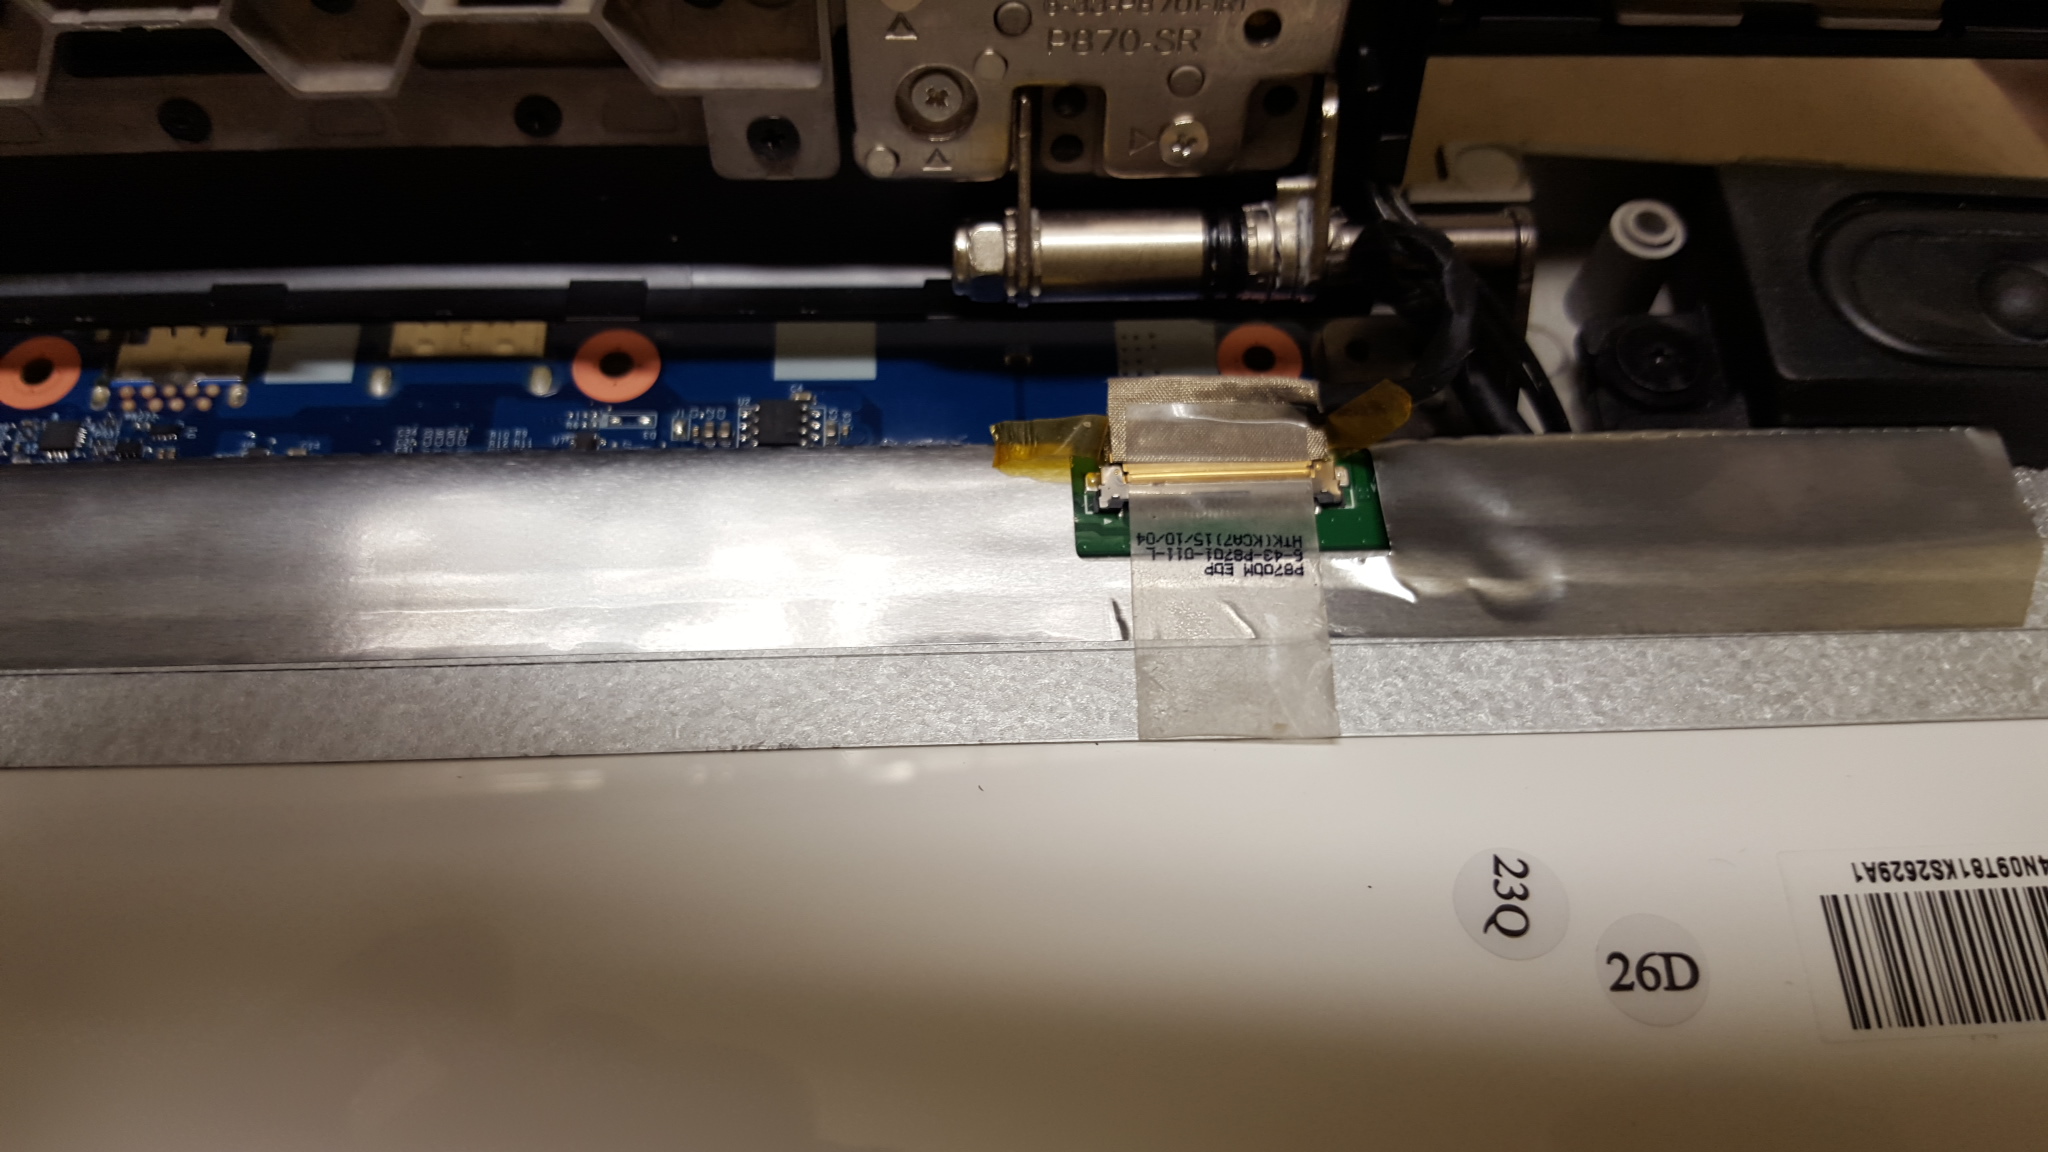
The Screen lying down on the foam spread. Keep you eyes on the pin connector placement jut below the right side of the hinge since we brought it forwards. Now even closer...
Lift the clear tap from the back of the panel first. I'd recommend using a paper-clip or forceps to ensure it isn't ruined because of finger residue or dust.
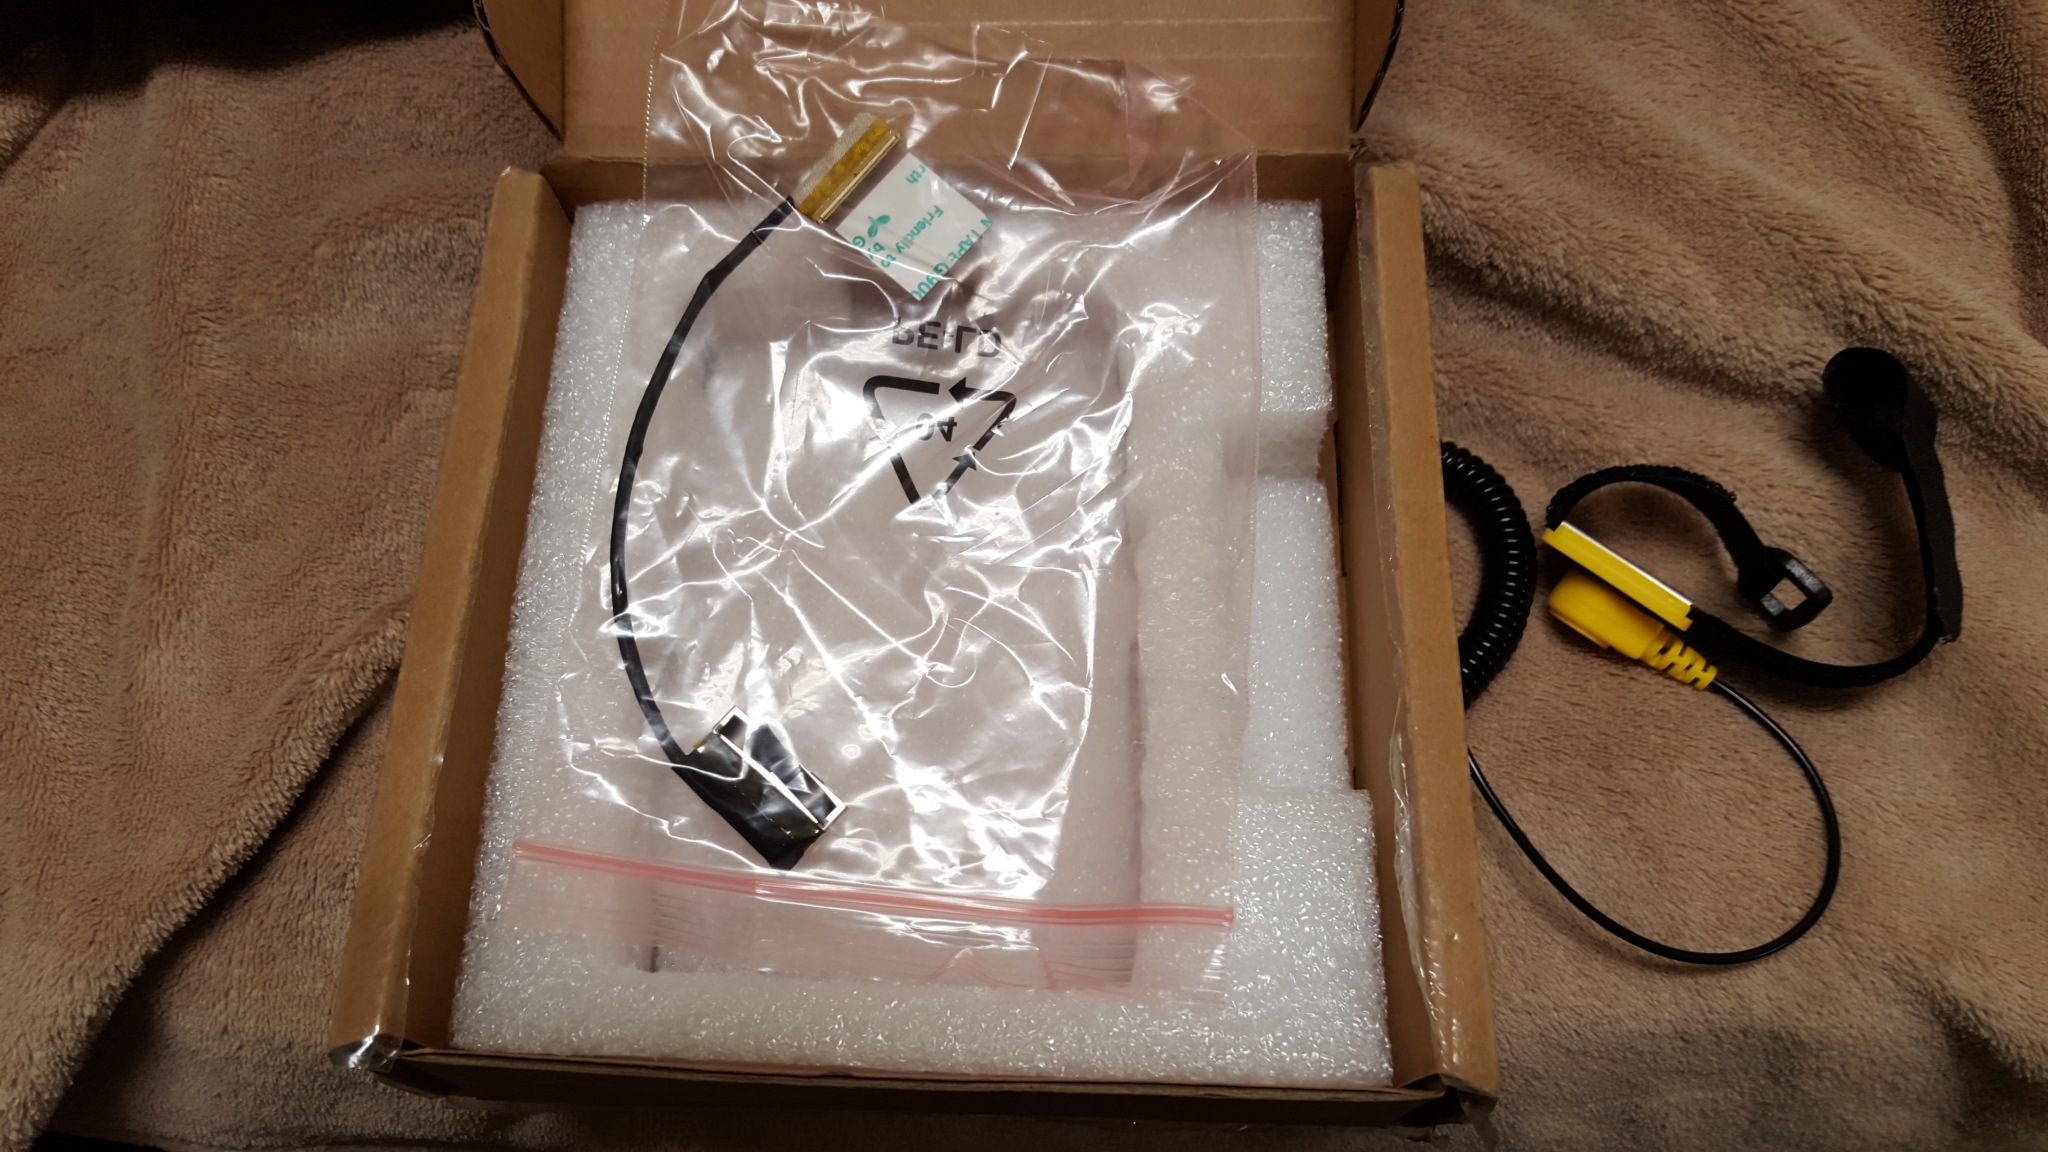
Disconnected from the screen. Now disconnect your EDP cable from the MOBO as well and keep it safe. Now for the new 4K EDP cable.
Just what you need! Also, here's a link for purchase yourself:
http://www.ebay.com/itm/Clevo-P870D...e-/131718160828?&_trksid=p2056016.m2516.l5255
A standalone currently sets you back $169 USD excluding shipment costs. In case you're unsure about the re-seller, they're called Razorsedgehttp://stores.ebay.com/razorsedgebyeurocomnotebooks/
They seem to be a direct Eurocom correspondent if not one in the same.
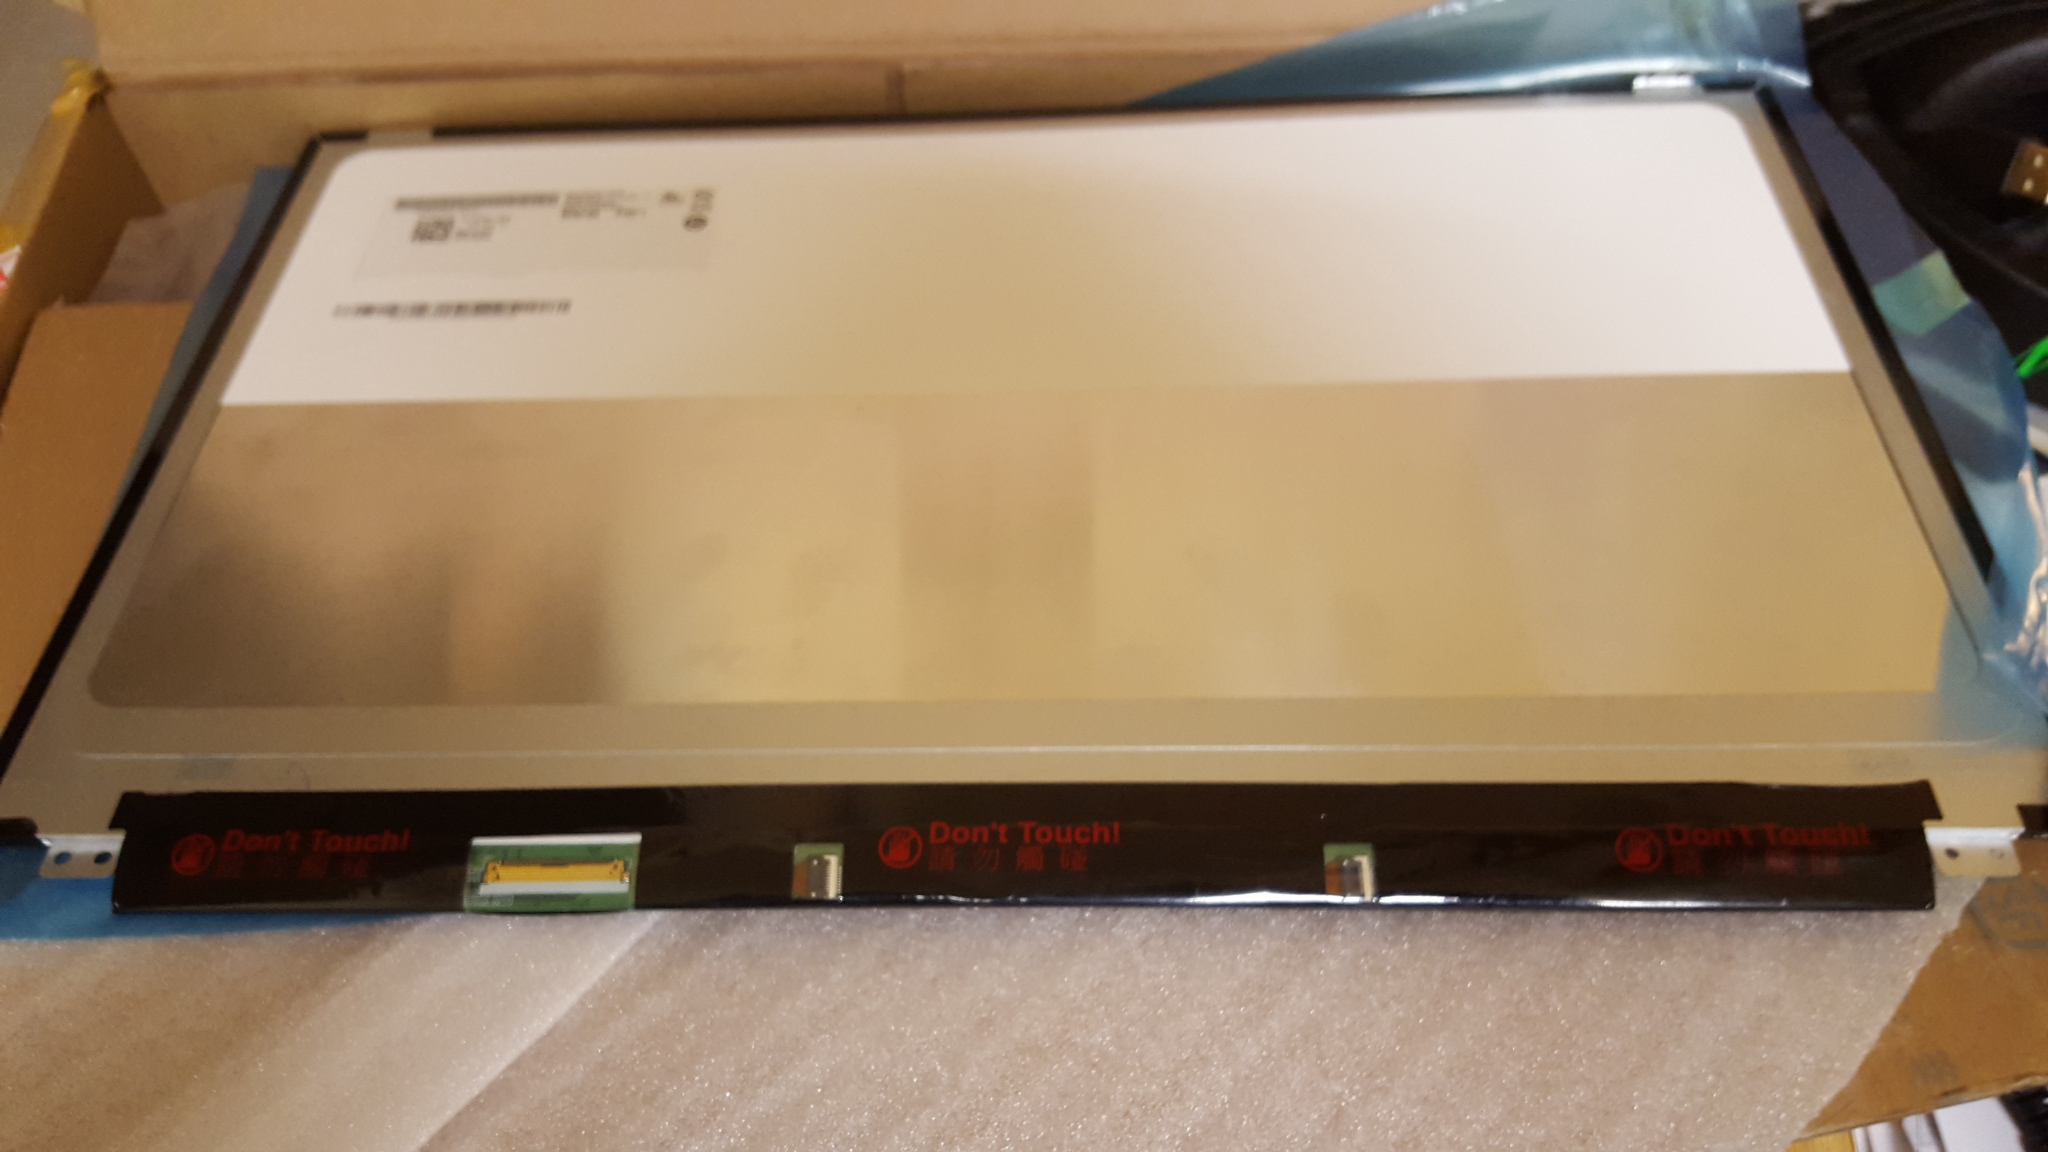
Now here's the screen you need! The 4K AUO (3840 x 2160) screen; model number B173ZAN01.0. A link to all info available on the panel:http://www.panelook.com/B173ZAN01.0_AUO_17.3_LCM_overview_25358.html
Also for purchase: http://www.ebay.com/itm/AUO-B173ZAN...43-94mm-LCD-/111894039402?hash=item1a0d678b6a
It'll set you back $625 USD though there are certainly ways to find it cheaper than what's on offer here.")
Lay it as see on the foam and connect the EDP cable. Remove the piece of plastic from over the stick portion of the tape and at last, secure the pin cable to the screen and MOBO if you haven't already.
After extensive surgery the phoenix can now begin to adjust to its new, ultra clarity 1000:1 face. Put your phoenix back together in reverse order and then the true journey can begin! When you first try to reboot the laptop it may take a little while longer so don't be afraid if it's not SSD level boot speed! As I can confirm you WILL lose G-sync in the Nvidia control panel though in the bios you will still have the "-G" moniker. And thus far panel overclocking is not extensive compared to the FHD though I've been trying to see if that is at all possible especially if down-scaling the resolution and then opting to run at 100Hz or more. Hope I was able to help those who wanted to make the upgrade as well. Enjoy your 4K guys!!!
-
 8
8
-


CLEVO@COMPUTEX 2016
in Clevo
Posted · Edited by Akaraah
Adding more relevant info.
Just more confirmation of what we already knew: http://videocardz.com/61503/leaked-driver-supports-mobile-nvidia-geforce-gtx-1080-and-gtx-1070 (or we can safely call it conjecture, all the same).
You can find the leaked driver info specific to the original forum post by clicking here. Maybe a paper launch is right on the horizon. "Early August" as a lot of rumors seem to be pointing at is very, very close. If it's anything like when Nvidia officially unveiled the 1080 back in early May around or on the 7th, then they'll officially "acknowledge" the existence of these cards at least three weeks out before they're for sale. There's also these article about the "actual" desktop 1060 here and here (be sure to use translate or have google chrome if you're not a native Chinese speaker/reader for the second link). If there's truth to any of these rumors, perhaps Nvidia will couple the paper launch of the desktop 1050 and 1060 with the announcement for the notebook (not "m", mind you") cards. Thoughts?
Happy 4th of July weekend everyone! Fellow Americans, non, native-borne, or otherwise.