karthikrajanv
-
Posts
1 -
Joined
-
Last visited
karthikrajanv's Achievements
Curious Beginner (1/7)
19
Reputation
-
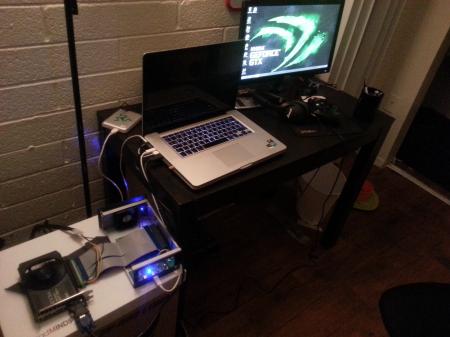
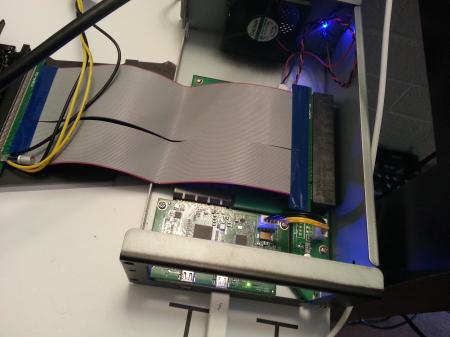
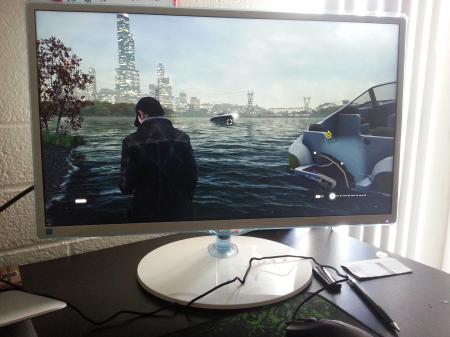
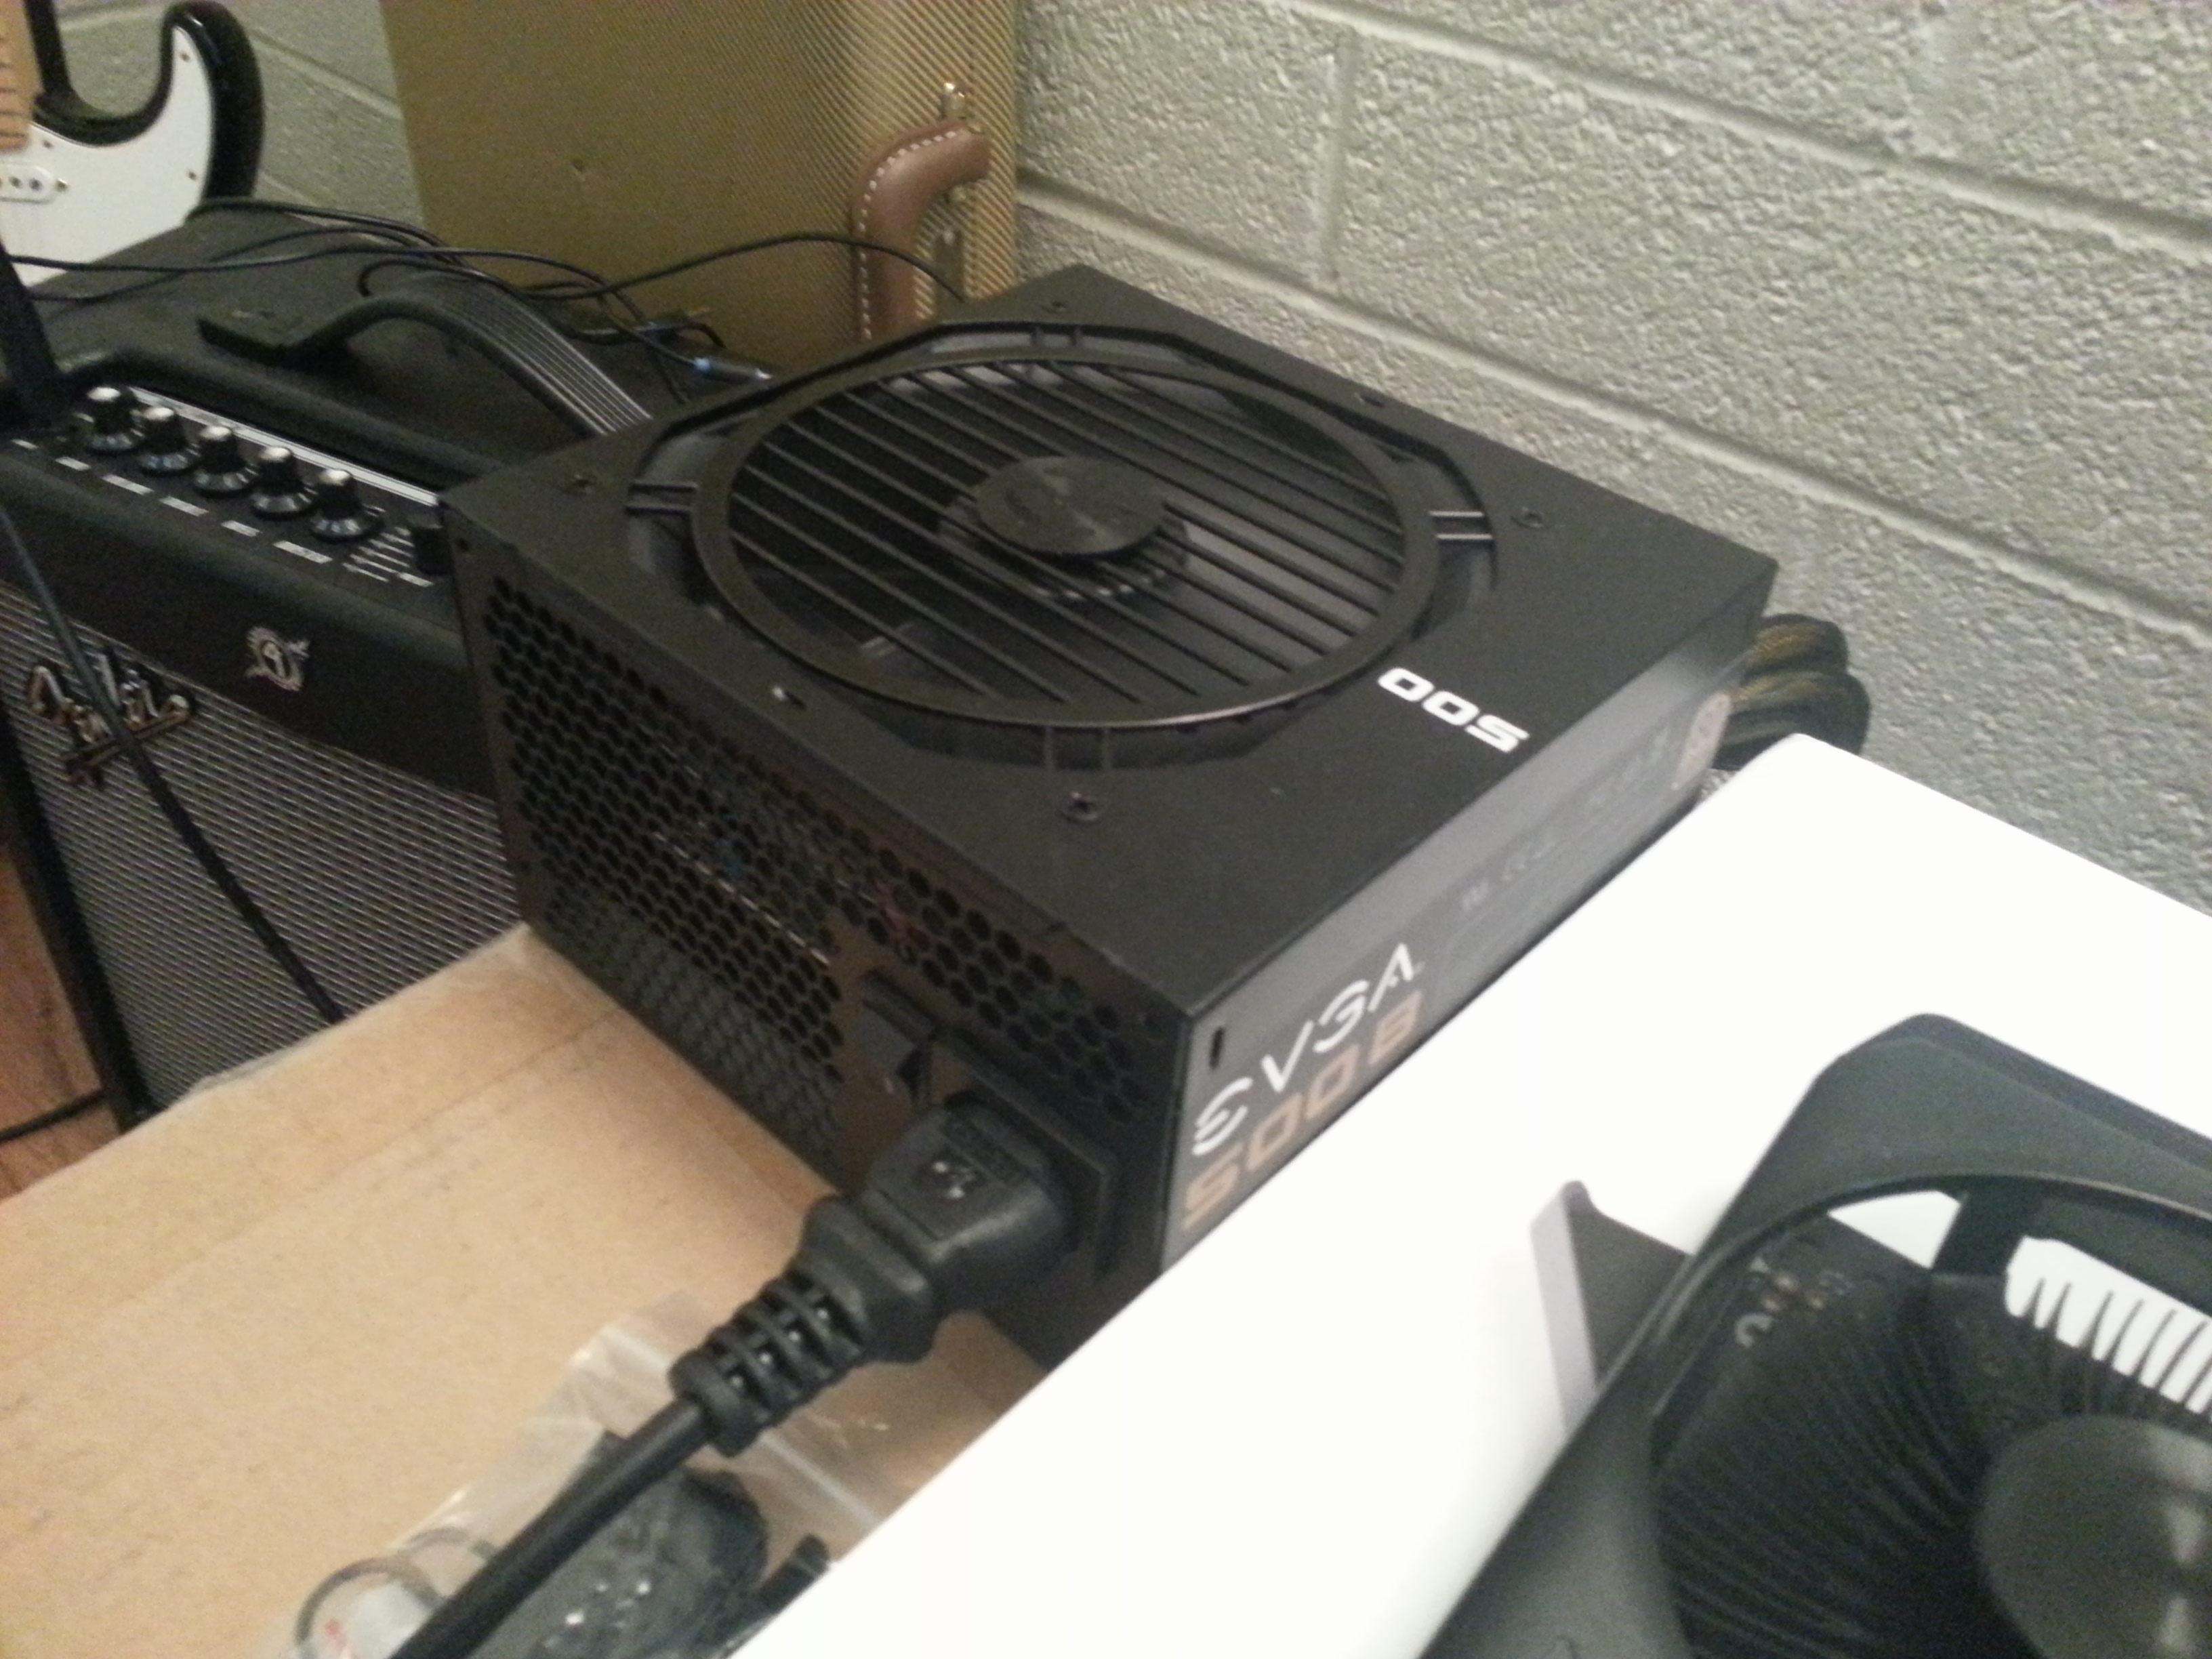
Would like to thank Tech Inferno Fan for helping me out with this entire thing. I wouldn't have gotten anywhere near to making this thing work without his help. Thank you! Macbook Pro Specs : i7-3740QM 2.7 Ghz Ivy Bridge CPU 16GB DDR3 RAM Intel HD graphics 4000(iGPU) + Nvidia GT 650M(dGPU). Note: iGPU not usable in Windows due to Apple firmware restrictions. Windows 8.1 Pro 64-bit (BIOS) 256GB Samsung 850 Pro SSD + 750 GB Stock HDD Components: as used for this implementation : AKiTio Thunder2 PCIe Box (260$) (TB Cable included- but too short) NVidia GTX 750Ti (2GB GDDR5) (150$) x16 PCIe Rise Cable with molex power connector EVGA 500B 500W PSU (55$) ATX Power Supply 24pin Jumper Switch (7$) (In order to power on the PSU w/o having it to be connected to a motherboard) Samsung 23.6" Wide Angle LED Monitor (1080p) (180$) HDMI Cable (6$) DIY eGPU Setup 1.20 available here ($25) (Note : ask specifically for version 1.20. Newer version 1.30's stricter PCIe compliance didn't resolve the TB Code 12 error) USB memory key for bootcamp installation. Other ways to power the GPU and the PCIe box (1) Using a molex to barrel (2.5mm/5.5mm) connector that goes into the AC plug of the AKiTio box. In this case, the GPU can be directly connected the the board without a riser and probably the enclosure can be closed depending up on the width of the graphics card. (2) Using the 60W stock adapter if the graphics card has a 6pin/8pin pcie connector. STEP 1 : Installing Windows 8.1 x64 using BOOTCAMP Install using bootcamp assistant. <br> Download bootcamp 5.x software package and install all the drivers. <br> Download and install the latest nvidia graphics driver (optional) STEP 2 : Putting together the eGPU/PSU/PCIe Box Open AKiTiO's box by a normal screwdriver, take out the PCIe board and attach the x16 riser cable with molex connector to the board. <br> Attach the GTX Card to the open end of the riser cable. <br> Connect the 4 pin molex connector from the PSU to the riser cable molex connector. Do not connect the AC adapter to the pcie box. This method is used as the adapter provides only 60W to the board and the GTX 750 (requires a minimum of 75W) draws power only from the board. If you are using any other graphics card with a 6pin/8pin pcie power supply, then go ahead connecting the AC adapter to the board and attach that graphics card without a riser cable. Connect the jump starter pin to the 24pin ATX connector of the PSU. <br> Finally, connect the thunderbolt cable from the pcie box to the macbook pro. After STEP 2, boot into windows to ensure the graphics card and the connections are working properly. Make sure the device is listed in the device manager. The eGPU will show up in the device manager with a code 12 'cannot allocate enough resources' error. STEP 3 : Using DIY Setup 1.20 to get rid of error 12 Install DIY Setup 1.20. (Install instructions will be given at the time of purchase) <br> Reboot with the eGPU connected and select DIY Setup 1.x from the windows boot menu. <br> If the eGPU is not working or the bootmenu doesn't appear when the eGPU is connected, try hot plugging the eGPU. ( or Hold alt when MBP starts up and wait for sometime to select the windows partition) <br> When the setup 1.x blue menu appears, select menu based setup. <br> Go to initialize and select eGPU. This will create the startup.bat file. <br> Do a 3.87GB/32-bit PCIe compaction on ALL except SATA+.. with closeunusedbridges=off. This will create the required pci.bat file. <br> When done, do a startup.bat test run and check if the PCI_w and all_alloc (256MB) says yes on the right hand side of the main menu. <br> If yes, chainload using mbr and select windows 8 from the boot menu this time. In my case, I get an error after every pcie compaction process saying "Remove disk a, Insert disk b" at the end of the compaction and it just hung up there. Was advised by Nando4 on the workaround here: force shut down, reboot into DIY setup menu>PCIe Compaction> Edit pci.bat. Change all the lines starting with a:x.x and b:x.x to 0a:x.x and 0b:x.x, to eradicate the floppy disk error. (x being the number, eg., a:1.0 b:7.0 ). Save the bat file. Then do Startup.bat->Test Run or boot into DIY Setup again>Automated startup via startup.bat. STEP 4: Rebooting into Windows 8 and setting up the eGPU Reboot into DIY Setup and select 'automated startup using startup.bat' with the eGPU connected to a LCD/LED monitor. The HD4000 driver in windows 8 is broken, hence the eGPU will work only on an external screen. <br> Once in the desktop, open Nvidia control panel and select Set up multiple displays from the left menu. Look for the 2 GPUs (dGPU and eGPU) with their respective display connected to them. Check mark the eGPU's monitor and uncheck the color LCD (internal) to display only on the external monitor. Click apply. TROUBLESHOOTING : Sometimes it takes too many tries for the eGPU to get detected and go into the windows boot menu. In that case, look for the wires (yellow and black) that connects the pci board and the thunderbolt board of the AKiTio box. Disconnect that and reboot everything. This lets you go into the boot menu and select the DIY setup without having to force shutdown and reboot several times until the mac detects the eGPU. When inside the menu based setup, reconnect the yellow and black wire and press F5 to rescan. This hotplugs and detects the eGPU which then shows up in the right hand side of the screen. Performance results and benchmarks will be updated soon.