Hi everyone,
Granted, I am not the first one to set up a native Thunderbolt eGPU system, but so far I have not come across a solder-free solution that works in OSX as well as Windows, so I wanted to write a little tutorial how I got my system running.
My Setup
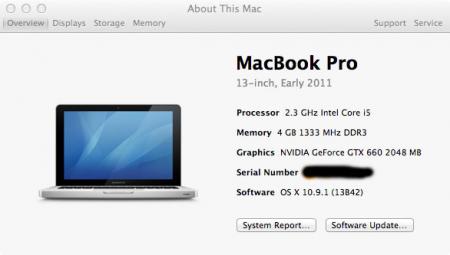
Early 2011 13” MBP
Sonnet Echo Express Pro (x16 mechanical interface and 150W internal PSU (including 75W aux connector)
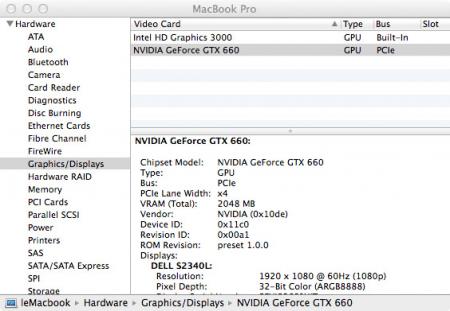
GTX 660
Not that it is particularly important which Thunderbolt extension bay is used, but the Sonnet pro line has got a couple of advantages:
It has got two x16 pci-e slots, so there is no need to void your brand new enclosure’s warranty just to fit in your graphics card.
It comes with a 75W auxiliary connector and 150W internal supply, so no extra psus, cables or whatnot scattered around, it’s a very neat and tidy solution
It is recently discontinued which means you can get them for a fraction of the ridiculous price tag on ebay
Disadvantages that I noticed: The thermal design is terrible, fans spin up quite loud early on and the ones it comes with as standard are very loud and annoying in particular (I hate you Sunon!). I fitted mine with Gelid Silent 5s as these are the only decent silent fans that come in 50mm. Overall noise is now acceptable and free from high pitched screeching even under hard gaming.
To get it to work under OSX
Nothing easier than that! All you have to do is tell OSX that the drivers are Thunderbolt enabled. This requires you to edit two kernel extensions:
/System/Library/Extensions/NVDAStartup.kext
/System/Library/Extensions/IONDRVSupport.kext
In these files (use terminal command “sudo nano” to edit) look for sections beginning with <key><key><key>CFBundleIdentifier</key> </key></key> and just before this section is closed with </dict> add the two following lines:
<true><true><key>IOPCITunnelCompatible</key>
<true/>
then close and save. Note that there are multiple of these entries in IONDRVSupport.kext.
Here is an example of how the section in NVDAStartup.kext should look like:
<key>NVDAStartup</key>
<dict>
<key>CFBundleIdentifier</key>
[…]
<key>NVDAType</key>
<string>Official</string>
<key>IOPCITunnelCompatible</key>
<true/>
</dict>
After that just reboot and you should be golden.
Things that don’t work so well: Clamshell mode is a bit messed up now as the internal display cannot be switched off anymore. I got around the issue by installing NoSleep that prevents the system from going to sleep and just ignoring the ‘extra’ display.
To get it to work under Windows
Nobody likes Windows 8. But unfortunately unless you want to start fiddling about with extender cables, delay lines and extra boot loaders and make everything messy you need to run Windows in EFI mode which is very poor in Windows 7. So what you need is Windows 8 or 8.1 64 bit (32 bit has no EFI support). There are one or two tutorials on how to install Win8EFI on a MacBook out there, but it is pretty straight forward anyways:
Go through initial bootcamp process: Create Windows USB installer, download bootcamp drivers and have them copied on the USB stick as well.
Abort bootcamp after 1 is done, don’t let it create a partition.
Open Disk Utility and create a partition for windows manually
Reboot and hold option/alt. The windows USB drive should show in the bootable devices list.
Install Windows and bootcamp drivers. Spend hours waiting for all Windows updates to install
Once Windows is installed all that is left to do is download and install the newest Geforce drivers from NVidia.
Here you go, native eGPU support in Windows as well!
Things that don’t work so well: For some reason I did not manage to get the MBPs sound chip recognized in Windows. But do not worry, you have got two options: 1. Use a monitor that supports HDMI audio. 2. Use a USB sound card (‘cause it sounds better anyways, allegedly).
Benchmarks:
Don’t care about numbers
Gaming experience:
Superb. Games suddenly look good again!
Concluding remarks:
Is it worth it? Probably not.
Would you do it again knowing that it’s not worth it? Definitely.
</true></true>
Performance benchmarks
As apparently numbers are important to some, here are the 3DMark results of my little system:
NVIDIA GeForce GTX 660 video card benchmark result - Intel Core i5-2415M Processor,Apple Inc. Mac-94245B3640C91C81


