


link3rd
-
Posts
100 -
Joined
-
Last visited
Content Type
Profiles
Forums
Downloads
Posts posted by link3rd
-
-
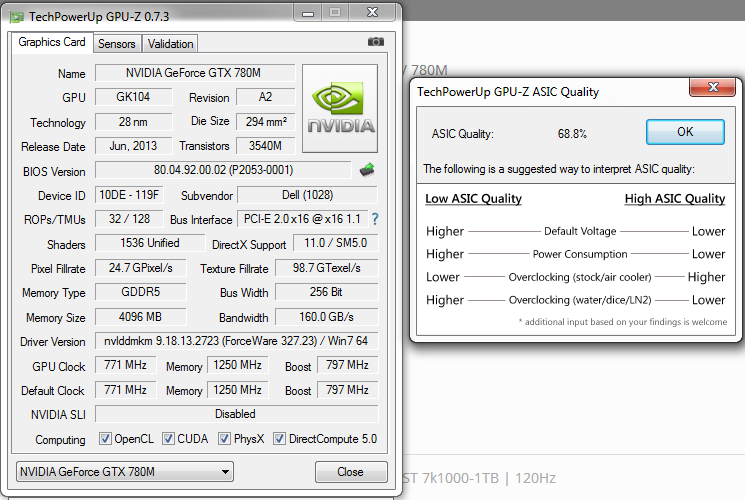
Mine is 76.6%. It's supposed to relate to how easily you'll be able to overclock, the higher the ASIC quality the higher you'll likely be able to overclock. I'm not sure how good of an indication it is though, and besides it's not like you can change it; if you're gonna overclock, then all you can do is find the highest stable settings, knowing the ASIC quality is not going to affect that.
I gotcha. You won't believe how TERRIFIED I am to do benchmarks, flash the vBios, and even overclock or increase the voltage (if i flash)... it's sad:33_002:
Everything's finally working again and I don't want to screw it up!

EDIT: when I had my 6870m and my 6990m, I didn't care about overclocks or bench marking... I don't know why I'm like this now.... it's so weird!
If load up svl7's bios, will it change the ASIC reading in gpuz?
-
@link3rd, if your GPU is working fine & the temperatures are good, which you say they are, then no need to open up the laptop. Just relax & enjoy it now! I happen to agree with you on the 1600x900 screen topic, the 780M isn't overkill for it if you max out all available settings in the latest games, and it just means that when games get more demanding over the next year or so, you'll be able to maintain better frame rates than the bods with the 1080p screen. If I was you, I wouldn't upgrade the screen to 1080p, I'd leave it as is.
Same thing I had in mind. Btw, what's your ASIC? my other card, it was like 73% I believe. Is 68% better or worse? IDK
-
This is not the case with the 780m 4GB, absolute overkill for that resolution.
Nope, you probably will need to increase v. for the core, memory OC 300-500MHz no overvolting required.
I understand, but remember I bought this laptop over 2 years ago. I only had a 1Gb 6870m at the time. Which is far less powerful than this 780m. What's your ASIC?
-
GPU boost 1.012v, GPU-Z check ASIC quality.
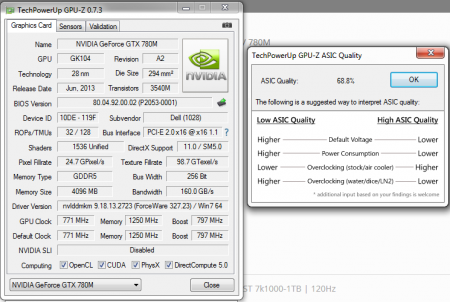
is it bad?
-
Sounds good, you've got it installed - you didn't wait for the wrist strap then?!
Did you check your temperatures yet, that would be the first thing I would do. If they're fine, then just go ahead and enjoy it! Probably not much need to overclock beyond the +135Mhz that's possible on the core with your existing VBIOS, especially given that you've only got the 1600x900 screen, so framerates will be excellent anyway, so therefore no need to flash the VBIOS really.
You can change the boot order in the BIOS, which you enter by pressing F2 during post after you've turned your computer on. You have to have the USB drive attached to the computer in order for the USB option to be available within the boot order. In fact, for mine, I have to enter the BIOS twice with the USB attached for it to appear in the boot order list.
That actually worked. I see the option to boot from USB storage now. I'm actually tempted to flash the bios now, lol. I was able to back up my vBios, i even typed "NVFLASH -6 780moc,rom" in the dos window. I just didn't press ENTER, I pressed ESC instead. The temperatures look ok for stock voltage. I really don't want to open up my laptop again tho. REALLY! ignorance is bliss
 svl7's vBios will prevent gpu throttling and both gpus are an overkill 1600x900 resolution anyway not to mention the inferior quality...for US$ 99,00 you can upgrade to a 1080p 60Hz screen, it's fairly easy to do (no teardown/same 40 pin connector/cable)glossy Screen for Dell ALIENWARE M17X R3. Replacement Laptop LCD Screens
I'm actually ok happy with my 1600x900 resolution screen. Remember I bought that intentionally because I know the VGA card will perform better with the lower resolution. It's all about gaming. I will ALWAYS sacrifice pretty graphics to get the frame rate fluidity I want.
On another note guys. I was playing tomb raider on ultra, not ultimate *fudge that hair*, with the +135MHz and the card isn't stable. It keeps crashing. So I only did +120-125MHz and it was ok. Another thing I noticed was that the peak voltage on this stock is 1.012V and not 1.0V... is that weird? I know i did not touch voltage settings, because I have the stock vbios.
-
Leave the boot order with the USB option first, to boot from the usb stick Ctrl+Alt+Del flashing won't hurt anything and with most games you won't need to OC at all, depending on game AA settings take advantage of the higher bandwidth and increase only memory 300-500MHz though...
 . Always compare temps within 780Ms /R3-4 and enjoy the beast, no worries man.
Watching The Shining...girlfriend dolly shot y mucho más.....

there's no option for usb boot in boot order.... thats what i mean :/
btw, u have the modded inf file for 331.65 driver?
-
@ Robbo, J95 & bikaso: I successfully managed to install the replacement 780M GTX into my M17xR3. No beeping. However, I really do not think that I should flash the bios with svl7's modded bios. what do you all think? To flash or not to flash, that is the question... I'm even scared to run benchmarks with it. I played SC blacklist, bf3 and tried out hitman absolution for a brief time. I'm not playing tomb raider on ultimate. It seems to work like my last one without the trouble of green lines.

My thoughts are, it works as far as I can see and I don't wana screw it up.
EDIT: I tried to boot from the flash drive just now to back up the vBios, not flash it. However, there is not option to boot from the flash drive. :06:This is either a good sign or a bad sigh. All I know is that I cannot flash the bios, so that thought is out of my mind, but the bad side is that I cannot boot from my flash drive with my windows image on it. any thoughts on any solutions? :59:Thanks
-
 1
1
-
-
Yes, that would the safest thing to do considering you've bought the wrist strap, but if it turns out you really just can't wait till it arrives, then maybe do a google search to work out safe antistatic procedures without the strap. (I don't have a wrist strap, but do try to follow anti-static procedures that I found on the net).
I never used to use an antistatic wrist strap. That was honestly my paranoid thoughts kicking in, LOL! But thinking about it, it may be safer to wait... Might do some brushing up on my work skills to get my mind off it, lol...

EDIT: Before I forget, BIG thanks to J95 and bikaso for all their help. I just hope and pray that everything fits and works now:04:
-
1
-
-
& J95Haha, yes, don't compromise this time, wait till you get everything in place! Looking forward to hopefully a successful result, or at least offering a few lines of advice if you're having issues!Ok, so I received the 780m yesterday. It seems they did an overnight for me. That's big of them...
 The heatsink, from the tracking information says it will arrive on 11/2/2013, but the anti-static wrist strap supposed to reach on 11/04/2013. :50_002:I guess I'll have to wait till next week to install everything.
-
OK, excellent, sounds like you understand how it all fits together. And I understand what you were saying about the bent heat pipes on your previous heatsink & how that would create problems in everthing lining up properly. From what you've described I've got a feeling that this time around your installation will be pain free & plain sailing, you've got everything lined up & understood right as far as I can see. Let us know how the installation goes, it's always good to see a positive outcome after the issues you've had.
Thank you. Everything will be arriving on different days. I'll be tempted to mix and match parts, but I will keep firm and wait for everything to arrive. I believe that the last thing to reach should be the anti-static wrist band. I wouldn't want to risk anything. I waited so long, I'm sure I can wait a few more days for everything to reach.

I'll post how the installation was, once I get everything. the wait begins....
*FINGERS CROSSED* 
-
Haha, that's very funny, you certainly have a way with the emoticons! I'm glad you've got the Static Wristband & feel more confident with a second run through on the installation. The heatsink issue you bring up sounds a little like a red herring to me though (as in not the reason for you previous issues), you said yourself that you managed to get good temps with your re-paste on your previous heatsink. To me, all the heatsinks for the R3 are pretty much the same in terms of cooling capacity (3 heatpipes), and instead it comes down to thermal pad placement & corresponding GPU die contact to get good temperatures. Although having the the correct X-bracket is important too. My 560M X-bracket works well with the GK104 670MX, so that would work well with the GK104 780M too I think. If you're coming from 6990 AMD then you could do with the correct X-bracket for the 780M I think (I was sure you were on NVidia before the 780M though! Confused - I'll check my posts). Either way, you certainly sound like you're on the right path, especially now you'll have your replacement 780M!
Remember, like I said previously, the heatsink does it's basic functions. That is: transfer heat from the gpu die through the copper pipes to the fin grills, however, the pipes are bent and seeing that everything has to line up perfectly, I didn't get it 100% correctly in-line. A bit of force is still needed to get everything lined in correctly. I would rather NOT go though any forcing again what-so-ever regardless of how much less it is than before.
Though it might not sound so complicated... "lining up the grills with the vent slot and the card with the pci slot simultaneously", BUT!!! take it from me... IT'S A HERCULEAN TASK!
And btw, yea, I had ATI cards before... 6870m and 6990m, I bought the stock M17xR3, late november, 2011 and I upgraded to the 6990m one year later... got it a little cheaper than alienware's price. From what I see, the price of their laptop chassis takes up most of the total price, because the component prices seem subsidized on their site. I mean it like...~$500 for the 780m GTX on the dell site, while it sells for over $750 on eBay.
EDIT: Yep, you'd mentioned you were on the 6990 before (my mistake). The 680M heatsink that you've ordered should work well with the 780M (apart from maybe needing to move around the thermal padding). Which X-bracket are you going to use? (Your 6990 one, or have you ordered one? I think you should use an NVidia X-bracket for best results).I negotiated a price for the upgrade kit. It came with the x-bracked already installed, so all systems should be go. The AMD x-bracket lines up with the holes in the nvidia card, but the bracket itself would fall on the capacitors on the card. AMD and NVIDIA companies make their x-brackets a different sizes and the individual companies design the cards to suit the spaces in the x-bracket to ensure that the bracket doesn't clash with the capacitors on the back of the card.
So although it would "fit" the holes, the capacitors would be crushed between the circuit board and the bracket. AMD heatsinks can work on NVIDIA cards, vice versa, but the thickness of the thermal pads needs to compensate the the gap between the gpu dies and the heatsink. Once this is done, the card would physically work
-
Told ya !..... the brightness screen issue is with the AMD card so it's probably driver related.
I agree. I am using my 6990m and had the settings in the motherboard bios set for receipt of the 780m, except for the audio card disabled. I set everything back however, and enabled the intel HD 3000. With that gpu, the brightness is at 100% that's so odd. :02:I have the 13.9 beta 2 driver atm, but with the 780m GTX, there was no brightness issue what so ever!
I am really anxious to get it installed in my computer. Any idea which driver I can use to fix this problem?Hi, that's great news about you getting a free replacement for your 780M! Let us know how you get on with the replacement when it arrives, do you think you'll be more confident with the install the 2nd time around?About the brightness, I'm not sure what's causing that. You obviously know how to change the brightness level by using the hot keys Fn+F4, Fn+F5, and you can also change brightness in Windows. You could try changing the brightness in Windows by typing 'Windows Mobility Center' into the 'Search Programs & Files' field after clicking on the Start Button. Windows Mobility Center lets you change a load of other stuff too.
On a side note, I spoke to the eBay seller that sold me the defective heatsink. I got him to send me the 680m GTX heatsink at a discounted price minus the initial cost I paid for the other defective heatsink. I REALLY don't want to go through that headache again... really!
Seeing that winter is near, the air's really dry, and static electricity buildup is HAUNTING me, so I ordered an anti-static wristband this time round. NO MISTAKES! This laptop is causing me so much stress and gona give me a nosebleed.

I swapped out my gpu, messed with mobo bios and gpu bios, repaste and repaste, flash this, flash that, backup this, modify that, unscrew this, shim that so many times, I sure I can do it with my eyes closed, lol... jk
I just want it to work 100%, no errors... Battlefield 4 is out and Call of Duty Ghosts is round the corner and I'm still struggling.

At the end of the day, I just HOPE everything turns out ok.
I'm planning to buy and upgrade my Alienware M17xr3 to 560M to 780M. For all the posts I have read is really scary for me because I'm not a tech person. Is it possible for me to do it myself by following instructions?Yes, it is definitely possible. You just need a little patience and if something doesn't work the first time round, don't panic; most likely you overlooked something. The stuff that you have to pay particular attention to is stuff that can potentially brick your components, such as flashing bios, etc. stuff like settings and what not, you don't have to study for like it's an exam, but stuff that needs to be done EXACTLY one way, ie the potentially hazardous stuff if it's done wrong; you have to read up on the recommended procedure and take your time.
Trust me. I've been through hell and back with my laptop. I've upgraded the hard drive to a solid state, DUG deep for ALL the drivers on Dell's site to get it back almost EXACTLY like factory settings, upgraded the wireless, the RAM in 4 slots, upgraded the cpu. Swapped my gpu countless times. LOL, repasted COUNTLESS times... the list goes on. I have yet to upgrade my DVD drive to a blu-ray and I doubt I will swap the motherboard to the R4's.
I feel I will do a review on the alienware laptops, Lol! rugged and solid to last
-
Hi, did you manage to get a replacement or a refund?
- - - Updated - - -
Sure it's possible, but bad things can happen, you just have to read the last few pages of this thread to realise. Have a google around & then see if it's worth the risk for you.
They issued a replacement earlier yesterday. The tech said it worked on their eurocom laptops, but not in their alienware test bed. It's odd. He mailed it today, so i'm expecting it by the end of the week or by next week... HOPEFULLY! Anyways. After all that craziness, I realized that the over all maximum brightness of my laptop screen has reduced. On boot, it's the same, but as soon as the windows log in screen shows, the brightness decreases. In safe mode, its bright. in normal mode, it's diminished. Any advice?
-
Oh well, don't feel too bad about it, it's a learning experience, if you get to install another card in your laptop in the future, or end up doing other DIY electronic stuff, then you will have learnt quite a bit & will be able to do it better next time.
I'm not sure how Eurocom will approach your RMA. If there are obvious signs of damage to the card, those 1mm deep scratches that you said you caused during installation, then I do have a few doubts about whether they will send you a replacement free of charge; but...I could be wrong, afterall the customer is often right, that's just good business! I hope they send you a replacement. Do you think you'll be able to do a better job of the installation if they send you that replacement? What would you do differently second time around do you think?
Not 1mm deep scratch.... About 1mm in length scratch. Like the blue paint in a 1mm line. My previous 6990m has it as well.... I'm still messaging them back and forth. They're waiting till Monday to pick up the pace.
-
i panicked.
 I messaged Eurocom on ebay. I filled out a service request for an RMA.
  I spoke to someone from paypal. My father advised me to open up a case on ebay. i did the everything.
My father advised me to get a refund. So I asked for that, but honestly, I just want my 780m:62:!
-
Ah, ok, so I can visualise the pins you're talking about. So the pins have cut a 1mm deep grove somewhere on the bottom surface of the card while you were installing it one time? 1mm is pretty deep, if that's cut through one of the circuits? I guess it depends where the 1mm deep groove is located, and if there are circuits in the area.
EDIT: when screwing the card down to the motherboard, I don't think that's a particularly sensitive area, so the extra force you used would be OK I imagine, as long as the card was located into the slot properly as you were screwing it down. (Are you using some reasonable quality electronics type screwdrivers, because I've found using those that you don't need to press down as hard to screw it down firmly? These are the ones I use: Hama Mini Screwdriver Kit: Amazon.co.uk: Computers & Accessories
not screwing down the card to the motherboard. i meant screwing down the heatsink to the video card. *SIGH*

i swear this computer will give me a heart attack... i just feeling to run outside in the street and scream at the top of my voice, LOL! wow! right now, im just looking busy in work. i swear i cant think straight
-
EDIT: not sure what you mean by the scrapes on your card, I couldn't picture what you were describing - a photo?
I cant take any images now, but if you remember, when you insert the card at an angle, into the pci slot... ALL the way in the slot. after, you have to rotate the card into place on top of the motherboard right. now, there are 2 pins. one on either side of the gpu. The gpu has slots to accommodate these pins. the pins are meant for keeping the card properly fastened and keeping it inside the pci slot. on hindsight, i remember applying more pressure to the screws when i screwed down the heatsink. I'm in work and all i can do is think about that are the possibilities for solutions or problems i may have done accidentally.
-
Did you run the 10 minute Heaven Benchmark test, this will show you if your temperatures are ok? Then you'll know if you've got a problem that needs addressing.
Well it sounds like you took your time padding up the heatsink, and sounds like you did a good job with that. What a pain you had with the bent heat sink pipes too! When the whole heatsink & card assembly is installed are any of the parts under stress - like maybe you had to force it into place in your laptop to fit due to the bent pipes. If the heatsink is under stress (forced into place) when installed in the laptop is it possible that this stress might be causing a force on the card to lift the heatsink away from the GPU core? That may effect cooling.
Is it worth reusing your X-bracket from your 460M? Is it possible that this matches with your heatsink better, I'm not sure if X-brackets are matched to particular GPUs or particular heatsink designs or both? Is it worth trying your old 460M heatsink? (I'm not sure there's a difference between M17xR3 heatsinks in terms of cooling capacity - mine has 3 heat pipes and that was installed on my 560M). Or maybe it's just not pasted up optimally? If you dissemble your heatsink from your chip you should see the paste evenly distributed over the whole of the GPU core. Also, if the layer of paste on the GPU looks quite thick when removing the heatsink, then it could prove that the heatsink is not sitting close enough to the GPU core (affected by X-bracket). But really, you don't need to do any of this stuff if your temps are ok when checked at 100% GPU usage for an extended period, so check with the Heaven Benchmark & post back with your temperatures, ran on a loop for at least 10 mins.
I had a reallllly long night last night........

I run the test on stock. I was getting 70+C... i went against my better judgement and removed the card to do a repaste. I installed it. green screen flashes... *SIGH* i tried everything. i removed the card and cleaned the inserts and air blown the pci slot... about 5-8 times. i even flashed bios back to stock, then back to svl7. i got it running. I run the benchmark and it was still glitching.
I even run it stock, overclock at stock voltage and over-volt +0.0125mV and overclock... it still glitched with the green lines.... sigh... temps were good however- 70C max on the overvolt and overclock. the others were 60'sC. I pasted it good. the paste job i did before was a mess.....

I turned on hitman absolution. screen went dead!
i force powered off and powered on.... only back light..... not video feed....

I tried re-seating it countless times.. nothing...
I looked at the card and noticed that they were indents in the card where the restraints are to hold the card in place... near the sides.... right in front the PCI slot..... like the holder actually scrapped about a millimeter off the surface of the card... REALLY small!
can this render the card useless???i put back in my 6990m and it worked flawlessly, so i know its the card. SIGH! i don't know what to do...
I couldn't sleep last night.... can you advise anything? sigh! I'm really regretting buying that card now..

EDIT: If it is that the card is really destroyed and 100% non-repairable. I strongly believe that I will give up gaming as a whole....
-
Haha, 1600x900 with a 780M, that will be some awesome framerates you'll see! That's because 1920x1080 screen has 1.4 times more pixels that need rendering in comparison to the 1600x900 screen - your games will fly! I'm pleased I have the lower res screen, for the same reason (even if the quality is not as good as the 1080 screen).
Yes, if your temperatures are really high during the heaven benchmark (at stock settings), then it could well indicate that the pasting & padding of the heatsink may need to be improved. It's important to get the heatsink padded up accurately so that the heatsink is able to sit nice & flat on the GPU core (making good & full contact with it). This was the hardest & most time consuming part of the process for me, to make sure all the pads on the heat sink were in the right place with the right height so that they make contact with all the chips on the card, while still allowing the heatsink to sit flat against the actual GPU core. I think that's the most crucial part of the installation process, alongside making sure that the GPU core is pasted up properly. I used AS5, and the spread method on the GPU core. Did you have the 460M/560M installed before? If so, that's the same heatsink as mine, so I should think that the X-bracket from your 460M/560M combined with your 460M/560M heatsink should work fine for the 780M (after moving the pads around, and adding/subtracting in some areas). I think that because I have the same heatsink & X-bracket, and my GPU core is GK104, which is the same physical chip as the 780M chip, so the physical parameters of the chip should be the same as your 780M in terms of contact height etc. (It's important to use the correct X-bracket, because the height of the posts are different, which helps determine the contact point of the heatsink to the GPU core. (So, I think you'd be OK in terms of that coming from a 460M, based on my experience with that particular setup).
Yea, I intentionally got the 1600x900 screen for that reason. I had the 6990m before, lol. Check my sig. I got the x-bracket with the card and I also had a big sheet of fuji poly thermal pad/ putty that I used on my 6990m. I had some remaining so I used those to pad my 780m.
I spent a LOOONG while cutting and matching the pads over the chips and letting everything line up with the heatsink. I also got a 2nd hand 100 watt heatsink on eBay. Took me hours to install, because the pipes were slightly bent. I was never so stressed out in my life! Imagine that the card was lining up with the PCI slot and because the pipe is bent, the grills were not lining up with the vent slot in the laptop chassis. vice versa. OMG! i literally had to screw up, test, unscrew, massage the pipes approximately into place, screw up, test, unscrew play with the pipes................. about 10 times!!! *SIGH*
when i screwed up, to know if the pads sit flush with the chips and the back plate for the heatsink; they stuck to the plate. If they didnt stick, i knew it was too thin and added more to suit. Then took them off the heatsink back plate and put the back on the card and screwed back up and if they stuck when i pulled off the heatsink, i knew it lined up. I did this over and over and over and over till ALL the pads stuck to the back plate EXACTLY. After all this testing and matching headache, I realised that it wasnt fitting in my computer because of the bent pipe. OMG!!!!! THAT WAS A LOOOOONG NIGHT!
If i have to take out the gpu again to repaste I will, once i ABSOLUTELY have to. However, I really am not looking forward to it.....
-
Here's a good quality link for download of Heaven Benchmark:
Unigine Heaven Benchmark 4.0 Windows Download
I ran it at Quality Ultra, Tessellation Maximum, no Anti-aliasing, resolution set to my native screen size (yours probably 1920x1080).
Well, my temperatures should be a bit lower than yours because your 780M has a higher TDP (Watts) than my 670MX, at least when comparing stock settings - your card consumes a lot more Watts/more power. If you've got a Watt Meter you could plug it into your electical outlet so you could measure your overall system Watt consumption and compare that to mine to get a better comparison, although your CPU would use more power too, but it would give you an idea. As I mentioned in one of my posts a few days ago, the quality of the paste job on the GPU can make a big difference, if not done right then you can see large increases in temperature. If yours is getting really hot, then that could be the cause; I know j95 has showed you the c-clip mod, but it's probably easier & safer to make sure you've got a good basic paste job first, at which point you may not even need the c-clip mod which carries those extra risks.
EDIT: I don't think Hitman Absolution is a particularly good benchmark for testing max GPU temperature, because when I've run the Hitman Benchmark GPU usage never remained stable at 100%, there's quite a bit of CPU or platform limited behaviour in that one so GPU is not always at 100% usage, whereas the Heaven Benchmark keeps your GPU at 100% constant GPU usage (resulting in near worst case temperature scenarios while gaming). What's the maximum temperature you get during a 10 minute Heaven Benchmark run? (You can just let that benchmark run on a loop forever until you click on the Quit button, so useful for stability testing).
Thank you, I will download it later when I get home from work. I am really not looking forward to removing my gpu again tho. However, if I have to, I will. =(
P.S. My screen resolution is 1600 x 900
-
Hi, here are my maximum GPU temperatures (670MX) while running 10mins of Heaven Benchmark (room temp = 20 degC, standard laptop automatic fan control (no HWInfo), Zalman NC2000 laptop cooler fans on max):
Stock: 0.925V 600Mhz core / 700Mhz memory = 56 degC (overall system Watt Consumption: 95W)
Overvolt #1: 0.975V, 1006Mhz core / 1100Mhz memory = 63 degC (overall system Watt Consumption: 125W)
Overvolt #2: 1.05V, 1124Mhz core / 1100Mhz memory = 66 degC (overall system Watt Consumption: 145W)
Laptop GPU fans only sped up to max rpm during periods of time during 'Overvolt #2'. (65degC is when max GPU fan RPM automatically kicks in)
WOW! how is it that the temps are so low? I really doubt that hitman absolution is that graphics intensive... I'm running it on ultra. Where can I get this Heaven Benchmark program?
Retention mod (c-clips removed) very careful when screwing, don't add unnecessary pressure...you can break the die.I left the c-clips in. I haven't removed them yet. I just applied more pressure to it as it currently is, because i remember that i intentionally left them "hand-tight". Taking the c-clip retention into account, threw my paranoia out the window and decided to screw it up tight and let the c-clips do it's job.
-
@Robbo and J95, Would you all mind sharing with me the max temperatures your 670XM and 780M both get at stock voltage and overvolted? I play hitman absolution, and I noticed that with the autofan option, I get about 65-70C at stock voltage and default clocks, 70-75C stock voltage @ 985/3000 MHz and 75-80-ish (+/- about 2C) at overvolt 12.5 mV @ 1007/3000 MHz...
I also screwed my CPU heatsink tighter after reading the link J95 posted above. Previously, I remembered not putting a lot of torque on the screws as I tightened them after pasting the CPU. I noticed better temperatures on the CPU while playing Hitman. I only played a little while, so I have yet to see the temps with CPU intensive games.
-
@link3rd A laptop cooler will improve temps 2-3C optimistic, vents intake distance 5cm - exhaust 20cm, we're talking about 100W cards and extreme processors so start with this CPU/GPU http://forum.techinferno.com/alienware-m17x-aw-17/24-m17x-retention-mod.html careful not to add too much pressure, use IC Diamond or Gelid Extreme thermal compounds. HWiNFO fan control will keep the laptop cooler, @Robbo default CPU tables/full blast 85C not constant - 90C, the R3 has a good cooling system but many times not well implemented thanks to 'users' loud noise levels complaints
M17xR3 GPU/CPU/PCH modded heatsinks, Gelid extreme/Fujipoly EXTREME Thermal pads, HWiNFO fan control, CPU temps probably a record for the R3, GPU all models so far...

OC 1097/6180 OV 1.075v, 4.4 GHz NVIDIA GeForce GTX 780M video card benchmark result - Intel Core i7-2960XM Processor,Alienware M17xR3
Very interesting link... =)
EDIT: Come to think of it, I remember that whenever I screwed on my CPU heat sink, it wasn't tight at all. It was due to those clips. I feel I'll try that mod in the VERY near future....
-
I don't think there's much difference in performance between pastes, maybe 5 degC max between best & worst, but that's assuming they're applied correctly & accurately. Sometimes it can be difficult to apply them properly, especially with low pressure heatsinks (like we have), then it's easier to do it properly with a softer paste. With our intel CPU on the M17xR3 I've tried the spread method & the line method with AS5, and both work about the same it seems - Arctic claim that you should use the spread method on mobile CPU's. I wouldn't bother using the IC Diamond, I heard it can scratch your chip & heatsink due to the hardness of the particles, which over time if you reapply a number of times, then I guess that could reduce the performance due to the surface imperfections. IC Diamond might give you 1 or 2 degC better than AS5 if both are applied properly.
You could test if your cooling system is working properly. Like this perhaps:
1) Run Prime95 for 5 mins, while looking in Throttlestop window to see what the clocks & Watt consumption of the CPU is. Note the highest temperature in Throttlestop window.
2) If your temperatures are over 84 degC by a significant amount and your Watt consumption on the CPU was less than 54W during the test, then you know the cooling system is not working as efficiently as mine. (Assuming your room temperature is similar). If it's not working as efficiently, then you could consider a repaste. Sound good?
EDIT: cure time changes with AS5 I've not noticed any significant difference, no lowering of temperatures over 200hours for me.
I was thinking of purchasing a cooling pad, do you think that it will help? I just have my laptop on a book to keep the bottom vents a little elevated. I noticed that in your sig, you have a "Zalman NC2000 notebook cooler". I checked up the reviews from the people who purchased it from amazon and most of them seemed quite pleased with it's performance. How will you rate it with regards to cooling?
M17x R3 GPU upgrade to gtx 780m
in Alienware M17x / AW 17
Posted
Ok. Soooo I downloaded cod ghosts mp right. I was getting 90fps on normal clocks. Nice... However, the fps was dipping ALOT! What did I do? I overclocked it to the max at the stock vbios. Crashing due to low voltage. "Instinctively and subconsciously", lol... I flashed it with svl7's vbios in order to get stable clocks at the overclock with raised voltage... Same thing... Conclusion:- cod ghosts needs a patch ASAP!
Idle temps are 54-56C with no hwinfo... Stock overclock:- High 60's
cod ghosts temps with +25mV +157/500Mhz & hwinfo:- high 50's- low 60's... Conclusion overclock is not needed and a patch is needed ASAP!
You think I should load back the factory bios? Or u think I could leave in the modded bios in and just don't overvolt as intended? I think the latter of the two is better. Bf4 runs nice on stock clocks... Ultra and high setting... High 60's temps... I overclock with stock voltage to avoid the dipping in frames. It helps a little... Hwinfo keeps the temps in the 60's... Anyone else tried those games? I don't wana do any bench marks tho. I'll just be the ignorant gamer, lol
Recommendations anyone?