


shikyo
-
Posts
16 -
Joined
-
Last visited
Content Type
Profiles
Forums
Downloads
Posts posted by shikyo
-
-
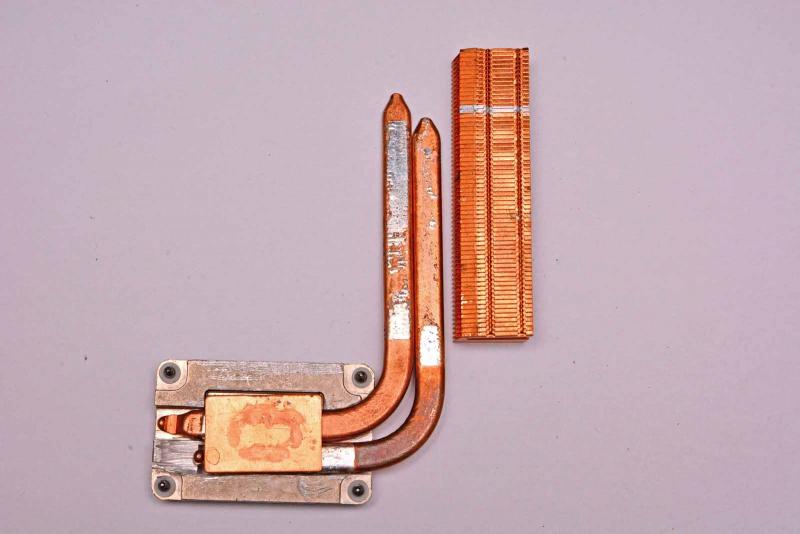
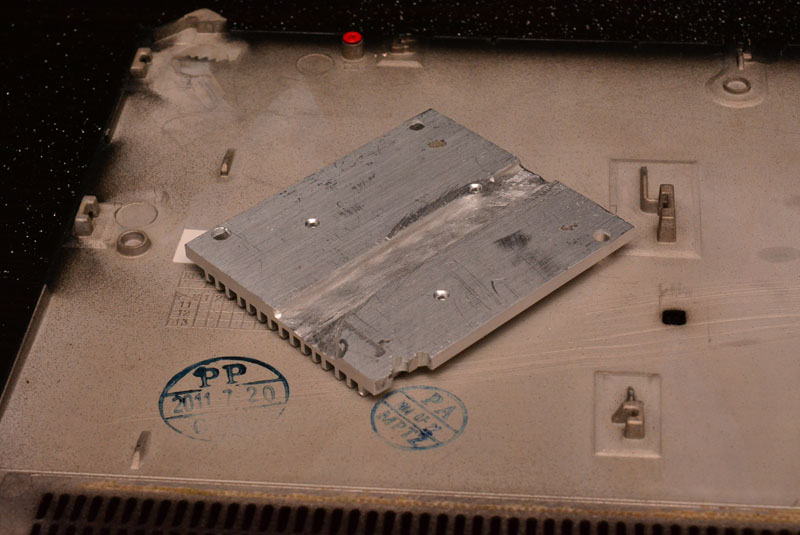
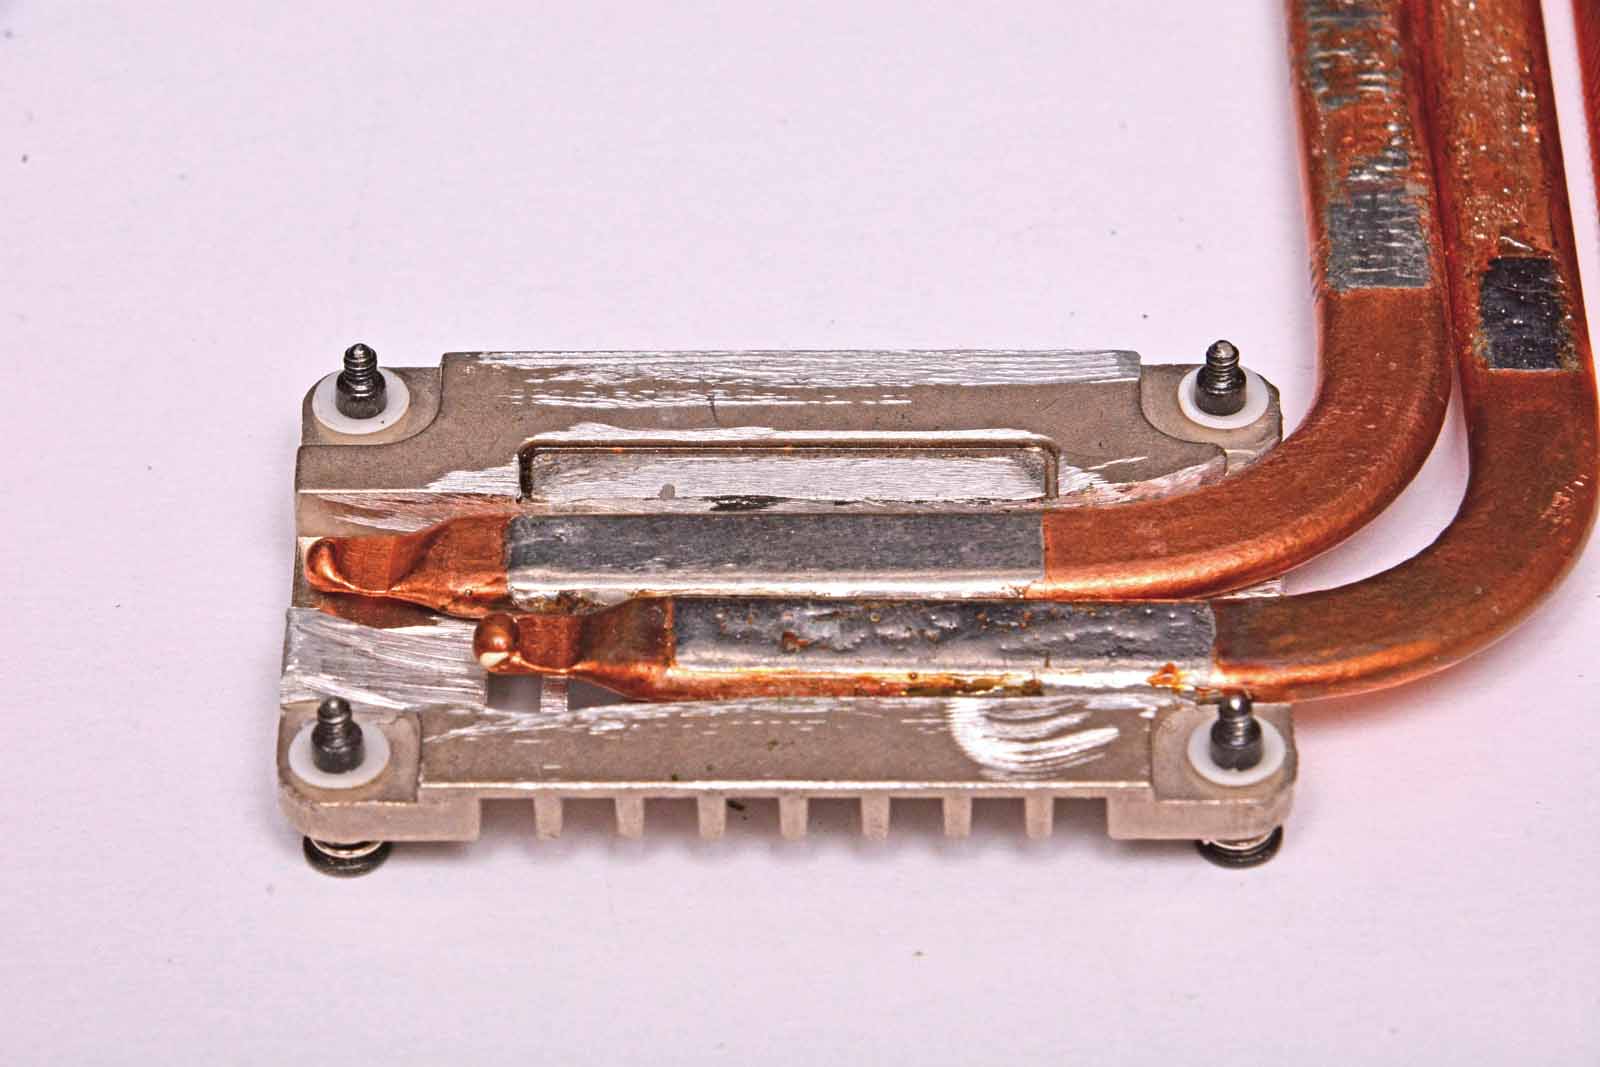
Hey everybody, I know it's been a while since my last update on the cooling solution, but Harvey hit us hard and just got everything back together so I'll toss up some updates. Well here is where I am on the second attempt of a prototype cooling solution.
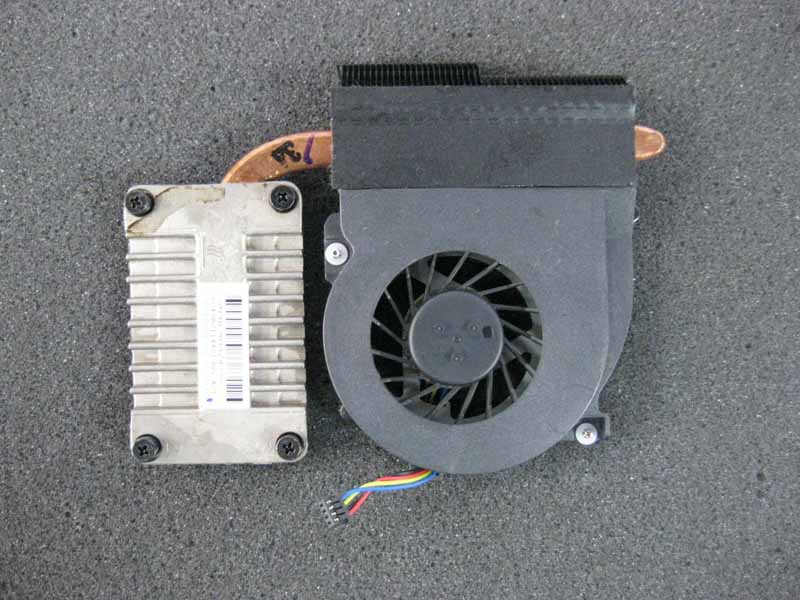
Basically it's keeping, re-using and modifying the aluminum heat sink because the copper one i had before was just retaining too much heat. I found the aluminum may heat up faster, but it doesn't retain much of the heat as it's going to be getting hopefully sent through now 2 heat pipes and to the copper radiator replacing the aluminum one. I still have to order the pyrolytic graphite to help move the heat off the heat sink and over to the pipes and radiator. And lastly the silver solder to join everything together. There is plenty on the parts, but i just want to make sure then is a good bond. I'm also making a good seal from fan to radiator with extra thermal tape for no leaks.
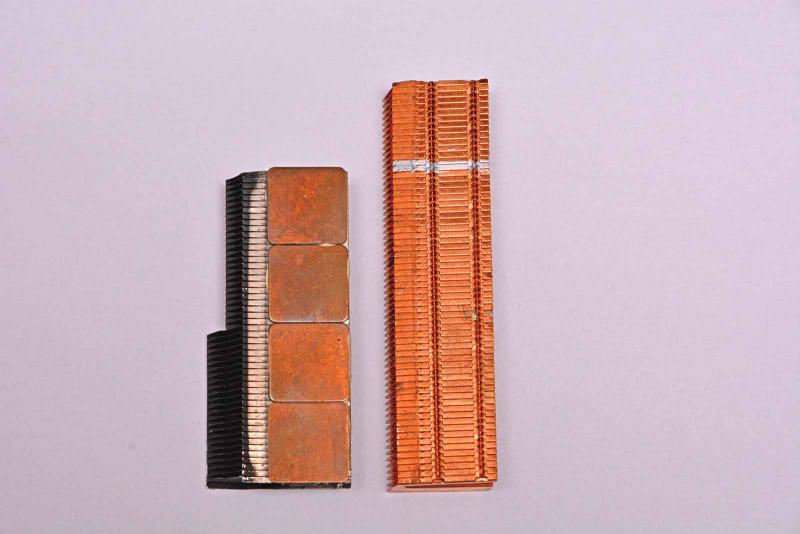
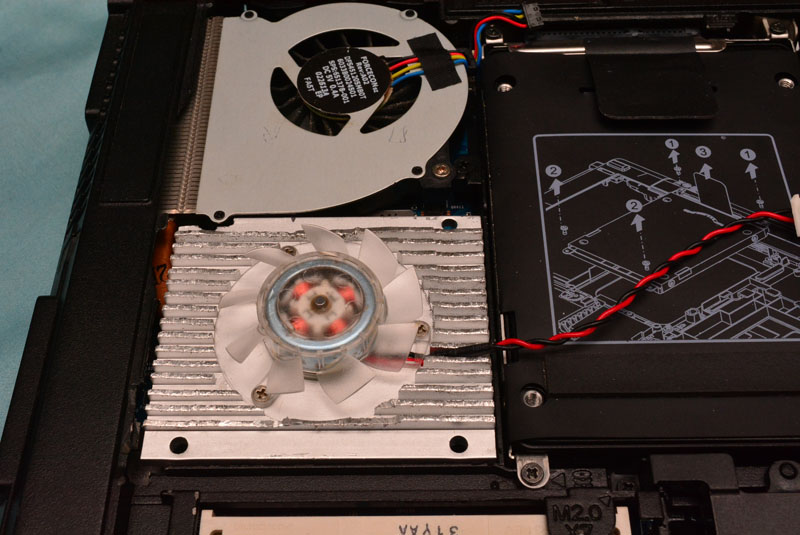
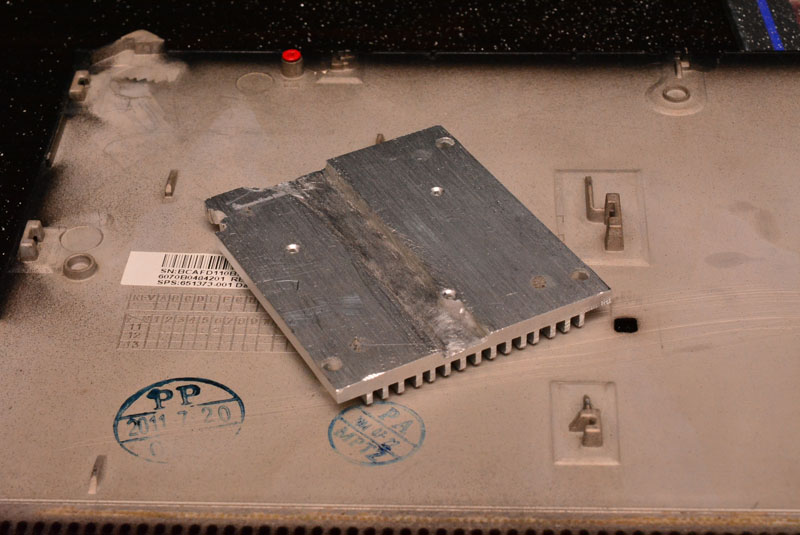
As you can see I found a whole new cooling system from another laptop and am going to be using the radiator off it, I marked it where I will be making my cut and it worked and i test fit it and the width, height and length is just right. Only issue is I need to shape it like the stock one to avoid that dumb port on the side i'll never use by the vents. Any ideas on how to cut super thin radiator copper lol? I grinded down the heat sink plate to accommodate 2 pipes and those will slide right into the new radiator hopefully taking more heat off the cpu and to the cooling area. I still have the cut out under the stock fan and in the future might try to work in another fan over the heatsink, like a 3 or 5mm one.


-
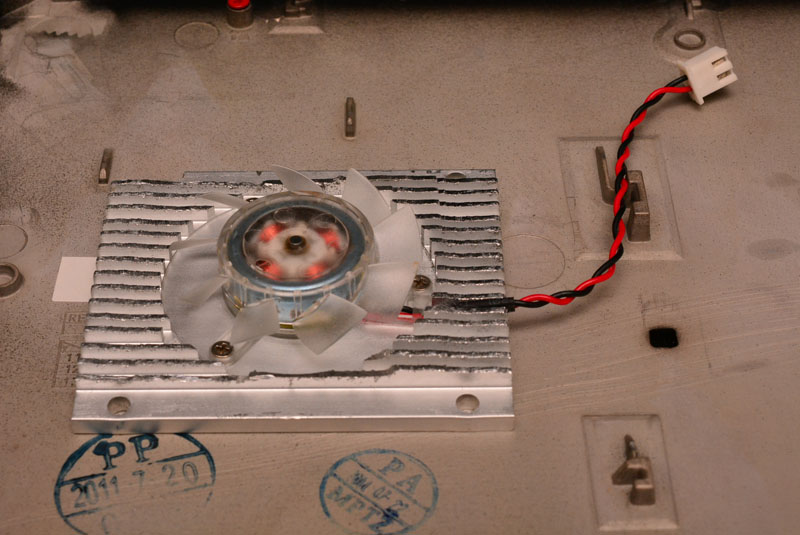
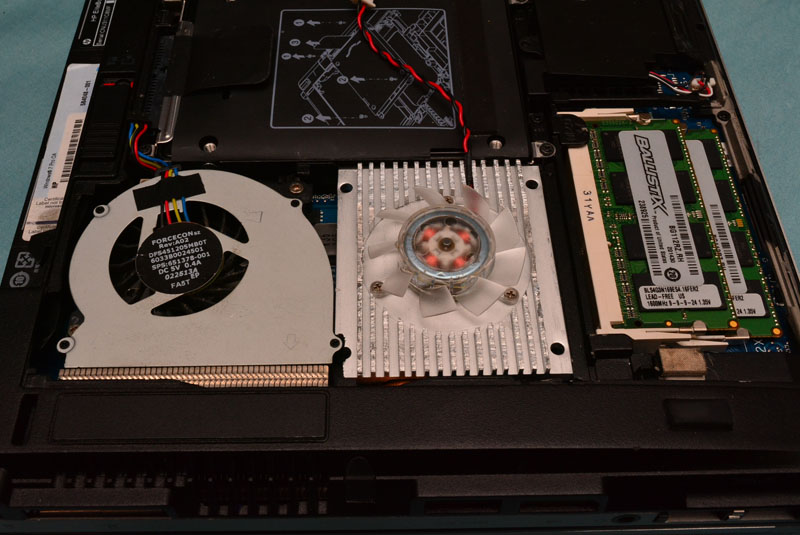
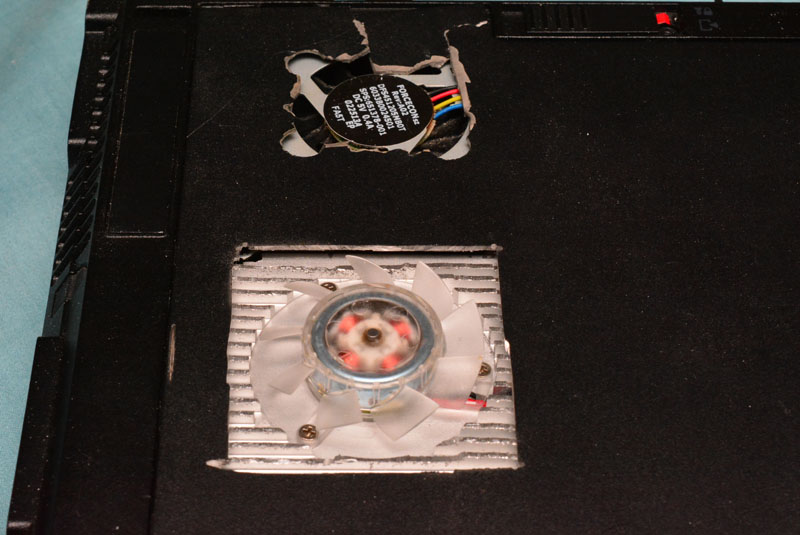
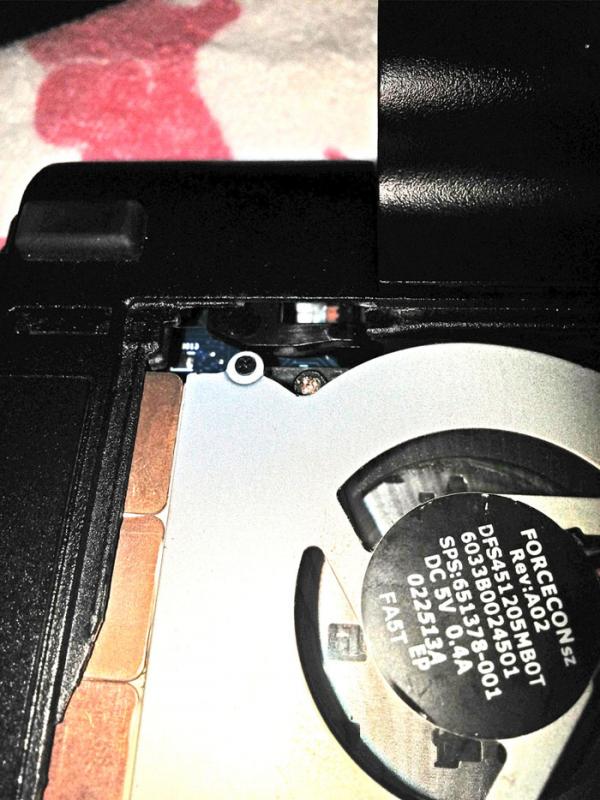
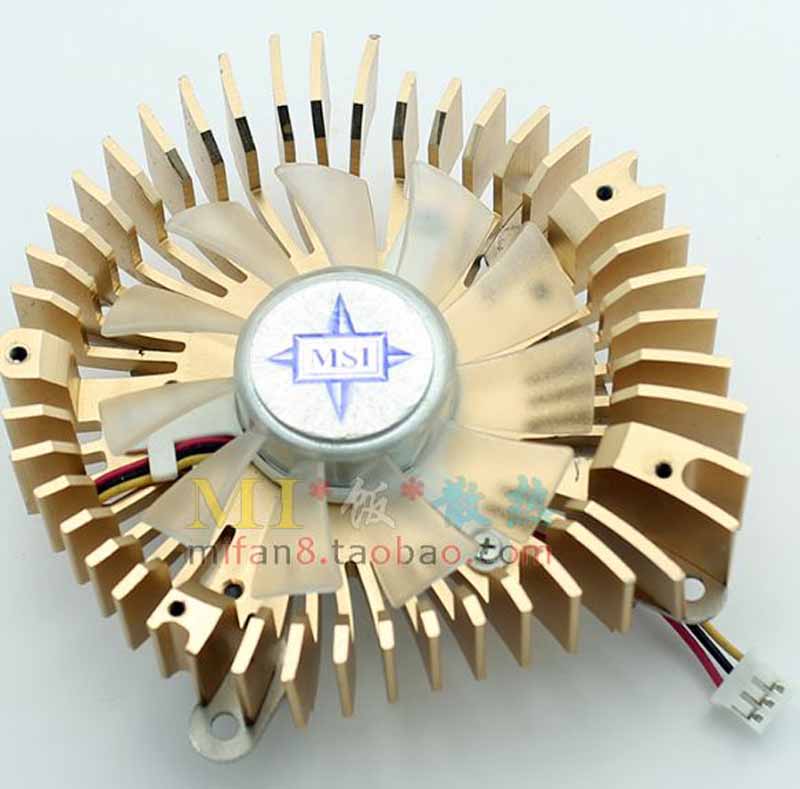
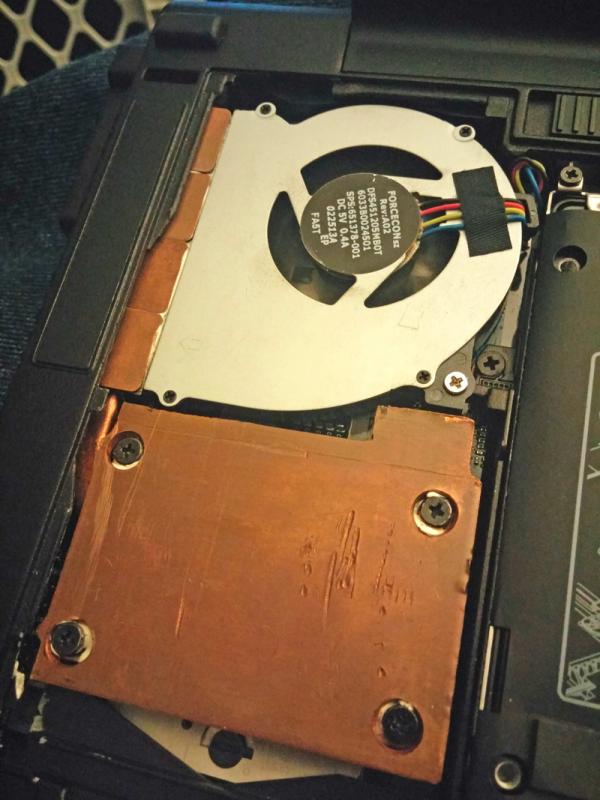
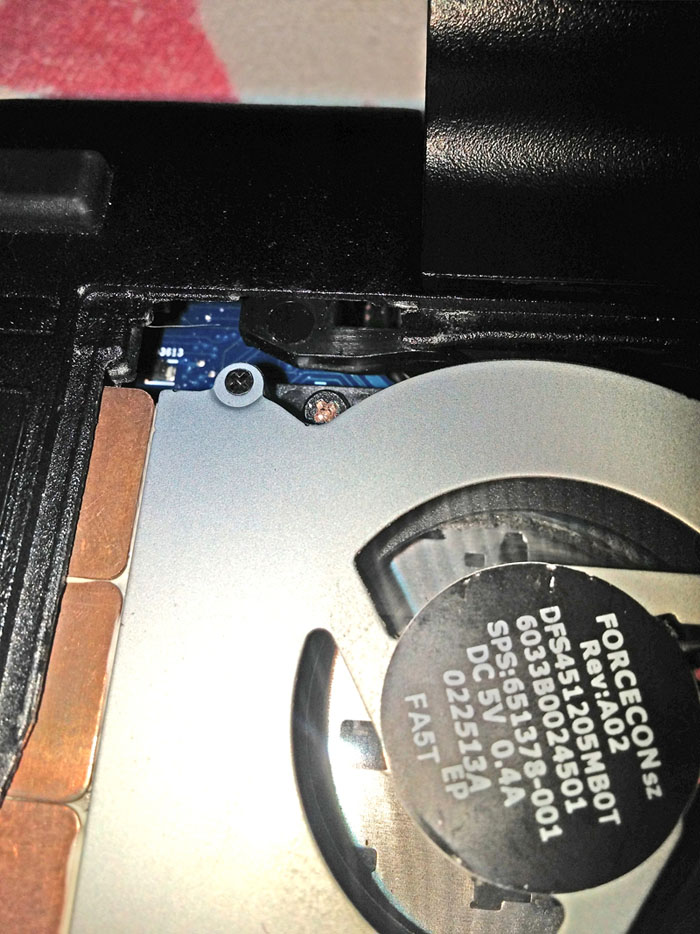
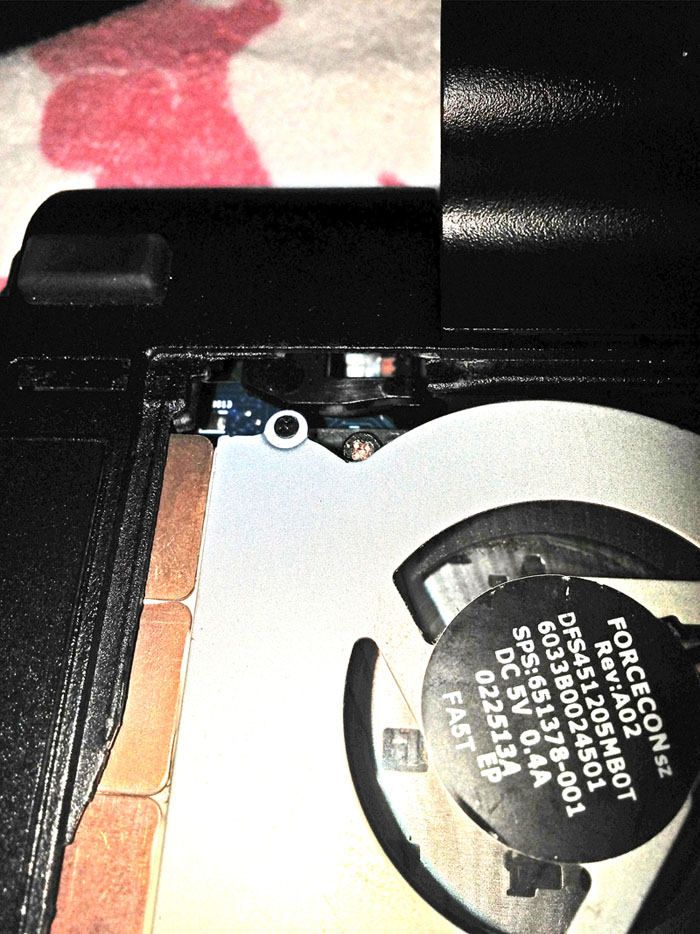
This is with the fan attached and a few test fits. At first glance it fits well and the lid goes on easy cause the cutout is wide enough. It would then need some screen to cover the whole, no problem.
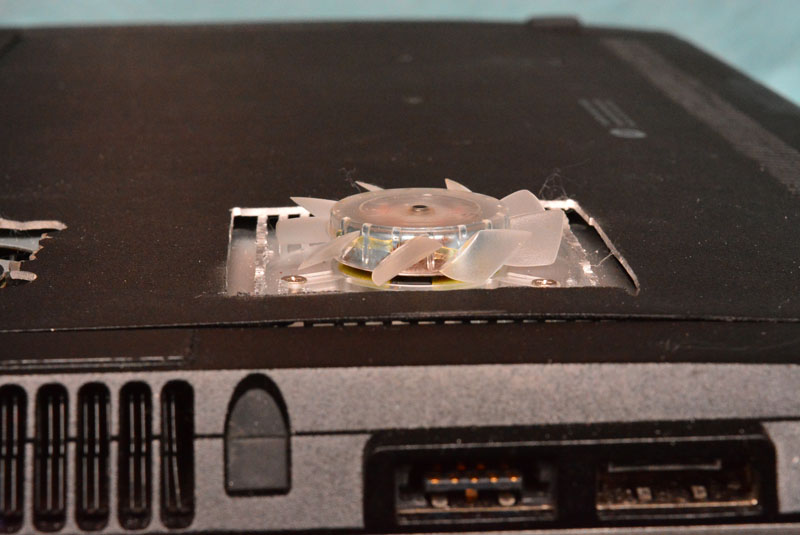
Then if you check the last picture, you will see what happened. This particular "Coolermaster" mini fan is too tall, the MSI one won't be here for another couple weeks, issues from china sending the wrong one.
Unless I add really tall rubber legs and build a cage around the fan, I think it sticks out too far clearly.
So I have 3 more versions to try, I'll keep you posted.
-
 2
2
-
-
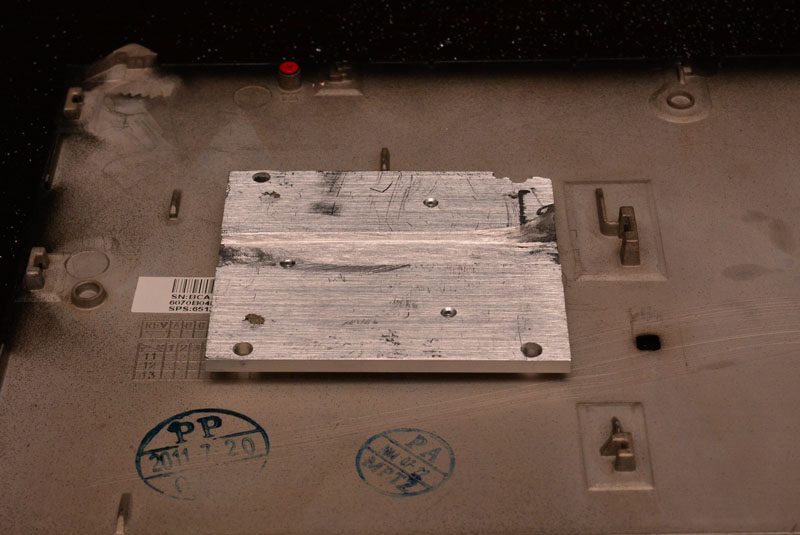
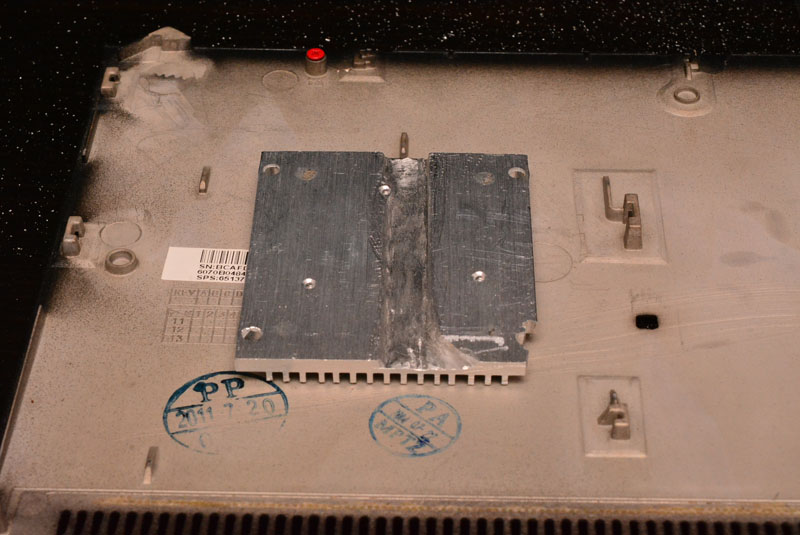
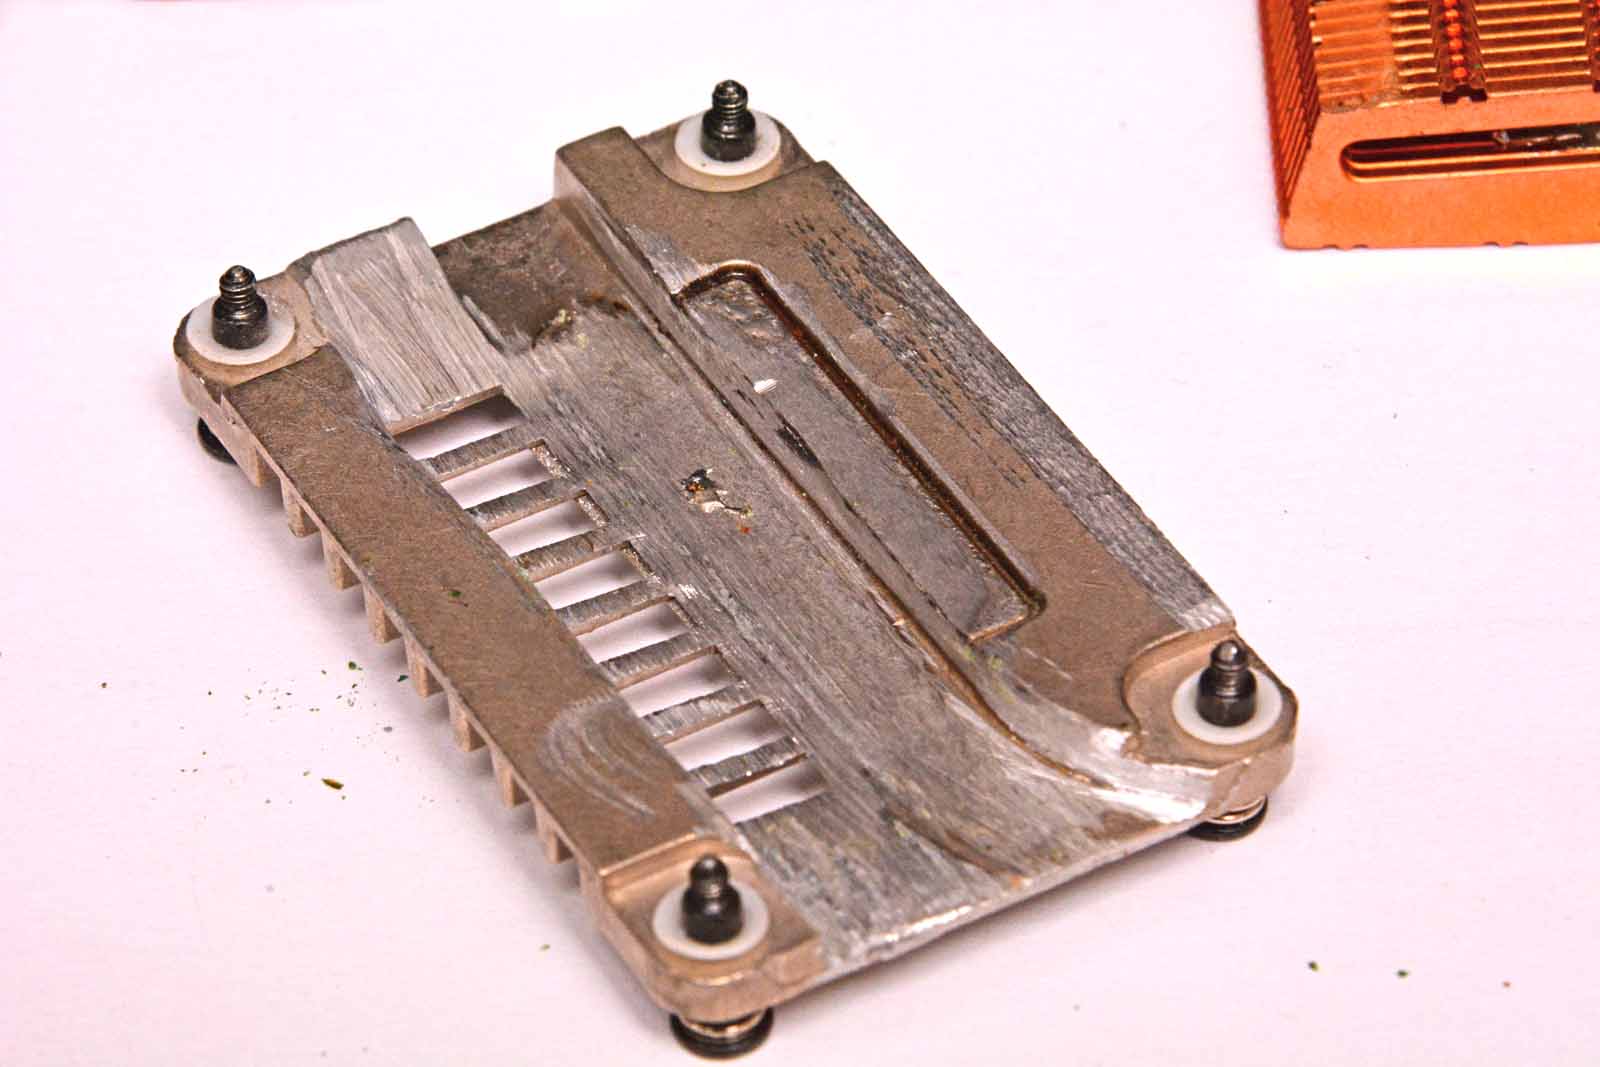
update on a prototype heatsink version 1:
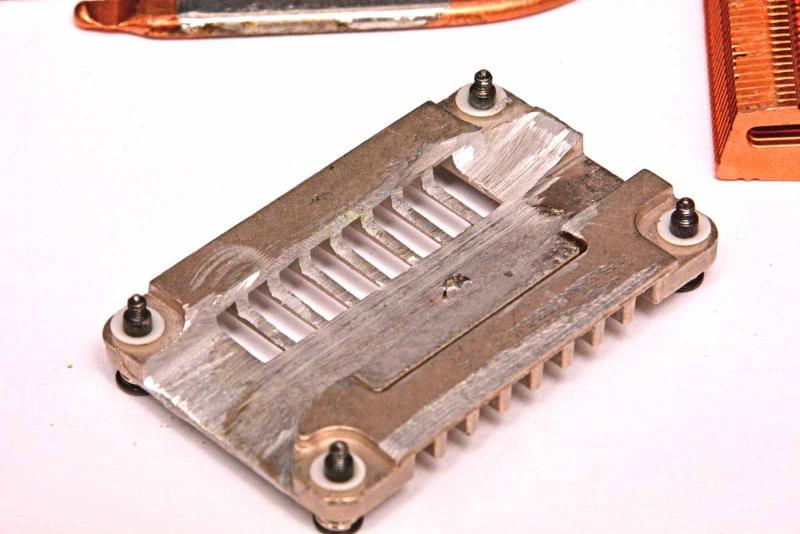
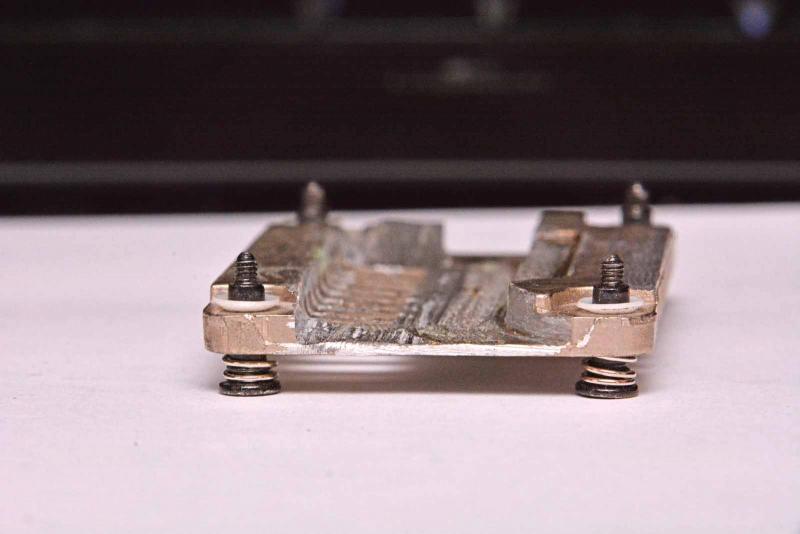
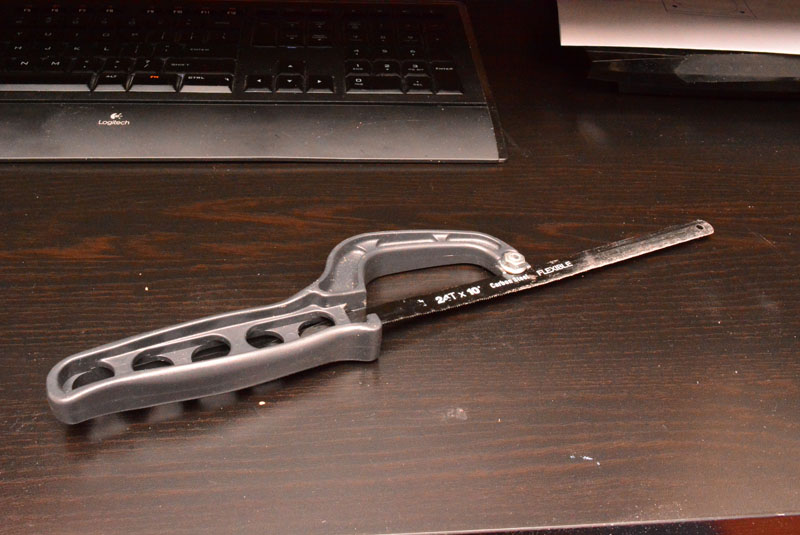
I have no access to any real tools of any kind which makes all this very difficult.
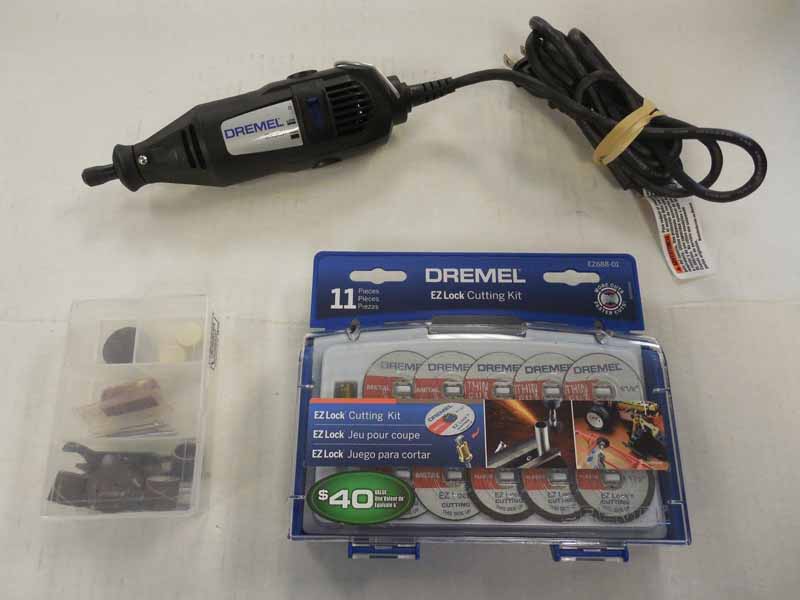
I had to hold this by hand and saw down the fins which takes an eternity and is not very straight. You can see the saw below, small and flimsy. A band saw would be quick and straight.
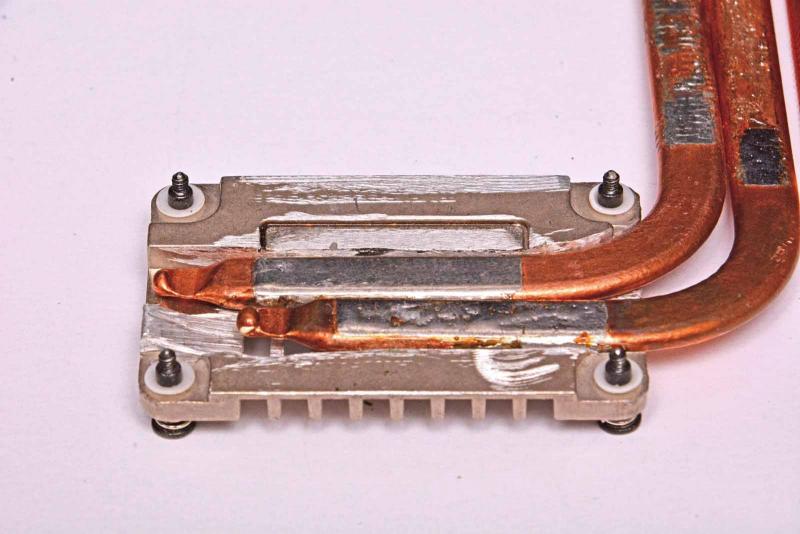
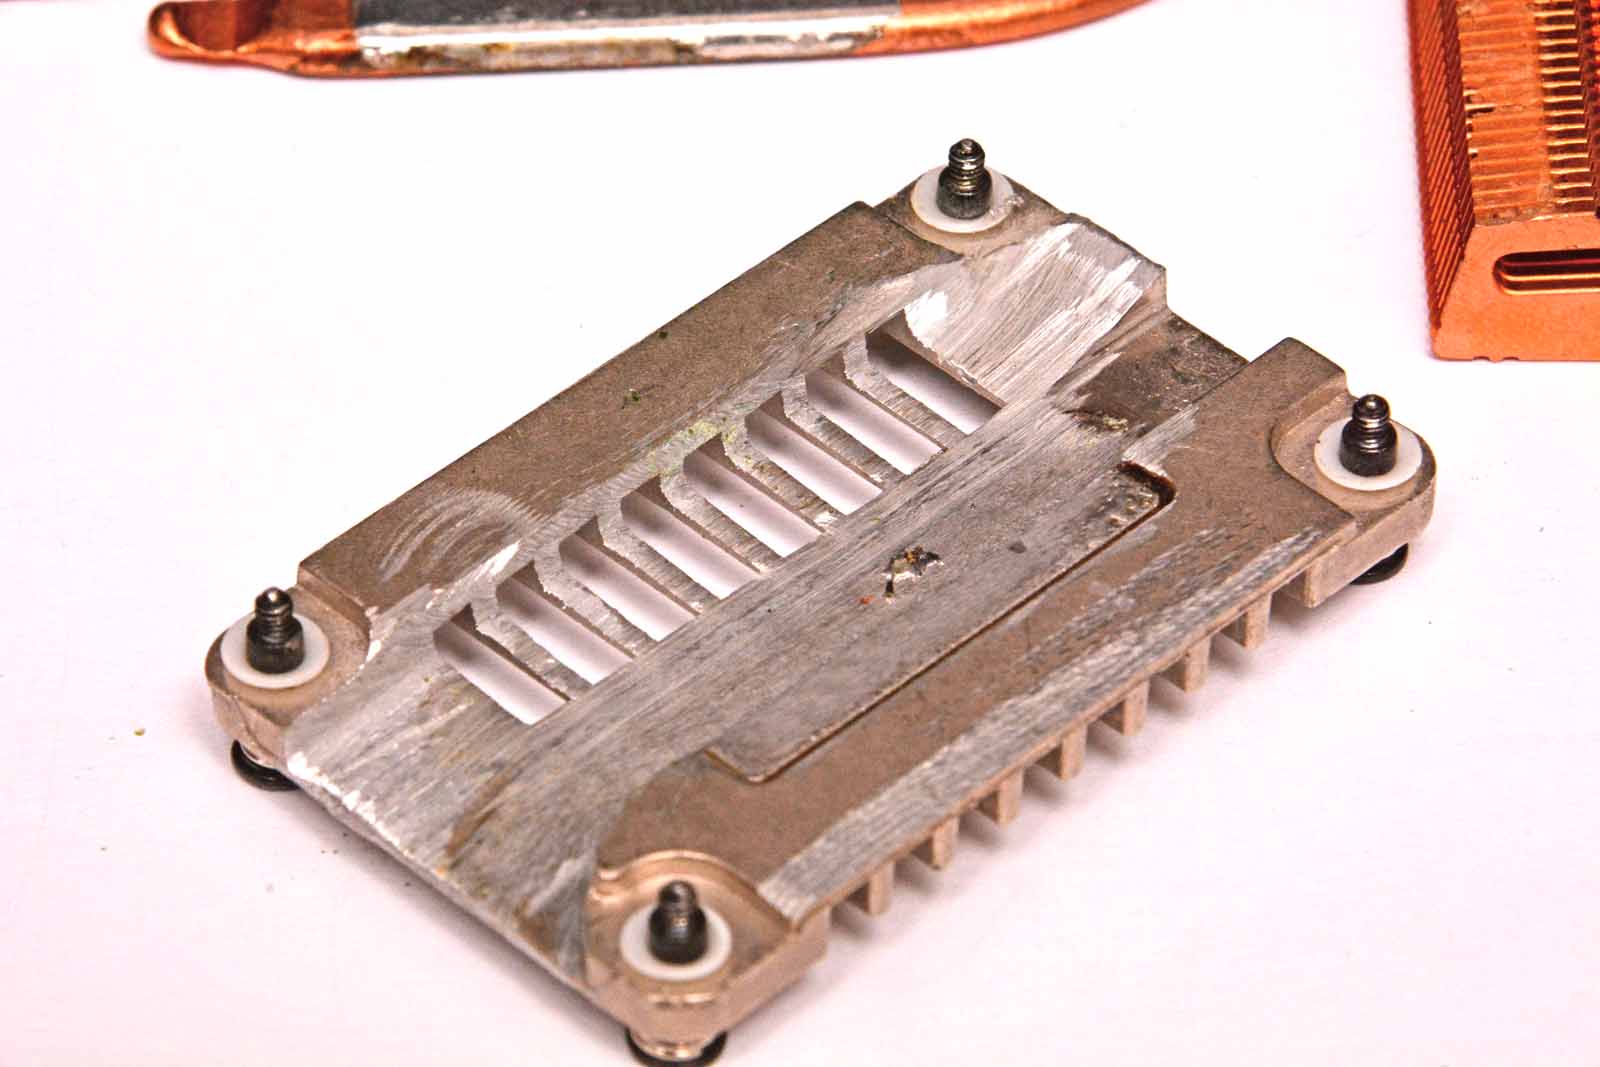
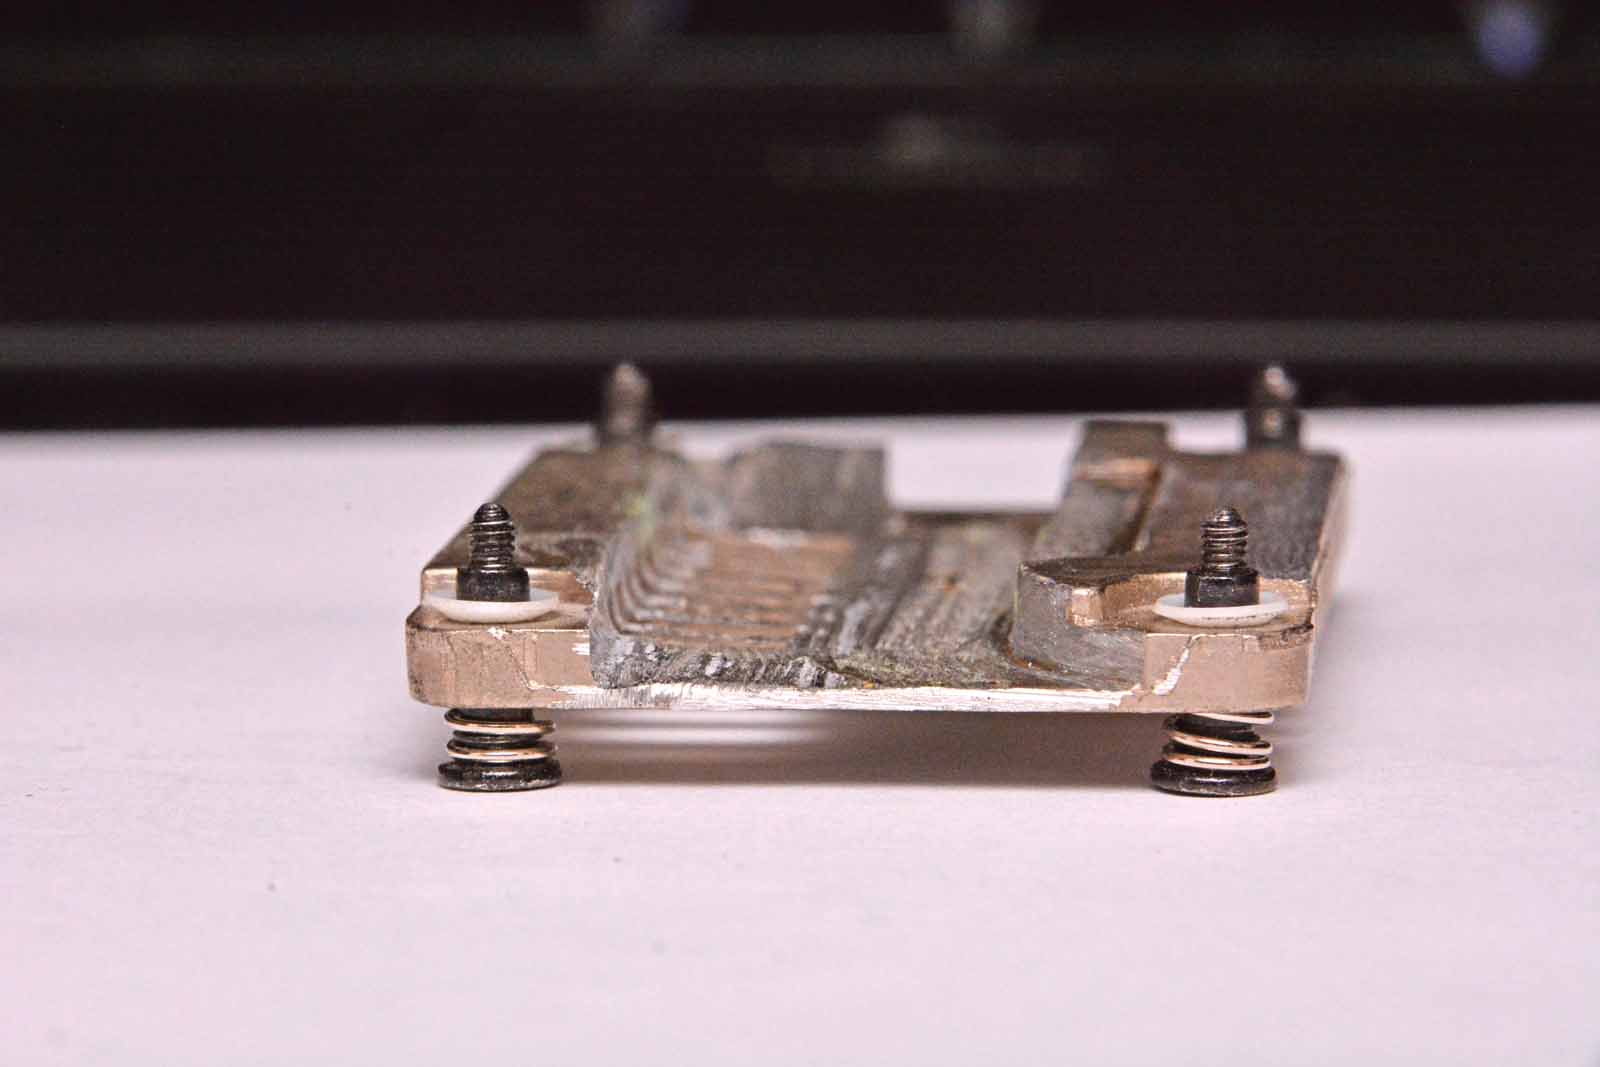
So I took the saw to the bottom of the heatsink to make way for the copper pipe and used the dremel to flatten it out. Very long process as it gets hot quick.
All this was done on aluminum for the first run but i do have a nice copper one that will be the final design. I went this route because the fan attaches on the topside on this one.

-
2
-
-
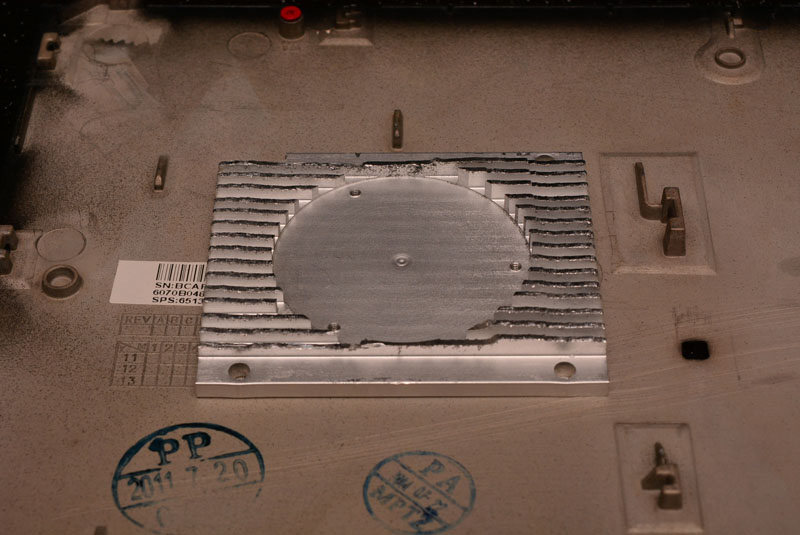
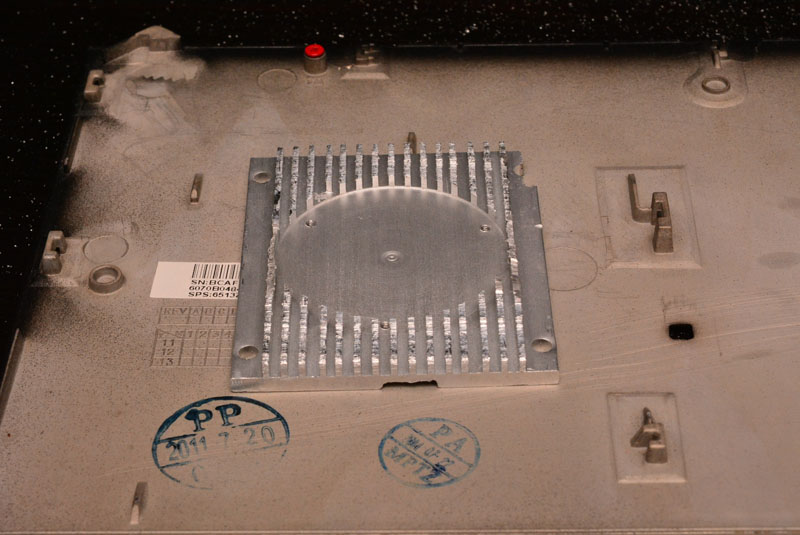
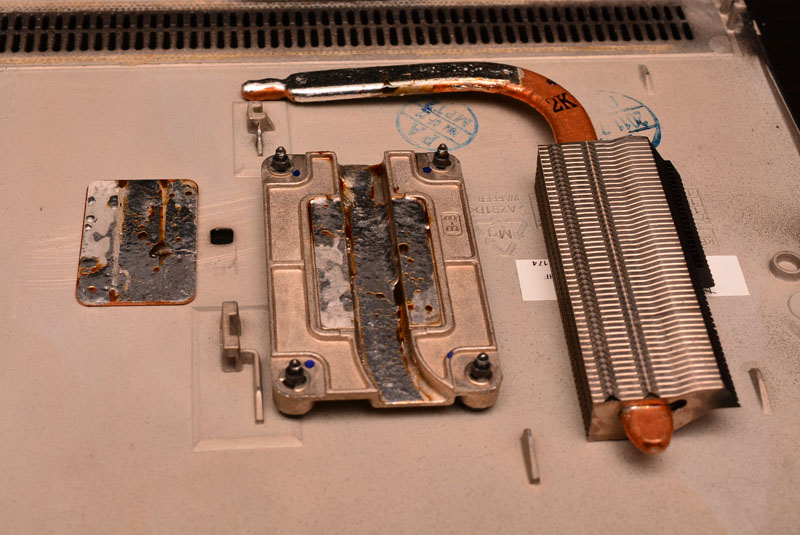
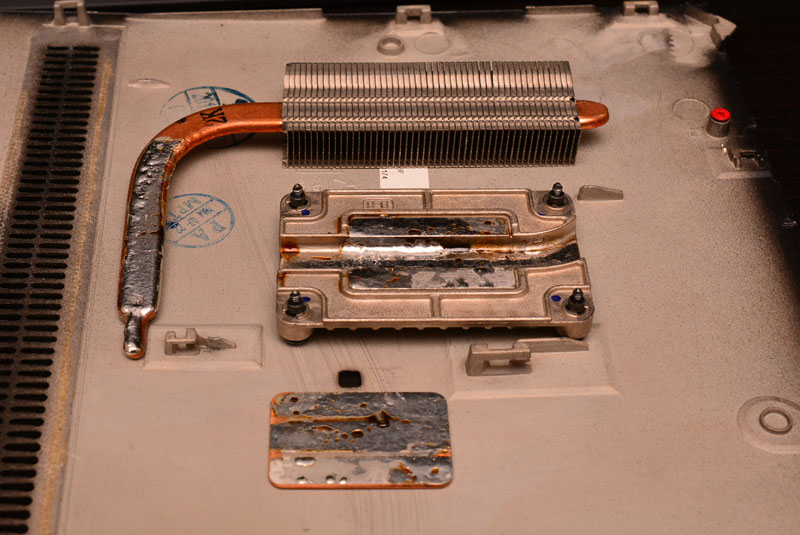
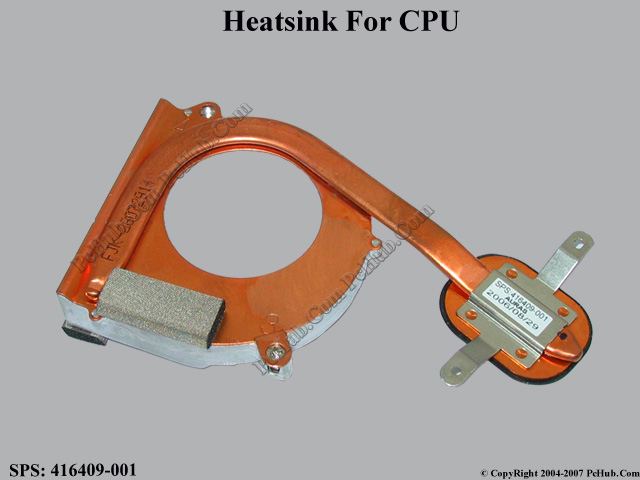
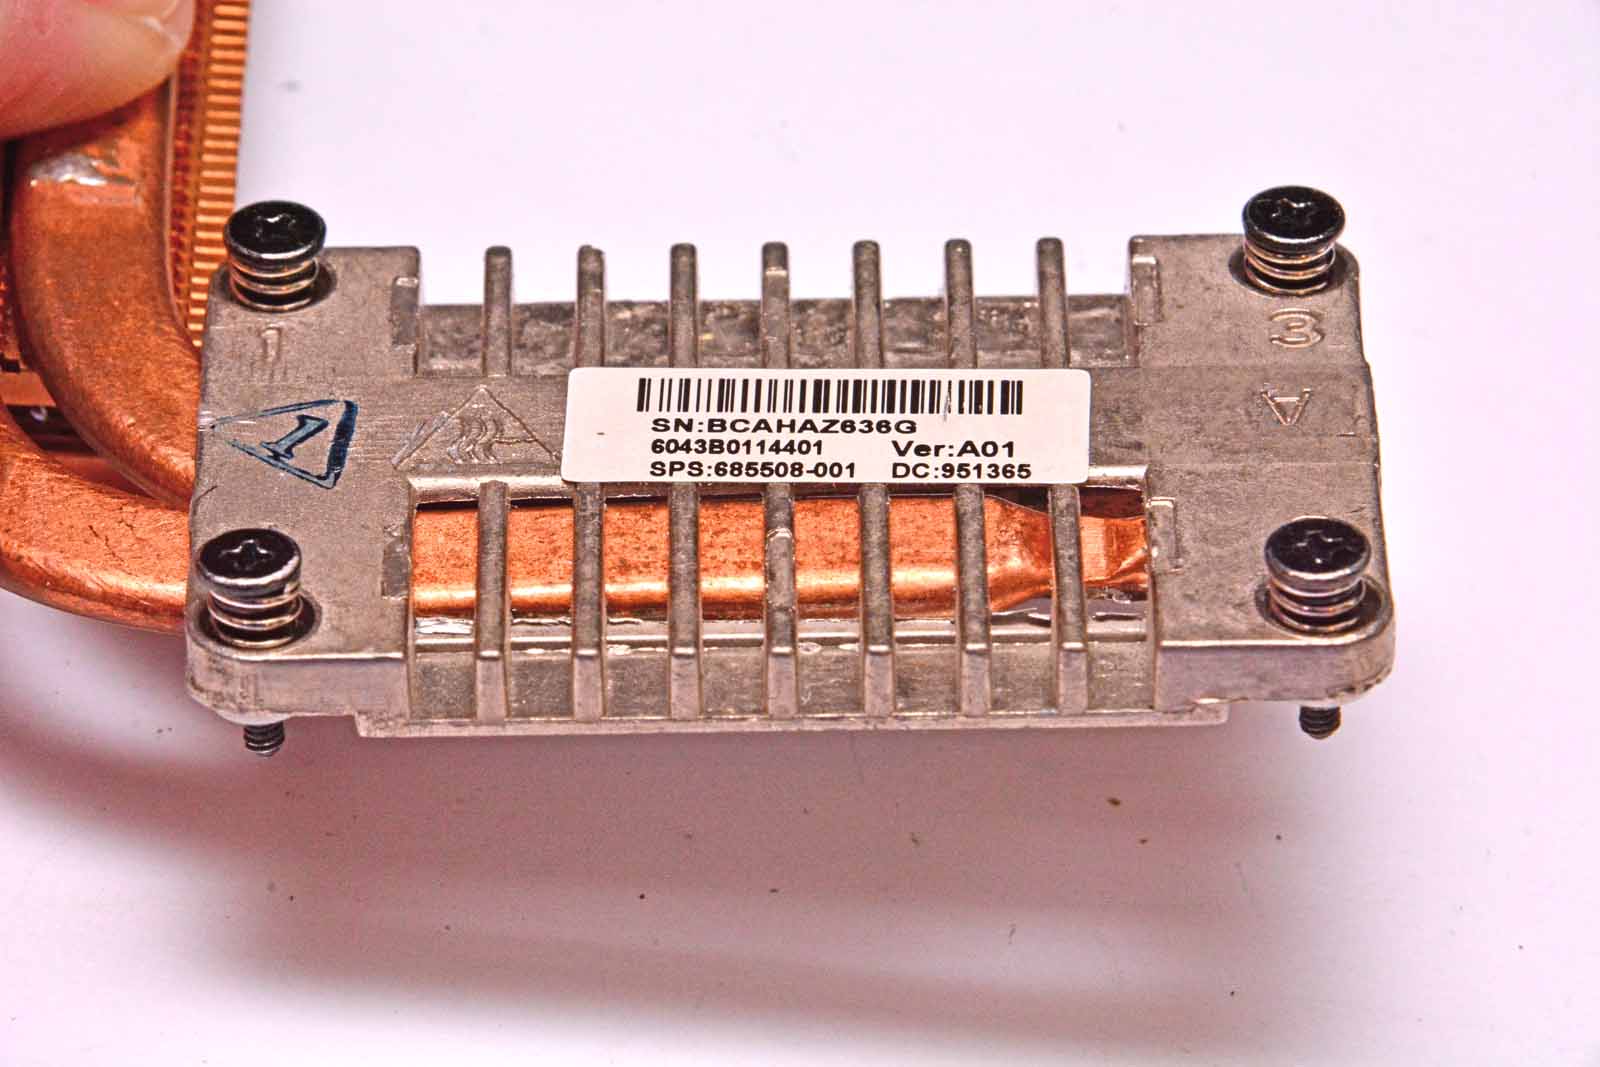
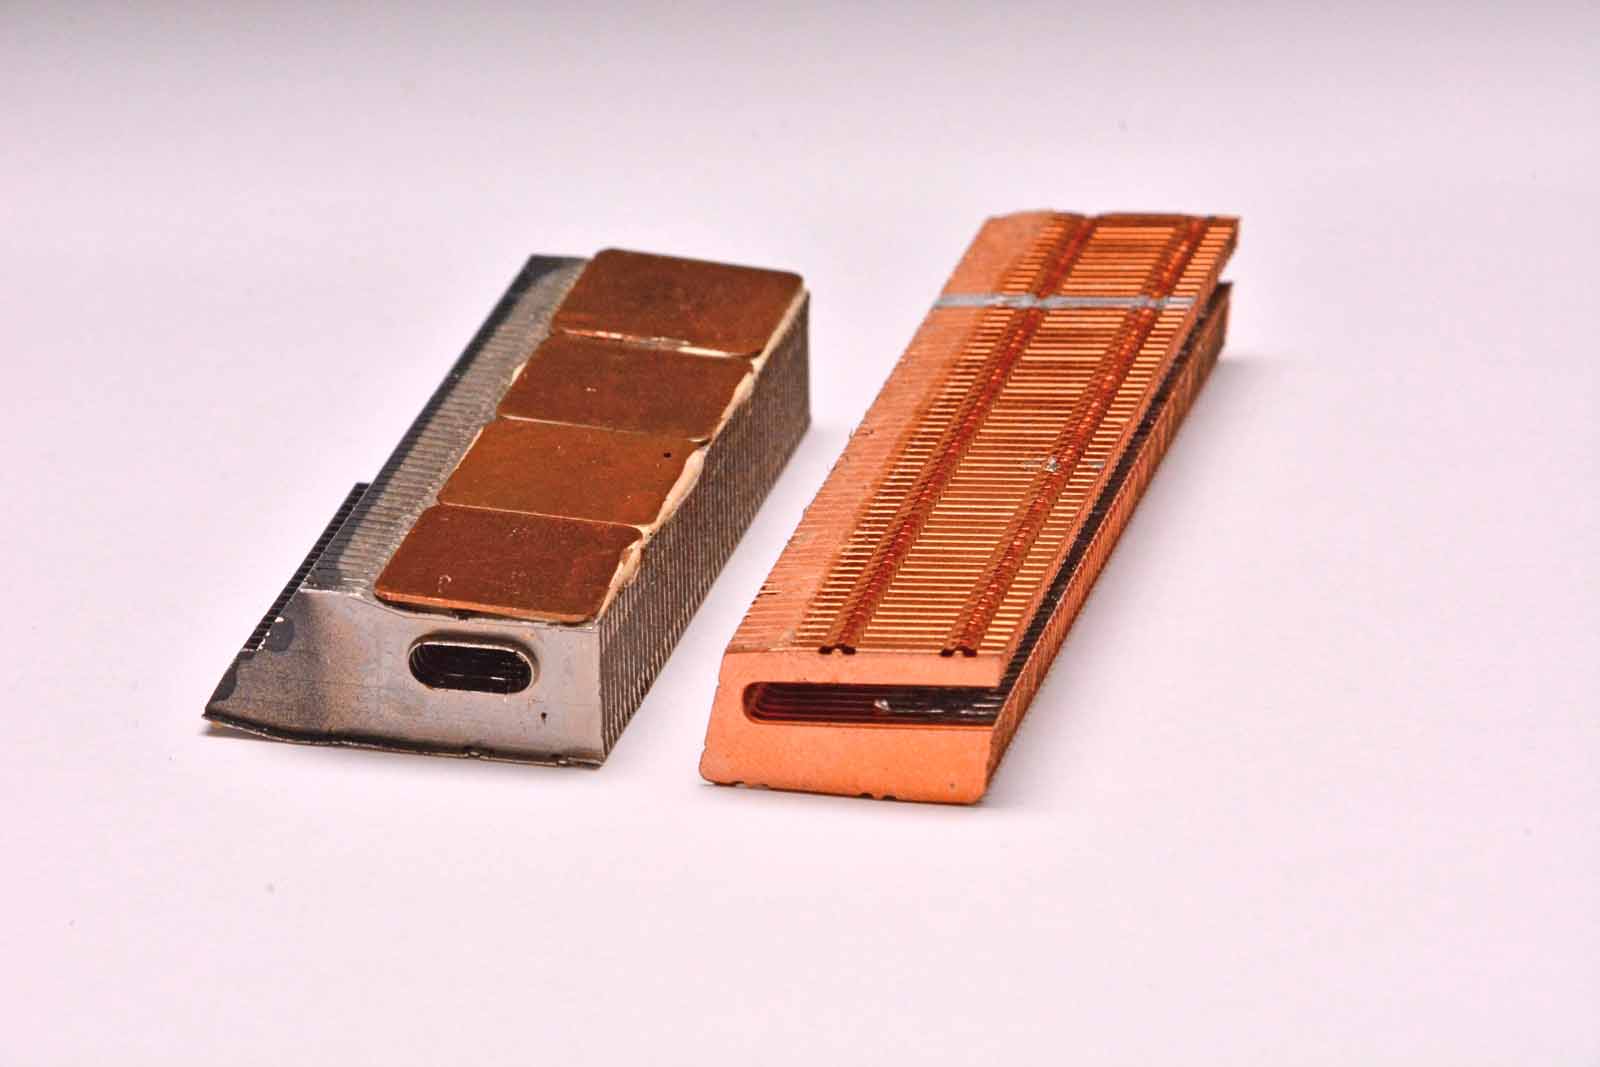
update on the stock heatsink:
400 degrees for a few minutes, with the parts elevated made them basically super easy to fall off. I lost no silver solder in the process so i'll reuse it when welding back with reverse process. the part with all the fins will slide out as well and with a little dremel action you could potentially slide in a bigger copper pipe and reapply silver solder and heat back up and it will stick.
-
2
-
-
4 hours ago, DavidRM said:
Having been lurking for a while, the forum has been a real help in deciding whether to get a 2570P, I thought I'd be brave and speak up! I'm most impressed by the knowledge shown by you all, puts me to shame.
I'm impressed with the 2570P, mine has the i7-3520M, and I've put W10 on a Samsung 840 EVO. Not the fastest, I know, but it was on the shelf doing nothing .
I have a couple of questions if I may.
1. Has anyone updated to F.64 BIOS? I have F.33 (in legacy), which is out of the ark but I have no problems that I'm aware of. I reckon 'if it ain't broke, don't fix it' but would F.64 be worth doing. I notice that HP say that once installed it can't be reverted.
2. Has anyone managed to use the GPS in the un2430 WWAN module in W10. It looks to me as if it's not supported after W7.
yeah it was a big help for me too, i got a 2560p first, then sold it for a 2570p.
all i can tell you about bios is from what i was able to find briefly.
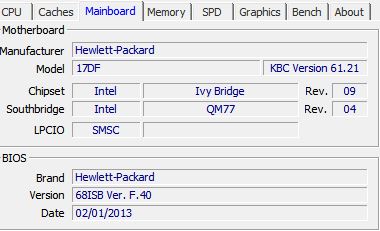
I currently have f.40, i had an older one, don't remember which but i stopped at f.40 cause i think i read something about not being able to go backwards.
then i confirmed that my $20 AzureWave Broadcom BCM94352HMB 802.11ac WLAN +BT 4.0 PCIE Network Card Laptop works with f.40.
next i read from page 1 that "badbadbad" has the same wifi card and then from page 23 that when he asked if going to f.45 from his f.44 if he would lose wifi whitelist and someone chimed in that he would not and also confirmed ME firmware would still work. Also that from f.42 to f.45 ME still worked. End result looks like he stayed with f.45 and was able to keep ac wireless.
So if you look here
it shows you each enhancement per bios update and from f.40 to f.45 now that we know i won't lose wifi, the benefits in those enhancements seem worth me trying. So i guess if it's worth it to you upgrade. Normally i would agree, if it aint broke don't upgrade, but in my case he confirmed i can upgrade with no issue, so i'll be doing that as soon as i finish my heatsink project here soon.
as for question #2 i have no idea, nor do i know what that is, i'd like to know now that you bring it up, please share if you don't mind.
-
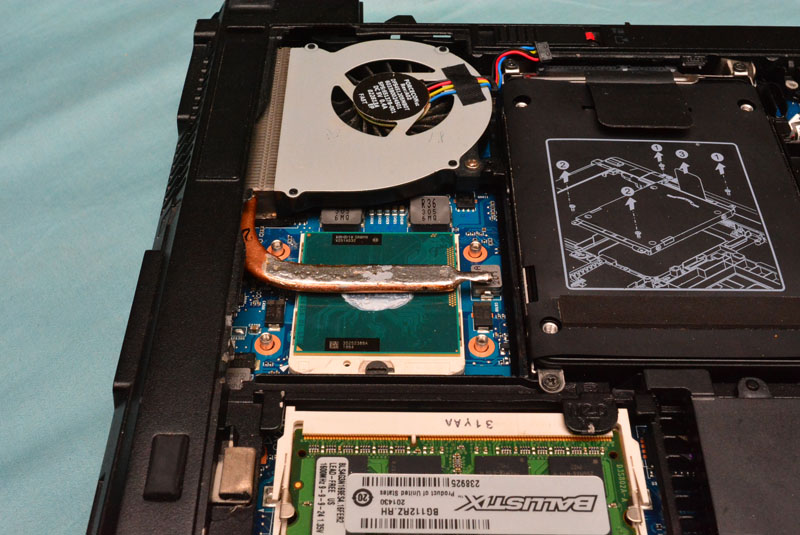
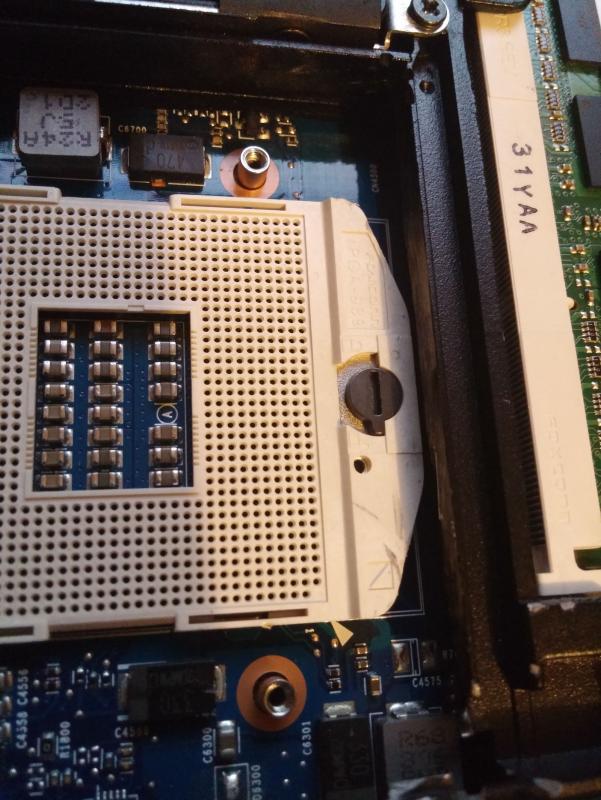
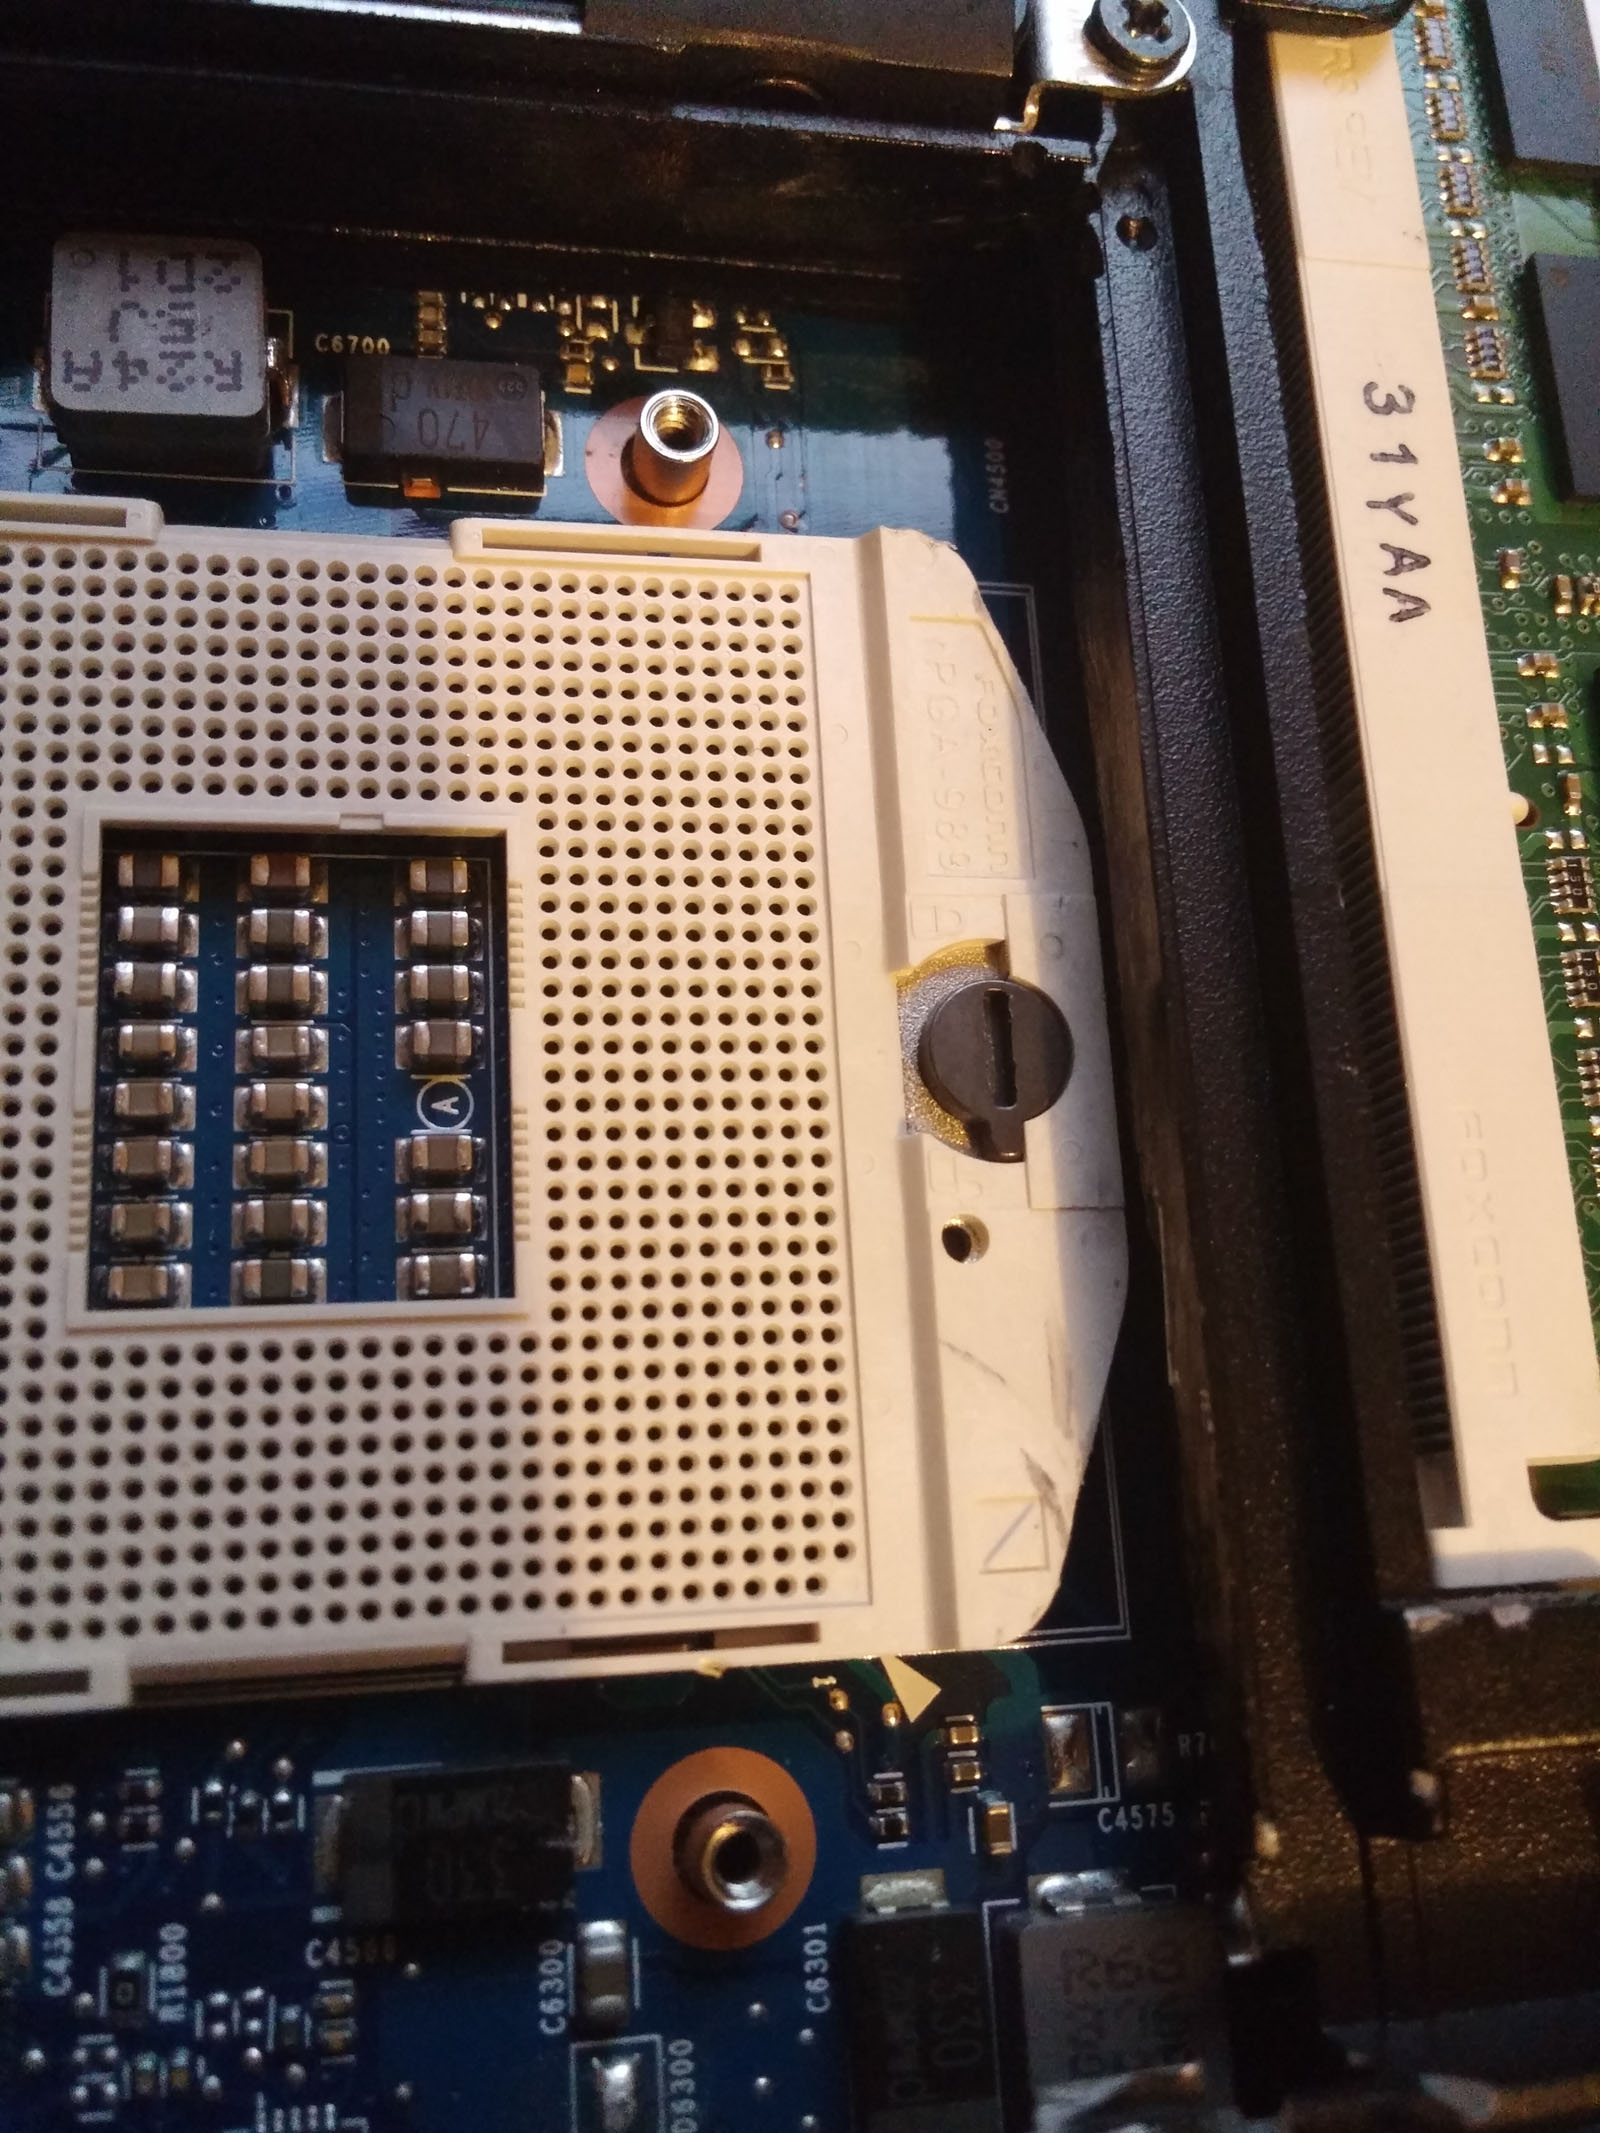
just a little update:
I managed to remove that little bit of case next to the cpu socket, it's not a lot, but it's a little bit more copper for the heatsink. Still waiting on the fan to get here, shouldn't be much longer. I have the heatsink in hand and am starting to shape it tomorrow. my biggest concern is cutting those fins and not damaging them too much. I'll also be removed the heat pipe from the stock heatsink tomorrow too. I read the best way was to just bake it a little and they would fall apart. hopefully all goes well. once the fan comes in and i shape it to fit, i'll post some more pics and toss some ideas around for placement.
-
On 1/6/2017 at 1:19 PM, surLeinad said:
Good day everyone. Recently i wanted to change ssd and clean fans in my 2570p, but I couldn't open the back door. The switcher (or how is that thing called, you switch it and back door comes off) - goes half way and stops. There's also a sound of probably jammed string. The switcher to take off battery comes off fine.
Can someone take a photo of back cover or laptop and circle the mounting points of backdoor?
And if anyone had similar problems - how did you fix it?hey
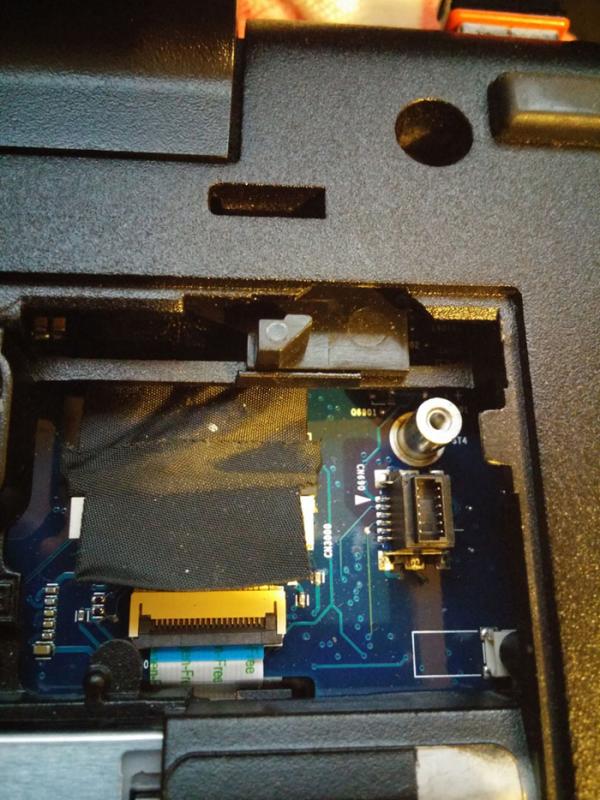
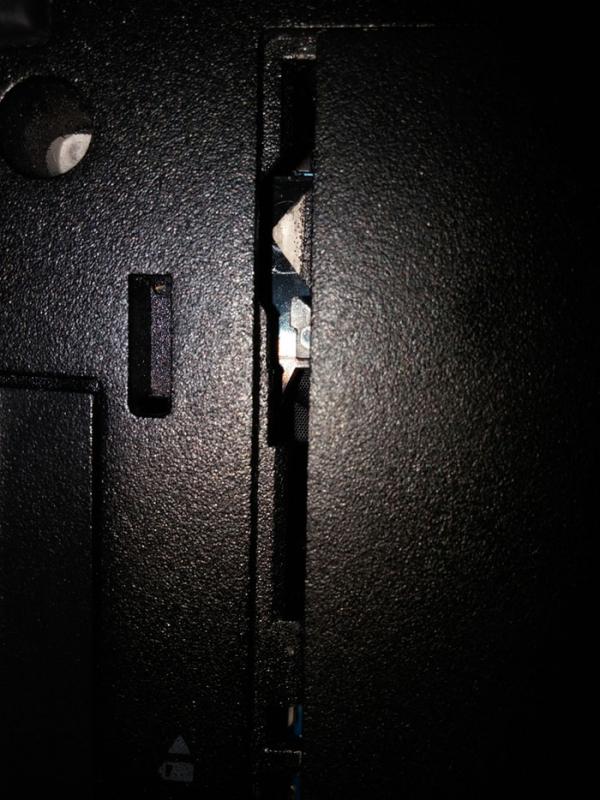
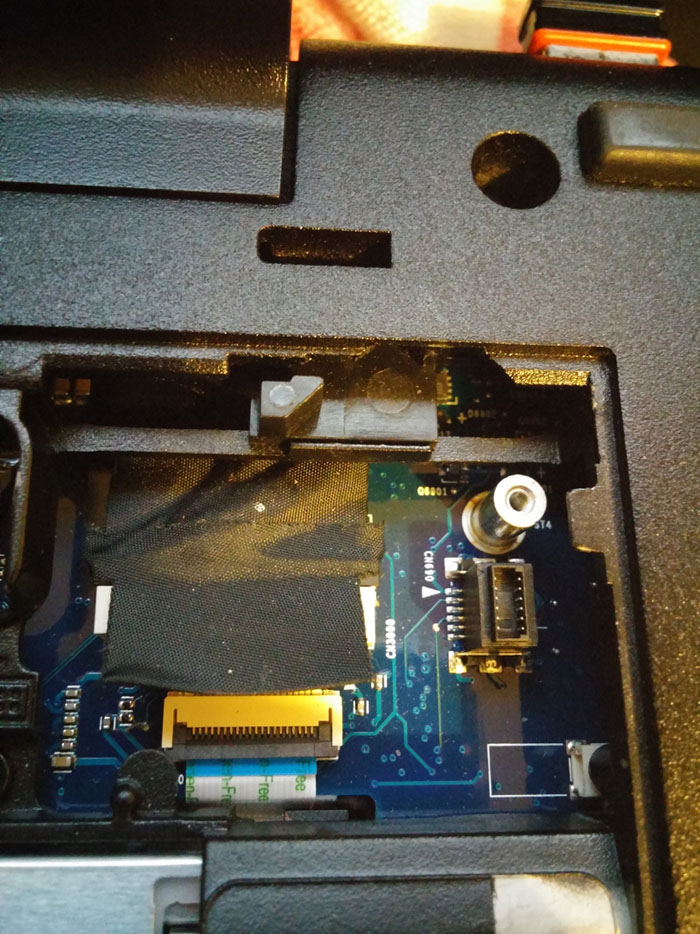
so i'm not too sure i understood what pics you wanted, but i can tell you i have the exact problem
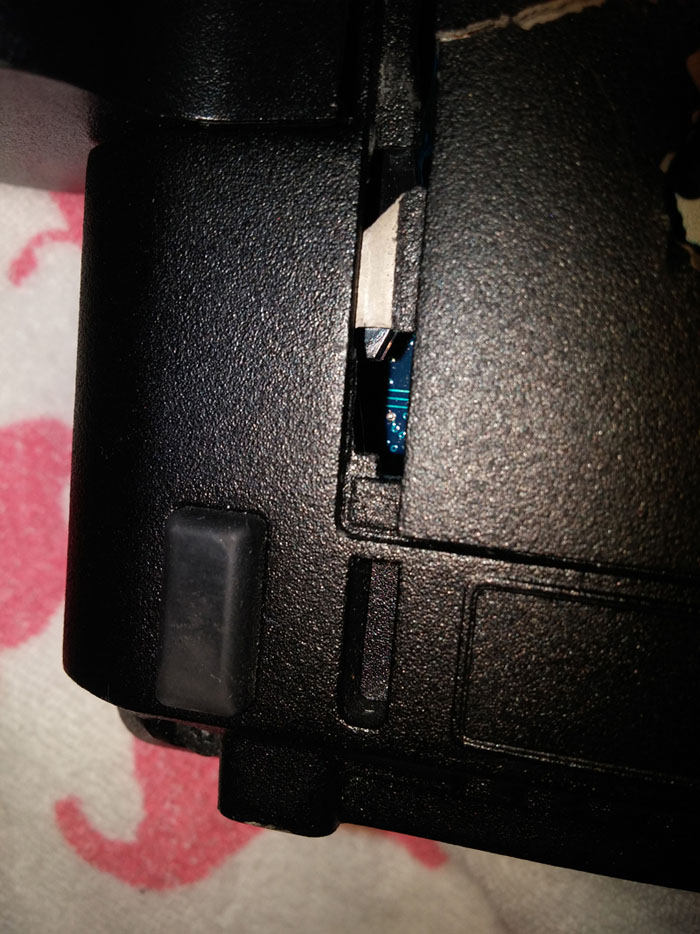
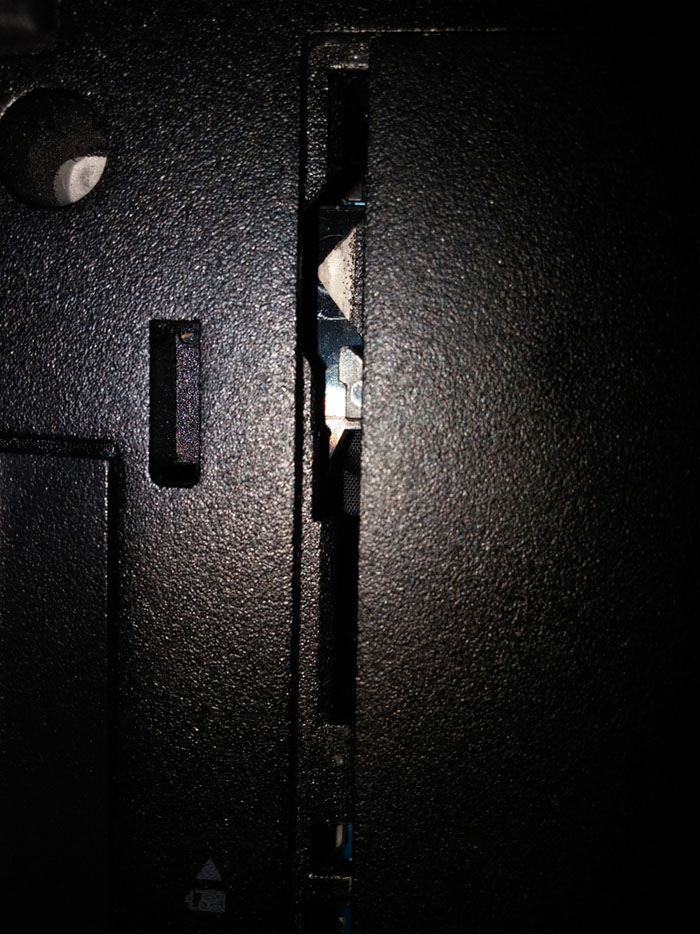
the battery ejects perfect, but the back door cover has always been a pain. it won't go all the way, so i just push it that direction and then i just use my nail at the crack and push down and it opens just fine. sometimes it needs a tug but other than that once i found out how to get it open, i just had to accept it was either a faulty switch or the bad design. I currently have my back lid with a hole where the cpu fan is for better breathing, now that i got my dremel kit in, i'll be drilling a much nicer perfect hold exactly where it needs to be in my new replacement lid. when i do that i'll be sure to try to mod the old cover at the holding brackets to see if any modding will allow it to open and close easier, if that works i'll take some pictures so you can see where i grinded down to make it easier, i hope that works. i'll keep you posted.
btw i posted these shots of the switch we are talking about at resting/switched position, hope that helps


-
yo nich66
I took the plunge and was able to get mine to work instantly. I did nothing other than remove old cpu, clean and apply new tp, and reapply heatsink and it fired right up.
I'm also on win 10- 64 bit, but i have bios ver f.40, idk if that makes a difference.
if it were me, i would honestly try another win 10 installation, the way I did it was instead of using the usb method with rufus i think, I just ran it from the desktop inside of windows 7 on this machine and just chose to keep all files and apps and it installed fine first try. Now its super smooth and zippy.
this is the version i am using-
Windows 10 X64 v1607 build 14393.576 en-US Dec 2016
-
On 1/3/2017 at 2:10 PM, batyanko said:
If you find a more powerful fan that fits there, that would be quite interesting to know. Maybe something maxing at 0,5 A or more, I imagine the motherboard should at least be able to supply 0,5 A.
With the additional copper you are totally right that it just absorbs the heat without necessarily dissipating it faster. But anyway I find that to be of big advantage for day-to-day usage - the CPU takes just a few seconds on 100% load for usual tasks, like loading a website or similar. The extra copper absorbs the extra heat just fine and dissipates it later, when the CPU is idle.
Otherwise it would be hard to really lower the temperatures without another fan, or tons of additional heat sink real estate.
For example you can have a look at that video card heat sink that I tried (4-5 posts ago, first pic) - that was one HUGE heat sink, having maybe a total real estate 2-3 times the area of a laptop heat sink.
And yet it performed worse than my current setup with 2nd fan (second pic), lowering max temperatures with about 6-7°C vs. 11-15°C.
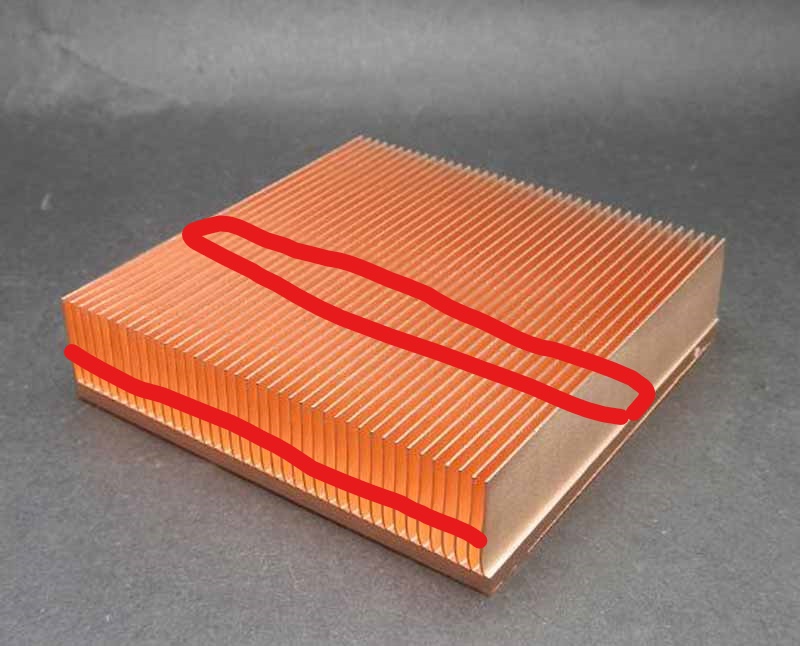
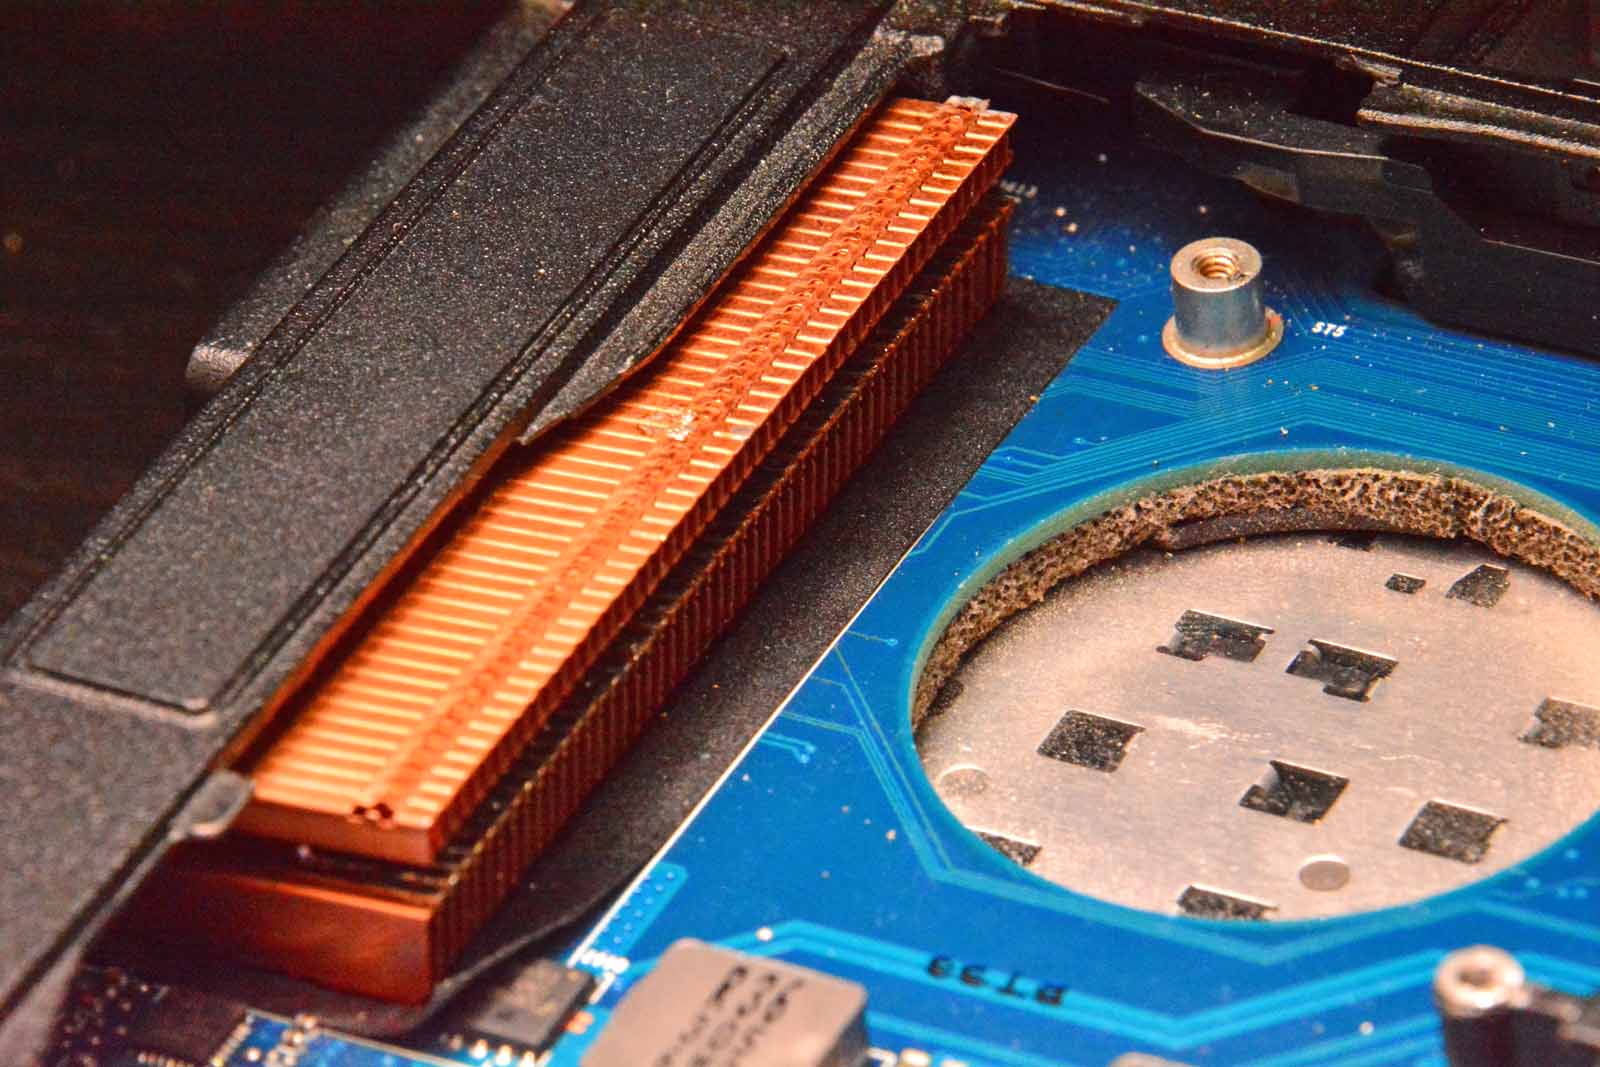
yeah I'm pretty excited, i got most of these parts in already and am just awaiting the msi fan and the skived heatsink. My plan is to take apart the stock heatsink and remove the aluminum, then trim down the copper heatsink to 50x60mm to fit in the cpu area. I will be removing some unused black plastic from the cpu area from the case to allow more copper to fit. I have to also trim down most of the fins (to the red line height) and then weld the copper pipe on the top side of the heatsink once i notch out some fins to allow the center to be bare (area in red), either that or notch out a groove on the bottom to let it slide under like the stock heatsink. I figure more copper to make contact with is better, fins for cooling, and then mount the fan. For the fan to work, all i have to do is trim down the height just a tad as well as a little bit off the sides. My measurements say it should fit perfectly between the screws of the cpu socket and then just drill out a hold on the bottom lid. I'll also need to drill a few screw holes on the new heatsink to accept the fan, as well as find a way to power it. It's all in theory as of now but i hope it works. I'll keep yall posted. All this should fit fine once i add some new rubber feet that are a bit taller. That will give me some extra space to let that fan breathe under there. I finally got the new quad core installed and it's running very nice. I didn't know this but i found out turbo boost doesn't work on battery only plugged in.
.

-
1
-
-
thanks. at the time it was a rush job, so i just cut it as big as i could while still letting the bottom cover fit and drilled the 4 holes. i used some metal epoxy to glue it on top of the original heatsink because i couldn't figure out how to remove the screws from it. the plate itself is pretty thick, but i think to be able to fully replace the stock heatsink with pure copper i would have to get a new piece of copper 2-3 times the thickness of this plate. and then somehow affix the copper elbow and radiator fins, i'm guessing some kind of welding. All that sounds doable but it still gets me thinking about how now i'll be absorbing more heat and retaining it with the same cfms. If i can get the turbine upgraded in the same housing then yes i'll do that for sure.
-
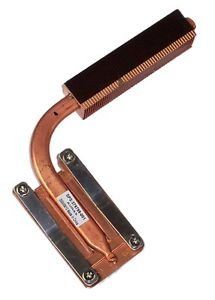
oh and i also tried these two heatsinks for compatibility or mod-ability and neither would work. I like the designs though. i was always mistaken thinking more copper would solve the problem till i learned it only absorbed it and stored it raising my temps. I ultimately just need a better way to expel the heat out hence the better fan approach.
-
1
-
-
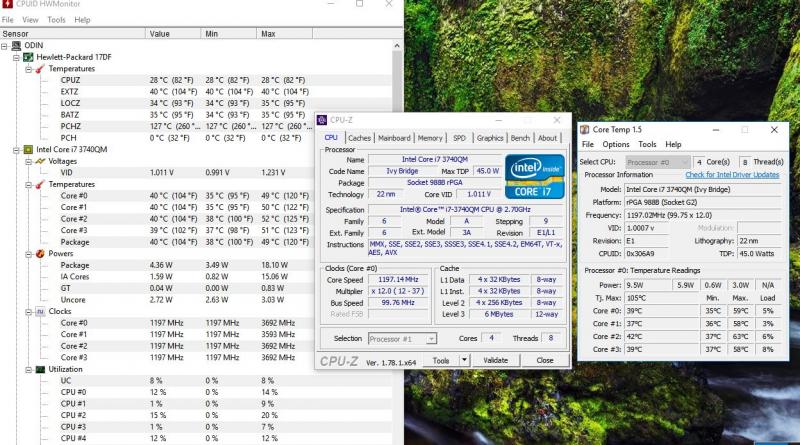
hey guys i haven't posted in a while just wanted to give some updates on my 2570p so far.
it's still running the stock i5- 3320m, but i'd like to install the i7-3740qm, i just need someone to chime in with the confirmation that cpu is 100% pure drop in compatible. If it is i'll snag one and get it done.
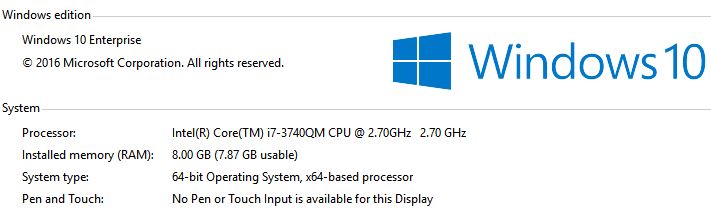
still only have 8 gb of Crucial Ballistix Sport 1600 1.35v, haven't really seem the need to upgrade to 16gb yet, but if prices are good, i might look into it. but if i make the cpu upgrade does anybody know if i can get faster ram too? like from 1600 to 1800 or 2100?
Samsung 850 evo
AzureWave Broadcom BCM94352HMB 802.11ac
UJ152 Blu-Ray CD/DVD-RW Drive
usb 3.0 expresscard, only 3 ports would work at a time in win 7 but now all 4 work in win 10.
i put a hole under the bottom case cover for the fan to breathe air in, it's still rough, i need to drill a cleaner hole and add the holey bottom mod to get more air in there. I've contacted the company that originally made the fan to see whether or not i can swap out the blower fan with a better one that pushes more cfm's no response yet.
i cut, drilled and modded a 7oz copper plate to fit over the heatsink of the cpu as well as added four 25x25x.5mm copper square shims to above the fins next to the fan with GELID extreme thermal compound.
also using the HP 90watt power adapter and the HP SX09 9cell 8850mah or 85670mWh
also just upgraded to win 10 from 7, runs nice and smooth still. No driver issues.
I honestly love this laptop. it's perfect for me as i'm a real estate photographer. I take it with me everywhere and it's small and light and does not get in the way at all. The long battery life is great and the matte screen helps me edit/upload pictures in the bright sun from the car.
The only things i count as cons are the the obvious no backlit keyboard, lack of 1080 screen and weak webcam. One day in the future i'm going to look into the keyboard/screen issues and try to mod something to work, long term project i know. I would like a better built in webcam, it would be cool if we could retrofit a better one in there.
or what about adding a brighter led to the bezel for typing at night.
either way, glad to see the forum is still going strong. glad to see both vets and new users coming together. cheers.
-
quick question:
would it be ok to use a thermal silicon heatsink pad under a copper shim with a center die cutout for the purpose of to just protect the processor circuits in case it bent under pressure or moved. Or would this have a negative effect and instead transfer the heat from the shim to the processor chip itself? both the shim and pad are the same 25x25x1 size.
example with single shim: had to use 2 since only 0.6mm thick and 1.0 is max clearance.
heatsink
thermal paste
copper shim
thermal paste
copper shim
thermal paste on die itself
thermal pad with die cutout to protect circuits
processor
-
Well I installed the SSD with the HP 2560p support site's newest AHCI drivers and it landed on 3gb/s. Now, my BIOS said i had f.40 at first, and in there was no option to use 6gb/s, so i figured i needed a newer ahci driver so i went to Intel's site and got the 12.0 desktop version instead of the 11.0 i had previously. All that did was give me a few more options in the intel manager software but still no 6gb/s. Well i finally found BIOS f.21 and decided to give it a shot, took a long time to find. When i finally did the windows version of the BIOS update it said i had version f.22, so i downgraded, restarted and viola 6gb/s. I have the before and after crystaldiskmark results but can't post pics yet. about a 150mb difference. Then I did an ATTO test and was getting very close to advertised speeds. Very happy. Still no option in BIOS for switching from 3 to 6 but either way it works now. This is my first SSD and windows boot time and program load is amazing.
Didn't need the half/full height adapter, it just fit. I got the Tyco antenna in today so it's going in Monday when i tear it open to do the lapping, GELID, and cleaning. Odd thing i noticed was there were 3 additional cables tucked under the stock card, (#3, 5 and 6) they are color coded) but i have no idea what they go to. I think i lost bluetooth when i removed the stock card, might have been a dual card, no sure. Some sites claim not and that the broadcom chip at the top of the lcd is the bluetooth. The wireless card is showing better speeds already, so let's hope that last antenna helps. Still have to figure out a upgrade to bluetooth 4.0.
The express card that i ordered was easy to install, i have pics but can't post, it was easy to install, cheap, and sits flush. I plan on leaving it in full time so no option to remove other than with your nail is not a big deal. The issue is that when you pull your flash drive out the card pulls out slightly, just use one finger to hold in and other hand to pull out the usb stick and it's fine. When i open the case i'll try a more permanent method to secure it. stay posted.
The other 4gb stick is in and running in dual channel for 8gb total, 9-9-9-24 timings at 1333, don't think i need more ram really but time will tell once i have the full adobe line installed, maybe then i'll need 16gb.
This laptop really is the nicest one i've owned. Sleek and stylish. It takes everything i throw at it and keeps up. Only issue i noticed is some case vibration on the top where your wrists sit and along the top edges. I just run my finger horizontally on the wrist pad and get strong vibrations. Other than that it's quiet and still. It get's a little warm at times but i thing my cooling upgrades should help. I'll have before and after temps to share as well as the service door mods.
Still waiting for a few more parts so as they go on i'll keep y'all posted.
-
Hi,
I read you're based in France. Just to let you know, if you think you're not up for the cooling mod I mentioned, I can drill it for you (I'm based in EU).
Basically the idea is this:
32x32x2.5mm copper shims on the heatsink to enhance its heat soak abilities
200x100x0.5mm copper mesh to help spread the heat across lower area near the service door - it's quite convenient as you can thermally join the laptop base with it.
Holes in service door in fan and optical bay area - should help the system breathe & direct the cool air through the hot mesh which in turn improves the cooling by a lot.
Final small mod - remove fan screws, use Noctua fan assembly (mainly the silicone screws), cut its head and use dual sided thin tape to secure it to laptop base and the fan. This should/will remove the annoying fan whine.
Still dunno how could 2560p/2570p pass the 35W TDP test, as it's CLEARLY not built to dissipate that much heat. Loading my CPU in default configuration to 35W resulted in temps 95 - 98°C, 84°C with service door removed.
With this mod, I'm expecting to hit max temps below 70°C
I'd really like to see what this looks like, post pics if possible or let's talk about how to get this done, i could use the help.
btw, new member. been reading here for a while, finally decided to post as i just got my 2560p with i5 2520m in a few days ago. Got it for a steal at $127.
mods on shelf waiting to go in:
240gb SataIII SSD with win7sp1
Half to Full Height Mini (PCI-E) Card Bracket Adapter
Intel Centrino Ultimate-N 6300
Third Tyco Antenna
Expresscard 34 to USB 3.0x2 card
another 4gb of 1333mhz ram for 8 total
Arctic Silver Arcticlean Thermal material Remover & Surface Purifier
heatsink lapping
GELID Solutions GC-Extreme thermal paste
displayport to hdmi converter
new 90watt ac adapter
fresh 6 cell battery
to do list:
cut out hole on service door under fan and add black steel honeycomb mesh (never done, need right tools first)
find a cooling solution, either one short server heatsink or just a big piece of copper to fit on top of the heatsink.
possibly tall enough to touch service door to use it as well.
future mods 1-2 months out:
Intel Core i7-2860QM 2.5GHz Quad Core
16gb of ram in dual channel
64gb USB 3.0 nano thumb drive as permanent storage option (need to have optical drive for clients)
exploring screen options (emailed auo to see if they have a brighter option, B125XTN01 shows to be 200 Brightness (cd/m²), not sure if it's an improvement over stock) I know fitment was an issue, but i'll just have to try all of the possible options and see what works.
explore possible cpu fan upgrades, modding for a bettery quality fan that might move a little more air but not be annoying loud.
9 cell battery
research a 1080p webcam option mod
taller antivibration rubber case feet for extra height and air draw.


12.5" HP Elitebook 2570P Owner's Lounge
in HP Business Class Notebooks
Posted
AzureWave Broadcom BCM94352HMB 802.11ac is what I use in windows 10, but no clue on the others. Sry.