


parczefal
-
Posts
9 -
Joined
-
Last visited
Content Type
Profiles
Forums
Downloads
Posts posted by parczefal
-
-
¡WARNING! This process will require you to wipe out your hard drive, you might get it to work with pre-installed systems but I haven't had the chance to do so.
As of now, brightness is not working on bootcamp, I'll need to research the issue.
Detailed step by step guide:
1. Create a Win 8.1 EFI bootable flash drive using Rufus.
2. Create an Arch Linux bootable flash drive using Rufus.
3. Create a OS X Yosemite bootable flash drive using createinstallmedia.
4. Boot your computer using the Win 8.1 install flash drive.
5. When you get to the Windows install screen, press shift+F10 to get to the MS Shell.
6. Execute the following commands:
6.1 diskpart
6.2 select disk 0
6.3 clean
6.4 convert gpt
6.5 create partition efi size=200
6.6 format fs=fat32
6.7 create partition msr size=128
6.8 create partition primary size=102400 (You might want to set your own size here)
6.9 format fs=ntfs quick label=Windows
6.10 exit
7. Proceed with Windows Installation
8. Once in Windows, click on start menu then type "cmd"
9. Launch diskpart again
10, Create your OS X Partition with the following commands:
10.1 create partition primary size=204800 (Set your own size here)
10.2 format fs=ntfs quick label=OSX (Don't worry about the filesystem, we'll reformat it using Disk Utility later)
10.3 exit
11. Restart your computer and boot into the OS X Yosemite installer
12. Launch Disk Utility
13. Erase your newly created partition using HFS+ as the filesystem
14. Close disk utility and install OS X in there.
15. Boot into OS X.
16. You'll now have both Windows 8.1 and OS X installed in EFI Mode, now you'll need to install Arch Linux.
17. Boot your computer into the Arch Linux installation USB.
18. Launch the Arch Console.
19. Execute the following commands:
19.1 Select your keymap by typing "loadkeys keymap_file (available keymaps are located in /usr/share/kbd/keymaps)"
19.2 Launch gdisk
19.3 Create a new partition for your root mountpoint
19.4 Create a new partition for your swap mountpoint
19.5 Creae a new partition for your boot mountpoint using EFI boot
19.6 Create a new partition for you extra boot mountpoint using EFI boot
19.7 Format your newly created partitions (mkfs.ext4 for root, mkswap for your swap partition and mkfs.vfat for your EFI boot partitions)
19.8 Mount your root partition on /mnt and your first boot patition on /mnt/boot/efi (You'll need to create this folder). "swapon" your swap partition.
19.9 I used a USB to Ethernet adapter, and the installation CD configured it automatically. If you need to configure wireless settings, please refer to the ARCH Wiki Guide: https://wiki.archlinux.org/index.php/Wireless_network_configuration
19.10 Edit the /etc/pacman.d/mirrorlist and comment out any unnecessary mirrors.
19.11 Execute the following command "pacstrap /mnt base"
19.12 Wait for the base packages to download and install
19.13 Generate your fstab file by issuing the following command: "genfstab -U -p /mnt >> /mnt/etc/fstab"
19.14 "chroot" into your newly created environment by typing this command: "arch-chroot /mnt /bin/bash"
19.15 Uncomment the needed locales in /etc/locale.gen, then generate them with: "locale-gen"
19.16 Execute the following command: # echo LANG=your_locale > /etc/locale.conf (where your_locale matches your keyboard and language settings)
19.17 Create a new initial RAM disk with: "mkinitcpio -p linux"
19.18 Set your root password with "passwd"
19.19 Create a new user for yourself with the following command: "useradd -m -G wheel <username>"
19.20 Set password for your user with "passwd <username>"
19.21 Upgrade pacman db with "pacman-db-upgrade", allocate the repositories with "pacman -Syy" and Install the sudo package with "pacman -S sudo"
19.22 Add your newly created user to the sudoers file located in "/etc/sudoers"
19.23 Switch to your newly created user with "su <username>"
19.24 Go into your user home directory "/home/<username>"
19.25 Install packer dependencies with "sudo pacman -S base-devel fakeroot jshon expac git"
19.26 Create a new directory to download pkgbuild "mkdir pkgbuild"
19.27 Install wget and vim with "sudo pacman -S wget vim"
19.28 Get into the pkgbuild directory and run "wget -c https://aur.archlinux.org/packages/pa/packer/PKGBUILD"
19.29 Execute the "makepkg" command inside that directory
19.30 Install the newly created package with "sudo pacman -U packer-*-pkg.tar.xz"
19.31 Go up one level
19.32 Download my pre-patched, pre-compiled grub2 binary from "http://www.nocreado.com/grub-git.tar.gz" (this one includes Andreas Heider patch to trick the bootloader with "apple_set_os")
19.33 Run "tar xvzf grub-git.tar.gz"
19.34 Switch to the grub-git directory
19.35 Run the following command: "makepkg -si --skippgpcheck" to install my version of grub
19.36 If everything went fine, then you're ready to install and configure grub. First thing you'll need to do is tweak the "/etc/default/grub" file and add "libata.force=noncq" to the GRUB_CMDLINE_LINUX_DEFAULT parameter, it should end up looking like this: GRUB_CMDLINE_LINUX_DEFAULT="quiet libata.force=noncq"
19.37 Install grub with the following command: "grub-install --target=x86_64-efi --efi-directory=/boot/efi --bootloader-id=grub --recheck --debug"
19.38 Generate your grub configuration file with the following comand "grub-mkconfig -o /boot/grub/grub.cfg" (This should reconize your vmlinuz images and your Windows installation).
19.39 If everything went well, go to your / and create a new mountpoint for your extra boot partition (e.g. sudo mkdir /loader).
19.40 Mount your patition there, switch to that folder.
19.41 Touch a file named "mach_kernel"
19.42 Create the following path inside the folder: "System/Library/CoreServices"
19.43 Switch to that newly created directory (CoreServices) and vim a file named SystemVersion.plist with the following contents:
Edit: Please refer to https://wiki.archlinux.org/index.php/MacBookPro11,x for the file contents configuration
19.44 In that same directory, generate your boot.efi image by issuing the following command: "grub-mkstandalone -o boot.efi -d /usr/lib/grub/x86_64-efi -O x86_64-efi /boot/grub/grub.cfg"
19.45 Reboot into OS X.
19.46 Mount your extra boot partition with diskutil "sudo diskutil mount /dev/diskXsY"
19.47 Bless your new partition with the following commands:
sudo bless --folder=
--file=/System/Library/CoreServices/boot.efi --setBoot
sudo bless --mount= <dev device=""> --file= /System/Library/CoreServices/boot.efi --setBoot
19.48 If everything went well, restart your computer holding the option key. You should be able to reach your arch installation by selecting the "efi boot" Volume and Arch Linux from the grub boot menu.
19.49 Once back in arch, download and compile https://github.com/0xbb/gpu-switch
19.50 Reboot into OS X, select the new EFI Volume "Arch Linux" as your main disk in the Startup Disk Applet.
19.51 Reboot your computer, you should be able to reach Grub without holding down the option key
19.52 Boot into Arch, execute sudo ./gpu-switch -i
19.53 Do "sudo reboot"
19.54 Once you're back in grub, click the "c" key to enter the console, type the command "apple_set_os" in the prompt.
19.55 Click "esc" and boot into windows, You should be able to see 2 display adapters!!!
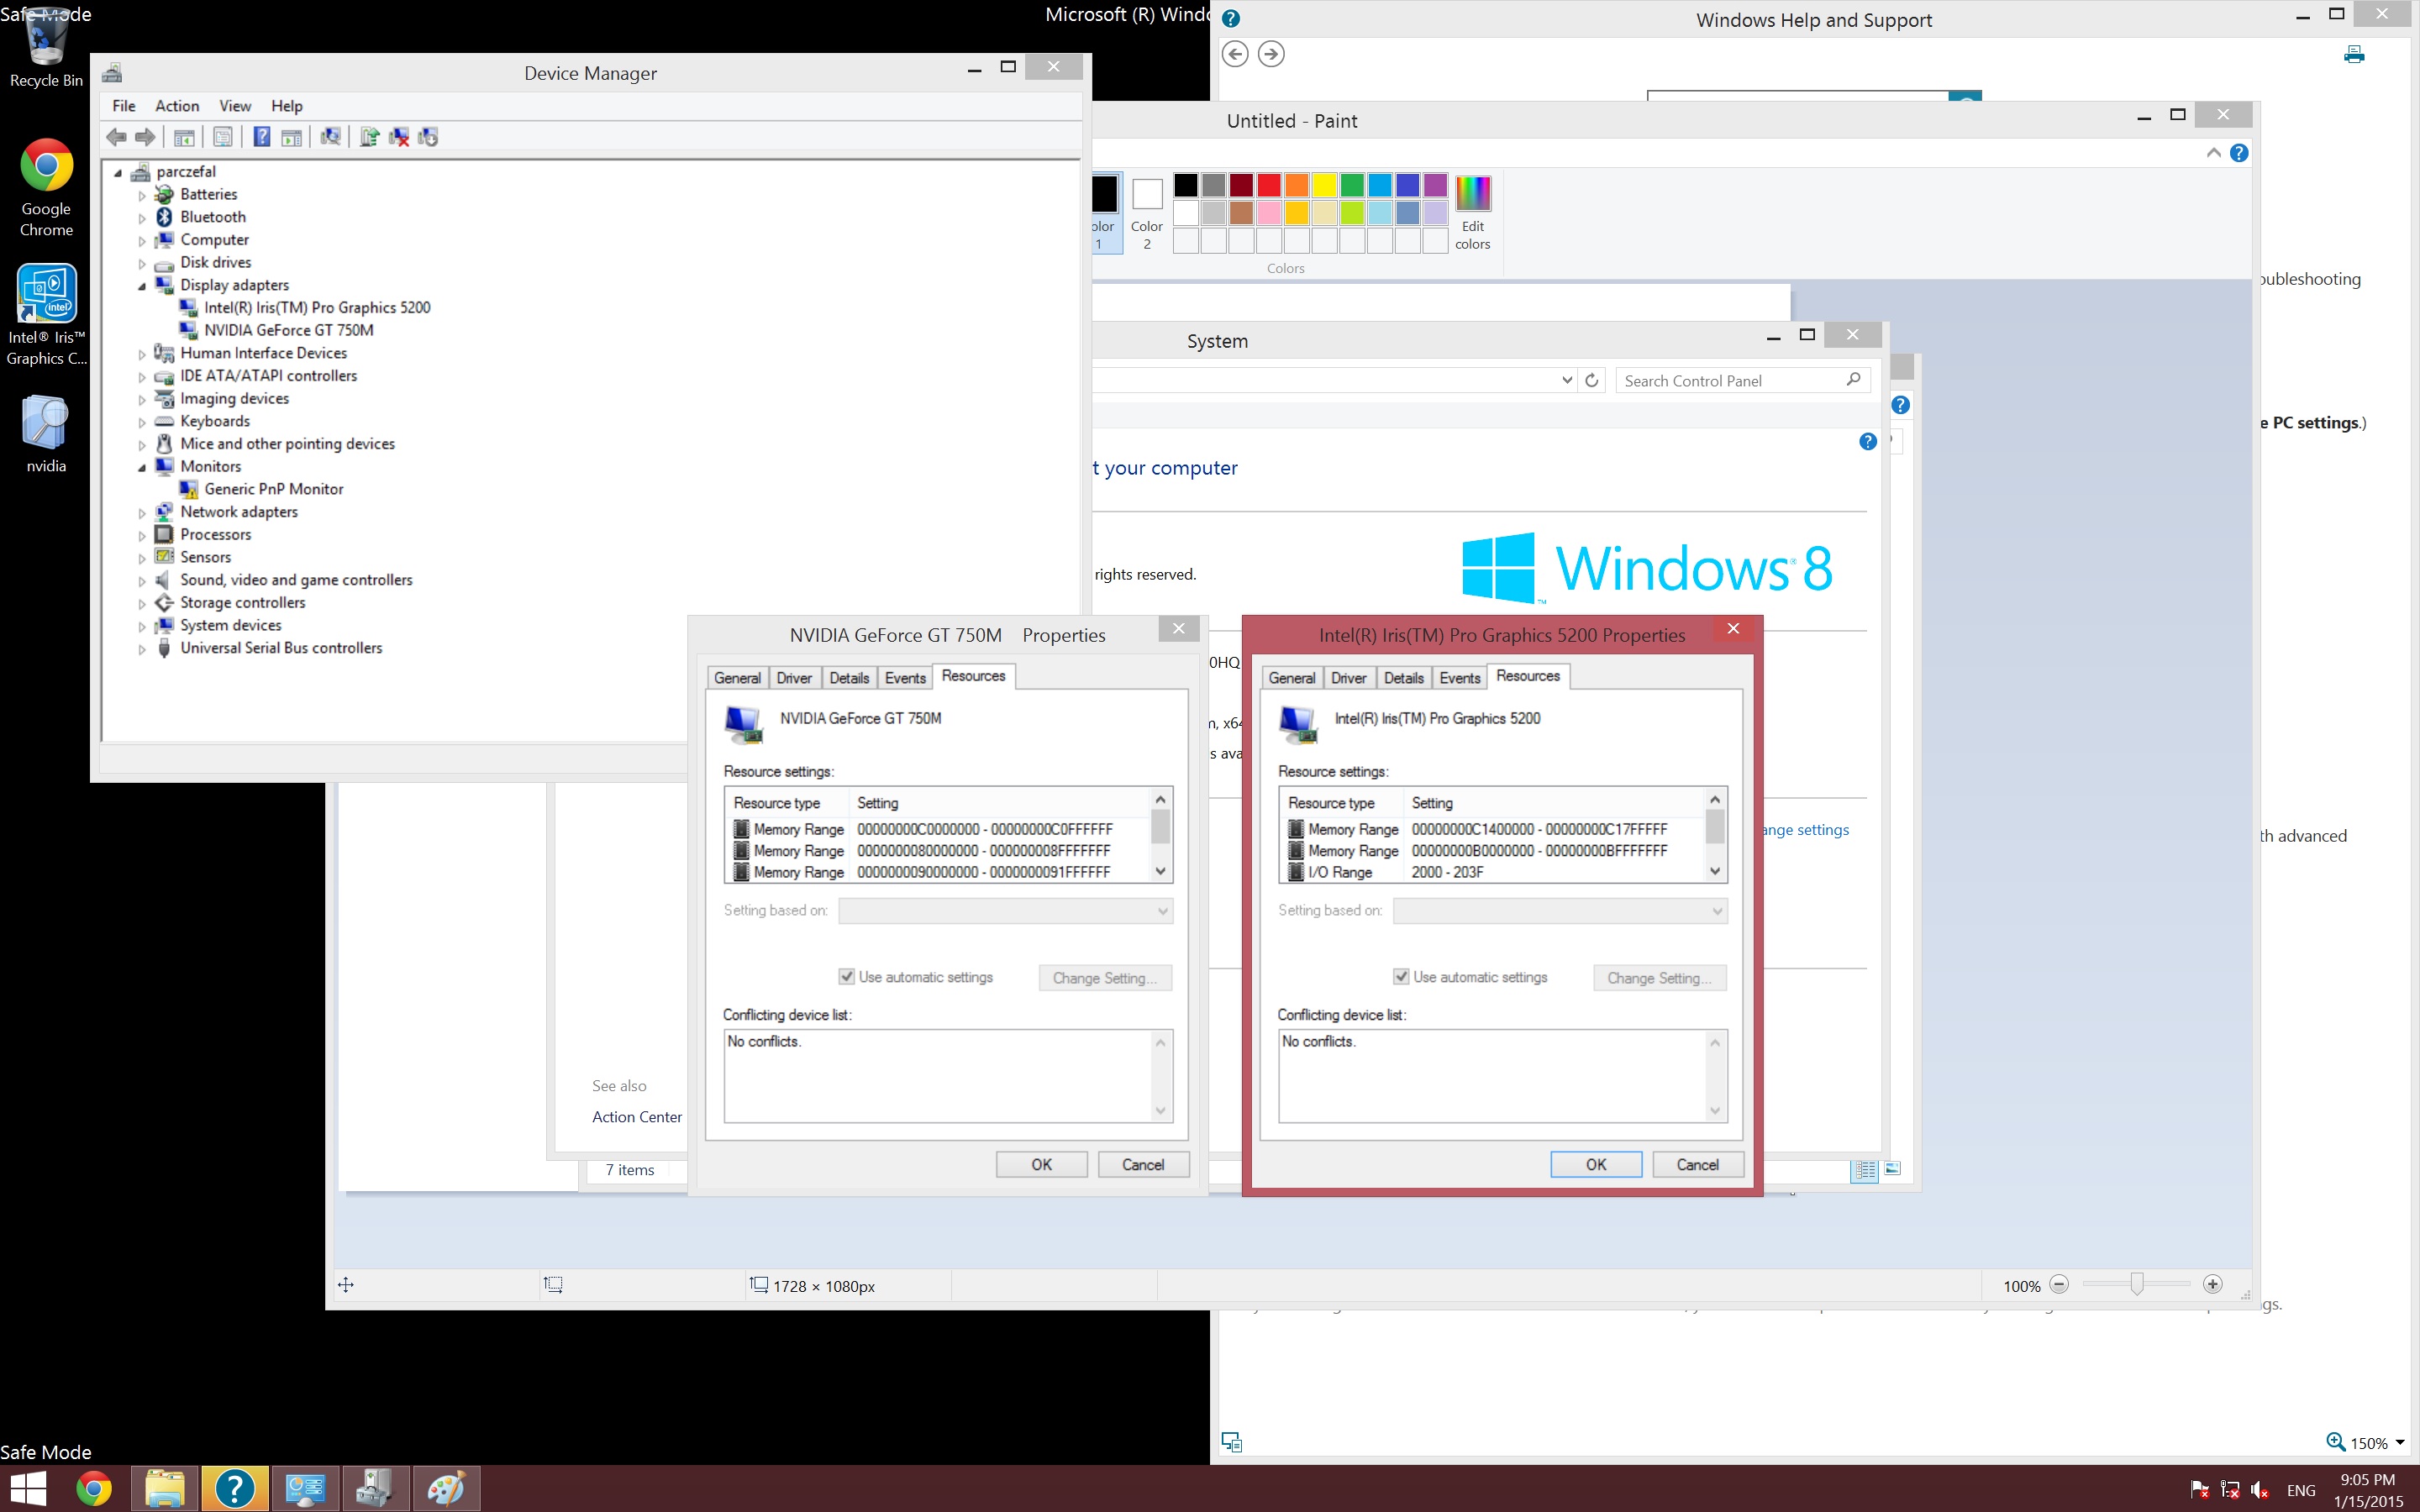
Now, the first time I installed the bootcamp drivers I just selected the windows partition while holding the option key at startup. This to avoid the dual video card config. Then I deactivated the nvidia card, executed the gpu-switch command, booted into windows and installed the newest intel drivers, this is how my device manager looks like:
Enjoy!
Greetings
Jose M.
References:
https://wiki.archlinux.org/index.php/MacBookPro11,x
https://wiki.archlinux.org/index.php/GRUB#Alternative_install_method
http://www.tswartz.net/blog/how-to-install-packer-the-archlinux-aur-helper
http://www.reddit.com/r/mac/comments/2fy3be/by_popular_demand_my_better_than_bootcamp_guide/
https://wiki.archlinux.org/index.php/installation_guide
http://lists.gnu.org/archive/html/grub-devel/2013-12/msg00442.html
https://github.com/0xbb/gpu-switch
Special Thanks to Andreas Heider and Tre87!
</dev></username></username></username></username>
-
 6
6
-
-
I Got it to Work!!
I'll describe my procedure in the next post, in broad terms, all you need to do is:
1. Wipe out your Hard Drive
2. Install Win 8.1 EFI Mode
3. Install OS X
4. Install Arch EFI Mode
5. Install grub on arch applying the following patch: [PATCH] Add apple_set_os command
6. Set your grub boot drive as your default in OS X startup disk applet.
7. Modify grub.cfg and compile your new bootx64.efi bootloader.
8. Download and compile https://github.com/0xbb/gpu-switch
9. Run sudo ./gpu-switch -i
10. Reboot from linux
11. Start windows from grub loader.
12. Install Intel Driver!
-
2
-
-
I've also tried this using grub, same blackscreen result:
#
# It is automatically generated by grub-mkconfig using templates
# from /etc/grub.d and settings from /etc/default/grub
#
### BEGIN /etc/grub.d/00_header ###
insmod part_gpt
insmod part_msdos
if [ -s $prefix/grubenv ]; then
load_env
fi
if [ "${next_entry}" ] ; then
set default="${next_entry}"
set next_entry=
save_env next_entry
set boot_once=true
else
set default="0"
fi
if [ x"${feature_menuentry_id}" = xy ]; then
menuentry_id_option="--id"
else
menuentry_id_option=""
fi
export menuentry_id_option
if [ "${prev_saved_entry}" ]; then
set saved_entry="${prev_saved_entry}"
save_env saved_entry
set prev_saved_entry=
save_env prev_saved_entry
set boot_once=true
fi
function savedefault {
if [ -z "${boot_once}" ]; then
saved_entry="${chosen}"
save_env saved_entry
fi
}
function load_video {
if [ x$feature_all_video_module = xy ]; then
insmod all_video
else
insmod efi_gop
insmod efi_uga
insmod ieee1275_fb
insmod vbe
insmod vga
insmod video_bochs
insmod video_cirrus
fi
}
if [ x$feature_default_font_path = xy ] ; then
font=unicode
else
insmod part_gpt
insmod ext2
set root='hd0,gpt6'
if [ x$feature_platform_search_hint = xy ]; then
search --no-floppy --fs-uuid --set=root --hint-bios=hd0,gpt6 --hint-efi=hd0,gpt6 --hint-baremetal=ahci0,gpt6 b53dd552-9d3e-4447-bec4-8dd6e231e1ba
else
search --no-floppy --fs-uuid --set=root b53dd552-9d3e-4447-bec4-8dd6e231e1ba
fi
font="/usr/share/grub/unicode.pf2"
fi
if loadfont $font ; then
set gfxmode=auto
load_video
insmod gfxterm
set locale_dir=$prefix/locale
set lang=en_US
insmod gettext
fi
terminal_input console
terminal_output gfxterm
if [ x$feature_timeout_style = xy ] ; then
set timeout_style=menu
set timeout=5
# Fallback normal timeout code in case the timeout_style feature is
# unavailable.
else
set timeout=5
fi
### END /etc/grub.d/00_header ###
### BEGIN /etc/grub.d/10_linux ###
menuentry 'Arch Linux, with Linux linux' --class arch --class gnu-linux --class gnu --class os $menuentry_id_option 'gnulinux-linux-advanced-b53dd552-9d3e-4447-bec4-8dd6e231e1ba' {
apple_set_os
load_video
set gfxpayload=keep
insmod gzio
insmod part_gpt
insmod ext2
set root='hd0,gpt6'
if [ x$feature_platform_search_hint = xy ]; then
search --no-floppy --fs-uuid --set=root --hint-bios=hd0,gpt6 --hint-efi=hd0,gpt6 --hint-baremetal=ahci0,gpt6 b53dd552-9d3e-4447-bec4-8dd6e231e1ba
else
search --no-floppy --fs-uuid --set=root b53dd552-9d3e-4447-bec4-8dd6e231e1ba
fi
echo 'Loading Linux linux ...'
linux /boot/vmlinuz-linux root=UUID=b53dd552-9d3e-4447-bec4-8dd6e231e1ba rw quiet rootflags=data=writeback libata.force=noncq
echo 'Loading initial ramdisk ...'
initrd /boot/initramfs-linux.img
}
menuentry 'Arch Linux, with Linux linux (fallback initramfs)' --class arch --class gnu-linux --class gnu --class os $menuentry_id_option 'gnulinux-linux-fallback-b53dd552-9d3e-4447-bec4-8dd6e231e1ba' {
apple_set_os
load_video
set gfxpayload=keep
insmod gzio
insmod part_gpt
insmod ext2
set root='hd0,gpt6'
if [ x$feature_platform_search_hint = xy ]; then
search --no-floppy --fs-uuid --set=root --hint-bios=hd0,gpt6 --hint-efi=hd0,gpt6 --hint-baremetal=ahci0,gpt6 b53dd552-9d3e-4447-bec4-8dd6e231e1ba
else
search --no-floppy --fs-uuid --set=root b53dd552-9d3e-4447-bec4-8dd6e231e1ba
fi
echo 'Loading Linux linux ...'
linux /boot/vmlinuz-linux root=UUID=b53dd552-9d3e-4447-bec4-8dd6e231e1ba rw quiet rootflags=data=writeback libata.force=noncq
echo 'Loading initial ramdisk ...'
initrd /boot/initramfs-linux-fallback.img
}
### END /etc/grub.d/10_linux ###
### BEGIN /etc/grub.d/20_linux_xen ###
### END /etc/grub.d/20_linux_xen ###
### BEGIN /etc/grub.d/30_os-prober ###
menuentry 'Windows Boot Manager (on /dev/sda1)' --class windows --class os $menuentry_id_option 'osprober-efi-6877-AB9C' {
outb 0x7C2 1
outb 0x7D4 0x28
outb 0x7C2 2
outb 0x7D4 0x10
outb 0x7C2 2
outb 0x7D4 0x40
outb 0x7C2 1
outb 0x7D4 50
outb 0x7C2 0
outb 0x7D4 50
apple_set_os
insmod part_gpt
insmod fat
set root='hd0,gpt1'
if [ x$feature_platform_search_hint = xy ]; then
search --no-floppy --fs-uuid --set=root --hint-bios=hd0,gpt1 --hint-efi=hd0,gpt1 --hint-baremetal=ahci0,gpt1 6877-AB9C
else
search --no-floppy --fs-uuid --set=root 6877-AB9C
fi
chainloader /efi/Microsoft/Boot/bootmgfw.efi
}
### END /etc/grub.d/30_os-prober ###
### BEGIN /etc/grub.d/40_custom ###
# This file provides an easy way to add custom menu entries. Simply type the
# menu entries you want to add after this comment. Be careful not to change
# the 'exec tail' line above.
### END /etc/grub.d/40_custom ###
### BEGIN /etc/grub.d/41_custom ###
if [ -f ${config_directory}/custom.cfg ]; then
source ${config_directory}/custom.cfg
elif [ -z "${config_directory}" -a -f $prefix/custom.cfg ]; then
source $prefix/custom.cfg;
fi
### END /etc/grub.d/41_custom ###
### BEGIN /etc/grub.d/60_memtest86+ ###
### END /etc/grub.d/60_memtest86+ ##### DO NOT EDIT THIS FILE
Iris Pro is working Flawlessly in Gentoo - Arch.
-
I'll Probably need some help around here!
So far I can boot to Win 8.1 using the Intel Iris Pro driver (5200) hooked to a "Virtual Display". Looks like the LCD panel is still hooked to the nVidia card with a Generic Driver.
I've tried a couple of different things:
Using reFind:
Cloned the process outlined here: [GUIDE] 2012 15" Macbook Pro Retina + GTX560Ti@8Gbps-TB1 (TH05) + Win8.1 , however, the screen just goes black and I have to force shutdown my computer. This is how my .nsh code looks like:
mm 7C2 1 ;IO :1
stall 100000
mm 7D4 1 ;IO :28
stall 100000
echo Switch Display
mm 7C2 1 ;IO :2
stall 100000
mm 7D4 1 ;IO :10
stall 100000
echo Switch DDC
mm 7C2 1 ;IO :2
stall 100000
mm 7D4 1 ;IO :40
stall 100000
echo Power down discrete graphics
mm 7C2 1 ;IO :1
stall 100000
mm 7D4 1 ;IO :50
stall 100000
mm 7C2 1 ;IO :0
stall 100000
mm 7D4 1 ;IO :50
echo enable iGPU
mm 0001013E 1 ;PCI :8
stall 100000
mm 00020004 1 ;PCI :7
stall 100000
echo Boot Grub
fs0:\EFI\Boot\bootx64.efiecho Switch select
This is what the pci command drops in the EFI Shell:
Vendor 8086 Device 0D04 Prog Interface 0
[/FONT]
[FONT=arial]00 00 01 00 => Bridge Device - PCI/PCI Bridge
Vendor 8086 Device 0D01 Prog Interface 0
[/FONT]
[FONT=arial]00 00 01 01 => Bridge Device - PCI/PCI Bridge
Vendor 8086 Device 0D05 Prog Interface 0
[/FONT]
[FONT=arial]00 00 02 00 => Display Controller - VGA/8514 Controller
Vendor 8086 Device 0D05 Prog Interface 0
[/FONT]
[FONT=arial]00 00 03 00 => Multimedia Device - UNDEFINED
Vendor 8086 Device 0D0C Prog Interface 0
[/FONT]
[FONT=arial]00 00 14 00 => Serial Bus Controllers - USB
Vendor 8086 Device 8C31 Prog Interface 30
[/FONT]
[FONT=arial]00 00 16 00 => Simple Communications Controllers - Other Communications
Vendor 8086 Device 8C3A Prog Interface 0
[/FONT]
[FONT=arial]00 00 1B 00 => Multimedia Device - UNDEFINED
Vendor 8086 Device 8C20 Prog Interface 0
[/FONT]
[FONT=arial]00 00 1C 00 => Bridge Device - PCI/PCI bridge
Vendor 8086 Device 8C10 Prog Interface 0
[/FONT]
[FONT=arial]00 00 1C 02 => Bridge Device - PCI/PCI bridge
Vendor 8086 Device 8C14 Prog Interface 0
[/FONT]
[FONT=arial]00 00 1C 03 => Bridge Device - PCI/PCI bridge
Vendor 8086 Device 8C16 Prog Interface 0
[/FONT]
[FONT=arial]00 00 1C 04 => Bridge Device - PCI/PCI Bridge
Vendor 8086 Device 8C18 Prog Interface 0
[/FONT]
[FONT=arial]00 00 1F 00 => Bridge Device - PCI/ISA Bridge
Vendor 8086 Device 8C4B Prog Interface 0
[/FONT]
[FONT=arial]00 00 1F 03 => Serial Bus Controllers - System Management Bus
Vendor 8086 Device 8C22 Prog Interface 0
[/FONT]
[FONT=arial]00 01 00 00 => Display Controller - VGA/8514 Controller
Vendor 10DE Device 0FE9 Prog Interface 0
[/FONT]
[FONT=arial]00 01 00 01 => Multimedia Device - UNDEFINED
Vendor 10DE Device 0E1B Prog Interface 0
[/FONT]
[FONT=arial]00 03 00 00 => Network Controller - Other Network Controller
Vendor 14E4 Device 43A0 Prog Interface 0
[/FONT]
[FONT=arial]00 04 00 00 => Multimedia Device - Other Multimedia Device
Vendor 14E4 Device 1570 Prog Interface 0
[/FONT]
[FONT=arial]00 05 00 00 => Mass Storage Controller - Undefined
Vendor 144D Device 1600 Prog Interface 1
[/FONT]
[FONT=arial]00 06 00 00 => Bridge Device PCI/PCI bridge
Vendor 8086 Device 156D Prog Interface 0
[/FONT]
[FONT=arial]00 07 00 00 => Bridge Device - PCI/PCI bridge
Vendor 8086 Device 156D Prog Interface 0
[/FONT]
[FONT=arial]00 07 03 00 => Bridge Device - PCI/PCI bridge
Vendor 8086 Device 156D Prog Interface 0
[/FONT]
[FONT=arial]00 07 04 00 => Bridge Device - PCI/PCU bridge
Vendor 8086 Device 156D Prog Interface 0
[/FONT]
[FONT=arial]00 07 05 00 =>Bridge Device - PCI/PCI bridge
Vendor 8086 Device 156D Prog Interface 0
[/FONT]
[FONT=arial]00 07 06 00 => Bridge Device - PCI/PCI bridge
Vendor 8086 Device 156D Prog Interface 0
[/FONT]
[FONT=arial]00 08 00 00 => Base System Peripherals - Other system peripheral
Vendor 8086 Device 156C Prog Interface 0[/FONT][FONT=arial]00 00 00 00 => Bridge Device - Host/PCI Bridge
-
Update!
I changed the nVidia driver in the Device Manager for it to use the Microsoft Basic Display Adapter. After the reboot, I was able to see the color I chose for the login screen. I tabbed twice, typed in my password and managed to get into the windows desktop!
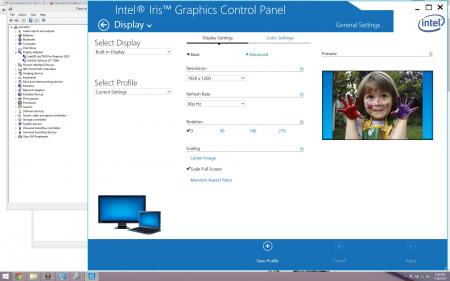
At first, it was using some type of "extended virtual desktop", but I managed to tweak some settings in the screen resolution applet to make the Color LCD my main desktop.
I'm also able to reach the Intel Graphics Control Panel.
Stay Tuned!
- - - Updated - - -
Have you seen this post: Win7 x64 booting natively via EFI (no BIOS emulation) - Page 42 - MacRumors Forums?And tried their tool? I was gonna test it later today..
Hey Tre87!
Actually, I found the hint to do this on those pages! Haven't had the chance to compile his code but I'll give it a go, I'll keep you updated!
-
Hey Guys! Sorry if this is not the appropriate forum, or if this has been done already (I found no related posts).
Long story short, I have the Iris Pro on the 15" Macbook (Mid 2014 with dGPU) partially working on Windows 8.1.
I created a triple boot installation (Mac, Win 8.1, Arch Linux), patched Grub to fake the "booting-into-os-x" procedure, and forced the iris pro 5200 driver installation on windows.
So far, I can only see the two devices working in safe mode, see screenshot below:
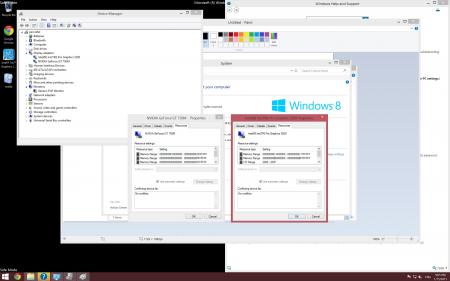
I have tried uninstalling the nVidia card drivers and something weird happens after windows load, looks like there's a secondary screen, with a different resolution to the right of the "main" screen. I can move the mouse and everything, but I can't log in.
If I disable the nVidia card, I just get a black screen after windows load.
Any ideas? Suggestions? I was thinking maybe I could get my hands dirty with nVidia CUDA and code an applet to manage this stuff. I'm good with C/C++ but I don't know if that's possible at all.
I can reveal more details if you want.
Thanks!
- - - Updated - - -
This is basically the Grub hack: http://lists.gnu.org/archive/html/grub-devel/2013-12/msg00442.html
I was thinking, maybe it's possible to completely disable the nVidia card from the Grub EFI console. Does anybody have any experience with that?
-
Thanks tre87! I'll definitely give it a shot then. I was going to get a 4K screen anyways, so let's see how it goes!
In terms of performance loss, when you use the internal screen using the drag n drop method. How much do you think you're losing? Around 20% or more?
Greetings!
-
Hi there! newbie here.
Just curious about something. After some research, someone said that the MBP internal screen can be used if you drag and drop the application from the external display (MacRumors Forums - View Single Post - 2013 15" Macbook Pro + GTX780Ti@16Gbps Thunderbolt2 eGPU implementation)
Would you mind giving it a shot and verify if it's possible at all?
Thanks in Advance!

[GUIDE] Enabling Intel Iris Pro (HD5200) in Win8.1 on 15" Macbook Pro with GT750M
in Apple eGPU discussion
Posted
I was thinking about that last night! Maybe if we compile this script as a grub module or executable file. I don't see any linux specific functions in the code. I'll give it a shot later!
Another bug I found is that Hibernate/Sleep isn't working correctly in Windows. Maybe the "null" driver get's installed based on the computer firmware or something.