Search the Community
Showing results for tags 'graphics'.
-
Could the expresscard HDMI wire be damaged even though the graphics card runs and the GDC beast turns on? I sometimes while plugged in can see the GPU in the device manager but it quickly disappears. Could it be my HDMI wire? how can i test it.
-
So i was thinking if i could make my lenovo yoga 500 better since its not very powerful when coming to games i usually play War thunder and i can get 60fps while on minimal and the laptop overheats quite fast so would there be a way how to make it faster like getting eGPU upgrading the components etc. I have also heard that the graphics card and the processor are soldered to the motherboard so i cant change it that easy please im open to any advices thanks in advance
-
Hey guys, I am pretty new here. This is my first post (I posted a similar thing on Reddit). I have been a long time lurker and am keen to get your guys' input on what I have to offer. So I found the Akitio Node for sale from this UK company: http://www.equip-u.com/shop/index.php?main_page=product_info&cPath=45_896&products_id=20752 Seems like a legit site from what I can tell etc. And it's even linked on the Akitio official website 'Where to Buy' page for Europe (https://www.akitio.com/where-to-buy/akitio-sites). But there's nothing on their site about being in stock etc. Now I've been lurking for a while and it looks like none of the Thunderbolt 3 eGPU boxes(apart from the Razer Core) are actually available at all in Europe yet. Am I missing anything? TL;DR version: Is it worth ordering from these guys on the chance that they actually have it in stock?
-
So I currently am using a GDC beast 8.0 with a 220W dell power supply. My GPU is the GTX 750 ti which does not require its own power. In 2weeks time I want to upgrade my GPU to the GTX 1060 6gb version. I have 2 questions regarding this. First, how would i power the new card, do i need to use a ATX power supply or can i just connect a pin from the GDC beast to the new GPU. Will the DELL 220W supply be enough for the card? Second, my CPU is OLD. It is the first gen i5 540m for the 8440p. It only supports gen 1 port, atleast that is what @****** told me. Can i use a brand new card such as the 1060 on this CPU without issues with the EGPU? If you need any more information please do not hesitate to ask. Thanks for reading.
-

I have no idea what im doing here here (HELP)
Codypom posted a topic in General Notebook Discussions
So basically, I wanted to find a way to play games without lagging everywhere and the only thing that is bad on my laptop is the graphics card, so somehow I stumbled into this eGPU page and hopefully someone can help me basically understand how all of this works or at least attempt to help me out. So I have an Dell Inspiron 17 7000 series and ill basically copy and paste the processor if that is relevant information. The processor is a Intel(R) core(TM) i5-5200U CPU @ 2.20GHz so I have no idea what most of this means because when it comes to laptops and modification I am just completely clueless. I was just hoping to get an answer from someone if I could even have a eGPU setup and what it would cost me for that and if it is even worth doing. I know this is where people who know everything about this stuff, but I am just really interested to see if I could actually just upgrade graphics cards without buying a brand new computer, and hopefully somebody can help a clueless man. Thank you for reading and replying if you choose to. -
You know, I really hate myself, I do. I swore to myself this time, "don't fall for NVIDIAs shit, you can resist the temptation of Titan X". So I held out, bought a 1080 thinking "ok I got this!". What helped even more was it was constantly out of stock on their website. So tonight I just check it for shits and giggles and what do you know, it's in stock. My finger starts twitching and I'm thinking, "oh fuck no you aren't!" and the next thing I know, I'm at the checkout process w/next day shipping. God damn you NVIDIA! I know in a few months I'll look back on this post and think, "damn I'm an idiot" but what the hell. Update a day later (today): It arrived this afternoon and it's definitely an impressive card. My biggest gripe is I have to set the fan to 90% when its boosting to 2 ghz in order to keep it from going above 80c. Since I game with headphones on, that's not a big deal for me. In overwatch with the gtx 1080 @ 2.05 ghz and 1440p max settings I wasn't able to get above 90-95 fps. This card stays in the 130-144 fps range which is perfect for my display. Pics: https://m.imgur.com/a/y58A5
-
Hello everyone, thanks to this site i have got a old laptop working with a eGPU. my set up 8.0 GDC beast vidock, EVGA GTX 750ti, 430W psu HP 8440p. Now while playing a games my FPS is very stable and really decent. My problem arises while doing other activities such as browsing the web or youtube. It seems my computer slows down A lot while connected to the eGPU system. I attached some tests I thought would be helpful. If you require anything else please ask. Thanks and love this forum for letting me game on my old as hell laptop! Would overclocking help in anyway? Thanks in advance for anyone reading this.

-
I want to get an egpu setup going on my F555LA, but I have a few questions and one major roadblock. First, the roadblock. I have no idea where the wifi card is inside the laptop, and therefore can't get to the mPCIe port the adapter needs. Also annoying is the fact that in order to open it up you have to remove the keyboard, but that isn't to big of an issue though because I won't be using it or the track pad when it's hooked up. Questions: Has anyone set up an eGPU on this model or any ASUS laptops? Which adapter should I get? Which GPU should I get? Are eGPU's reliable? Laptop's specs for those who need to know. Processor: i5 5200u iGPU: intel hd 5500 RAM: 12gb HDD: 500gb OS: WIN 10
-
 Hello tech inferno! This is my first post here. This seems the place to be for info on setting up eGPUs. I've done some research, and I'm pretty sure I'm willing to take the plunge down the eGPU rabbit hole. Here's my idea: Since I love the idea of having all my stuff on one sleek, organized computer, I would like to have a 15 inch macbook pro (2015) with an external 'docking station' of sorts that houses hard-drives, a disk drive, and extra ports (usb, ethernet, ect.), and of course, a powerful gpu. I would have two thunderbolt cables: one for the graphics and one for everything else. I would like the external docking station to be housed entirely within a cooler master elite 120 white that I have laying around. The thing is really good looking and seems to be the perfect size. I have attached some pictures of the case for reference. I would like to put the power supply, the graphics card, the hard drives, and the disk drives in their natural places in the case, and I would also really, really like the egpu to work in both windows and mac. It would be cool to have the ports on the case work, but this is in no way necessary. Questions: Will this work? What is possible and what is not? Will the macbook retina with the AMD Radeon R9 M370X be ok for egpu, or should I stick with the iris-only? Any help would be appriciated, as I am eager to learn, but a total noob on egpus. thanks so much, Hunter
 -
 Ok so I do I lot of work on Rhino 3D, Sketchup and too Revit. I also use Maxwell and sometimes VRay for rendering. My current 15" Macbook pro with Iris pro graphics really sucks for this. When I move models around they get laggy and often freeze and crash. I do expect rendering to always take a while. Should I go with the Thunder2 and a GTX 970 with a PSU or would I be fine with the built in AMD R9 m370X of the higher priced macbook. The GTX kills it on benchmarks however the GTX requires a PSU and its hard to take around.... Thanks!
 -
Not sure where to post this so I just added it to general. I just upgraded my M17X R4 120Hz from 675m to a 980m and I'm having a problem I hope someone here can help me with. To start: It was installed correctly and successfully on Windows 10 (I wanted to start somewhere more certain). Everything worked fine and everything read fine (as far as the graphics card goes). After I was sure everything was working properly, I reverted to Windows 7. As I read, with the current unlocked BIOS A11 (posted on this site) it's capable of running 9xxM series in windows 7. When I installed 7 on this laptop soon after buying it (reformatted old HDD, moved to bay 1, inserted 500GB SSD in bay 0 and installed 7 OS on it) I installed selecting the UEFI option and the drive is in GPT. As mentioned, I have Unlocked A11 BIOS (thank you to the maker on this site!). Anyway, once I reverted to 7 it started to boot up and said it needed to run startup repair. I allowed it and it froze once the bar filled at the bottom. Upon restarting I tried once more.. same thing. I tried to "start normally" and it starts boot looping. I then changed "Load Legacy Option Rom" from disable to enable. This causes the 8 beep post issue immediately upon power on. This problem doesn't exist when this option is disabled. I then utilized the HDMI trick (I made a separate post for this the other day. Connect HDMI out to any screen and it will cause post on the laptop screen [but not on the external device]. Can then immediately disconnect once post has occured and works fine with no error or beeps). This let it boot up and I'm able to get to the desktop and everything works fine. Can even run screen at 120Hz. I ran diagnostics on the card, checked drivers.. everything is reading correctly. This is workable, but far from an ideal solution as I need to have a cable and some kind of HDMI screen available just to boot up every time. I have two option here and I'm hoping someone can provide a little guidance one way or the other. I can either fix the boot looping issue on "Legacy Rom - disabled" (it hangs on classpnp.sys when I try safe mode if that information helps at all). OR, I need to find a way for it to post when "Legacy Rom - enable" without connecting to an HDMI device (just plugging in the cable doesn't work. It has to be connected to something on the other end). For the first, I have tried start up repair and tried repairing using my WIN 7 disc but it doesn't actually pull up the menu. It just shows the windows loading screen and then freezes after a while. For the second I have tried changing different video options in hopes it will post on boot without connecting to an external or tried to find a way to keep the HDMI port active without something being in it. I can make no progress with either of these as I'm unaware exactly what exaclty the selections change. I currently have it set to PEG. Also, I have tried bios reset through removing all power sources and the 2032 CMOS and holding power button 30 seconds. Didn't help. Any help or guidance would be greatly appreciated. Feel free to ask any questions you have that could assist in ascertaining the source of the problem in either instance. As a last resort, I could go back to 10, but I would really rather not. The R4 (in Dell's words) isn't being tested for compatibility. Many features don't seem to work, and overall I just much prefer 7.
-
 Intel's Gregory Bryant, vice president and general manager of Intel’s desktop clients platform, has gone on record during a speech at the J.P. Morgan forum saying that the company's IGP (integrated graphics processor) called Iris and Iris Pro are fast enough for casual and mainstream gamers and that they would no longer need a discrete graphics solution. That statement in itself does not sound unreasonable or outlandish as Intel IGP performance has steadily increased over the years and eaten into AMD and NVIDIA's low end share. However, Mr. Bryant also stated that Iris and Iris Pro can outperform 80% of discrete graphics chips , “We have improved graphics 30 times what they were five years ago,” but admits that Intel has done a poor job communicating the benefits of integrated graphics. According to Steam's hardware survey, as of December 2015, Intel currently holds 18.66% of the overall share with 54.61% going to NVIDIA and 26.23% to AMD. This market share is virtually unchanged from December 2014 where Intel had a share of 18.88% so it seems they do have some work to do if they want to increase their appeal to gamers. Unlike NVIDIA, AMD manufactures APUs that compete with Intel's IPG solutions but with the release of Iris 6200 pro, Intel has taken a significant lead over AMD and has even approached NVIDIA's discrete GeForce GTX 750 performance at the entry level. With AMD Zen APUs possibly being released in 2017, it may give the firm the opportunity to finally take back the low end APU performance from Intel. Source: PC World View full article
 -
AMD Announces New 14nmm FinFET GPU Architecture Called Polaris
Brian posted a topic in Hardware News
AMD has just e-mailed the press release (found at the end of this article) for it's new next generation 14nm FinFET GPU architecture called Polaris. In addition, AMD has produced a new video in which Raja Koduri, SVP and Chief Architect of AMD's Radeon Technology Group, and others from AMD, discuss Polaris and also give us a demonstration of it with 2x perf/watt gains vs "a comparable GPU from the competition". Earlier VideoCardz leaked some Polaris slides that are now confirmed as being accurate so we've included them here: A lot of this information isn't a big surprise to those that follow the GPU industry closely but at least now we have official confirmation from AMD. The following is their official press release: EDIT: Article corrected for errors 1/4/16 View full article -
AMD has allegedly delayed their upcoming flagship dual GPU based on the Fiji silicon dubbed "Gemini" to Q2 2016. Earlier this year, during an E3 livecast, Lisa Su (AMD CEO) had committed to a release date of Christmas 2015. When questioned by hardware.fr about the delay, AMD claims it has been pushed back because the HMD (head mounted display) ecosystem isn't quite ready yet and therefore they opted to hold off on Gemini's release until Q2 2016. However, this does bring into question whether Gemini will even be relevant in Q2 2016 as AMD is also scheduled to begin release of it's much anticipated next generation Greenland GPU during that time frame. Sources: Hardware.fr, TechPowerUP Edited for corrections. View full article
-
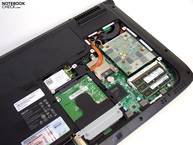
After a whole month and a half of searching, buying, returning and gambling, I have finally managed to upgrade my Medion Erazer X7817 from a GeForce GTX 670M which is now dead, to a fully-functional GTX 770M at a reasonable idle temperature of 35-40c and a clock of 706MHZ - but most importantly, 1.5GB of VRAM to 3GB of VRAM! Since it was a tough time for me even though I eventually made it through with such success, I'm making a tutorial for anyone else who was in the same boat and how to upgrade their Medion Erazer (or other MSI barbone) laptops, whether they need a replacement or if they're just looking for an upgrade. I. The Research If you happen to own an Erazer and you're looking to upgrade your graphics card without just buying another laptop whole, you're in luck, as the Erazer series is one of the few select brands of laptops that have switchable MXM GPUs. Most of the time, the average "laptop" has their GPU soldered to the motherboard, but that mostly only applies to the more casual brands like HP or the standard Dell. What's more, Medion is also an OEM partner of MSI - one of the largest gaming laptop manufacturers around. Erazers are actually barebones of MSI laptops, so in theory you're actually using a re-branded MSI laptop. But even though Erazers are very similar to barebones, they are not identical - which is why I'm making this tutorial, as there are a few extra measures one must take to upgrade an Erazer as opposed to upgrading a regular MSI laptop. First, you need to find out what type of motherboard your laptop is built on. Most are similar in physical shape, but many have crucially different names. 1. Find your BIOS version A. Click the Start Menu on Windows B. In the search box type "System Information" and hit enter C. You should see next to BIOS your version number: In this case, my laptop's BIOS version is E1762IMS.30P, which tells us that my laptop is an MS-1762 barbone. Older models may be different, such as 1761 or 16F3, but as far as I know they all determine what can be done for your laptop. II. Find a new graphics card compatible with your board This is one of the important parts, as you will need to decide carefully what you want. Take your motherboard type into account, and browse around. Unfortunately laptop graphics cards aren't sold officially - they are usually only sold on eBay or on other sites hosted in the third world. Luckily, there are plenty of sellers on eBay from various countries. Again, browse around. Here's what you need to know: * While every graphics card may be different in terms of amount of VRAM and power, they all follow the same MXM 3.0 Type B format. They are all similar in physical shape and size. The layout of the chips may be different (which can determine whether you may need to buy a new heatsink, but usually some will work just fine if the placement of thermal pads is good) IMPORTANT: MSI-branded cards are normally GREEN. Clevo cards and some Alienware cards are BLUE. Make sure you buy a GREEN graphics card, and read the description of the item and check whether the seller states it is compatible with MSI as well as other brands. It's best to buy a card which has been pulled from an MSI laptop, though in some cases some Clevo cards may work as well if you flash an MSI vBIOS over it. Make sure the seller is willing to accept returns as well if there are any problems! You also need to compare your current graphics card to see whether the power output is the same - it's best to upgrade from a 75w GPU to another 75w GPU, if that is your case. TechPowerUp has an extremely useful databse of almost every graphics card in existence, including ones made for notebooks. Find your current graphics card on this website, and look at it's statistics - mainly the output. Then go find a suitable upgrade with the same power output - and of course the same size and shape. Another important thing - make sure the GPU you have in mind has VBIOS for different brands. In Medion's case, it's best to get a graphics card which has an MSI BIOS, or else the chance of it being compatible falls immensely. I made this mistake when I bought a 765M, only to find that there was no MSI VBIOS for it, and it wouldn't work in a 1762. If you're unsure, ask in this thread and I'll help you! When you've found an upgrade that you're sure can work with your Erazer, go ahead and buy one. III. Removing and Installing Note that you will need to open up the bottom casing of your laptop. While it may seem daunting at first, it is actually very easy to do. Once you've done it the first time, you can do it confidently and easily. You don't need an IT service to do it for you - it's so easy even a caveman can do it! For removing the graphics card, a regular screwdriver is enough. Though I would also advise the use of an anti-static wrist strap - they're dirt cheap and can be bought at your local computer store. Note that some chassis can be different - mine for example is a bulky chassis with seven screws on the bottom while others may have a more slimline design. This is the bottom of a 1762 MSI chassis: To the left of the fan is the heatsink, and under that heatsink rests your graphics card. 1. Remove the old graphics card A. Shut down your laptop. B. Unplug your laptop's AC adapter. C. Remove the battery from the bottom - slide the two locks out and lift. D.Open the laptop lid and hold the power button down for 10 seconds - this will drain the capacitors and eliminate any chance of electrical discharge. E. Turn the laptop upside down and rest it gently on the top of the lid. F.Using a screwdriver, begin to remove the seven screws holding the cover in place. (Note: you may need to flip the laptop back up once you've loosened the screws to get them out, make sure you don't lose them though) G. Gently pry off the bottom cover, being careful not to snap any plastic bits. H. You should now be seeing the inside of your laptop. On the corner of the fan is a tiny screw holding it in place. Undo the screw and pull out the wire plug leading to the motherboard. I. Lift the fan out of the laptop. Set it aside. J. Turn your attention to the heatsink. On the heatsink are four screws with numbers next to them. Undo them in sequential order, 1, 2, 3, 4. K. Carefully lift the heatsink away, and place it upside down so that the copper layer facing the GPU is facing up. L. You should now be seeing your graphics card. There is a tiny screw on the side holding it in place. Undo it. M. As you undo the screw the card will tilt itself upwards. When the screw is out of it's place, set it aside. N. Gently pull out the old graphics card, handling it by the edges. Once removed, place it gently somewhere safe. Always handle it by the edges! Now it's time to insert the new graphics card, assuming you have it of course! (Though it's good practice to study the inside of your laptop and familiarize yourself with it so that when the time to insert the new card comes it won't be as daunting.) IMPORTANT: You will need a syringe of thermal paste (IC Diamond 7-carat is a good one), thermal silicon pads and two bottles of ArtiClean or rubbing alchohol - one to emulsify and remove any dry paste on the card, and the other to purify and ready the metal core of the card for new paste. A lint-free cloth or similar is also a good idea. This is to help transfer heat from the heatsink to the graphics card - without this your card is very likely to burn out and die! 2. Insert the new graphics card A. Carefully unpack your new card. Most sellers will place it inside a blue translucent packet wrapped in layers of bubblewrap. Gently take the card out of the packet, holding it by the edges. B. If the card has any dried-up thermal paste on it, take a bottle of ArtiClean surface remover and drop one or two droplets onto the surface and leave it for a few seconds. Then take a cloth and rub the paste off gently. C. Once the paste has been removed, repeat the process with the purifier and spread it around with the cloth again. D. Now, using the tube of thermal paste carefully push a small, pea-sized amount onto the surface. E. Stick your thermal pads onto the various modules and chips on the graphics card. The layout is different for each card, look it up on Google to see where they should go. Here is an example: You can cut the thermal pads with scissors if necessary. But use them sparingly! F. When the thermal paste and pads have been applied, insert the card diagonally into the MXM slot where your old card was. When it fits in, gently push the card down into place, using the screw from the old GPU to hold it in place. G. Carefully position the heatsink on the new card, and place it down on top of the new card, making sure the spring-screws on the heatsink fit into the holes on the GPU. H.Following the sequential order again, screw the heatsink in place. You may need to gently push down on the screw, but don't force it! I. Place the fan back in next to the heatsink. Plug the wire into the motherboard again and screw the fan in place. J. Now place the plastic back cover onto the laptop again, making sure all the plastic parts fit into their slots. K. Place the seven screws back in their places and tighten. At this point, there could be a number of outcomes: 1. Your laptop may accept the new graphics card and it will function without the need for a BIOS/VBIOS flash. If your card shows up as a Standard VGA Graphics Adapter in Device Manager, download and install the latest drivers. This is unlikely, but if it works, then great! 2. Your laptop may not recognize the new graphics card and it will not appear in Device Manager, not even as a Standard VGA Graphics Adapter. If the fans are NOT spinning to 100% after the new card is inside, then a BIOS flash will be required. This is the most likely outcome. 3. Ditto, except the fans ARE spinning up to 100% after startup, which unfortunately means the card is dead. This is a way of telling you whether there is no card or if there is a dead card in your laptop. If this is the case, return to the seller, get a refund, and try again. This is again unlikely (fortunately) 4. You cannot install any drivers for your new card. Use GPU-Z to identify the subvendor of your card. If it isn't MSI (1462), a VBIOS flash will be required. 2 and 4 are the only outcomes where further action is needed, so we can continue from there. If something else is up, ask here and I will try my best to help you. When you first turn on the laptop, your laptop might immediately shut off afterwards. Don't worry - this normally happens when something has been changed inside the laptop (Which of course it has). It should just turn on again. In the case of Outcome 2, flash a new BIOS and firmware. If your new graphics card is not appearing in Device Manager and only the onboard graphics are present, then your current BIOS is incompatible with the new card. This is usually the case when one makes a jump from, for example, a 560M to a 770M. Don't panic - this is often the case and can be fixed easily. You will need to find a new BIOS for your laptop. Unfortunately, Medion don't normally provide BIOS updates unlike MSI. Why they don't is beyond me personally, but we're gonna stick it to them and flash an MSI BIOS over the Medion one! Now you will need to do plenty of research. For starters, you should only seek a BIOS compatible with your current motherboard. Take your current BIOS and compare the version. For example, if your BIOS version begins with E16F3, it would be ideal to download a 16F3 BIOS. Note that you may need to force the flash - which is a gamble as it could brick your notebook. Again, ask around and research - be absolutely sure of what you're doing. Do NOT, and I repeat, do NOT, flash any BIOS meant for Alienware or Clevo laptops - you WILL brick your system. ONLY use MSI BIOSes for Medion laptops. Also, flashing using a Windows utility is not recommended. Always use DOS to be on the safe side. Since I've only done this to one laptop of my own, I can only say that for anyone wanting to upgrade to a newer graphics card like the 7**M series on a 1762 board, I would recommend the E1762IMS.30P BIOS and the 1762EMS2.503 firmware. Again, ask around and research - there are plenty of knowledgeable people around, especially here, the MSI forum and the TechInferno forum, who can tell what can work for your laptop. 1. Create a DOS-bootable flash drive There are plenty of guides on how to do this, but I recommend HowToGeek's article as it even uses a laptop's BIOS as an example. 2. Boot from your DOS flash drive and flash the BIOS. NOTE: I recommend doing this before installing a new graphics card, just to be on the safe side. You may run the laptop without a heatsink or GPU - leave the fan. A. Copy and paste the contents of the BIOS and firmware .zip files into the root of your flash drive. Note: You might have two flash.bat's, one is for the BIOS and one is for the firmware. Rename the one for the firmware to something else if this is the case. Capitalization of letters doesn't count. B. Restart your laptop, and press F10 when the first startup screen appears (Some maybe different, basically - open your boot menu) C. You should be presented with a few options. Select the Flash Disk and hit enter. D. You'll be given two options on the keyboard layout. Just press Enter as it does not entirely matter. E. You should now be ready to enter commands. Type dir to display the contents of your flash drive. F. Type flash.bat Close your eyes, cross your fingers, and hit Enter. G. Stand back, don't touch ANYTHING. Your fans will spin to 100%, this is normal. Wait until you are given the option to type another command. Do NOT turn off your laptop OR remove the AC adapter. Make sure it stays on at all costs! If you get the following during the flash: Error: ROM file ROMID is not compatible with existing BIOS ROMID. Then don't worry, nothing has changed. Your fans will gradually spin down to normal speed. However, you will need to force the flash if this happens, but ONLY if you are absolutely sure this is the correct BIOS for your notebook! I can't stress this enough - ASK FIRST! To force the flash, type afudos (nameofthebios) /p /b /n /k /x and hit Enter. Wait until you are given the option to enter another command. If you are given the option to enter a command and the flash appears to have worked successfully with no errors, it's time to flash the firmware. Type (nameofthebat).bat to flash the firmware. If you get an error that basically says it's not compatible, type ENEF_030 /FLASH -E -B34c (nameofthefirmware) and hit Enter. Wait for it to finish. When all is done, press Ctrl+Alt+Delete to restart your laptop. Your laptop might shut off and start up on its own afterwards. It may repeat this. Don't interfere unless it has shut off permanently. In this case, just press the power button again and see what happens. If all is successful, your laptop might boot into a new startup screen. The boot order may have changed - it might boot to the flash drive and open FreeDOS. In that case, just press Ctrl+Alt+Delete and open the Setup menu (it will tell you on the startup screen what key it is) and change the boot order so that it will boot from the drive which your OS is installed on first. Either way, boot to Windows and login. Open Device Manager, you should now see your card being recognized as a Standard VGA Graphics Adapter. It will probably report an error - just install the latest driver and voila. Your card is now functional in your Medion Erazer. NOTE: Some aesthetic LEDs on your laptop may stop working, and some touch controls may switch roles (e.g the Bluetooth button may turn into the TurboBoost button, the TurboBoost button may turn into the Eject button etc.) but these are purely aesthetic changes and won't affect the general function of your laptop. In the case of Outcome 4, flash the vBIOS to your graphics card. If your graphics card is showing up as a Standard VGA Graphics Adapter after booting for the first time with the card installed, and you cannot install any drivers or you get a BSOD on startup with the drivers installed, you will most likely need to flash the vBIOS on your card. The vBIOS is different from the BIOS - it only affects your graphics card, not your motherboard. 1. Download the MSI vBIOS for your graphics card. A. Go to TechPowerUp's GPU Databse and find your new graphics card. B. On the page where it displays it's statistics, click "Find graphics card BIOS for this card" under VGA BIOS. C. Download the MSI vBIOS, make sure the amount of VRAM is correct. (e.g to flash a Clevo 770M with 3GB you will need an MSI 770M vBIOS with 3GB as well) D. Download a utility called NVFlash E. Extract the contents of the downloaded .zip to the root of a DOS-bootable USB. Copy and paste the MSI vBIOS file for your graphics card in there as well. Rename the vBIOS file to something simple. F. Restart your laptop and open the Boot Menu. Boot from your flash drive. G. After starting FreeDOS, type nvflash -a This will display the current graphics card, provided it can be detected in Windows. If NVflash detects it, type nvflash -4 -5 -6 "nameofvbios" Make sure you're using the right vBIOS before doing this, and that you're flashing it to the matching card. If all is well, press Ctrl+Alt+Delete to restart your machine. And that's about it. If anyone has any questions or suggestions I should add, feel free to post here. DISCLAIMER: I am not responsible for any system brick, damage, scam etc. I am only writing this guide to help you as the consumer. It is up to you what BIOS you flash, what vBIOS you flash, what card you buy, and ultimately what you do in general. I am open to questions, and remember: don't take any unnecessary risks.
-
 Hi! As topic says one of my gtx580m burned (literally flashed and smoked when we tested it with dell technician) so now I am without the primary card. Even though the secondary 580m is still in my bios doesn't see any card besides Intel Sandy Bridge which is obviously integrated IntelHD. Now when i tried to run my system, windows loads, but I can't get to the desktop cause all I get is a white screen. It's the same on safe mode and even when I tried to run Linux from the USB. Is there any option to change integrated graphics as my primary without getting on windows for fn+f7? It's white screen all the time... Any ideas? Thanks, Tycjan.
 -
I have an ASUS G50VT-X1 model (getting a little old, I know) and i was wondering exactly how and where to put a new thermal compound, and how to remove the older thermal compound. specifically I'm looking to put it on the heatsink for the graphics card unit but if i have enough I suppose i might as well replace it on the CPU as well.
-
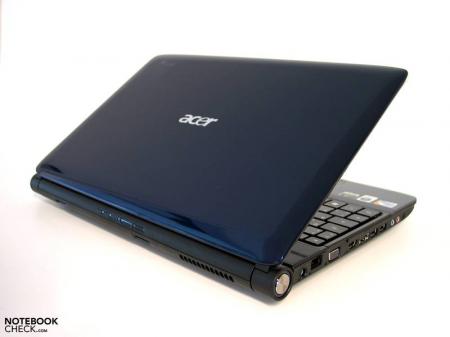
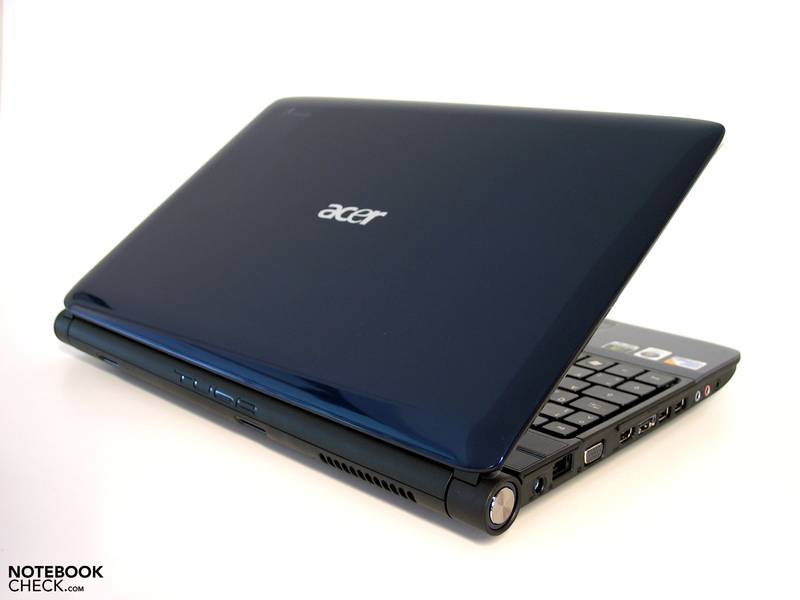
Hello ladies and gentlemen, This thread is for Acer 5739G laptop owners and other laptop owners that have Core 2 DUO/QUAD processor equipped lappys. Some Pictures from Notebookcheck.com Specs: Intel® Core™2 Duo processor T9800 (6 MB L2 cache, 2.93 GHz, 1066 MHz FSB, 35 W), supporting Intel® 64 architecture Intel® Core™2 Duo processor T9600 (6 MB L2 cache, 2.80 GHz, 1066 MHz FSB, 35 W), supporting Intel® 64 architecture Intel® Core™2 Duo processor T9550 (6 MB L2 cache, 2.66 GHz, 1066 MHz FSB, 35 W), supporting Intel® 64 architecture Intel® Core™2 Duo processor T6600 (2 MB L2 cache, 2.20 GHz, 800 MHz FSB, 35 W), supporting Intel® 64 architecture Intel® Core™2 Duo processor T6400 (2 MB L2 cache, 2.00 GHz, 800 MHz FSB, 35 W), supporting Intel® 64 architecture Intel® Core™2 Duo processor P9500 (6 MB L2 Cache, 2.53 GHz, 1066 MHz FSB, 25 W), supporting Intel® 64 architecture Intel® Core™2 Duo processor P8700 (3 MB L2 cache, 2.53 GHz, 1066 MHz FSB, 25 W), supporting Intel® 64 architecture Intel® Core™2 Duo processor P8600 (3 MB L2 cache, 2.40 GHz, 1066 MHz FSB, 25 W), supporting Intel® 64 architecture Intel® Core™2 Duo processor P7450 (3 MB L2 cache, 2.13 GHz, 1066 MHz FSB, 25 W), supporting Intel® 64 architecture GPU: GT 130M, 240M. MXM A 3.0 Module Current Build Processor: T9600 at 2.93Ghz RAM: 6GB clocked at 1066Mhz GPU: AMD 6770M Hardrive: Seagate 7200RPM 500GB Thermal Compound: Arctic Silver 5 note:Thread in development.