Search the Community
Showing results for tags 'clevo'.
-
T|I and the author are no longer associated. For support kindly contact the author directly
-
Hy everone! Is there a unlocked vbios for the GTX 675M for under-, overvolting? Or is there a Programm for Nvidia vbios Editing? I Have only found One for AMD Chips and the newer Kepler Chips but none for Fermi. I`m using a Clevo P150EM if that is important. Thanks halo19fan89
-
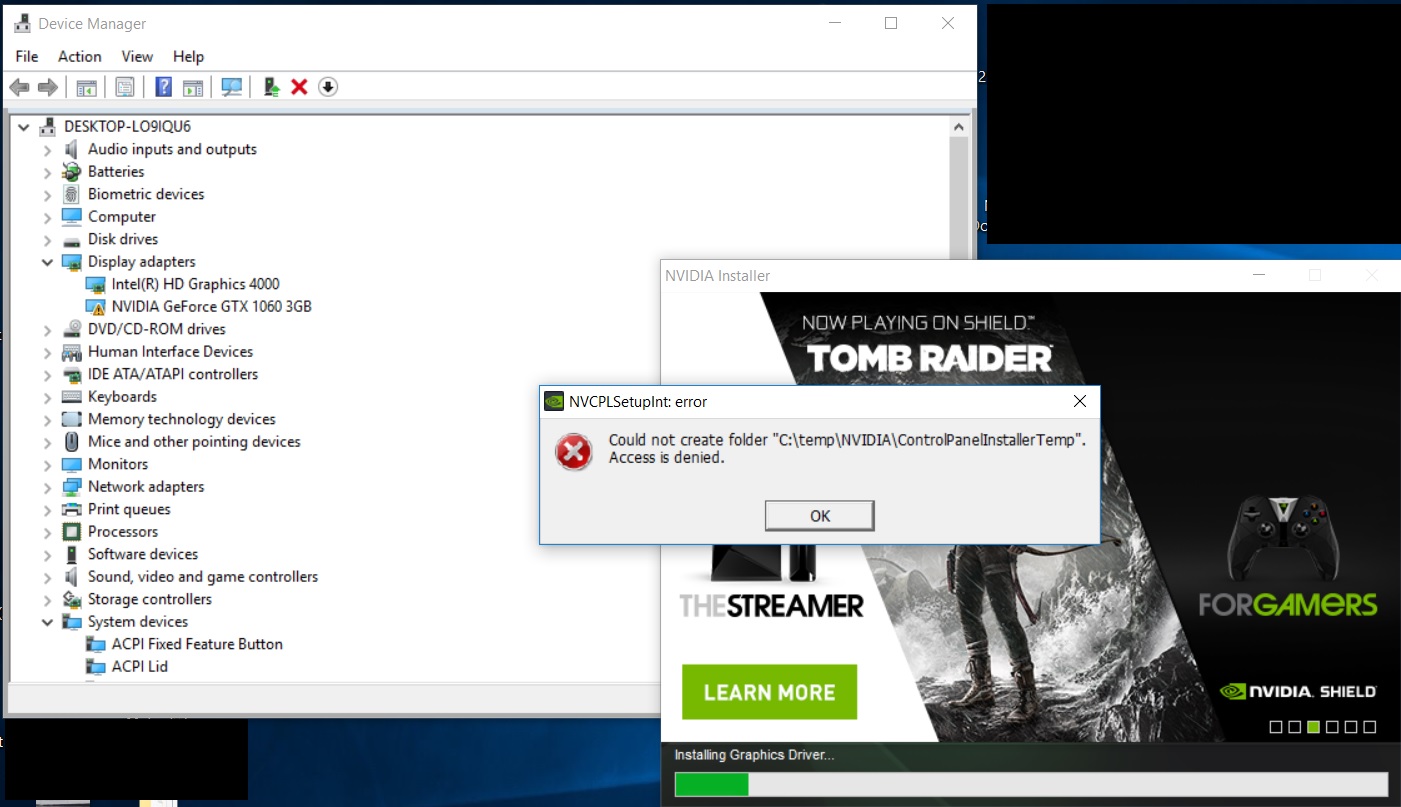
 Hello guys, I wanted to give my older laptop a bit of kick. It's a W150ER (XMG A502) laptop with GT 650M. I got the GDC for mPCIe wifi slot, EVGA GTX 1060 and 450W Corsair PSU. But I need some help. 1. With everything wired up, having green LED on GDC device the eGPU wasn't recognized in device manager. eGPU fan was just wiggling in roughly 2s intervals. 2. I tried to hotswap from wifi to GDC as described in troubleshoot post, that made the system load the GTX 1060. Fan got spinning few seconds after swap and then turned off. Now what I got is the code 43 error and fans not spinning at all. Tried several ways that I found to overcome that, including installing older driver. During one of the installation attempts I actually got the external monitor loaded for few second before installation ended with error (still no fan spinning, even though the GTX 1060 got a bit warm). After failing to install the driver, GTX 1060 disappears from Display adapters and is available after restart again with error. Can anyone help me to get it working? What's with the fan? I'm kinda worried about it. Thank you very much!
-
 Hello everyone. I've been reading the forums for quite a while now, and I can't even describe how helpful everyone at techinferno is. It's time for my first post and my question is towards the GPU vBios and Alienware/Clevo gurus here at techinferno. I've bought a barebone Origin EON 15-X (Clevo p750dm) it's the Skylake version. I also have an MSI GTX970m 6GB which doesn't seem to be working when installed in the 15-X (black screen not even backlight, only the keyboard backlight is working, no fans are spinning and there are no beeps). I think it might be due to the MSI vBios. I want to try to flash the card with a Clevo vBios (thanks to Prema) and see if the card would then work. I was hoping I can use my trusty M18x r2 for that task. In the primary GPU slot I've got my 7970m and in the slave slot I've put the 970m. When I power the laptop and go to the bios, it only shows "ATI GFX" for "Discrete Graphics 1 and for "Discrete Graphics 2" shows "Not Detected". I've tried booting to Windows and checked the device manager, same thing only the 7970m is listed. I'm not sure if what I'm trying to do is even possible. Any help will be greatly appreciated. Thanks in advance
 -
Hei guys ! Really need help. I have notebook, motherboard CLEVO W240HU. the BIOS from American Megatrend Inc. When I'm trying to flash my bios. it said "Bios write-proected". How can I disabling it? Thanks
-
Hi guys, I succesfully flashed v2 vbios from prema and I tried 1v and and oc but I couldnt. I think it was power suply. Mine is 230w. And I tried 0.75 0.50 0.25 and 0 volt. But now I m trying game, benchmark screen goes dark and after beeping at 0 volt. Is this a hardware damage? I used just 1v max.(temperature max 70c) I tried cmos reset DDU Xtu uninstall And come back to stock vbios I think my card is dying Please help me!
-
Hi, I have a Clevo P170EM with an AMD 7970M. Last year I tried to change the vBIOS of my 7970M, a friend of my tried to change it because he wanted to ''overlock'' the card. He said no worries I said okay do it, then later on he returned my laptop and bricked both my card and the normal BIOS. I had to repair the laptop trough a repair company in the city. They only could repair the BIOS by doing another BIOS on it. They said to try everything with the card but my laptop wouldn't accept it. The problem: After the Windows 10 installation I installed all the drivers from the manufacters site (http://www.eurocom.com/ec/drivers(226)ec). Including the SSD driver, then I FIRST installed and fully updated the Intel HD Graphics. After that I installed the AMD videocard drivers (crimsons edition), the weird part is, AMD autodetect sees my card and so does Windows. Then the driver ask me to restart my laptop, after restarting the Windows logo appears then the screen goes black with a blinking cursor left upper screen. I believe it has someting to do with the vBIOS of the card and I also believe that the card is not bricked but just wrong BIOS. I asked the manufacter and they say that the card may be bricked, when I ask for the BIOS they would not provide it for free (bastards). I asked for both the motherboard and AMD card BIOS, they said I have to pay for it. Question: Can someone provide information and files for the right vBIOS? I mean the vBIOS that is standard. Greetz, Jamie P.s I have some pictures and screenshot of Windows and the BIOS detecting the graphic card, the weird thing is both OS and BIOS detect the card but when I install the drivers it goes black P.s.s I already tried everything AMD support provided so I have no use for comments like ''Try unistall with DDU'' or try with second monitor etc. As you can see I've disabled the card because when I enable, Windows freezes and screen goes black.
-
 Does anybody know if the P370em mainboard or (Prema) BIOS will support a 4k display? I see another Clevo model with a how-to for the 4k display upgrade with links to a 40pin connector adapter that seems to make it plug-and-play. It seems like this should also be feasible for the P370em given the pin connector is compatible and the OS and GPU both support 4k displays... (at least through the HDMI/DisplayPort). Here is the article that details the upgrade. http://forum.notebookreview.com/threads/how-to-upgrade-the-phoenix-clevo-p870dm-g-from-fhd-to-4k-picture-guide.787821/ Any thoughts?
 -
 Hi all! Figured since there aren't many avenues out there as of yet that properly show how to dissect your phoenix, I'd try to take up the mantle with my own experience in upgrading the LCD panel from FHD 1080 to the 4K panel. Before we get started, I'd like to present a list a useful tools to have beforehand if you intend to pursue this endeavor. I'll be providing pictures of my own tools as well as links to various components you need for purchase if you intend to follow-suit: MOD EDIT: ATTENTION HUGE PICTURE LOAD AHEAD!
 -
Hello guys, I am new here so I hope you all having a good day. I will tell my problem without wasting time. Last night, I wanted to upgrade my bios and did exect ways that Prema suggested. After "step2", laptop didnt switched on again, computer doesnt starting. When I press power button, neither fans nor harddisks starting, screen stays off, power led in front blinks 2 times green and computer stays off. I've tried to pull out CMOS battery, unplugged, removed battery, pressed power button 30seconds and assembled they again but computer didnt started either. I am not seeing any booting sequence. How can I recover my computer? If you can help me , I would be so grateful. have A nice day.
-
 Hello earth, WARNING: although this is a semi-guide, what you're about to read isn't for the faint hearted XD, I'm not responsible for any damage, fire, death to your pet etcetera if you attempt to do it... As you may already know, you cannot force custom timings on intel igps, unlike dGPU system only, since Intel IGP cannot do EDID overrides. More about EDID: https://en.wikipedia.org/wiki/Extended_Display_Identification_Data The solution was to dump the EDID which can be done using modeline in windows registry, linux modeline, or dumping directly from the EEPROM (electrically erasable read only memory found physically in most screen logic) which should be straightforward as we need to actually reflash it with our modification simply over i2c interface using arduino (simple 328 with serial-to-usb, can be from 8$ to 25$ max) you can also buy an EEPROM programmer which can be slightly expensive. The screen I have is a CMN1B, Chi . Should also work with AOU 95% gamut screen, any screen with i2c interface to eeprom, you can actually trace it along the 18th and 19th pin from the LVDS cable, however it should be pretty visible. So I ended up (easily), disassembling the screen as per this guide: [GUIDE] How to replace an LCD panel on a Clevo shell (pictures included) | NotebookReview I've then cut the film from both sides then taped for making it easier to work (i.e: instead of cutting EEPROM's pin location): There are 2 EEPROMS in my case, identified it simply by looking at the test point tagging, EE_SC SD etc, should be similar in any other displays: Tip size reference, basically any 15 to 30 watts soldering iron should work, unless the testpoints are tiny on other displays like AUO, though it is least likely you will ever have to desolder the EEPROM chip: Sold'er! Roger that(You can see the EE_* tags, SC for clock, and D for data etc): Connect to my Duino(wire it as you normal i2c): My EDID dumped in Linux before proceding to flash: EDID: 00ffffffffffff000daeb11500000000 01160104902213780231d59f56589527 15505400000001010101010101010101 010101010101963b803271383e405a3c 690058c21000001a9b2580ee70382340 3523350058c21000001a000000fe0056 434d3858024e31353648470a00000000 000041319e0000000002010a20200005 BACKLIGHT: 133 range: (0, 976) Backlight: 133 range: (0, 976) scaling mode: Full aspect supported: None, Full, Center, Full aspect Broadcast RGB: Automatic supported: Automatic, Full, Limited 16:235 audio: auto supported: force-dvi, off, auto, on 1920x1080 (0x4c) 152.5MHz +HSync -VSync *current +preferred h: width 1920 start 2010 end 2070 total 2226 skew 0 clock 68.5KHz v: height 1080 start 1086 end 1095 total 1142 clock 60.0Hz Pasted in Deltacast EDID editor then modified Pixel clock from 152 mhz (60hz calculated in DTD calculator) to 209 mhz, you have to calculate by entering these from the upper code repecitevly from top to bottom 920x1080 (0x4c) 152.5MHz +HSync -VSync *current +preferred h: width 1920 start 2010 end 2070 total 2226 skew 0 clock 68.5KHz v: height 1080 start 1086 end 1095 total 1142 Export the modifications in EDID editor as hex, make sure you add 60hz(original mod) in block 3 so you can switch between 40 60 120, then using find&replace method modify the format according to the next step Then modify the array in the code (acc to format, 0x and ,) upload to arduino: https://learn.adafruit.com/adafruit-tfp401-hdmi-slash-dvi-decoder-to-40-pin-ttl-display/editing-the-edid I'v managed to go up to 120hz stable, yours may be different although the same model number... xrandr output at 85hz: Had to reboot twice on Windows under UEFI boot manager in order to recognize the 120hz option, weird Again, this is not a thorough guide, just sharing my experience. It went pretty straightforward, and simple as a typical EDID modding over VGA cable or DVI.
 -
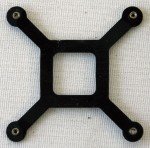
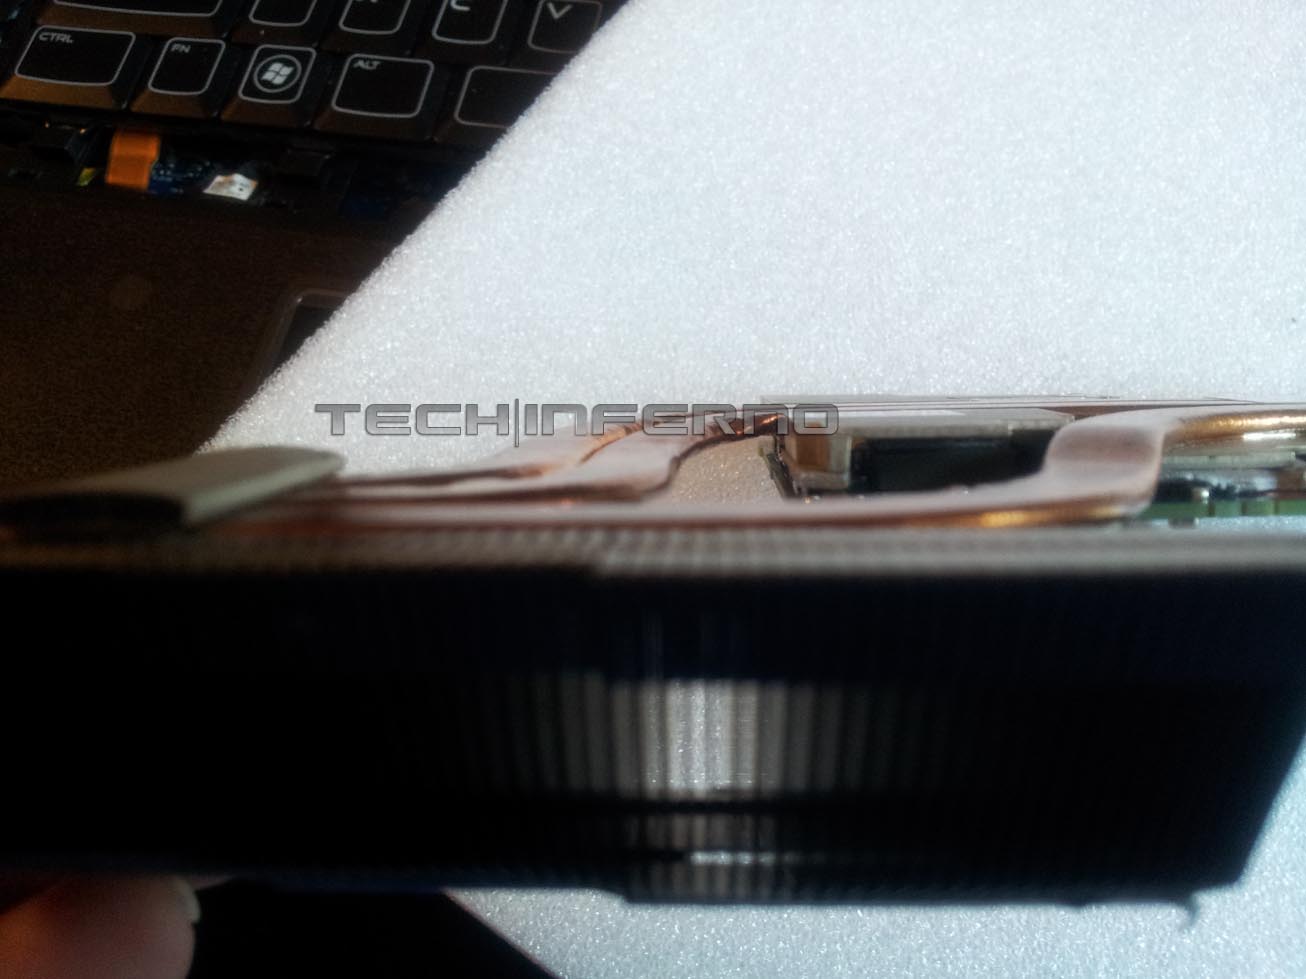
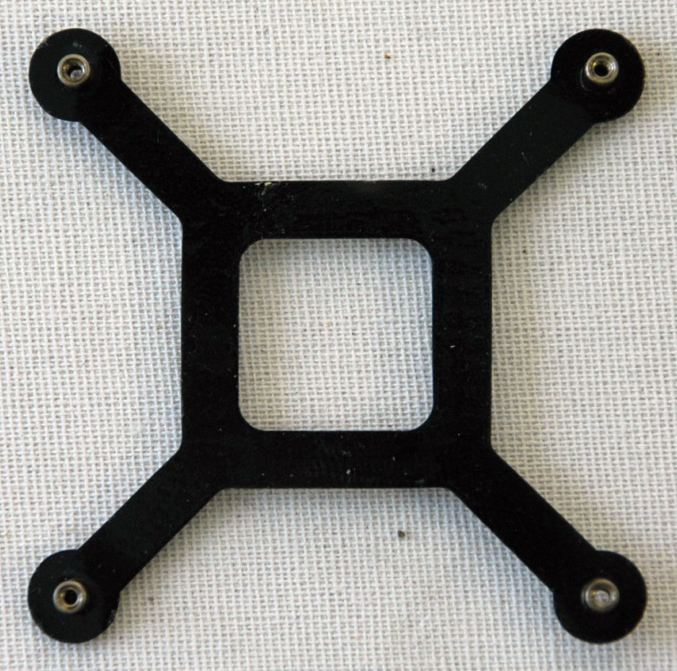
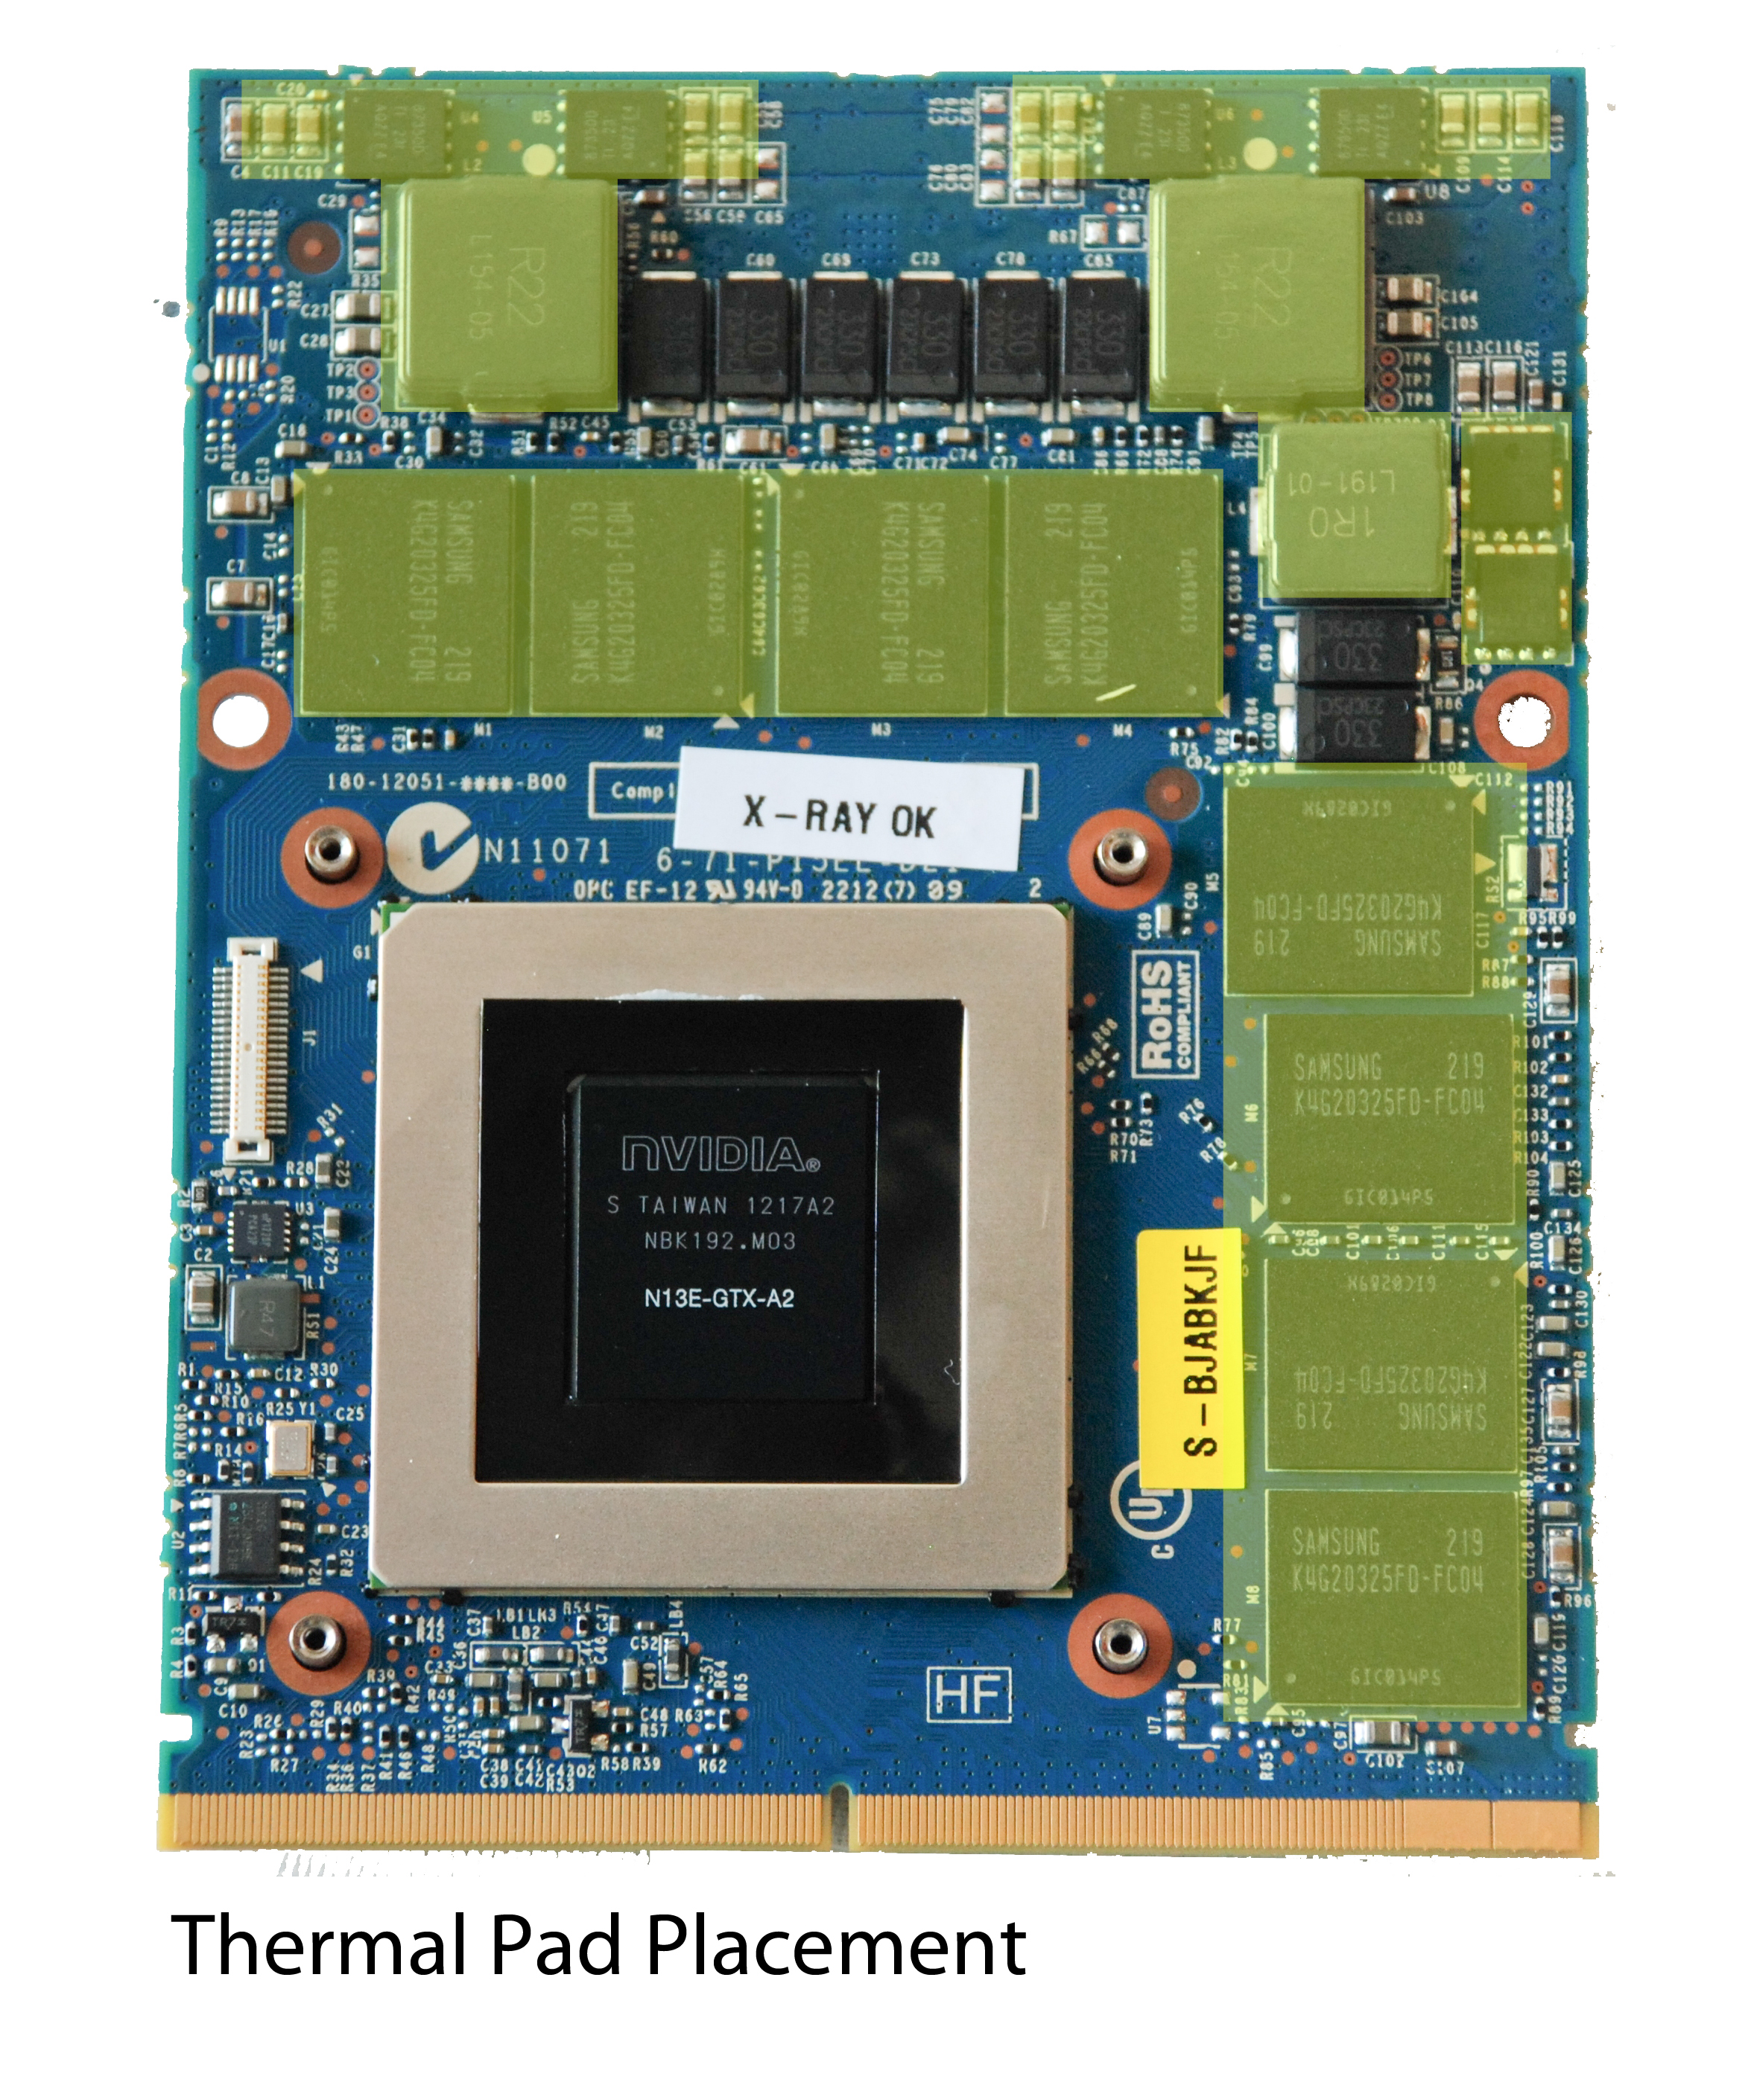
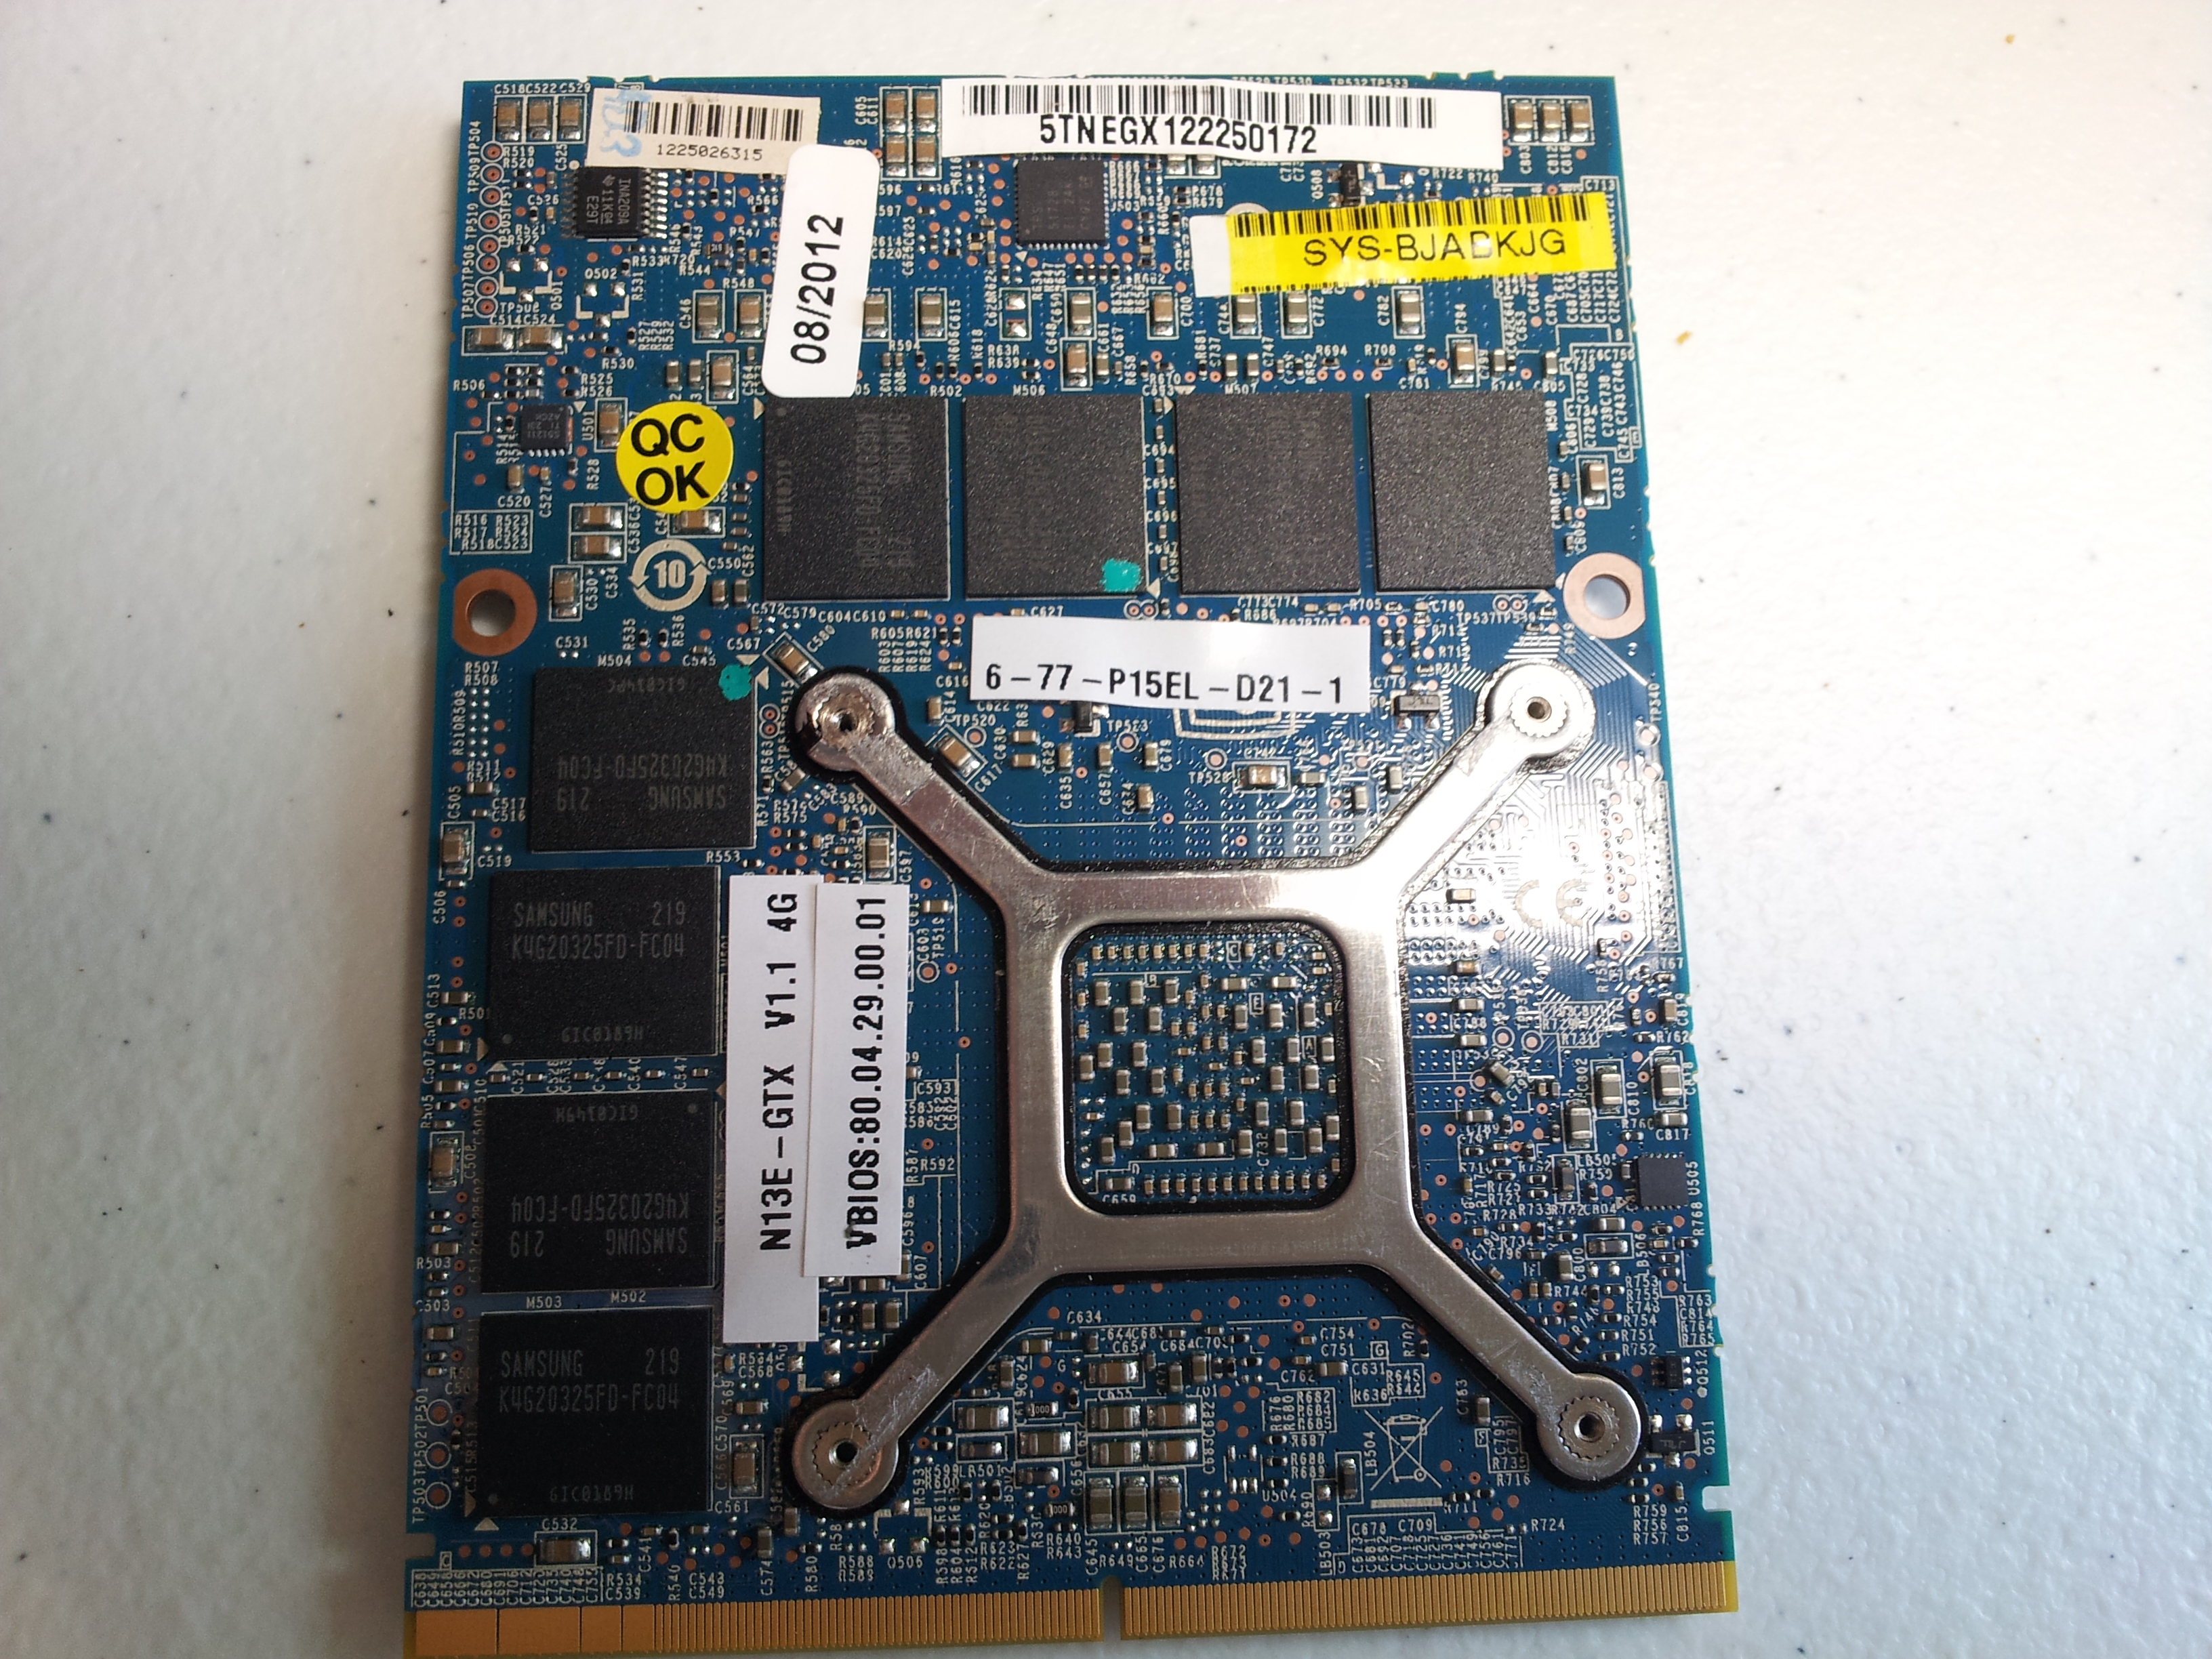
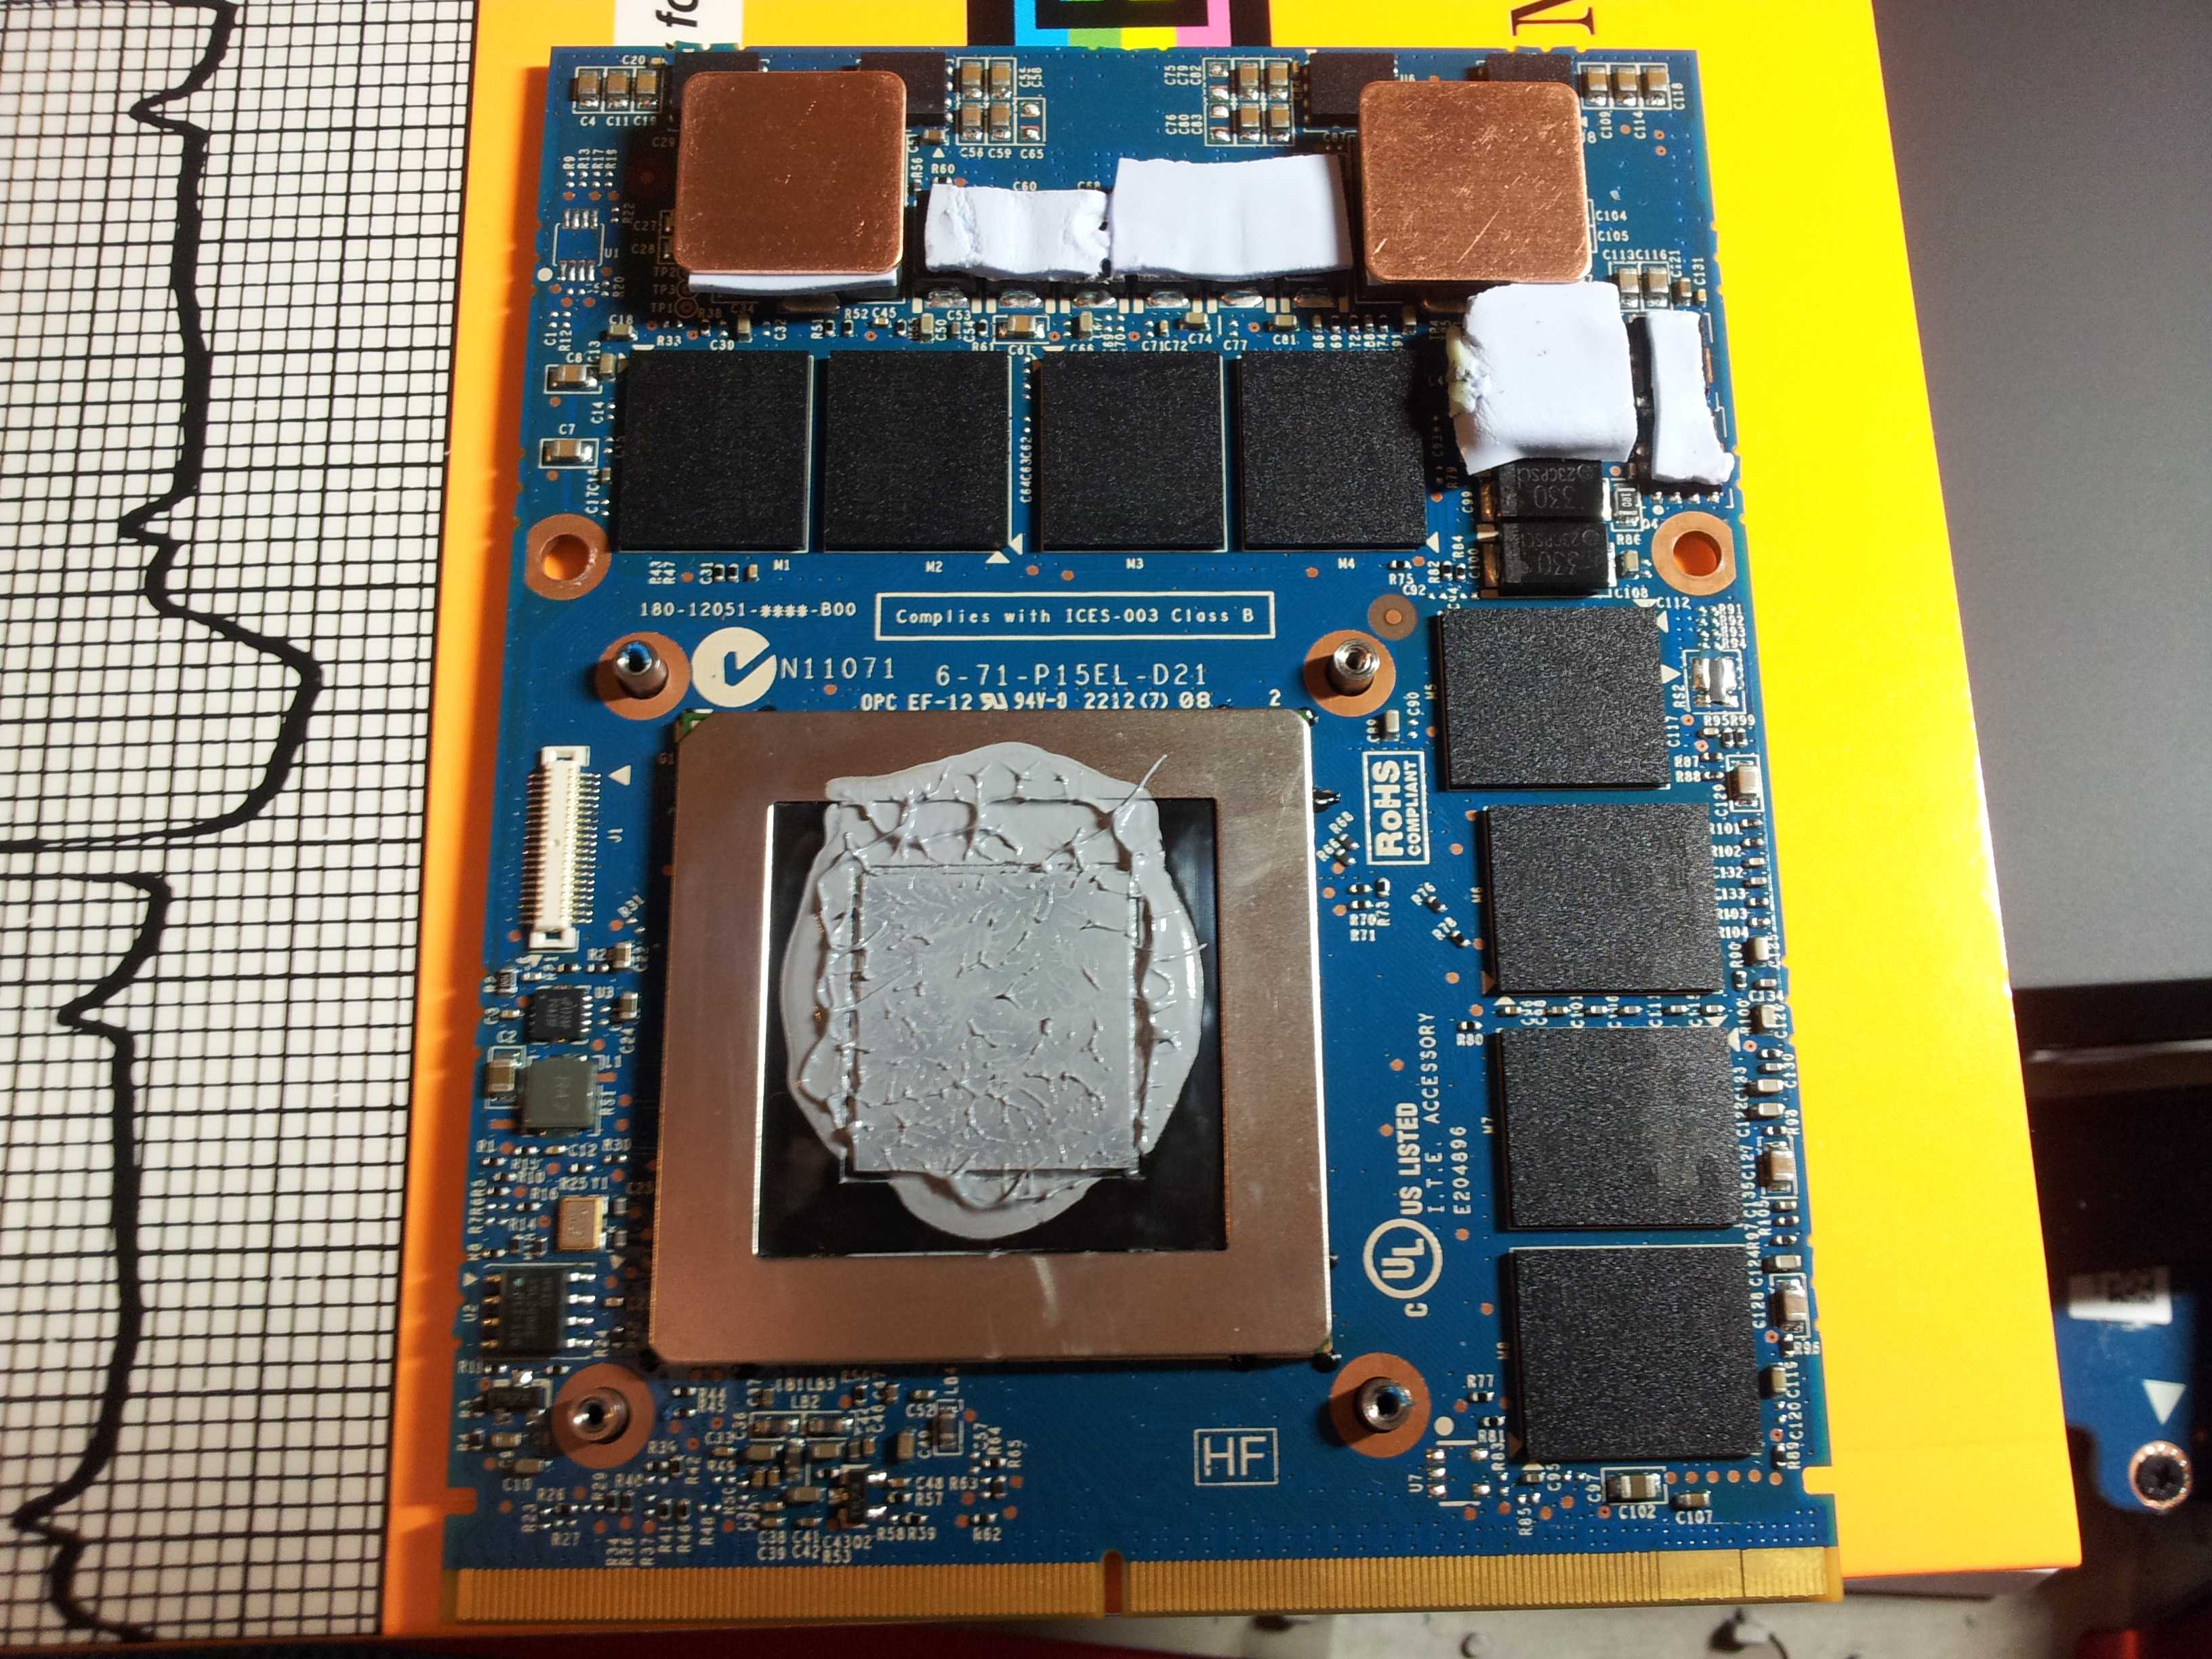
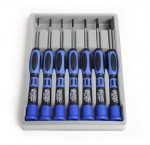
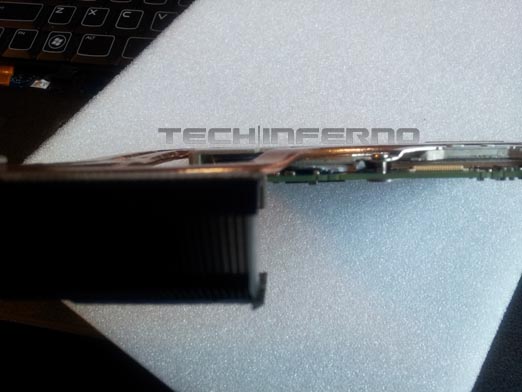
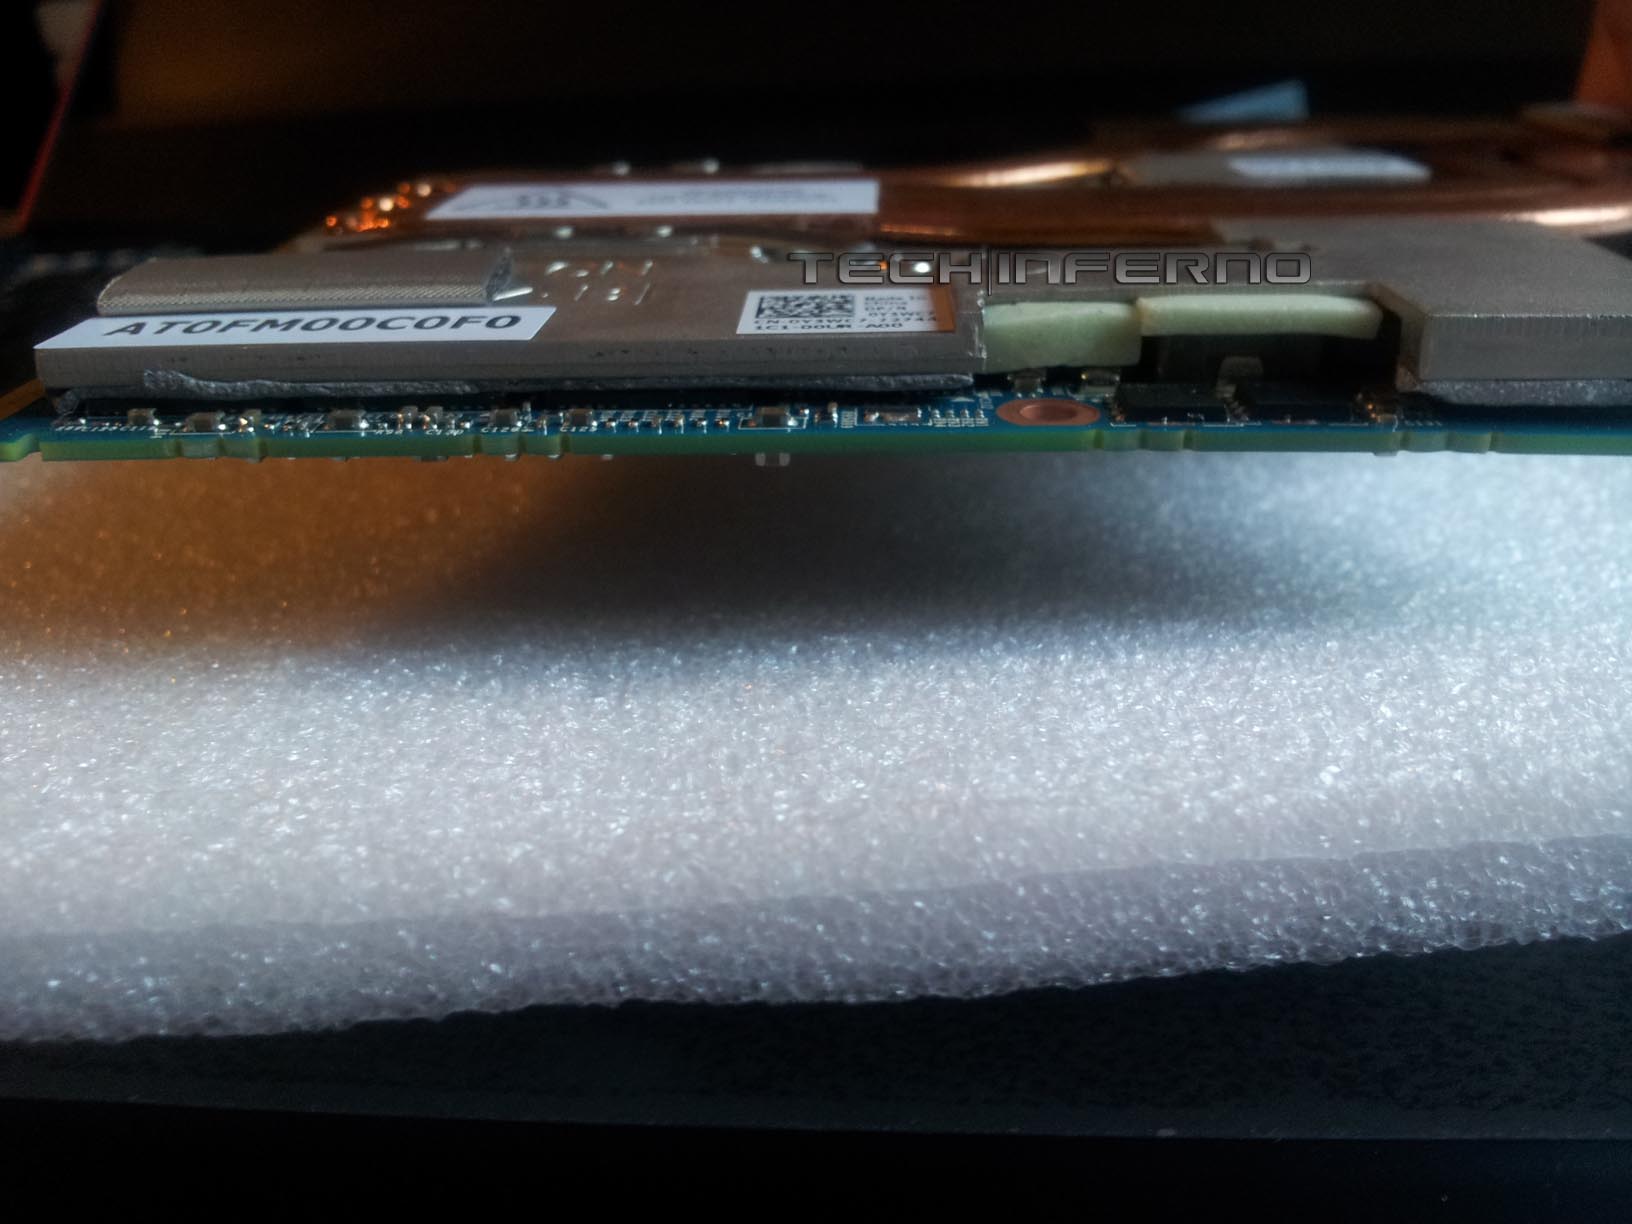
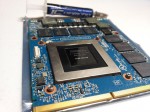
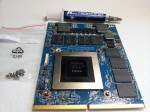
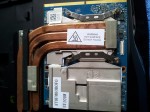
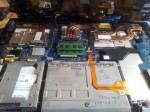
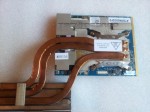
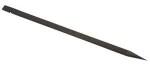
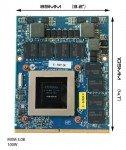
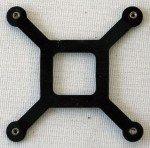
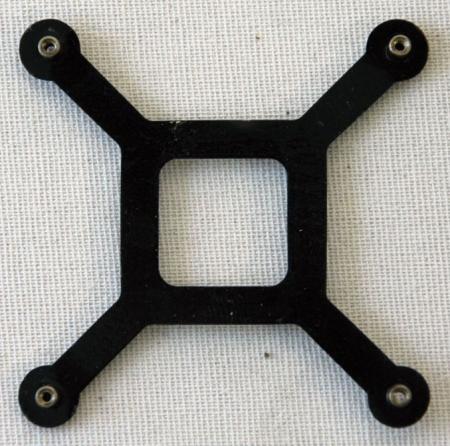
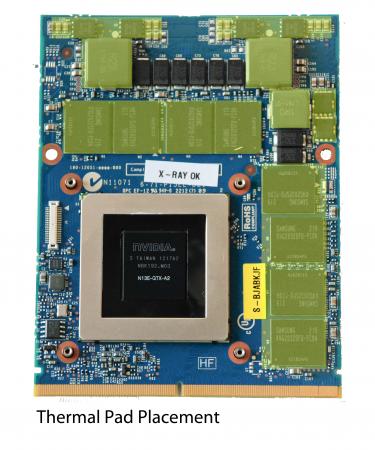
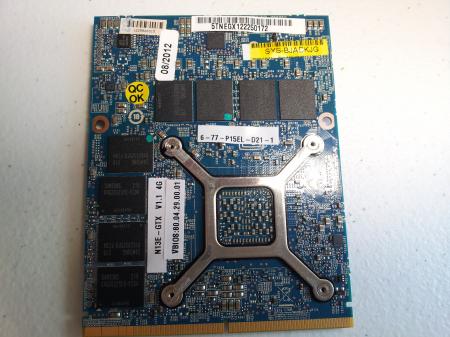
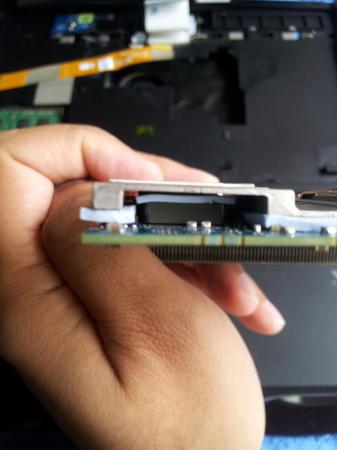
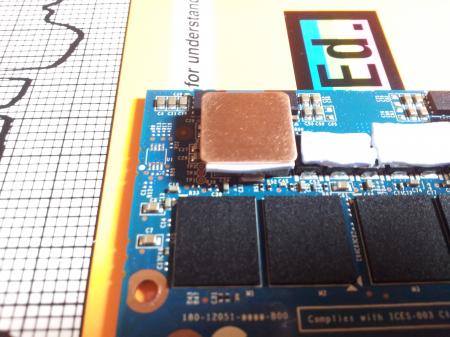
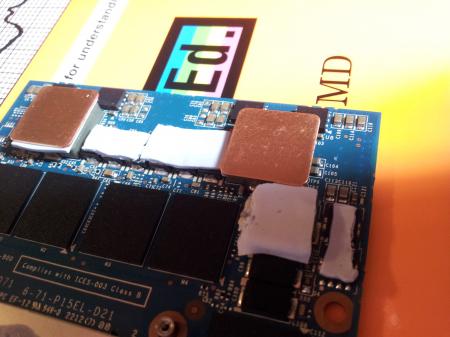
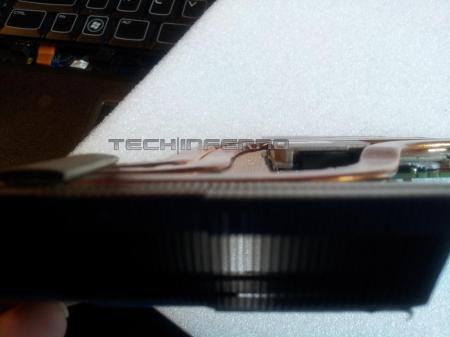
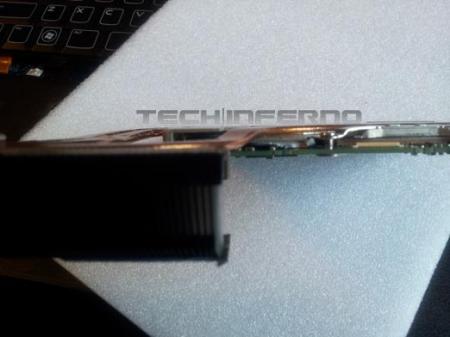
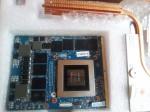
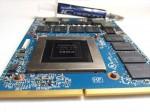
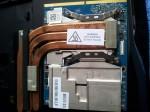
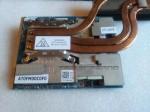
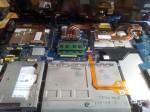
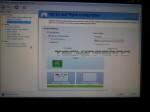
Officially, the upgrade path for the Alienware M18x-R1 ends with the nVidia GTX 580M but is that really going to stop the Tech|Inferno enthusiast from trying the latest and greatest? Absolutely not! So let’s get started. Parts & Tools Needed Quantity Part Needed (1) or (2) Clevo GTX 680M Kit from RJTech (1) X-Bracket (also included with 680M kit when purchased from RJTech) (1)Screws Screws (Also included with 680M kit from RJTech) (1)680M SLI cable SLI Cable (optional, can be found on eBay or directly from Dell) (1)IC Diamond ICD7 Diamond(recommended) or MX-4 Thermal Paste (1)Thermal pads Aftermarket Thermal Pads (1) ESD Mat + Strap (1) Precision Screwdriver Set (1) Techni-Tool Spudger Clevo GTX 680M Upgrade Kit When you purchase the Clevo GTX 680M Upgrade Kit from places like RJTech or MXM-Upgrade, they usually send a full kit that includes the X-bracket, screws, thermal paste, and Clevo heatsink. For the M18x-R1 or R2, the Clevo heatsink will be useless so you can elect to either resell it on eBay or just toss it in the garbage. A point of importance to keep in mind is that whether you opt to purchase the GTX 680M by itself or as a kit, be sure it comes with the x-bracket and Clevo screws (more information on this below). Typical price for an upgrade kit as of September 2012 is around $750-$850.00 USD. M18x Disassembly The Alienware M18x-R1 is a fairly sophisticated system that requires the user to have a familiarity with taking apart notebooks. Because some of the parts in the M18x are fragile, it is recommended you only attempt this if you feel you have sufficient experience. Refer to the Alienware M18x Service Manual to learn how to take apart the system. View Alienware’s Tear Down videos to see how its done. Installation Installation is pretty straightforward, be sure to use the ESD mat + strap when handling the M18x and GTX 680M so that no damage occurs to the sensitive electronics. Once the M18x has been opened up, remove the existing video cards. Ensure that you are using GTX 560M/580M video card heatsinks for full compatibility with the GTX 680M. You must use the screws (linked in the above table) designed for the Clevo GTX 680M X-Bracket since the Dell screws do not fit. Remove the retention washers from the 560M/580M heatsink in order to remove the original screws. Clean the previous thermal paste from the GPU using isopropyl alcohol and a cotton pad. Alternatively, coffee filter paper also works well. Place the thermal pads on the video card according to the picture below: One problem you may encounter while fitting new pads is that the heatsink does not make full contact with the inductors on the video card. To alleviate this, a thicker aftermarket thermal pad can be used or copper shims + ICD7 such as the photo below: Once the thermal pads and/or shim have been placed, do a test placement with the heatsink to ensure all the thermal pads make contact with the heatsink. An example of proper contact is illustrated in the photos below: After proper pad contact has been determined, place a thin line of thermal paste across the GPU, seat the heatsink and fasten it with the screws. Both the right and left heatsinks require different fitting of the pads so always check for proper contact before installation. Driver .inf Modification The Clevo GTX 680M may require the proper device id to be added to the nvcv.inf file found in the Display.Driver directory. Credit: jhmonroy Instructions Using Notepad, open nvcv.inf from the ‘Display.Driver’ directory (I suggest you copy a backup of file elsewhere) (Using the replace function) Replace all occurrences of DEV_11A0&SUBSYS_51051558 with DEV_11A0&SUBSYS_xxxx1028 (You can replace any GTX 680M Dev ID code you wish) Replace all occurrences of %NVIDIA_DEV.11A0.5105.1558% with %NVIDIA_DEV.11A0.xxxx.1028% <–Dell hardware ID. Replace all occurrences of NVIDIA_DEV.11A0.5105.1558 with NVIDIA_DEV.11A0.xxxx.1028 The latest beta drivers require more extensive modification that go beyond the scope of this article at this time. However, there are modified nVidia beta drivers available at LaptopVideo2Go that have the .inf files already modified for both the desktop and notebook and thus are a simple point and click installation–which is what we recommend. Update 9/13/12: You can grab the latest 306.23 modded drivers from our forum to use with the M18x-R1 and Clevo GTX 680M. Clevo GTX680M Gallery


-
Will P640RE with 970M work with vr because in NVCP the LCD is connected to iGpu help me
-
Hi. I'm having a Clevo W370ST with i7 CPU and I\ve noticed, that even when CPU throttling, the fan operates only at half-speed. Of course I could always press Fn+1 but I'm a bit lazy so I think about different solution. I already know a little about BIOS Mods, but I haven't found a tool to actually modify the EC. I've tried to learn how it works with RW Everything and Hex Editor but I don't think that's a good approach. Can anyone tell my if there is a tool to modify the fan profile in my EC file?
-
Hello, i recently bought a x7200 with one gtx 680m in it. now im planning to upgrade to sli with an other gtx680m. but i can't find a heatsink with fan. so the question is: does the p570wm GPU heatsink fit into the x7200? they look very similar. or does someone sell parts of a x7200? thanks in advance
-
Pretty excited about this laptop never had a real powerhouse of a computer before so this will be epic. Got this for gaming because my old laptop is starting to be unplayable on some games. i7 3630qm gtx 680m 8gb 1600mhz blu-ray drive 750gb 7500rpm hdd killer network bigfoot 1202 card Should be a great computer really looking forward to it and overclocking it. Read alot of reviews about it and now it shall soon be mine.
-
Hello, It seems that new Pascal gpus in mxm form factor no longer support Surround? Any insight on why it has been disabled, or how to enable it? 980 desktop mxm supports mxm according to notebookcheck. Thanks!
-
Hi, Some days ago i have bought Dream Machines ( Clevo p775dm3-g) with GTX 1080, once i received package i started to test it, and it was hard to believe but i have very low performance. My config: Procesor i5-6600K VGA GTX 1080 16GB DDR4 2133MHz Windows 10 PRO Samsung NVMe 950 EVO Score: All test where with native resolution 1920x1080 3dMark Firestrike : 8900~11000 (it is not constant) 3dMark Time Spy : 6200~6800 Overwatch (EPIC) : 45~80 FPS Witcher 3 (UBER) : 40~87 FPS I have newest drivers for 1080, BIOS is up to date. Do you have any idea why performace is so low or why there is large variance ?
-
 Guessing who will be the first company to include the nVidia Pascal 1080 and AMD Polaris GPU's inside their Laptops: 1- 2- 3- 4-
 -
Hi All! I'm pretty new to this forum, but I've been very interested in possibly buying a GTX 980M for my P150EM. I recently got this P150EM from a trade on craigslist and couldn't be happier (especially since I learned that I could upgrade the GPU). I'll just start off by asking the questions that I definitely want the answers to. I've looked on eBay and it's become painfully obvious that the GTX 980M is worth a pretty penny. I've got a GTX 680M in my laptop right now, so would I have a good chance of selling my GTX 680M on eBay or some other site where someone would buy it? (Unless someone here is interested in buying it The 980M's that I've seen for sale on eBay don't all come with the heatsinks, but just include the 980M itself. Would I need to find one that includes the heatsinks as well or would I be fine with using the same heatsinks I'm using right now for my 680M? If you guys have any other tips on what to look out for and how to get it working flawlessly it would be much appreciated!
-
 Just wondering if anyone else has experienced issues with excessive backlight bleed on their Clevo laptop? The panel is a 75Hz LP173WF4-SPF1.
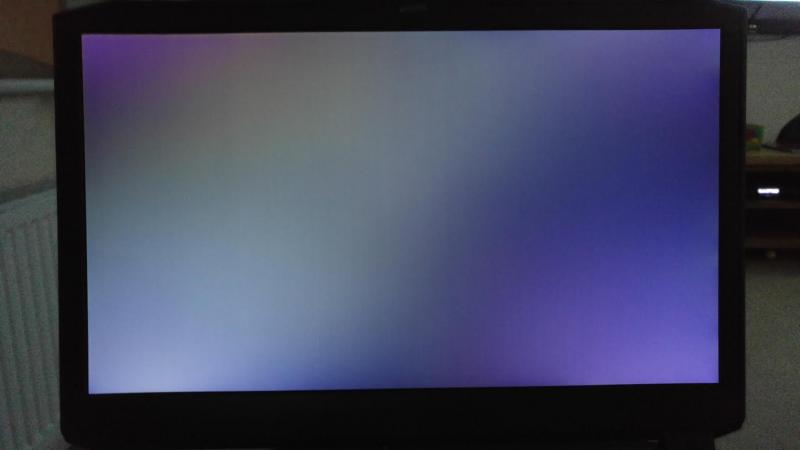
-
Dear Respected Members, I want your advice please: Upgrading my Clevo P570WM from GTX 880m SLI to GTX 980m SLI (=$2000) or the new GTX 1070/1080 if applicable? I need to verify if it will support one or 2 of them in SLI?? or Get a new Clevo P870 or Eurocom Sky 9XE Unlocked with the 980m's SLI (=$3500)? and then I have to sell my old Beast and if your advice is to go for the new system, what is the best choice?: 1- GTX 980m SLI 2- GTX 980 Desktop 3- Just wait for the GTX 980 Desktop SLI? 4- GTX 1070/1080 if applicable 5- Something else Best Regards.
-
Hi all,I'm a proud owner of my old Clevo P150EM and early this year made the upgrade to a GTX 970M and couldn't be happier with that, it looked like a new PC.Today my Windows installed the Windows 10 anniversary update and it screwed my drivers and I can't get my graphic card to work.Already tried various Nvidia Drivers, used DDU to uninstall old drivers, tried modded inf files, disable signature control, and nothing seems to be working. I'm getting kind of desperate here.Does anybody here have the same problem or has the know how to help me? Please?Cheers,António
-
Hi all, It didn't dawn on me until recently after I purchased a new external harddrive with USB 3.0 that the transfer/write speeds seem to be really slow for USB 3.0. It got me thinking so I checked the Eurocom website for my laptop model for the drivers and they don't have drivers for USB 3.0 eXtensible Host for windows 10. I went onto Intel to try and find it but I couldn't find the drivers for windows 10 either, only windows 7 and 8. Any idea what might be the issue here and how to get my speeds up to par?
-
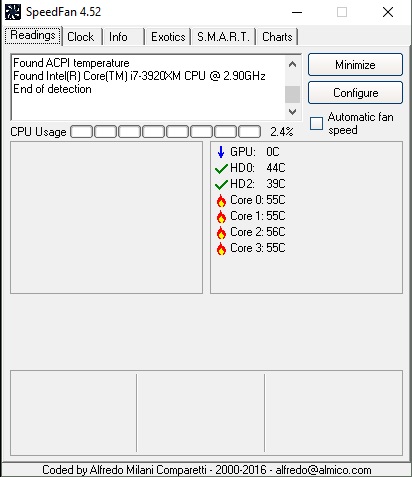
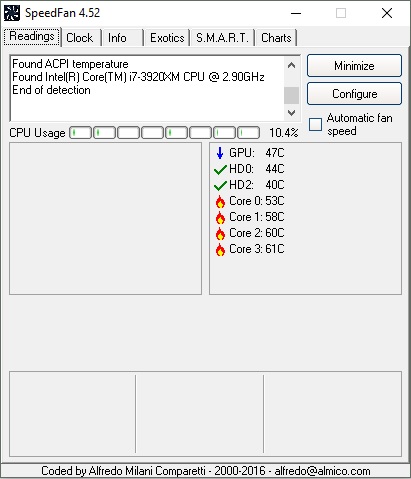
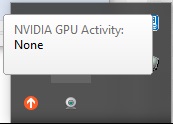
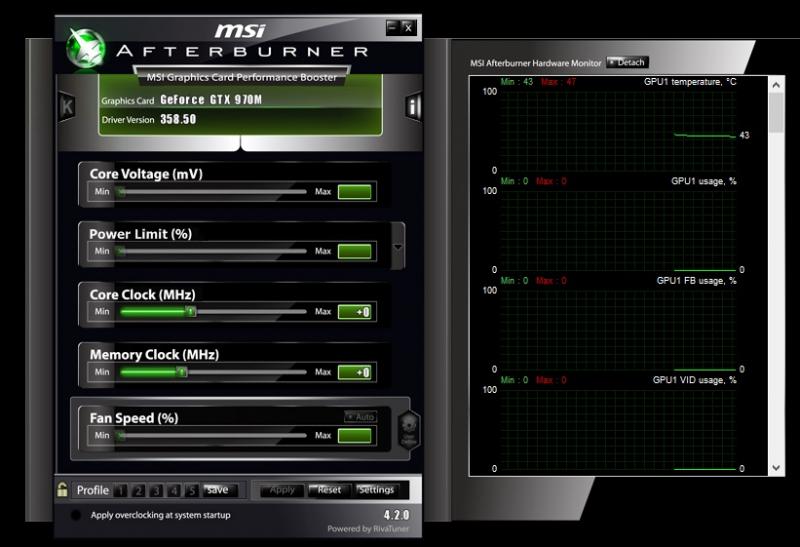
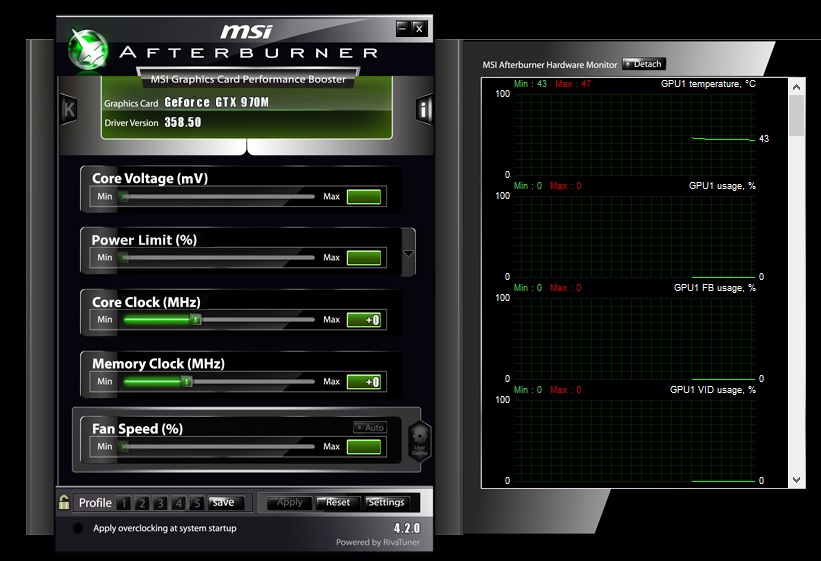
Hi all, I've my GTX 970M working for a good while, but I decided to re-apply the thermal paste today because my card seemed to get a bit hot and my gaming would suffer from fps drops. I figured re-applying the thermal paste would work, but it didn't. I then uninstalled the drivers and tried reinstalling different drivers to see if they'd perform better, but for some reason my FPS is constantly below 60 FPS no matter what game it is. I've tried checking my settings in nVidia control panel, I tried flashing the vBios, I've changed countless settings to try and make it work but nothing is working. I also noticed that when I use Speed Fan, the GPU section doesn't consistently show my GPU temps. It stays at 0 Celsius for the most part, but then randomly reads 47 Celsius. Any ideas of what could be wrong or how to possibly fix this? **EDIT** So I've noticed that the card just isn't working at all, which explains the low FPS. Although i'm not entirely sure why it's doing that. MSI Afterburner shows that it doesn't have any activity as well as the built-in nVidia GPU activity application I've got going on my task bar. In-game the icon isn't even colored, it's just black and white. I updated my bios with Prema's latest for my P150EM and I flashed my vBios, but still nothing. I've also tried installing 5 different drivers and they all yield the same results. Help would be much appreciated!!!!!