-
Posts
4643 -
Joined
-
Last visited
-
Days Won
789
Content Type
Profiles
Forums
Downloads
Everything posted by svl7
-
Version 1.0.0
74 downloads
From the author: Patched this together on request, M18x R1 BIOS A05 (unlocked) with the RST 11.5 OROM. The orom comes from the station-drivers site, not sure whether it will work fine with the M18x, though I don't really see why it shouldn't. Btw, something's weird with the original orom in the R1 BIOS, the checksum is wrong... confusing. Anyway, here's the BIOS, let me know how it performs. Also remember to use the latest RST driver for this ROM. Flash with your favorite BIOS utility or the tools provided by Dell. As always, use at your own risk.. Original thread: -
Version 1.0.0
33 downloads
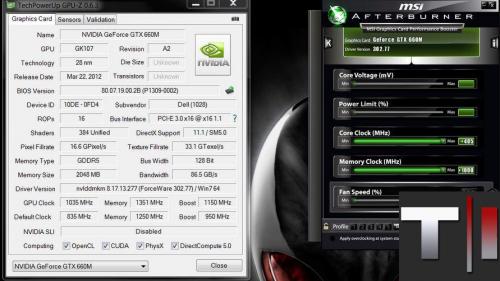
User with any of the M14x R2 / M17x R4 / M18x R2 notebooks with a current BIOS have reported issues when using the Secure Boot / Fast Boot options in combination with the dedicated Nvidia / AMD GPU. Files contained in this archive: GTX 660m - 80.07.39.00.0F.zip Dell GTX 680m - 80.04.5B.00.02.zip Dell 7970m - 015.022.000.001.000000.C42904A1.119.zip Dell Dell 675m - 70.24.4E.00.10.zip To learn more about how to use the files in this archive, please visit the thread below: Donation link In case you want to buy me a beer Thanks and cheers! -
Version 1.0.0
47 downloads
User with any of the M14x R2 / M17x R4 / M18x R2 notebooks with a current BIOS have reported issues when using the Secure Boot / Fast Boot options in combination with the dedicated Nvidia / AMD GPU. Files contained in this archive: GTX 660m - 80.07.39.00.0F.zip Dell GTX 680m - 80.04.5B.00.02.zip Dell 7970m - 015.022.000.001.000000.C42904A1.119.zip Dell Dell 675m - 70.24.4E.00.10.zip To learn more about how to use the files in this archive, please visit the thread below: Donation link In case you want to buy me a beer Thanks and cheers! -
Version 1.0.0
9 downloads
User with any of the M14x R2 / M17x R4 / M18x R2 notebooks with a current BIOS have reported issues when using the Secure Boot / Fast Boot options in combination with the dedicated Nvidia / AMD GPU. Files contained in this archive: GTX 660m - 80.07.39.00.0F.zip Dell GTX 680m - 80.04.5B.00.02.zip Dell 7970m - 015.022.000.001.000000.C42904A1.119.zip Dell Dell 675m - 70.24.4E.00.10.zip To learn more about how to use the files in this archive, please visit the thread below: Donation link In case you want to buy me a beer Thanks and cheers! -
Version 1.0.0
361 downloads
Alienware M17x R3 A12 unlocked BIOS with tweaks on SATA settings Files contained in this archive: AtpTimerInfo.dll Ding.wav FWUpdLcl.exe InsydeFlashx64.exe iscflashx64.dll iscflashx64.sys PAR00MEC.fd platform.ini READ ME.txt xerces-c_2_7.dll To learn more about how to use the files in this archive, please visit the thread below: Donation link In case you want to buy me a beer Thanks and cheers! -
Version 1.0.0
115 downloads
This file is an unlocked version of A05 BIOS from Dell for the Alienware M11x R3 Files contained in this archive: READ ME.txt M11x R3 - A05 [unlocked].exe To learn more about how to use the files in this archive, please visit the thread below: Donation link In case you want to buy me a beer Thanks and cheers! -
Version 1.0.0
778 downloads
Files contained in this archive: FTP-DOS.zip prr2.zip M18x R2 - BIOS A03 'unlocked.zip M18x R2 - BIOS A08 'unlocked.zip M18x_R2_-_BIOS_A08_-_[unlocked]_-_[IRST 11.0.6.1702].zip M18x_R2_BIOS_A03_-_[unlocked] - [IRST 11.6.0.1702].zip M18x_R2_BIOS_A09_-_[unlocked].zip [FPT]-M18x_R2_BIOS_A09_-_[unlocked].zip [FPT]-M18x_R2_BIOS_A10_-_[unlocked]_V2.zip M18x_R2_-_BIOS_A08_-_[unlocked].zip M18x_R2_BIOS_A03_-_[unlocked].zip For information on how to use the files in this archive, see here: My donation link in case you want to buy me a beer -
Version 1.0.0
2087 downloads
Files contained in this download: Asus 770m (G750JX) - 80.06.54.00.13 'OC edition' rev02.zip Clevo 670mx - 3GB - 80.04.58.00.03 - 'OC edition'_rev02.zip Clevo 675mx (4GB) - 80.04.58.00.05_'OCedition'_rev00.zip Clevo 680m - 80.04.29.00.01 'OCedition' revised_01.zip Clevo 680m - 80.04.33.00.10 'OCedition' revised_01.zip Clevo 680m - 80.04.33.00.10_'OCedition'_revised_01 - OV 1000v.zip Clevo 680m - 80.04.33.00.10_'OCedition'_revised_01 - OV 1025v.zip Clevo 680m - 80.04.33.00.10_'OCedition'_revised_01 - OV 1050v.zip Clevo 680m - 80.04.67.00.01 'OCedition' revised_01.zip Dell 680m - 80.04.5B.00.02_'OCedition'_revised_00.zip Dell 680m - 80.04.33.00.32__'OCedition'_revised_00 - OV 1000v.zip Dell 680m - 80.04.33.00.32__'OCedition'_revised_00 - OV 1025v.zip Dell 680m - 80.04.33.00.32__'OCedition'_revised_00 - OV 1050v.zip Dell 680m - 80.04.33.00.32__'OCedition'_revised_00.zip Dell 765m - 80.06.61.00.01 - 'OC edition' (AW 17) - v00.zip Dell 765m - 80.06.64.00.01 'OC edition' (AW 14).zip Dell K4000m - 80.04.33.00.34_'OC edition'.zip Dell K5000m - 80.04.33.00.05 'OCedition' rev00.zip HP K3000m - 80.04.33.00.2E - 'OC edition'.zip MSI 670mx (1.5GB) - 80.04.5B.00.A5 'OCedition' rev00.zip MSI 675mx (2GB) - 80.04.58.00.14_'OCedition'_rev00.zip MSI 675mx (4GB) - 80.04.58.00.0E_'OCedition'_rev00.zip MSI 680m - 80.04.33.00.24_'OCedition'_revised_02 - OV 1000v.zip MSI 680m - 80.04.33.00.24_'OCedition'_revised_02 - OV 1025v.zip MSI 680m - 80.04.33.00.24_'OCedition'_revised_02 - OV 1050v.zip MSI 680m - 80.04.33.00.24_'OCedition'_revised_02.zip MSI 770m - 80.06.54.00.11 'OC edition' - rev02.zip Nvidia 770m - 80.06.51.00.0F 'OC edition' - rev02.zip Nvidia GTX 780m - 'OC edition' - rev02.zip Nvidia GTX 860m (Kepler) - 'OC edition' - rev00.zip Nvidia GTX 870m - 'OC edition' - rev00.zip Nvidia GTX 880m - 'OC edition' - rev00.zip Nvidia K3000m - 80.04.3A.00.07_'OCedition'_rev00.zip Instructions on how to use these files: -
Version 1.0.0
1110 downloads
Files contained in this archive: [Y580][Y480]-'unlocked_BIOS'_660mGHzEdition_WhitelistMod.zip 'Error 104' - fix.zip Lenovo Y580 - Y480 BIOS v8.00 (5DCN90WW) - Mod.zip Lenovo Y580 - Y480 BIOS v8.01 (5DCN90WW) - Mod.zip Lenovo_Y480_Y580_-_BIOS_V.206_[unlocked].zip Lenovo_Y480_Y580_-_BIOS_V.206_[unlocked][no whitelist].zip Y580-Y480_BiosFix.zip fpt-dos.zip fptw64.zip prr2.zip For information on how to use the files in this archive, see here: My donation link in case you want to buy me a beer -
Version 1.0.0
1551 downloads
Files contained in this archive: Fptw64_(8_series).zip Lenovo_Y510p-Y410p_[v1.07][v1.09][v1.10]_BiosFixer.zip Lenovo_Y510p-Y410p_[v3.05]_modified.zip Y510p-Y410p_[v2.04][v2.07]_BiosFixer_(Whitelist only).zip Y510p-Y410p_v207_[stock].zip For information on how to use the files in this archive, see here: My donation link in case you want to buy me a beer -
Version 1.0.0
1208 downloads
Files contained in this archive: 'Error 104' Fix - v01.zip Lenovo Y500 - Y400 - BIOS [v2.02] - stock .zip Lenovo_Y500-Y400_-_Mod_[v2.04] (including update for 2.02 & 2.03 users).zip Lenovo-y500-y400-bios-[v2.02]-stock-.zip Y500 -Y400 - SLI 650m - 80.07.27.00.33 - OC.rom.zip Y500 - Y400 - SLI 750m - 80.07.9D.00.11 - OC.zip For instructions on how to use these files, see this thread: Donation Link: Here's the 'buy me a beer' link in case you like this << -
Version 1.0.0
5 downloads
AMDs professional mobile GPUs (FirePro M Series) use the same hardware as their gaming equivalent (Mobility Radeon HD Series) The difference lies in the VBIOS and in the specialized driver. This allows to simply change a 6970m into a FirePro M8900 by simply flashing the appropriate VBIOS and installing the corresponding driver: (UPDATE: This also works with the 6990m, see the update at the end of the post) The advantage of the FirePro card lies in the better CAD and DCC performance, optimized OpenGL support, OpenCL features and AMD Eyefinity technology. In short: The card gets optimized for professional applications instead of games. A 6970m is very well capable of CAD work and a M8900 can still play games, but their performance is optimized for other tasks, and this can make quite a difference. A game uses a GPU differently than CAD software. For example you don't need a high frame rate when designing something with CAD software, but it's crucial that the rendering of your work is accurate and detailed. So if you have a 6970m and need to use professional software once in a while you might want to give this a try. I haven't installed any CAD software on my system at the moment, but the driver seems to work properly, haven't seen any issues so far.The procedure doesn't take long, you only need to flash the VBIOS, uninstall your gaming driver and install the professional one. You can use the M8900 driver of the Dell Precision M6600 workstation, you'll find it at the Dell drivers page. Maybe you find a more recent driver on the AMD homepage. Here are some screenshots of the Catalyst Pro Control Center, you'll probably notice some features which aren't available with the Radeon HD cards: I've done this with my Sapphire 6970m, it'll definitely work with the Dell 6970m as well and it's save to assume that this is true for the Clevo/Eurocom version too. Since there are some changes in hardware IDs you'll need to force the flash. NOTE: This should work just as well when your system has a FirePro M8900 and you want to optimize the gaming performance - simply flash the 6970m VBIOS and install the regular driver and you're done. The Dell 6970m VBIOS can be found in this post. Also a big thanks to @Star Forge for providing the VBIOS of the FirePro M8900!! Here's a 3dMark Vantage run with after applying the soft mod to the 6970m, everything at stock, also in the CPCC. Not too bad imo, same pretty much the same as the stock run I did when I got the 6970m in April. Would be interesting to see some gaming comparisions... but I haven't installed any games atm. EDIT: For M17x r3 users: You need to modify the driver, otherwise it won't install here the instruction, a big thanks goes to @devillucifer for investigating this problem and finding a solution. When I come around to do so I'll post a link to a modified driver so you don't have to modify them yourself. Detailed guide for flashing the VBIOS: UPDATE: This also works with the 6990m. Note that the M8900 VBIOS has the same clock speeds as the 6970m, so the 6990m is actually underclocked with this VBIOS. You can easily overclock it with software or modify the clocks of the VBIOS before flashing, so that you're back at 6990m speeds. But even at standard clocks the 6990m performs better than the M8900 or 6970m, the card has 120 additional shaders which will bring a little performance boost as you can see in the screenshot below, I about 1000 points more on the GPU score compared to the 6970m flashed with the M8900 VBIOS (at the same clocks). -
Version 1.0.0
96 downloads
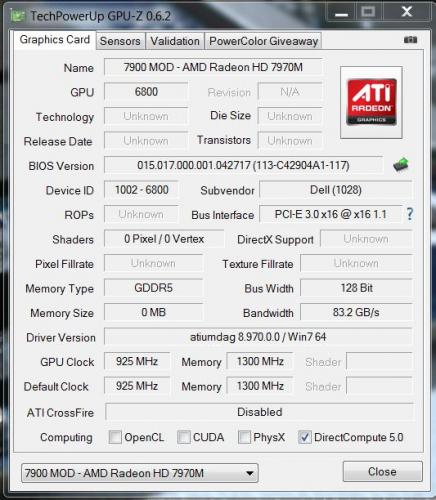
Did some tests with the VBIOS of the AMD 7970m, here's what I've got so far: - Overvolting: So far no success, when I increase the 3d voltage the card simply stays at the 2d profile. Fixed that Be aware that overvolting should only be done by experienced users and can seriously harm your GPU, shorten the life of its components and lead to unsuspected effects and / or system instability. I take no responsibility for any possible damages. Overvolting has been tested by me and @widezu69 (thanks!). It works, but can lead to instability, you need to find your limit. The M15x doesn't handle it well. I noticed similar behaviour as with my overvolted 6970m, drops in clocks, instability etc. At 1.15V even immediate crash at GPU load. The M17x R3 seems to handle it a bit better, there's probably more headroom in the voltage supply circuits which are providing the voltage for the GPU. I was able to run some vantage tests at 1Ghz with a 0.05V overvolt, my previous core clock limit was at about 950Mhz... so it definitely works. Different systems will behave in different ways, only way to find it out is to test it. Don't do it if you lack overclock experience. - Undervolting: Only did some quick tests, but it seems to work. The driver crashed all the time at clocks which normally worked fine. And at more sane clocks the card worked as expected. - Update: Yes, works very well - Core / memory clocks: Works fine so far, I only tested the 3d settings, but I assume it also works for the other clock profiles. In the GPU-Z screenshot you can see the changed clocks: There's quite a bit of work behind this, so just in case you want to buy me a beer... Here's a list of what the package contains. The names are pretty self-explanatory. "uv" for undervolt, "ov" for overvolt, clocks are "core-memory" Keep in mind that you need to rename the files before flashing due to the 8 character file name limit in DOS. Modified clocks: Dell7970m-900-1250.ROM Dell7970m-925-1300.ROM Dell7970m-940-1350.ROM Dell7970m-940-1400.ROM Dell7970m-950-1350.ROM Dell7970m-950-1400.ROM Undervolted: Dell7970m-uv-0950v.ROM Dell7970m-uv-0975v.ROM Dell7970m-uv-1000v.ROM Overvolted: Dell7970m-ov-1125v.ROM Dell7970m-ov-1150v.ROM Overvolted & modified clocks: Dell7970m-900-1300-ov1075v.ROM Dell7970m-900-1300-ov1100v.ROM Dell7970m-950-1400-ov1100v.ROM All files are based on the OEM Dell 7970m VBIOS. Instructions: For flashing refer to this guide: There's a list with the checksums of all files included in the VBIOS package, I highly recommend to check the integrity of the file before flashing it. This can easily be done with ATIflash, if you don't know how please check the guide linked above. And as always, flash on your own risk, you are responsible for your system and the changes you make on it. Feel free to ask questions, feedback is welcome as well! -
Version 1.0.0
323 downloads
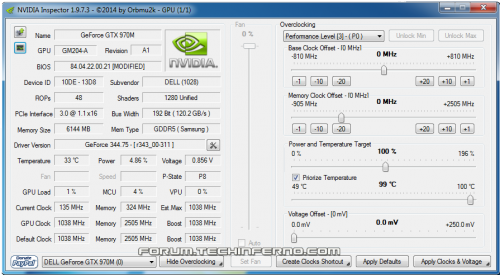
NVIDIA 'Maxwell' VBIOS mods Here you find modified VBIOS versions for the mobile parts of the Nvidia 'Maxwell' series. The VBIOS versions in this post are tweaked for performance and versatility. You'll get almost complete control over the performance parameters of your GPU. List of available VBIOS mods: Nvidia GTX 970m - 'OC edition' rev0 - >> 6 GB Version << - modified by @johnksss & svl7 -> see attachments Nvidia GTX 980m - 'OC edition' rev0 - >> 8 GB Version << - modified by @johnksss & svl7 -> see attachments Screenshot demonstrating the capabilities of the 970m versions: >> Read the instructions carefully before flashing! << If anything is unclear after reading or if you have additional remarks, please post in the thread. Flashing: - Go to the device manager -> 'Display Adapters' -> chooser your GPU, right click on it and choose disable - Flash the VBIOS with mnvflash, a modified version of nvflash (see attachments). Here are detailed instructions for nvflash in case you aren't familiar with it. - After the flashing is done: Enable the GPU once again in the device manager. - Reboot Do NOT use driver 347.09, it's broken and useless and won't allow you to overclock, even with the stock firmware. Don't distribute the files hosted here outside of Tech|Inferno. Don't modify the files you download here. Donation link in case you want to buy me a beer Thanks and cheers! -
Version 1.0.0
470 downloads
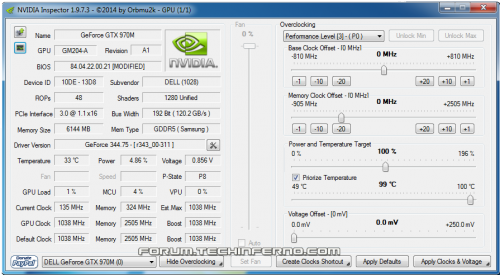
NVIDIA 'Maxwell' VBIOS mods Here you find modified VBIOS versions for the mobile parts of the Nvidia 'Maxwell' series. The VBIOS versions in this post are tweaked for performance and versatility. You'll get almost complete control over the performance parameters of your GPU. List of available VBIOS mods: Nvidia GTX 970m - 'OC edition' rev0 - >> 6 GB Version << - modified by @johnksss & svl7 -> see attachments Nvidia GTX 980m - 'OC edition' rev0 - >> 8 GB Version << - modified by @johnksss & svl7 -> see attachments Screenshot demonstrating the capabilities of the 970m versions: >> Read the instructions carefully before flashing! << If anything is unclear after reading or if you have additional remarks, please post in the thread. Flashing: - Go to the device manager -> 'Display Adapters' -> chooser your GPU, right click on it and choose disable - Flash the VBIOS with mnvflash, a modified version of nvflash (see attachments). Here are detailed instructions for nvflash in case you aren't familiar with it. - After the flashing is done: Enable the GPU once again in the device manager. - Reboot Do NOT use driver 347.09, it's broken and useless and won't allow you to overclock, even with the stock firmware. Don't distribute the files hosted here outside of Tech|Inferno. Don't modify the files you download here. Donation link in case you want to buy me a beer Thanks and cheers! -
Version 5.513.0
515 downloads
Flashing Overview: - Go to the device manager -> 'Display Adapters' -> chooser your GPU, right click on it and choose disable - Flash the VBIOS with mnvflash, a modified version of nvflash (see attachments). Below are detailed instructions for nvflash in case you aren't familiar with it. - After the flashing is done: Enable the GPU once again in the device manager. - Reboot Detailed Instructions: As soon as you see the command line you're ready to go, write dir and hit enter to display all the files on the USB drive. Display all Nvidia adapters in the system: nvflash -a or alternatively the longer version of the command: nvflash --list This command will return you a list with all Nvidia adapters present in your system. Here's an example output of this command run on my M15x with a 680m in it: NVIDIA Firmware Update Utility (Version 5.117) NVIDIA display adapters present in system: <0> N13E-GTX (10DE,11A0,1028,02A2) H:--:NRM B:02,PCI,D:00,F:00 The number in the <> brackets is the index of the corresponding device. SLI users will have more than one entry and flash each card separately. Backup your current VBIOS: Never forget to keep a backup of your original VBIOS before you flash anything non-stock. Use this command to save a copy of the firmware to your USB drive: nvflash -b filename.rom or with nvflash --save filename.rom Flash the VBIOS to your card(s): For a single card it's really straight forward, you don't need to worry about the adapter indices. Just use this command: nvflash -6 vbiosname.rom -6 will allow you to override mismatches of the PCI subsystem ID. In case of a mismatch you'll need to confirm the flash with 'y'. NOTE: Users with a non-US keyboard might need to press 'z' or similar, because the 'y' isn't at the same location for all keyboard layouts. SLI users will need to flash each card separately. The concept stays the same, but you will need to use the corresponding adapter index to flash a card. How to figure out the adapter nr. is described above. Flashing goes like this: nvflash -i[index] -6 vbios.rom [index] represents a number, namely the index you found with the 'nvflash -a' command. So a command example to flash a card which has index 0 is: 'nvflash -i0 -6 vbios.rom' Donation link In case you want to buy me a beer Thanks and cheers! -
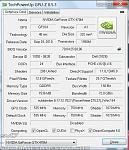
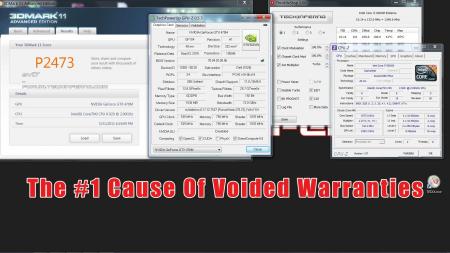
Guide – M15x with Nvidia GTX 470m IMPORTANT: The Nvidia 470m is not officially supported by Dell. Upgrading to this card may void your warranty. Some background to this mod: The first guy who tried to put a Nvidia 470m in an Alienware M15x was @iloveb00bs in December 2010, shortly after the card got released.Unfortunately it didn’t work as desired, the card worked, but only at 2d clocks. All attempts to bring it to 3d clocks failed, and the card wasn’t supported by Nibitor support at this time.Also @widezu69 didn’t get it to work a couple of weeks ago, so I didn’t think it would be possible. But in the process of trying to upgrade the Asus G73JW of a colleague I got my hands on a Nvidia GTX 470m and since we didn’t get it to work in the G73, I thought let’s try it again in the M15x. I had to mod the vbios to get it running at 3d clocks. I’m not that experienced with Nvidia cards, so that’s probably why it took me a couple of attempts to get it working. First I changed the 2d clocks and voltage (P3 in Nibitor) to 3d values. The result was that the card idled at 3d clocks, but as soon as I opened a 3d application it went downclocked itself to about 73MHz core and got to 2d voltage again… pretty annoying. After some more tests I realized that I had to change the lower 3d clocks and voltage (P7 in Nibitor). This did the trick. Apparently the card only checks P7 and P3 in the VBIOS, the actual 3d clock entries (P15) seem to have no effect at all. The fan control works perfectly. Haven’t tested DP/HDMI audio yet, but I’ll do this sometime soon. Things to do before exchanging the card: Download the drivers. I used the latest Nvidia beta driver (v275.27) and the modded .inf files from laptopvideo2go. As the card comes from Clevo I guess the Clevo (and resellers) driver will work as well. But I usually prefer the latest driver for performance and stability. Also get GPU-Z for monitoring your video card and verifying it. Make sure you have thermal paste, maybe some new thermal pads as well as something to clean the heatsink (e.g. isoproply alcohol) and some cloths around. I also highly recommend using a grounded ESD-mat and a wristband. Know what you’re doing. You need to partially disassemble your machine to get to the GPU. Prepare yourself thoroughly, check out my little GPU exchangement guide and if you need more information also the M15x service manual, as well as the official teardown video. It can be helpful to write down all the steps in advance when you’re doing this for the first time.In case there’s still something unclear about the disassembling procedure after checking out all the stuff I just mentioned, just ask. Exchanging the GPU is really pretty easy. Very important: Make all the necessary preparations to flash the modified vbios to the card in order to get it working at 3d clocks:You’ll need a DOS bootable USB drive with NVflash on it. If you have already such an USB drive you can skip the next step and simply copy the mod470m.rom file from the attached archive to your stick. If you first need to create such an USB drive follow these instructions: Creating a bootable DOS USB drive (by @Brian ) Step 1: Download all the following files as they will be needed throughout this guide.1. Download the HP USB Key Utility: HP USB Disk Storage Format Tool – v2.1.8 Download – EXTREME Overclocking2. Download the Windows 98 system files: Windows 98 System Files Download – EXTREME Overclocking Step 2: Creating a Bootable USB Drive to Flash to GPU1. Install the HP USB Key Utility2. Launch the HP USB Key Utility and do the following: - Insert your USB thumb drive. - Select File system as “FAT32″ - Select Format Option as “Create a DOS bootable Disk…” - Checkmark the box that says, “Quick Format” - Locate the directory you extracted the Win98 files. - Format the USB key using the the Win98 files. The upgrading procedure: Uninstall your GPU drivers. Make a power drain (Turn off your M15x, remove the power cord and the battery. Then press and hold down the power button (Alienhead) for about 10-20 sec. Remove your GPU - Here’s a little guide with pics in case you need some help. Clean your heatsink, if necessary replace the thermal pads with new ones. Make sure the 470m has a retention bracket on the back of the GPU. If not take the one from your old GPU and put it there. Properly insert your GPU, make sure that it sits properly and that the die is clean. Apply the thermal paste, and attach the heatsink. Then (after reassembling your system), boot, install the drivers and reboot. Make sure the fans are running (otherwise you probably forgot to plug in the fan). Open GPU-Z and verify your card and the clocks. Default 3D clocks are 535/750/1070 MHz (core/memory/shader), you can see them in the “Graphics card” tab of GPU-Z. Make sure PowerPlay is enabled in the Catalyst Control Center. Also make sure Stealth Mode is deactivated. Check your temperatures. Idle temps should be 40-50°C, depending on your ambient temp of course. While gaming or doing something similar GPU-intense the system will run significantly hotter, 60-70°C, maybe a bit higher. >>>Now you need to flash the modded vbios to your GTX 470m in order to get your card working at 3d speeds<<< WARNING: Flashing the vbios of your GPU always involves some risk and can brick your card in case something goes wrong. Make sure you know the exact procedure before doing this. I do not take any responsibility for damaged cards, systems or whatever. -Plug in your properly prepared USB drive -Make sure your system is plugged in (AC adapter and to be safe battery as well) -Reboot -When you see the Alienhead press [F12] to get to the boot menu, choose “Boot from USB” A command prompt will appear. First of all, make a backup of your original 470m vbios! Use the following command: Code: nvflash -b orig470m.rom Before flashing, test whether the file isn’t corrupted (errors while copying it to the stick or similar): Code: nvflash -v mod470m.rom The image size must be 64000 bytes and the CRC32 3C8FA599 Now flash the modded vbios: Code: nvflash -5 -6 mod470m.rom Press enter. A couple of warnings will appear, follow the instructions on the screen to confirm the flash procedure. Remember, some Keyboard layouts have the [Z] key at the place where the US layout has the [Y] key. So in case you have such a keyboard you’ll need to press [z] instead of [y], otherwise the flashing procedure will get cancelled. Then press [Ctrl][Alt]+[Del] to reboot your system, unplug the USB stick. You can use GPU-Z to verify the flash of the vbios. It should look like this afterwards: Here some first benchmarks, both at stock clocks, PhysX off and the rest in the Nvidia control panel on standard settings, CPU at 3.2GHz. I haven’t seen other 470m benchmarks of other systems, but 9k stock vantage seems reasonable. The card is probably pretty overclockable, but I haven’t tested this yet. I have yet to find overclocking tool with which I can set the core clock manually, so far I only managed to change the memory and shader clock with Nvidia Inspector. Otherwise I’ll have to modify the vbios in order to overclock it (which isn’t the best solution as I can’t really push the card with this method) However, it seems the card can be overvolted, haven’t tested it yet but Nibitor allows me to change the voltage to 0.99V (instead of 0.94V). The only issue so far is that the card runs either at 3d clocks or at 2d clocks. Nothing between this.
-
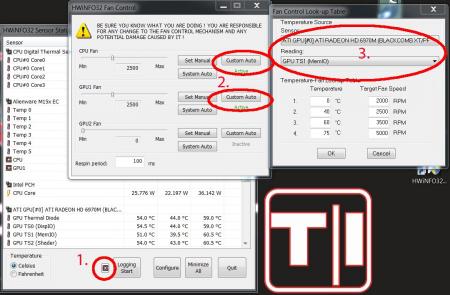
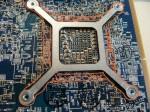
IMPORTANT: The 6970m is not officially supported by Dell. Upgrading to this card may void your warranty. The 6970m is a powerful card, it will draw more power and produce more heat. This card can significantly improve the performance of your system, however, the long-term effects of running this card in a M15x are currently unknown, but it works great so far. Cards that are known to work: The card Dell uses in the M17x R3: This has only been tested for a short while so far, but it seems to work perfectly fine. Credits go to Rogue-OP and iloveb00bs, the first guys who tried to put a 6970m in a M15x. -DP/HDMI works, confirmed by Strigae, fan control works It seems you need to install the M17x R3 drivers first before you can get the official AMD drivers. I guess installing for example the modded 11.4 will work as well. Dell Part nr. is: V9XKH.Good luck when ordering one from Dell, depending on where you live and what kind of rep you get on the phone they might not want to sell you the card as it isn’t officially available for your system. Call again in this case, or if you know someone with a M17x R3 let him order the card for you. 6970m from MXM-upgrade.com: Works great, but no fan control. The fans are constantly at a high speed, but not completely at full full speed. For now you’ll need to manually control the fans with HWinfo32. -DP/HDMI works. Sound through HDMI works when you install the Dell 6970m vbios and the M17x R3 HDMI audio driver. Here are the instructions for this. Card can now be ordered for the M15x from mxm-upgrade. Clevo (and resellers) 6970m: The card from Clevo and resellers (Eurocom etc.) works as well, but make sure you get a version of the card which has holes for the back plate! Some of these cards have the screw holes for mounting the heatsink soldered on which makes it impossible to use the Dell backplate, and since Clevo uses slightly smaller screws than Dell you can’t simply put your heatsink on such a card. Contact your dealer in advance to make sure you get a card which doesn’t have the screw holes soldered to the PCB, otherwise you’ll have to remove it (which is difficult) or use some smaller screws on the heatsink. For all these cards the heatsink of the M15x fits perfectly. No modification needed. Cards from other vendors / manufacturers may work as well. If you got a different 6970m running in your M15x let me know and I’ll upgrade the list. Things to do before swapping the cards: Download the drivers. This modded 11.5 should work, click on “MobilityMod Windows 7/Vista” in the linked thread. Also get GPU-Z for monitoring your video card and verifying it, Trixx, for under- and overclocking and in case you haven’t got a Dell card also HWinfo32 (I recommend getting it anyway since it is a great system monitoring tool) Make sure you have thermal paste, maybe some new thermal pads as well as something to clean the heatsink (e.g. isoproply alcohol) and some cloths around. I also highly recommend using a grounded ESD-mat and a wristband. Know what you’re doing. You need to partially disassemble your machine to get to the GPU. Prepare yourself thoroughly, check out my little guide. In case you need more information, there’s also the M15x service manual, as well as the teardown video. It can be helpful to write down all the steps in advance when you’re doing this for the first time. The upgrading procedure: Uninstall your GPU drivers. Make a power drain (Turn off your M15x, remove the power cord and the battery. Then press and hold down the power button (Alienhead) for about 10-20 sec. Remove your GPU. Clean your heatsink, if necessary replace the thermal pads with new ones. Make sure the 6970m has a retention bracket on the back of the GPU. If not take the one from your old GPU and put it there. Also make sure you read the section about the “retention bracket problem”. Properly insert your GPU, make sure that it sits properly. Apply the thermal paste, and attach the heatsink. Then (after reassembling your system), boot, install the drivers and reboot. Make sure the fans are running. Open GPU-Z and verify your card and the clocks. It should look more or less like this. Default 3D clocks are 680/900MHz (core/memory) and 150/100MHz when idling. Make sure PowerPlay is enabled in the Catalyst Control Center. Also make sure Stealth Mode is deactivated. Check your temperatures. Idle temps should be 40-50°C, but this also depends on your ambient temperature . While gaming or doing something similar GPU-intense the system will run significantly hotter, 70-80°C, maybe a bit higher. Note: By lifting the back of your system a bit (for example with a book) you can improve the airflow in the system. This can really help lowering the temps. The back plate problem: The retention bracket of the 6970m has a different size than the regular M15x cards (260m, 5850m etc.)When your card doesn’t come with this x-plate you need to take the one you have on your old GPU, but this one won’t fit properly. Nevertheless it works, even if it covers some resistors on the back of the card. Make sure you’re not shorting anything. Usually the back plate has an insulating black plastic pad on it, this will work. However, if your x-plate doesn’t have this pad on it, you must cover it with some thin, insulating tape. Here you can see the problem, in the first picture I marked the are which gets covered by the backplate and in the second picture the highlighted area shows where the plate should be. The space beneath the card becomes pretty tight, but it works. My advice is contacting your dealer before buying the card and asking whether he can provide the correct x-plate. (In case he tells you that you should use the one from your old card tell him it has a different size.) Power consumption: The power draw of the card is probably about 75-100W. I run this card together with an i7 920xm in my M15x and it works fine. Nevertheless you need to be careful, as the PSU of the M15x is only rated 150W. When doing some 3dM11 runs with both GPU and CPU overclocked I measured about 160-170W current draw from my system during the combined test. You really need to be careful when running this card, especially when you have an extreme processor (920/940xm). Pushing both GPU and CPU can (and will) bring the PSU to its limits (and above). Some numbers about the power draw when playing games, everything on stocks: Black Ops Zombies (everything on max): ~ 130-140W Portal 2 (everything on max): ~110-125W Medal of Honor (everything on max) ~140-150W Crysis 2 (set to “Hardcore) ~ 140-150W The device I use for measuring the power draw has an accuracy of about ± 10W. Fan control: In case you have a card which makes your fans running at a high speed all the time you will need to use HWinfo32 to automatically (or if you prefer, manually) control the fan speed. It’s possible to create a fan control look-up table and let HWinfo32 automatically control the fan speed by temperature. 1. Click on the fan symbol2. Click on “Custom Auto” 3. Choose the temperature sensor diode which you want to use as reference.4. Set the desired speeds/temperatures according to your needs. Do this for both GPU and CPU, ignore GPU2 fan. I recommend using the hottest GPU diode (usually MemIO).A big thanks to Mumak, the developer of this fantastic tool. Here you can find the official Alienware fan control thread in case you find a bug or need to know more. Warning: Adjusting the fan speed can be dangerous!! Always keep an eye on your temps and never forget to adjust the values before doing something CPU or GPU intense (in case you control them manually) Possible problems and solutions: Unable to install drivers. Solution: Try a different driver. Also contact your vendor, maybe he knows a specific one that works. Idle clocks are 250/900 instead of 100/150. Solution: Check your display settings and make sure only your internal notebook monitor is selected. 250/900 are the idle clocks when you’re connected to an external monitor (or when your display settings are got messed up, probably driver related) The GPU temps are crazy high! Solution: Repaste. You probably did a bad job with the thermal paste. Also make sure your system is dust-free and that the heatsink sits properly and is making contact (also check the pads where the memory modules touch the heatsink). While idling the GPU clocks change from 2d to 3d clocks and back all couple of seconds. Solution: This behaviour can be caused by the M17x r3 6970m driver (A00). Get the latest AMD driver and you should be fine. If you have this problem with a different driver try another driver version.
-
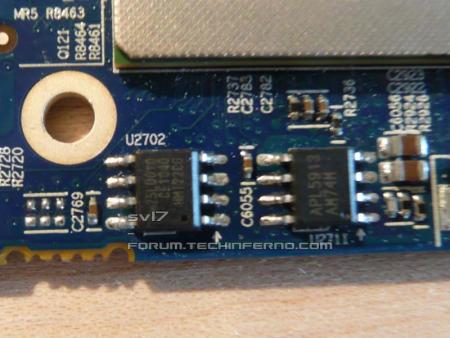
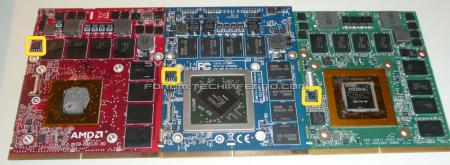
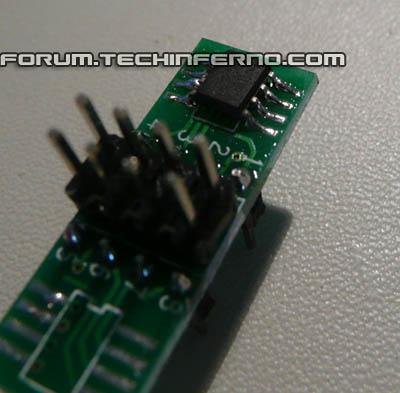
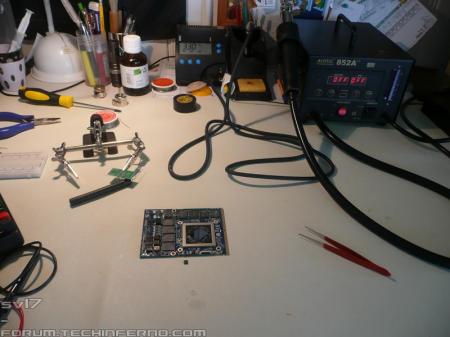
There are several reasons for flashing the VBIOS of a mobile GPU, for example if a newer version is available, or if you modify it for higher clocks or voltage, or maybe undervolt it for less heat… It’s a common procedure when trying to optimize your system according to your needs. However, flashing always involves a certain risk of rendering your card useless, “bricking” it, especially when experimenting with modded VBIOS versions. That’s also how I managed to brick my 6970m in my Alienware M15x. I tried to flash it with a modded version of a VBIOS which (apparently) wasn’t suited for my card. Sometimes it’s possible to do a so called “blind flash” to recover the card (flashing it without having any picture on the screen), however since my system didn’t even POST after flashing the experimental VBIOS I didn’t have this option. Fortunately a card isn’t dead after flashing a VBIOS which isn’t suited for it or after a bad flash, even if the system can’t boot anymore. The problem is only caused by the firmware of the card (VBIOS) and not by hardware faults. This means to get the card working again, it simply needs to be reprogrammed with the proper VBIOS. There are professional services which are capable of doing this for a little fee, but I decided to see whether I can fix the card myself. The VBIOS is stored somewhere on the card in a flash memory chip. It should be a serial flash memory chip with 8 pins. Here’s the location of this chip, for the Nvidia GTX 260m, AMD 6970m and ATI 5850m (from left to right) The memory chips are “single operating voltage serial flash memory” which use anSPI – bus. There’s no cheap programmer available which officially supports the chip which stores the VBIOS of the 6970m, but a couple of affordable programmers that can handle very similar chips (same SPI modes, memory organization, size, etc.). After comparing some datasheets of different flash memory chips and discussing it on the forum, I came to the conclusion that it should work with a cheap programmer, even though the specific IC wasn’t supported by it. Before and after desoldering the eeprom chip. (after image lost) Desoldering the chip is the most difficult part. You don’t want to accidentally remove one of those tiny SMD parts or kill something with too much heat. Also the card, and especially these little ICs, are ESD-sensitive, this means an ESD mat and wristband are highly recommendable for this job. I desoldered the flash chip with my hot air station, that’s much more comfortable than using a soldering iron (which of course is an option as well). Since most companies have to use lead-free solder, removing the chip needs more heat than for all the usual DIY soldering (which is mostly done with solder containing lead, at least in my case. It’s easier to handle in my opinion). As it’s a surface mounted device, it needs to be in a socket in order to be programmed, it can’t be put in the ZIF socket of the programmer. I don’t have an SOIC socket for this size, but the programmer came with an improvised PCB – socket for 8 pin SOIC chips. This means turning on the soldering iron and solder the chip to the “socket” (see the picture on the left side). Then I programmed the chip, it wasn’t recognized by the programmer, but choosing a chip from the list which was technically identical (same block size, interface, etc.) allowed me to erase the flash memory and write and verify the original VBIOS data. After doing the whole soldering procedure in reverse order I was finally able to boot the system again with the card. Tech|Inferno member AssimilatorX also suggests to reflash the VBIOS again per DOS and ATIflash, just to make sure that there’s definitely no error in the stored VBIOS. So operation “GPU reviving” was successful. This should work for most mobile GPUs I guess, since all cards I’ve seen so far use similar flash memory chips. Though it can still depend on the programmer. What’s needed is a steady hand, proper soldering equipment, ESD-protection and a programmer. Here’s a pic of my soldering workplace:
-
Version 1.0.0
69 downloads
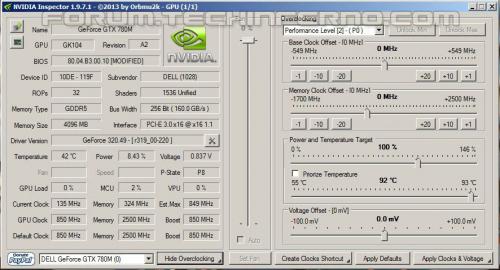
The 'Kepler' GPUs from Nvidia perform really well, even at increased clocks speeds they stay quite cool - a perfect behavior when it comes to overclocking and improving the performance. Unfortunately the mobile GPUs suffer from an artificial +135MHz core overclocking limit, so you can't go higher by using tools like Nvidia Inspector and similar. The modified VBIOS files listed here have this limit unlocked, some have increased stock clocks or tweaked voltages. Instructions: I recommend flashing under DOS using nvflash Donation link In case you want to buy me a beer Thanks and cheers!- 1 review
-
- 6
-

-
- 680m
- oc edition
-
(and 1 more)
Tagged with:
-
Version 1.0.0
40 downloads
The 'Kepler' GPUs from Nvidia perform really well, even at increased clocks speeds they stay quite cool - a perfect behavior when it comes to overclocking and improving the performance. Unfortunately the mobile GPUs suffer from an artificial +135MHz core overclocking limit, so you can't go higher by using tools like Nvidia Inspector and similar. The modified VBIOS files listed here have this limit unlocked, some have increased stock clocks or tweaked voltages. Instructions: I recommend flashing under DOS using nvflash Donation link In case you want to buy me a beer Thanks and cheers!-
- 5
-

-
- 680m
- oc edition
-
(and 1 more)
Tagged with:
-
Version 1.0.0
29 downloads
The 'Kepler' GPUs from Nvidia perform really well, even at increased clocks speeds they stay quite cool - a perfect behavior when it comes to overclocking and improving the performance. Unfortunately the mobile GPUs suffer from an artificial +135MHz core overclocking limit, so you can't go higher by using tools like Nvidia Inspector and similar. The modified VBIOS files listed here have this limit unlocked, some have increased stock clocks or tweaked voltages. Instructions: I recommend flashing under DOS using nvflash Donation link In case you want to buy me a beer Thanks and cheers! -
Version 1.0.0
38 downloads
The 'Kepler' GPUs from Nvidia perform really well, even at increased clocks speeds they stay quite cool - a perfect behavior when it comes to overclocking and improving the performance. Unfortunately the mobile GPUs suffer from an artificial +135MHz core overclocking limit, so you can't go higher by using tools like Nvidia Inspector and similar. The modified VBIOS files listed here have this limit unlocked, some have increased stock clocks or tweaked voltages. Instructions: I recommend flashing under DOS using nvflash Donation link In case you want to buy me a beer Thanks and cheers! -
Two new modified BIOS for M14x R1 users. Both based on A08, but with the same SATA performance as in A05.This allows GF106 users which are still on A05 to benefit from the fixes included in A08 while keeping the SATA performance of A05 and it allows GF116 users to get the benefits of A05 SATA behavior.It's actually the result of trying to bring GF116 support to A05 in order to change the SATA behavior (as requested by he_yincheng), since this didn't work as planned I tried it the other way around - bringing the SATA performance of A05 to A08, which succeeded. Thanks @he_yincheng for testing! Check here to see some screenshots he posted to verify that it is working as intended.There are two versions of this mod available, one is the standard A08 with only the SATA tweak and the other is the unlocked version of it.In the M14x R1 voltage mod thread you can also find both versions with an increased GPU voltage, GF106 and GF116 supported.As always with such mods, use at your own risk, I don't take any responsibility for possible issues. You are responsible for the changes you make on your system.Feedback is welcome!Donate link - feel free to buy me a beer if you like this mod M14xR1_A08_[unlocked]_incl_SATA_fix.zip M14xR1_A08_SATA_fix.zip
- 57 replies
-
- 12
-


