


Jahnsinn
-
Posts
84 -
Joined
-
Last visited
-
Days Won
2
Content Type
Profiles
Forums
Downloads
Posts posted by Jahnsinn
-
-
I've got the Asus RT-N66U for a couple of months now and I can't find anything negative on it. No wireless drops, no reboots had to be done. And the wireless is available through all my flat ( 150sqm, 7 rooms). Had a lot of routers in the past and I always lost connection after half of the flat.
-
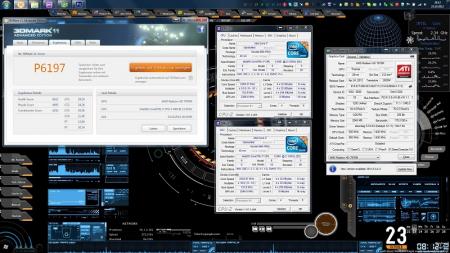
just made a quick benchmark with the new 12.11 beta driver, P6197 B-)
custom clocks @ 950/[email protected] on all steps. Works just perfect

cpu steps: 18x133mhz @ 65/62
-
 1
1
-
-
Just a quick question, I might be buying this card:
Which is a Clevo one, I read in the OP that the mounting holes etc need to be there, does this card look correct for my m15x?
thanks
looks good. Are you able to get a picture taken from the side?
-
If I remember correctly it was the 304.79 when I had the card in my system. I had an HDMI monitor connected to the M15x per DP, worked perfectly fine.
what was the size of the monitor? I still get issues when connecting my 55" BEFORE I start a 3d application. After starting the app it's okay. So I guess yours was just fine whatever you've done with it.
-
tried to flash my gpu yesterday, but surprisingly it doesn't work at all anymore. I went through the procedure of atiflash, was all successful and rebooted the system. back in windows I checked the clocks and they are still the same as before. So I thought there went something wrong with atiflash. So went back to dos and tried to flash again. But atiflash said, the vbios I try to flash is identical with the one on the card. Tried to flash some other vbioses, butthe clocks stay all the same O.o
checksums all okay
what I did since the last successful flash: - updated to catalyst 12.9 7900mod
- installed updated version of msi afterburner with "xcl-command" to enable amd overdrive.
uninstalled both but still the same. Can't get a different vbios flashed onto the card.
The card just works fine, so actually no faulty card.
-
This has been an excellent thread. Think I've read it start to end about three times. This is my first post as a new member on TI, so forgive me if the format is not correct.
To Jahnsinn: You mention in a post on the 15th September that you are going to try liquid cooling on the GPU in the M15x. Is this a custom modified heatsink or where are sourcing the heatsink from? What is a liquid cooling heatsink? (copper tubes filled with mercury or the like?)
To Jahnsinn: In one of your earlier posts you made reference to purchasing the 7970M through eurcom on Ebay and provided a link. The link you provided is just to Ebay.co.uk and not to an ebay item. Are you referring to Upgrademonkey on Ebay? I've bought upgrades from these guys before and the service and products have been good.
Nice work by SVL7, I’ve found your threads really knowledgeable and can tell you know what you are talking about. If I upgrade to a 7970M and use your bios, I'll definitely be buying you a pint.
sry mate for the late response.
the cpu is a heatsink, originally made for cooling desktop GPU dies.
eurocom is named as upgradeyourlaptop on ebay.
AMD Radeon HD7970M (WimbledonXT) MXM 3.0b 2GB GDDR5 VGA Module - CrossFire Ready | eBay
thanks to @mw86 and @svl7 for the quick reply to @frostie
btw @mw86: I got a notifier you mentioned me and got redirected to Brians flickering issue O.o strange thing.
-
1
-
-
I experienced flickering on my external tv screen whilst gaming, but not on the internal screen. weird thing.
-
I have a problem with my alienware m14x r1, the problem is the cooling.
The problem is when I'm playing a game, from 60 fps drops to 15 fps (Fraps) and stays there. The laptop doesn't shutdown give errors and bsod, I have tried this few methods cleaning fan,replacing thermal paste, playing in a air conditioned room, Laptop Cooler and adjusting the fan speed. Is there something wrong with the hardware itself?
Are you sure it's the temps? How high do they get?
-
I just picked up a M18x R2. I went to install my SSD's. When I lifted up the the little beige clamp that holds the HD cable into the connector I noticed that one of the legs was broken. Anyone know where to get another one?
Well, I'd just ask the Alienware customer support service. Quickest way to get one.
-
Excellent write up, and nice work! I have to ask though, for all this the system will be tied to the desk, why not just get a desktop?
Sent from my Samsung Captivate/ICS CM9 via Tapatalk.
Because I already have a laptop^^ a desktop is much more expensive and wouldn't be something special, actually

I don't need the laptop as a "laptop" anymore. Got a asus transformer tablet with keyboard. So no reason to keep the heavy laptop handy. Also it'll be an eye catcher once all is propper placed.
-
Well, now the bottleneck will be the supply of adequate power by the mobo...
that's true, unfortunately

but even by moderate OCing the cpu and gpu, I got drops due to high temps on the gpu. So now it's quite more stable and should get just a bit more performance. Maybe there's a little bird, telling me a mobo mod to get some more power on the mobo
-
updated the pics. nearly all working now. need to figure out what's worng with the others. tomorrow I will add temperatures and benchmarks. Let's see if I can get higher clocks without throttling. But now it's time for a couple of beer
-
1
-
-
http://downloads.dell.com/FOLDER00896545M/1/M14R2A09WIN64.exe
that's the direct link. just click on it from time to time so you don't need to run through dell's homepage.
-
update:
http://forum.techinferno.com/alienware-m15x/2220-%5Bguide%5D-m15x-water-cooling.html
unfortunately still not all pix working.
-
hahah you must be new here


.gif)


not just used to it
-
painted my cloud
you're a fucking freak, man

-
I used ATIFlash, I tried forcing the flash with "atiflash -f -newbios -p 1 new.rom" but still no luck. When I get home tonight I'll pull a log of the flash. Thanks for your help.
Do you have more than one graphics card in your system? If not you have to type 0 instead of 1 !
-
First of all, let me say I haven't finished yet. I'm still working on it and will update this thread from time to time due to much work at the moment.
When I fitted my 940xm and the 7970m I got really mad of the heat and the fan noises even in idle mode. So I decided to get it all cooled with a silent, most important quiet, external water cooling system. I checked the internet and found evth I need to get it done. The most difficult thing was to find slim water blocks to cover the dies. I will list all the parts I used with article number and website if you're interested at the end of this post.
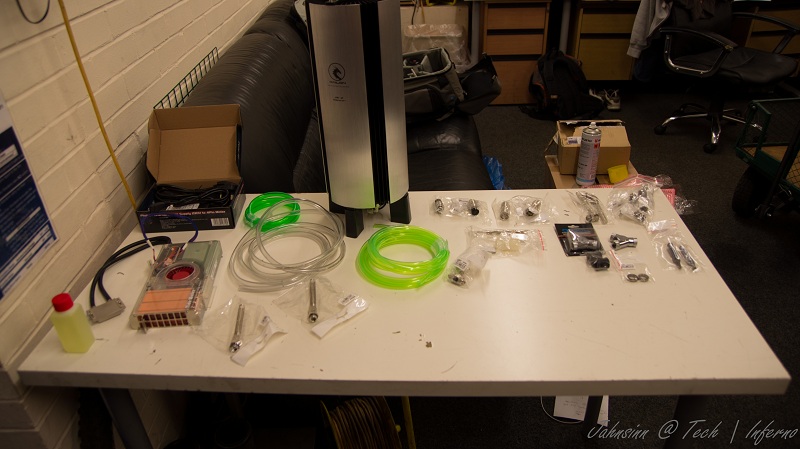
First the overview. These parts are going to be used:

Actually not much, so let's start.
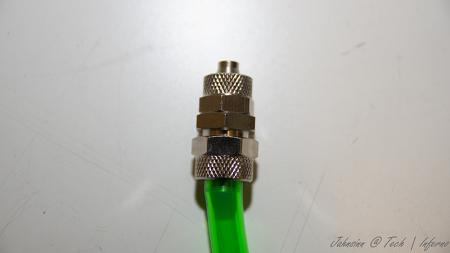
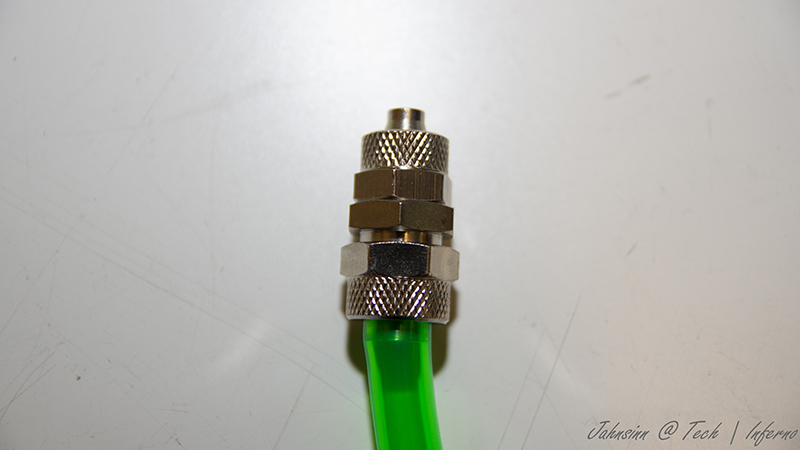
I start tubing at the inner hose socket of the reserator. This is the place where the pump is placed behind. You have to use a 10/8mm hose. By this, 10mm means the outside diameter of the hose, 8mm means the inside diameter. This is very important to know by everything you do on water cooling systems due to different fittings, barbs or reducers.
Fit the hose and tighten it well with a spanner.
Now you need a reducer to get on a 8/6mm hose. This is necessary to get in fitted to the chiller.
At the other end you need to fit the 8/6mm hose.
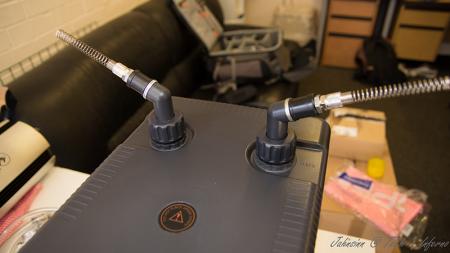
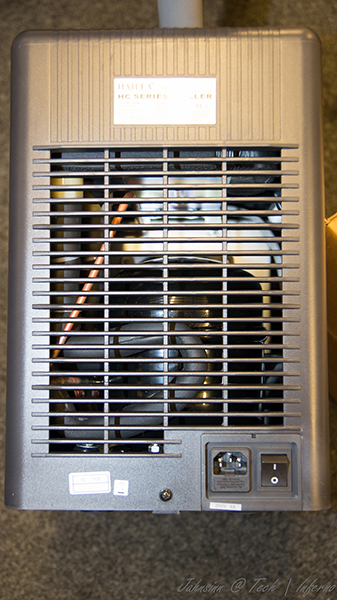
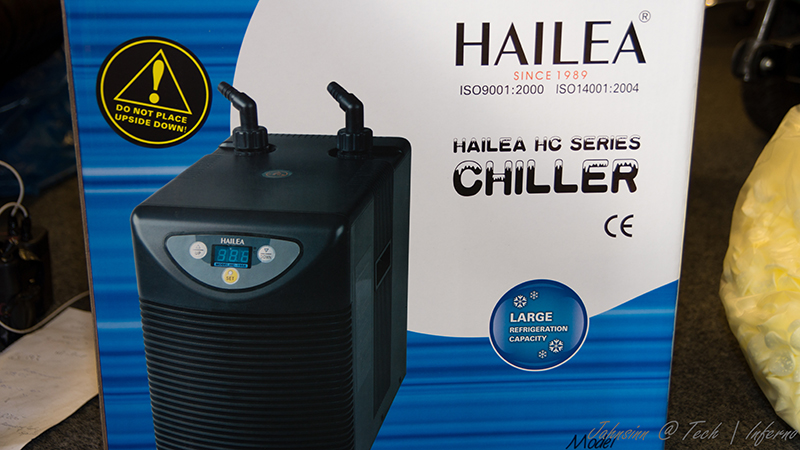
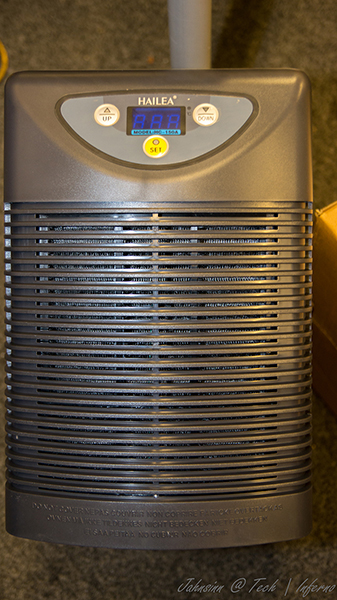
After this is done the 8/6mm hose leads into the chiller. A chiller pushs down your temps to a predefined value set by you, the minimum you can get theoretically is +3°C. Basically you can say it works like a refrigerator. This is very helpfully when you start gaming or other intense work on the laptop to keep the temps low.
Here are some pics of it.
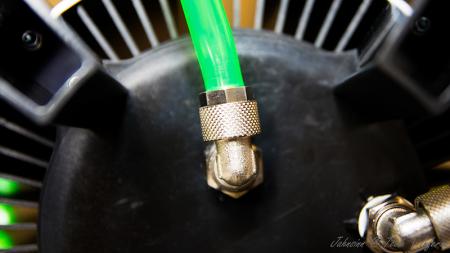
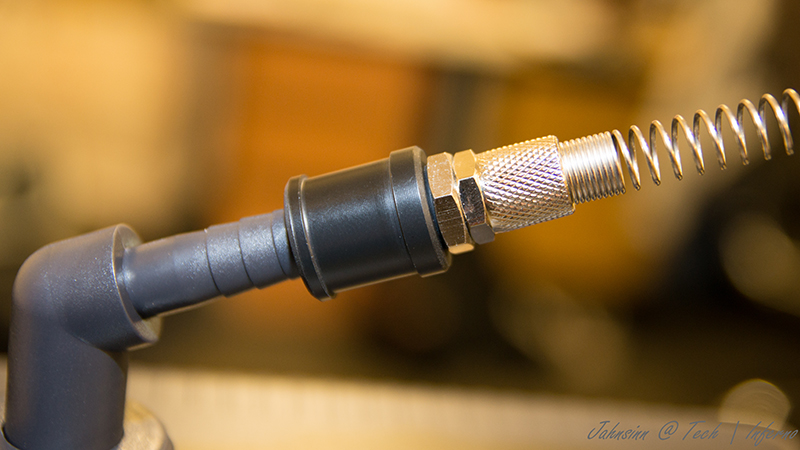
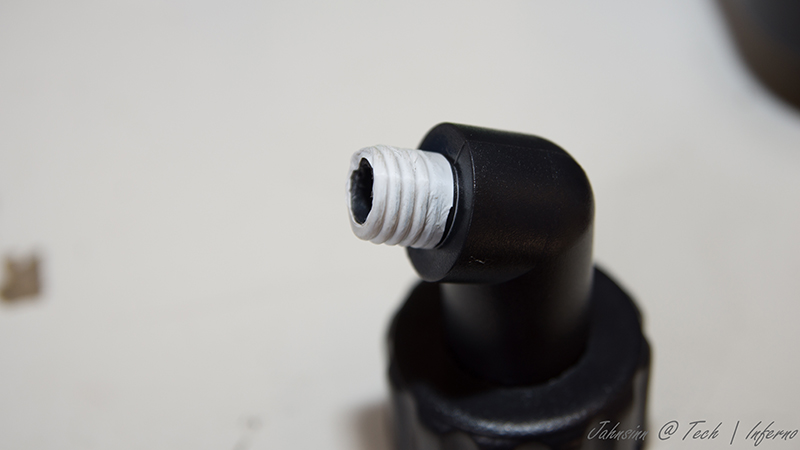
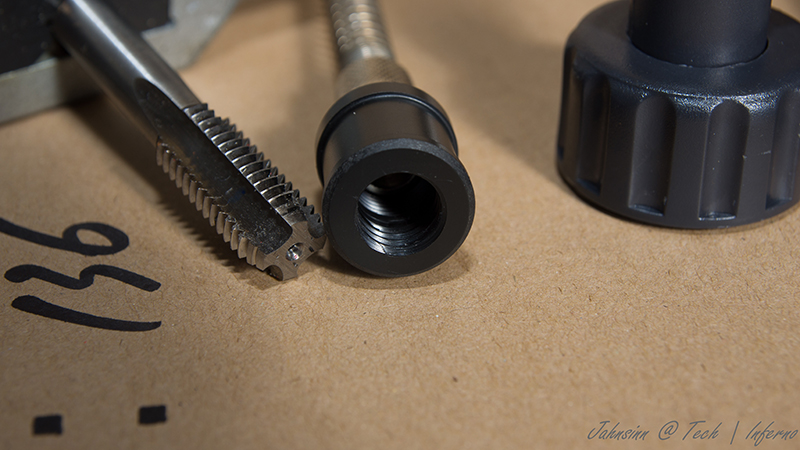
To get the hose fitted the first custom made had to be done. Maybe I didn't know how it actually works, but I had no clue how else to do it without a modification...
As you can see on the picture, the 1/4" adapter didn't fit to the chiller's nozzle. I really don't know what's the original idea by the developers.

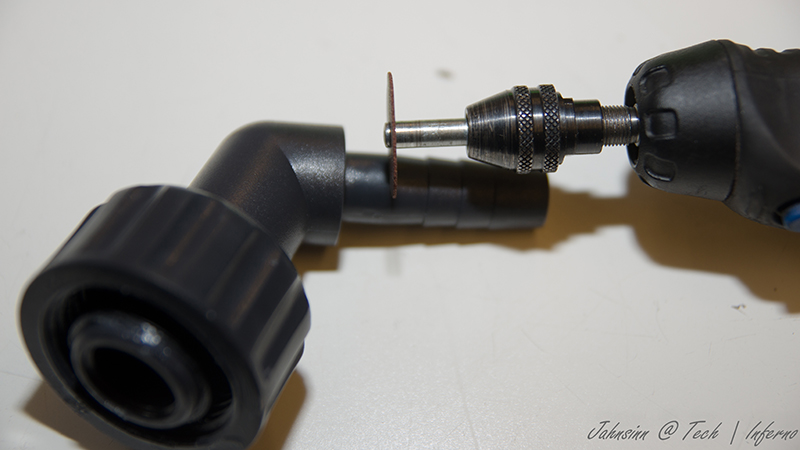
So the first adjustment had to be made. Cut the end of the nozzle as you can see on the pic.

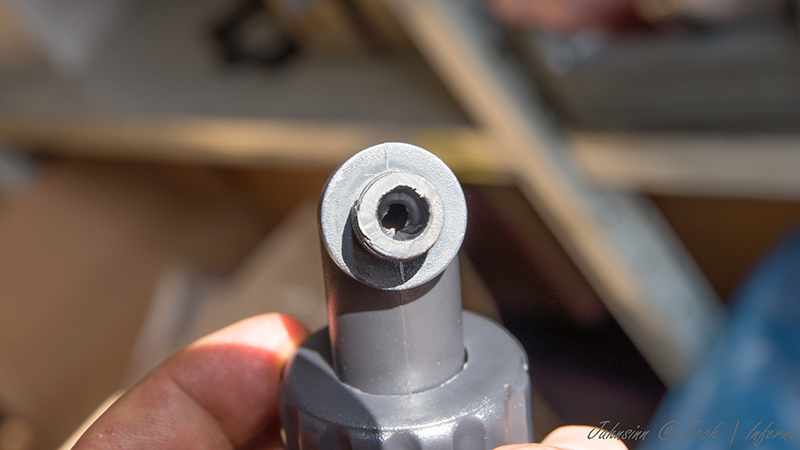
When this was done I noticed really pour casting quality inside the nozzle. This would massively reduce your flow speed.

So I used a drill to get it out.
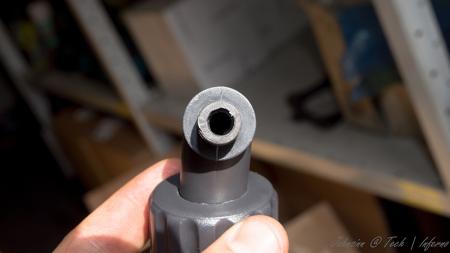
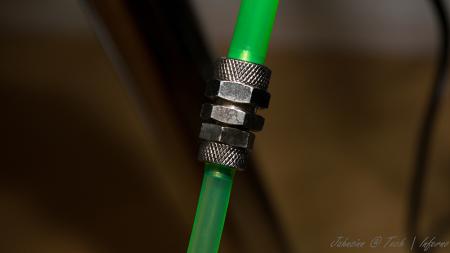
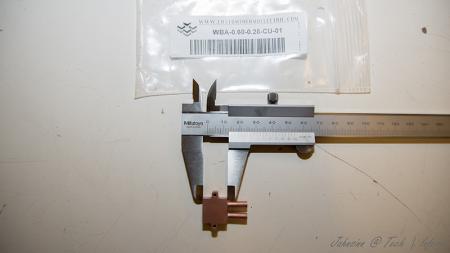
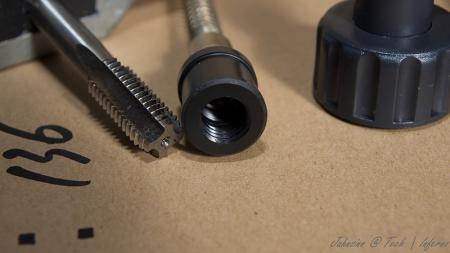
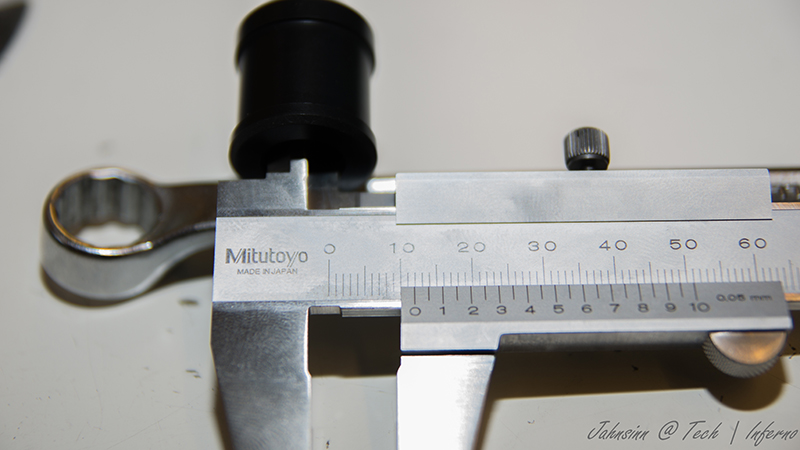
Finally I got an outside diameter of 13mm at the nozzle.
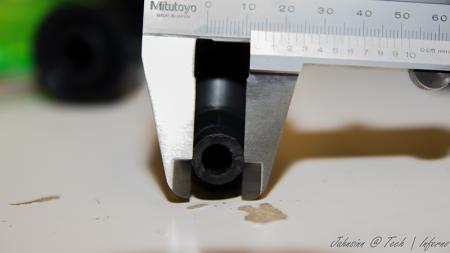
The adapter has 12mm inside diameter

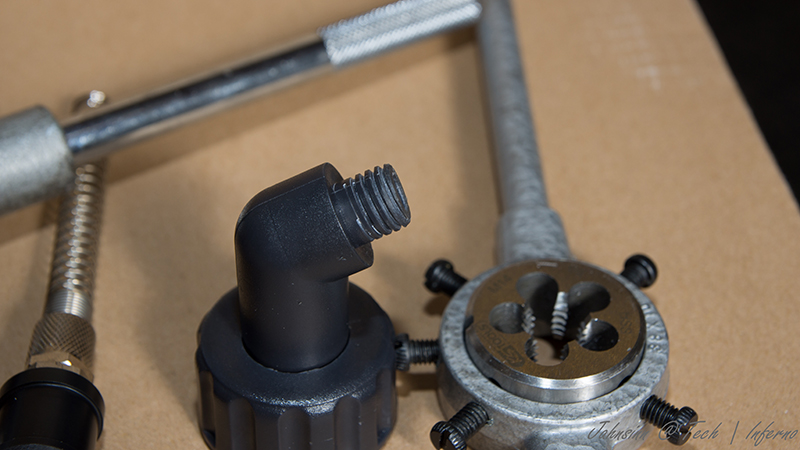
So just perfect to cut a M14 thread to both parts.

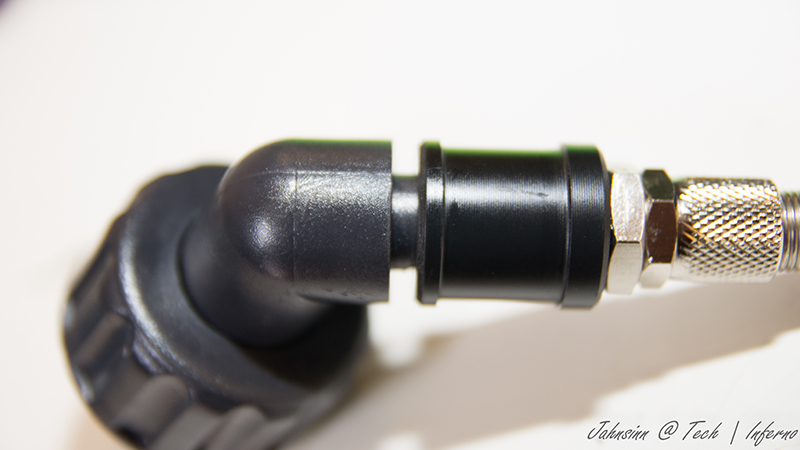
Unfortunately I couldn't get closer due to the layout of the die.

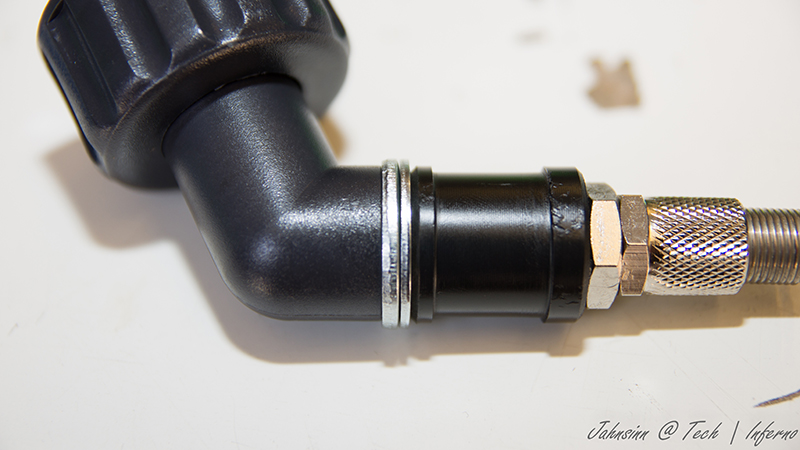
two washers solve this problem to get it proper tightened.

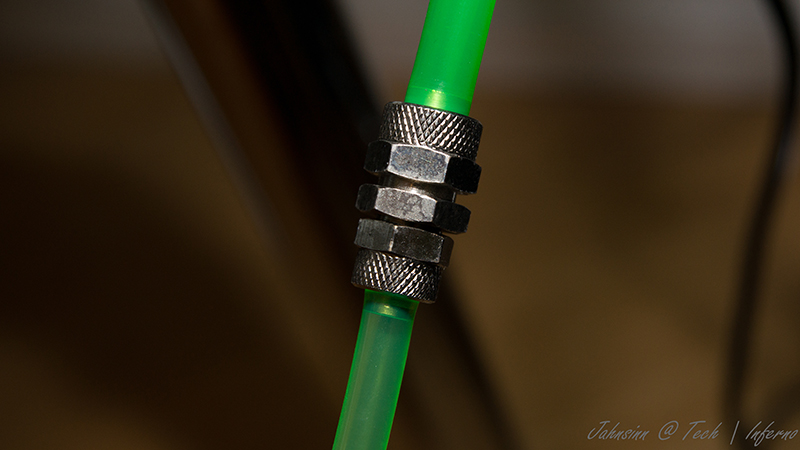
To get it proper sealed I used teflon tape. Just the best way to get something sealed. Don't do it without any sealing!
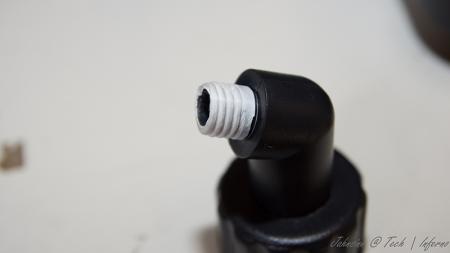
Use some Vaseline before you stick in the nozzles.
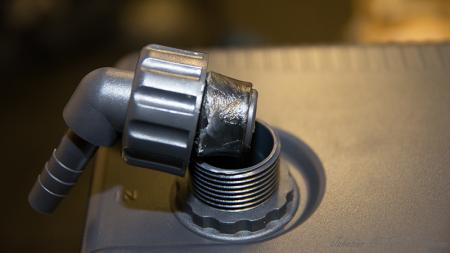
Do the same with second side of course. At the end it'll look like that.
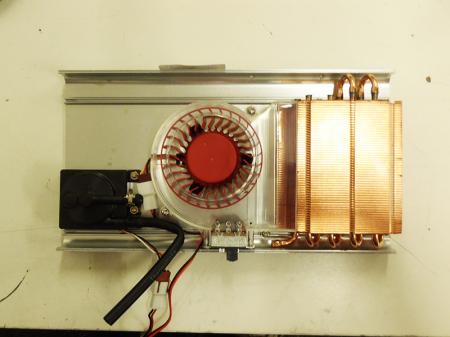
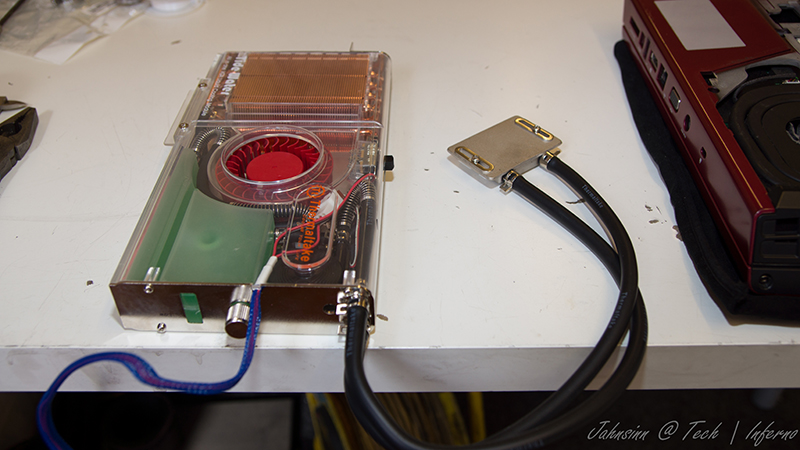
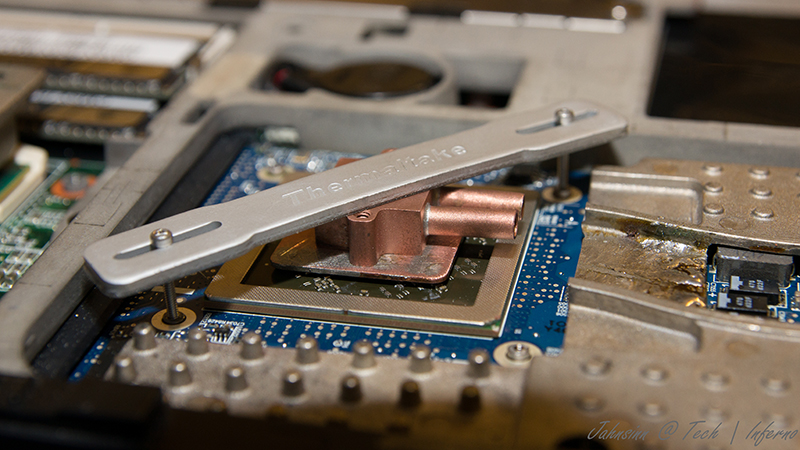
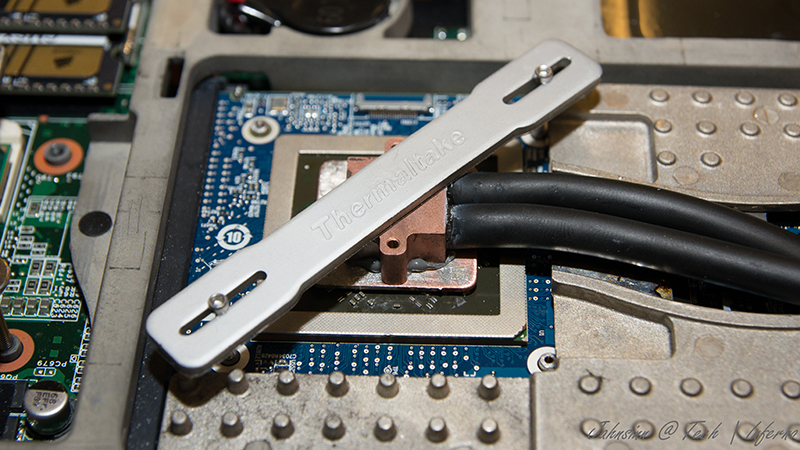
Let's get to the CPU water block. I purchased the Thermaltake CL-W0052 Tide Water, originally made for desktop PCs to cool down the graphics card, on ebay to get all the stuff I'll need to do it. I chose that one because the water block has just a height of 8mm. Also all the hoses and clamps will be helpful.
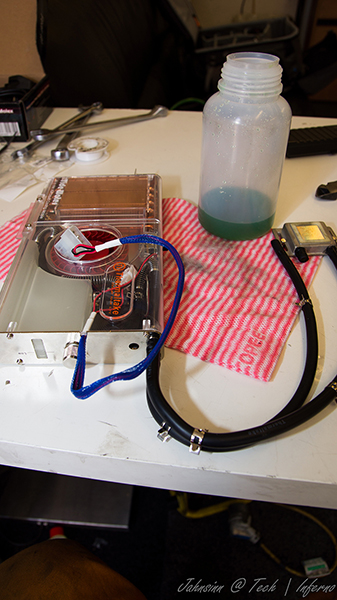
First drain the coolant.

Then I opened the chassis and robbed all hoses and clamps. You'll need them in a couple of minutes. They're all bonded quite well, so just cut them at the ends.
I also cut and removed the hoses of the water block itself, just to make sure everything is okay. I didn't want to get upset when I filled the system with water. So I cut them and removed the old adhesive.
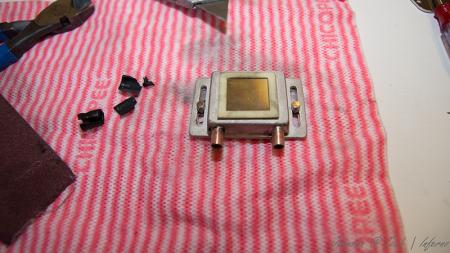
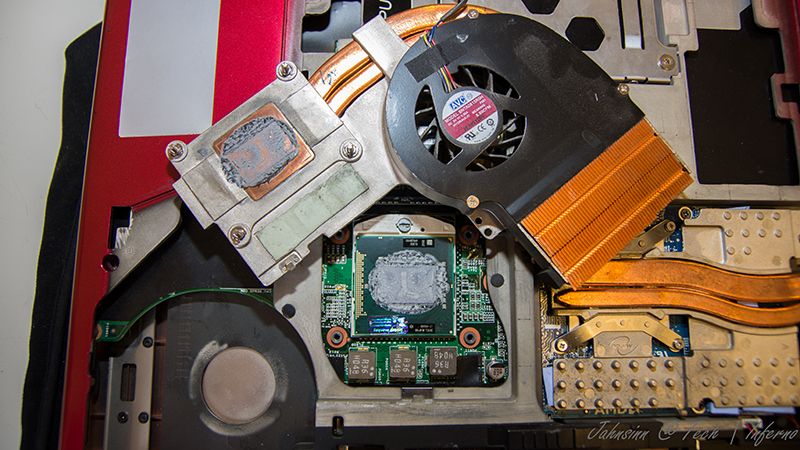
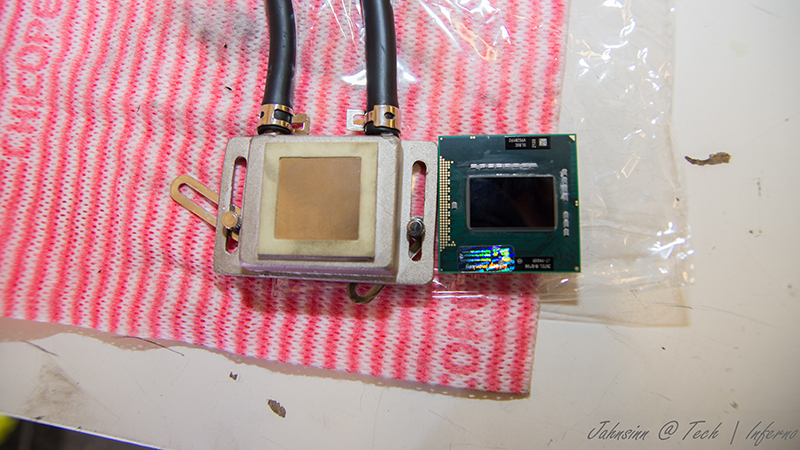
I then removed the original cpu heatsink
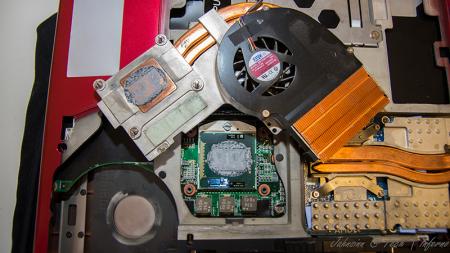
and compared the die with the water block

The water block as it was out from the box was just a touch too small to fit correctly onto the die. So I just removed the tape around the block. Now it was ready to get fitted.
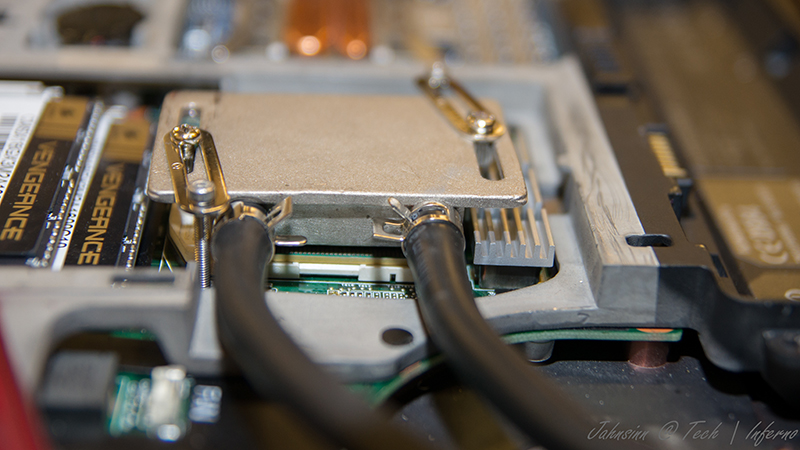
All I needed to do was loosing the existing bolts on the water block and tightened it with M2.5x20 hex nut bolts into the existing holes. At the end it looks like that.
By the way, the mosfet heatsinks came with the tide water vga cooler. I also fitted the black hoses as they were, just without the glew and it still seals perfectly.
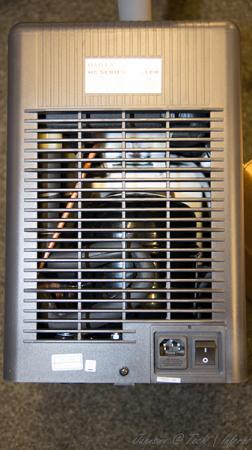
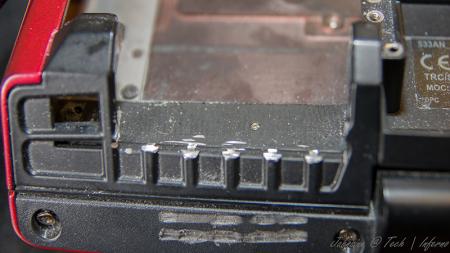
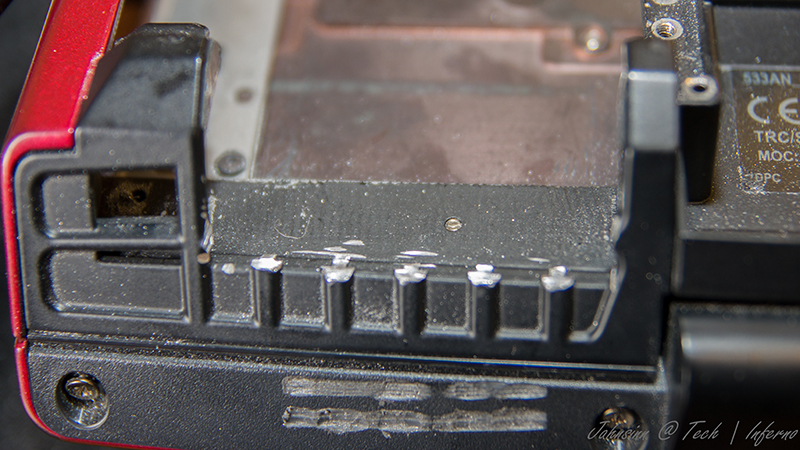
To get the hoses guided out of the laptop you need to remove your fan control at the back of your laptop. When you're doing this, be careful not to touch the chassis as I did with whatever you use. I used the dremel and didn't see it for a while. What a shame!
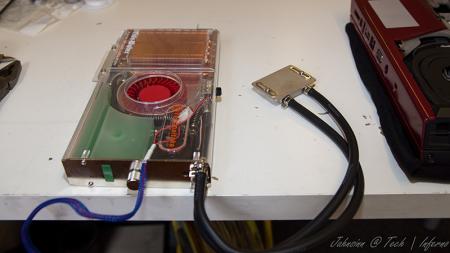
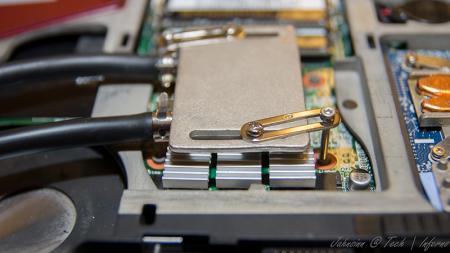
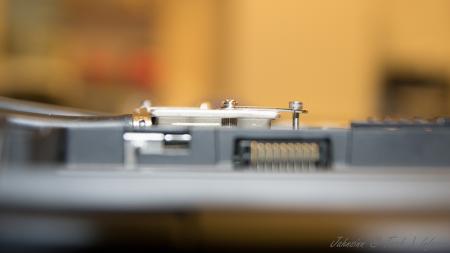
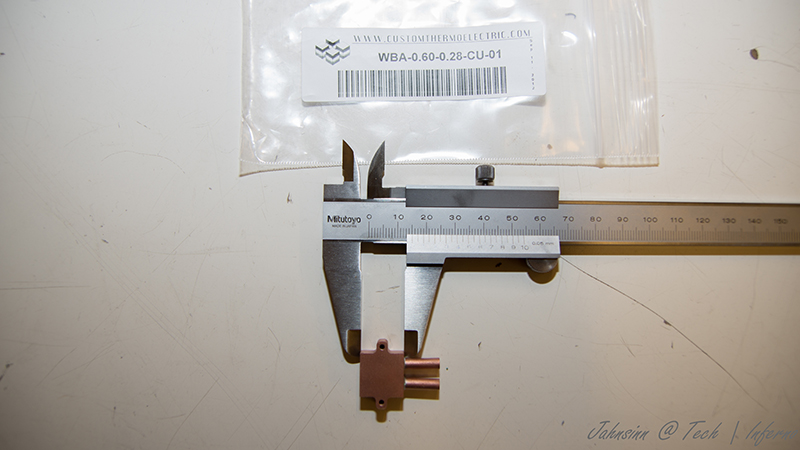
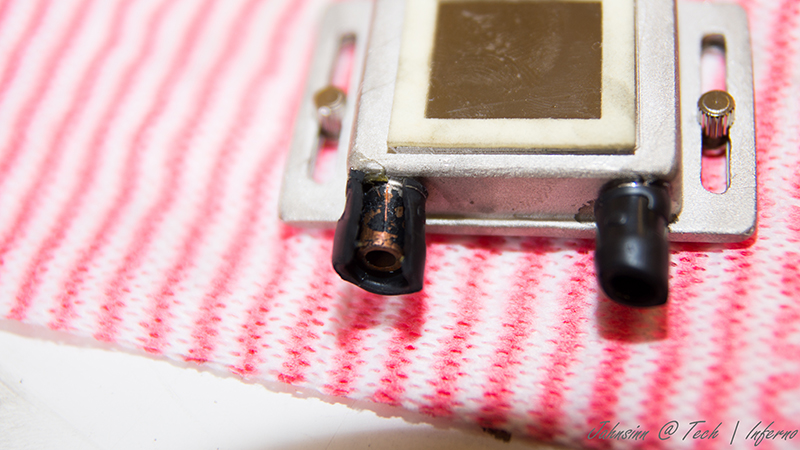
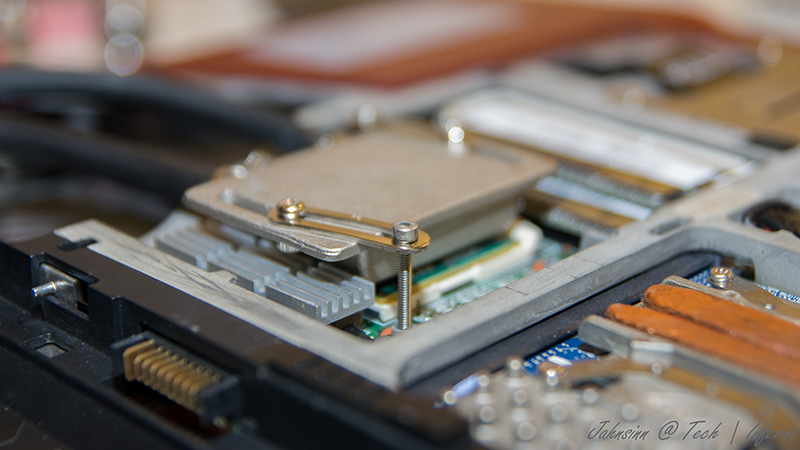
Nevermind, so let's get over to the gpu side. I bought a very tiny water block with just 15x15x7mm dimensions to not to exceed the height. So may be later I will be able to fit the backplate cover again.
The water blocks would actually fit on the die, perfectly. But due to the layout of the gpu die the block just fits in diagonal postion. So useless for me.
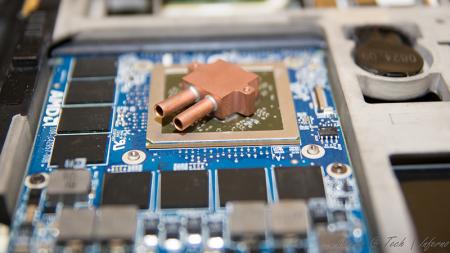
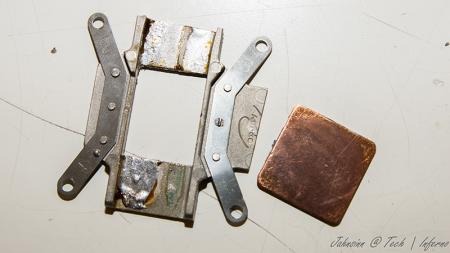
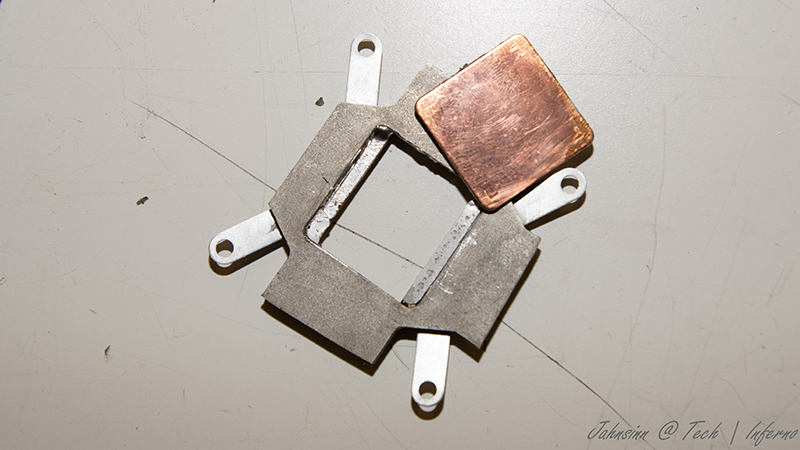
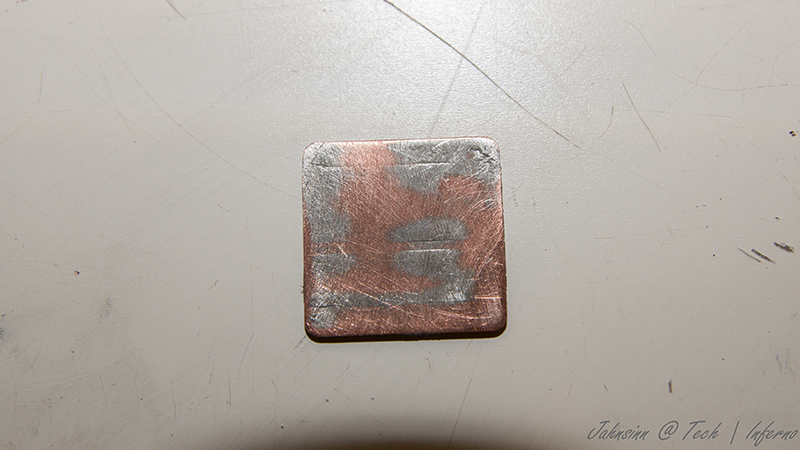
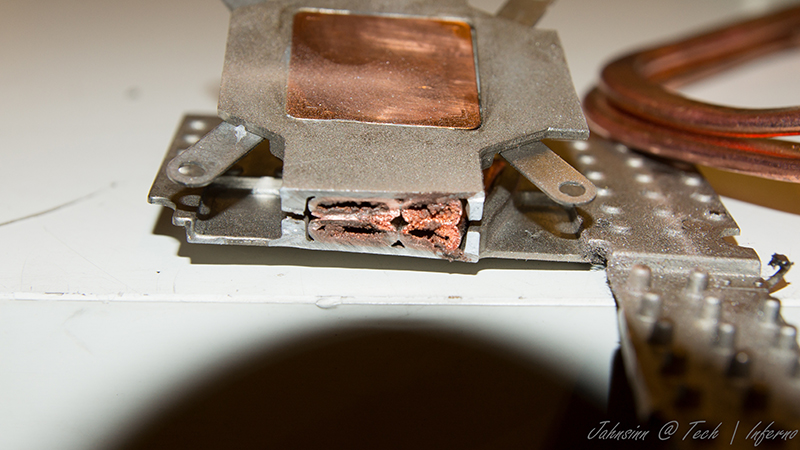
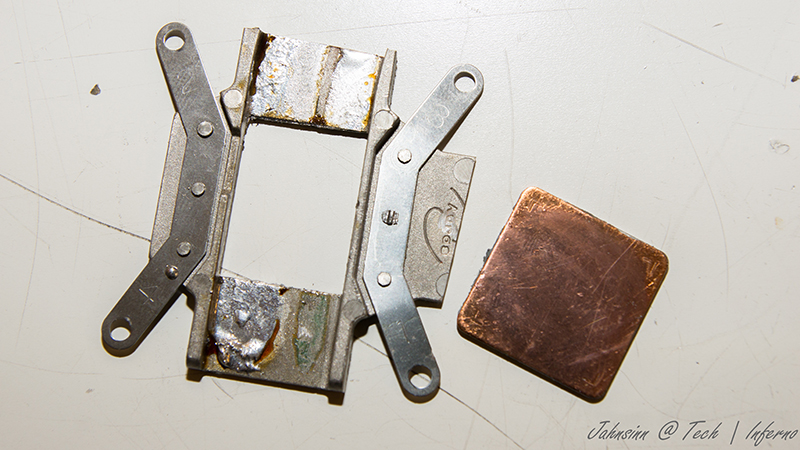
To get the water block in the right direction I unsoldered the copper plate of the original heatsink. That one has got the right dimensions to get this solved.
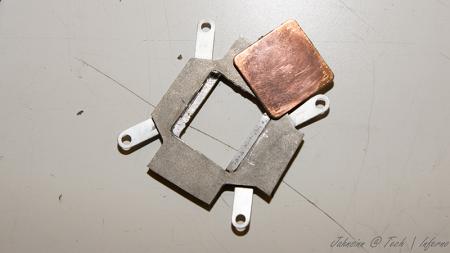
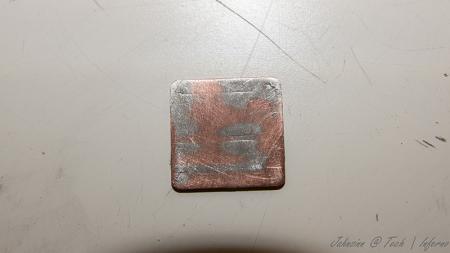
Clean the copper plate from the old tin on top by using the Dremel or sandpaper.
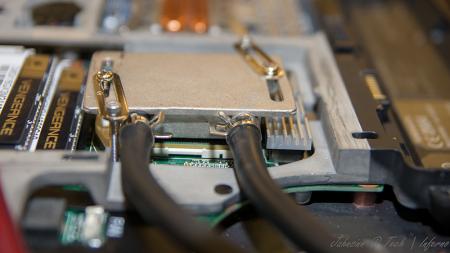
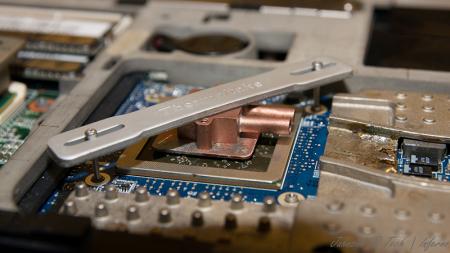
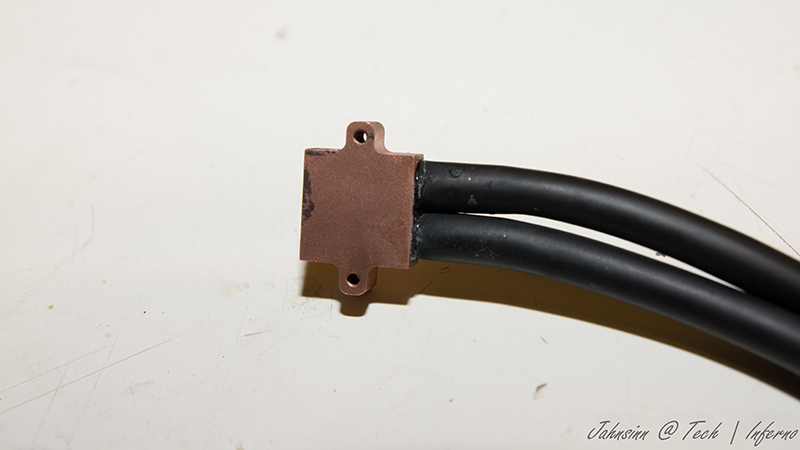
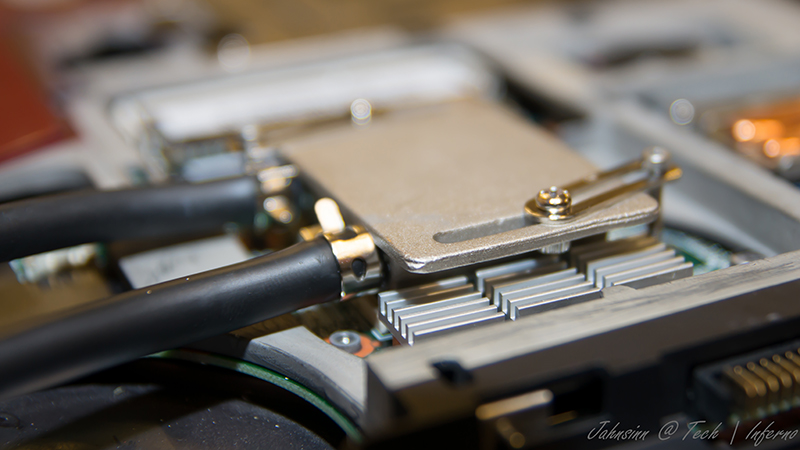
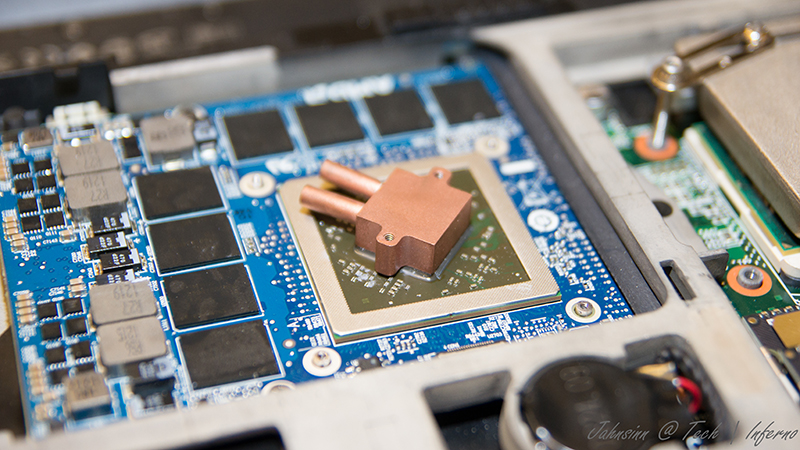
At the end that's the way it should work. Just to mention, also the holder came with Thermaltake tide water cooler. The bolts I bought seperatly on ebay. They are M1.6x20 but too long, so I cut them down to 15mm. Now they fit into the existing holes and push down the block properly
Use now the -->small<-- black hoses robbed from Thermaltake chassis. These are the inside hoses, they're smaller. You need to use some adhesive because the clamps coming with the hoses are just a way too big and don't keep it tight to nozzle.

Now just add some thermal paste between copper plate and die, and copper plate and water block. Tighten it all down.

Finally it looks like that.
[ATTACH=CONFIG]5105[/ATTACH]
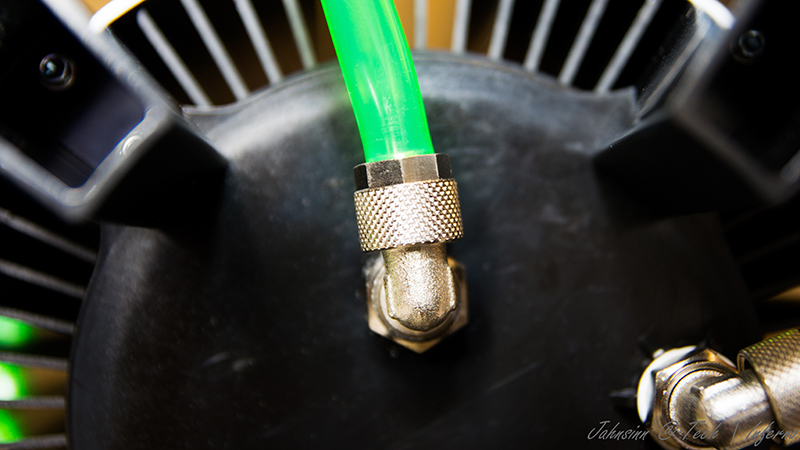
hoses leaded through the fan grill, gpu side. I mention again, just temporarily cause I'm still waiting for parts. in progress...
[ATTACH=CONFIG]5107[/ATTACH] [ATTACH=CONFIG]5106[/ATTACH]
cpu side
[ATTACH=CONFIG]5108[/ATTACH][ATTACH=CONFIG]5109[/ATTACH]
The hose laying is actually just in common sense. Nothing particular I should mention.
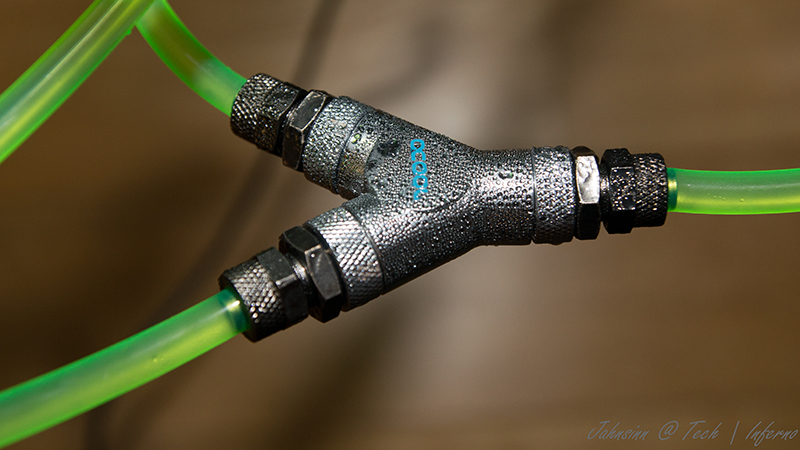
Reserator -> 10/8mm hose -> 10/8mm to 8/6mm reducer -> 1/4" compression fitting -> 1/4" adapter for chiller -> chiller nozzle -> chiller -> nozzle, adapter, fitting -> 8/6mm hose -> Y-splitter

first end hose -> 8/6mm hose -> quick coupling -> black hose (termaltake tide water) -> cpu block inlet-> cpu outlet -> black hose -> quick coupling -> 8/6mm -> Y-splitter
second end hose -> 8/6mm hose -> 6mm barb -> small black hose (thermaltake tide water) -> gpu block inlet -> gpu outlet -> small black hose -> 6mm barb -> 8/6mm hose -> Y-splitter
|
Y-splitter -> 8/6mm hose -> 10/8 to 8/6mm reducer -> reserator
update in progress...


-
15
-
-
I make a full install windows 8, everything is working fine, but only BF3 crash after 5 min. Somebody have a solution for this?
is there any compatibility mode support in win8?
-
The only problem with blind flashing is that the Laptop will not post when the 7970m is running as the main GPU. The laptop turns on but I dont have keyboard functions and no display. There is no signs of windows starting up so I assume the bios posting is stuck due to the 7970m vbios being broken.
When I startup with the HD4000 as the main GPU, atiflash (DOS) and Winflash (Windows) both dont detect my video adapter or (7970m). I tried doing a auto.exe on the atiflash but the same problem is that the system does not post so it does not allow the auto.exe to execute in DOS.
Is there a way to change boot priories in the BIOS? other laptops usually you can select the default to whatever you want i.e. cd/dvd, USB, HDD but on the m17x R4 it seems I cant select my own boot priorities. I just thought id give this a try even though the BIOS doesnt post it might be worth a shot anyway and see if the auto.exe would trigger, unlikely though.
If you have you have any thoughts on how to work around the laptop not posting I would be most interested.
thanks,
That's why it's called "blind flash"
your screen is black, so you need to do it with a black screen. boot from your usb drive and type in the ati commands. is that really your fourth post about the same issue? O.o
-
1
-
-
as mw86 said, do a blind flash and it should work again.
-
2
-
-
Enable unofficial overclocking in Afterburner and use option 2 so it disables powerplay. ULPS disabled may help but shouldn't be required.
Sent from my Paranoid Samsung Galaxy S3 on Sprint using Tapatalk 2 Jelly Bean flavor included
@x2pinpoint: to enable unofficial overclocking, close MSI afterburner, go to your MSI afterburner install path and open MSIAfterburner.cfg.
Scroll down to the end of the file. There you will find the following:
[ATIADLHAL]
UnofficialOverclockingEULA =
UnofficialOverclockingMode = 0
AccessibilityCheckingPeriod = 0
change it to the following:
[ATIADLHAL]
UnofficialOverclockingEULA = 1
UnofficialOverclockingMode = 1
AccessibilityCheckingPeriod = 0
start afterburner again, agree the popup and you'll be able to set clocks.
Have fun!
-
1
-
-
Haha now you should be impressed, it was like playing a game from 1995. Join our mumble next time.
Sent from my GT-N7000
just tried. server refuses connection. Is it only up during playing?
-
I'm surprised I got 13 kills using igfx at 640x480 and 13-25 fps avg lol.
Sent from my GT-N7000
ahh, that's why you were sticking your gun in my arse


[Guide] - M15x with AMD 7970m
in Alienware M15x/AW 15
Posted
couldn't bench much so far. quite busy at the moment, loads of work, don't know where to start first
chiller is set on 12°C, that's just the point before condensation appears on tubes and quick couplings. gpu runs with full load taken at 35°C, cpu at 28°C average. unfortunately I don't have time to update my guide post. damn work, I need to find something I earn money whilst sleeping^^
weekend is near, maybe I get some more time there.
cya l8er