juniordiscart
-
Posts
90 -
Joined
-
Last visited
-
Days Won
2
Content Type
Profiles
Forums
Downloads
Everything posted by juniordiscart
-

automate-eGPU EFI - Mac bootscreen on eGPU
juniordiscart replied to euqlaog's topic in Apple eGPU discussion
@goalque Any possibility of using the script without an eGPU? I sold my eGPU system, but are still interested in using the functions of enabling the internal GPU and disabling the dGPU. -
@smohkie Yes, in theorie that should be possible. Its just the same process as with one. One small downside is that the second unit will also be running if you only need just one at that moment. But other than that, I don't see any major hurdles of getting that to work.
-
automate-eGPU EFI - Mac bootscreen on eGPU
juniordiscart replied to euqlaog's topic in Apple eGPU discussion
Alright! Nice going @goalque! Very cool to see something of your new work. I see you implemented the ability to disable the dGPU and enable the iGPU. Did you happen to test whether a mbpr with dGPU still causes the 10-20% constant load using Windows? I stopped using Windows because of the obligated usage of the dGPU. If that issue got resolved, I might install Windows again and try some things out. Right now my mbpr is a bit too important to fiddle around with. So I hope someone is able to help out on that Anyway, many thanks for the cool project! -
@cyphersk8 Hey, sorry to say that this is the wrong topic to ask that question. The script is to get your eGPU running in OS X, not Windows. But to get you on your way on getting it to work in Windows you can do the following. As it seems, you encounter the code 12 issue. This means you have Windows 10 installed in MBR mode (some kind of legacy mode). You can also re-install Windows 10 in EFI mode, which will (most likely) resolve this issue. To do this, when you have a USB drive with the Windows 10 install image on it, during booting of your iMac, press the Alt-key to bring up to boot selection menu. You should see multiple options for your drive, including an EFI one. Use the EFI option to start the installation of Windows in that mode. However, if re-installing Windows 10 is not an option, you can use @Tech Inferno Fan Setup 1.30 software to resolve the issue. You can buy it here:
-
Hi @goalque I know you are probably really busy, but I'm eagerly awaiting the updated version of your script / app you hinted at a few pages back. How is that project coming along? Is there a way to follow progress on it? Or will it be a bit more closed-source as to avoid scams such as the Bizon box? Anyway, still a big thanks for your contributions to this community and the great script! Running it myself right now on a Macbook Pro Mid 2014 with 750m + GTX960 on OS X 10.010.4.
-
Hi Crof, sorry for the late reply. I'm not as active anymore as I used to be. With running in EFI mode, it kind of depends on the model of your Macbook. I'm not entirely sure, but from the 2012 or 2013 model on, when you install Windows through OS X Bootcamp, it will automatically install Windows in EFI mode (at least, it does that for Windows 10 and 8). But you can also install Windows directly from USB drive, when you created the appropriate disk partitions in OS X. When you power on your MacBook, and press Alt (or option key), you get to see the boot selection menu. Whn your USB drive with Windows installation files is connected, you should see 2 options for the connected USB drive: one "regular" Windows install option (which installs Windows in MBR mode), and another EFI option. Preferably select the EFI option. That's what I meant with installing Windows in EFI mode. I explicitly mentioned this, because many unaware people would be tempted to select the MBR option, while the EFI option is the better one IMO.
-
@MikhailBV HDMI to thunderbolt adapter is something you would have to create yourself, and I doubt it will be easy. The products you see in shops are all HDMI to displayport (which uses the same port layout as Thunderbolt, but doesn't have support for PCI-e data transmission which is essential for eGPU usage). Best option for a Macbook is to use an Akitio Thunder2. If you want to stick with the PE4H option, you will need something like the Sonnect Echo Pro.
-
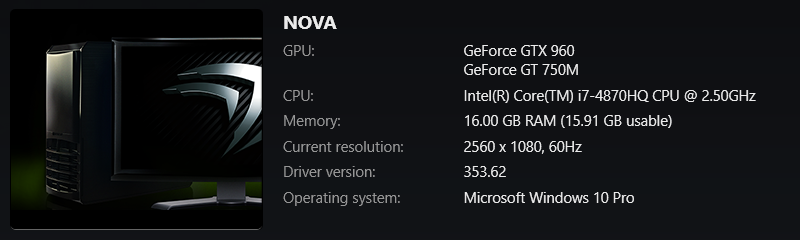
Hey guys After about a year of testing, experimenting and finishing up my build, I decided to put my setup on display here. I'm pretty happy with how it turned out. Specifications of my current setup: Machine: MacBook Pro 15" (mid 2014) CPU: Intel Core i7 4780HQ @ 2.5GHz RAM: 16GB Storage: 512GB SSD OS: Windows 10 Pro (x64) and OS X Yosemite 10.10.5 E-GPU: Akitio Thunder2 Case: Coolermaster Elite 130 PSU: Corsair RM450 GPU: EVGA GTX960 4GB SuperSC ACX 2.0+ External monitor: Dell U2913WM Ultra wide-screen monitor Setting up the hardware: In the early stages of my build, I used a powered riser. Back then it was recommended. However, it quickly became clear that it was a cause for stability issues, so I removed the riser from my build and made a molex-to-barrel adapter from the plug that came with the Akitio. I also drilled some holes into the case so I could mount the Akitio circuit board into the case like you would do with a motherboard. I wasn't pleased with the result however, because the card didn't have enough support for its weight. So I cut off the back of the Akitio inner-case so my card would fit inside the enclosure. I mounted the circuit board back into the inner-case, and screwed the inner-case into the mounting holes of the case I drilled. To turn on the E-GPU setup, I also mounted a latching vandal switch at the front of the case that is hooked up to the PSU. This allows to easily turn on/off the system. Setting up the software: There was not much to this, actually. This version of the MacBook pro (the ones with dedicated GPU) hardly experience any problems with the installation. For Windows 8.1 and 10 (having them installed in EFI mode), it immediately detected the presence of the extra GPU and was as simple as installing the correct NVIDIA drivers again. For OS X, I used the script from @goalque to make it work, which is very neatly and easily done. Issues: I faced some issues while I experimenting and playing with the setup. My initial setup used a Gigabyte GTX770 4GB, which seemed to crash rather randomly. I had the same problem with a Gigabyte GTX760. These cards, however, were factory overclocked, and clocking them back to the default specifications from NVIDIA somewhat lessened the problem. But I never experienced these issues when using older cards (GTX560 and GTX460). So I assume it was either something with the 700-series, or manufacturer related. The card I use right now, the EVGA GTX960, doesn't have any of these stability issues. The only problem I still face right now, is the black boot screen without booting chime. I can see my USB-devices starting up (blinking lights, LED displays turning on), but it doesn't get further than that. I need to do a hard shutdown of the system by holding down the power button, hoping to have better luck next time I turn it on. However, this doesn't cause any stability issues once the system finally gets past the boot chime. Credits: I would like to sincerely thank this entire community for making this possible. Your dedication and experimentation to making this work is something that I admire and appreciate. I believe this setup is the most ideal one and most convenient to use in my daily life: good system on the go for work, best system at home to game!
-
@tre87 Sorry, was away for a couple of days. Great that you got it working and stable!
-
Hmm, I didn't really follow a pre-made guide. However these are the steps I followed: Undoing is done by simply removing the refind folder from the EFI partition. Some more detailed steps from a post I made from thread http://forum.techinferno.com/implementation-guides-apple/8717-%5Bguide%5D-enabling-intel-iris-pro-hd5200-win8-1-15-macbook-pro-gt750m-4.html
-
Well, you can always mess about a bit with the iGPU of course. The changes are undone fairly quickly. I just found it to be kind of disappointing. Yes, I indeed just booted the installer and just deleted all partitions of my SSD (I don't have OS X installed, so I didn't need to keep track of it) but just formatting the Windows partition should be enough.
-
@tre87 I only ran it on Win 8.1. I might try again later on Win 10, to check it out again. I didn't compare the heat dissipation, mostly because my Macbook stays on my desk in clamshell mode (plus I use a Blue Lounge kickstand), and I hardly take it on my lap. It should be generating less heat indeed, but with a constant CPU load of 10-20%, I think that effect is undone. I do know that the fans sometimes kicked in when the iGPU was enabled, even though the Macbook was idle. Although I can't really find the post anymore, but I believe someone said that the load disappears when after booting, you put Windows to sleep mode and then wake it again. But this is problematic when a TB device is attached, since it disables sleep mode in Windows. The Github issue thread where I reported the power stealing can be found here: https://github.com/0xbb/gpu-switch/issues/5 I believe there is no specific thread that discusses the iGPU stealing power here on Tech Inferno. I think @TheGrreatGatsby reported in a thread that his load was a constant 20% when his iGPU was enabled (he has a 2015 model with AMD dGPU, but is experiencing the same issues).
-
@tre87 I meant that for eGPU use, the dGPU models seem to experience no issues and can have the same experience as on Windows 8. But now that you mention it, there are hardly posts of failures on iGPU-only models. But I can't comment on them anyway... Sorry for the confusion. You could try to get the iGPU working, but as I mentioned in the thread for enabling the iGPU on this forum (I also opened an issue at the Github page where Andreas Heider confirms my problem) there is a constant CPU load between 10% and 20%, effectively undoing the battery saving you would get from running on the iGPU. But you can always try of course.
-
@tre87 It seems there are few problems for the dGPU models, but going from the posts above it seems that the iGPU-only models have some struggles. I did a quick test like you asked to: I browsed for 20mins, with screen brightness about half and got from 98% battery to 92% battery. Yesterday I also had a skype-conversation with webcams going both ways which lasted for a little more than 3 hours (Don't know if that is a reference ) Tested bluetooth as well. I could successfully connect to my phone, and stayed connected for a few hours, so I assume that it works ok. I hope these answers help you and are what you had hoped for.
-
I think an SSD is always "idle" when it isn't reading or writing... So I don't know whether it will give a noticeable difference when telling Windows is should power down your drives. So I never noticed anything unusual there, or thought it was a problem. I'll do a quick check later today to see the battery drain. Hmmm, I do notice some Wi-Fi problems, but I'm not sure whether they are related to something Win10 specific or that it just my network, since I had sporadic interrupts under Win 8.1 as well. But these problems don't drop my connection to my network or something. So I'm not experiencing connection dropouts. I haven't tested bluetooth yet, since I don't have any bluetooth devices to couple to at the moment. (I have wireless speakers, but I won't get these back until late september :/ ) My keyboard keys initially didn't work when doing an upgrade. So I re-installed the bootcamp drivers again for the keyboard, and everything works again as expected. The bootcamp configuration screen also seems to work as before. You probably won't have problems there when doing a clean install. Only upgraded installations will probably experience the most issues.
-
Hmm, I never experienced any lockups for sleep mode. But I usually disable sleep mode and hibernation mode. I always do a complete shutdown of my system, never sleep or hibernate. I disabled those options. So I can't comment on that unfortunately. The reason I disable these features is that (especially in the past) caused lots of problems (not necessariy eGPU problems) but since the SSD is very fast, I don't mind the slightly longer bootup times. I do know that you can't enter sleep mode when Thunderbolt devices are connected to the system, since not all Thunderbolt hardware is hot-pluggable and can cause crashes. Maybe that could be the cause of your concern? I never really benchmarked my battery to see how long it could hold out, but I believe Windows 10 gives a marginally better batterylife. Windows 10 also has a new energy saving feature when the battery gets below a certain percentage (much like is known with smartphones). So I'd say you will see an increase, but don't expect to see a few hours of difference. I just removed the nvidia folder that you can find in the bootcamp folders. It doesn't give you any warnings or something during installation, so you can just delete the folders (I also removed the setup files for ATI-based GPU systems, since I don't have any AMD hardware and I also removed the Intel Graphics driver. Not that this last one matters much, since the Intel GPU is disabled at boot time and isn't visible anyways, but just to make sure it doesn't fuck up with my system.) Hope this helps you.
-
Like @zackbummente, I did a clean install after I upgraded to Windows 10, just to make sure no incompatible drivers or other software was present. I would strongly suggest to do a clean install after the upgrade to avoid potential problems with older drivers. I also just installed the regular bootcamp drivers, but stripped away the nvidia setups, since Windows 10 delivers its own, and the ones in the bootcamp folder are outdated.
-
You are able to use the internal display, but applications started on the internal display will only render on the 750m GPU. Only an external monitor can accelerate rendering on the eGPU. I had the same issue with the display driver failing and reverting back to a Microsoft Basic Display adapter driver, but this is, I believe, because the multi-monitor setup is set to "Mirror" by default. I wasn't able to do mirroring of my displays on Windows 8.1, so I was surprised to see that "working" on Windows 10. But I think it cause the display driver crash, so I set the display mode to "Extend", and haven't had any problems since.
-
I installed the latest ones from nvidia after those from Windows update rolled in. No, I did not install Intel Graphics drivers since the Intel GPU gets disabled in my MacBook that has dual graphics. Yeah, external monitor, Dell U2913WM.
-
I have a MBPr (mid 2014) with nvidia 750m, and I have Windows 10 Pro currently running on my system without any problems. Played some bechmarks and games. Seems as stable as my previous Windows 8.1 configuration.
-
@TheGrreatGatsby If you believe your card is drawing too much power, you can always try to downclock it to the standard nvidia settings using Rivatuner, MSI Afterburner, of similar software and see if that helps.
-
@Nintonito Yes, this guide can be applied to a 750m model as well. The only big difference between the 2015 and mid 2014 models is the SSD and the GPU. But the steps to get it working are the same. However, there are many more guides available for the 750m model already. So I think, if you want to be sure, you better follow one of those guides instead.
-
Well, although your script activated my eGPU flawlessly in OS X (so props to that! ), it didn't have any effect on booting into Windows. So I'll just stick with putting it in right after the startup chime.
-
You can't disable the only display adapter active in your system, otherwise you only have a black screen to look at. You'll need to boot into Windows safe mode to get it fixed again. So that is not what you want to do. Besides, it wouldn't magically activate the Intel graphics all of a sudden. The reason you can't see your Intel graphics card is because the default MacBook behavior is to disable the Intel graphics on any operating system that isn't OS X. So if you want to see your Intel graphics in Windows, you need to trick the MacBook into thinking that it is loading OS X while it is actually loading Windows instead. You can do this by installing rEFInd, setting a custom EFI bootfile and loading a script in Windows. Summary of steps: - Install rEFInd: The rEFInd Boot Manager: Installing rEFInd - Set custom EFI bootfile: https://github.com/0xbb/apple_set_os.efi - Run Windows script: https://github.com/0xbb/gpu-switch For installing the custom EFI bootfile, see the steps in the first post of this thread, where Gatsby quoted my steps to follow.
-
@ibuick As SimonSays says, I'd first make sure that the PSU surely is turned on and giving power to the graphics card. I see you have a Corsair RM PSU, which means the cooling fans remain idle when no significant load is put on them. So you're never really sure whether the PSU is turned on or not. I would make sure that you applied the paperclick trick correctly by connecting a simple fan to one of the molex connections. If you applied the paperclip correctly to the PSU, then the fan should start spinning, and then you can make sure your graphics card is getting the power from the PSU. Sometimes, you need to fiddle a little with the paperclip to make sure it has contact on both pins of the PSU. If, after this it still doesn't work, you might consider that some parts are broken.