Leaderboard


Popular Content
Showing content with the highest reputation on 11/21/16 in all areas
-
2 points
-
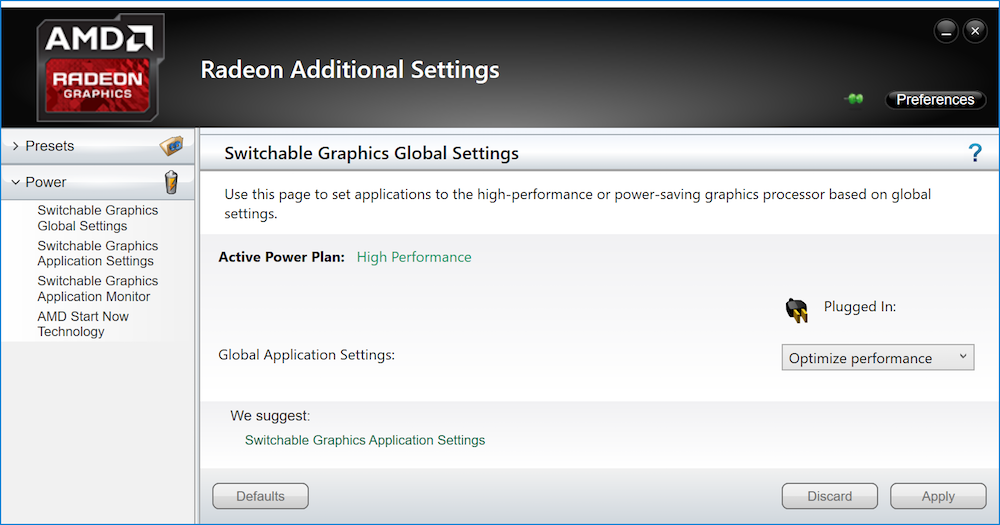
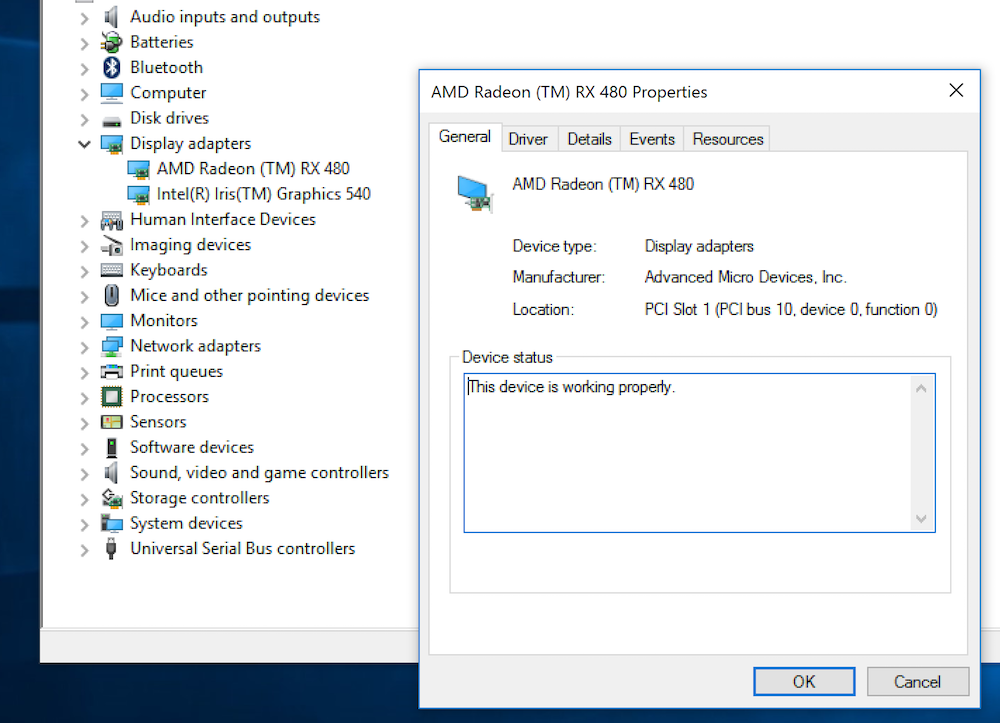
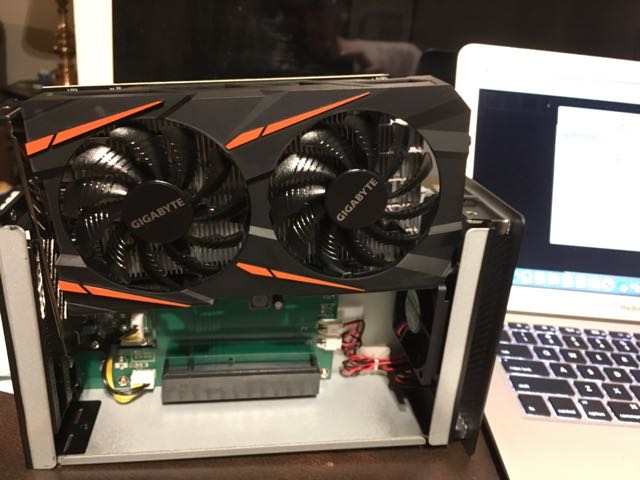
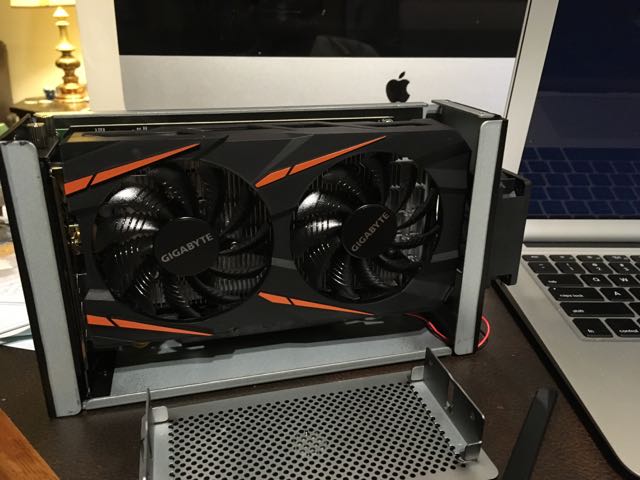
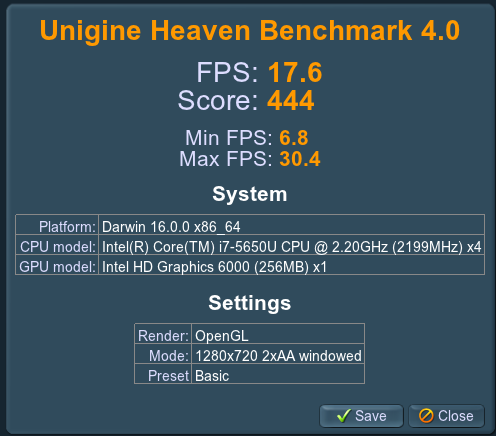
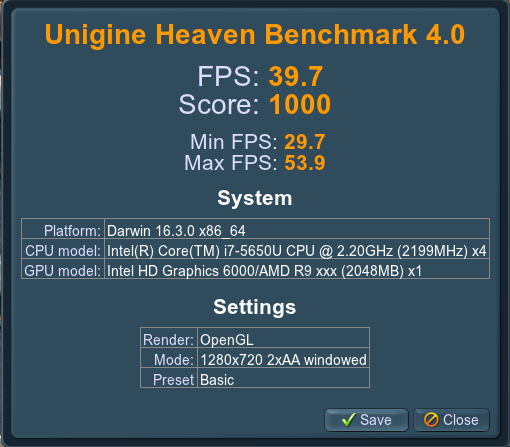
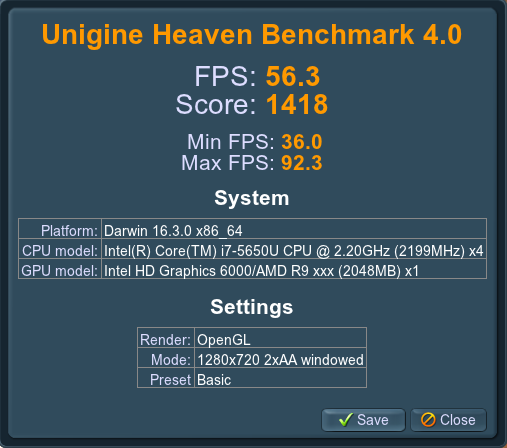
Easy Budget eGPU for OSX My objective for this build was to make a plug-and-play eGPU that was cheaper than a console and suitable for casual 1080p eSport gaming. Sadly, this wasn't quite plug and play and with a total project cost of ~$350 after extended store warrantees and rebates the 'cheaper than a console' objective is only true if you include console accessories or look at the release pricing. Still, I have a working eGPU that can play Paladins on at least medium settings at 1080p that didn't require any power supply modifications. Hardware > AKiTiO Thunder2 > This 5.5mm x 2.5mm 108W DC adaptor (anything 90-120W should work) > A Gigabyte RX 460 Windforce 2GB Tools > Philips screw driver > Wire Cutters Software > MacOS 10.12.2 > Terminal Known Issues > An external display is required for acceleration, but if the display is connected before the GPU is recognized the macOS will crash during startup. > If FileVault is on then system startup will occur after log in, which prevents one from using the external display to log in. > If FileVault is on then the computer may crash if the display goes to sleep. Hardware Installation My 7.5" GPU was within a half-inch of being a simple drop-in. Making it fit required removing the enclosure fan, which I then screwed back into the same orientation the the other side of the ventilation cutout. That required some physical effort since the fan holes on that side were not pre-threaded for the screws, but it wasn't much harder than driving a screw into wood. (I skipped the 4th inside corner screw since the board was in the way). The wire cutter was used to carefully snip the zip-tie holding the fan/LED wire bundle. I would have skipped reinstalling the fan except I couldn't get the fan connector to disconnect and didn't want to cut any actual wires. The power adaptor was a simple swap in. No wiring modifications required. The plug sticks out a little but otherwise it just plugged right in. Kext Mods > Step 0: Have a backup. > Step 1: Disable SIP. > Step 2: Use an editor, PlistBuddy, or a script to add IOPCITunnelCompatible to the AMDRadeonX4100 and AMD9500Controller kexts. The former is required for the RX 460 to be recognized in the AKiTiO enclosure, the latter to enable acceleration. AMDSupport.kext might also need to be updated. >> I used a combination of modified scripts and vi while learning my way around the kexts, but copy/pasting PlistBuddy commands is the simplest explanation. (Exact sequence not verified. I'll confirm when 10.12.2 comes out of beta and I have to remod the kexts) sudo /usr/libexec/PlistBuddy -c "Add :IOKitPersonalities:AMDBaffinGraphicsAccelerator:IOPCITunnelCompatible bool true" /System/Library/Extensions/AMDRadeonX4100.kext/Contents/Info.plist 2>/dev/null sudo /usr/libexec/PlistBuddy -c "Add :IOKitPersonalities:Controller:IOPCITunnelCompatible bool true" /System/Library/Extensions/AMD9500Controller.kext/Contents/Info.plist 2>/dev/null sudo /usr/libexec/PlistBuddy -c "Add :IOKitPersonalities:ATI\ Support:IOPCITunnelCompatible bool true" /System/Library/Extensions/AMDSupport.kext/Contents/Info.plist 2>/dev/null sudo touch /System/Library/Extensions >> Alternatively modify one of @goalque's scripts. This script can be used as-is if your hard drive is named "Macintosh HD" and the famous automate-eGPU script can be used with the RX460 if all AMDRadeonX4000 references are replaced with AMDRadeonX4100. (But note that the renaming will break the script for eGPUs use with older x4000 Radeon cards) > Step 3: Restart with the eGPU (but not the external display) plugged in. > Step 4: Plug in the external display and set the external display as primary by going to [System Preferences]->Displays->Arrangement, deselecting mirroring, and dragging the white bar from the internal display outline to the external. And now, Heaven Benchmarks for Internal_HD_6000, Internal_RX460, External_RX460 Alternative GPU choices: The GTX-750 ti (not the SC) and Mini-GTX-950 where the other two cards that caught my eye when looking for <75W options. However I decided I wanted something newer than the 750 and the 950 mini was too pricy for my budget. No promises that either would actually work, but they might be worth looking into if anyone had a strong preference for Nvidea on OSX mixed with a strong aversion to power supply splitters or wiring converters.
 1 point
 -
I am proud owner of a new Clevo P775DM3 laptop with 1080 gpu and 6700K processor. As I am using the system mostly as workstation (besides some gaming), I am a bit annoyed by the noisy fans and for several projects I need Linux so I set up a dual boot configuration. It took some time to aggregate some information of the hardware behavior, mostly from this forum, nodebookreview, and some other, so I hope it might help sum people to summarize my findings here. In particular, I am still not satisfied with the fan noise, so I am glad for any advise. First of all: I like the system very much and also Linux runs pretty smoothly. It is an excellent compromise as a desktop replacement and the powerful hardware can easily handle workstation load. I player around with the clocks only shortly, and can operate the CPU at 4.2 or 4.4 with all cores in prime avx staying somewhat below 90 deg, so the cooling seems to work pretty well. My main concern however, is to operate it in a silent mode when idle, and from that perspective it totally failed. Obviously this is not relevant for overclocking, but I assume everyone is not constantly running games with headspeakers, so noisy fans are a major design flaw in my opinion. I made some progress so far, but I am not fine with the result yet. I tried to reverse engineer the fan behavior as far as I could. My conclusions are: - The settings Quiet / Multimedia / Performance in the ClevoControlCenter have little influence. They mostly apply different default settings. The main difference is between the fan modes (Full, Overclock, Automatic, Custom). - The modes overclock and automatic seem to apply a fan curve that is defined in the embedded controller (EC), which is exactly the way I would it like to be. The difference between overclock and automatic is mainly a slower hysteresis (high pass filter) in the control logic, so it does not spin up fast at load spikes. In addition, the fan settings of the automatic mode at a given temperature are somewhat lower than in overclock mode, in particular at low temperatures. At high temperatures, both get very loud. - The system has two fans, the CPU temperature regulates the left one, the GPU regulates the right one. In both cases (automatic and overclock), the systems gets really loud starting from around 50 deg. - The custom mode lets me define a start and stop temperature for the fan, but essentially it is not working as intended. It does indeed stop the fan completely at low temperatures, but start and stop temperature are related (but not identical) to what I set. When I define a fan stop below 60deg and fan active at 70deg (centigrade), the fan starts to spin at around 55 deg, cools down the hardware to around 48, then it turns off again until the hardware has reached 55 again. Because in a fanless mode the hardware reaches 55 in little time, this is no reasonable modus operandi, in particular because the fan seems to spin up fully for a short time when it sets in. - After a reboot or suspend/resume, the fans revert back to overclock mode, even if I set them to automatic before. I would consider that a bug of the ControlCenter. - When the system runs on battery, it seems to use yet another fan curve which is really silent and it dramatically cuts the clocks to around 2.4 GHz for the CPU. (In particular, it seems to me it does not cut the CPU clocks itself, but lowers the power limit.) Anyway, that fan curve might actually work well (system is silent even at 50 deg GPU temperature, fans spin up at really high temperatures), but I have no idea how how to activate it with PSU. I also observed some throttling that was reported by PREMA before. When the GPU is used, CPU clocks are throttled. Somehow, this only happens on Windows. On linux, the CPUs will constantly stay at full clocks if both CPU and GPU are under load. I don't know how the throttling is implemented. Perhaps the linux pstate kernel driver is interfering with it. There is also some throttling when the GPU gets warmer (starting way before 90 deg). Perhaps that is why the standard fan curve tries to keep the card below 50 deg (see below). Running idle, my system settles at around 35-40 deg CPU temperature and 50 deg GPU temperature (at 20 deg environment). I am actually wondering why the GPU gets so hot. Pascal is very efficient and in idle mode I would not expect it to drain much power. I would actually be interested in other people's idle temperature. I'll probably repaste the GPU when I find some time, but currently the warm GPU is actually convenient for tuning the system. Anyway, this 50 deg GPU makes the fan always spin fast (at around 3k RPM), so the system is constantly loud. (For reading the fan RPMs: the hwinfo64 tool can read it for some clevo models (https://www.hwinfo.com/forum/Thread-Solved-Monitor-CPU-and-GPU-fan-RPM-on-Clevo-laptops?page=9). So the fans are controlled via the EC, there seems no direct control of the fans the software. One has to speak with the EC. The common tools (msi afterburner, fanspeed, hwinfo, etc.) fail for this clevo Model. If I get it right, the PREMA BIOS contains also an updated EC firmware with an improved (slower at low temp?) fan curve, but that is not available yet, and anyway I will have to wait for a public version without a premium partner. So I am wondering what to do now. I couldn't find much info on the actual firmware content, or how to modify the fan curves. Ideal would be the possibility to set the fan curve via software, but I don't know if this is possible at all. There is a ClevoECView application which was leaked from Clevo some years ago that gives some insight, and some gui build a linux tool to manipulate the EC (https://github.com/SkyLandTW/clevo-indicator). I have extended that tool for my model, such that I can now set hardcoded fan speeds for GPU and CPU and read both fan's RPM and the CPU temperature (https://github.com/davidrohr/clevo-indicator - Naturally I will not take any responsibility if this breaks a system!). What I am missing yet is where in the EC memory I could get the GPU fan duty cycle or the GPU temperature. Checking the EC dumps at different fan settings makes me think it is simply not available. What is a bit weird: under Windows it seems to me the EC exposes the GPU Fan duty cycle at 0xCF, while under Linux the value is constant. I'd appreciate if anyone has an idea. Setting the fans to 15% - 30% duty cycle makes the system silent to completely silent, increasing the temperatures to 55-65 deg at idle, which I consider fair. I have not yet found out how to activate one of the fan profiles via speaking to the EC. In particular, I would be interested in activating the automatic or the on-battery profile. At least, there is a way to go back to the overclock profile: pressing fn-1 once after fixing the clocks reverts it. I am assuming that fn-1 actually fixed the clocks in the same way I am doing, so the EC assumes I am already in full fan mode, thus it goes back to overclock mode. So my current setup is that I pin the fans to a slow speed for normal operation, and I revert to the overclock mode for computing / gaming. But I don't really like this setup. It is both dangerous and inconvenient. I was thinking of implementing a background daemon or a kernel driver to maintain the fan curve manually, (the utility at github which I started from actually already provides such a mode) but that is not the ideal solution. It would be a problem when the background daemon exits / crashes, and I am also not sure about the stability of how I set the fan speed. I would really prefer a proper fan curve in the EC. That is the silver bullet. It is an absolute pity that such great hardware is deteriorated by a useless EC firmware. Finally some info on running Linux for those who are interested: Most of the hardware runs out of the box. The special keys on the keyboard are a bit of a problem, but there is a linux-laptop company called tuxedo computers which offer linux-based clevo laptops and they have implemented a kernel module for it, which is easy to compile (can be found in their forum: www.linux-onlineshop.de - it is called tuxedo-wmi). What annoys me a bit is that I can query very little hardware info. lm-sensors only detects the simple intel coretemp driver for CPU temperatures, and it gets the temperature of the wifi module. I would love any advise on how to query e.g. the CPU voltage, but it seems there is no linux kernel module yet for the monitoring chip used in the clevo system (at least there is one unsupported SuperIO chip).1 point
-
When I had my Black widow and FK1 connected, there would be these spikes . That would only happen once or twice per reboot. The main fps drops were when either an USB device or Ethernet cable were connected to the Core. But it's definitely usable. Just don't connect anything that needs to do a lot of data transfer , like Ethernet / USB.1 point
-
Definitely agree. Are you referring to peripherals taking away from TB3 bandwidth or PCIe x4? At least on my system in either case , I didn't have any issues with peripherals. But using the Core over TB3 was a different story. The TB3 HDK did not have any peripheral ports.1 point
-
There is a cheaper offer at Digikey.1 point
-
My recommendation is to hold your horses....cause it can work,and be cheap. I doubt thunderbolt would have any problem, since tbolt is better than mpcie in terms of issues. And since I've set it up in terms of issues, and FINALLY WORKS i recommend you guy a gtx 980 ti, with a PSU...and fire that baby up cause it will work! quick update: Got it working. https://gyazo.com/bc629d6d4597582938f75a7ca2dfb337 my setup: - asus g75vw with 670mx (from a g75vx- and I modded its bios) -beast exp gdc - <30$. beast mini PCIe version v8.4D -DELL DA-2 220W input for beast adapter. -gtx 750 ti from MSI (ANY card BELOW pascal 1050, 1060 and 1070-1080 series) that uses a driver BELOW 372.70) ORIGINAL firestrike: NEW firestrike: didnt need setup 1.30 Windows recognised it INSTANTLY plug and play LITERALLY. Steps to install it: -Plug it in on mpcie -turn windows on. -install DDU display driver uninstaller - uninstall ALL nvidia drivers. - reboot -install your new EGPU driver ( beware! install the older drivers BELOW 372.70) -reboot. -install your dedicated gpu drivers -reboot again -watch and be amazed on how your new egpu works: try gpu-z on both gpus, on egpu you should see core clocks...and then go in nvidia control panel in start menu (not gfe experience) and set up your gpu preferences.1 point
-
You're right, there is uncertainty regarding which TB3 enclosures are TB3 Mac compatible. Another aspect is AMD stability. PowerColor's Devil Box has been on the market for some time, is there any info on this?1 point
-
Yes, https://www.techinferno.com/index.php?/forums/topic/10718-2016-macbook-pros-and-egpus/&do=findComment&comment=152495 Metal acceleration does work with the RX 480, OpenCL doesn’t. RX 460 provides full support: https://www.techinferno.com/index.php?/forums/topic/10845-2015-13-mba-rx46016gbps-tb2-akitio-thunder2-108w-adaptor-osx-102-hedge/ There is a binary hack for uncertified TB3 enclosures on Netkas forum. Hopper Disassembler reveals many things, but I would not publish reverse engineered information that violates Apple’s SLA section [M].1 point
-
If you did disable signature check via bcdedit command it would persist forever1 point
-
Second follow-up: I delidded the CPU and repasted CPU and GPU with grizzly conductonaut. Unfortunately, it doesn't help a lot with idle temperatures, but temperatures under load decreased tremendously. CPU went down from 80 to 60 deg running prime95 AVX.1 point
-
Awesome. Internal screen performance is ~96% of the external in 3DMark11. The total score was even better than the external due to physics. http://www.3dmark.com/3dm11/11753719 This was through the TB3-TB2 adapter. It says “AMD XConnect Lite Technology” in the system tray.
 1 point
 -
It’s more meaningful to use an external monitor to achieve maximum performance. Haven’t heard about internal screen performance with an AMD dGPU. One German review sheds some light on this: https://www.computerbase.de/2016-10/powercolor-devil-box-test/2/ XConnect technology may require a specific dGPU. If doesn’t work, there are ready-made headless adapters if you want to try @LukeHero's method: http://www.fit-pc.com/web/products/fit-headless/ http://www.newertech.com/products/hdmi_headless_video_adapter.php1 point
-
If you're going to choose AMD eGPU, you can drag a windowed app to the extended internal screen, and its contents will be accelerated by the eGPU. If someone has forgotten: This functionality is included in the demo. As @Tech Inferno Fan noted, I'm confident that MBP13,3 behaves similarly as the MBP11,5 (M370X dGPU) regarding gmux, and HD530 can be activated manually as well for Nvidia Optimus. Someone just has to try.1 point
-
GeForce 375.95 *Install drivers at your own risk* Windows 10 + GeForce Drivers are Killing Samsung and LG Notebook LCD Display Panels Uninstall PrecisionX, including screen overclocking tools. Instead, keep MSI Afterburner's RTSS for monitoring purposes. Requirements: Flash latest @Prema's v2 980M & 970M (Please consider donating to Prema) Win10/8.1 'F8' Boot options 'Safe Mode' & 'Disable driver Signing' cmd (Admin) bcdedit /set {default} bootmenupolicy legacy -> reboot -> F8 -> select 'Disable Driver Signature Enforcement' -> Install drivers Run DDU "Clean & Shutdown (Safe Mode) Extract driver using 7-Zip Display.Driver folder, copy/overwrite the proper .inf file(s). Extracted driver package >> delete the folders as shown below (don't skip this step) -> run setup.exe >>> Keep these folders only <<< INF MOD v375.95 nv_dispi.inf (including nvdmi.inf) PEG/Dedicated All Models: M15x, M17x, AW17 R1, M18x, AW18 R1 (including Optimus/M17xR4) excluding AW 2015 - GTX 980 , 980M , 970M , 965M , 880M , 870M , 860M , 780M , 770M , 765M , 680M , 675MX , 670MX , 660M nvcvi.inf: Optimus Alienware 17 / 05AA (only) GTX 980M - 970M - 965M GeForce 375.95 Win 7/8.1 GeForce 375.95 Win10 Alienware Laptops nv_dispi.inf_v375.95_Win7_8.1_PEG_Dedicated_Alienware.zip nvcvi.inf_v375.95_Win7_8.1_Optimus_Alienware_17.zip nv_dispi.inf_v375.95_Win10_PEG_Dedicated_Alienware.zip nvcvi.inf_v375.95_Win10_Optimus_Alienware_17.zip Clevo Laptops (non-Optimus) nv_dispi.inf_v375.95_Win7_8.1_PEG_Dedicated_CLEVO.zip nv_dispi.inf_v375.95_Win10_PEG_Dedicated_CLEVO.zip AW 900M Throttling workarounds: M18xR2 Flash @Swick1981 [Bios Mod] M18xR2 - Legacy Support now Available M18xR2 980M workaround Hibernation method HERE and HERE Please use the SEARCH function to see if your question has been answered/posted already. https://www.techinferno.com/index.php?/announcement/4-user-account-promotion-rules-read-before-posting/ @Tulius run DDU "Clean and Shutdown", install drivers using only nvdmi.inf below (Win10) SLI fix incl. nvdmi.inf_v375.95_Alienware_M18xR2_980M_Beast_Win10.zip @johnriper install nv_dispi.inf (Win10) for Alienware above, please follow the instructions to the letter: disabling driver signing etc https://www.techinferno.com/index.php?/announcement/4-user-account-promotion-rules-read-before-posting/1 point
-
Wrong file, G-SYNC GPU ID 1617 GPU-Z screenshot above (980M-G) https://biosmods.wordpress.com/gtx9-g/ It shouldn't matter DM or ZM for AW, but better ask @Prema anyway.1 point